Category:Notetags (MZ)





|
VisuStella, Caz Wolf, Fallen Angel Olivia, Atelier Irina, and other affiliated content creators.
Contents
- 1 Active Chain Skills VisuStella MZ
- 2 Aggro Control System VisuStella MZ
- 3 Ambience Sounds VisuStella MZ
- 4 Anti-Damage Barriers VisuStella MZ
- 5 Auto Skill Triggers VisuStella MZ
- 6 Battle AI VisuStella MZ
- 7 Battle Command - Talk VisuStella MZ
- 8 Battle Core VisuStella MZ
- 8.1 HP Gauge-Related Notetags
- 8.2 Animation-Related Notetags
- 8.3 Battleback-Related Notetags
- 8.4 Battle Command-Related Notetags
- 8.5 JavaScript Notetag: Battle Command-Related
- 8.6 Targeting-Related Notetags
- 8.7 JavaScript Notetag: Targeting-Related
- 8.8 Damage-Related Notetags
- 8.9 Critical-Related Notetags
- 8.10 JavaScript Notetags: Critical-Related
- 8.11 Life Steal-Related Notetags
- 8.12 Action Sequence-Related Notetags
- 8.13 Animated Sideview Battler-Related Notetags
- 8.14 Enemy-Related Notetags
- 8.15 JavaScript Notetags: Mechanics-Related
- 8.16 Battle Layout-Related Notetags
- 8.17 Troop Size Tags
- 8.18 Troop Comment Tags
- 9 Battle Cursor VisuStella MZ
- 10 Battle Grid System VisuStella MZ
- 10.1 Setup Nodes-Related Notetags
- 10.2 Movement Range-Related Notetags
- 10.3 User Action Movement-Related Notetags
- 10.4 Target Action Movement-Related Notetags
- 10.5 Action-User Requirements-Related Notetags
- 10.6 Action-Target Requirements-Related Notetags
- 10.7 Weapon Range-Target Requirements-Related Notetags
- 10.8 Action-Target Specific Ranks, Flanks, Nodes-Related Notetags
- 10.9 Area of Effect-Related Notetags
- 10.10 Temporary Troop Grid-Related Name Tags
- 10.11 Node Passive States-Related Notetags
- 10.12 Node Trigger-Related Notetags
- 10.13 Special Target Node Effects-Related Notetags
- 11 Battle System - ATB VisuStella MZ
- 12 Battle System - BTB VisuStella MZ
- 12.1 General BTB-Related Notetags
- 12.2 BTB Turn Order Display-Related Notetags
- 12.3 Brave Points Cost-Related Notetags
- 12.4 Brave Point Manipulation-Related Notetags
- 12.5 JavaScript Notetags: Brave Point Manipulation
- 12.6 Brave Point Managment-Related Notetags
- 12.7 Multiple Action-Related Notetags
- 12.8 Action Fusion-Related Notetags
- 13 Battle System - CTB VisuStella MZ
- 14 Battle System - ETB VisuStella MZ
- 15 Battle System - FTB VisuStella MZ
- 16 Battle System - OTB VisuStella MZ
- 17 Battle System - PTB VisuStella MZ
- 18 Battle System - STB VisuStella MZ
- 19 Battle Voices VisuStella MZ
- 20 Bestiary VisuStella MZ
- 21 Boost Action VisuStella MZ
- 22 Break Shields VisuStella MZ
- 23 Bright Effects VisuStella MZ
- 24 Button Trigger Events VisuStella MZ
- 25 Challenge System VisuStella MZ
- 26 Character Creation System VisuStella MZ
- 27 Class Change System VisuStella MZ
- 28 Combat Log VisuStella MZ
- 29 Common Event Menu VisuStella MZ
- 30 Conditional Random Encounters VisuStella MZ
- 31 Consumable Defensive States VisuStella MZ
- 32 Core Engine VisuStella MZ
- 33 Database Inheritance VisuStella MZ
- 33.1 Everything-Related Notetags
- 33.2 Notetag Inheritance-Related Notetags
- 33.3 Basic Property Inheritance-Related Notetags
- 33.4 Damage Formula Inheritance-Related Notetags
- 33.5 Parameters Inheritance-Related Notetags
- 33.6 Enemy Action Patterns-Related Notetags
- 33.7 Trait Inheritance-Related Notetags
- 33.8 Effects Inheritance-Related Notetags
- 34 Date and Time VisuStella MZ
- 35 Dragonbones Union VisuStella MZ
- 36 Dice Rolls and RNG Seeds VisuStella MZ
- 37 Elements and Status Menu Core VisuStella MZ
- 38 Encounter Effects VisuStella MZ
- 39 Enhanced TP System VisuStella MZ
- 40 Enemy Levels VisuStella MZ
- 40.1 Setup Enemy Level Notetags
- 40.2 JavaScript Notetags: Setup Enemy Level
- 40.3 Enemy Appearance-Related Notetags
- 40.4 Map Notetags that Determine Enemy Levels
- 40.5 JavaScript Notetags: Map Notetags that Determine Enemy Levels
- 40.6 Enemy Level Parameter Notetags
- 40.7 Enemy Level Skill Requirement Notetags
- 40.8 Enemy Level Change Notetags
- 40.9 JavaScript Notetags: Enemy Level Change
- 41 Equip Battle Skills VisuStella MZ
- 42 Equip Medal System VisuStella MZ
- 43 Equip Passive System VisuStella MZ
- 44 Equipment Set Bonuses VisuStella MZ
- 45 Event Chain Reactions VisuStella MZ
- 46 Event Signals VisuStella MZ
- 47 Events and Movement Core VisuStella MZ
- 48 Evolution Matrix Skills VisuStella MZ
- 49 Extra Enemy Drops VisuStella MZ
- 50 Field Skills VisuStella MZ
- 51 Fluctuating Shop Prices VisuStella MZ
- 52 Frontview Battle UI VisuStella MZ
- 53 Full Field Recovery VisuStella MZ
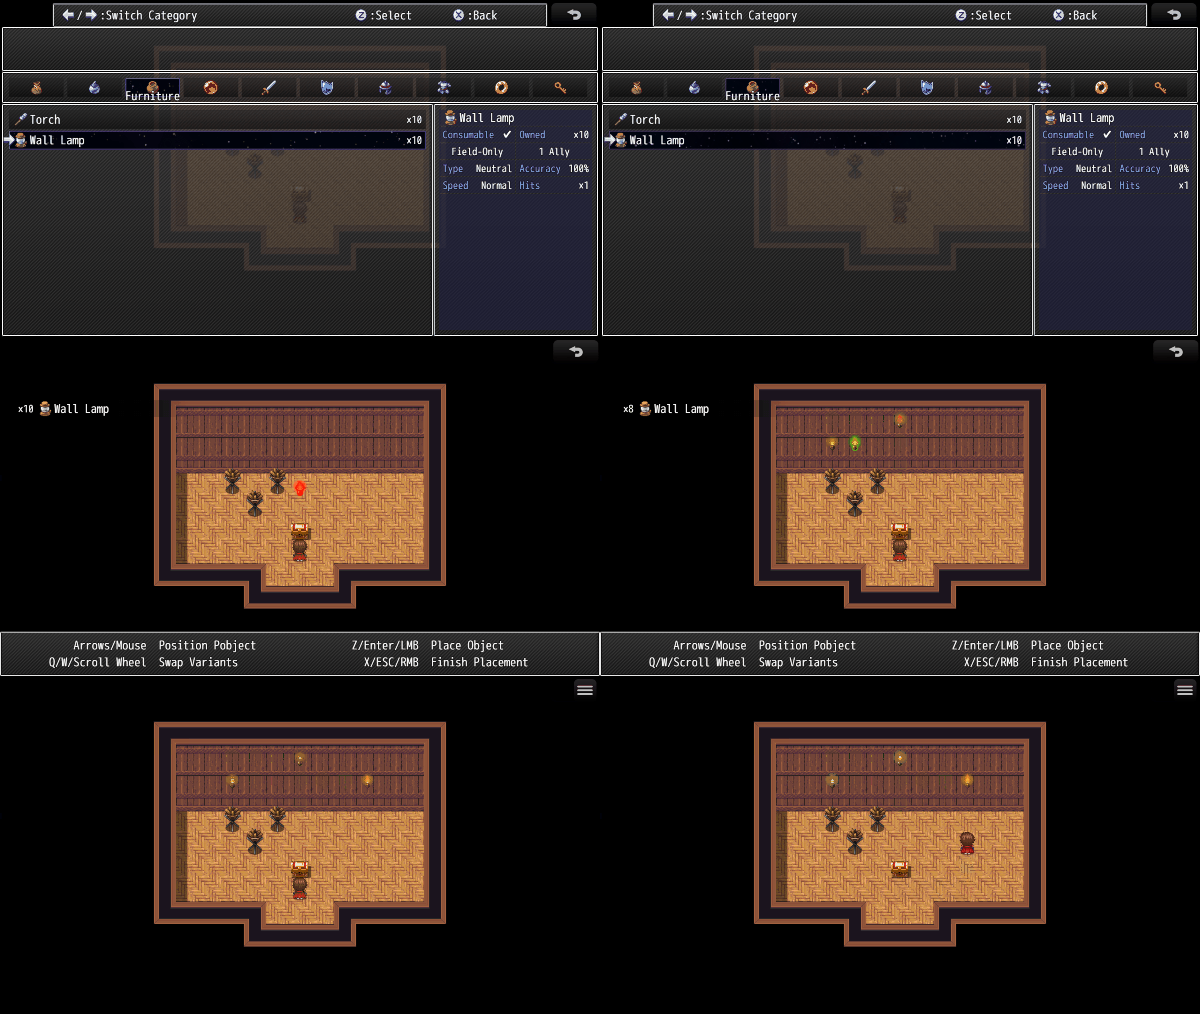
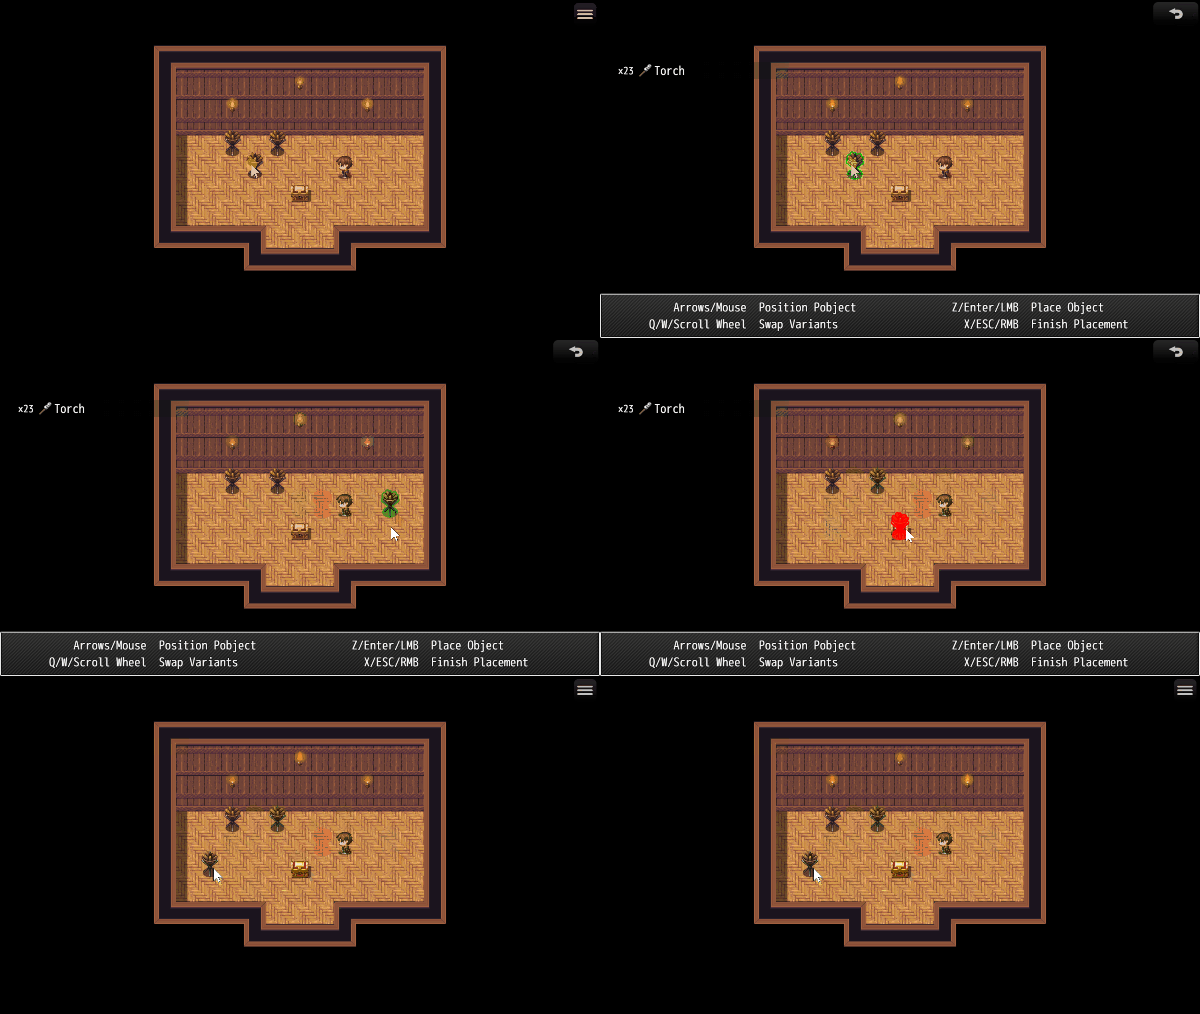
- 54 Furniture System VisuStella MZ
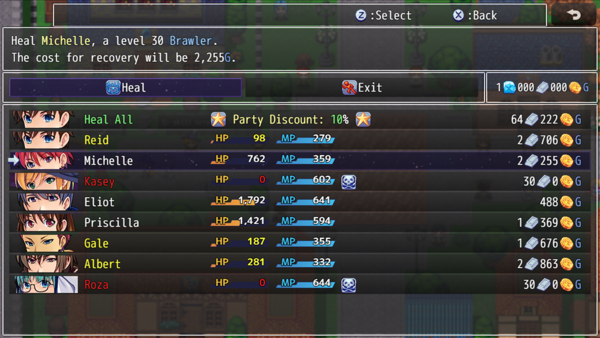
- 55 Hospital Shop VisuStella MZ
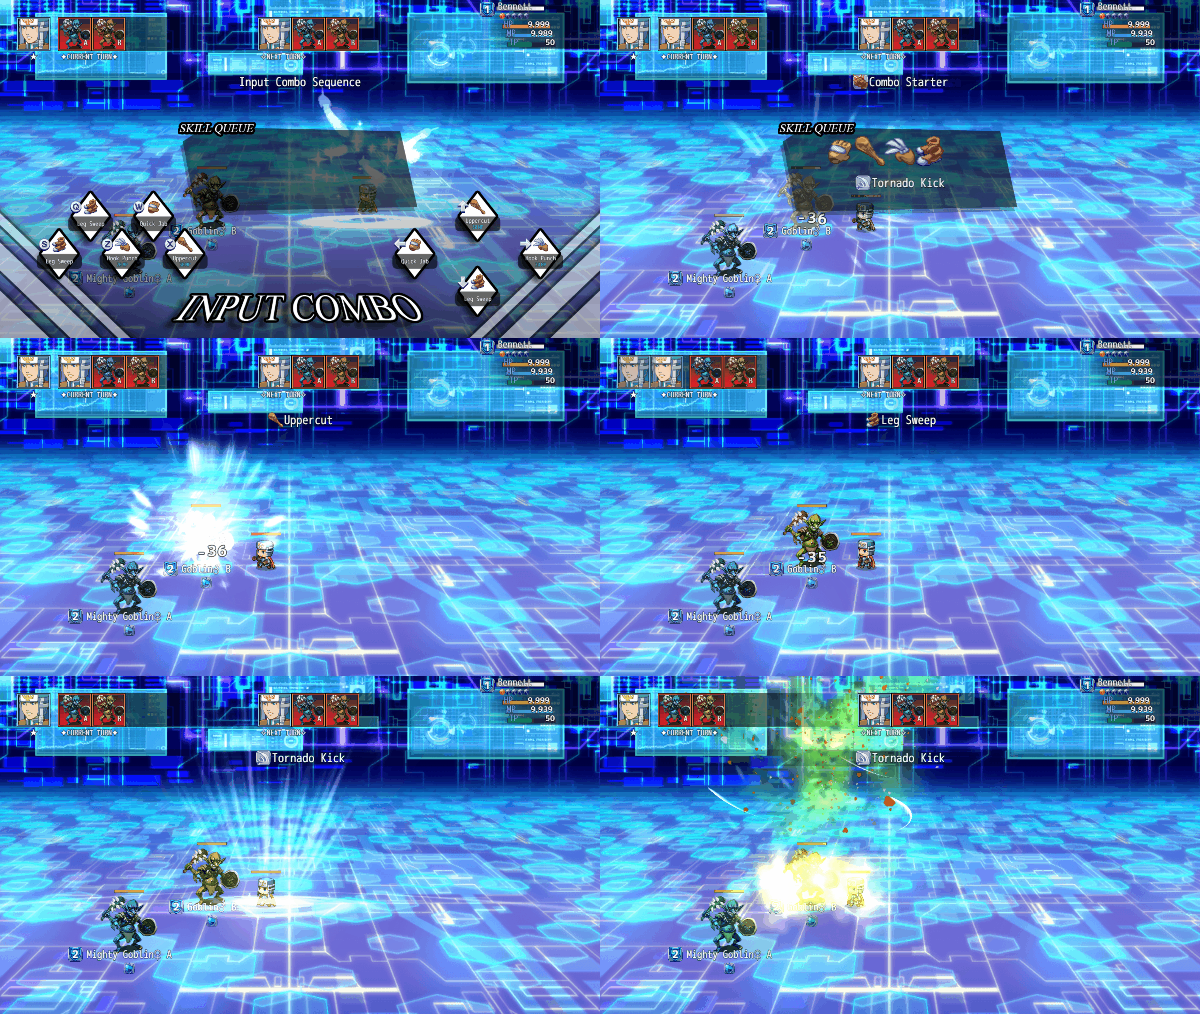
- 56 Input Combo Skills VisuStella MZ
- 57 Items and Equips Core VisuStella MZ
- 58 Item Crafting System VisuStella MZ
- 58.1 General Notetags
- 58.2 Proxy Notetags
- 58.3 Switch-Related Notetags
- 58.4 Masking-Related Notetags
- 58.5 JavaScript Notetag: Effect-Related
- 58.6 Crafting Animation-Related Notetags
- 58.7 Crafting Common Event Notetags
- 58.8 Crafting Common Event Requirement-Related Notetags
- 58.9 Batch-Related Notetags
- 59 Item Concoction Skills VisuStella MZ
- 60 Item Throw Skills VisuStella MZ
- 61 Life State Effects VisuStella MZ
- 62 Lighting Effects VisuStella MZ
- 63 Limited Skill Uses VisuStella MZ
- 64 Main Menu Core VisuStella MZ
- 65 Map Camera Zoom VisuStella MZ
- 66 Map Damage Effect VisuStella MZ
- 67 Map Event Effects VisuStella MZ
- 68 More Currencies VisuStella MZ
- 69 Movement Effects VisuStella MZ
- 70 Multi-Layer HP Gauge VisuStella MZ
- 71 New Game Plus VisuStella MZ
- 72 Proximity Compass VisuStella MZ
- 73 Proximity Messages VisuStella MZ
- 74 Quest Journal System VisuStella MZ
- 75 QTE and Trigger System VisuStella MZ
- 76 Random Dungeon Maps VisuStella MZ
- 77 Recruiting Board VisuStella MZ
- 78 Shop Batches VisuStella MZ
- 79 Shop Common Events VisuStella MZ
- 80 Shop Listing Unlock VisuStella MZ
- 81 Skill Containers VisuStella MZ
- 82 Skill Cooldowns VisuStella MZ
- 83 Skill Learn System VisuStella MZ
- 83.1 Ability Points-Related Notetags
- 83.2 Skill Points-Related Notetags
- 83.3 Learnable Skills-Related Notetags
- 83.4 Skill Learn Cost-Related Notetags
- 83.5 JavaScript Notetags: Skill Costs
- 83.6 Show Condition-Related Notetags
- 83.7 JavaScript Notetags: Show Conditions
- 83.8 Require Condition-Related Notetags
- 83.9 JavaScript Notetags: Requirement Conditions
- 83.10 Animation-Related Notetags
- 83.11 JavaScript Notetags: On Learning Conditions
- 84 Skill Mastery VisuStella MZ
- 85 Skill Shop VisuStella MZ
- 86 Skill Stealer VisuStella MZ
- 87 Skills and States Core VisuStella MZ
- 87.1 General Skill Notetags
- 87.2 Skill Cost Notetags
- 87.3 JavaScript Notetags: Skill Costs
- 87.4 Gauge Replacement Notetags
- 87.5 Item Cost-Related Notetags
- 87.6 Skill Accessibility Notetags
- 87.7 JavaScript Notetags: Skill Accessibility
- 87.8 General State-Related Notetags
- 87.9 JavaScript Notetags: On Add/Erase/Expire
- 87.10 JavaScript Notetags: Slip Damage/Healing
- 87.11 Passive State Notetags
- 87.12 JavaScript Notetags: Passive State
- 88 State Tooltips VisuStella MZ
- 89 Steal Items VisuStella MZ
- 90 Unique Tile Effects VisuStella MZ
- 91 Variable Gauges VisuStella MZ
- 92 Victory Aftermath VisuStella MZ
- 93 Visual Cutin Effect VisuStella MZ
- 94 Visual Fogs VisuStella MZ
- 95 Visual Item Inventory VisuStella MZ
- 96 Visual State Effects VisuStella MZ
- 97 Visual Parallaxes VisuStella MZ
- 98 Weakness Display VisuStella MZ
- 99 Weapon Animation VisuStella MZ
- 100 Weapon Swap System VisuStella MZ
- 101 Weapon Unleash VisuStella MZ
- 102 Weather Effects VisuStella MZ
- 103 End of List
|
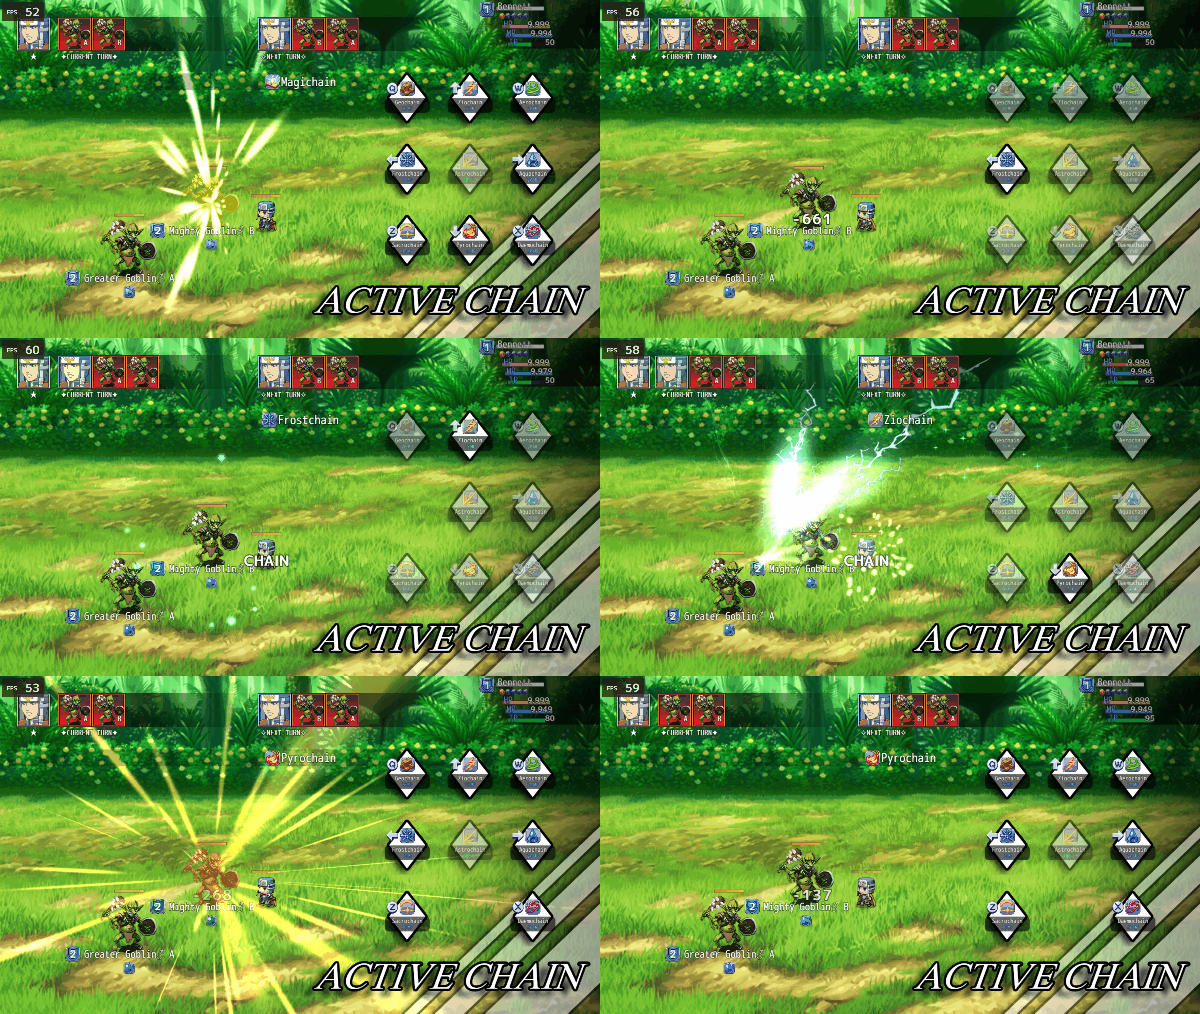
RPG Maker MZ's editor is unable to allow for custom traits/properties that a game dev may wish to associate with a database object, event, map, etc. Notetags are used to work around such limitations by allowing the game dev to tag certain traits/properties using specific Notetags declared by the related plugin. Here is a list of Notetag(s) that you may use. Active Chain Skills VisuStella MZThe following are notetags that have been added through this plugin. These notetags will not work with your game if this plugin is OFF or not present. --- Chain Skill-Related Notetags--- <Chain Skill key: id>
<Chain Skill key: name>
<Available Chain Skill key: id>
<Available Chain Skill key: name>
- Used for: Skill Notetags
- Adds a chainable skill to the specific 'key' when pressed. This variant
requires the actor to either have learned the skill or have it temporarily
accessible through traits.
- There are no differences between the <Chain Skill key: x> and the
<Available Chain Skill key: x> notetags, it's a matter of preference of
which you want to use.
- Replace 'key' with a string representing the key trigger you wish to bind
this chain skill with.
- 'down', 'left', 'right', 'up'
- You can substitute the above for the NumPad values: 'down' with '2',
'left' with '4', 'right' with '6', and 'up' with '8'
- 'ok', 'cancel', 'pageup', 'pagedown', 'shift'
- You can substitute the above for the Keyboard inputs: 'ok' with 'z',
'cancel' with 'x', 'pageup' with 'q', 'pagedown' with 'w', and
'shift' for 's'
- Do not include the quotes.
- For 'id' variant: replace 'id' with the ID of the skill to chain using
the marked key.
- For 'name' variant: replace 'name' with the name of the skill to chain
using the marked key.
- Insert multiple copies of this notetag to bind different keys.
Examples:
<Chain Skill up: Thunder I>
<Chain Skill left: 107>
<Available Chain Skill down: Fire I>
<Available Chain Skill right: 123>
--- <Learned Chain Skill key: id>
<Learned Chain Skill key: name>
<Known Chain Skill key: id>
<Known Chain Skill key: name>
- Used for: Skill Notetags
- Adds a chainable skill to the specific 'key' when pressed. This variant
requires the actor to have learned the skill in order to chain it
regardless of whether or not the actor has temporary trait access.
- There are no differences between the <Learned Chain Skill key: x> and the
<Known Chain Skill key: x> notetags, it's a matter of preference of
which you want to use.
- Replace 'key' with a string representing the key trigger you wish to bind
this chain skill with.
- 'down', 'left', 'right', 'up'
- You can substitute the above for the NumPad values: 'down' with '2',
'left' with '4', 'right' with '6', and 'up' with '8'
- 'ok', 'cancel', 'pageup', 'pagedown', 'shift'
- You can substitute the above for the Keyboard inputs: 'ok' with 'z',
'cancel' with 'x', 'pageup' with 'q', 'pagedown' with 'w', and
'shift' for 's'
- Do not include the quotes.
- For 'id' variant: replace 'id' with the ID of the skill to chain using
the marked key.
- For 'name' variant: replace 'name' with the name of the skill to chain
using the marked key.
- Insert multiple copies of this notetag to bind different keys.
Examples:
<Learned Skill up: Thunder I>
<Learned Skill left: 107>
<Known Chain Skill down: Fire I>
<Known Chain Skill right: 123>
--- <Forced Chain Skill key: id>
<Forced Chain Skill key: name>
<Always Chain Skill key: id>
<Always Chain Skill key: name>
- Used for: Skill Notetags
- Adds a chainable skill to the specific 'key' when pressed. This variant
will always have the skill available for chaining.
- There are no differences between the <Forced Chain Skill key: x> and the
<Always Chain Skill key: x> notetags, it's a matter of preference of
which you want to use.
- Replace 'key' with a string representing the key trigger you wish to bind
this chain skill with.
- 'down', 'left', 'right', 'up'
- You can substitute the above for the NumPad values: 'down' with '2',
'left' with '4', 'right' with '6', and 'up' with '8'
- 'ok', 'cancel', 'pageup', 'pagedown', 'shift'
- You can substitute the above for the Keyboard inputs: 'ok' with 'z',
'cancel' with 'x', 'pageup' with 'q', 'pagedown' with 'w', and
'shift' for 's'
- Do not include the quotes.
- For 'id' variant: replace 'id' with the ID of the skill to chain using
the marked key.
- For 'name' variant: replace 'name' with the name of the skill to chain
using the marked key.
- Insert multiple copies of this notetag to bind different keys.
Examples:
<Forced Skill up: Thunder I>
<Forced Skill left: 107>
<Always Chain Skill down: Fire I>
<Always Chain Skill right: 123>
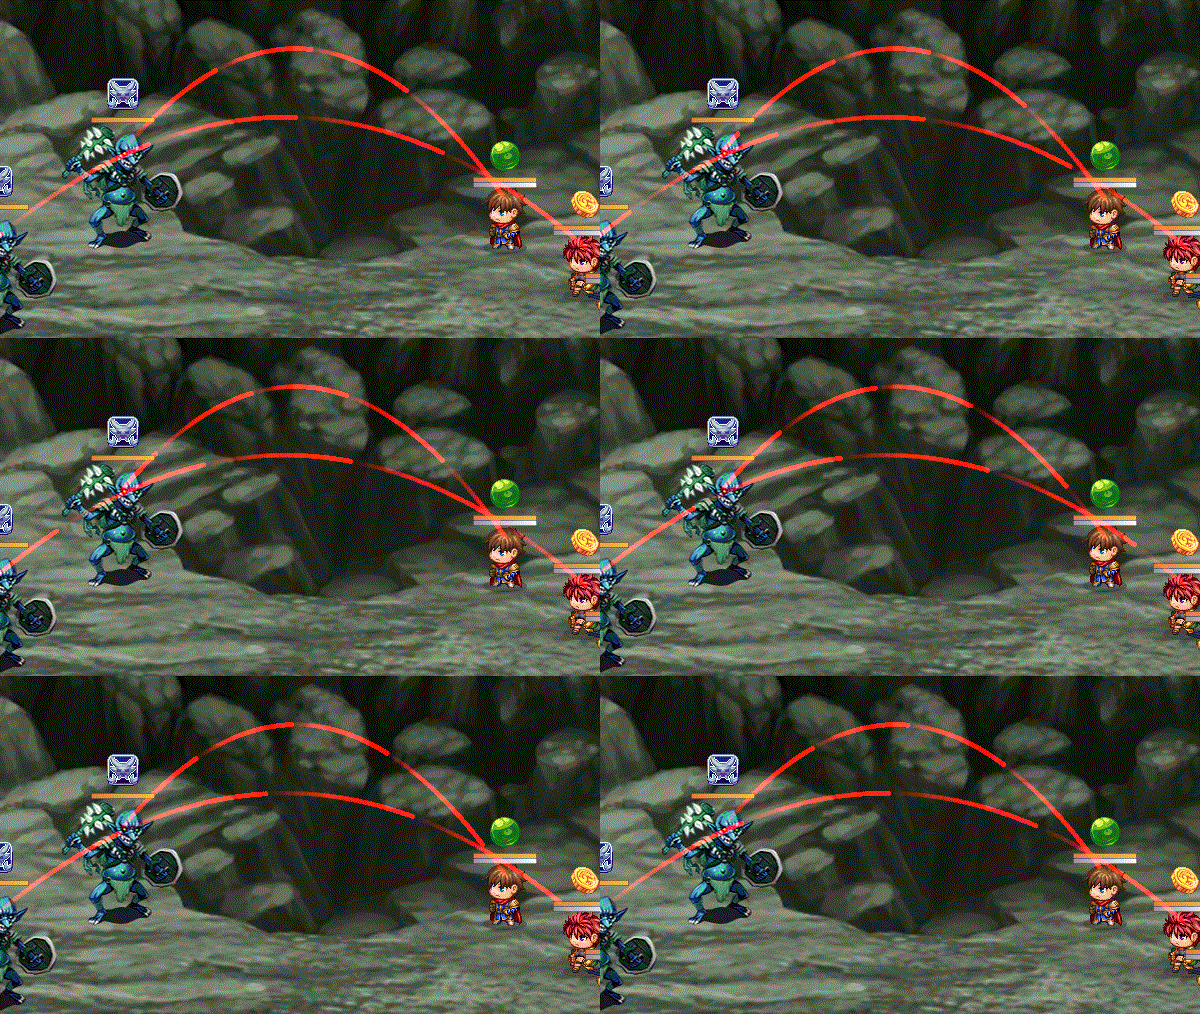
--- <Chain Only> - Used for: Skill Notetags - Causes this skill to only become usable during an Active Chain Skill sequence as long as other costs and conditions have been met. --- Confirmation-Related Notetags--- <Chain Confirm Animation: x> - Used for: Skill Notetags - Changes the confirmation animation when chaining into this skill. - Requires VisuMZ_0_CoreEngine! - Replace 'x' with a number representing the ID of the animation to play when chaining into this skill. - If this notetag is not used, play the animation found in the Plugin Parameters instead. --- Aggro Control System VisuStella MZThe following are notetags that have been added through this plugin. These notetags will not work with your game if this plugin is OFF or not present. Provoke-Related NotetagsThe following notetags enable you to utilize the Provoke effects added by this plugin. Provoked targets can only attack the provoking unit for single target actions. --- <Provoke> - Used for: State Notetags - Causes the state affected unit to be able to only attack the caster of the provoke state for single target actions. - If multiple provoke states are applied, then the provoker is the one who applied the highest priority provoke state. - States with <Provoke> on them will automatically remove themselves if the provoker dies. Update made by Arisu. --- <Provoke Height Origin: x%> - Used for: Actor, Enemy Notetags - Sets the provoke height origin point to x% of the sprite's height. - This is the landing point for the provoke trails. - Replace 'x' with a number presenting what rate of the sprite's height to set as the provoke height origin point. --- <Bypass Provoke> - Used for: Actor, Class, Weapon, Armor, Enemy, State Notetags - Makes the affected unit to ignore any and all provoke effects applied by any provoke states, allowing them to target foes as if they are unaffected by provoke states altogether. --- <Bypass Provoke> - Used for: Skill and Item Notetags - Makes the action bypass provoke effects applied by any provoke states, allowing this action to target foes as if the user is unaffected by any provoke effects altogether. --- Taunt-Related Notetags--- <Taunt> <All Taunt> - Used for: Actor, Class, Weapon, Armor, Enemy, State Notetags - Causes the taunting unit to become the target of the opposing team's single target actions for physical, magical, and certain hit actions. - If multiple taunters exist, then the opposing team can select between any of the taunters for targets. --- <Physical Taunt> <Magical Taunt> <Certain Taunt> - Used for: Actor, Class, Weapon, Armor, Enemy, State Notetags - Causes the taunting unit to become the target of the opposing team's single target actions for physical, magical, and certain hit actions respectively. - Add/remove any combination of the above to cause the affected unit to become the target of those types of actions. - If multiple taunters exist, then the opposing team can select between any of the taunters for targets. --- <Bypass Taunt> - Used for: Actor, Class, Weapon, Armor, Enemy, State Notetags - The affected unit will ignore any and all taunt effects created by the opposing team, allowing them to use single target actions as if no taunters exist on the opposing team. --- <Bypass Taunt> - Used for: Skill and Item Notetags - Makes the action bypass taunt effects created by the opposing team, allowing the user to use single target actions as if no taunters exist on the opposing team. --- Aggro-Related Notetags--- <User Aggro: +x> <User Aggro: -x> - Used for: Skill, Item - Upon using this action, raise the user's battle aggro value by 'x'. - Replace 'x' with the amount of battle aggro to increase/decrease by. - This effect will only apply once per usage regardless of the number of successful hits landed by the action. --- <Target Aggro: +x> <Target Aggro: -x> - Used for: Skill, Item - Upon using this action, raise the target's battle aggro value by 'x'. - Replace 'x' with the amount of battle aggro to increase/decrease by. - This effect will apply multiple times based on the number of successful hits landed by the action. --- <Aggro: +x> <Aggro: -x> - Used for: Actor, Class, Weapon, Armor, Enemy, State Notetags - Causes the affected unit to passively have increased/decreased aggro values independent of the amount of aggro it earns in battle. - Replace 'x' with the amount of aggro this object increases/decreases by. --- <Aggro Multiplier: x%> - Used for: Actor, Class, Weapon, Armor, Enemy, State Notetags - Causes the affected unit to increase the amount of perceived aggro it has by the aggro multiplier. - Replace 'x' with a number representing the percentage to increase/decrease the perceived aggro by. - If multiple of these traits exist across different trait objects, the effects are increased multiplicatively. --- <Bypass Highest Aggro> - Used for: Actor, Class, Skill, Item, Weapon, Armor, Enemy, State Notetags - If used on skills or items, the action will decide targets by aggro weight instead of always picking the highest aggro unit(s). - If used on trait objects, the affected unit will decide targets by aggro weight instead of always picking the highest aggro unit(s). - This is used for enemy A.I. or Actor auto battle A.I. --- <Bypass Highest Aggro> - Used for: Skill and Item Notetags - Makes the action bypass highest aggro effects and instead focuses on targets by aggro weight instead. - This is used for enemy A.I. or Actor auto battle A.I. --- <Target Highest Aggro> - Used for: Actor, Class, Skill, Item, Weapon, Armor, Enemy, State Notetags - If used on skills or items, the action will always decide its targets by the highest aggro value. - If used on trait objects, the affected unit will always decide on targets by the highest aggro value. - If the <Bypass Highest Aggro> notetag exists, this effect is ignored. - This is used for enemy A.I. or Actor auto battle A.I. --- JavaScript Notetags: Aggro-Related--- <JS User Aggro> code code value = code </JS User Aggro> - Used for: Skill, Item - Replace 'code' with JavaScript code to determine the final 'value' to change the user's battle aggro to upon using this skill. - The 'user' variable represents the one using the skill/item. - The 'target' variable represents the one receiving the skill/item hit. - This effect will only apply once per usage regardless of the number of successful hits landed by the action. --- <JS Target Aggro> code code value = code </JS Target Aggro> - Used for: Skill, Item - Replace 'code' with JavaScript code to determine the final 'value' to change target's battle aggro to upon using this skill. - The 'user' variable represents the one using the skill/item. - The 'target' variable represents the one receiving the skill/item hit. - This effect will apply multiple times based on the number of successful hits landed by the action. --- Ambience Sounds VisuStella MZ
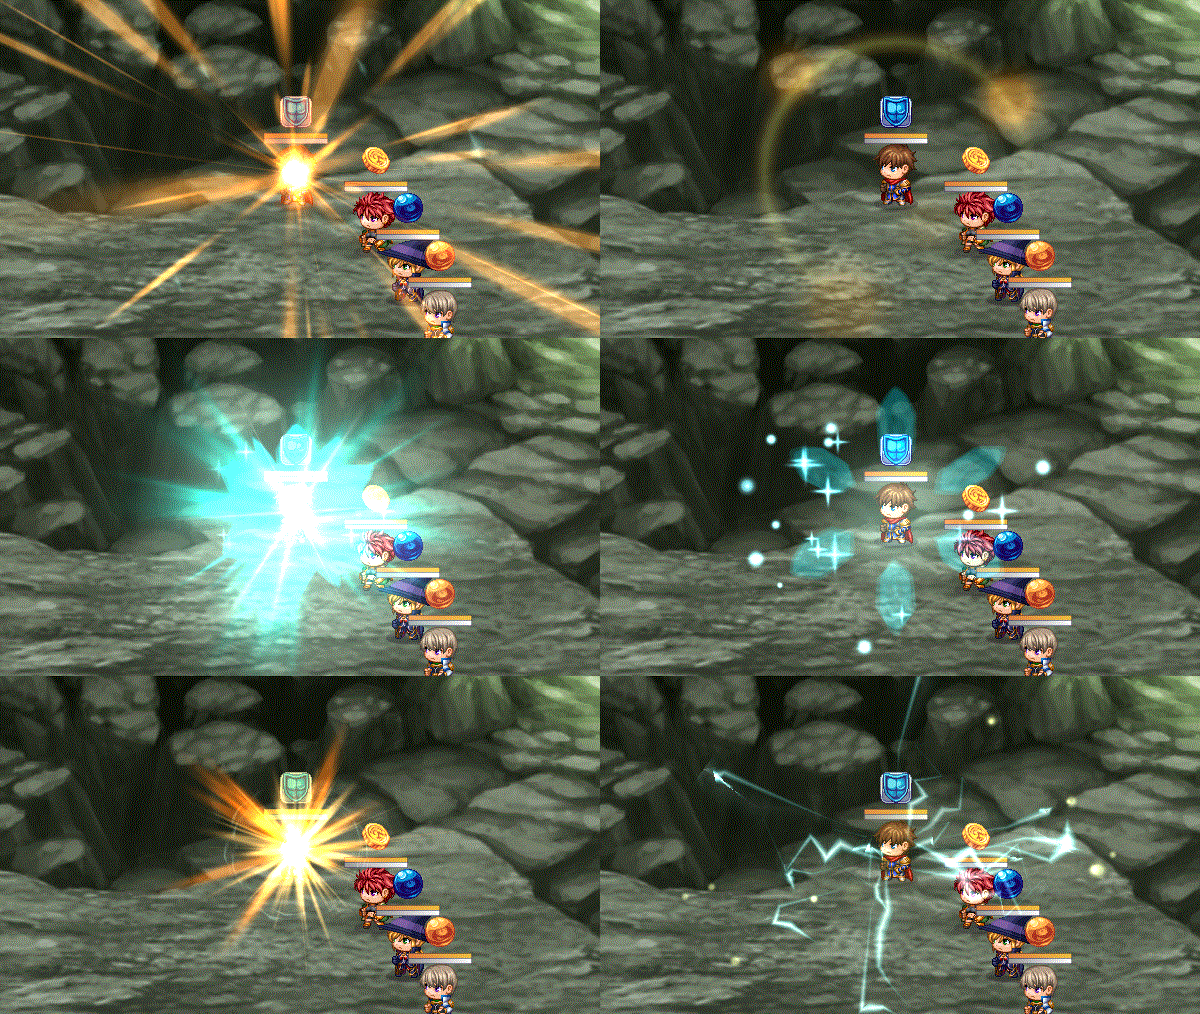
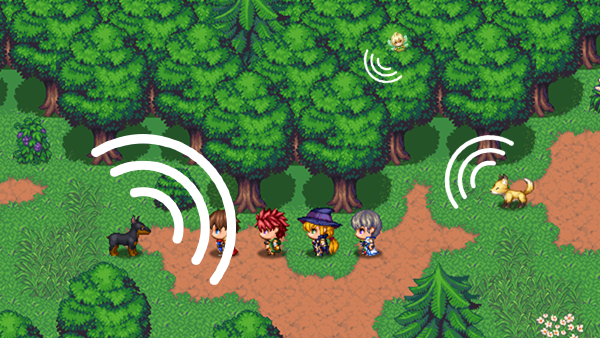
--- Event-Related Notetags--- <Ambience SFX: name> <Ambience SFX: name, volume> <Ambience SFX: name, volume, pitch> <Ambience SFX: name, volume, pitch, pan> - Used for: Event Notetags and Event Page Comment Tags - Adds the ambience sound effect to the event's ambience pool. - If there are multiple entries, add multiple sound effects. - A random sound effect will be picked each time it's ready to play. - The variant you use will determine how customized you want the sound effect's properties. Otherwise, the information will come from the default Plugin Parameter settings. - Replace 'name' with the filename of the sound effect found in /audio/se/ to play. Do NOT include the file extension. - Replace 'volume' with a number representing the volume of the sound. - Replace 'pitch' with a number representing the pitch of the sound effect. - Replace 'pan' with a number representing the pan of the sound effect. - If this is placed in a notetag, the effect will be present across all event pages used. - If this is placed inside a page's comment, the effect will only occur if that event page is currently active. --- <Ambience Interval: x> - Used for: Event Notetags and Event Page Comment Tags - Determines the interval at which the ambience sound effects play. - If this notetag is not used, then the interval played will be determined by the default Plugin Parameter settings. - Replace 'x' with a number representing the time in frames between ambience sound effects playing. 60 frames is equal to a second. - If this is placed in a notetag, the effect will be present across all event pages used. - If this is placed inside a page's comment, the effect will only occur if that event page is currently active. --- <Ambience Distance: x> <Ambience Proximity: x> - Used for: Event Notetags and Event Page Comment Tags - Determines the maximum proximity distance in tiles away from the event the player can hear the ambience sound effects from. - This will not form a diamond shape. This will form a circular radius. - There are no difference between the notetags. The one you use is entirely up to your own personal preferences. - If this notetag is not used, then the maximum proximity distance will be determined by the default Plugin Parameter settings. - Replace 'x' with a number representing the maximum proximity distance in tiles to hear the event from. - If this is placed in a notetag, the effect will be present across all event pages used. - If this is placed inside a page's comment, the effect will only occur if that event page is currently active. --- <Ambience Interval Variance: x%> - Used for: Event Notetags and Event Page Comment Tags - Determines the interval variability. The value of the final interval amount will vary by this percentage value. - If this plugin is not used, then the interval variance will be determined by the default Plugin Parameter settings. - Replace 'x' with a percentage representing the variability amount. - If this is placed in a notetag, the effect will be present across all event pages used. - If this is placed inside a page's comment, the effect will only occur if that event page is currently active. --- <Ambience Volume Variance: x%> - Used for: Event Notetags and Event Page Comment Tags - Determines the volume variability. The value of the final volume amount will vary by this percentage value. - If this plugin is not used, then the volume variance will be determined by the default Plugin Parameter settings. - Replace 'x' with a percentage representing the variability amount. - If this is placed in a notetag, the effect will be present across all event pages used. - If this is placed inside a page's comment, the effect will only occur if that event page is currently active. --- <Ambience Pitch Variance: x%> - Used for: Event Notetags and Event Page Comment Tags - Determines the pitch variability. The value of the final pitch amount will vary by this percentage value. - If this plugin is not used, then the pitch variance will be determined by the default Plugin Parameter settings. - Replace 'x' with a percentage representing the variability amount. - If this is placed in a notetag, the effect will be present across all event pages used. - If this is placed inside a page's comment, the effect will only occur if that event page is currently active. --- Anti-Damage Barriers VisuStella MZThe following are notetags that have been added through this plugin. These notetags will not work with your game if this plugin is OFF or not present. --- Cancellation Barrier-Related Notetags--- <hitType Barrier Cancel Damage Over: x>
<hitType Barrier Cancel Damage Over: formula>
- Used for: State Notetags
- Turns this state into a Cancellation Barrier that blocks all damage equal
to or over a specific amount determined by a formula.
- Replace 'hitType' with any of the following:
- 'All' for all damage types.
- 'Certain Hit' for certain hit damage only.
- 'Physical' for physical damage only.
- 'Magical' for magical damage only.
- 'Element id' for elemental damage that matches the element's 'id'.
- 'Element name' for elemental damage that matches the element's name.
- Insert multiple element id's or names with commas separating them.
- Replace 'x' with a number value to determine the damage threshold that
will be blocked by this barrier type.
- Replace 'formula' with a calculation that determines how much damage will
be the barrier's threshold.
- 'user' will refer to the current attacking user. If none is present,
then refer to the target.
- 'target' will be the battler receiving the damage.
Examples:
<All Barrier Cancel Damage Over: 1000>
<Physical Barrier Cancel Damage Over: 500>
<Magical Barrier Cancel Damage Over: user.def + target.mdf>
<Element Fire Cancel Damage Over: Math.randomInt(300)>
<Element Wind, Ice Barrier Cancel Damage Over: $gameVariables.value(42)>
--- <hitType Barrier Cancel Damage Under: x>
<hitType Barrier Cancel Damage Under: formula>
- Used for: State Notetags
- Turns this state into a Cancellation Barrier that blocks all damage equal
to or under a specific amount determined by a formula.
- Replace 'hitType' with any of the following:
- 'All' for all damage types.
- 'Certain Hit' for certain hit damage only.
- 'Physical' for physical damage only.
- 'Magical' for magical damage only.
- 'Element id' for elemental damage that matches the element's 'id'.
- 'Element name' for elemental damage that matches the element's name.
- Insert multiple element id's or names with commas separating them.
- Replace 'x' with a number value to determine the damage threshold that
will be blocked by this barrier type.
- Replace 'formula' with a calculation that determines how much damage will
be the barrier's threshold.
- 'user' will refer to the current attacking user. If none is present,
then refer to the target.
- 'target' will be the battler receiving the damage.
Examples:
<All Barrier Cancel Damage Under: 100>
<Physical Barrier Cancel Damage Under: 200>
<Magical Barrier Cancel Damage Under: user.def + target.mdf>
<Element Fire Barrier Cancel Damage Under: Math.randomInt(500)>
<Element Wind, Ice Barrier Cancel Damage Under: $gameVariables.value(42)>
--- Nullification Barrier-Related Notetags--- <hitType Nullify Barrier: x>
<hitType Nullify Barrier: formula>
- Used for: State Notetags
- Nullification Barriers block all damage at the cost of one charge.
- If a Nullification Barrier runs out of charges, it will automatically
remove itself from the battler.
- Replace 'hitType' with any of the following:
- 'All' for all damage types.
- 'Certain Hit' for certain hit damage only.
- 'Physical' for physical damage only.
- 'Magical' for magical damage only.
- 'Element id' for elemental damage that matches the element's 'id'.
- 'Element name' for elemental damage that matches the element's name.
- Insert multiple element id's or names with commas separating them.
- Replace 'x' with a number value to determine the number of charges the
Nullification Barrier will have.
- Replace 'formula' with a calculation that determines how much damage will
be the barrier's charges.
- 'user' will refer to the current attacking user. If none is present,
then refer to the target.
- 'target' will be the battler receiving the damage.
- Note! This effect is incompatible with the Absorption Barrier effect and
both cannot be placed on the same state. They can, however, be placed on
two separate states.
Examples:
<All Nullify Barrier: 3>
<Physical Nullify Barrier: 5>
<Magical Nullify Barrier: user.level + target.level>
<Element Fire Nullify Barrier: Math.randomInt(10)>
<Element Wind, Ice Nullify Barrier: $gameVariables.value(42)>
--- <Nullify Barrier Degen: x> <Nullify Barrier Degen: formula> - Used for: State Notetags - This will cause the charges for the Nullification Barrier to decay by a certain amount each regeneration phase. - Replace 'x' with a static number for it to decay by. - Replace 'formula' with a calculation that determines how many charges it will decay by. - 'target' will be the battler the Nullification Barrier is on. Examples: <Nullify Barrier Degen: 1> <Nullify Barrier Degen: Math.randomInt(3)> --- <Nullify Barrier Regen: x> <Nullify Barrier Regen: formula> - Used for: State Notetags - This will cause the charges for the Nullification Barrier to raise by a certain amount each regeneration phase. - Replace 'x' with a static number for it to regen by. - Replace 'formula' with a calculation that determines how many charges it will regen by. - 'target' will be the battler the Nullification Barrier is on. Examples: <Nullify Barrier Regen: 1> <Nullify Barrier Regen: Math.randomInt(3)> --- Reduction Barrier-Related Notetags--- <hitType Reduce Barrier: x%>
<hitType Reduce Barrier: formula>
- Used for: State Notetags
- Turns the state into a Reduction Barrier. Reduction Barriers reduce
incoming damage by a percentile.
- If a battler has multiple Reduction Barriers, they stack additively.
- Replace 'hitType' with any of the following:
- 'All' for all damage types.
- 'Certain Hit' for certain hit damage only.
- 'Physical' for physical damage only.
- 'Magical' for magical damage only.
- 'Element id' for elemental damage that matches the element's 'id'.
- 'Element name' for elemental damage that matches the element's name.
- Insert multiple element id's or names with commas separating them.
- Replace 'x' with a percentile number indicating the amount of damage it
will reduce by.
- Replace 'formula' with a calculation that determines the percentage of
damage that will be reduced by.
- 'user' will refer to the current attacking user. If none is present,
then refer to the target.
- 'target' will be the battler receiving the damage.
Examples:
<All Reduce Barrier: 20%>
<Physical Reduce Barrier: 40%>
<Magical Reduce Barrier: user.hpRate()>
<Element Fire Reduce Barrier: Math.random() * 0.50>
<Element Wind, Ice Reduce Barrier: $gameVariables.value(42) * 0.01>
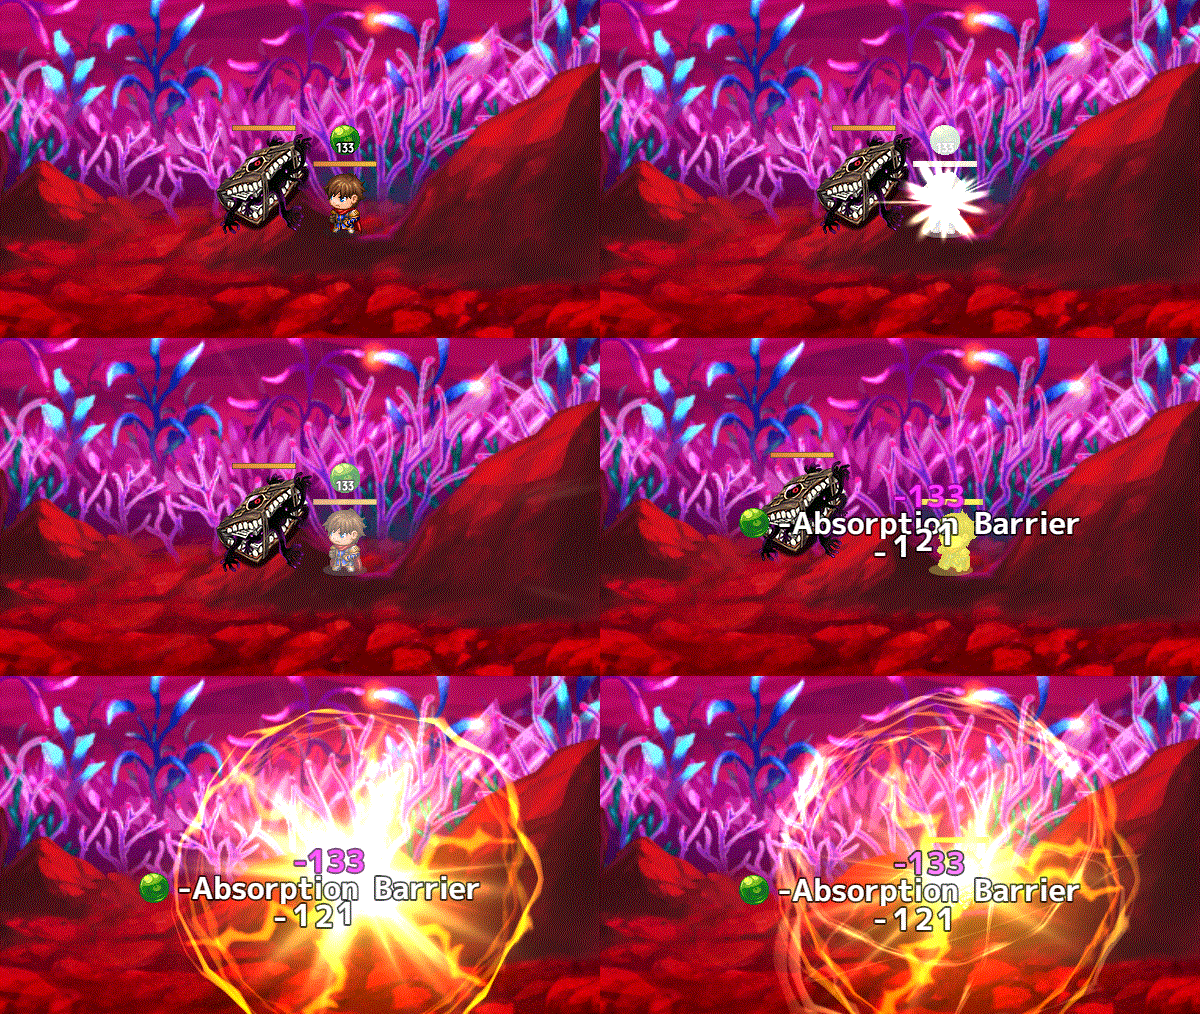
--- Absorption Barrier-Related Notetags--- <hitType Absorb Barrier: x>
<hitType Absorb Barrier: formula>
- Used for: State Notetags
- Turns the state into an Absorption Barrier which contains a visible
barrier that will block damage 1 for 1.
- If the Absorption Barrier's value is reduced to 0, it will automatically
remove itself.
- Replace 'hitType' with any of the following:
- 'All' for all damage types.
- 'Certain Hit' for certain hit damage only.
- 'Physical' for physical damage only.
- 'Magical' for magical damage only.
- 'Element id' for elemental damage that matches the element's 'id'.
- 'Element name' for elemental damage that matches the element's name.
- Insert multiple element id's or names with commas separating them.
- Replace 'x' with a number value to determine the barrier value the
Absorption Barrier state has upon being applied.
- Replace 'formula' with a calculation that determines what barrier value
Absorption Barrier state has upon being applied.
- 'user' will refer to the current attacking user. If none is present,
then refer to the target.
- 'target' will be the battler receiving the damage.
- Note! This effect is incompatible with the Nullification Barrier effect
and both cannot be placed on the same state. They can, however, be placed
on two separate states.
Examples:
<All Absorb Barrier: 300>
<Physical Absorb Barrier: 500>
<Magical Absorb Barrier: user.def + target.mdf>
<Element Fire Absorb Barrier: Math.randomInt(1000)>
<Element Wind, Ice Absorb Barrier: $gameVariables.value(42)>
--- <Absorb Barrier Degen: x> <Absorb Barrier Degen: formula> - Used for: State Notetags - This will cause the barrier for the Absorption Barrier to decay by a certain amount each regeneration phase. - Replace 'x' with a static number for it to decay by. - Replace 'formula' with a calculation that determines how much barrier it will decay by. - 'target' will be the battler the Absorption Barrier is on. Examples: <Absorb Barrier Degen: 1> <Absorb Barrier Degen: Math.randomInt(3)> --- <Absorb Barrier Regen: x> <Absorb Barrier Regen: formula> - Used for: State Notetags - This will cause the barrier for the Absorption Barrier to regen by a certain amount each regeneration phase. - Replace 'x' with a static number for it to regen by. - Replace 'formula' with a calculation that determines how much barrier it will regen by. - 'target' will be the battler the Absorption Barrier is on. Examples: <Absorb Barrier Regen: 1> <Absorb Barrier Regen: Math.randomInt(3)> --- MP Barrier-Related Notetags--- <hitType MP Barrier: x%>
<hitType MP Barrier: formula>
- Used for: State Notetags
- Turns this state into an MP-Dispersion Barrier state where a portion of
the incoming damage can be dispersed into the affected battler's MP pool.
- Damage will be dispersed 1 for 1 with MP. If there is insufficient MP,
the damage dispersion percentile will be reduced to account for MP.
- If MP reaches 0, the state will automatically remove itself.
- Replace 'hitType' with any of the following:
- 'All' for all damage types.
- 'Certain Hit' for certain hit damage only.
- 'Physical' for physical damage only.
- 'Magical' for magical damage only.
- 'Element id' for elemental damage that matches the element's 'id'.
- 'Element name' for elemental damage that matches the element's name.
- Insert multiple element id's or names with commas separating them.
- Replace 'x' with a percentile number indicating the amount of damage that
is dispersed into the battler's MP pool.
- Replace 'formula' with a calculation that determines the percentage of
damage that will be dispersed into the MP pool.
- 'user' will refer to the current attacking user. If none is present,
then refer to the target.
- 'target' will be the battler receiving the damage.
Examples:
<All MP Barrier: 20%>
<Physical MP Barrier: 40%>
<Magical MP Barrier: user.hpRate()>
<Element Fire MP Barrier: Math.random() * 0.50>
<Element Wind, Ice MP Barrier: $gameVariables.value(42) * 0.01>
--- TP Barrier-Related Notetags--- <hitType TP Barrier: x%>
<hitType TP Barrier: formula>
- Used for: State Notetags
- Turns this state into a TP-Dispersion Barrier state where a portion of
the incoming damage can be dispersed into the affected battler's TP pool.
- Damage will be dispersed 1 for 1 with TP. If there is insufficient TP,
the damage dispersion percentile will be reduced to account for TP.
- If TP reaches 0, the state will automatically remove itself.
- TP can be generated upon being hit. This gained TP does not apply to the
TP-Dispersion Barrier as it is generated after being hit.
- Replace 'hitType' with any of the following:
- 'All' for all damage types.
- 'Certain Hit' for certain hit damage only.
- 'Physical' for physical damage only.
- 'Magical' for magical damage only.
- 'Element id' for elemental damage that matches the element's 'id'.
- 'Element name' for elemental damage that matches the element's name.
- Insert multiple element id's or names with commas separating them.
- Replace 'x' with a percentile number indicating the amount of damage that
is dispersed into the battler's TP pool.
- Replace 'formula' with a calculation that determines the percentage of
damage that will be dispersed into the TP pool.
- 'user' will refer to the current attacking user. If none is present,
then refer to the target.
- 'target' will be the battler receiving the damage.
Examples:
<All TP Barrier: 20%>
<Physical TP Barrier: 40%>
<Magical TP Barrier: user.hpRate()>
<Element Fire TP Barrier: Math.random() * 0.50>
<Element Wind, Ice TP Barrier: $gameVariables.value(42) * 0.01>
--- Barrier Bypass-Related Notetags--- <Ignore Barriers> - Used for: Skill, Item Notetags - Causes this skill or item to completely ignore any barriers on the target. --- <Ignore Barriers as User> - Used for: Actor, Class, Weapon, Armor, Enemy, State Notetags - If an attacker with this notetag on any of its trait objects attacks a target with barriers, ignore the target's barriers. --- <Ignore Barriers as Target> - Used for: Actor, Class, Weapon, Armor, Enemy, State Notetags - If a target battler has this notetag on any of its trait objects receives an attack, any barriers on the target battler will be ignored. --- Break State-Related Notetags--- <hitType Breaks State> - Used for: State Notetags - If an attack hits a battler with this state and state's notetag, as long as the damage type matches, automatically remove the state. - Replace 'hitType' with any of the following: - 'All' for all damage types. - 'Certain Hit' for certain hit damage only. - 'Physical' for physical damage only. - 'Magical' for magical damage only. - 'Element id' for elemental damage that matches the element's 'id'. - 'Element name' for elemental damage that matches the element's name. - Insert multiple element id's or names with commas separating them. - This can be used for states that aren't barriers. - This occurs before most of the pre-damage phase. --- Auto Skill Triggers VisuStella MZThe following are notetags that have been added through this plugin. These notetags will not work with your game if this plugin is OFF or not present. --- Skill Trigger-Related Notetags--- <No Auto Skill Trigger> - Used for: Skill, Item State Notetags - This prevents Auto Skill Triggers from occurring upon using this skill or item. --- <Auto Trigger: condition>
<Auto Trigger x%: condition>
- Used for: Skill Notetags
- Turns this skill into an Auto Trigger Skill, where it will automatically
be used if the 'condition' has been met.
- If using the x% variant, the Auto Trigger has a x% chance to occur.
- Replace 'x' with a number value representing the chance to succeed.
- Skill must be usable normally outside of the occasion in order to trigger.
- This marked skill cannot trigger any other Auto Skill Triggers in order to
prevent an infinite loop.
- Skills can have multiple Auto Triggers and will trigger upon meeting the
conditions of any of them.
- Replace 'condition' with any of the below keywords:
*Note1*: Being the target of an action means the potential target must be
a part of the original scope, regardless of how the targets are changed
up later by Action Sequences.
Keywords:
---
Battle Start
- Triggers skill when the battle starts.
Battle Win
- Triggers skill when the battle is won.
Death
- Triggers skill moments before the user's death.
- If the user recovers enough HP from the skill trigger, then the
user won't die. However, any other Death triggered effects will
still continue to prompt.
---
Attack User
- Triggers skill when the user uses a basic attack.
Guard User
- Triggers skill when the user guards.
Item User
- Triggers skill when the user uses any item.
Physical User
- Triggers skill when the user performs any physical action.
Magical User
- Triggers skill when the user performs any magical action.
Certain Hit User
- Triggers skill when the user performs a certain hit action.
Skill Type name User
- Triggers skill when the user performs a skill of the named
Skill Type.
Element name User
- Triggers skill when the user performs an action with the named
element type.
---
Attack Target
- Triggers skill when user is the target of a basic attack.
- See Note1 Above.
Guard Target
- Triggers skill when user is the target of a guard action.
- See Note1 Above.
Item Target
- Triggers skill when user is the target of an item action.
- See Note1 Above.
Physical Target
- Triggers skill when user is the target of a physical action.
- See Note1 Above.
Magical Target
- Triggers skill when user is the target of a magical action.
- See Note1 Above.
Certain Hit Target
- Triggers skill when user is the target of a certain hit action.
- See Note1 Above.
Skill Type name Target
- Triggers skill when user is the target of a skill by named
Skill Type.
- See Note1 Above.
Element name Target
- Triggers skill when user is the target of of an action with the named
element type.
- See Note1 Above.
---
Attack Ally
- Triggers skill when user is the target of a basic attack
and is an ally of the currently active battler.
- See Note1 Above.
Guard Ally
- Triggers skill when user is the target of a guard action
and is an ally of the currently active battler.
- See Note1 Above.
Item Ally
- Triggers skill when user is the target of an item action
and is an ally of the currently active battler.
- See Note1 Above.
Physical Ally
- Triggers skill when user is the target of a physical action
and is an ally of the currently active battler.
- See Note1 Above.
Magical Ally
- Triggers skill when user is the target of a magical action
and is an ally of the currently active battler.
- See Note1 Above.
Certain Hit Ally
- Triggers skill when user is the target of a certain hit action
and is an ally of the currently active battler.
- See Note1 Above.
Skill Type name Ally
- Triggers skill when user is the target of a skill by named
Skill Type and is an ally of the currently active battler.
- See Note1 Above.
Element name Ally
- Triggers skill when user is the target of of an action with the named
element type and is an ally of the currently active battler.
- See Note1 Above.
---
Attack Enemy
- Triggers skill when user is the target of a basic attack
and is an enemy of the currently active battler.
- See Note1 Above.
Guard Enemy
- Triggers skill when user is the target of a guard action
and is an enemy of the currently active battler.
- See Note1 Above.
Item Enemy
- Triggers skill when user is the target of an item action
and is an enemy of the currently active battler.
- See Note1 Above.
Physical Enemy
- Triggers skill when user is the target of a physical action
and is an enemy of the currently active battler.
- See Note1 Above.
Magical Enemy
- Triggers skill when user is the target of a magical action
and is an enemy of the currently active battler.
- See Note1 Above.
Certain Hit Enemy
- Triggers skill when user is the target of a certain hit action
and is an enemy of the currently active battler.
- See Note1 Above.
Skill Type name Enemy
- Triggers skill when user is the target of a skill by named
Skill Type and is an enemy of the currently active battler.
- See Note1 Above.
Element name Enemy
- Triggers skill when user is the target of of an action with the named
element type and is an enemy of the currently active battler.
- See Note1 Above.
---
Attack Friends
- Triggers skill when a basic attack occurs and the active battler
is in the user's allied team.
Guard Friends
- Triggers skill when a guard action occurs and the active battler
is in the user's allied team.
Item Friends
- Triggers skill when an item action occurs and the active battler
is in the user's allied team.
Physical Friends
- Triggers skill when a physical action occurs and the active battler
is in the user's allied team.
Magical Friends
- Triggers skill when a physical action occurs and the active battler
is in the user's allied team.
Certain Hit Friends
- Triggers skill when a certain hit action occurs and the active battler
is in the user's allied team.
Skill Type name Friends
- Triggers skill when a skill by the named Skill Type action occurs and
the active battler is in the user's allied team.
Element name Friends
- Triggers skill when an action with the named element type occurs and
the active battler is in the user's allied team.
---
Attack Friends Only
- Triggers skill when a basic attack occurs and the active battler
is in the user's allied team, but the active battler cannot be the user.
Guard Friends Only
- Triggers skill when a guard action occurs and the active battler
is in the user's allied team, but the active battler cannot be the user.
Item Friends Only
- Triggers skill when an item action occurs and the active battler
is in the user's allied team, but the active battler cannot be the user.
Physical Friends Only
- Triggers skill when a physical action occurs and the active battler
is in the user's allied team, but the active battler cannot be the user.
Magical Friends Only
- Triggers skill when a physical action occurs and the active battler
is in the user's allied team, but the active battler cannot be the user.
Certain Hit Friends Only
- Triggers skill when a certain hit action occurs and the active battler
is in the user's allied team, but the active battler cannot be the user.
Skill Type name Friends Only
- Triggers skill when a skill by the named Skill Type action occurs and
the active battler is in the user's allied team, but the active battler
cannot be the user.
Element name Friends Only
- Triggers skill when an action with the named element type occurs and
the active battler is in the user's allied team, but the active battler
cannot be the user.
---
Attack Opponents
- Triggers skill when a basic attack occurs and the active battler
is in the user's opposing team.
Guard Opponents
- Triggers skill when a guard action occurs and the active battler
is in the user's opposing team.
Item Opponents
- Triggers skill when an item action occurs and the active battler
is in the user's opposing team.
Physical Opponents
- Triggers skill when a physical action occurs and the active battler
is in the user's opposing team.
Magical Opponents
- Triggers skill when a physical action occurs and the active battler
is in the user's opposing team.
Certain Hit Opponents
- Triggers skill when a certain hit action occurs and the active battler
is in the user's opposing team.
Skill Type name Opponents
- Triggers skill when a skill by the named Skill Type action occurs and
the active battler is in the user's opposing team.
Element name Opponents
- Triggers skill when an action with the named element type occurs and
the active battler is in the user's opposing team.
---
Examples:
<Auto Trigger: Battle Start>
<Auto Trigger: Death>
<Auto Trigger: Attack User>
<Auto Trigger: Guard User>
<Auto Trigger: Physical Target>
<Auto Trigger: Magical Target>
<Auto Trigger: Certain Hit Ally>
<Auto Trigger: Item Enemy>
<Auto Trigger: Skill Type Magic Ally>
<Auto Trigger: Skill Type Special Enemy>
<Auto Trigger: Element Fire Friends>
<Auto Trigger: Element Ice Opponents>
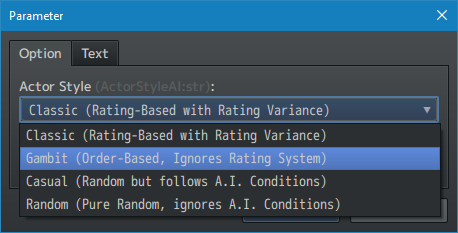
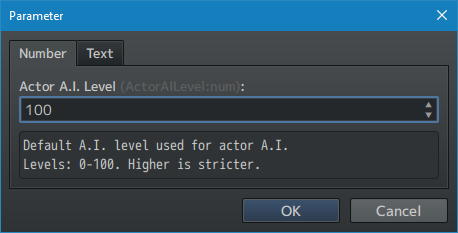
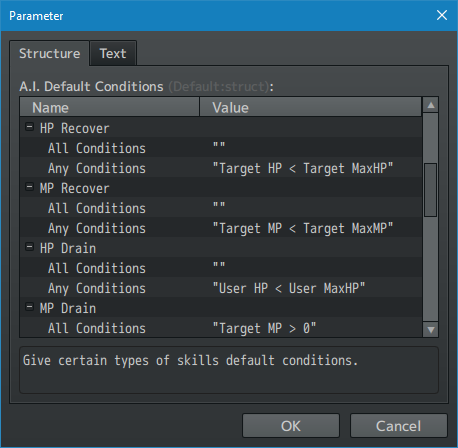
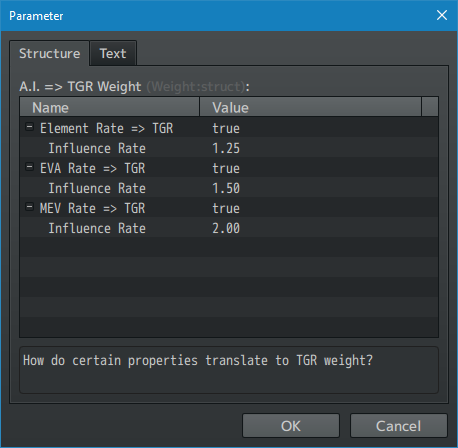
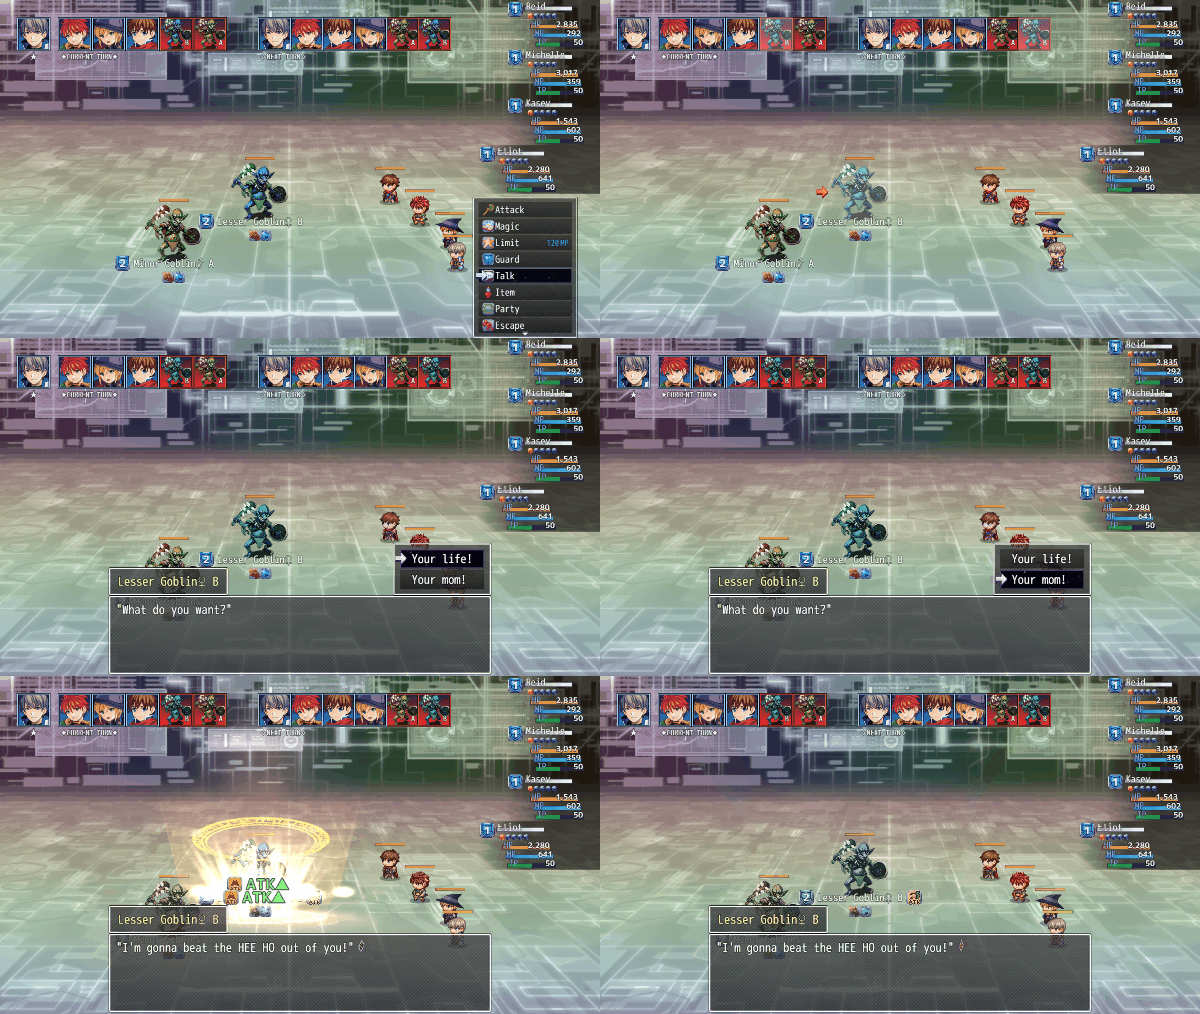
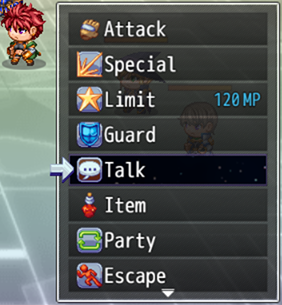
--- Battle AI VisuStella MZThe following are notetags that have been added through this plugin. These notetags will not work with your game if this plugin is OFF or not present. General A.I. Settings NotetagsThese notetags set the general A.I. related settings for enemies and any actors that use A.I. (requires Auto Battle and has a reference A.I.). --- <AI Style: x> - Used for: Class, Enemy Notetags - Replace 'x' with 'Classic', 'Gambit', 'Casual', or 'Random' without the quotes. Example: <AI Style: Gambit> - Determines the A.I. style used. Refer to the A.I. Styles section on the various types of styles. - For actors, place this inside the associated class's notebox instead. - For actors, this does not apply if there is no referenced enemy A.I. list. - Setup the reference enemy through either the Plugin Parameters or by using the <Reference AI: Enemy id> notetag found below. --- <AI Level: x> - Used for: Actor, Enemy Notetags - Designates the unit's A.I. level if A.I. is to be used. - Replace 'x' with a number from 0 to 100. - Units with higher A.I. Levels will be more strict about conditions. - Units with lower A.I. Levels will be more lax about conditions. --- <AI Rating Variance: x> - Used for: Actor, Enemy Notetags - Sets the variance amount when determining A.I. actions by rating. - Replace 'x' with a number between 0 and 9. - 0 for no variance. - Lower numbers for less variance. - Higher numbers for more variance. --- <Reference AI: Enemy id> <Reference AI: name> - Used for: Class Notetags - Causes any actor using this class that has the Auto Battle trait to use a specific enemy's attack pattern (ratings, conditions, etc.) to determine which skill to use in battle. - Replace 'id' with a number representing the enemy's ID to reference. - Replace 'name' with the name the enemy to reference. - Actors are only able to use skills they would normally have access to. - Actors need to have LEARNED the skill. - Actors need to be able to access the skill's SKILL TYPE. - Actors need to have the RESOURCES to pay for the skill. - If you cannot figure out why an auto battle actor cannot use a specific skill, turn OFF auto battle and see if you can use the skill normally. --- <No Reference AI> - Used for: Class Notetags - Prevents the class from using any enemies as their reference A.I. pattern (including the one set in the Plugin Parameters). --- Skill A.I. Condition NotetagsInsert these notetags into the noteboxes of skills that you'd like to give custom A.I. conditions for. The 'All' version of the notetags require every condition to be met while the 'Any' version of the notetags require only one of the conditions to be met. If both are used together, then the 'All' conditions must be completely fulfilled while the 'Any' conditions need only one to be fulfilled. --- <All AI Conditions> condition condition condition </All AI Conditions> - Used for: Skill - Add/remove as many conditions as needed for the skill. - All conditions must be met in order for this to become a valid skill for the AI to use. - This can be used together with <Any AI Conditions>. If either of these notetags exist, do not use the Plugin Parameter defaul conditions. - This will not inherit default 'All' conditions in the Plugin Parameters. - Replace 'condition' with any of the following Condition List below. --- <Any AI Conditions> condition condition condition </Any AI Conditions> - Used for: Skill - Add/remove as many conditions as needed for the skill. - As long as one condition is met, this becomes a valid skill for the AI to use. If none of them are met, this skill becomes invalid for AI use. - This can be used together with <All AI Conditions>. If either of these notetags exist, do not use the Plugin Parameter defaul conditions. - This will not inherit default 'Any' conditions in the Plugin Parameters. - Replace 'condition' with any of the following Condition List below. --- <No AI Conditions> - Used for: Skill - Removes any default 'All' and 'Any' conditions for this skill. --- Condition ListReplace 'condition' in the notetags in the above section with any of the following to make conditions. These conditions are also used in the Plugin Parameters for the default conditions, too. --- x >= y
x > y
x === y
x !== y
x < y
x <= y
- Replace 'x' and 'y' with any of the following:
- A numeric value representing a hard number.
- '50%' or any other percentile number to represent a rate.
- '0.5' or any other float number to represent a rate.
- 'Variable x' (replace 'x' with a number) for variable x's current value.
- 'HP%', 'MP%', 'TP%' for HP, MP, and TP rates respectively.
- 'MaxHP', 'MaxMP', 'MaxTP' for the potential target's respective values.
- 'Level' for the potential target's level. Requires VisuMZ_0_CoreEngine for
this to affect enemies.
- 'ATK', 'DEF', 'MAT', 'MDF', 'AGI', 'LUK' for the potential target's total
parameter value.
- 'param Buff Stacks' for the potential target's current Buff stacks.
- Replace 'param' with 'ATK', 'DEF', 'MAT', 'MDF', 'AGI', 'LUK'
- 'param Debuff Stacks' for the potential target's current Debuff stacks.
- Replace 'param' with 'ATK', 'DEF', 'MAT', 'MDF', 'AGI', 'LUK'
- 'param Buff Turns' for potential target's current buff turn duration.
- Replace 'param' with 'ATK', 'DEF', 'MAT', 'MDF', 'AGI', 'LUK'
- Returns 0 if the potential target is not affected by that buff.
- 'param Debuff Turns' for potential target's current debuff turn duration.
- Replace 'param' with 'ATK', 'DEF', 'MAT', 'MDF', 'AGI', 'LUK'
- Returns 0 if the potential target is not affected by that debuff.
- 'State id Turns' or 'State name Turns' for potential target's current turn
duration on that particular state.
- Replace 'id' with a number representing the ID of the state.
- Replace 'name' with the state's name.
- Returns 0 if the potential target is not affected by that state.
- Returns the max safe number value if the potential target is has that
state as a passive state.
- 'Element id Rate', 'Element name Rate', 'name Element Rate'
- Returns a (float) value of the potential target's element's rate.
- Replace 'id' with the ID of the element whose rate is to be checked.
- Replace 'name' with the name of the element whose rate is to be checked.
- Ignore any text codes in the element name.
- 'Team Alive Members'
- Returns a number value indicating how many alive members there are on
the potential target's team.
- 'Team Dead Members'
- Returns a number value indicating how many dead members there are on
the potential target's team.
- When no keyword matches are found, the comparison value will be
interpreted as JavaScript code. If the JavaScript code fails, it will
default to a 0 value.
*NOTE* JavaScript cannot be used without comparison operators to reduce
error. This means if you want to check if a switch is on or not, don't
simply use "$gameSwitches.value(42)" as it does not have any comparison
operators. Instead, use "$gameSwitches.value(42) === true" to check.
*NOTE* To make any of these conditions base off of the user instead, add
the word 'user' before the condition as such:
user hp% >= 0.50
user atk buff stacks === 2
user team alive members < 3
--- Always - Going to be valid no matter what. --- x% Chance - Replace 'x' with a number value representing the percent chance this skill would pass as valid. --- Switch x On Switch x Off - Replace 'x' with the ID of the switch to check as ON/OFF. --- User is Actor User is Enemy Target is Actor Target is Enemy - Requires the user or potential target to be an actor/enemy. --- User Has State id User Has State name Target Has State id Target Has State name - Replace 'id' with the ID of the state the user or potential target needs to have. - Replace 'name' with the name of the state the target needs to have. --- User Not State id User Not State name Target Not State id Target Not State name - Replace 'id' with the ID of the state the user or potential target cannot have. - Replace 'name' with the name of the state the target cannot have. --- User Has param Buff User Has param Debuff Target Has param Buff Target Has param Debuff - Requires user or potential target to have the associated parameter buff/debuff at any stack level. - Replace 'param' with 'ATK', 'DEF', 'MAT', 'MDF', 'AGI', 'LUK' --- User Has param Max Buff User Has param Max Debuff Target Has param Max Buff Target Has param Max Debuff - Requires potential user or target to have the associated parameter buff/debuff at maxed out stacks. - Replace 'param' with 'ATK', 'DEF', 'MAT', 'MDF', 'AGI', 'LUK' --- User Not param Buff User Not param Debuff Target Not param Buff Target Not param Debuff - Requires user or potential target to not have the associated parameter buff/debuff at any stack level. - Replace 'param' with 'ATK', 'DEF', 'MAT', 'MDF', 'AGI', 'LUK' --- User Not param Max Buff User Not param Max Debuff Target Not param Max Buff Target Not param Max Debuff - Requires user or potential target to not have the associated parameter buff/debuff at maxed out stacks. - Replace 'param' with 'ATK', 'DEF', 'MAT', 'MDF', 'AGI', 'LUK' --- A.I. => TGR Weight NotetagsYou can set how much influence on TGR weights actors and enemies will place when determining valid targets for their actions. --- <AI Element Rate Influence: x.x> - Used for: Actor, Enemy Notetags - Sets how much TGR weight influence is given based on the element rate. - Replace 'x.x' with a numberic value representing the influence rate. --- <Bypass AI Element Rate Influence> - Used for: Actor, Enemy Notetags - Makes the actor/enemy not factor in element rates when calculating TGR weights to determine action targets. --- <AI EVA Influence: x.x> - Used for: Actor, Enemy Notetags - Sets how much TGR weight influence is given based on the EVA rate. - Replace 'x.x' with a numberic value representing the influence rate. --- <Bypass AI EVA Influence> - Used for: Actor, Enemy Notetags - Makes the actor/enemy not factor in EVA rates when calculating TGR weights to determine action targets. --- <AI MEV Influence: x.x> - Used for: Actor, Enemy Notetags - Sets how much TGR weight influence is given based on the MEV rate. - Replace 'x.x' with a numberic value representing the influence rate. --- <Bypass AI MEV Influence> - Used for: Actor, Enemy Notetags - Makes the actor/enemy not factor in MEV rates when calculating TGR weights to determine action targets. --- Battle Command - Talk VisuStella MZThe following are notetags that have been added through this plugin. These notetags will not work with your game if this plugin is OFF or not present. --- Enemy-Related Notetags--- <Talk Common Event: x> - Used for: Enemy Notetags - Determines the Common Event that will be ran when talking to this specific enemy. - If this notetag is not used, the Common Event used will be whatever has been set up as default in the Plugin Parameters. - Replace 'x' with a number representing the Common Event's ID to run. --- Talk-Related Notetags--- <Battle Command Talk> - Used for: Actor, Class, Weapon, Armor, State Notetags - Allows the affected actor to talk. - This will bypass the default show Plugin Parameter. - This does not bypass the leader-only Plugin Parameter. <pre> --- <pre> <No Battle Command Talk> - Used for: Actor, Class, Weapon, Armor, State Notetags - Prevents the affected actor from being able to talk. - This will bypass the default show Plugin Parameter. --- Battle Core VisuStella MZThe following are notetags that have been added through this plugin. These notetags will not work with your game if this plugin is OFF or not present. HP Gauge-Related NotetagsThe following notetags allow you to set whether or not HP Gauges can be displayed by enemies regardless of Plugin Parameter settings. --- <Show HP Gauge> - Used for: Enemy Notetags - Will always show the HP Gauge for the enemy regardless of the defeat requirement setting. - This does not bypass the player's Options preferences. - This does not bypass disabling enemy HP Gauges as a whole. --- <Hide HP Gauge> - Used for: Enemy Notetags - Will always hide the HP Gauge for the enemy regardless of the defeat requirement setting. - This does not bypass the player's Options preferences. --- <Battle UI Offset: +x, +y> <Battle UI Offset: -x, -y> <Battle UI Offset X: +x> <Battle UI Offset X: -x> <Battle UI Offset Y: +y> <Battle UI Offset Y: -y> - Used for: Actor and Enemy Notetags - Adjusts the offset of HP Gauges and State Icons above the heads of actors and enemies. - Replace 'x' with a number value that offsets the x coordinate. - Negative x values offset left. Positive x values offset right. - Replace 'y' with a number value that offsets the y coordinate. - Negative y values offset up. Positive x values offset down. --- Animation-Related NotetagsThe following notetags allow you to set animations to play at certain instances and/or conditions. --- <Slip Animation: x> - Requires VisuMZ_0_CoreEngine! - Used for: Actor, Class, Weapon, Armor, Enemy, State Notetags - During the phase at which the user regenerates HP, MP, or TP, this animation will play as long as the user is alive and visible. - Replace 'x' with a number value representing the Animation ID to play. --- <Cast Animation: x> - Used for: Skill Notetags - Plays a battle animation at the start of the skill. - Replace 'x' with a number value representing the Animation ID to play. --- <Attack Animation: x> - Used for: Enemy Notetags - Gives an enemy an attack animation to play for its basic attack. - Replace 'x' with a number value representing the Animation ID to play. --- Battleback-Related NotetagsYou can apply these notetags to have some control over the battlebacks that appear in different regions of the map for random or touch encounters. --- <Region x Battleback1: filename> <Region x Battleback2: filename> - Used for: Map Notetags - If the player starts a battle while standing on 'x' region, then the 'filename' battleback will be used. - Replace 'x' with a number representing the region ID you wish to use. - Replace 'filename' with the filename of the graphic to use. Do not insert any extensions. This means the file 'Castle1.png' will be only inserted as 'Castle1' without the '.png' at the end. - *NOTE: This will override any specified battleback settings. --- Battle Command-Related NotetagsYou can use notetags to change how the battle commands of playable characters appear in battle as well as whether or not they can be used. --- <Seal Attack> <Seal Guard> <Seal Item> - Used for: Actor, Class, Weapon, Armor, Enemy, State Notetags - Prevents specific battle commands from being able to be used. --- <Battle Commands> Attack Skills SType: x SType: name All Skills Skill: x Skill: name Guard Item Party Escape Auto Battle Combat Log Talk Weapon Swap </Battle Commands> - Used for: Class Notetags - Changes which commands appear in the Actor Command Window in battle. If this notetag is not used, then the default commands determined in Plugin Parameters => Actor Command Window => Command List will be used. - Add/remove/modify entries as needed. - Attack - Adds the basic attack command. - Skills - Displays all the skill types available to the actor. - SType: x - Stype: name - Adds in a specific skill type. - Replace 'x' with the ID of the skill type. - Replace 'name' with the name of the skill type (without text codes). - All Skills - Adds all usable battle skills as individual actions. - Skill: x - Skill: name - Adds in a specific skill as a usable action. - Replace 'x' with the ID of the skill. - Replace 'name' with the name of the skill. - Guard - Adds the basic guard command. - Item - Adds the basic item command. - Party - Requires VisuMZ_2_PartySystem. - Allows this actor to switch out with a different party member. - Escape - Adds the escape command. - Auto Battle - Adds the auto battle command. - Combat Log - Requires VisuMZ_4_CombatLog. - Opens up the combat log. - Talk - Requires VisuMZ_3_BattleCmdTalk! - Shows talk command if applicable. - Weapon Swap - Requires VisuMZ_2_WeaponSwapSystem. - Swaps the current weapon. Example: <Battle Commands> Attack Skill: Heal Skills Guard Item Escape </Battle Commands> --- <Command Text: x> - Used for: Skill Notetags - When a skill is used in a <Battle Commands> notetag set, you can change the skill name text that appears to something else. - Replace 'x' with the skill's name you want to shown in the Actor Battle Command window. - Recommended Usage: Shorten skill names that are otherwise too big to fit inside of the Actor Battle Command window. --- <Command Icon: x> - Used for: Skill Notetags - When a skill is used in a <Battle Commands> notetag set, you can change the skill icon that appears to something else. - Replace 'x' with the ID of icon you want shown in the Actor Battle Command window to represent the skill. --- <Command Require Learn> - Used for: Skill Notetags - Determines if a battle command is visible or not by whether the actor has learned the skill. - Learning the skill is a requirement. Acquiring the skill through traits does not count as learning the skill. --- <Command Require Access> - Used for: Skill Notetags - Determines if a battle command is visible or not by whether the actor has access to the skill. - Having access to the skill can come through either learning the skill or temporarily acquiring it through trait objects. --- <Command Show Switch: x> <Command Show All Switches: x,x,x> <Command Show Any Switches: x,x,x> - Used for: Skill Notetags - Determines if a battle command is visible or not through switches. - Replace 'x' with the switch ID to determine the skill's visibility. - If 'All' notetag variant is used, item will be hidden until all switches are ON. Then, it would be shown. - If 'Any' notetag variant is used, item will be shown if any of the switches are ON. Otherwise, it would be hidden. - This can be applied to Attack and Guard commands, too. --- <Command Hide Switch: x> <Command Hide All Switches: x,x,x> <Command Hide Any Switches: x,x,x> - Used for: Skill Notetags - Determines if a battle command is visible or not through switches. - Replace 'x' with the switch ID to determine the skill's visibility. - If 'All' notetag variant is used, item will be shown until all switches are ON. Then, it would be hidden. - If 'Any' notetag variant is used, item will be hidden if any of the switches are ON. Otherwise, it would be shown. - This can be applied to Attack and Guard commands, too. --- <Battle Portrait: filename> - Used for: Actor - This is used with the "Portrait" Battle Layout. - Sets the battle portrait image for the actor to 'filename'. - Replace 'filename' with a picture found within your game project's img/pictures/ folder. Filenames are case sensitive. Leave out the filename extension from the notetag. - This will override any menu images used for battle only. --- <Battle Portrait Offset: +x, +y> <Battle Portrait Offset: -x, -y> <Battle Portrait Offset X: +x> <Battle Portrait Offset X: -x> <Battle Portrait Offset Y: +y> <Battle Portrait Offset Y: -y> - Used for: Actor - This is used with the "Portrait" and "Border" Battle Layouts. - Offsets the X and Y coordinates for the battle portrait. - Replace 'x' with a number value that offsets the x coordinate. - Negative x values offset left. Positive x values offset right. - Replace 'y' with a number value that offsets the y coordinate. - Negative y values offset up. Positive x values offset down. --- JavaScript Notetag: Battle Command-RelatedThe following are notetags made for users with JavaScript knowledge to determine if skill-based battle commands are visible or hidden. --- <JS Command Visible> code code visible = code; </JS Command Visible> - Used for: Skill Notetags - The 'visible' variable is the final returned variable to determine the skill's visibility in the Battle Command Window. - Replace 'code' with JavaScript code to determine the skill's visibility in the Battle Command Window. - The 'user' variable represents the user who will perform the skill. - The 'skill' variable represents the skill to be used. --- Targeting-Related NotetagsThe following notetags are related to the targeting aspect of skills and items and may adjust the scope of how certain skills/items work. --- <Always Hit> <Always Hit Rate: x%> - Used for: Skill, Item Notetags - Causes the action to always hit or to always have a hit rate of exactly the marked x%. - Replace 'x' with a number value representing the hit success percentage. --- <Repeat Hits: x> - Used for: Skill, Item Notetags - Changes the number of hits the action will produce. - Replace 'x' with a number value representing the number of hits to incur. --- <Target: x Random Any> - Used for: Skill, Item Notetags - Makes the skill pick 'x' random targets when used. - Targets can be both actors and enemies. - This will overwrite the existing database scope and ignore the database's existing scope in favor of this. - Replace 'x' with a number value representing the number of random targets. --- <Target: x Random Enemies> - Used for: Skill, Item Notetags - Makes the skill pick 'x' random targets when used. - Targets are only enemies. - This will overwrite the existing database scope and ignore the database's existing scope in favor of this. - Replace 'x' with a number value representing the number of random targets. --- <Target: x Random Allies> - Used for: Skill, Item Notetags - Makes the skill pick 'x' random targets when used. - Targets are only actors. - This will overwrite the existing database scope and ignore the database's existing scope in favor of this. - Replace 'x' with a number value representing the number of random targets. --- <Target: All Allies But User> - Used for: Skill, Item Notetags - This will overwrite the existing database scope and ignore the database's existing scope in favor of this. - Targets all allies with the exception of the user. --- <Target: Ally or Enemy> - Used for: Skill, Item Notetags - Allows the player to target allies or enemies with the skill/item. - Keep in mind this does NOT allow you to select dead party members. - This will overwrite the existing database scope and ignore the database's existing scope in favor of this. - Target selection emphasis will go to allies first. - Ignored when used by enemies and will be treated as an ally scope. - Auto-battle actors will also treat this action as an ally scope. - For certain battle layouts in frontview, this will open the Actor Select window in order for Touch Input to be able to select actors. --- <Target: Enemy or Ally> - Used for: Skill, Item Notetags - Allows the player to target enemies or allies with the skill/item. - Keep in mind this does NOT allow you to select dead party members. - This will overwrite the existing database scope and ignore the database's existing scope in favor of this. - Target selection emphasis will go to enemies first. - Ignored when used by enemies and will be treated as an enemy scope. - Auto-battle actors will also treat this action as an enemy scope. - For certain battle layouts in frontview, this will open the Actor Select window in order for Touch Input to be able to select actors. --- <Single or Multiple Select>
- Used for: Skill, Item Notetags
- Requires an original scope that can select individual targets.
- This will allow the skill/item to be able to select either single targets
or multiple targets at once.
- In order to select "all enemies", the player must press the "Page Up"
keyboard button or the visual on screen "All Enemies" button.
- In order to select "all allies", the player must press the "Page Down"
keyboard button or the visual on screen "All Allies" button.
- Those wondering why this isn't regulated to a command left or right of
the enemies and actors is because mouse controls and touch controls
would not be able to select all enemies or all allies that way.
- This can NOT be used with single dead ally scopes.
- If there is an enemy with Taunt or Provoke, the option to select
"All Enemies" does not become possible.
- The enemy AI and Auto-Battle actor AI will NOT make use of the ability to
toggle between single and multiple target scopes. They will only use the
single target versions of these skills.
--- <Disperse Damage>
- Used for: Skill, Item Notetags
- This will cause any damage dealt by this skill to be split equally amongst
all targets of the skill including repeats.
- For basic attacks, any damage reduction added attack trait totals will
by reverted.
- This does NOT have to be used with <Single or Multiple Select> notetag and
can be used by itself for an "All" scope, making the skill/item deal less
damage if there's more enemies and more damage if there's less enemies.
--- <Cannot Target User> - Used for: Skill, Item Notetags - This will cause the action to be unable to select the user as the target. - This is not a targeting scope. Instead, it is used in addition to any other targeting scopes out there. - When used with "All" scopes, the user is removed from the target pool. - This is also applied outside of battle. - If the user somehow enters the target pool, the user is then replaced by a random ally found in the party. --- JavaScript Notetag: Targeting-Related--- <JS Targets> code code targets = [code]; </JS Targets> - Used for: Skill, Item Notetags - The 'targets' variable is an array that is returned to be used as a container for all the valid action targets. - The 'targets' variable will include the original set of targets determined by the skill/item's original scale. - Replace 'code' with JavaScript code to determine valid targets. --- Damage-Related Notetags--- <Damage Style: name> - Used for: Skill, Item Notetags - Replace 'name' with a Damage Style name to change the way calculations are made using the damage formula input box. - Names can be found in Plugin Parameters => Damage Settings => Style List --- <Armor Reduction: x> <Armor Reduction: x%> - Used for: Actor, Class, Skill, Item, Weapon, Armor, Enemy, State Notetags - If used on skills and/or items, sets the current skill/item's armor reduction properties to 'x' and/or 'x%'. - If used on trait objects, adds 'x' and/or 'x%' armor reduction properties when calculating one's own armor. - Use the 'x' notetag variant to determine a flat reduction value. - Use the 'x%' notetag variant to determine a percentile reduction value. --- <Armor Penetration: x> <Armor Penetration: x%> - Used for: Actor, Class, Skill, Item, Weapon, Armor, Enemy, State Notetags - If used on skills and/or items, sets the current skill/item's armor penetration properties to 'x' and/or 'x%'. - If used on trait objects, adds 'x' and/or 'x%' armor penetration properties when calculating a target's armor. - Use the 'x' notetag variant to determine a flat penetration value. - Use the 'x%' notetag variant to determine a percentile penetration value. --- <Magic Reduction: x> <Magic Reduction: x%> - Used for: Actor, Class, Skill, Item, Weapon, Armor, Enemy, State Notetags - If used on skills and/or items, sets the current skill/item's armor reduction properties to 'x' and/or 'x%'. - If used on trait objects, adds 'x' and/or 'x%' armor reduction properties when calculating one's own armor. - This applies to magical attacks. - Use the 'x' notetag variant to determine a flat reduction value. - Use the 'x%' notetag variant to determine a percentile reduction value. --- <Magic Penetration: x> <Magic Penetration: x%> - Used for: Actor, Class, Skill, Item, Weapon, Armor, Enemy, State Notetags - If used on skills and/or items, sets the current skill/item's armor penetration properties to 'x' and/or 'x%'. - If used on trait objects, adds 'x' and/or 'x%' armor penetration properties when calculating a target's armor. - This applies to magical attacks. - Use the 'x' notetag variant to determine a flat penetration value. - Use the 'x%' notetag variant to determine a percentile penetration value. --- <Bypass Damage Cap> - Used for: Actor, Class, Skill, Item, Weapon, Armor, Enemy, State Notetags - If used on skills and/or items, this will cause the action to never have its damage capped. - If used on trait objects, this will cause the affected unit to never have its damage capped. --- <Damage Cap: x> - Used for: Actor, Class, Skill, Item, Weapon, Armor, Enemy, State Notetags - If used on skills and/or items, this will declare the hard damage cap to be the 'x' value. - If used on trait objects, this will raise the affect unit's hard damage cap to 'x' value. If another trait object has a higher value, use that value instead. --- <Bypass Soft Damage Cap> - Used for: Actor, Class, Skill, Item, Weapon, Armor, Enemy, State Notetags - If used on skills and/or items, this will cause the action to never have its damage scaled downward to the soft cap. - If used on trait objects, this will cause the affected unit to never have its damage scaled downward to the soft cap. --- <Soft Damage Cap: +x%> <Soft Damage Cap: -x%> - Used for: Actor, Class, Skill, Item, Weapon, Armor, Enemy, State Notetags - If used on skills and/or items, this will increase/decrease the action's soft cap by x% where 'x' is a percentage value representing the increment changed by the hard cap value. - If used on trait objects, this will raise the affect unit's soft damage limit by x% where 'x' is a percentage value representing the increment changed by the hard cap value. --- <Unblockable> - Used for: Skill, Item Notetags - Using "Guard" against this skill will not reduce any damage. --- Critical-Related NotetagsThe following notetags affect skill and item critical hit rates and the critical damage multiplier. --- <Always Critical> - Used for: Skill, Item Notetags - This skill/item will always land a critical hit regardless of the user's CRI parameter value. --- <Set Critical Rate: x%> - Used for: Skill, Item Notetags - This skill/item will always have a x% change to land a critical hit regardless of user's CRI parameter value. - Replace 'x' with a percerntage value representing the success rate. --- <Modify Critical Rate: x%> <Modify Critical Rate: +x%> <Modify Critical Rate: -x%> - Used for: Skill, Item Notetags - Modifies the user's CRI parameter calculation for this skill/item. - The 'x%' notetag variant will multiply the user's CRI parameter value for this skill/item. - The '+x%' and '-x%' notetag variants will incremenetally increase/decrease the user's CRI parameter value for this skill/item. --- <Modify Critical Multiplier: x%> <Modify Critical Multiplier: +x%> <Modify Critical Multiplier: -x%> - Used for: Skill, Item Notetags - These notetags determine the damage multiplier when a critical hit lands. - The 'x%' notetag variant multiply the multiplier to that exact percentage. - The '+x%' and '-x%' notetag variants will change the multiplier with an incremenetal rate for this skill/item. --- <Modify Critical Bonus Damage: x%> <Modify Critical Bonus Damage: +x%> <Modify Critical Bonus Damage: -x%> - Used for: Skill, Item Notetags - These notetags determine the bonus damage added when a critical hit lands. - The 'x%' notetag variant multiply the damage to that exact percentage. - The '+x%' and '-x%' notetag variants will change the bonus damage with an incremenetal rate for this skill/item. --- JavaScript Notetags: Critical-RelatedThe following are notetags made for users with JavaScript knowledge to determine how critical hit-related aspects are calculated. --- <JS Critical Rate> code code rate = code; </JS Critical Rate> - Used for: Skill, Item Notetags - The 'rate' variable is the final returned amount to determine the critical hit success rate. - Replace 'code' with JavaScript code to determine the final 'rate' to be returned as the critical hit success rate. - The 'user' variable represents the one using the skill/item. - The 'target' variable represents the one receiving the skill/item hit. --- <JS Critical Damage> code code multiplier = code; bonusDamage = code; </JS Critical Damage> - Used for: Skill, Item Notetags - The 'multiplier' variable is returned later and used as the damage multiplier used to amplify the critical damage amount. - The 'bonusDamage' variable is returned later and used as extra added damage for the critical damage amount. - Replace 'code' with JavaScript code to determine how the 'multiplier' and 'bonusDamage' variables are calculated. - The 'user' variable represents the one using the skill/item. - The 'target' variable represents the one receiving the skill/item hit. --- Life Steal-Related Notetags--- <HP Life Steal: x%> <MP Life Steal: x%> - Used for: Skill, Item Notetags - Causes this skill/item to have Life Steal properties, allowing the user to take x% of the HP/MP Damage as recovered HP/MP. - HP Life Steal can only take HP from dealt HP damage. - MP Life Steal can only take MP from dealt MP damage. - Replace 'x' with a number representing the percentage of the dealt damage used as HP/MP recovery. - This cannot be used with skills/items with HP Drain/MP Drain. Life Steal is a different mechanic from HP Drain/MP Drain. --- <HP Life Steal Certain Hit: +x%>
<HP Life Steal Physical Hit: +x%>
<HP Life Steal Magical Hit: +x%>
<HP Life Steal Certain Hit: -x%>
<HP Life Steal Physical Hit: -x%>
<HP Life Steal Magical Hit: -x%>
<MP Life Steal Certain Hit: +x%>
<MP Life Steal Physical Hit: +x%>
<MP Life Steal Magical Hit: +x%>
<MP Life Steal Certain Hit: -x%>
<MP Life Steal Physical Hit: -x%>
<MP Life Steal Magical Hit: -x%>
- Used for: Used for: Actor, Class, Armor, Enemy, State Notetags
- The related battler's various trait properties can have passive life steal
properties that will trigger upon using skills/items with matching hit
types regardless of whether or not the skill/item innately has Life Steal.
- Notetag variants with "Certain Hit" will only trigger from "Certain Hit"
skill and item types. Same with "Physical" and "Magical" variants.
- HP Life Steal can only take HP from dealt HP damage.
- MP Life Steal can only take HP from dealt MP damage.
- Replace 'x' with a number representing the additive stacking percentage
boost of the dealt damage used as HP/MP recovery. The effects will stack
additively with other trait objects.
- This cannot be used with skills/items with HP Drain/MP Drain. Life Steal
is a different mechanic from HP Drain/MP Drain.
--- <Cancel Life Steal> <Cancel HP Life Steal> <Cancel MP Life Steal> - Used for: Skill, Item Notetags - Prevents this skill from allowing Life Steal effects to occur including the passive life steal calculators from the skill/item user. - This does not affect HP Drain/MP Drain. Life Steal is a different mechanic from HP Drain/MP Drain. --- <Guard Life Steal> <Guard HP Life Steal> <Guard MP Life Steal> - Used for: Used for: Actor, Class, Armor, Enemy, State Notetags - If the related battler becomes the target of Life Steal, this will prevent the Life Steal effects from taking effect. - This does not affect HP Drain/MP Drain. Life Steal is a different mechanic from HP Drain/MP Drain. --- <Disarm Life Steal> <Disarm HP Life Steal> <Disarm MP Life Steal> - Used for: Used for: Actor, Class, Armor, Enemy, State Notetags - Makes the related battler unable to HP/MP Life Steal regardless of the skill/item and its related properties like equipment. - This does not prevent skills/items with innate Life Steal from being used. Only the Life Steal part of the skill/item will have no effect. - This does not affect HP Drain/MP Drain. Life Steal is a different mechanic from HP Drain/MP Drain. --- <Negative Life Steal> <Negative HP Life Steal> <Negative MP Life Steal> - Used for: Used for: Actor, Class, Armor, Enemy, State Notetags - If the related battler becomes the target of Life Steal, this will invert the healing properties of Life Steal, causing the Life Steal user to instead take HP/MP damage. - This does NOT heal the target related battler. - This does not prevent skills/items with innate Life Steal from being used. Only the Life Steal part of the skill/item will have no effect. - This does not affect HP Drain/MP Drain. Life Steal is a different mechanic from HP Drain/MP Drain. --- Action Sequence-Related NotetagsAction Sequences allow you full control over how a skill and/or item plays through its course. These notetags give you control over various aspects of those Action Sequences. More information is found in the Action Sequences help section. --- <Custom Action Sequence> - Used for: Skill, Item Notetags - Removes all automated Action Sequence parts from the skill. - Everything Action Sequence-related will be done by Common Events. - Insert Common Event(s) into the skill/item's effects list to make use of the Custom Action Sequences. - This will prevent common events from loading in the Item Scene and Skill Scene when used outside of battle. --- <Auto Action Sequence> - Used for: Skill, Item Notetags - If the Action Sequence Plugin Parameter "Auto Notetag" is enabled, this plugin will prevent custom action sequences from happening for the skill or item, and instead, use an Automatic Action Sequence instead. - Ignore this if you have "Auto Notetag" disabled or set to false. By default, this setting is set to false. Please be aware of the changes you've made to your game before using it. --- <Bypass Auto Action Sequence> - Used for: Skill, Item Notetags - This notetag is used for the game devs that have the Action Sequence Plugin Parameter "Auto Notetag" on for applying <Custom Action Sequence> to everything. - This will allow items and skills to be able to launch their common events from the menu scene regardless of the inherent restriction to prevent action sequence based skills/items with common events from launching. - Ignore this if you have "Auto Notetag" disabled or set to false. By default, this setting is set to false. Please be aware of the changes you've made to your game before using it. --- <Common Event: name> - Used for: Skill, Item Notetags - Battle only: calls forth a Common Event of a matching name. - Replace 'name' with the name of a Common Event to call from when this skill/item is used in battle. - Remove any \I[x] in the name. - Insert multiple notetags to call multiple Common Events in succession. - This will occur after any Common Event Trait Effects for the skill/item's database entry. - This is primarily used for users who are reorganizing around their Common Events and would still like to have their skills/items perform the correct Action Sequences in case the ID's are different. --- <Display Icon: x> <Display Text: string> - Used for: Skill, Item Notetags - When displaying the skill/item name in the Action Sequence, determine the icon and/or text displayed. - Replace 'x' with a number value representing the icon ID to be displayed. - Replace 'string' with a text value representing the displayed name. --- <Common Event Key: name>
<Common Event Keys: name, name, name>
<Common Event Keys>
key
key
key
</Common Event Keys>
- Used for: Skill, Item Notetags
- Will generate Common Events for the skill/item with a corresponding key.
- Replace 'name' with the name of the Common Event's key that you want to
reference. That key will be converted into a Common Event effect for the
skill/item and be treated as an action sequence.
- The notetag variants that use multiple keys will have the keys added in
the order they are listed.
- If keys do not reference any Common Events, no Common Events will be
added for that key.
- To mark a Common Event with a key, insert inside a Common Event's name the
[ and ] brackets around the text that will be used as the Common Event's
key text.
- For example, if Common Event's name is "Penta Slash [PENTA]", then the
key used is "PENTA" without the quotes.
- This key could then be referenced by <Common Event Key: PENTA> notetag.
- Do not use commas (,) inside the key text as it will be automatically
removed for the sake of consistency.
- This feature is made for make the process of sharing Action Sequences to
become easier without needing to line up Common Event ID's.
--- Animated Sideview Battler-Related NotetagsEnemies can use Animated Sideview Actor graphics thanks to this plugin. These notetags give you control over that aspect. Some of these also affect actors in addition to enemies. --- <Sideview Battler: filename> <Sideview Battlers> filename: weight filename: weight filename: weight </Sideview Battlers> - Used for: Enemy Notetags - Replaces the enemy's battler graphic with an animated Sideview Actor graphic found in the img/sv_actors/ folder. - Replace 'filename' with the filename of the graphic to use. Do not insert any extensions. This means the file 'Actor1_1.png' will be only inserted as 'Actor1_1' without the '.png' at the end. - If the multiple notetag vaiant is used, then a random filename is selected from the list upon the enemy's creation. - Replace 'weight' with a number value representing how often the 'filename' would come up. The higher the weight, the more often. You may omit this and the colon(:) and just type in the 'filename' instead. - Add/remove lines as you see fit. Example: <Sideview Battlers> Actor1_1: 25 Actor1_3: 10 Actor1_5 Actor1_7 </Sideview Battlers> --- <Sideview Anchor: x, y> - Used for: Actor, Enemy Notetags - Sets the sprite anchor positions for the sideview sprite. - Replace 'x' and 'y' with numbers depicting where the anchors should be for the sideview sprite. - By default, the x and y anchors are 0.5 and 1.0. --- <Sideview Home Offset: +x, +y> <Sideview Home Offset: -x, -y> - Used for: Actor, Class, Weapon, Armor, State Notetags - Offsets the sideview actor sprite's home position by +/-x, +/-y. - Replace 'x' and 'y' with numbers depicting how much to offset each of the coordinates by. For '0' values, use +0 or -0. - This notetag will not work if you remove it from the JavaScript code in Plugin Parameters > Actor > JS: Home Position --- <Sideview Weapon Offset: +x, +y> <Sideview Weapon Offset: -x, -y> - Used for: Actor, Class, Weapon, Armor, Enemy State Notetags - Offsets the sideview weapon sprite's position by +/-x, +/-y. - Replace 'x' and 'y' with numbers depicting how much to offset each of the coordinates by. For '0' values, use +0 or -0. --- <Sideview Show Shadow> <Sideview Hide Shadow> - Used for: Actor, Enemy Notetags - Sets it so the sideview battler's shadow will be visible or hidden. --- <Sideview Shadow Scale: x%> <Sideview Shadow Scale: x.y> - Used for: Actor, Enemy Notetags - Adjusts the scaling size of the sideview battler's shadow. - This affects both the X and Y scale. --- <Sideview Shadow Scale X: x%> <Sideview Shadow Scale X: x.y> <Sideview Shadow Scale Y: x%> <Sideview Shadow Scale Y: x.y> - Used for: Actor, Enemy Notetags - Adjusts the scaling size of the sideview battler's shadow. - These affect their respective X and Y scales separately. --- <Sideview Collapse> <Sideview No Collapse> - Used for: Enemy Notetags - Either shows the collapse graphic or does not show the collapse graphic. - Collapse graphic means the enemy will 'fade away' once it's defeated. - No collapse graphic means the enemy's corpse will remain on the screen. --- <Sideview Idle Motion: name>
<Sideview Idle Motions>
name: weight
name: weight
name: weight
</Sideview Idle Motions>
- Used for: Enemy Notetags
- Changes the default idle motion for the enemy.
- Replace 'name' with any of the following motion names:
- 'walk', 'wait', 'chant', 'guard', 'damage', 'evade', 'thrust', 'swing',
'missile', 'skill', 'spell', 'item', 'escape', 'victory', 'dying',
'abnormal', 'sleep', 'dead'
- If the multiple notetag vaiant is used, then a random motion name is
selected from the list upon the enemy's creation.
- Replace 'weight' with a number value representing how often the 'name'
would come up. The higher the weight, the more often. You may omit this
and the colon(:) and just type in the 'name' instead.
- Add/remove lines as you see fit.
Example:
<Sideview Idle Motions>
walk: 25
wait: 50
guard
victory
abnormal
</Sideview Idle Motions>
--- <Sideview Size: width, height> - Used for: Enemy Notetags - When using a sideview battler, its width and height will default to the setting made in Plugin Parameters => Enemy Settings => Size: Width/Height. - This notetag lets you change that value to something else. - Replace 'width' and 'height' with numbers representing how many pixels wide/tall the sprite will be treated as. - This does NOT change the image size. This only changes the HITBOX size. --- <Sideview Weapon: weapontype> <Sideview Weapons> weapontype: weight weapontype: weight weapontype: weight </Sideview Weapons> - Used for: Enemy Notetags - Give your sideview enemies weapons to use. - Replace 'weapontype' with the name of the weapon type found under the Database => Types => Weapon Types list (without text codes). - If the multiple notetag vaiant is used, then a random weapon type is selected from the list upon the enemy's creation. - Replace 'weight' with a number value representing how often the weapontype would come up. The higher the weight, the more often. You may omit this and the colon(:) and just type in the 'weapontype' instead. - Add/remove lines as you see fit. Example: <Sideview Weapons> Dagger: 25 Sword: 25 Axe </Sideview Weapons> --- <traitname Sideview Battler: filename> <traitname Sideview Battlers> filename: weight filename: weight filename: weight </traitname Sideview Battlers> - Used for: Enemy Notetags - Requires VisuMZ_1_ElementStatusCore - Allows certain Trait Sets to cause battlers to have a unique appearance. - Replace 'filename' with the filename of the graphic to use. Do not insert any extensions. This means the file 'Actor1_1.png' will be only inserted as 'Actor1_1' without the '.png' at the end. - If the multiple notetag vaiant is used, then a random filename is selected from the list upon the enemy's creation. - Replace 'weight' with a number value representing how often the 'filename' would come up. The higher the weight, the more often. You may omit this and the colon(:) and just type in the 'filename' instead. - Add/remove lines as you see fit. Examples: <Male Sideview Battlers> Actor1_1: 25 Actor1_3: 10 Actor1_5 Actor1_7 </Male Sideview Battlers> <Female Sideview Battlers> Actor1_2: 25 Actor1_4: 10 Actor1_6 Actor1_8 </Female Sideview Battlers> --- <traitname Sideview Idle Motion: name>
<traitname Sideview Idle Motions>
name: weight
name: weight
name: weight
</traitname Sideview Idle Motions>
- Used for: Enemy Notetags
- Requires VisuMZ_1_ElementStatusCore
- Allows certain Trait Sets to cause battlers to have unique idle motions.
- Replace 'name' with any of the following motion names:
- 'walk', 'wait', 'chant', 'guard', 'damage', 'evade', 'thrust', 'swing',
'missile', 'skill', 'spell', 'item', 'escape', 'victory', 'dying',
'abnormal', 'sleep', 'dead'
- If the multiple notetag vaiant is used, then a random motion name is
selected from the list upon the enemy's creation.
- Replace 'weight' with a number value representing how often the 'name'
would come up. The higher the weight, the more often. You may omit this
and the colon(:) and just type in the 'name' instead.
- Add/remove lines as you see fit.
Examples:
<Jolly Sideview Idle Motions>
wait: 25
victory: 10
walk
</Jolly Sideview Idle Motions>
<Serious Sideview Idle Motions>
walk: 25
guard: 10
wait
</Jolly Sideview Idle Motions>
--- <traitname Sideview Weapon: weapontype> <traitname Sideview Weapons> weapontype: weight weapontype: weight weapontype: weight </traitname Sideview Weapons> - Used for: Enemy Notetags - Requires VisuMZ_1_ElementStatusCore - Allows certain Trait Sets to cause battlers to have unique weapons. - Replace 'weapontype' with the name of the weapon type found under the Database => Types => Weapon Types list (without text codes). - If the multiple notetag vaiant is used, then a random weapon type is selected from the list upon the enemy's creation. - Replace 'weight' with a number value representing how often the weapontype would come up. The higher the weight, the more often. You may omit this and the colon(:) and just type in the 'weapontype' instead. - Add/remove lines as you see fit. Examples: <Male Sideview Weapons> Dagger: 25 Sword: 25 Axe </Male Sideview Weapons> <Female Sideview Weapons> Dagger: 25 Spear: 25 Cane </Female Sideview Weapons> --- Enemy-Related Notetags--- <Battler Sprite Cannot Move> - Used for: Enemy Notetags - Prevents the enemy from being able to move, jump, and/or float due to Action Sequences. Useful for rooted enemies. --- <Swap Enemies> name: weight name: weight name: weight </Swap Enemies> - Used for: Enemy Notetags - Causes this enemy database object to function as a randomizer for any of the listed enemies inside the notetag. When the enemy is loaded into the battle scene, the enemy is immediately replaced with one of the enemies listed. The randomization is based off the 'weight' given to each of the enemy 'names'. - Replace 'name' with the database enemy of the enemy you wish to replace the enemy with. - Replace 'weight' with a number value representing how often the 'name' would come up. The higher the weight, the more often. You may omit this and the colon(:) and just type in the 'name' instead. - Add/remove lines as you see fit. Example: <Swap Enemies> Bat: 50 Slime: 25 Orc Minotaur </Swap Enemies> --- JavaScript Notetags: Mechanics-RelatedThese JavaScript notetags allow you to run code at specific instances during battle provided that the unit has that code associated with them in a trait object (actor, class, weapon, armor, enemy, or state). How you use these is entirely up to you and will depend on your ability to understand the code used and driven for each case. --- <JS Pre-Start Battle> code code code </JS Pre-Start Battle> <JS Post-Start Battle> code code code </JS Post-Start Battle> - Used for: Actor, Class, Weapon, Armor, Enemy, State Notetags - Runs JavaScript code at the start of battle aimed at the function: BattleManager.startBattle() - 'Pre' runs before the function runs. - 'Post' runs after the function runs. - Replace 'code' with JavaScript code to run desired effects. - The 'user' variable represents the one affected by the trait object. --- <JS Pre-Start Turn> code code code </JS Pre-Start Turn> <JS Post-Start Turn> code code code </JS Post-Start Turn> - Used for: Actor, Class, Weapon, Armor, Enemy, State Notetags - Runs JavaScript code at the start of a turn aimed at the function: BattleManager.startTurn() - 'Pre' runs before the function runs. - 'Post' runs after the function runs. - Replace 'code' with JavaScript code to run desired effects. - The 'user' variable represents the one affected by the trait object. --- <JS Pre-Start Action> code code code </JS Pre-Start Action> <JS Post-Start Action> code code code </JS Post-Start Action> - Used for: Actor, Class, Skill, Item, Weapon, Armor, Enemy, State Notetags - Runs JavaScript code at the start of an action aimed at the function: BattleManager.startAction() - 'Pre' runs before the function runs. - 'Post' runs after the function runs. - If used on skills and/or items, this will only apply to the skill/item being used and does not affect other skills and items. - If used on trait objects, this will apply to any skills/items used as long as the unit affected by the trait object has access to the trait object. - Replace 'code' with JavaScript code to run desired effects. - The 'user' variable represents the one affected by the trait object. --- <JS Pre-Apply> code code code </JS Pre-Apply> - Used for: Skill, Item Notetags - Runs JavaScript code at the start of an action hit aimed at the function: Game_Action.prototype.apply() - 'Pre' runs before the function runs. - If used on skills and/or items, this will only apply to the skill/item being used and does not affect other skills and items. - Replace 'code' with JavaScript code to run desired effects. - The 'user' variable represents the one using the skill/item. - The 'target' variable represents the one receiving the skill/item hit. --- <JS Pre-Apply as User> code code code </JS Pre-Apply as User> <JS Pre-Apply as Target> code code code </JS Pre-Apply as Target> - Used for: Actor, Class, Weapon, Armor, Enemy, State Notetags - Runs JavaScript code at the start of an action hit aimed at the function: Game_Action.prototype.apply() - 'Pre' runs before the function runs. - If used on trait objects, this will apply to any skills/items used as long as the unit affected by the trait object has access to the trait object. - If the 'as User' notetag variant is used, this code will be run as a response to the action from the action user end. - If the 'as Target' notetag variant is used, this code will be run as a response to the action from the action target end. - Replace 'code' with JavaScript code to run desired effects. - The 'user' variable represents the one using the skill/item. - The 'target' variable represents the one receiving the skill/item hit. --- <JS Pre-Damage> code code code </JS Pre-Damage> - Used for: Skill, Item Notetags - Runs JavaScript code before damage is dealt aimed at the function: Game_Action.prototype.executeDamage() - 'Pre' runs before the function runs. - If used on skills and/or items, this will only apply to the skill/item being used and does not affect other skills and items. - Replace 'code' with JavaScript code to run desired effects. - The 'user' variable represents the one using the skill/item. - The 'target' variable represents the one receiving the skill/item hit. --- <JS Pre-Damage as User> code code code </JS Pre-Damage as User> <JS Pre-Damage as Target> code code code </JS Pre-Damage as Target> - Used for: Actor, Class, Weapon, Armor, Enemy, State Notetags - Runs JavaScript code before damage is dealt aimed at the function: Game_Action.prototype.executeDamage() - 'Pre' runs before the function runs. - If used on trait objects, this will apply to any skills/items used as long as the unit affected by the trait object has access to the trait object. - If the 'as User' notetag variant is used, this code will be run as a response to the action from the action user end. - If the 'as Target' notetag variant is used, this code will be run as a response to the action from the action target end. - Replace 'code' with JavaScript code to run desired effects. - The 'user' variable represents the one using the skill/item. - The 'target' variable represents the one receiving the skill/item hit. --- <JS Post-Damage> code code code </JS Post-Damage> - Used for: Skill, Item Notetags - Runs JavaScript code after damage is dealt aimed at the function: Game_Action.prototype.executeDamage() - 'Post' runs after the function runs. - If used on skills and/or items, this will only apply to the skill/item being used and does not affect other skills and items. - Replace 'code' with JavaScript code to run desired effects. - The 'user' variable represents the one using the skill/item. - The 'target' variable represents the one receiving the skill/item hit. --- <JS Post-Damage as User> code code code </JS Post-Damage as User> <JS Post-Damage as Target> code code code </JS Post-Damage as Target> - Used for: Actor, Class, Weapon, Armor, Enemy, State Notetags - Runs JavaScript code after damage is dealt aimed at the function: Game_Action.prototype.executeDamage() - 'Post' runs after the function runs. - If used on trait objects, this will apply to any skills/items used as long as the unit affected by the trait object has access to the trait object. - If the 'as User' notetag variant is used, this code will be run as a response to the action from the action user end. - If the 'as Target' notetag variant is used, this code will be run as a response to the action from the action target end. - Replace 'code' with JavaScript code to run desired effects. - The 'user' variable represents the one using the skill/item. - The 'target' variable represents the one receiving the skill/item hit. --- <JS Post-Apply> code code code </JS Post-Apply> - Used for: Skill, Item Notetags - Runs JavaScript code at the end of an action hit aimed at the function: Game_Action.prototype.apply() - 'Post' runs after the function runs. - If used on skills and/or items, this will only apply to the skill/item being used and does not affect other skills and items. - Replace 'code' with JavaScript code to run desired effects. - The 'user' variable represents the one using the skill/item. - The 'target' variable represents the one receiving the skill/item hit. --- <JS Post-Apply as User> code code code </JS Post-Apply as User> <JS Post-Apply as Target> code code code </JS Post-Apply as Target> - Used for: Actor, Class, Weapon, Armor, Enemy, State Notetags - Runs JavaScript code at the end of an action hit aimed at the function: Game_Action.prototype.apply() - 'Post' runs after the function runs. - If used on trait objects, this will apply to any skills/items used as long as the unit affected by the trait object has access to the trait object. - If the 'as User' notetag variant is used, this code will be run as a response to the action from the action user end. - If the 'as Target' notetag variant is used, this code will be run as a response to the action from the action target end. - Replace 'code' with JavaScript code to run desired effects. --- <JS Pre-End Action> code code code </JS Pre-End Action> <JS Post-End Action> code code code </JS Post-End Action> - Used for: Actor, Class, Weapon, Armor, Enemy, State Notetags - Runs JavaScript code at the end of an action aimed at the function: BattleManager.endAction() - 'Pre' runs before the function runs. - 'Post' runs after the function runs. - If used on trait objects, this will apply to any skills/items used as long as the unit affected by the trait object has access to the trait object. - Replace 'code' with JavaScript code to run desired effects. - The 'user' variable represents the one affected by the trait object. --- <JS Pre-End Turn> code code code </JS Pre-End Turn> <JS Post-End Turn> code code code </JS Post-End Turn> - Used for: Actor, Class, Weapon, Armor, Enemy, State Notetags - Runs JavaScript code at the end of a turn aimed at the function: Game_Battler.prototype.onTurnEnd() - 'Pre' runs before the function runs. - 'Post' runs after the function runs. - Replace 'code' with JavaScript code to run desired effects. - The 'user' variable represents the one affected by the trait object. --- <JS Pre-Regenerate> code code code </JS Pre-Regenerate> <JS Post-Regenerate> code code code </JS Post-Regenerate> - Used for: Actor, Class, Weapon, Armor, Enemy, State Notetags - Runs JavaScript code when a unit regenerates HP/MP aimed at the function: Game_Battler.prototype.regenerateAll() - 'Pre' runs before the function runs. - 'Post' runs after the function runs. - Replace 'code' with JavaScript code to run desired effects. - The 'user' variable represents the one affected by the trait object. --- <JS Battle Victory> code code code </JS Battle Victory> - Used for: Actor, Class, Weapon, Armor, Enemy, State Notetags - Runs JavaScript code when a battle is won aimed at the function: BattleManager.processVictory() - Replace 'code' with JavaScript code to run desired effects. - The 'user' variable represents the one affected by the trait object. --- <JS Escape Success> code code code </JS Escape Success> - Used for: Actor, Class, Weapon, Armor, Enemy, State Notetags - Runs JavaScript code when escaping succeeds aimed at the function: BattleManager.onEscapeSuccess() - Replace 'code' with JavaScript code to run desired effects. - The 'user' variable represents the one affected by the trait object. --- <JS Escape Failure> code code code </JS Escape Failure> - Used for: Actor, Class, Weapon, Armor, Enemy, State Notetags - Runs JavaScript code when escaping fails aimed at the function: BattleManager.onEscapeFailure() - Replace 'code' with JavaScript code to run desired effects. - The 'user' variable represents the one affected by the trait object. --- <JS Battle Defeat> code code code </JS Battle Defeat> - Used for: Actor, Class, Weapon, Armor, Enemy, State Notetags - Runs JavaScript code when a battle is lost aimed at the function: BattleManager.processDefeat() - Replace 'code' with JavaScript code to run desired effects. - The 'user' variable represents the one affected by the trait object. --- <JS Pre-End Battle> code code code </JS Pre-End Battle> <JS Post-End Battle> code code code </JS Post-End Battle> - Used for: Actor, Class, Weapon, Armor, Enemy, State Notetags - Runs JavaScript code when the battle is over aimed at the function: BattleManager.endBattle() - 'Pre' runs before the function runs. - 'Post' runs after the function runs. - Replace 'code' with JavaScript code to run desired effects. - The 'user' variable represents the one affected by the trait object. --- Battle Layout-Related NotetagsThese tags will change the battle layout for a troop regardless of how the plugin parameters are set up normally. Insert these tags in either the noteboxes of maps or the names of troops for them to take effect. If both are present for a specific battle, then priority goes to the setting found in the troop name. --- <Layout: type> <Battle Layout: type> - Used for: Map Notetags, Troop Name Tags, and Troop Comment Tags - Changes the battle layout style used for this specific map or battle. - Replace 'type' with 'default', 'list', 'xp', 'portrait', or 'border'. - Those with VisuMZ_3_FrontviewBattleUI can use 'frontview'. - Those with VisuMZ_3_SideviewBattleUI can use 'sideview'. - If using Troop Comment Tags, then as long as the tag appears in a comment found on any of the Troop's pages (even if they don't run), the tag will be considered in effect. --- Troop Size Tags--- <Extend: x> <Extend: x, x, x> - Used for: Troop Name Tags and Troop Comment Tags - Adds enemies from another troop to the current troop. - Enemies from another troop will retain their database positions. - Replace 'x' with the ID of the database troop entry you wish to add enemy members from. - Insert multiple x's to add from more troops. - Extended troop members will be added in the order they're listed. - Be cautious of how many enemies you add as too many will lag the battle system. We are not responsible for frame drops due to this. --- Troop Comment TagsPlace these tags inside of a comment found in a troop page's event list. --- <Once Parallel When Start Battle> - Used for: Troop Page Comment Tags - Causes the troop page to immediately load the moment the battle scene begins to fade in (not after it fades in). This is faster than a turn 0 condition troop page. Troop page conditions are ignored. - This can be used for things like the Action Sequence Camera plugin, the Visual Battle Environment plugin, and/or initial battle poses and such in order to provide a near seamless battle transition experience. - This does NOT trigger when coming out of the options menu or party menu. - This WILL trigger when going from battle to battle nonstop via plugins like VisuStella MZ's Chain Battles. - When actors are moving towards their home positions, it will take around 30 frames by default. Use this information however you like. --- Battle Cursor VisuStella MZThe following are notetags that have been added through this plugin. These notetags will not work with your game if this plugin is OFF or not present. --- Cursor Appearance-Related Notetags--- <Battle Cursor Icon: x> - Used for: Actor, Enemy Notetags - Changes the battle select cursor into the specific icon. - Replace 'x' with the icon index you wish to use. --- <Battle Cursor Picture: filename> <Battle Cursor System: filename> - Used for: Actor, Enemy Notetags - Changes the battle select cursor into the specific image. - The 'Picture' variant loads images from img/pictures/. - The 'System' variant loads images from img/system/. - Replace 'filename' with the filename of the image found in the specific target folder. - Do not include the file extension. --- <Battle Cursor Frame Delay: x> - Used for: Actor, Enemy Notetags - If using a 'picture' or 'system' image that has the animated format, you can adjust how much delay there is between each animated frame. - Replace 'x' with a number representing the delay between frames. Lower is faster. Higher is slower. --- Cursor Location-Related Notetags--- <Battle Cursor Anchor X: Left> <Battle Cursor Anchor X: Center> <Battle Cursor Anchor X: Right> - Used for: Actor, Enemy Notetags - Determines the origin/anchor X location of the battle cursor sprite for this specific actor/enemy. --- <Battle Cursor Anchor Y: Top> <Battle Cursor Anchor Y: Middle> <Battle Cursor Anchor Y: Bottom> - Used for: Actor, Enemy Notetags - Determines the origin/anchor Y location of the battle cursor sprite for this specific actor/enemy. --- <Battle Cursor Position X: Left> <Battle Cursor Position X: Center> <Battle Cursor Position X: Right> - Used for: Actor, Enemy Notetags - Determines the position X location of where the battle cursor sprite appears on the actor or enemy sprite when targeting them. --- <Battle Cursor Position Y: Top> <Battle Cursor Position Y: Middle> <Battle Cursor Position Y: Bottom> - Used for: Actor, Enemy Notetags - Determines the position Y location of where the battle cursor sprite appears on the actor or enemy sprite when targeting them. --- <Battle Cursor Offset X: +x> <Battle Cursor Offset X: -x> - Used for: Actor, Enemy Notetags - Offsets the X position of the battle cursor sprite by pixels. - Replace 'x' with a number representing the pixels to offset the battle cursor sprite by. - Negative numbers go left. - Positive numbers go right. --- <Battle Cursor Offset Y: +y> <Battle Cursor Offset Y: -y> - Used for: Actor, Enemy Notetags - Offsets the Y position of the battle cursor sprite by pixels. - Replace 'y' with a number representing the pixels to offset the battle cursor sprite by. - Negative numbers go up. - Positive numbers go down. --- Cursor Wave-Related Notetags--- <Battle Cursor No Wave> - Used for: Actor, Enemy Notetags - Removes any oscillation from the battle cursor. --- <Battle Cursor Horizontal Wave: x> - Used for: Actor, Enemy Notetags - The battle cursor will oscillate back and forth horizontally from the left to the right. - Replace 'x' with a number representing the pixel distance to oscillate. --- <Battle Cursor Vertical Wave: x> - Used for: Actor, Enemy Notetags - The battle cursor will oscillate back and forth vertically from the top to the bottom. - Replace 'x' with a number representing the pixel distance to oscillate. --- <Battle Cursor Wave Speed: x> - Used for: Actor, Enemy Notetags - Select how fast the cursor oscillates. - Lower is slower. Higher is faster. - Replace 'x' with a number representing the speed at which the cursor will oscillate at. - Use decimal values between 0 and 1 for the best results. --- Battle Grid System VisuStella MZThe following are notetags that have been added through this plugin. These notetags will not work with your game if this plugin is OFF or not present. --- Setup Nodes-Related Notetags--- <Start Rank: x> <Start Ranks: x, x, x> <Start Flank: x> <Start Flanks: x, x, x> - Used for: Actor and Enemy Notetags - If "Battle Grid Tactics" is enabled, ignore this for actors. The grid tactics menu will determine where actors will start in battle. - Determines the preferred starting Rank/Flank 'x' node for this battler. - If another allied battler is already on that node, then this battler will pick the next available 'x' Rank/Flank. - If none of the preferred Ranks/Flanks are available, then the battler will start at the next suitable location without getting in another battler's way. - Replace 'x' with a number representing the ideal starting Ranks/Flanks for this battler with higher priority given to the numbers at the start. - This notetag can be used together with each otherfor more precise starting node locations. --- <Grid Size: r X f>
- Used for: Enemy Notetags
- Changes the space occupied by this enemy to be 'r' Ranks and 'f' Flanks.
- This turns the enemy into a "Large Enemy" and "Large Enemies" have the
special properties listed below:
- Large enemies will occupy multiple nodes at the same time and will take
on any of the effects applied all of the occupied nodes.
- Large enemies cannot move or be moved to different nodes.
- Large enemies will bypass the usage requirements for the notetag:
<rule Move User Node direction: x>
- If a small enemy transforms into a large enemy, the enemy will adjust
its node position in order to accomodate fitting in the grid. It may or
may not overlap other enemies and will do little to change that in order
to avoid conflicts. Be wary of transforming enemies from smaller sizes
to larger sizes as this can look very janky.
- If there is not enough space on the grid to fit all enemies listed in the
troop, the plugin will ask you to redesign that troop.
Examples:
<Grid Size: 1 X 3>
<Grid Size: 2 X 2>
<Grid Size: 3 X 2>
<Grid Size: 4 X 3>
--- Movement Range-Related Notetags--- <Move Base: type> - Used for: Class Notetags - Sets the movement base to 'type'. - Replace 'type' with a type from the "Movement Range Types" section below. - Insert multiples of this notetag to combine the movement base. - If this notetag or its variant is not used, then the movement base range will be determined by the Plugin Parameters. --- <Move Base> type type type </Move Base> - Used for: Class Notetags - Sets the movement base to 'type'. - Replace 'type' with a type from the "Movement Range Types" section below. - Insert as many types as you want to combine the movement base. - If this notetag or its variant is not used, then the movement base range will be determined by the Plugin Parameters. --- <Move Range: type> - Used for: Actor, Weapon, Armor, State Notetags - Expands the movement range with 'type'. - Replace 'type' with a type from the "Movement Range Types" section below. - Insert multiples of this notetag to expand the movement range. --- <Move Range> type type type </Move Range> - Used for: Actor, Weapon, Armor, State Notetags - Expands the movement range with 'type'. - Replace 'type' with a type from the "Movement Range Types" section below. - Insert as many types as you want to expand the movement range. --- <No Grid Movement> - Used for: Actor, Class, Weapon, Armor, Enemy, State Notetags - Once applied to the affected battler, the battler cannot change grid node positions as if completely bound to the grid node. - This will also disable an actor's ability to use the Move command. - This will also disable a battler's ability to use skills/items that have the <rule Move User Node direction: x> notetag. - When the battler is targeted with a <rule Move Target Node direction: x> notetag, the battler will NOT move. --- <Seal Grid Movement> - Used for: Actor, Class, Weapon, Armor, Enemy, State Notetags - Once applied to the affected battler, the battler cannot change grid node positions willingly as the user but can be moved as the target. - This will also disable an actor's ability to use the Move command. - This will also disable a battler's ability to use skills/items that have the <rule Move User Node direction: x> notetag. - When the battler is targeted with a <rule Move Target Node direction: x> notetag, the battler can be moved. --- Movement TypesThese are used with the <Movement Base> and <Movement Range> notetags and are the values you'd insert in place of the 'type' parameter. --- All - Expands the movement range to the whole grid. - Takes priority over the rest of the types. None - Removes all movement range options. - Takes priority over the rest of the types except for "All". --- Square x - Base: Sets a square-shaped range around the user. - Range: Expands area to a square-shaped range around the user. - Boosts additively with other "Square x" types. - x refers to the distance from the center to the side of a square. Radius x - Base: Sets a diamond-shaped range around the user. - Range: Expands area to a diamond-shaped range around the user. - Boosts additively with other "Radius x" types. - Boosts additively with "Square x" type. - x refers to the distance from the center to the edge of the radius. Full Rank - Expands movement range to the nodes with the same rank as the user. Rank x - Base: Sets the ranks to the side of the user. - Range: Expands movement range to side nodes the same rank as the user. - Boosts additively with other "Rank x" types. - Boosts additively with "Square x" and "Radius x" types. - x refers to the Rank's ID starting from 1. Full Flank - Expands movement range to the nodes with the same flank as the user. Flank x - Base: Sets the flank to the front and back of the user. - Range: Expands movement range to front and back nodes the same flank as the user. - Boosts additively with other "Flank x" types. - Boosts additively with "Square x" and "Radius x" types. - x refers to the Flank's ID starting from 1. Full All Diagonal - Expands movement range to all nodes diagonal from user. All Diagonal x - Base: Sets the movement range to diagonals from user. - Range: Expands movement range to diagonals from user. - Boosts additively with other "All Diagonal x" types. - Boosts additively with "Square x" and half of "Radius x" types. - x refers to the diagonal distance from the user. Full Diagonal Forward - Expands movement range to all front diagonal nodes from user. Diagonal Forward x - Base: Sets the movement range to front diagonal nodes from user. - Range: Expands movement range to front diagonal nodes from user. - Boosts additively with other "Diagonal Forward x" types. - Boosts additively with "Square x" and half of "Radius x" types. - x refers to the diagonal distance from the user. Full Diagonal Backward - Expands movement range to all behind diagonal nodes from user. Diagonal Backward x - Base: Sets the movement range to behind diagonal nodes from user. - Range: Expands movement range to behind diagonal nodes from user. - Boosts additively with other "Diagonal Backward x" types. - Boosts additively with "Square x" and half of "Radius x" types. - x refers to the diagonal distance from the user. Full Forward - Expands movement range to all nodes directly in front of user. Forward x - Base: Sets movement range to nodes directly in front of user. - Range: Expands movement range to nodes directly in front of user. - Boosts additively with other "Forward x" types. - Boosts additively with other "Flank x" types. - Boosts additively with "Square x" and "Radius x" types. - x refers to the node distance from the user. Full Backward - Expands movement range to all nodes directly behind user. Backward x - Base: Sets movement range to nodes directly behind user. - Range: Expands movement range to nodes directly behind user. - Boosts additively with other "Backward x" types. - Boosts additively with other "Flank x" types. - Boosts additively with "Square x" and "Radius x" types. - x refers to the node distance from the user. Full Upward - Expands movement range to all nodes to the flank above user. Upward x - Base: Sets movement range to nodes to the flank above user. - Range: Expands movement range to nodes to the flank above user. - Boosts additively with other "Upward x" types. - Boosts additively with other "Rank x" types. - Boosts additively with "Square x" and "Radius x" types. - x refers to the node distance from the user. Full Downward - Expands movement range to all nodes to the flank below user. Downward x - Base: Sets movement range to nodes to the flank below user. - Range: Expands movement range to nodes to the flank below user. - Boosts additively with other "Downward x" types. - Boosts additively with other "Rank x" types. - Boosts additively with "Square x" and "Radius x" types. - x refers to the node distance from the user. --- Not Square x - Restricts nodes in a square-shaped area around the user. - Takes largest of the "Not Square x" types. - x refers to the distance from the center to the side of a square. Not Radius x - Restricts nodes in a diamond-shaped area around the user. - Takes largest of the "Not Radius x" types. - x refers to the distance from the center to the edge of the radius. Not Full Rank - Restricts all of the nodes with the same rank as the user. Not Rank x - Restricts movement from the side nodes the same rank as the user. - Takes largest of the "Not Rank x" types. - x refers to the Rank's ID starting from 1. Not Full Flank - Restricts all of the nodes with the same flank as the user. Not Flank x - Restricts movement from the front/back nodes the same flank as the user. - Takes largest of the "Not Flank x" types. - x refers to the Flank's ID starting from 1. Not Full All Diagonal - Restricts movement from all nodes diagonal from user. Not All Diagonal x - Restricts movement range from diagonals from user. - Takes largest of the "Not All Diagonal x" types. - x refers to the diagonal distance from the user. Not Full Diagonal Forward - Restricts movement from all front diagonal nodes from user. Not Diagonal Forward x - Restricts movement from front diagonal nodes from user. - Takes largest of the "Not Diagonal Forward x" types. - x refers to the diagonal distance from the user. Not Full Diagonal Backward - Restricts movement from all behind diagonal nodes from user. Not Diagonal Backward x - Restricts movement from behind diagonal nodes from user. - Takes largest of the "Not Diagonal Backward x" types. - x refers to the diagonal distance from the user. Not Full Forward - Restricts movement from all nodes directly in front of user. Not Forward x - Restricts movement from nodes directly in front of user. - Takes largest of the "Not Forward x" types. - x refers to the node distance from the user. Not Full Backward - Restricts movement from all nodes directly behind user. Not Backward x - Restricts movement from nodes directly behind user. - Takes largest of the "Not Backward x" types. - x refers to the node distance from the user. Not Full Upward - Restricts movement from nodes to the flank above user. Not Upward x - Restricts movement from nodes to the flank above user. - Takes largest of the "Not Upward x" types. - x refers to the node distance from the user. Not Full Downward - Restricts movement from nodes to the flank below user. Not Downward x - Restricts movement from nodes to the flank below user. - Takes largest of the "Not Downward x" types. - x refers to the node distance from the user. --- King - Sets the movement range to the range of a Chess board's King piece. - This is essentially the same as "Square 1" type. Queen - Sets the movement range to the range of a Chess board's Queen piece. - This is essentially a combination of "Full Rank", "Full Flank", and "Full All Diagonals" types. Rook - Sets the movement range to the range of a Chess board's Rook piece. - This is essentially a combination of "Full Rank" and "Full Flank" types. Bishop - Sets the movement range to the range of a Chess board's Rook piece. - This is essentially a combination of "Full All Diagonals" types. Knight - Sets the movement range to the range of a Chess board's Knight piece. - This is essentially a combination of "Square 2", "Not All Diagonal 2", "Not Rank 2", "Not Flank 2" types. Pawn - Sets the movement range to the range of a Chess board's Pawn piece. - This is essentially the same as "Forward 1" type. --- User Action Movement-Related Notetags--- <rule Move User Node direction: x>
- Used for: Skill, Item Notetags
- Upon using this skill/item, the user will move 'x' nodes in the specified
'direction' while following the movement 'rule' needed.
- This effect will occur before applying damage or other effects.
- This effect will occur regardless of missing or evasion.
- This effect will occur only once during the action and will not trigger
multiple times with a multi-hit or multi-target skill/item.
- This effect will NOT occur when used by Triggers.
- Replace 'rule' with any of the following text to for movement ruling:
- Must, Mid, Must Mid, Switch, Switch Mid, Must Switch, Must Switch Mid
- Must - User MUST be able to land on target node or else the user
cannot move and the skill/item will be rendered unusable. If there are
any obstacles or allies on that node, the user cannot move and cannot
use the skill/item.
- Mid - User aims to land on target node, but will stop mid-way if any
allies or obstacles are in the way. User will stop at earliest node.
If the user cannot move past the initial node, the skill/item will be
used as if there's no need to move.
- Must Mid - Same as the above except if the user cannot move past the
initial node, the skill/item cannot be used.
- Switch - Moves to target node. If there is an ally on target node that
can switch, the user will switch positions with that ally and then the
skill/item can be used. If the user cannot move to target node, then
the skill/item will be used as if there's no need to move.
- Switch Mid - User will try to move to target node. If there is an ally
on the way towards the target node that can switch, then the user will
switch with the ally even if the ally is not at the target node. The
user will stop halfway for any other obstacles. If the user cannot
move past the initial node, the skill/item will be used as if there's
no need to move.
- Must Switch - User must move to target node where there is an ally
that can switch positions. If not, the skill/item cannot be used.
- Must Switch Mid - User will try to move towards target node. If there
are any allies on the way that can switch, then the user will switch
with that ally even if the ally is not at the target node and then the
skill/item can be used. Otherwise, the skill/item cannot be used even
if there is a clear path to the target node.
- Replace 'direction' with any of the following text for direction:
- Forward, Backward, Upward, Downward, Leftward, Rightward
- Up-Forward, Up-Backward, Up-Leftward, Up-Rightward
- Down-Forward, Down-Backward, Down-Leftward, Down-Rightward
- Replace 'x' with a number representing the number of nodes to move in the
specified direction.
Examples:
<Must Move User Node Upward: 1>
<Switch Move User Node Downward: 1>
<Mid Move User Node Forward: 2>
<Can Mid Move User Node Backward: 2>
<Can Move User Node Up-Forward: 1>
<Can Switch Mid Move User Node Forward: 3>
--- <Silent Move User Node> <Visual Move User Node> - Used for: Skill, Item Notetags - Used together with <rule Move User Node direction: x> notetag. - Determines if the change to the user's node location will be silent and discreet or visual and noticeable. - Use one notetag or the other. - If neither notetag is used, then the effect will default to the setting found in the Plugin Parameters. --- <Move User Node Duration: x>
- Used for: Skill, Item Notetags
- Used together with <rule Move User Node direction: x> notetag.
- Also requires the movement to be visual and noticeable.
- Do this with either the <Visual Move User Node> notetag or the related
Plugin Parameter.
- Determines how many frames the movement node change will take.
- Replace 'x' with a number representing the frame duration of the node
change animation.
- If this notetag is not used, then the duration will default to the setting
found in the Plugin Parameters.
--- Target Action Movement-Related Notetags--- <rule Move Target Node direction: x>
- Used for: Skill, Item Notetags
- Upon using this skill/item, the target will move 'x' nodes in the
specified 'direction' while following the movement 'rule' needed.
- This effect will occur after applying damage or other effects.
- This effect will occur only if the action effect connects.
- This effect will occur only once during the action and will not trigger
multiple times with a multi-hit or multi-target skill/item.
- This effect will not affect the user if the user performed a self
movement effect with the <rule Move User Node direction: x> notetag.
- This effect will NOT occur when used by Triggers.
- Replace 'rule' with any of the following text to for movement ruling:
- Exact, Mid, Switch, Switch Mid, Crash, Crash Mid
- Exact - Aims to move target to target node and will take no other
nodes except for that exact target node. If target cannot be moved to
target node due to it being out of bounds or there being any battlers
on that node, then no movements will be made.
- Mid - Aims to move target to target node, but will stop mid-way if any
battlers or obstacles are in the way. Target will stop at earliest
node. However, if the target cannot move past the initial node, then
no movements will be made.
- Switch - Target a specific node and moves the target there. If there
is a battler on target node, the target will switch positions with
that battler if the battler can switch. If the other battler cannot
switch, then the target will not move.
- Switch Mid - Same as the above except the target will stop at the
earliest available node. If there is a battler on the way, the target
will switch places with that battler if the battler can switch nodes.
If there are no available nodes, then the battler will not move.
- Crash - Aims to move target to target node, but if there is another
battler on that node, then crashing will occur and both the target and
the battler will take crash damage. The battler will remain in place
while the target moves back to its original node.
- Crash Mid - Aims to move target to target node, but will stop at the
earliest node. If there's a battler in the way, then crashing will
occur and both the target and battler will take crash damage. The
battler will remain in place while the target stops at the last
availabe node before the crash.
- Replace 'direction' with any of the following text for direction:
- Forward, Backward, Upward, Downward, Leftward, Rightward
- Up-Forward, Up-Backward, Up-Leftward, Up-Rightward
- Down-Forward, Down-Backward, Down-Leftward, Down-Rightward
- Replace 'x' with a number representing the number of nodes to move in the
specified direction.
Examples:
<Mid Move Target Node Forward: 1>
<Switch Move Target Node Forward: 1>
<Switch Mid Move Target Node Backward: 2>
<Crash Move Target Node Forward: 1>
<Crash Mid Move Target Node Backward: 2>
--- <Silent Move Target Node> <Visual Move Target Node> - Used for: Skill, Item Notetags - Used together with <rule Move Target Node direction: x> notetag. - Determines if the change to the target's node location will be silent and discreet or visual and noticeable. - Use one notetag or the other. - If neither notetag is used, then the effect will default to the setting found in the Plugin Parameters. --- <Move Target Node Duration: x>
- Used for: Skill, Item Notetags
- Used together with <rule Move Target Node direction: x> notetag.
- Also requires the movement to be visual and noticeable.
- Do this with either the <Visual Move Target Node> notetag or the related
Plugin Parameter.
- Determines how many frames the movement node change will take.
- Replace 'x' with a number representing the frame duration of the node
change animation.
- If this notetag is not used, then the duration will default to the setting
found in the Plugin Parameters.
--- <Grid Distance Damage Per Node: x% param>
- Used for: Skill, Item Notetags
- Used together with one of the target movement notetags.
- Deals 'x%' of user's 'param' as damage based on target's distance moved.
- Replace 'x' with a number representing a percentage of the user's
parameter to deal as damage.
- Replace 'param' with text representing the parameter to reference for
damage:
- 'MaxHP', 'MaxMP', 'ATK', 'DEF', 'MAT', 'MDF', 'AGI', or 'LUK'
- 'HIT', 'EVA', 'CRI', 'CEV', 'MEV', 'MRF', 'CNT', 'HRG', 'MRG', 'TRG'
- 'TGR', 'GRD', 'REC', 'PHA', 'MCR', 'TCR', 'PDR', 'MDR', 'FDR', 'EXR'
- Keep in mind if you use values like 'HIT', they will be often be rates
(numbers between 0 and 1 as rates) so adjust your 'x%' accordingly.
--- Action-User Requirements-Related Notetags--- <Require Rank: x> <Require Ranks: x, x, x> <Require Flank: x> <Require Flanks: x, x, x> - Used for: Skill, Item Notetags - Requires the user of the skill/item to be standing on a Rank/Flank 'x' node in order to be usable in battle. - Ignore this requirement when used outside of battle. - Replace 'x' with a number representing the node Rank/Flank required for the user to stand on in order to use this skill/item. - Insert multiple 'x' values to allow for a larger spread of Ranks/Flanks. - If the user is moved to a different node that does not meet the Rank/Flank requirements to use this skill/item, the user will not use it. --- <Require Not Rank: x> <Require Not Ranks: x, x, x> <Require Not Flank: x> <Require Not Flanks: x, x, x> - Used for: Skill, Item Notetags - Requires the user of the skill/item to NOT be standing on a Rank/Flank 'x' node in order to be usable in battle. - Ignore this requirement when used outside of battle. - Replace 'x' with a number representing the node Rank/Flank required for the user to NOT stand on in order to use this skill/item. - Insert multiple 'x' values to allow for a larger spread of Ranks/Flanks. - If the user is moved to a different node that does not meet the Rank/Flank requirements to use this skill/item, the user will not use it. --- <Require Front Rank> <Require Back Rank> <Require Top Flank> <Require Bottom Flank> - Used for: Skill, Item Notetags - Requires the user of the skill/item to be standing on the a certain Rank/Flank node. - A team's "Front Rank" is its first Rank occupied by living members. - A team's "Back Rank" is its last Rank occupied by living members. - A team's "Top Flank" is its first Flank occupied by living members. - A team's "Bottom Flank" is its last Flank occupied by living members. - Ignore this requirement when used outside of battle. - If the user is moved to a different node that does not meet the Rank/Flank requirements to use this skill/item, the user will not use it. --- Action-Target Requirements-Related Notetags--- <Target Only Rank: x>
<Target Only Ranks: x, x, x>
<Target Only Flank: x>
<Target Only Flanks: x, x, x>
- Used for: Skill, Item Notetags
- The skill/item will only affect the targets found in Rank/Flank 'x' and
will require there to be a target found in that Rank/Flank in order to be
used.
- This will be applied on top of whatever targeting scope is used.
- This applies both ways for actors and enemies.
- If there are no valid targets found in the Rank/Flank, then the
skill/item will be disabled and cannot be used.
- If there are Provoke or Taunt targets on the field and this is an action
that needs target selection, they must be within valid Ranks/Flanks that
can be targeted by this action or else this action can't be used.
- Can be used together with other "Target Only" notetags.
- Ignore this requirement when used outside of battle.
- This does not work with <Target: x Node, Rank, Flank> notetags.
- Replace 'x' with a number representing the Rank/Flank to restrict the
scope of the skill/item action to.
--- <Target Only Same Rank>
<Target Only Same Flank>
- Used for: Skill, Item Notetags
- The skill/item will only affect targets found in the same Rank/Flank as
the action's user.
- This will be applied on top of whatever targeting scope is used.
- This applies both ways for actors and enemies.
- If there are no valid targets found in the Rank/Flank, then the
skill/item will be disabled and cannot be used.
- If there are Provoke or Taunt targets on the field and this is an action
that needs target selection, they must be within valid Ranks/Flanks that
can be targeted by this action or else this action can't be used.
- Can be used together with other "Target Only" notetags.
- Ignore this requirement when used outside of battle.
- This does not work with <Target: x Node, Rank, Flank> notetags.
--- <Target Only Front Rank>
<Target Only Back Rank>
<Target Only Top Flank>
<Target Only Bottom Flank>
- Used for: Skill, Item Notetags
- The skill/item will only affect targets found in certain Rank/Flank node.
- A team's "Front Rank" is its first Rank occupied by living members.
- A team's "Back Rank" is its last Rank occupied by living members.
- A team's "Top Flank" is its first Flank occupied by living members.
- A team's "Bottom Flank" is its last Flank occupied by living members.
- This will be applied on top of whatever targeting scope is used.
- This applies both ways for actors and enemies.
- If there are Provoke or Taunt targets on the field and this is an action
that needs target selection, they must be within valid Ranks/Flanks that
can be targeted by this action or else this action can't be used.
- Can be used together with other "Target Only" notetags.
- Ignore this requirement when used outside of battle.
- This does not work with <Target: x Node, Rank, Flank> notetags.
--- Weapon Range-Target Requirements-Related Notetags--- <Target In Weapon Range>
<Use Weapon Range>
- Used for: Skill, Item Notetags
- The skill/item will utilize the battler's weapon range instead of the
action's weapon range.
- This will completely bypass the "Target Only" notetags in favor of the
"Weapon Range" notetags.
- Actors will use the weapon range of their first weapon if they are using
multiple weapons.
- If an actor is not using any weapon, it will use the default melee range.
- Depending on the settings found in the Plugin Parameters, the default
melee range may only target the Front Rank.
- Enemies will use the weapon range found in their own notetags. If there
aren't any "Weapon Range" notetags found in the enemy's note box, then it
will use the default melee range.
- Depending on the settings found in the Plugin Parameters, the default
melee range may only target the Front Rank.
- The notetag variants do the same thing. Which you choose to use is
entirely up to personal preference.
- This does not work with <Target: x Node, Rank, Flank> notetags.
--- <Weapon Range Melee>
<Weapon Range All>
- Used for: Weapon, Enemy Notetags
- These are quick shortcuts to mark specific range types.
- Melee - Targets only the front rank. Same as <Weapon Range Front Rank>.
- All - Targets the whole battlefield. When using this, everything becomes
a valid target. This is mostly used as a shortcut to bypass the default
Plugin Parameter weapon range settings.
- These notetags will follow the rules of others:
- This will be applied on top of whatever targeting scope is used.
- This applies both ways for actors and enemies.
- If there are no valid targets found in the Rank/Flank, then the
dependent action will be disabled and cannot be used.
- If there are Provoke or Taunt targets on the field and this is an action
that needs target selection, they must be within valid Ranks/Flanks that
can be targeted by this action or else this action can't be used.
- Can be used together with other "Weapon Range" notetags.
- Ignore this requirement when used outside of battle.
--- <Weapon Range Rank: x>
<Weapon Range Ranks: x, x, x>
<Weapon Range Flank: x>
<Weapon Range Flanks: x, x, x>
- Used for: Weapon, Enemy Notetags
- The weapon range will only affect the targets found in Rank/Flank 'x' and
will require there to be a target found in that Rank/Flank in order to be
used.
- This will be applied on top of whatever targeting scope is used.
- This applies both ways for actors and enemies.
- If there are no valid targets found in the Rank/Flank, then the
dependent action will be disabled and cannot be used.
- If there are Provoke or Taunt targets on the field and this is an action
that needs target selection, they must be within valid Ranks/Flanks that
can be targeted by this action or else this action can't be used.
- Can be used together with other "Weapon Range" notetags.
- Ignore this requirement when used outside of battle.
- Replace 'x' with a number representing the Rank/Flank to restrict the
scope of the weapon range to.
--- <Weapon Range Same Rank>
<Weapon Range Same Flank>
- Used for: Weapon, Enemy Notetags
- The weapon range will only affect targets found in the same Rank/Flank as
the action's user.
- This will be applied on top of whatever targeting scope is used.
- This applies both ways for actors and enemies.
- If there are no valid targets found in the Rank/Flank, then the
dependent action will be disabled and cannot be used.
- If there are Provoke or Taunt targets on the field and this is an action
that needs target selection, they must be within valid Ranks/Flanks that
can be targeted by this action or else this action can't be used.
- Can be used together with other "Weapon Range" notetags.
- Ignore this requirement when used outside of battle.
--- <Weapon Range Front Rank>
<Weapon Range Back Rank>
<Weapon Range Top Flank>
<Weapon Range Bottom Flank>
- Used for: Weapon, Enemy Notetags
- The weapon range will only affect targets found in set Rank/Flank node.
- A team's "Front Rank" is its first Rank occupied by living members.
- A team's "Back Rank" is its last Rank occupied by living members.
- A team's "Top Flank" is its first Flank occupied by living members.
- A team's "Bottom Flank" is its last Flank occupied by living members.
- This will be applied on top of whatever targeting scope is used.
- This applies both ways for actors and enemies.
- If there are Provoke or Taunt targets on the field and this is an action
that needs target selection, they must be within valid Ranks/Flanks that
can be targeted by this action or else this action can't be used.
- Can be used together with other "Weapon Range" notetags.
- Ignore this requirement when used outside of battle.
--- Action-Target Specific Ranks, Flanks, Nodes-Related Notetags--- <Target: Enemy Grid Node>
<Target: Enemy or Ally Grid Node>
<Target: Ally Grid Node>
<Target: Ally or Enemy Grid Node>
- Used for: Skill, Item Notetags
- Allows the player to select a specific node to target on either the enemy
or ally grid side (or both).
- Using the "Enemy or Ally" or "Ally or Enemy" variants will allow players
to select from either side. "Enemy or Ally" will default to enemy side
first while "Ally or Enemy" will default to ally side first.
- This can be used together with the <Area of Effect> notetags.
- This will suppress the <Target Only> and <Weapon Range> notetag effects.
- The player must select a tile that contains a battler on it.
- If used together with <Area of Effect> notetags, the nodes within the
Area of Effect must contain at least one battler in it.
- If the enemy team has provoked the user or if there are taunt targets,
the selectable nodes become limited only the provoker or taunt targets.
- Although selecting the enemy provoker or taunter is required, they are
not required to be present when the skill/item launches. If they changed
nodes, the target will still be the selected node.
--- <Target: Empty Enemy Grid Node>
<Target: Empty Enemy or Ally Grid Node>
<Target: Empty Ally Grid Node>
<Target: Empty Ally or Enemy Grid Node>
<Target: Any Enemy Grid Node>
<Target: Any Enemy or Ally Grid Node>
<Target: Any Ally Grid Node>
<Target: Any Ally or Enemy Grid Node>
- Used for: Skill, Item Notetags
- Similar to <Target: x Grid Node> targeting types except that these require
the player to select a specific type of node.
- "Empty" will require the player to select a node without any alive
battlers standing on top of it.
- Enemy AI and Auto-Battle AI will select a random empty node. If not, it
will select a random node regardless of empty-state.
- "Any" will allow the player to select any node.
- Enemy AI and Auto-Battle AI will select a random node.
- This will NOT select any battlers as targets. Instead, it will utilize the
selected node to perform actions through either Action Sequences or
special notetags found in the "Special Target Node Effects" section.
--- <Target: Enemy Grid Rank>
<Target: Enemy or Ally Grid Rank>
<Target: Ally Grid Rank>
<Target: Ally or Enemy Grid Rank>
- Used for: Skill, Item Notetags
- Allows the player to select a specific Rank to target on either the enemy
or ally grid side (or both).
- Using the "Enemy or Ally" or "Ally or Enemy" variants will allow players
to select from either side. "Enemy or Ally" will default to enemy side
first while "Ally or Enemy" will default to ally side first.
- This ignores any <Area of Effect> notetags.
- This will suppress the <Target Only> and <Weapon Range> notetag effects.
- The player must select a Rank that contains a battler on it.
- If the enemy team has provoked the user or if there are taunt targets,
the selectable Ranks become limited only the provoker or taunt targets.
- Although selecting the enemy provoker or taunter is required, they are
not required to be present when the skill/item launches. If they changed
Ranks, the target will still be the selected Rank.
--- <Target: Enemy Grid Flank>
<Target: Enemy or Ally Grid Flank>
<Target: Ally Grid Flank>
<Target: Ally or Enemy Grid Flank>
- Used for: Skill, Item Notetags
- Allows the player to select a specific Flank to target on either the enemy
or ally grid side (or both).
- Using the "Enemy or Ally" or "Ally or Enemy" variants will allow players
to select from either side. "Enemy or Ally" will default to enemy side
first while "Ally or Enemy" will default to ally side first.
- This ignores any <Area of Effect> notetags.
- This will suppress the <Target Only> and <Weapon Range> notetag effects.
- The player must select a Flank that contains a battler on it.
- If the enemy team has provoked the user or if there are taunt targets,
the selectable Flanks become limited only the provoker or taunt targets.
- Although selecting the enemy provoker or taunter is required, they are
not required to be present when the skill/item launches. If they changed
Flanks, the target will still be the selected Flank.
--- Area of Effect-Related Notetags--- <Area of Effect: type>
- Used for: Skill, Item Notetags
- Adds an area of effect to this skill/item.
- Can only be used with skills/items that have selection properties such
as single target skills/items or the ability to target specific nodes.
- This does not work with non-selection skills like All targets, Random
Targets, or User only.
- This does not work with specific Rank and Flank selection.
- Replace 'type' with a type from the "Area of Effect Types" section below.
- Insert multiples of this notetag to expand the Area of Effect range.
--- <Area of Effect>
type
type
type
</Area of Effect>
- Used for: Skill, Item Notetags
- Adds an area of effect to this skill/item.
- Can only be used with skills/items that have selection properties such
as single target skills/items or the ability to target specific nodes.
- This does not work with non-selection skills like All targets, Random
Targets, or User only.
- This does not work with specific Rank and Flank selection.
- Replace 'type' with a type from the "Area of Effect Types" section below.
- Insert as many types as you want to expand the Area of Effect range.
--- Area of Effect TypesThese are used with the <Area of Effect> notetags and are the values you'd insert in place of the 'type' parameter. --- All - Expands the Area of Effect range to the whole grid. - Takes priority over the rest of the types. None - Removes all Area of Effect range options. - Takes priority over the rest of the types except for "All". --- Square x - Expands area to a square-shaped range around the user. - Boosts additively with other "Square x" types. - x refers to the distance from the center to the side of a square. Radius x - Expands area to a diamond-shaped range around the user. - Boosts additively with other "Radius x" types. - Boosts additively with "Square x" type. - x refers to the distance from the center to the edge of the radius. Full Rank - Expands Area of Effect range to the nodes with the same rank as the user. Rank x - Expands Area of Effect range to side nodes the same rank as the user. - Boosts additively with other "Rank x" types. - Boosts additively with "Square x" and "Radius x" types. - x refers to the Rank's ID starting from 1. Full Flank - Expands Area of Effect range to the nodes with the same flank as the user. Flank x - Expands Area of Effect range to front and back nodes the same flank as the user. - Boosts additively with other "Flank x" types. - Boosts additively with "Square x" and "Radius x" types. - x refers to the Flank's ID starting from 1. Full All Diagonal - Expands Area of Effect range to all nodes diagonal from user. All Diagonal x - Expands Area of Effect range to diagonals from user. - Boosts additively with other "All Diagonal x" types. - Boosts additively with "Square x" and half of "Radius x" types. - x refers to the diagonal distance from the user. Full Diagonal Forward - Expands Area of Effect range to all front diagonal nodes from user. Diagonal Forward x - Expands Area of Effect range to front diagonal nodes from user. - Boosts additively with other "Diagonal Forward x" types. - Boosts additively with "Square x" and half of "Radius x" types. - x refers to the diagonal distance from the user. Full Diagonal Backward - Expands Area of Effect range to all behind diagonal nodes from user. Diagonal Backward x - Expands Area of Effect range to behind diagonal nodes from user. - Boosts additively with other "Diagonal Backward x" types. - Boosts additively with "Square x" and half of "Radius x" types. - x refers to the diagonal distance from the user. Full Forward - Expands Area of Effect range to all nodes directly in front of user. Forward x - Expands Area of Effect range to nodes directly in front of user. - Boosts additively with other "Forward x" types. - Boosts additively with other "Flank x" types. - Boosts additively with "Square x" and "Radius x" types. - x refers to the node distance from the user. Full Backward - Expands Area of Effect range to all nodes directly behind user. Backward x - Expands Area of Effect range to nodes directly behind user. - Boosts additively with other "Backward x" types. - Boosts additively with other "Flank x" types. - Boosts additively with "Square x" and "Radius x" types. - x refers to the node distance from the user. Full Upward - Expands Area of Effect range to all nodes to the flank above user. Upward x - Expands Area of Effect range to nodes to the flank above user. - Boosts additively with other "Upward x" types. - Boosts additively with other "Rank x" types. - Boosts additively with "Square x" and "Radius x" types. - x refers to the node distance from the user. Full Downward - Expands Area of Effect range to all nodes to the flank below user. Downward x - Expands Area of Effect range to nodes to the flank below user. - Boosts additively with other "Downward x" types. - Boosts additively with other "Rank x" types. - Boosts additively with "Square x" and "Radius x" types. - x refers to the node distance from the user. --- Temporary Troop Grid-Related Name Tags--- <Grid> <Battle Grid> <No Grid> <No Battle Grid> - Used for: Map Notetags, Troop Name Tags, and Troop Comment Tags - Requires VisuMZ_2_BattleGridSystem! - Changes the battle system to utilize the Battle Grid System or not. - If using Troop Comment Tags, then as long as the tag appears in a comment found on any of the Troop's pages (even if they don't run), the tag will be considered in effect. - If none of these notetags or comment tags are found, refer to the default settings found in the Plugin Parameters. --- Node Passive States-Related Notetags--- <Actor Node x, y Passive State: id> <Actor Node x, y Passive States: id, id, id> <Actor Node x, y Passive State: name> <Actor Node x, y Passive States: name, name, name> <Enemy Node x, y Passive State: id> <Enemy Node x, y Passive States: id, id, id> <Enemy Node x, y Passive State: name> <Enemy Node x, y Passive States: name, name, name> - Used for: Troop Comment Tags - Adds a passive state(s) to the Actor/Enemy Node at 'x', 'y' so that when a battler stands on that Node, that battler will gain the passive state(s). - Pick 'Actor' or 'Enemy' to determine which side of the screen to place the passive state(s) on. - Replace 'x' with a number representing the Node Rank. - Replace 'y' with a number representing the Node Flank. - For 'id' variant, replace 'id' with a number representing the ID of the state you wish to add as a passive state effect. - Insert multiple 'id' values to add multiple passive states. - For 'name' variant, replace 'name' with the name of the state that you wish to add as a passive state effect. - Insert multiple 'name' values to add multiple passive states. - Insert multiple copies of this comment tag to add Passive State Nodes at different grid locations. - If using Troop Comment Tags, then as long as the tag appears in a comment found on any of the Troop's pages (even if they don't run), the tag will be considered in effect. Examples: <Actor Node 1, 2 Passive State: 15> <Actor Node 4, 3 Passive States: 15, 16> <Enemy Node 1, 2 Passive State: HP Regeneration> <Enemy Node 4, 3 Passive States: HP Regeneration, MP Regeneration> --- Node Trigger-Related Notetags--- <Actor Node x, y Trigger: id>
<Actor Node x, y Trigger: name>
<Enemy Node x, y Trigger: id>
<Enemy Node x, y Trigger: name>
- Used for: Troop Comment Tags
- Adds a trigger to the Actor/Enemy Node at 'x', 'y' so that when a battler
stands on that Node, that battler will activate the trigger and skill 'id'
will affect the battler.
- Pick 'Actor' or 'Enemy' to determine which side of the screen to place
the passive state(s) on.
- Replace 'x' with a number representing the Node Rank.
- Replace 'y' with a number representing the Node Flank.
- For 'id' variant, replace 'id' with a number representing the ID of the
skill you wish to set as a trigger effect.
- For 'name' variant, replace 'name' with the name of the skill that you
wish to set as a trigger effect.
- Insert multiple copies of this comment tag to add Trigger Nodes at
different grid locations.
- Each node can only contain ONE trigger!
- Otherwise, newly placed triggers will overwrite the old ones.
- When actors and enemies spawn in upon setup, if they happen to start the
battle on a node with a trigger, the trigger will be erased.
- Triggers added by these notetags will have no innate user. Instead, the
user will become the battler that triggers it.
- Triggers will only affect the battler that triggered it regardless base
skill's scope.
- The trigger skill's damage formula, effects, animation, and repeat times
will be used to determine the type of effect that occurs on the battler.
- Common Event effects will not occur.
- If the trigger skill has notetags that would move the user or target,
they will NOT occur and the related notetag effects are suppressed.
- If using Troop Comment Tags, then as long as the tag appears in a comment
found on any of the Troop's pages (even if they don't run), the tag will
be considered in effect.
Examples:
<Actor Node 1, 2 Trigger: 52>
<Actor Node 4, 3 Trigger: Heal I>
<Enemy Node 1, 2 Trigger: 99>
<Enemy Node 4, 3 Trigger: Fire I>
--- <Trigger Name: text> - Used for: Skill Notetags - When this skill is used as a trigger, the popup text that appears will show 'text' instead of the skill's name. - Replace 'text' with text you want to display as the Trigger Skill's popup text when a battler activates it. --- <Trigger Icon: x> - Used for: Skill Notetags - When this skill is used as a trigger, the popup text that appears will show 'x' icon instead of the skill's icon. - Replace 'x' with a number representing the icon index you want to display as the Trigger Skill's popup text when a battler activates it. --- <Trigger Animation: x> - Used for: Skill Notetags - When this skill is used as a trigger, the animation that is played will show 'x' animation instead of the skill's animation. - Replace 'x' with a number representing the ID of the animation you want to play as the Trigger Skill's animation when a battler activates it. --- Special Target Node Effects-Related Notetags--- <Clear Passive States From Target Node> - Used for: Skill, Item Notetags - Clears all Passive States from target selected node. - Used with <Target: Empty x Grid Node> or <Target: Any x Grid Node> targeting notetags. - Does NOT work with regular battler targeting scopes. --- <Add Passive State To Target Node: id> <Add Passive States To Target Node: id, id, id> <Add Passive State To Target Node: name> <Add Passive States To Target Node: name, name, name> - Used for: Skill, Item Notetags - Adds specific Passive State(s) to target selected node. - Used with <Target: Empty x Grid Node> or <Target: Any x Grid Node> targeting notetags. - Does NOT work with regular battler targeting scopes. - For 'id' variant, replace 'id' with a number representing the ID of the state you wish to add as a passive state effect. - Insert multiple 'id' values to add multiple passive states. - For 'name' variant, replace 'name' with the name of the state that you wish to add as a passive state effect. - Insert multiple 'name' values to add multiple passive states. --- <Remove Passive State From Target Node: id> <Remove Passive States From Target Node: id, id, id> <Remove Passive State From Target Node: name> <Remove Passive States From Target Node: name, name, name> - Used for: Skill, Item Notetags - Removes specific Passive State(s) from target selected node. - Used with <Target: Empty x Grid Node> or <Target: Any x Grid Node> targeting notetags. - Does NOT work with regular battler targeting scopes. - For 'id' variant, replace 'id' with a number representing the ID of the state you wish to remove as a passive state effect. - Insert multiple 'id' values to remove multiple passive states. - For 'name' variant, replace 'name' with the name of the state that you wish to remove as a passive state effect. - Insert multiple 'name' values to remove multiple passive states. --- <Add Trigger to Target Node> - Used for: Skill Notetags - Plants this skill as a Trigger on target selected node. - Used with <Target: Empty x Grid Node> targeting notetag. - Does NOT work with regular battler targeting scopes. --- <Remove Trigger From Target Node> - Used for: Skill, Item Notetags - Removes any Trigger effects from target selected node. - Used with <Target: Empty x Grid Node> or <Target: Any x Grid Node> targeting notetags. - Does NOT work with regular battler targeting scopes. --- <Teleport to Target Node>
- Used for: Skill, Item Notetags
- Moves user (if selected on the user's side of the grid) or a random
opposing battler (if selected on the opponent's side of the grid) to
target selected node instantaneously.
- Used with <Target: Empty x Grid Node> or <Target: Any x Grid Node>
targeting notetags.
- When used with <Target: Any x Grid Node>, if there is another battler on
target node and that battler can switch, switch both members.
- Otherwise, ignore the teleport effect.
- Does NOT work with regular battler targeting scopes.
- This cannot be used with <Traverse to Target Node: x Frames>.
--- <Traverse to Target Node: x Frames>
- Used for: Skill, Item Notetags
- Moves user (if selected on the user's side of the grid) or a random
opposing battler (if selected on the opponent's side of the grid) to
target selected node with a duration of 'x' frames.
- Replace 'x' with a number representing the frame duration in the movement
time needed to traverse to target selected node.
- Used with <Target: Empty x Grid Node> or <Target: Any x Grid Node>
targeting notetags.
- When used with <Target: Any x Grid Node>, if there is another battler on
target node and that battler can switch, switch both members.
- Otherwise, ignore the traverse effect.
- Does NOT work with regular battler targeting scopes.
- This cannot be used with <Teleport to Target Node>.
--- <Level x Push From Target Node: y Frames> <Level x Pull To Target Node: y Frames> - Used for: Skill, Item Notetags - 'Push' variant pushes all movable members on the targeted side of the grid away from target Node with 'x' strength and a duration of 'y' frames. - 'Pull' variant pulls all movable members on the targeted side of the grid towards target Node with 'x' strength and a duration of 'y' frames. - Replace 'x' with a number representing the maximum times a member can move from this effect. - Replace 'y' with a number representing the frame duration in the movement time caused by this effect. - These notetags are mutually exclusive and cannot be used together. --- Battle System - ATB VisuStella MZThe following are notetags that have been added through this plugin. These notetags will not work with your game if this plugin is OFF or not present. General ATB-Related NotetagsThese notetags are general purpose notetags that have became available through this plugin. --- <ATB Help> description description </ATB Help> - Used for: Skill, Item Notetags - If your game happens to support the ability to change battle systems, this notetag lets you change how the skill/item's help description text will look under TPB/ATB. - This is primarily used if the skill behaves differently in TPB/ATB versus any other battle system. - Replace 'description' with help text that's only displayed if the game's battle system is set to TPB/ATB. --- <Hide ATB Gauge> - Used for: Enemy Notetags - If you don't want an enemy to show their ATB Gauge, use this notetag. --- ATB Field Gauge-Related NotetagsThese notetags only work if the ATB Field Gauge is enabled. --- <ATB Field Gauge Icon: x> - Used for: Actor, Enemy Notetags - Changes the marker graphic used for the battler to a specific icon. - Replace 'x' with the icon index to be used. --- <ATB Field Gauge Face: filename, index> - Used for: Actor, Enemy Notetags - Changes the marker graphic used for the enemy to a specific face. - Replace 'filename' with the filename of the image. - Do not include the file extension. - Replace 'index' with the index of the face. Index values start at 0. - Example: <ATB Field Gauge Face: Monster, 1> --- ATB Gauge Manipulation-Related NotetagsThese notetags are used for ATB Gauge manipulation purposes. --- <ATB After Gauge: x%> - Used for: Skill, Item Notetags - After using the skill/item, the user's ATB Gauge will be set to x%. - Replace 'x' with a percentile value representing the amount you want the ATB Gauge to reset to after the skill/item's usage. --- <ATB Charge Gauge: x%> <ATB Charge Gauge: +x%> <ATB Charge Gauge: -x%> - Used for: Skill, Item Notetags - If the target is in a charging state, change the target's gauge amount to x% or by x% (if using the +/- variants). - Replace 'x' with a percentile value representing the amount of the ATB Gauge you wish to alter it to/by. - This only affects targets who are in a charging state. --- <ATB Cast Gauge: x%> <ATB Cast Gauge: +x%> <ATB Cast Gauge: -x%> - Used for: Skill, Item Notetags - If the target is in a casting state, change the target's gauge amount to x% or by x% (if using the +/- variants). - Replace 'x' with a percentile value representing the amount of the ATB Gauge you wish to alter it to/by. - This only affects targets who are in a casting state. --- <ATB Interrupt> - Used for: Skill, Item Notetags - If this skill/item hits a target who is in a casting state, interrupt that action to cancel it and reset the target's ATB Gauge to 0%. --- <ATB Cannot Be Interrupted> - Used for: Skill, Item Notetags - Makes the skill/item immune to ATB Interruptions. --- <ATB Battle Start Gauge: +x%> <ATB Battle Start Gauge: -x%> - Used for: Actor, Class, Skill, Weapon, Armor, Enemy, State Notetags - Determine how much extra or less ATB Gauge the battler will start with if associated with one of these database objects. - Replace 'x' with a percentile value determining how much extra or less ATB Gauge value the battler will start battle with. - These values are additive when stacked. --- <ATB After Gauge: +x%> <ATB After Gauge: -x%> - Used for: Actor, Class, Skill, Item, Weapon, Armor, Enemy, State Notetags - Determine how much influence there is on the ATB Gauge after finishing a skill/item. Increase or decrease the amount after each action. - Replace 'x' with a percentile value determining how much influence there is on the ATB Gauge after the skill/item has finished performing. - These values are additive when stacked. --- JavaScript Notetags: ATB Gauge ManipulationThe following are notetags made for users with JavaScript knowledge to give more control over conditional ATB Gauge Manipulation. --- <JS ATB Charge Gauge> code code rate = code; </JS ATB Charge Gauge> - Used for: Skill, Item Notetags - Replace 'code' with JavaScript code to determine how much to change the ATB Gauge to if the target is in a charging state. - The 'rate' variable represents rate value the ATB Gauge will change to between the values of 0 and 1. - The 'rate' variable will default to the target's current ATB Gauge rate if the target is in a charging state. --- <JS ATB Cast Gauge> code code rate = code; </JS ATB Cast Gauge> - Used for: Skill, Item Notetags - Replace 'code' with JavaScript code to determine how much to change the ATB Gauge to if the target is in a casting state. - The 'rate' variable represents rate value the ATB Gauge will change to between the values of 0 and 1. - The 'rate' variable will default to the target's current ATB Gauge rate if the target is in a casting state. --- <JS ATB After Gauge> code code rate = code; </JS ATB After Gauge> - Used for: Skill, Item Notetags - Replace 'code' with JavaScript code to determine how much to change the ATB Gauge to after performing this skill/item action. - The 'rate' variable represents rate value the ATB Gauge will change to between the values of 0 and 1. - The 'rate' variable will default to 0. --- Battle System - BTB VisuStella MZThe following are notetags that have been added through this plugin. These notetags will not work with your game if this plugin is OFF or not present. --- General BTB-Related NotetagsThese notetags are general purpose notetags that have became available through this plugin. --- <BTB Help> description description </BTB Help> - Used for: Skill, Item Notetags - If your game happens to support the ability to change battle systems, this notetag lets you change how the skill/item's help description text will look under BTB. - This is primarily used if the skill behaves differently in BTB versus any other battle system. - Replace 'description' with help text that's only displayed if the game's battle system is set to BTB. --- <BTB Cannot Brave> - Used for: Actor, Class, Weapon, Armor, Enemy, State Notetags - If a battler is affected by a trait object with one of these notetags, that battler cannot use Brave to generate more actions. - For actors, this will come with the Brave Command disabled. --- <BTB Hide Brave> - Used for: Actor, Class, Weapon, Armor, Enemy, State Notetags - If a battler is affected by a trait object with one of these notetags, that battler cannot use Brave to generate more actions. - For actors, this will come with the Brave Command hidden along with their BP values. --- BTB Turn Order Display-Related NotetagsThese notetags affect the BTB Turn Order Display --- <BTB Turn Order Icon: x> - Used for: Actor, Enemy Notetags - Changes the slot graphic used for the battler to a specific icon. - Replace 'x' with the icon index to be used. --- <BTB Turn Order Face: filename, index> - Used for: Actor, Enemy Notetags - Changes the slot graphic used for the enemy to a specific face. - Replace 'filename' with the filename of the image. - Do not include the file extension. - Replace 'index' with the index of the face. Index values start at 0. - Example: <BTB Turn Order Face: Monster, 1> --- Brave Points Cost-Related NotetagsThe following notetags are used to manage Brave Point (BP) costs, how some actions can alter other BP values, and more. --- <BTB BP Cost: x> - Used for: Skill, Item Notetags - Determines how much BP the battler uses when performing this action. - Replace 'x' with a number value to determine its BP cost. --- <BTB Hide BP Cost> - Used for: Skill, Item Notetags - Prevents the BP cost from being shown for this action. --- Brave Point Manipulation-Related NotetagsThe following notetags are used to manage Brave Point (BP) costs, how some actions can alter other BP values, and more. --- <BTB User Set BP: x> <BTB Target Set BP: x> - Used for: Skill, Item Notetags - Sets the user/target's current BP to a specific value. - Replace 'x' with a number value to determine how much you want the user or target's BP to be set to. - The 'user' variant only affects the action's user. - The 'target' variant only affects the action's target. --- <BTB User Gain BP: +x> <BTB Target Gain BP: +x> <BTB User Lose BP: -x> <BTB Target Lose BP: -x> - Used for: Skill, Item Notetags - Causes the action to alter how much BP the user/target has. - Replace 'x' with a number value to determine how much BP is gained/lost for the user/target. - The 'user' variant only affects the action's user. - The 'target' variant only affects the action's target. --- JavaScript Notetags: Brave Point ManipulationThe following are notetags made for users with JavaScript knowledge to give more control over Brave Point alteration. --- <JS BTB User BP> code code value = code; </JS BTB User BP> - Used for: Skill, Item Notetags - Replace 'code' with JavaScript code to determine what is the user's final BP value after all of the code is ran. - The 'value' variable is the returned value to be set as the user's BP. This value also starts off as the user's current BP. - The 'user' variable refers to the action's user. - The 'target' variable refers to the action's current target. --- <JS BTB Target BP> code code value = code; </JS BTB Target BP> - Used for: Skill, Item Notetags - Replace 'code' with JavaScript code to determine what is the current target's final BP value after all of the code is ran. - The 'value' variable is the returned value to be set as the target's BP. This value also starts off as the target's current BP. - The 'user' variable refers to the action's user. - The 'target' variable refers to the action's current target. --- Brave Point Managment-Related NotetagsThe following notetags are used to for battlers to manage their BP settings throughout the course of the fight. --- <BTB Initial BP: +x> <BTB Initial BP: -x> - Used for: Actor, Class, Weapon, Armor, Enemy, State Notetags - If a battler is affected by a trait object with one of these notetags, alter that battler's initial BP at the start of battle. - Replace 'x' with a number value representing how much you want to alter the affected battler's initial BP at the start of battle. --- <BTB BP Regen: +x> <BTB BP Degen: -x> - Used for: Actor, Class, Weapon, Armor, Enemy, State Notetags - If a battler is affected by a trait object with one of these notetags, alter the amount of BP regenerated at the end of each battle turn. - Replace 'x' with a number value representing how much BP is regenerated (or decreased). - Use a positive number for gaining BP at the end of each turn. - Use a negative number for losing BP at the end of each turn. --- <BTB Maximum BP: +x> <BTB Maximum BP: -x> <BTB Minimum BP: +x> <BTB Minimum BP: -x> - Used for: Actor, Class, Weapon, Armor, Enemy, State Notetags - If a battler is affected by a trait object with one of these notetags, increase or decrease the maximum/minimum BP that battler can have by 'x'. - Replace 'x' with a number value representing the amount to change the battler's maximum/minimum BP by. - These numbers cannot exceed or go under the designated amounts set by the hard cap in this plugin's Plugin Parameters. --- Multiple Action-Related NotetagsThese notetags allow you to determine how multiple actions are handled through the Brave Turn Battle system. --- <BTB Maximum Actions: +x> <BTB Maximum Actions: -x> - Used for: Actor, Class, Weapon, Armor, Enemy, State Notetags - If a battler is affected by a trait object with one of these notetags, increase/decrease the maximum number of actions that battler can have through the Brave Command. - Replace 'x' with a number value representing the amount of maximum actions to increase/decrease by. - This value cannot make a battler go below 1 maximum action. - This value cannot make a battler go above the hard cap set in this plugin's Plugin Parameters. --- <BTB Multiple Actions: id, id> <BTB Multiple Actions: id, id, id> <BTB Multiple Actions: id, id, id, id> <BTB Multiple Actions: name, name> <BTB Multiple Actions: name, name, name> <BTB Multiple Actions: name, name, name, name> - Used for: Skill Notetags - When an enemy (NOT ACTOR) uses this skill, the game will appear as if the enemy is using the Brave Command to load up multiple actions at a time. - Replace 'id' with the database ID of the skill to use in the multiple action queue. - Replace 'name' with the name of the skill to use in the enemy's multiple action queue. --- Action Fusion-Related NotetagsFor more details, please refer to the Action Fusion dedicated section listed earlier in the documentation. --- Flexible Action Fusion <BTB Flexible Fusion: id, id> <BTB Flexible Fusion: id, id, id> <BTB Flexible Fusion: id, id, id, id> <BTB Flexible Fusion: name, name> <BTB Flexible Fusion: name, name, name> <BTB Flexible Fusion: name, name, name, name> - Used for: Skill, Item Notetags - This Action Fusion skill/item will occur as long as any of the listed combination skills/items are queued in the action list for that turn. These actions can be queued in any order. - Replace 'id' with the database ID of the skill/item to use as a combination requirement. - Replace 'name' with the name of the skill/item to use as a combination requirement. - Skill Action Fusions can only use skills for combinations. - Item Action Fusions can only use items for combinations. - Skills and items that have selectable targets need to have matching targets to be a part of the same Action Fusion combination. - Skills and items that do not have selectable targets are combination targets for any and all candidates. - When an Action Fusion is performed, it will not consume the resources for the database object itself, but instead, from each of the skills/items used to bring it out. - Is used directly, this action's resource consumption will be performed as if it was not an Action Fusion skill/item. - If a queue could potentially meet the demands of multiple Action Fusions, then the Action Fusion with the highest database ID is given priority. - The battler must be able to pay the actions of each of the queued actions used to form the Action Fusion. - Insert multiple copies of this notetag to give this Action Fusion more combinations that can activate it. --- Strict Action Fusion <BTB Strict Fusion: id, id> <BTB Strict Fusion: id, id, id> <BTB Strict Fusion: id, id, id, id> <BTB Strict Fusion: name, name> <BTB Strict Fusion: name, name, name> <BTB Strict Fusion: name, name, name, name> - Used for: Skill, Item Notetags - This Action Fusion skill/item will occur as long as the exact listed combination(s) of skills/items is queued in the action list for that turn. These actions can be queued in any order. - Replace 'id' with the database ID of the skill/item to use as a combination requirement. - Replace 'name' with the name of the skill/item to use as a combination requirement. - Skill Action Fusions can only use skills for combinations. - Item Action Fusions can only use items for combinations. - Skills and items that have selectable targets need to have matching targets to be a part of the same Action Fusion combination. - Skills and items that do not have selectable targets are combination targets for any and all candidates. - When an Action Fusion is performed, it will not consume the resources for the database object itself, but instead, from each of the skills/items used to bring it out. - Is used directly, this action's resource consumption will be performed as if it was not an Action Fusion skill/item. - If a queue could potentially meet the demands of multiple Action Fusions, then the Action Fusion with the highest database ID is given priority. - The battler must be able to pay the actions of each of the queued actions used to form the Action Fusion. - Insert multiple copies of this notetag to give this Action Fusion more combinations that can activate it. --- <BTB Cannot Fusion> - Used for: Actor, Class, Weapon, Armor, Enemy, State Notetags - If a battler is affected by a trait object that has this notetag, that battler cannot perform any Action Fusions. Queued skills will occur normally instead. - If the actor is affected by both notetags for <BTB Cannot Fusion> and <BTB Enable Fusion> priority will be given based on the order of their trait objects. --- <BTB Enable Fusion> - Used for: Actor, Class, Weapon, Armor, Enemy, State Notetags - If a battler is affected by a trait object that has this notetag, that battler is allowed to perform any Action Fusions. Queued skills will occur normally instead. - If the actor is affected by both notetags for <BTB Cannot Fusion> and <BTB Enable Fusion> priority will be given based on the order of their trait objects. --- Battle System - CTB VisuStella MZThe following are notetags that have been added through this plugin. These notetags will not work with your game if this plugin is OFF or not present. --- General CTB-Related NotetagsThese notetags are general purpose notetags that have became available through this plugin. --- <CTB Help> description description </CTB Help> - Used for: Skill, Item Notetags - If your game happens to support the ability to change battle systems, this notetag lets you change how the skill/item's help description text will look under CTB. - This is primarily used if the skill behaves differently in CTB versus any other battle system. - Replace 'description' with help text that's only displayed if the game's battle system is set to CTB. --- CTB Turn Order Display-Related NotetagsThese notetags affect the CTB Turn Order Display --- <CTB Turn Order Icon: x> - Used for: Actor, Enemy Notetags - Changes the slot graphic used for the battler to a specific icon. - Replace 'x' with the icon index to be used. --- <CTB Turn Order Face: filename, index> - Used for: Actor, Enemy Notetags - Changes the slot graphic used for the enemy to a specific face. - Replace 'filename' with the filename of the image. - Do not include the file extension. - Replace 'index' with the index of the face. Index values start at 0. - Example: <CTB Turn Order Face: Monster, 1> --- CTB Speed Manipulation-Related NotetagsThese notetags are used for CTB Speed manipulation purposes. --- <CTB Set Order: x> - Used for: Skill, Item Notetags - Sets the target's CTB Turn Order position to exactly x. - Replace 'x' with a number value depicting the exact position of the turn order position. 0 is the currently active battler and cannot be used. 1 is closest to taking a turn. Higher numbers are further away. - This does not affect the currently active battler. --- <CTB Change Order: +x> <CTB Change Order: -x> - Used for: Skill, Item Notetags - Sets the target's CTB Turn Order position by x slots. - Replace 'x' with a number value indicating the increase or decrease. Negative values decrease the turns needed to wait while positive values increase the turns needed. - This does not affect the currently active battler. --- <CTB After Speed: x%> - Used for: Skill, Item Notetags - After using the skill/item, the user's CTB Speed will be set to x%. - Replace 'x' with a percentile value representing the amount you want the CTB Speed to reset to after the skill/item's usage. --- <CTB Charge Speed: x%> <CTB Charge Speed: +x%> <CTB Charge Speed: -x%> - Used for: Skill, Item Notetags - If the target is in a charging state, change the target's speed amount to x% or by x% (if using the +/- variants). - Replace 'x' with a percentile value representing the amount of the CTB Speed you wish to alter it to/by. - This only affects targets who are in a charging state. --- <CTB Cast Speed: x%> <CTB Cast Speed: +x%> <CTB Cast Speed: -x%> - Used for: Skill, Item Notetags - If the target is in a casting state, change the target's speed amount to x% or by x% (if using the +/- variants). - Replace 'x' with a percentile value representing the amount of the CTB Speed you wish to alter it to/by. - This only affects targets who are in a casting state. --- JavaScript Notetags: CTB Speed ManipulationThe following are notetags made for users with JavaScript knowledge to give more control over conditional CTB Speed Manipulation. --- <JS CTB Order> code code order = code; </JS CTB Order> - Used for: Skill, Item Notetags - Replace 'code' with JavaScript code to determine where to set the target's order on the CTB Turn Order Display to. - The 'order' variable represents the final position on the Turn Order Display to place the target. - The 'position' variable represents the target's current position on the Turn Order Display. - This does not affect the currently active battler. --- <JS CTB Charge Speed> code code rate = code; </JS CTB Charge Speed> - Used for: Skill, Item Notetags - Replace 'code' with JavaScript code to determine how much to change the CTB Speed to if the target is in a charging state. - The 'rate' variable represents rate value the CTB Speed will change to between the values of 0 and 1. - The 'rate' variable will default to the target's current CTB Speed rate if the target is in a charging state. --- <JS CTB Cast Speed> code code rate = code; </JS CTB Cast Speed> - Used for: Skill, Item Notetags - Replace 'code' with JavaScript code to determine how much to change the CTB Speed to if the target is in a casting state. - The 'rate' variable represents rate value the CTB Speed will change to between the values of 0 and 1. - The 'rate' variable will default to the target's current CTB Speed rate if the target is in a casting state. --- <JS CTB After Speed> code code rate = code; </JS CTB After Speed> - Used for: Skill, Item Notetags - Replace 'code' with JavaScript code to determine how much to change the CTB Speed to after performing this skill/item action. - The 'rate' variable represents rate value the CTB Speed will change to between the values of 0 and 1. - The 'rate' variable will default to 0. --- Battle System - ETB VisuStella MZThe following are notetags that have been added through this plugin. These notetags will not work with your game if this plugin is OFF or not present. --- General ETB-Related NotetagsThese notetags are general purpose notetags that have became available through this plugin. --- <ETB Help> description description </ETB Help> - Used for: Skill, Item Notetags - If your game happens to support the ability to change battle systems, this notetag lets you change how the skill/item's help description text will look under ETB. - This is primarily used if the skill behaves differently in ETB versus any other battle system. - Replace 'description' with help text that's only displayed if the game's battle system is set to ETB. --- Energy Cost-Related Notetags--- <ETB Energy Cost: x> - Used for: Skill, Item Notetags - Changes the ETB energy cost of this skill/item to 'x'. - Replace 'x' with a number value representing the energy cost required to perform the skill. --- <ETB Hide Energy Cost> - Used for: Skill, Item Notetags - Makes the ETB energy cost for this skill/item hidden regardless of Plugin Parameter settings. --- <ETB Show Energy Cost> - Used for: Skill, Item Notetags - Makes the ETB energy cost for this skill/item visible regardless of Plugin Parameter settings. --- Mechanics-Related Notetags--- <ETB Pass Turn> - Used for: Skill, Item Notetags - If a battler uses this skill/item, then even if there is energy left for the team to perform, that battler would no longer be able to input as they have already passed their turn. - By default, this applies to "Guard". If you don't want it to apply to the Guard skill, turn it off in the Plugin Parameters for mechanics. --- <ETB Energy: +x> <ETB Energy: -x> - Used for: Actor, Class, Weapon, Armor, Enemy, State Notetags - Battlers associated with these trait objects can increase or decrease the maximum number of actions performed each turn. - Replace 'x' with a number representing the increase or decrease in energy count per turn. - Depending on the Plugin Parameters, altering the max value can result in gaining or losing remaining actions for the current turn. --- Battle System - FTB VisuStella MZThe following are notetags that have been added through this plugin. These notetags will not work with your game if this plugin is OFF or not present. --- General FTB-Related NotetagsThese notetags are general purpose notetags that have became available through this plugin. --- <FTB Help> description description </FTB Help> - Used for: Skill, Item Notetags - If your game happens to support the ability to change battle systems, this notetag lets you change how the skill/item's help description text will look under FTB. - This is primarily used if the skill behaves differently in FTB versus any other battle system. - Replace 'description' with help text that's only displayed if the game's battle system is set to FTB. --- Action Cost-Related Notetags--- <FTB Action Cost: x> - Used for: Skill, Item Notetags - Changes the FTB action cost of this skill/item to 'x'. - Replace 'x' with a number value representing the action cost required to perform the skill. --- <FTB Hide Action Cost> - Used for: Skill, Item Notetags - Makes the FTB action cost for this skill/item hidden. --- Mechanics-Related Notetags--- <FTB Pass Turn> - Used for: Skill, Item Notetags - If a battler uses this skill/item, then even if there are actions left for the team to perform, that battler would no longer be able to input as they have already passed their turn. - By default, this applies to "Guard". If you don't want it to apply to the Guard skill, turn it off in the Plugin Parameters for mechanics. --- <FTB Actions: +x> <FTB Actions: -x> - Used for: Actor, Class, Weapon, Armor, Enemy, State Notetags - Battlers associated with these trait objects can increase or decrease the maximum number of actions performed each turn. - Replace 'x' with a number representing the increase or decrease in action count per turn. - Depending on the Plugin Parameters, altering the max value can result in gaining or losing remaining actions for the current turn. --- Battle System - OTB VisuStella MZThe following are notetags that have been added through this plugin. These notetags will not work with your game if this plugin is OFF or not present. --- General OTB-Related NotetagsThese notetags are general purpose notetags that have became available through this plugin. --- <OTB Help> description description </OTB Help> - Used for: Skill, Item Notetags - If your game happens to support the ability to change battle systems, this notetag lets you change how the skill/item's help description text will look under OTB. - This is primarily used if the skill behaves differently in OTB versus any other battle system. - Replace 'description' with help text that's only displayed if the game's battle system is set to OTB. --- OTB Turn Order Display-Related NotetagsThese notetags affect the OTB Turn Order Display --- <OTB Turn Order Icon: x> - Used for: Actor, Enemy Notetags - Changes the slot graphic used for the battler to a specific icon. - Replace 'x' with the icon index to be used. --- <OTB Turn Order Face: filename, index> - Used for: Actor, Enemy Notetags - Changes the slot graphic used for the enemy to a specific face. - Replace 'filename' with the filename of the image. - Do not include the file extension. - Replace 'index' with the index of the face. Index values start at 0. - Example: <OTB Turn Order Face: Monster, 1> --- Instant Use-Related Notetags--- <OTB Instant> <OTB Instant Use> <OTB Instant Cast> - Used for: Skill, Item Notetags - Allows the skill/item to be used immediately without consuming a turn. --- Action-Related Notetags--- <OTB User Add Current Turn Actions: x> <OTB User Add Next Turn Actions: x> - Used for: Skill, Item Notetags - Adds extra actions for the user to perform during the current/next turn. - Added actions will go towards the back of the action list. - Multi-hit skills/items will trigger this effect multiple times. - Replace 'x' with a number representing the amount of actions to add. --- <OTB Target Add Current Turn Actions: x> <OTB Target Add Next Turn Actions: x> - Used for: Skill, Item Notetags - Adds extra actions for the target to perform during the current/next turn. - Added actions will go towards the back of the action list. - Multi-hit skills/items will trigger this effect multiple times. - Replace 'x' with a number representing the amount of actions to add. --- Turn Order Manipulation-Related Notetags--- <OTB User Current Turn: +x> <OTB User Next Turn: +x> <OTB User Follow Turn: +x> <OTB User Current Turn: -x> <OTB User Next Turn: -x> <OTB User Follow Turn: -x> - Used for: Skill, Item Notetags - Changes the user's position in the turn order for the current turn, next turn, or whichever turn is following. - If using the "Follow" variant, if the user has actions left for the current turn, it will affect the current turn. If not, it affects the next turn instead. - Replace 'x' with a number representing the number of slots to change. - Negative numbers move the user closer to the front. - Positive numbers move the user towards the back. - This effect only occurs once per skill/item use and at the start of the action when initializing the skill/item. --- <OTB Target Current Turn: +x> <OTB Target Next Turn: +x> <OTB Target Follow Turn: +x> <OTB Target Current Turn: -x> <OTB Target Next Turn: -x> <OTB Target Follow Turn: -x> - Used for: Skill, Item Notetags - Changes the target's position in the turn order for the current turn, next turn, or whichever turn is following. - If using the "Follow" variant, if the target has actions left for the current turn, it will affect the current turn. If not, it affects the next turn instead. - Replace 'x' with a number representing the number of slots to change. - Negative numbers move the target closer to the front. - Positive numbers move the target towards the back. - This effect will occur as many times as there are successfully connected hits for each target, meaning a target can have its turn order shifted multiple times. - These are best used with single target skills/items as multi-target skills may shift multiple targets back and forth with each other if they are adjacent to one another. --- Battle System - PTB VisuStella MZThe following are notetags that have been added through this plugin. These notetags will not work with your game if this plugin is OFF or not present. --- General PTB-Related NotetagsThese notetags are general purpose notetags that have became available through this plugin. --- <PTB Help> description description </PTB Help> - Used for: Skill, Item Notetags - If your game happens to support the ability to change battle systems, this notetag lets you change how the skill/item's help description text will look under PTB. - This is primarily used if the skill behaves differently in PTB versus any other battle system. - Replace 'description' with help text that's only displayed if the game's battle system is set to PTB. --- Press Action Cost-Related Notetags--- <PTB Press Consume: x> - Used for: Skill, Item Notetags - Changes the PTB press action cost of this skill/item to consume 'x'. - Replace 'x' with a number value representing the press action cost required to perform the skill. - When consuming press actions, it will consume half actions before full actions. - The consume/convert type can be altered by the skill results. --- <PTB Press Convert: x> - Used for: Skill, Item Notetags - Changes the PTB press action cost of this skill/item to convert 'x'. - Replace 'x' with a number value representing the press action cost required to perform the skill. - When converting press actions, it will convert full actions into half actions. If there are no full actions to convert, it will instead consume half actions. - The consume/convert type can be altered by the skill results. --- <PTB Press Compress: x> - Used for: Skill, Item Notetags - Changes the PTB press action cost of this skill/item to compress 'x'. - Replace 'x' with a number value representing the press action cost required to perform the skill. - When converting press actions, it will consume any half actions. If there are no half actions, it will convert full actions into half actions. - The consume/convert type can be altered by the skill results. --- <PTB Press Force Consume: x> - Used for: Skill, Item Notetags - Changes the PTB press action cost of this skill/item to consume 'x'. - Replace 'x' with a number value representing the press action cost required to perform the skill. - When consuming press actions, it will consume half actions before full actions. - The consume/convert type CANNOT be altered by the skill results. --- <PTB Press Force Convert: x> - Used for: Skill, Item Notetags - Changes the PTB press action cost of this skill/item to convert 'x'. - Replace 'x' with a number value representing the press action cost required to perform the skill. - When converting press actions, it will convert full actions into half actions. If there are no full actions to convert, it will instead consume half actions. - The consume/convert type CANNOT be altered by the skill results. --- <PTB Press Force Compress: x> - Used for: Skill, Item Notetags - Changes the PTB press action cost of this skill/item to compress 'x'. - Replace 'x' with a number value representing the press action cost required to perform the skill. - When converting press actions, it will consume any half actions. If there are no half actions, it will convert full actions into half actions. - The consume/convert type CANNOT be altered by the skill results. --- <PTB Hide Press Cost> - Used for: Skill, Item Notetags - Makes the PTB press cost for this skill/item hidden regardless of Plugin Parameter settings. --- <PTB Show Press Cost> - Used for: Skill, Item Notetags - Makes the PTB press cost for this skill/item visible regardless of Plugin Parameter settings. --- Post Gain-Related Notetags--- <PTB Post-Gain Full Actions: +x> <PTB Post-Lose Full Actions: -x> - Used for: Skill, Item Notetags - Causes the user's team to gain full actions AFTER paying the action costs. - Replace 'x' with a number representing the amount of full actions to gain or lose. --- <PTB Post-Gain Half Actions: +x> <PTB Post-Lose Half Actions: -x> - Used for: Skill, Item Notetags - Causes the user's team to gain half actions AFTER paying the action costs. - Replace 'x' with a number representing the amount of half actions to gain or lose. --- Mechanics-Related Notetags--- <PTB Pass Turn> - Used for: Skill, Item Notetags - If a battler uses this skill/item, then even if there are actions left for the team to perform, that battler would no longer be able to input as they have already passed their turn. --- <PTB Full Actions: +x> <PTB Full Actions: -x> - Used for: Actor, Class, Weapon, Armor, Enemy, State Notetags - Battlers associated with these trait objects can increase or decrease the maximum number of full actions performed each turn. - Replace 'x' with a number representing the increase or decrease in action count per turn. - Depending on the Plugin Parameters, altering the max value can result in gaining or losing remaining actions for the current turn. --- Battle System - STB VisuStella MZThe following are notetags that have been added through this plugin. These notetags will not work with your game if this plugin is OFF or not present. --- General STB-Related NotetagsThese notetags are general purpose notetags that have became available through this plugin. --- <STB Help> description description </STB Help> - Used for: Skill, Item Notetags - If your game happens to support the ability to change battle systems, this notetag lets you change how the skill/item's help description text will look under STB. - This is primarily used if the skill behaves differently in STB versus any other battle system. - Replace 'description' with help text that's only displayed if the game's battle system is set to STB. --- STB Turn Order Display-Related NotetagsThese notetags affect the STB Turn Order Display --- <STB Turn Order Icon: x> - Used for: Actor, Enemy Notetags - Changes the slot graphic used for the battler to a specific icon. - Replace 'x' with the icon index to be used. --- <STB Turn Order Face: filename, index> - Used for: Actor, Enemy Notetags - Changes the slot graphic used for the enemy to a specific face. - Replace 'filename' with the filename of the image. - Do not include the file extension. - Replace 'index' with the index of the face. Index values start at 0. - Example: <STB Turn Order Face: Monster, 1> --- Instant Use-Related Notetags--- <STB Instant> <STB Instant Use> <STB Instant Cast> - Used for: Skill, Item Notetags - Allows the skill/item to be used immediately without consuming a turn. --- Exploit-Related Notetags--- <STB Exploited Gain State: id> <STB Exploited Gain State: id, id, id> <STB Exploited Gain State: name> <STB Exploited Gain State: name, name, name> - Used for: Class, Enemy Notetags - If an actor (with the specified class) or enemy is exploited via elemental weaknesses or critical hits, apply the listed penalty state(s). - Replace 'id' with a number representing the penalty state ID's you wish to apply to the exploited battler. - Insert multiple 'id' values to apply multiple penalty states at once. - Replace 'name' with the name of the penalty state you wish to apply to the exploited battler. - Insert multiple 'name' entries to apply multiple penalty states at once. --- <STB Cannot Be Exploited> - Used for: Actor, Class, Weapon, Armor, Enemy, State Notetags - This prevents the affected battler from being exploited via elemental weaknesses or critical hits. --- <STB Exploiter Gain State: id> <STB Exploiter Gain State: id, id, id> <STB Exploiter Gain State: name> <STB Exploiter Gain State: name, name, name> - Used for: Class, Enemy Notetags - If an actor (with the specified class) or enemy exploits an opponent with an elemental weakness or critical hit, apply the listed bonus state(s). - Replace 'id' with a number representing the bonus state ID's you wish to apply to the exploited battler. - Insert multiple 'id' values to apply multiple bonus states at once. - Replace 'name' with the name of the bonus state you wish to apply to the exploited battler. - Insert multiple 'name' entries to apply multiple bonus states at once. --- <STB Cannot Be Exploiter> - Used for: Actor, Class, Weapon, Armor, Enemy, State Notetags - This prevents the affected battler from exploiting any opponents via elemental weaknesses or critical hits. --- Battle Voices VisuStella MZThe following are notetags that have been added through this plugin. These notetags will not work with your game if this plugin is OFF or not present. --- Voice Set-Related Notetags--- <Voice Set: name>
- Used for: Actor, Enemy Notetags
- Declares a battle voice set for the target actor/enemy to use.
- Replace 'name' with the name of the battle voice set used in the Plugin
Parameters to declare the contents of that battle voice set to be played.
- If you are unsure which, it's the Plugin Parameter that says "Name" and
in its decription will show "<Voice Set: name>".
- If nothing is declared, the actor/enemy will not use battle voice lines.
- This can be changed for actors via Plugin Commands.
--- <Language lang Voice Set: name>
- Used for: Actor, Enemy Notetags
- Requires VisuMZ_2_VoiceActControl and Voice Language Switching enabled.
- Declares a battle voice set for the target actor/enemy to use when using
a certain voice language.
- Replace 'lang' with the language name this voice set is used for.
- Bengali, Chinese, Czech, Danish, Dutch, English, Finnish, French,
German, Greek, Hindi, Hungarian, Indonesian, Italian, Japanese, Korean,
Norwegian, Polish, Portuguese, Romanian, Russian, Slovak, Spanish,
Swedish, Tamil, Thai, Turkish
- Replace 'name' with the name of the battle voice set used in the Plugin
Parameters to declare the contents of that battle voice set to be played.
- If you are unsure which, it's the Plugin Parameter that says "Name" and
in its decription will show "<Voice Set: name>".
- Insert multiple of these notetags to have different voice sets for
different voiced languages.
- This can be changed for actors via Plugin Commands.
--- --- <Voice Set Volume: x> <Voice Set Pitch: x> <Voice Set Pan: x> - Used for: Actor, Enemy Notetags - Adjusts the battle voice set's volume, pitch, and panning. - Replace 'x' with number values representing the setting you want used. - For volume, use a number between 0 and 100. 100 is full volume. - For pitch, use a number between 50 and 150. 100 is neutral. - For pan, use a number between -100 and 100. 0 is neutral. - If these notetags are not used, the actor/enemy will use the settings found in the default Plugin Parameters instead. --- <Trait Voice Sets>
type Set: name
type Volume: value
type Pitch: value
type Pan: value
type Set: name
type Volume: value
type Pitch: value
type Pan: value
type Set: name
type Volume: value
type Pitch: value
type Pan: value
</Trait Voice Sets>
- Used for: Enemy Notetags
- Requires VisuMZ_1_ElementStatusCore!
- Allows enemies that have different trait variants to have different battle
voice sets, such as different voices for Male and Female, or different
elements, blessings, etc.
- Replace 'type' with the name of an associated Trait Set type found in the
Plugin Parameters. This can be for any Trait Set except 'SubElement'.
- Replace 'name' with the name of the battle voice set used in the Plugin
Parameters to declare the contents of that battle voice set to be played.
- If you are unsure which, it's the Plugin Parameter that says "Name" and
in its decription will show "<Voice Set: name>".
- Replace 'value' with number values representing the setting you want used.
- For volume, use a number between 0 and 100. 100 is full volume.
- For pitch, use a number between 50 and 150. 100 is neutral.
- For pan, use a number between -100 and 100. 0 is neutral.
- If none of these are used, then the enemy will not have any battle voices.
--- Bestiary VisuStella MZThe following are notetags that have been added through this plugin. These notetags will not work with your game if this plugin is OFF or not present. --- Bestiary-Related Notetags--- <Bestiary Category: x> <Bestiary Categories: x, x, x> - Used for: Enemy Notetags - Displays this enemy in the Bestiary category(ies) 'x'. - Replace 'x' with the ID Key of the category or categories found in the Plugin Parameters. - If this notetag is not used, use the default category determined by the Plugin Parameters. --- <Hide in Bestiary> - Used for: Enemy Notetags - Prevents this enemy from being listed in the Bestiary. --- <Bestiary Custom Picture: filename> - Used for: Enemy Notetags - Makes this enemy display a custom picture in the Bestiary instead of the battler graphic used in-game. - Replace 'filename' with the name of the image file to pick from the game project's /img/pictures/ folder. - Filenames are case sensitive. - Leave out the filename extension from the notetag. --- <Bestiary Battleback 1: filename> <Bestiary Battleback 2: filename> - Used for: Enemy Notetags - Makes this enemy display a custom battleback background in the Bestiary instead of the default graphic determined by the Plugin Parameters. - Replace 'filename' with the name of the image file to pick from the game project's /img/battlebacks1/ and /img/battlebacks2/ folders. - Filenames are case sensitive. - Leave out the filename extension from the notetag. - If these notetags are not used, use the default settings found in the Plugin Parameters instead. --- <Bestiary Lore> text text text </Bestiary Lore> - Used for: Enemy Notetags - Inserts the written 'text' as the enemy's lore in the Bestiary. - Replace 'text' with whatever you want as the enemy's lore. - If this notetag is not used, then the text displayed will be the default settings found in the Plugin Parameters. --- <Hide Skill in Bestiary> - Used for: Skill Notetags - Prevents this skill from being listed in the Bestiary. --- Boost Action VisuStella MZThe following are notetags that have been added through this plugin. These notetags will not work with your game if this plugin is OFF or not present. --- Boost Effect-Related Notetags--- <Boost Damage> - Used for: Skill, Item Notetags - Boosts will alter the damage dealt by this skill/item. - The amount of damage increased will be determined by the Plugin Parameter Mechanical settings for Damage Multipliers and Addition. - When using Action Sequences, this will have no effect outside of the MECH: Action Effect command. --- <Boost Turns> - Used for: Skill, Item Notetags - Boosts will alter the duration of skills, buffs, and debuffs added by this skill/item. - The amount of turns increased will be determined by the Plugin Parameter Mechanical settings for Turn Multipliers and Addition. - When using Action Sequences, this will have no effect outside of the MECH: Action Effect command. --- <Boost Repeat> - Used for: Skill, Item Notetags - Boosts will alter the number of repeated hits dealt by this skill/item. - The amount of hits increased will be determined by the Plugin Parameter Mechanical settings for Repeated Hits Multipliers and Addition. - When using Action Sequences, this will have no effect outside of the MECH: Action Effect command. --- <Boost Effect Gain> - Used for: Skill, Item Notetags - Boosts will alter the number of Boost Points acquired through the <Target Boost Points: +x> and <User Boost Points: +x> notetags. - The power of the effect will be determined by the Plugin Parameter Mechanical settings for Effect Multipliers and Addition. - When using Action Sequences, this will have no effect outside of the MECH: Action Effect command. --- <Boost Analyze> - Used for: Skill, Item Notetags - Requires VisuMZ_3_WeaknessDisplay! - Boosts will alter the number of revealed weaknesses by this skill/item. - The amount of weaknesses revealed will be determined by the Plugin Parameter Mechanical settings for Analyze Multipliers and Addition. - When using Action Sequences, this will have no effect outside of the MECH: Action Effect command. --- Boost Points Gain/Loss-Related Notetags--- <User Boost Points: +x> <User Boost Points: -x> <Target Boost Points: +x> <Target Boost Points: -x> - Used for: Skill, Item Notetags - The user/target will gain/lose Boost Points if this skill/item connects. - Replace 'x' with a number representing the number of Boost Points for the user/target to gain/lose. --- <Boost Points Battle Start: x%> - Used for: Actor, Class, Weapon, Armor, Enemy, State Notetags - Determines how many extra (or less) Boost Points the battler will start a new battle with. - Replace 'x' with a number representing the amount of Boost Points to increase or decrease the starting Boost Points value by multiplicatively. --- <Boost Points Battle Start: +x> <Boost Points Battle Start: -x> - Used for: Actor, Class, Weapon, Armor, Enemy, State Notetags - Determines how many extra (or less) Boost Points the battler will start a new battle with. - Replace 'x' with a number representing the amount of Boost Points to increase or decrease the starting Boost Points value by additively. --- Boost Point Requirements-Related NotetagsThe following are notetags that make skills/items require a certain amount of Boost Points to be in "use" before they can become enabled. --- <Require x Boost Points> - Used for: Skill, Item Notetags - This causes the skill to require at least x Boost Points to be spent. - Replace 'x' with a number value representing the Boost Points to be spent. --- <Require >= x Boost Points> - Used for: Skill, Item Notetags - This causes the skill to require at least x Boost Points to be spent. - Replace 'x' with a number value representing the Boost Points to be spent. --- <Require > x Boost Points> - Used for: Skill, Item Notetags - This causes the skill to require more than x Boost Points to be spent. - Replace 'x' with a number value representing the Boost Points to be spent. --- <Require = x Boost Points> - Used for: Skill, Item Notetags - This causes the skill to require exactly x Boost Points to be spent. - Replace 'x' with a number value representing the Boost Points to be spent. --- <Require < x Boost Points> - Used for: Skill, Item Notetags - This causes the skill to require less than x Boost Points to be spent. - Replace 'x' with a number value representing the Boost Points to be spent. --- <Require <= x Boost Points> - Used for: Skill, Item Notetags - This causes the skill to require at most x Boost Points to be spent. - Replace 'x' with a number value representing the Boost Points to be spent. --- Boosting-Related Notetags--- <Boost Sealed> - Used for: Actor, Class, Weapon, Armor, Enemy, State Notetags - As long as the battler is affected by a trait object with this notetag, the battler cannot Boost. --- Enemy-Related Notetags--- <Boost Skill id: Full> <Boost name: Full> - Used for: Enemy Notetags - Determines which skills the notetag'd enemy will Boost and their range for Boosting it. - When the enemy Boosts for this skill, the enemy will use as many Boost Points as it can to cast it. - Replace 'id' with a number representing the skill ID to Boost. - Replace 'name' with the skill's name to Boost. --- <Boost Skill id: At Least x> <Boost name: At Least x> - Used for: Enemy Notetags - Determines which skills the notetag'd enemy will Boost and their range for Boosting it. - When the enemy Boosts for this skill, the enemy will only use Boost Points after reaching 'x' Boost Points and will use as much as it can. - Replace 'id' with a number representing the skill ID to Boost. - Replace 'name' with the skill's name to Boost. --- <Boost Skill id: At Most x> <Boost name: At Most x> - Used for: Enemy Notetags - Determines which skills the notetag'd enemy will Boost and their range for Boosting it. - When the enemy Boosts for this skill, the enemy will only as many Boost Points as it can unless the Boost Points spent go over 'x'. - Replace 'id' with a number representing the skill ID to Boost. - Replace 'name' with the skill's name to Boost. --- <Boost Skill id: Exactly x> <Boost name: Exactly x> - Used for: Enemy Notetags - Determines which skills the notetag'd enemy will Boost and their range for Boosting it. - When the enemy Boosts for this skill, the enemy will only use 'x' Boost Points when Boosting for the skill. - Replace 'id' with a number representing the skill ID to Boost. - Replace 'name' with the skill's name to Boost. --- Regeneration-Related Notetags--- <Boost Points Regen: x%> - Used for: Actor, Class, Weapon, Armor, Enemy, State Notetags - Alters the amount of Boost Points gained when regenerating Boost Points (as long as the battler can). - Replace 'x' with a number value representing the amount of Boost Points to increase or decrease the regenerated amount by multiplicatively. --- <Boost Points Regen: +x> <Boost Points Regen: -x> - Used for: Actor, Class, Weapon, Armor, Enemy, State Notetags - Alters the amount of Boost Points gained when regenerating Boost Points (as long as the battler can). - Replace 'x' with a number value representing the amount of Boost Points to increase or decrease the regenerated amount by additively. --- Break Shields VisuStella MZThe following are notetags that have been added through this plugin. These notetags will not work with your game if this plugin is OFF or not present. --- Break Shield Calculation-Related Notetags--- <Break Shields: x> - Used for: Actor, Class, Enemy Notetags - Declares the base amount of Break Shields this battler will have. - This will ignore the default setting from the Plugin Parameters. - Replace 'x' with a number representing the base amount of Break Shields to give this battler. - If both the Actor and Class database object has this notetag, priority will be given to the Class before the Actor. --- <Break Shields: +x> <Break Shields: -x> - Used for: Actor, Class, Weapon, Armor, Enemy, State Notetags - Allows trait objects to alter the amount of Break Shields battlers have whenever their Break Shields are reset. - Replace 'x' with a number representing the Break Shields to increase or decrease the amount by. - Total Break Shields cannot go under 1 and cannot go whatever the maximum is declared inside the Plugin Parameters. --- Break Shield Alteration-Related Notetags--- <Break Reduce: x> - Used for: Skill, Item Notetags - Reduces the target's Break Shield by x if this action hits a weakness. - This will ignore the default setting from the Plugin Parameters. - Replace 'x' with a number to determine how many Break Shields to reduce. - If Break Shields reach 0, the target will enter a Stun state. --- <Change Break Shield: x> - Used for: Skill, Item Notetags - This will change the target battler's Break Shield value to x if the battler isn't currently stunned. - No effect if you don't use this notetag. - Replace 'x' with a number value to change the target battler's Break Shield value to. --- <Increase Break Shield: +x> <Decrease Break Shield: -x> - Used for: Skill, Item Notetags - This will either increase the target battler's break shield by x or decrease the target battler's break shield by x. - Happens after the Change Break Shield notetag. - No effect if you don't use this notetag. - Replace 'x' with a number value representing the amount to alter the target's Break Shields by. --- Element-Related Notetags--- <Protect Element: id> <Protect Elements: id, id, id> <Protect Element: name> <Protect Elements: name, name, name> - Used for: Actor, Class, Weapon, Armor, Enemy, State Notetags - Specified element(s) will be guarded and Break Shields cannot be reduced when struck with that element (as long as the requirement is above 100%). - The element rate for those will cap at 100%, preventing extra damage from being dealt despite having weaknesses, although custom JS effects will bypass this. - Replace 'id' with a number value representing the ID(s) of the element(s). - Replace 'name' with the name(s) of the element(s). --- Bright Effects VisuStella MZThe following are notetags that have been added through this plugin. These notetags will not work with your game if this plugin is OFF or not present. --- Bloom-Related Notetags---
<Bloom Scale: x> - Used for: Map Notetags and Troop Names - Changes the bloom scale to x for map/battle. - Replace 'x' with a number to represent the value. Use decimals. - Lower - Less bloom - Higher - More bloom ---
<Bloom Brightness: x> - Used for: Map Notetags and Troop Names - Changes the bloom brightness to x for map/battle - Replace 'x' with a number to represent the value. Use decimals. - Lower - Darker - Higher - Brighter ---
<Bloom Threshold: x> - Used for: Map Notetags and Troop Names - Changes the bloom threshold to x for map/battle. - Replace 'x' with a number to represent the value. Use decimals. - Lower - Less picky - Higher - More picky ---
<Bloom Horz Scale: x to y> <Bloom Vert Scale: x to y> - Used for: Map Notetags - Map only. Sets an adjusting scale when traveling left to right on the map (Horz) or up to down on the map (Vert). - Replace 'x' and 'y' with numbers to represent the value. Use decimals. - Lower - Less bloom - Higher - More bloom --- <Bloom Horz Brightness: x to y> <Bloom Vert Brightness: x to y> - Used for: Map Notetags - Map only. Sets an adjusting brightness when traveling left to right on the map (Horz) or up to down on the map (Vert). - Replace 'x' and 'y' with numbers to represent the value. Use decimals. - Lower - Darker - Higher - Brighter --- <Bloom Horz Threshold: x to y> <Bloom Vert Threshold: x to y> - Used for: Map Notetags - Map only. Sets an adjusting threshold when traveling left to right on the map (Horz) or up to down on the map (Vert). - Replace 'x' and 'y' with numbers to represent the value. Use decimals. - Lower - Less picky - Higher - More picky --- Blur-Related Notetags--- <Blur: x> - Used for: Map Notetags and Troop Names - Changes the blur strength used for the screen to 'x'. - Replace 'x' with a number representing the blur strength. For best results, use numbers between 0 and 5 where 0 is no blur and higher numbers mean higher blur strength. --- Godray-Related Notetags---
<Godray> <No Godray> - Used for: Map Notetags and Troop Names - Changes if there will be a godray on the map/battle regardless of the default settings in the plugin parameters. --- <Godray Speed: x> - Used for: Map Notetags and Troop Names - Sets the flickering speed of the rays. - Replace 'x' with a number to represent the value. Use decimals. - Lower - Slower - Higher - Faster ---
<Godray Gain: x> - Used for: Map Notetags and Troop Names - Sets the gain/intensity of the rays. - Replace 'x' with a number to represent the value. Use decimals. - Lower - Lighter - Higher - Intense ---
<Godray Lacunarity: x> - Used for: Map Notetags and Troop Names - Sets the lacunarity/density of the rays. - Replace 'x' with a number to represent the value. Use decimals. - Lower - Less dense - Higher - More dense ---
<Godray Angle: x> - Used for: Map Notetags and Troop Names - Sets the angle of the rays. - Replace 'x' with a number to represent the value. Use a negative or positive integer value. - Negative - Coming from the left - Positive - Coming from the right ---
<Godray Horz Speed: x to y> <Godray Vert Speed: x to y> - Used for: Map Notetags - Map only. Adjusts godray speed going left to right on a map (Horz) or up to down on a map (Vert). - Replace 'x' and 'y' with numbers to represent the value. Use decimals. - Lower - Slower - Higher - Faster --- <Godray Horz Gain: x to y> <Godray Vert Gain: x to y> - Used for: Map Notetags - Map only. Adjusts godray gain going left to right on a map (Horz) or up to down on a map (Vert). - Replace 'x' and 'y' with numbers to represent the value. Use decimals. - Lower - Lighter - Higher - Intense --- <Godray Horz Lacunarity: x to y> <Godray Vert Lacunarity: x to y> - Used for: Map Notetags - Map only. Adjusts godray lacunarity going left to right on a map (Horz) or up to down on a map (Vert). - Replace 'x' and 'y' with numbers to represent the value. Use decimals. - Lower - Less dense - Higher - More dense --- <Godray Horz Angle: x to y> <Godray Vert Angle: x to y> - Used for: Map Notetags - Map only. Adjusts godray angle going left to right on a map (Horz) or up to down on a map (Vert). - Replace 'x' and 'y' with numbers to represent the value. Use a negative or positive integer values. - Negative - Coming from the left - Positive - Coming from the right --- Color Adjust-Related Notetags---
<Color Adjust Brightness: x> - Used for: Map Notetags and Troop Names - Alters the screen brightness for the map/battle. - Replace 'x' with a number to represent the value. Use decimals. - Lower - Darker - Higher - Brighter ---
<Color Adjust Contrast: x> - Used for: Map Notetags and Troop Names - Adjusts the screen contrast for the map/battle. - Replace 'x' with a number to represent the value. Use decimals. - Lower - Less contrast - Higher - More contrast ---
<Color Adjust Saturate: x> - Used for: Map Notetags and Troop Names - Adjusts the screen saturation for the map/battle. - Replace 'x' with a number to represent the value. Use decimals. - Lower - Darker - Higher - Brighter ---
<Color Adjust Horz Brightness: x to y> <Color Adjust Vert Brightness: x to y> - Used for: Map Notetags - Map only. Alters the screen brightness when moving left to right on a map (Horz) or up to down on a map (Vert). - Replace 'x' and 'y' with numbers to represent the value. Use decimals. - Lower - Darker - Higher - Brighter --- <Color Adjust Horz Contrast: x to y> <Color Adjust Vert Contrast: x to y> - Used for: Map Notetags - Map only. Adjusts the screen contrast when moving left to right on a map (Horz) or up to down on a map (Vert). - Replace 'x' and 'y' with numbers to represent the value. Use decimals. - Lower - Less contrast - Higher - More contrast --- <Color Adjust Horz Saturate: x to y> <Color Adjust Vert Saturate: x to y> - Used for: Map Notetags - Map only. Adjusts the screen saturation when moving left to right on a map (Horz) or up to down on a map (Vert). - Replace 'x' and 'y' with numbers to represent the value. Use decimals. - Lower - Less intensity - Higher - More intensity --- Tilt Shift Notetags--- <Tilt Shift Pixel Blur: x> - Used for: Map Notetags and Troop Names - Adjusts the tilt shift filter's pixel blur amount for the map/battle. - Replace 'x' with a number to represent the blur intensity. - Lower = less blur - Higher = more blur --- <Tilt Shift Gradient Blur: x> - Used for: Map Notetags and Troop Names - Adjusts the tilt shift filter's gradient blur amount for the map/battle. - Replace 'x' with a number to represent the gradient blur distance. - Lower = less gradient - Higher = more gradient --- Button Trigger Events VisuStella MZThe following are notetags that have been added through this plugin. These notetags will not work with your game if this plugin is OFF or not present. --- Event-Related Notetags and Comment Tags--- <Trigger Button: button>
<Trigger Buttons: button, button, button>
- Used for: Event Notetags and Comment Tags
- Allows the event to remotely trigger upon the player pressing a specific
keyboard button.
- The event's Trigger condition must be either "Action Button",
"Player Touch", or "Event Touch".
- This does not work with "Autorun" or "Parallel".
- Insert the tag inside the Notebox to make the Button Trigger apply to ALL
of the event's pages.
- Insert the tag inside of a Comment to make the Button Trigger apply ONLY
to the specific event pages that have those comments on them.
- Replace 'button' with any of the following buttons (remove quotes):
- "Down", "Left", "Right", "Up"
- "OK", "Cancel", "PageUp", "PageDown",
- "Control", "Shift", "Tab"
- Typing in a button wrong (such as adding a space to "Page Up") will
yield no results.
- The "Cancel" button trigger will prevent the Main Menu from being called
when pressed with the Keyboard, but it will NOT prevent the Main Menu
from being called with mouse buttons or touch controls.
- Insert multiple buttons separated by commas to allow for multiple keyboard
buttons to trigger them.
Examples:
<Trigger Button: OK>
<Trigger Button: Left, Down>
<Trigger Button: Up, Right>
<Trigger Button: PageUp, PageDown>
--- <No Auto Trigger Icon> - Used for: Event Notetags and Comment Tags - Prevents icons from being automatically assigned to the event if it is assigned a Trigger Button. --- <No Auto Click Trigger> - Used for: Event Notetags and Comment Tags - Prevents click trigger from being automatically assigned to the event if it is assigned a Trigger Button. --- Map-Related Notetags--- <Seal Input Move> - Used for: Map Notetags - Prevents the player from being able to use directional inputs and touch navigation on this specific map. - If this notetag is not used, the setting will default to whatever is set up in the Plugin Parameters > Auto QOL Settings > Auto <Seal Input Move> setting. --- <No Seal Input Move> - Used for: Map Notetags - Allows the player to be able to use directional inputs and utilize touch navigation on this specific map. - If this notetag is not used, the setting will default to whatever is set up in the Plugin Parameters > Auto QOL Settings > Auto <Seal Input Move> setting. --- Challenge System VisuStella MZThe following are notetags that have been added through this plugin. These notetags will not work with your game if this plugin is OFF or not present. --- Map-Related Notetags--- <Challenge Set: name> <Challenge Sets: name, name, name> - Used for: Map Notetags - Use this to define which local Challenge Sets will affect this map. - Replace 'name' with the named 'Challenge Set ID' found in the Challenge Set groups in the Plugin Parameters. - Insert multiple 'name' entries to allow more than one Challenge Set to affect this map. - The Global Challenge Set affects all maps except those marked with the <No Global Challenges> notetag. --- <No Global Challenges> - Used for: Map Notetags - Prevents this map from being affected by the Global Challenge Set found in the Plugin Parameters. - This map can still be affected by local Challenge Sets marked through the <Challenge Set: name> notetag. --- Character Creation System VisuStella MZThe following are notetags that have been added through this plugin. These notetags will not work with your game if this plugin is OFF or not present. --- Actor-Related Notetags--- <Cannot Select Dismiss> - Used for: Actor Notetags - This actor cannot be selected as a dismissal target through the actor selection scene. - This actor can still be manually dismissed from the party through event commands and/or script calls. --- <Cannot Select Retrain> - Used for: Actor Notetags - This actor cannot be selected as a retrain target through the actor selection scene. - This actor can still be manually retrained by having the associated Plugin Command directly target the actor (instead of using 0 for selection). --- Class-Related Notetags<Icon: x> - Used for: Class Notetags - Sets the icon used for this class to icon index 'x'. - Replace 'x' with a number representing the index of the icon you wish to use as a marker for this class. --- Class Change System VisuStella MZThe following are notetags that have been added through this plugin. These notetags will not work with your game if this plugin is OFF or not present. --- Class Basics-Related Notetags--- <Icon: x> - Used for: Class Notetags - Assigns an icon index for the class to 'x'. - Replace 'x' with a number representing the index value on the IconSet image in the img/system/ folder for the icon you want to assign. - If this notetag is not used, the icon index will default to the setting found in the Class Change System's Plugin Parameters. --- <Help Description> text text </Help Description> - Used for: Class Notetags - Assigns a help description to the class. - Replace 'text' with text you want displayed when this class is selected in the Class Change scene's class list. - If this notetag is not used, the help description will default to the setting found in the Class Change System's Plugin Parameters. --- <Class Change Animation: x> - Used for: Class Notetags - Assigns an animation for the class when the actor changes to that class. - Replace 'x' with a number representing the ID of the animation found in the database to play when the actor changes to that class. - If this notetag is not used, the animation will default to the setting found in the Class Change System's Plugin Parameters. --- <Class Change Picture: filename> <Picture: filename> - Used for: Class Notetags - Uses a picture from your project's /img/pictures/ folder instead of the class's icon during for the Class Change scene. - Replace 'filename' with the filename of the image. - Do not include the file extension. - Scaling will not apply to the picture. - Use the <Picture: filename> version for any other plugins that may be using this as an image outside of class changing, too. - The size used for the image will vary based on your game's resolution. --- Class Specific Graphics-Related Notetags--- <Class id Face: filename, index> <Class name Face: filename, index> - Used for: Actor Notetags - Gives this actor a class specific face graphic. - For 'id' variant, replace 'id' with a number representing class's ID. - For 'name' variant, replace 'name' with the class's name. - Replace 'filename' with the filename of the graphic found inside the img/faces/ folder. Do not include the file extension. - Replace 'index' with the index of the graphic. Index values start at 0. Examples: <Class 1 Face: Actor2, 0> <Class Swordsman Face: Actor2, 0> --- <Class id Character: filename, index> <Class name Character: filename, index> - Used for: Actor Notetags - Gives this actor a class specific map character sprite graphic. - For 'id' variant, replace 'id' with a number representing class's ID. - For 'name' variant, replace 'name' with the class's name. - Replace 'filename' with the filename of the graphic found inside the img/characters/ folder. Do not include the file extension. - Replace 'index' with the index of the graphic. Index values start at 0. Examples: <Class 1 Character: Actor2, 0> <Class Swordsman Character: Actor2, 0> --- <Class id Battler: filename> <Class name Battler: filename> - Used for: Actor Notetags - Gives this actor a class specific sideview battler graphic. - For 'id' variant, replace 'id' with a number representing class's ID. - For 'name' variant, replace 'name' with the class's name. - Replace 'filename' with the filename of the graphic found inside the img/sv_actors/ folder. Do not include the file extension. Examples: <Class 1 Battler: Actor2_1> <Class Swordsman Battler: Actor2_1> --- <Class id Menu Portrait: filename> <Class name Menu Portrait: filename> - Used for: Actor Notetags - Requires VisuMZ_1_MainMenuCore! - Gives this actor a class specific menu portrait graphic. - For 'id' variant, replace 'id' with a number representing class's ID. - For 'name' variant, replace 'name' with the class's name. - Replace 'filename' with the filename of the graphic found inside the img/pictures/ folder. Do not include the file extension. Examples: <Class 1 Menu Portrait: Actor2_1> <Class Swordsman Menu Portrait: Actor2_1> --- <Class id Battle Portrait: filename> <Class name Battle Portrait: filename> - Used for: Actor Notetags - Requires VisuMZ_1_BattleCore! - Gives this actor a class specific battle portrait graphic. - For 'id' variant, replace 'id' with a number representing class's ID. - For 'name' variant, replace 'name' with the class's name. - Replace 'filename' with the filename of the graphic found inside the img/pictures/ folder. Do not include the file extension. Examples: <Class 1 Battle Portrait: Actor2_1> <Class Swordsman Battle Portrait: Actor2_1> --- Class Unlocking-Related Notetags--- <Unlocked Classes: id> <Unlocked Classes: id, id, id> <Unlocked Classes: name> <Unlocked Classes: name, name, name> - Used for: Actor Notetags - Allows this actor to start with certain classes unlocked. These classes are unlocked in addition to the ones found in the Plugin Parameters. - For 'id' variant, replace 'id' with a number representing class's ID. - For 'name' variant, replace 'name' with the class's name. - Insert multiple data entries to unlock more classes. --- <Auto Unlock Requirements> Class id: Level x Class name: Level x Class id: x AP Class name: x AP Class id: x CP Class name: x CP Class id: x JP Class name: x JP Class id: x SP Class name: x SP AP: x CP: x JP: x SP: x </Auto Unlock Requirements> - Used for: Class Notetags - Have this class unlock automatically whenever all of the conditions have been met after a battle is over or upon entering the Class Change scene. - Insert/delete any number of copies of the middle conditions as needed. - For 'id' conditions, replace 'id' with a number representing class's ID. - For 'name' conditions, replace 'name' with the class's name. - For 'AP', 'CP', 'JP', 'SP' conditions that have class markers, they require that many of the resource as the 'x' value for that class. These are best used with resource types that are class specific. - For 'AP', 'CP', 'JP', 'SP' conditions that have class markers, they require that many of the resource as the 'x' value for the current class. These are best used with resource types that are shared. - 'AP' and 'SP' conditions require VisuMZ_2_SkillLearnSystem. Examples: <Auto Unlock Requirements> Class 4: Level 20 Class 6: Level 15 </Auto Unlock Requirements> <Auto Unlock Requirements> Class Knight: Level 20 Class Spellblade: Level 15 </Auto Unlock Requirements> <Auto Unlock Requirements> Class Knight: 200 JP Class Spellblade: 100 JP </Auto Unlock Requirements> <Auto Unlock Requirements> Class Knight: 200 JP CP: 500 </Auto Unlock Requirements> --- Category-Related Notetags--- <Starting Multiclasses: x> - Used for: Actor Notetags - Lets the actor start with 'x' amount of class slots to assign. - Replace 'x' with a number value representing the number of slots the actor can assign classes to. - If this notetag is not used, the slot values will default to the setting found in the Class Change System's Plugin Parameters. - Slot values cannot go under 1 or exceed the maximum number of layers found in the "Multiclass Settings" Plugin Parameters. --- <Starting Tier x Class: id> <Starting Tier x Class: name> - Used for: Actor Notetags - If an actor has multiclass slots, determine which subclasses are assigned to them at the start. - Replace 'x' with a number value representing the multiclass slot to assign to. '1' is the primary slot. '2' is the second slot. - For 'id' conditions, replace 'id' with a number representing class's ID. - For 'name' conditions, replace 'name' with the class's name. - Insert multiple copies of this notetag to assign multiple classes to different slots. Example: <Starting Tier 2 Class: Sorcerer> <Starting Tier 3 Class: Priest> --- <Restrict Class Change Tier: x> <Restrict Class Change Tiers: x, x, x> - Used for: Actor Notetags - This makes an actor unable to change the class found in any of the listed tier slots unless this effect is cancelled by Plugin Commands. - Replace 'x' with a number representing the tier slot(s) to restrict. --- <Class Change Tier Only: x> <Class Change Tiers Only: x, x, x> - Used for: Class Notetags - This makes the specific class only assignable to specific class tiers. - Replace 'x' with a number representing the tier slot(s) that this class can be assigned and equipped to. --- Class Points-Related Notetags--- <Starting CP: x> - Used for: Actor Notetags - Determines the amount of Class Points the actor starts with in his/her starting class. - Replace 'x' with a numeric value representing the amount of Class Points to start out with. --- <Class id Starting CP: x> <Class name Starting CP: x> - Used for: Actor Notetags - Determines the amount of Class Points the actor starts with in a specific class if Class Points aren't shared across all classes. - Replace 'x' with a numeric value representing the amount of Class Points to start out with. - Replace 'id' with the ID of the class to set starting Class Points for. - Replace 'name' with the name of the class to set starting Class Points for. --- <CP Gain: x> <User CP Gain: x> - Used for: Skill, Item Notetags - When this skill/item is used in battle, the user will acquire 'x' amount of Class Points. - Replace 'x' with a number representing the amount of Class Points for the user to earn upon usage. - This effect will trigger each time per "hit". - This effect will take over the "Per Action Hit" Class Points gain from the Plugin Parameters. --- <Target CP Gain: x> - Used for: Skill, Item Notetags - When this skill/item is used in battle, the target will acquire 'x' amount of Class Points. - Replace 'x' with a number representing the amount of Class Points for the target to earn upon usage. - This effect will trigger each time per "hit". --- <CP: x> - Used for: Enemy Notetags - Determines the amount of Class Points the enemy will give the player's party upon being defeated. - Replace 'x' with a number representing the amount of Class Points to grant the player's party each. - This effect will take over the "Per Enemy" Class Points gain from the Plugin Parameters. --- <Class Points Rate: x%> - Used for: Actor, Class, Weapon, Armor, State Notetags - Increases the amount of Class Points the affected battler will gain by a percentile value. - Replace 'x' with a percentage number representing the amount of Class Points that will be acquired. - This stacks multiplicatively with each other. - This does not apply when Class Points are directly added, lost, or set. --- Job Points-Related Notetags--- <Starting JP: x> - Used for: Actor Notetags - Determines the amount of Job Points the actor starts with in his/her starting class. - Replace 'x' with a numeric value representing the amount of Job Points to start out with. --- <Class id Starting JP: x> <Class name Starting JP: x> - Used for: Actor Notetags - Determines the amount of Job Points the actor starts with in a specific class if Job Points aren't shared across all classes. - Replace 'x' with a numeric value representing the amount of Job Points to start out with. - Replace 'id' with the ID of the class to set starting Job Points for. - Replace 'name' with the name of the class to set starting Job Points for. --- <JP Gain: x> <User JP Gain: x> - Used for: Skill, Item Notetags - When this skill/item is used in battle, the user will acquire 'x' amount of Job Points. - Replace 'x' with a number representing the amount of Job Points for the user to earn upon usage. - This effect will trigger each time per "hit". - This effect will take over the "Per Action Hit" Job Points gain from the Plugin Parameters. --- <Target JP Gain: x> - Used for: Skill, Item Notetags - When this skill/item is used in battle, the target will acquire 'x' amount of Job Points. - Replace 'x' with a number representing the amount of Job Points for the target to earn upon usage. - This effect will trigger each time per "hit". --- <JP: x> - Used for: Enemy Notetags - Determines the amount of Job Points the enemy will give the player's party upon being defeated. - Replace 'x' with a number representing the amount of Job Points to grant the player's party each. - This effect will take over the "Per Enemy" Job Points gain from the Plugin Parameters. --- <Job Points Rate: x%> - Used for: Actor, Class, Weapon, Armor, State Notetags - Increases the amount of Job Points the affected battler will gain by a percentile value. - Replace 'x' with a percentage number representing the amount of Job Points that will be acquired. - This stacks multiplicatively with each other. - This does not apply when Job Points are directly added, lost, or set. --- Combat Log VisuStella MZThe following are notetags that have been added through this plugin. These notetags will not work with your game if this plugin is OFF or not present. --- Bypass-Related Notetags--- <Bypass Combat Log> - Used for: State Notetags - Insert this notetag inside a state to make its state messages ignored. --- Common Event Menu VisuStella MZComment TagsThe following are comment tags that have been added through this plugin. These comment tags will not work with your game if this plugin is OFF or not present. To make a comment tag, create a comment inside of the Common Event and type in any of the comment tags seen below for their effects. --- Basic-Related Comment Tags--- <Name: text> - Used for: Common Event Comment Tag - Replaces the text that appears in the Common Event Menu List with this instead of the Common Event's name found in the database. - Replace 'text' with the name you want to be displayed in the List Window. - If this comment tag is not used, default to the Common Event's name. --- <Icon: x> - Used for: Common Event Comment Tag - Sets the icon shown next to this Common Event. - Replace 'x' with a number representing the icon index used for this Common Event. - If this comment tag is not used, default to the Plugin Parameters. --- <Indent: x> - Used for: Common Event Comment Tag - Indents the name when it appears in the Common Event List. - Replace 'x' with the number of times to indent the name. - Each indent is equal to an icon width. --- <Picture: filename> - Used for: Common Event Comment Tag - Description - Replace 'filename' with a picture found within your game project's img/pictures/ folder. - Filenames are case sensitive. - Leave out the filename extension from the notetag. --- Description-Related Comment Tags--- <Help Description> text text </Help Description> - Used for: Common Event Comment Tag - When this Common Event is selected, display this text in the Help Window. - Replace 'text' with the text you want to display in the Help Window when this Common Event is selected. - You can chain together Comment event commands in the RPG Maker Editor to combine their contents in case you want to add more than 4 lines of text. --- <Subtext Description> text text </Subtext Description> - Used for: Common Event Comment Tag - When this Common Event is selected, display this text in the Sub Window. - Replace 'text' with the text you want to display in the Sub Window when this Common Event is selected. - You can chain together Comment event commands in the RPG Maker Editor to combine their contents in case you want to add more than 4 lines of text. --- <Extra Description x> text text </Extra Description x> - Used for: Common Event Comment Tag - When this Common Event is selected, display this text in the Extra Window. - Replace 'x' with a number from 1 to 10 to determine which Extra Window to display the text in. - Replace 'text' with the text you want to display in the Extra Window when this Common Event is selected. - You can chain together Comment event commands in the RPG Maker Editor to combine their contents in case you want to add more than 4 lines of text. --- Visibility-Related Comment Tags--- <Show Switch: x> <Show All Switches: x,x,x> <Show Any Switches: x,x,x> - Used for: Common Event Comment Tag - Determines the visible status of the Common Event based on switches. - Replace 'x' with the switch ID to determine the Common Event's visibility. - If 'All' notetag variant is used, the Common Event will be hidden until all switches are ON. Then, it would be shown. - If 'Any' notetag variant is used, the Common Event will be shown if any of the switches are ON. Otherwise, it would be hidden. --- <Hide Switch: x> <Hide All Switches: x,x,x> <Hide Any Switches: x,x,x> - Used for: Common Event Comment Tag - Determines the visible status of the Common Event based on switches. - Replace 'x' with the switch ID to determine the Common Event's visibility. - If 'All' notetag variant is used, the Common Event will be shown until all switches are ON. Then, it would be hidden. - If 'Any' notetag variant is used, the Common Event will be hidden if any of the switches are ON. Otherwise, it would be shown. --- JavaScript Comment Tag: VisibilityThe following are notetags made for users with JavaScript knowledge to determine if a Common Event is visible in the menu by code. --- <JS Visible> code code visible = code; </JS Visible> - Used for: Common Event Comment Tag - Determines the visible status of the Common Event based on JavaScript code. - Replace 'code' to determine the type visible status of the Common Event. - You can chain together Comment event commands in the RPG Maker Editor to combine their contents in case you want to add more than 4 lines of code. - The 'visible' variable returns a boolean (true/false) to determine if the Common Event will be visible or not. - All other Common Event conditions must be met in order for this to code to count. --- Enable-Related Comment Tags--- <Enable Switch: x> <Enable All Switches: x,x,x> <Enable Any Switches: x,x,x> - Used for: Common Event Comment Tag - Determines the enabled status of the Common Event based on switches. - Replace 'x' with the switch ID to determine if the Common Event's enabled. - If 'All' notetag variant is used, the Common Event will be disabled until all switches are ON. Then, it would be enabled. - If 'Any' notetag variant is used, the Common Event will be enabled if any of the switches are ON. Otherwise, it would be disabled. --- <Disable Switch: x> <Disable All Switches: x,x,x> <Disable Any Switches: x,x,x> - Used for: Common Event Comment Tag - Determines the enabled status of the Common Event based on switches. - Replace 'x' with the switch ID to determine if the Common Event's enabled. - If 'All' notetag variant is used, the Common Event will be enabled until all switches are ON. Then, it would be disabled. - If 'Any' notetag variant is used, the Common Event will be disabled if any of the switches are ON. Otherwise, it would be enabled. --- JavaScript Comment Tag: EnableThe following are notetags made for users with JavaScript knowledge to determine if a Common Event can be selectable by code. --- <JS Enable> code code enabled = code; </JS Enable> - Used for: Common Event Comment Tag - Determines the enabled status of the Common Event based on JavaScript code. - Replace 'code' to determine the type enabled status of the Common Event. - You can chain together Comment event commands in the RPG Maker Editor to combine their contents in case you want to add more than 4 lines of code. - The 'enabled' variable returns a boolean (true/false) to determine if the Common Event will be enabled or not. - All other Common Event conditions must be met in order for this to code to count. --- Conditional Random Encounters VisuStella MZTo make these comment tags work, insert any of the below comment tags inside a comment found within any of the troop's pages. The page's conditions do not need to be met and can even work with the "Don't Run" condition. If there are multiple comments, the comments will be stringed together allowing for more than 6 lines of conditions. If using the Battle Core's "Base Troop ID(s)" Plugin Parameter, the comments from the Base Troop pages will also be copied over. --- Requirement Comment Tags--- <Random Encounter Requirements>
condition
condition
condition
condition
</Random Encounter Requirements>
- Used for: Troop Page Comment Tags
- Create conditional requirements for this random encounter to be met before
it would appear in the random encounter pool for the map.
- Replace 'condition' with any of the conditions listed in below section.
- Insert and/or remove 'condition' lines to add/remove conditions.
- If you are using the Battle Core, this will NOT work with a Base Troop.
You will get an alert message saying so.
- Why? Because this can cause all of the troops in the game to just shut
off and you don't want that.
Condition ListReplace 'condition' in the notetags in the above section with any of the following to make conditions. These conditions are also used in the Plugin Parameters for the default conditions, too. --- x >= y x > y x === y x !== y x < y x <= y - Replace 'x' and 'y' with any of the following: - 'Switch x' (replace 'x' with a number) for switch x's current state. - 'TRUE', 'FALSE', 'ON', 'OFF' for the opposite x/y value. - Using any of these boolean modifiers must be paired with '===' or '!==' - 'Variable x' (replace 'x' with a number) for variable x's current value. - A numeric value representing a hard number. - '50%' or any other percentile number to represent a rate. - '0.5' or any other float number to represent a rate. - 'Item id Count' for the number of specific items the party owns. - Replace 'id' with the ID of the item. - 'Item name Count' for the number of specific items the party owns. - Replace 'name' with the ID of the item. - 'Weapon id Count' for the number of specific weapons the party owns. - Replace 'id' with the ID of the weapon. - 'Weapon name Count' for the number of specific weapons the party owns. - Replace 'name' with the ID of the weapon. - 'Armor id Count' for the number of specific armors the party owns. - Replace 'id' with the ID of the armor. - 'Armor name Count' for the number of specific armors the party owns. - Replace 'name' with the ID of the armor. - 'Alive Members' for the number of alive party members when drops are being determined. - 'Battle Members' for the number of participating party members in battle. - 'Dead Members' for the number of dead party members when drops are being determined. - 'Death Turn' for the turn the enemy died. If an enemy was revived during battle, then take the most recent turn the enemy has died. - 'Party Gold' for the party's current gold value when drops are being determined. - 'Party Members' for the number of total party members in battle. --- BGM Comment Tags--- <Forced BGM> Name: filename Volume: x Pitch: x Pan: x </Forced BGM> - Used for: Troop Page Comment Tags - Forces a specific BGM to play whenever this specific encounter is primed for battle. - This will override any database settings or music changes from event commands. - Replace 'filename' with the filename of the BGM you want to play. - Do NOT include the file extension. - Replace 'volume' with a number to determine sound volume. - Replace 'pitch' with a number to determine sound pitch. - Replace 'pan' with a number to determine sound panning. --- Consumable Defensive States VisuStella MZThe following are notetags that have been added through this plugin. These notetags will not work with your game if this plugin is OFF or not present. --- Reflection-Related Notetags--- <1 Time Reflect Element: id>
<1 Time Reflect Elements: id, id, id>
<1 Time Reflect Element: name>
<1 Time Reflect Elements: name, name, name>
<x Charges Reflect Element: id>
<x Charges Reflect Elements: id, id, id>
<x Charges Reflect Element: name>
<x Charges Reflect Elements: name, name, name>
- Used for: State Notetags
- Turns the state into a Consumable Defensive State that will reflect the
specific element until consumed.
- Reflection will occur before Evasion and Damage Immunity.
- Replace 'id' with a number representing the element ID to be reflected.
- Replace 'name' with the name of the element to be reflected.
- Remove any \I[x] text codes from it if present.
- If VisuMZ_1_SkillsStatesCore is installed, you may use the 'x' notetags.
- Replace 'x' with the number of usable charges the state would have
before being consumed. Usable charges go down by 1 each trigger.
- IMPORTANT: You cannot use other Consumable Defensive State notetags
together in the same state.
--- <1 Time Reflect SType: id>
<1 Time Reflect STypes: id, id, id>
<1 Time Reflect SType: name>
<1 Time Reflect STypes: name, name, name>
<x Charges Reflect SType: id>
<x Charges Reflect STypes: id, id, id>
<x Charges Reflect SType: name>
<x Charges Reflect STypes: name, name, name>
- Used for: State Notetags
- Turns the state into a Consumable Defensive State that will reflect a
skill with the specific skill type until consumed.
- Reflection will occur before Evasion and Damage Immunity.
- Replace 'id' with a number representing the skill type ID to be reflected.
- Replace 'name' with the name of the skill type to be reflected.
- Remove any \I[x] text codes from it if present.
- If VisuMZ_1_SkillsStatesCore is installed, you may use the 'x' notetags.
- Replace 'x' with the number of usable charges the state would have
before being consumed. Usable charges go down by 1 each trigger.
- IMPORTANT: You cannot use other Consumable Defensive State notetags
together in the same state.
--- <1 Time Reflect Certain Hit Skills>
<1 Time Reflect Physical Hit Skills>
<1 Time Reflect Magical Hit Skills>
<1 Time Reflect All Skills>
<x Charges Reflect Certain Hit Skills>
<x Charges Reflect Physical Hit Skills>
<x Charges Reflect Magical Hit Skills>
<x Charges Reflect All Skills>
- Used for: State Notetags
- Turns the state into a Consumable Defensive State that will reflect a
skill with the specific hit type until consumed.
- Reflection will occur before Evasion and Damage Immunity.
- If VisuMZ_1_SkillsStatesCore is installed, you may use the 'x' notetags.
- Replace 'x' with the number of usable charges the state would have
before being consumed. Usable charges go down by 1 each trigger.
- IMPORTANT: You cannot use other Consumable Defensive State notetags
together in the same state.
--- <1 Time Reflect Certain Hit Items>
<1 Time Reflect Physical Hit Items>
<1 Time Reflect Magical Hit Items>
<1 Time Reflect All Items>
<x Charges Reflect Certain Hit Items>
<x Charges Reflect Physical Hit Items>
<x Charges Reflect Magical Hit Items>
<x Charges Reflect All Items>
- Used for: State Notetags
- Turns the state into a Consumable Defensive State that will reflect an
item with the specific hit type until consumed.
- Reflection will occur before Evasion and Damage Immunity.
- If VisuMZ_1_SkillsStatesCore is installed, you may use the 'x' notetags.
- Replace 'x' with the number of usable charges the state would have
before being consumed. Usable charges go down by 1 each trigger.
- IMPORTANT: You cannot use other Consumable Defensive State notetags
together in the same state.
--- <1 Time Reflect Certain Hit Actions>
<1 Time Reflect Physical Hit Actions>
<1 Time Reflect Magical Hit Actions>
<1 Time Reflect All Actions>
<x Charges Reflect Certain Hit Actions>
<x Charges Reflect Physical Hit Actions>
<x Charges Reflect Magical Hit Actions>
<x Charges Reflect All Actions>
- Used for: State Notetags
- Turns the state into a Consumable Defensive State that will reflect an
action (skill and/or item) with the specific hit type until consumed.
- Reflection will occur before Evasion and Damage Immunity.
- If VisuMZ_1_SkillsStatesCore is installed, you may use the 'x' notetags.
- Replace 'x' with the number of usable charges the state would have
before being consumed. Usable charges go down by 1 each trigger.
- IMPORTANT: You cannot use other Consumable Defensive State notetags
together in the same state.
--- Evasion-Related Notetags--- <1 Time Evasion Element: id>
<1 Time Evasion Elements: id, id, id>
<1 Time Evasion Element: name>
<1 Time Evasion Elements: name, name, name>
<x Charges Evasion Element: id>
<x Charges Evasion Elements: id, id, id>
<x Charges Evasion Element: name>
<x Charges Evasion Elements: name, name, name>
- Used for: State Notetags
- Turns the state into a Consumable Defensive State that will evade the
specific element until consumed.
- Evasion will occur after Reflection and before Damage Immunity.
- Replace 'id' with a number representing the element ID to be evaded.
- Replace 'name' with the name of the element to be evaded.
- Remove any \I[x] text codes from it if present.
- If VisuMZ_1_SkillsStatesCore is installed, you may use the 'x' notetags.
- Replace 'x' with the number of usable charges the state would have
before being consumed. Usable charges go down by 1 each trigger.
- IMPORTANT: You cannot use other Consumable Defensive State notetags
together in the same state.
--- <1 Time Evasion SType: id>
<1 Time Evasion STypes: id, id, id>
<1 Time Evasion SType: name>
<1 Time Evasion STypes: name, name, name>
<x Charges Evasion SType: id>
<x Charges Evasion STypes: id, id, id>
<x Charges Evasion SType: name>
<x Charges Evasion STypes: name, name, name>
- Used for: State Notetags
- Turns the state into a Consumable Defensive State that will evade a
skill with the specific skill type until consumed.
- Evasion will occur after Reflection and before Damage Immunity.
- Replace 'id' with a number representing the skill type ID to be evaded.
- Replace 'name' with the name of the skill type to be evaded.
- Remove any \I[x] text codes from it if present.
- If VisuMZ_1_SkillsStatesCore is installed, you may use the 'x' notetags.
- Replace 'x' with the number of usable charges the state would have
before being consumed. Usable charges go down by 1 each trigger.
- IMPORTANT: You cannot use other Consumable Defensive State notetags
together in the same state.
--- <1 Time Evasion Certain Hit Skills>
<1 Time Evasion Physical Hit Skills>
<1 Time Evasion Magical Hit Skills>
<1 Time Evasion All Skills>
<x Charges Evasion Certain Hit Skills>
<x Charges Evasion Physical Hit Skills>
<x Charges Evasion Magical Hit Skills>
<x Charges Evasion All Skills>
- Used for: State Notetags
- Turns the state into a Consumable Defensive State that will evade a
skill with the specific hit type until consumed.
- Evasion will occur after Reflection and before Damage Immunity.
- If VisuMZ_1_SkillsStatesCore is installed, you may use the 'x' notetags.
- Replace 'x' with the number of usable charges the state would have
before being consumed. Usable charges go down by 1 each trigger.
- IMPORTANT: You cannot use other Consumable Defensive State notetags
together in the same state.
--- <1 Time Evasion Certain Hit Items>
<1 Time Evasion Physical Hit Items>
<1 Time Evasion Magical Hit Items>
<1 Time Evasion All Items>
<x Charges Evasion Certain Hit Items>
<x Charges Evasion Physical Hit Items>
<x Charges Evasion Magical Hit Items>
<x Charges Evasion All Items>
- Used for: State Notetags
- Turns the state into a Consumable Defensive State that will evade an
item with the specific hit type until consumed.
- Evasion will occur after Reflection and before Damage Immunity.
- If VisuMZ_1_SkillsStatesCore is installed, you may use the 'x' notetags.
- Replace 'x' with the number of usable charges the state would have
before being consumed. Usable charges go down by 1 each trigger.
- IMPORTANT: You cannot use other Consumable Defensive State notetags
together in the same state.
--- <1 Time Evasion Certain Hit Actions>
<1 Time Evasion Physical Hit Actions>
<1 Time Evasion Magical Hit Actions>
<1 Time Evasion All Actions>
<x Charges Evasion Certain Hit Actions>
<x Charges Evasion Physical Hit Actions>
<x Charges Evasion Magical Hit Actions>
<x Charges Evasion All Actions>
- Used for: State Notetags
- Turns the state into a Consumable Defensive State that will evade an
action (skill and/or item) with the specific hit type until consumed.
- Evasion will occur after Reflection and before Damage Immunity.
- If VisuMZ_1_SkillsStatesCore is installed, you may use the 'x' notetags.
- Replace 'x' with the number of usable charges the state would have
before being consumed. Usable charges go down by 1 each trigger.
- IMPORTANT: You cannot use other Consumable Defensive State notetags
together in the same state.
--- Immunity-Related Notetags--- <1 Time Immunity Element: id>
<1 Time Immunity Elements: id, id, id>
<1 Time Immunity Element: name>
<1 Time Immunity Elements: name, name, name>
<x Charges Immunity Element: id>
<x Charges Immunity Elements: id, id, id>
<x Charges Immunity Element: name>
<x Charges Immunity Elements: name, name, name>
- Used for: State Notetags
- Turns the state into a Consumable Defensive State that will nullify damage
from the specific element until consumed. Other effects may still occur.
- Immunity will occur after Reflection and Evasion.
- Replace 'id' with a number representing the element ID to nullify.
- Replace 'name' with the name of the element to nullify.
- Remove any \I[x] text codes from it if present.
- If VisuMZ_1_SkillsStatesCore is installed, you may use the 'x' notetags.
- Replace 'x' with the number of usable charges the state would have
before being consumed. Usable charges go down by 1 each trigger.
- IMPORTANT: You cannot use other Consumable Defensive State notetags
together in the same state.
--- <1 Time Immunity SType: id>
<1 Time Immunity STypes: id, id, id>
<1 Time Immunity SType: name>
<1 Time Immunity STypes: name, name, name>
<x Charges Immunity SType: id>
<x Charges Immunity STypes: id, id, id>
<x Charges Immunity SType: name>
<x Charges Immunity STypes: name, name, name>
- Used for: State Notetags
- Turns the state into a Consumable Defensive State that will nullify damage
from a skill with the specific skill type until consumed. Other effects
may still occur.
- Immunity will occur after Reflection and Evasion.
- Replace 'id' with a number representing the skill type ID to nullify.
- Replace 'name' with the name of the skill type to nullify.
- Remove any \I[x] text codes from it if present.
- If VisuMZ_1_SkillsStatesCore is installed, you may use the 'x' notetags.
- Replace 'x' with the number of usable charges the state would have
before being consumed. Usable charges go down by 1 each trigger.
- IMPORTANT: You cannot use other Consumable Defensive State notetags
together in the same state.
--- <1 Time Immunity Certain Hit Skills>
<1 Time Immunity Physical Hit Skills>
<1 Time Immunity Magical Hit Skills>
<1 Time Immunity All Skills>
<x Charges Immunity Certain Hit Skills>
<x Charges Immunity Physical Hit Skills>
<x Charges Immunity Magical Hit Skills>
<x Charges Immunity All Skills>
- Used for: State Notetags
- Turns the state into a Consumable Defensive State that will nullify damage
from a skill with the specific hit type until consumed. Other effects may
still occur.
- Immunity will occur after Reflection and Evasion.
- If VisuMZ_1_SkillsStatesCore is installed, you may use the 'x' notetags.
- Replace 'x' with the number of usable charges the state would have
before being consumed. Usable charges go down by 1 each trigger.
- IMPORTANT: You cannot use other Consumable Defensive State notetags
together in the same state.
--- <1 Time Immunity Certain Hit Items>
<1 Time Immunity Physical Hit Items>
<1 Time Immunity Magical Hit Items>
<1 Time Immunity All Items>
<x Charges Immunity Certain Hit Items>
<x Charges Immunity Physical Hit Items>
<x Charges Immunity Magical Hit Items>
<x Charges Immunity All Items>
- Used for: State Notetags
- Turns the state into a Consumable Defensive State that will nullify damage
from an item with the specific hit type until consumed. Other effects may
still occur.
- Immunity will occur after Reflection and Evasion.
- If VisuMZ_1_SkillsStatesCore is installed, you may use the 'x' notetags.
- Replace 'x' with the number of usable charges the state would have
before being consumed. Usable charges go down by 1 each trigger.
- IMPORTANT: You cannot use other Consumable Defensive State notetags
together in the same state.
--- <1 Time Immunity Certain Hit Actions>
<1 Time Immunity Physical Hit Actions>
<1 Time Immunity Magical Hit Actions>
<1 Time Immunity All Actions>
<x Charges Immunity Certain Hit Actions>
<x Charges Immunity Physical Hit Actions>
<x Charges Immunity Magical Hit Actions>
<x Charges Immunity All Actions>
- Used for: State Notetags
- Turns the state into a Consumable Defensive State that will nullify damage
from an action (skill and/or item) with the specific hit type until
consumed. Other effects may still occur.
- Immunity will occur after Reflection and Evasion.
- If VisuMZ_1_SkillsStatesCore is installed, you may use the 'x' notetags.
- Replace 'x' with the number of usable charges the state would have
before being consumed. Usable charges go down by 1 each trigger.
- IMPORTANT: You cannot use other Consumable Defensive State notetags
together in the same state.
--- Stackable Charges-Related Notetags--- <Max Stackable Charges: x> - State Notetags - Requires VisuMZ_1_SkillsStatesCore! - Allows the max stackable charges for the state to become 'x'. - Replace 'x' with a number representing the maximum charges the state can potentially have. If 'x' is lower than the default charge amount, 'x' will become the default charge amount. - This is not a Consumable Defensive State notetag and can therefore be used together with the above notetags. - If this notetag is not present, whenever a Consumable Defensive State is reapplied, the charge number resets. With this notetag, the charges become stackable up to a maximum of 'x'. --- Core Engine VisuStella MZThe following are notetags that have been added through this plugin. These notetags will not work with your game if this plugin is OFF or not present. Actors-Related NotetagsParameter limits can be adjusted in the Plugin Parameters, but this won't lift the ability to change the values of an actor's initial or max level past the editor's limits. Instead, this must be done through the usage of notetags to accomplish the feat. --- <Max Level: x> - Used for: Actor Notetags - Replace 'x' with an integer to determine the actor's max level. - This allows you to go over the database limit of 99. - If this notetag isn't used, default to the actor's database value. --- <Initial Level: x> - Used for: Actor Notetags - Replace 'x' with an integer to determine the actor's initial level. - This allows you to go over the database limit of 99. - If this notetag isn't used, default to the actor's database value. --- Classes-Related NotetagsAs actor levels can now surpass 99 due to the notetag system, there may be some skills you wish certain classes can learn upon reaching higher levels past 99, too. --- <Learn At Level: x> - Used for: Class Skill Learn Notetags - Replace 'x' with an integer to determine the level this class will learn the associated skill at. - This allows you to go over the database limit of 99. - If this notetag isn't used, default to the class's database value. --- Enemies-Related NotetagsEnemies are now given levels. The levels don't do anything except to serve as a container for a number value. This way, levels can be used in damage formulas (ie. a.atk - b.level) without causing any errors. To give enemies levels, use the notetags below. These notetags also allow you to adjust the base parameters, EXP, and Gold past the database limitations. --- <Level: x> - Used for: Enemy Notetags - Replace 'x' with an integer to determine the enemy's level. - If no level is declared, the level will default to 1. --- <param: x>
- Used for: Enemy Notetags
- Replace 'param' with 'MaxHP', 'MaxMP', 'ATK', 'DEF', 'MAT', 'MDF', 'AGI',
or 'LUK' to determine which parameter to alter.
- This notetag does NOT work with X Parameters, S Parameters, or any
custom parameters. This notetag ONLY works with the base parameters.
- Replace 'x' with an integer to set an enemy's 'param' base value.
- This will overwrite the enemy's database value and can exceed the original
value limitation in the database.
- If these notetags aren't used, default to the enemy's database value.
--- <EXP: x> <Gold: x> - Used for: Enemy Notetags - Replace 'x' with an integer to determine the enemy's EXP or Gold values. - This will overwrite the enemy's database value and can exceed the original value limitation in the database. - If these notetags aren't used, default to the enemy's database value. --- Animations-Related NotetagsAnimations in RPG Maker MZ are done by Effekseer and the animation system has been revamped. However, the animations are only centered on the targets now, and cannot be attached to the head or foot. Insert these tags into the names of the animations in the database to adjust their positions. --- <Head> <Foot> - Used for: Animation Name Tags - Will set the animation to anchor on top of the sprite (if <Head> is used) or at the bottom of the sprite (if <Foot> is used). --- <Anchor X: x> <Anchor Y: y> <Anchor: x, y> - Used for: Animation Name Tags - Will anchor the animation at a specific point within the sprite based on the 'x' and 'y' values. - Replace 'x' and 'y' with numeric values representing their positions based on a rate where 0.0 is the furthest left/up (x, y respectively) to 1.0 for the furthest right/down (x, y respectively). Examples: <Anchor X: 0.4> <Anchor Y: 0.8> <Anchor: 0.2, 0.9> --- <Offset X: +x> <Offset X: -x> <Offset Y: +y> <Offset Y: -y> <Offset: +x, +y> <Offset: -x, -y> - Used for: Animation Name Tags - Will anchor the animation to be offset by an exact number of pixels. - This does the same the editor does, except it lets you input values greater than 999 and lower than -999. - Replace 'x' and 'y' with numeric values the exact number of pixels to offset the animation's x and y coordinates by. Examples: <Offset X: +20> <Offset Y: -50> <Offset: +10, -30> --- <Mirror Offset X> <No Mirror Offset X> - Used for: Animation Name Tags - If an animation is mirrored, you can choose to have the animation's Offset X value be mirrored, too (or not at all). - If no name tag is discovered, this will use the setting found in the Plugin Parameters > QoL Settings > Misc > Ani: Mirror Offset X setting. --- <Rate: x> - Used for: MV Animation Name Tags - Allows you to adjust the update for this MV Animation. - Does NOT work with Effekseer animations. - The lower the number, the faster. - Replace 'x' with a number representing the animation update rate. - Default rate: 4. - Minimum rate: 1. - Maximum rate: 10. --- Quality of Life-Related NotetagsBy default, RPG Maker MZ does not offer an encounter step minimum after a random encounter has finished. This means that one step immediately after finishing a battle, the player can immediately enter another battle. The Quality of Life improvement: Minimum Encounter Steps allows you to set a buffer range between battles for the player to have some breathing room. --- <Minimum Encounter Steps: x> - Used for: Map Notetags - Replace 'x' with the minimum number of steps before the player enters a random encounter on that map. - If this notetag is not used, then the minimum encounter steps for the map will default to Quality of Life Settings => Encounter Rate Min. --- Tile shadows are automatically added to certain tiles in the map editor. These tile shadows may or may not fit some types of maps. You can turn them on/off with the Quality of Life Plugin Parameters or you can override the settings with the following notetags: <Show Tile Shadows> <Hide Tile Shadows> - Used for: Map Notetags - Use the respective notetag for the function you wish to achieve. - If this notetag is not used, then the tileset shadow settings for the map will default to Quality of Life Settings => No Tile Shadows. --- <Scroll Lock X> <Scroll Lock Y> - Used for: Map Notetags - Will prevent the map from being able to scroll left/right(x) or up/down(y) if these notetags are present. - Useful for when maps are just slightly smaller than normal and the tiny scrolling is distracting. - This will use the display nudge setting found in the Plugin Parameters. - This setting will be disabled if the map is zoomed in. --- <Scroll Lock X: x>
<Scroll Lock Y: y>
- Used for: Map Notetags
- Will prevent the map from being able to scroll left/right(x) or up/down(y)
if these notetags are present and will nudge the map camera slightly.
- Useful for when maps are just slightly smaller than normal and the tiny
scrolling is distracting.
- Replace 'x' and 'y' with numbers between 0 and 1 to represent how much is
being judged.
- For example, for a 1280x720 resolution, a 27 tile wide map will benefit
from a nudge of 0.15625. Play with these numbers to determine the best
value for your maps.
- This setting will be disabled if the map is zoomed in.
--- Basic, X, and S Parameters-Related NotetagsA battler's parameters, or stats as some devs know them as, are the values that determine how a battler performs. These settings allow you to alter behaviors and give boosts to trait objects in a more controlled manner. --- <param Plus: +x> <param Plus: -x> - Used for: Actor, Class, Weapon, Armor, Enemy, State Notetags - Adds or subtracts 'x' to 'param' plus value when calculating totals. - Replace 'param' with 'MaxHP', 'MaxMP', 'ATK', 'DEF', 'MAT', 'MDF', 'AGI', or 'LUK' to determine which parameter to modify. - Replace 'x' with an integer on how much to adjust the parameter by. - This is used to calculate the 'plus' portion in the Parameter Settings => Basic Parameter => Formula. --- <param Rate: x%> <param Rate: x.x> - Used for: Actor, Class, Weapon, Armor, Enemy, State Notetags - Changes 'param' rate to 'x' to alter the total 'param' value. - Replace 'param' with 'MaxHP', 'MaxMP', 'ATK', 'DEF', 'MAT', 'MDF', 'AGI', or 'LUK' to determine which parameter to modify. - Replace 'x' with a percentage (ie. 150%) or a rate (ie. 1.5). - This is used to calculate the 'paramRate' portion in Parameter Settings => Basic Parameter => Formula. --- <param Flat: +x> <param Flat: -x> - Used for: Actor, Class, Weapon, Armor, Enemy, State Notetags - Adds or subtracts 'x' to 'param' plus value when calculating totals. - Replace 'param' with 'MaxHP', 'MaxMP', 'ATK', 'DEF', 'MAT', 'MDF', 'AGI', or 'LUK' to determine which parameter to modify. - Replace 'x' with an integer on how much to adjust the parameter by. - This is used to calculate the 'flatBonus' portion in Parameter Settings => Basic Parameter => Formula. --- <param Max: x> - Used for: Actor, Class, Weapon, Armor, Enemy, State Notetags - Sets max caps for the 'param' to be 'x'. If there are multiple max caps available to the unit, then the highest will be selected. - Replace 'param' with 'MaxHP', 'MaxMP', 'ATK', 'DEF', 'MAT', 'MDF', 'AGI', or 'LUK' to determine which parameter to modify. - Replace 'x' with an integer to determine what the max cap should be. --- <xparam Plus: +x%> <xparam Plus: -x%> <xparam Plus: +x.x> <xparam Plus: -x.x> - Used for: Actor, Class, Weapon, Armor, Enemy, State Notetags - Adds or subtracts 'x' to 'xparam' plus value when calculating totals. - Replace 'xparam' with 'HIT', 'EVA', 'CRI', 'CEV', 'MEV', 'MRF', 'CNT', 'HRG', 'MRG', 'TRG' to determine which X parameter to modify. - Replace 'x' with a percentage (ie. 150%) or a rate (ie. 1.5). - This is used to calculate the 'plus' portion in the Parameter Settings => X Parameter => Formula. --- <xparam Rate: x%> <xparam Rate: x.x> - Used for: Actor, Class, Weapon, Armor, Enemy, State Notetags - Changes 'param' rate to 'x' to alter the total 'xparam' value. - Replace 'xparam' with 'HIT', 'EVA', 'CRI', 'CEV', 'MEV', 'MRF', 'CNT', 'HRG', 'MRG', 'TRG' to determine which X parameter to modify. - Replace 'x' with a percentage (ie. 150%) or a rate (ie. 1.5). - This is used to calculate the 'paramRate' portion in Parameter Settings => X Parameter => Formula. --- <xparam Flat: +x%> <xparam Flat: -x%> <xparam Flat: +x.x> <xparam Flat: -x.x> - Used for: Actor, Class, Weapon, Armor, Enemy, State Notetags - Adds or subtracts 'x' to 'xparam' plus value when calculating totals. - Replace 'xparam' with 'HIT', 'EVA', 'CRI', 'CEV', 'MEV', 'MRF', 'CNT', 'HRG', 'MRG', 'TRG' to determine which X parameter to modify. - Replace 'x' with a percentage (ie. 150%) or a rate (ie. 1.5). - This is used to calculate the 'flatBonus' portion in Parameter Settings => X Parameter => Formula. --- <sparam Plus: +x%> <sparam Plus: -x%> <sparam Plus: +x.x> <sparam Plus: -x.x> - Used for: Actor, Class, Weapon, Armor, Enemy, State Notetags - Adds or subtracts 'x' to 'sparam' plus value when calculating totals. - Replace 'sparam' with 'TGR', 'GRD', 'REC', 'PHA', 'MCR', 'TCR', 'PDR', 'MDR', 'FDR', 'EXR' to determine which S parameter to modify. - Replace 'x' with a percentage (ie. 150%) or a rate (ie. 1.5). - This is used to calculate the 'plus' portion in the Parameter Settings => S Parameter => Formula. --- <sparam Rate: x%> <sparam Rate: x.x> - Used for: Actor, Class, Weapon, Armor, Enemy, State Notetags - Changes 'param' rate to 'x' to alter the total 'sparam' value. - Replace 'sparam' with 'TGR', 'GRD', 'REC', 'PHA', 'MCR', 'TCR', 'PDR', 'MDR', 'FDR', 'EXR' to determine which S parameter to modify. - Replace 'x' with a percentage (ie. 150%) or a rate (ie. 1.5). - This is used to calculate the 'paramRate' portion in Parameter Settings => S Parameter => Formula. --- <sparam Flat: +x%> <sparam Flat: -x%> <sparam Flat: +x.x> <sparam Flat: -x.x> - Used for: Actor, Class, Weapon, Armor, Enemy, State Notetags - Adds or subtracts 'x' to 'sparam' plus value when calculating totals. - Replace 'sparam' with 'TGR', 'GRD', 'REC', 'PHA', 'MCR', 'TCR', 'PDR', 'MDR', 'FDR', 'EXR' to determine which S parameter to modify. - Replace 'x' with a percentage (ie. 150%) or a rate (ie. 1.5). - This is used to calculate the 'flatBonus' portion in Parameter Settings => S Parameter => Formula. --- JavaScript Notetags: Basic, X, and S ParametersThe following are notetags made for users with JavaScript knowledge. These notetags are primarily aimed at Basic, X, and S Parameters. --- <JS param Plus: code> - Used for: Actor, Class, Weapon, Armor, Enemy, State Notetags - Runs 'code' to change the 'param' plus value. - Replace 'param' with 'MaxHP', 'MaxMP', 'ATK', 'DEF', 'MAT', 'MDF', 'AGI', or 'LUK' to determine which parameter to modify. - Replace 'code' with JavaScript code to determine how much to change the plus amount for the parameter's total calculation. - This is used to calculate the 'plus' portion in the Parameter Settings => Basic Parameter => Formula. --- <JS param Rate: code> - Used for: Actor, Class, Weapon, Armor, Enemy, State Notetags - Runs 'code' to change the 'param' rate value. - Replace 'param' with 'MaxHP', 'MaxMP', 'ATK', 'DEF', 'MAT', 'MDF', 'AGI', or 'LUK' to determine which parameter to modify. - Replace 'code' with JavaScript code to determine how much to change the param rate amount for the parameter's total calculation. - This is used to calculate the 'paramRate' portion in Parameter Settings => Basic Parameter => Formula. --- <JS param Flat: code> - Used for: Actor, Class, Weapon, Armor, Enemy, State Notetags - Runs 'code' to change the 'param' flat value. - Replace 'param' with 'MaxHP', 'MaxMP', 'ATK', 'DEF', 'MAT', 'MDF', 'AGI', or 'LUK' to determine which parameter to modify. - Replace 'code' with JavaScript code to determine how much to change the flat bonus amount for the parameter's total calculation. - This is used to calculate the 'flatBonus' portion in Parameter Settings => Basic Parameter => Formula. --- <JS param Max: code> - Used for: Actor, Class, Weapon, Armor, Enemy, State Notetags - Runs 'code' to determine what the max cap for 'param' should be. If there are multiple max caps available to the unit, then the highest is selected. - Replace 'param' with 'MaxHP', 'MaxMP', 'ATK', 'DEF', 'MAT', 'MDF', 'AGI', or 'LUK' to determine which parameter to modify. - Replace 'code' with JavaScript code to determine the max cap for the desired parameter. --- <JS xparam Plus: code> - Used for: Actor, Class, Weapon, Armor, Enemy, State Notetags - Runs 'code' to change the 'xparam' plus value. - Replace 'xparam' with 'HIT', 'EVA', 'CRI', 'CEV', 'MEV', 'MRF', 'CNT', 'HRG', 'MRG', 'TRG' to determine which X parameter to modify. - Replace 'code' with JavaScript code to determine how much to change the plus amount for the X parameter's total calculation. - This is used to calculate the 'plus' portion in the Parameter Settings => X Parameter => Formula. --- <JS xparam Rate: code> - Used for: Actor, Class, Weapon, Armor, Enemy, State Notetags - Runs 'code' to change the 'xparam' rate value. - Replace 'xparam' with 'HIT', 'EVA', 'CRI', 'CEV', 'MEV', 'MRF', 'CNT', 'HRG', 'MRG', 'TRG' to determine which X parameter to modify. - Replace 'code' with JavaScript code to determine how much to change the param rate amount for the X parameter's total calculation. - This is used to calculate the 'paramRate' portion in Parameter Settings => X Parameter => Formula. --- <JS xparam Flat: code> - Used for: Actor, Class, Weapon, Armor, Enemy, State Notetags - Runs 'code' to change the 'xparam' flat value. - Replace 'xparam' with 'HIT', 'EVA', 'CRI', 'CEV', 'MEV', 'MRF', 'CNT', 'HRG', 'MRG', 'TRG' to determine which X parameter to modify. - Replace 'code' with JavaScript code to determine how much to change the flat bonus amount for the X parameter's total calculation. - This is used to calculate the 'flatBonus' portion in Parameter Settings => X Parameter => Formula. --- <JS sparam Plus: code> - Used for: Actor, Class, Weapon, Armor, Enemy, State Notetags - Runs 'code' to change the 'sparam' plus value. - Replace 'sparam' with 'TGR', 'GRD', 'REC', 'PHA', 'MCR', 'TCR', 'PDR', 'MDR', 'FDR', 'EXR' to determine which S parameter to modify. - Replace 'code' with JavaScript code to determine how much to change the plus amount for the S parameter's total calculation. - This is used to calculate the 'plus' portion in the Parameter Settings => S Parameter => Formula. --- <JS sparam Rate: code> - Used for: Actor, Class, Weapon, Armor, Enemy, State Notetags - Runs 'code' to change the 'sparam' rate value. - Replace 'sparam' with 'TGR', 'GRD', 'REC', 'PHA', 'MCR', 'TCR', 'PDR', 'MDR', 'FDR', 'EXR' to determine which S parameter to modify. - Replace 'code' with JavaScript code to determine how much to change the param rate amount for the S parameter's total calculation. - This is used to calculate the 'paramRate' portion in Parameter Settings => S Parameter => Formula. --- <JS sparam Flat: code> - Used for: Actor, Class, Weapon, Armor, Enemy, State Notetags - Runs 'code' to change the 'sparam' flat value. - Replace 'sparam' with 'TGR', 'GRD', 'REC', 'PHA', 'MCR', 'TCR', 'PDR', 'MDR', 'FDR', 'EXR' to determine which S parameter to modify. - Replace 'code' with JavaScript code to determine how much to change the flat bonus amount for the S parameter's total calculation. - This is used to calculate the 'flatBonus' portion in Parameter Settings => S Parameter => Formula. --- Battle Setting-Related NotetagsThese tags will change the settings for battle regardless of how the battle system is set up normally. Insert these tags in either the noteboxes of maps or the names of troops for them to take effect. If both are present for a specific battle, then priority goes to the setting found in the troop name. --- <FV> <Front View> <Battle View: FV> <Battle View: Front View> - Used for: Map Notetags, Troop Name Tags, and Troop Comment Tags - Changes the perspective of battle to front view for this specific map or battle. - Make sure you have the enemy image files available in the img/enemies/ folder as they will used instead of the "sv_enemies" graphics. - If using Troop Comment Tags, then as long as the tag appears in a comment found on any of the Troop's pages (even if they don't run), the tag will be considered in effect. --- <SV> <Side View> <Battle View: SV> <Battle View: Side View> - Used for: Map Notetags, Troop Name Tags, and Troop Comment Tags - Changes the perspective of battle to side view for this specific map or battle. - Make sure you have the enemy image files available in the img/sv_enemies/ folder as they will used instead of the "enemies" graphics. - Make sure your actors have "sv_actor" graphics attached to them. - If using Troop Comment Tags, then as long as the tag appears in a comment found on any of the Troop's pages (even if they don't run), the tag will be considered in effect. --- <DTB> <Battle System: DTB> - Used for: Map Notetags, Troop Name Tags, and Troop Comment Tags - Changes the battle system to the default battle system (DTB). - If using Troop Comment Tags, then as long as the tag appears in a comment found on any of the Troop's pages (even if they don't run), the tag will be considered in effect. --- <TPB Active> <ATB Active> <Battle System: TPB Active> <Battle System: ATB Active> <TPB Wait> <ATB Wait> <Battle System: TPB Wait> <Battle System: ATB Wait> - Used for: Map Notetags, Troop Name Tags, and Troop Comment Tags - Changes the battle system to the time progress battle system (TPB) or active turn battle system (ATB) if you have VisuMZ_2_BattleSystemATB installed for the game project. - If using Troop Comment Tags, then as long as the tag appears in a comment found on any of the Troop's pages (even if they don't run), the tag will be considered in effect. --- <BTB> <Battle System: BTB> <CTB> <Battle System: CTB> <ETB> <Battle System: ETB> <FTB> <Battle System: FTB> <OTB> <Battle System: OTB> <PTB> <Battle System: PTB> <STB> <Battle System: STB> - Used for: Map Notetags, Troop Name Tags, and Troop Comment Tags - Changes the battle system to the respective battle system as long as you have those plugins installed in the current project. - If using Troop Comment Tags, then as long as the tag appears in a comment found on any of the Troop's pages (even if they don't run), the tag will be considered in effect. --- <Grid> <Battle Grid> <No Grid> <No Battle Grid> - Used for: Map Notetags, Troop Name Tags, and Troop Comment Tags - Requires VisuMZ_2_BattleGridSystem! - Changes the battle system to utilize the Battle Grid System or not. - If using Troop Comment Tags, then as long as the tag appears in a comment found on any of the Troop's pages (even if they don't run), the tag will be considered in effect. - If none of these notetags or comment tags are found, refer to the default settings found in the Plugin Parameters. --- Database Inheritance VisuStella MZThe following are notetags that have been added through this plugin. These notetags will not work with your game if this plugin is OFF or not present. --- Everything-Related Notetags--- <Inherit Everything From: id> <Inherit Everything From: id, id, id> <Inherit Everything From: name> <Inherit Everything From: name, name, name> - Used for: Actor, Class, Skill, Item, Weapon, Armor, Enemy, State, and Tileset Notetags - This will inherit notetags, basic properties, damage formulas, parameters, action patterns, traits, and effects from the parent object. - Replace 'id' with the ID of the database object to inherit from. - Replace 'name' with the name of the database object to inherit from. - The database object must exist within the same database. - You cannot inherit data from objects of a different database. - Insert multiple inheritance notetags to inherit from more than one parent object for this child object. --- <Inherit First Everything> - Used for: Actor, Class, Skill, Item, Weapon, Armor, Enemy, State, and Tileset Notetags - This will inherit notetags, basic properties, damage formulas, parameters, action patterns, traits, and effects from the parent object. - This will inherit from the first object of the same database. - Insert multiple inheritance notetags to inherit from more than one parent object for this child object. --- <Inherit Last Everything> - Used for: Actor, Class, Skill, Item, Weapon, Armor, Enemy, State, and Tileset Notetags - This will inherit notetags, basic properties, damage formulas, parameters, action patterns, traits, and effects from the parent object. - This will inherit from last object of the same database. - Insert multiple inheritance notetags to inherit from more than one parent object for this child object. --- <Inherit Previous Everything> - Used for: Actor, Class, Skill, Item, Weapon, Armor, Enemy, State, and Tileset Notetags - This will inherit notetags, basic properties, damage formulas, parameters, action patterns, traits, and effects from the parent object. - This will inherit from previous object of the same database. - Insert multiple inheritance notetags to inherit from more than one parent object for this child object. --- <Inherit Next Everything> - Used for: Actor, Class, Skill, Item, Weapon, Armor, Enemy, State, and Tileset Notetags - This will inherit notetags, basic properties, damage formulas, parameters, action patterns, traits, and effects from the parent object. - This will inherit from next object of the same database. - Insert multiple inheritance notetags to inherit from more than one parent object for this child object. --- Notetag Inheritance-Related Notetags--- <Inherit Notetags From: id> <Inherit Notetags From: id, id, id> <Inherit Notetags From: name> <Inherit Notetags From: name, name, name> - Used for: Actor, Class, Skill, Item, Weapon, Armor, Enemy, State, and Tileset Notetags - This will inherit notetags from the parent object. - Replace 'id' with the ID of the database object to inherit from. - Replace 'name' with the name of the database object to inherit from. - The database object must exist within the same database. - You cannot inherit data from objects of a different database. - Insert multiple inheritance notetags to inherit from more than one parent object for this child object. --- <Inherit First Notetags> - Used for: Actor, Class, Skill, Item, Weapon, Armor, Enemy, State, and Tileset Notetags - This will inherit notetags from the parent object. - This will inherit from the first object of the same database. - Insert multiple inheritance notetags to inherit from more than one parent object for this child object. --- <Inherit Last Notetags> - Used for: Actor, Class, Skill, Item, Weapon, Armor, Enemy, State, and Tileset Notetags - This will inherit notetags from the parent object. - This will inherit from last object of the same database. - Insert multiple inheritance notetags to inherit from more than one parent object for this child object. --- <Inherit Previous Notetags> - Used for: Actor, Class, Skill, Item, Weapon, Armor, Enemy, State, and Tileset Notetags - This will inherit notetags from the parent object. - This will inherit from previous object of the same database. - Insert multiple inheritance notetags to inherit from more than one parent object for this child object. --- <Inherit Next Notetags> - Used for: Actor, Class, Skill, Item, Weapon, Armor, Enemy, State, and Tileset Notetags - This will inherit notetags from the parent object. - This will inherit from next object of the same database. - Insert multiple inheritance notetags to inherit from more than one parent object for this child object. --- Basic Property Inheritance-Related Notetags--- <Inherit Properties From: id> <Inherit Properties From: id, id, id> <Inherit Properties From: name> <Inherit Properties From: name, name, name> - Used for: Actor, Class, Skill, Item, Weapon, Armor, Enemy, State, and Tileset Notetags - This will inherit basic properties determined by the plugin parameters. - Replace 'id' with the ID of the database object to inherit from. - Replace 'name' with the name of the database object to inherit from. - The database object must exist within the same database. - You cannot inherit data from objects of a different database. - Insert multiple inheritance notetags to inherit from more than one parent object for this child object. - If there are multiple parent objects, the inheritance for overwritten properties will come from the last listed parent object. --- <Inherit First Properties> - Used for: Actor, Class, Skill, Item, Weapon, Armor, Enemy, State, and Tileset Notetags - This will inherit basic properties determined by the plugin parameters. - This will inherit from the first object of the same database. - Insert multiple inheritance notetags to inherit from more than one parent object for this child object. - If there are multiple parent objects, the inheritance for overwritten properties will come from the last listed parent object. --- <Inherit Last Properties> - Used for: Actor, Class, Skill, Item, Weapon, Armor, Enemy, State, and Tileset Notetags - This will inherit basic properties determined by the plugin parameters. - This will inherit from last object of the same database. - Insert multiple inheritance notetags to inherit from more than one parent object for this child object. - If there are multiple parent objects, the inheritance for overwritten properties will come from the last listed parent object. --- <Inherit Previous Properties> - Used for: Actor, Class, Skill, Item, Weapon, Armor, Enemy, State, and Tileset Notetags - This will inherit basic properties determined by the plugin parameters. - This will inherit from previous object of the same database. - Insert multiple inheritance notetags to inherit from more than one parent object for this child object. - If there are multiple parent objects, the inheritance for overwritten properties will come from the last listed parent object. --- <Inherit Next Properties> - Used for: Actor, Class, Skill, Item, Weapon, Armor, Enemy, State, and Tileset Notetags - This will inherit basic properties determined by the plugin parameters. - This will inherit from next object of the same database. - Insert multiple inheritance notetags to inherit from more than one parent object for this child object. - If there are multiple parent objects, the inheritance for overwritten properties will come from the last listed parent object. --- Damage Formula Inheritance-Related Notetags--- <Inherit Damage Formula From: id> <Inherit Properties From: id, id, id> <Inherit Damage Formula From: name> <Inherit Damage Formula From: name, name, name> - Used for: Skill, Item Notetags - This will inherit and extend the damage formula from the parent object. - Replace 'id' with the ID of the database object to inherit from. - Replace 'name' with the name of the database object to inherit from. - The database object must exist within the same database. - You cannot inherit data from objects of a different database. - Insert multiple inheritance notetags to inherit from more than one parent object for this child object. --- <Inherit First Damage Formula> - Used for: Skill, Item Notetags - This will inherit and extend the damage formula from the parent object. - This will inherit from the first object of the same database. - Insert multiple inheritance notetags to inherit from more than one parent object for this child object. --- <Inherit Last Damage Formula> - Used for: Skill, Item Notetags - This will inherit and extend the damage formula from the parent object. - This will inherit from last object of the same database. - Insert multiple inheritance notetags to inherit from more than one parent object for this child object. --- <Inherit Previous Damage Formula> - Used for: Skill, Item Notetags - This will inherit and extend the damage formula from the parent object. - This will inherit from previous object of the same database. - Insert multiple inheritance notetags to inherit from more than one parent object for this child object. --- <Inherit Next Damage Formula> - Used for: Skill, Item Notetags - This will inherit and extend the damage formula from the parent object. - This will inherit from next object of the same database. - Insert multiple inheritance notetags to inherit from more than one parent object for this child object. --- Parameters Inheritance-Related Notetags--- <Inherit Parameters From: id> <Inherit Parameters From: id, id, id> <Inherit Parameters From: name> <Inherit Parameters From: name, name, name> - Used for: Weapon, Armor, Enemy Notetags - This will inherit and extend the parameters from the parent object. - Replace 'id' with the ID of the database object to inherit from. - Replace 'name' with the name of the database object to inherit from. - The database object must exist within the same database. - You cannot inherit data from objects of a different database. - Insert multiple inheritance notetags to inherit from more than one parent object for this child object. --- <Inherit First Parameters> - Used for: Weapon, Armor, Enemy Notetags - This will inherit and extend the parameters from the parent object. - This will inherit from the first object of the same database. - Insert multiple inheritance notetags to inherit from more than one parent object for this child object. --- <Inherit Last Parameters> - Used for: Weapon, Armor, Enemy Notetags - This will inherit and extend the parameters from the parent object. - This will inherit from last object of the same database. - Insert multiple inheritance notetags to inherit from more than one parent object for this child object. --- <Inherit Previous Parameters> - Used for: Weapon, Armor, Enemy Notetags - This will inherit and extend the parameters from the parent object. - This will inherit from previous object of the same database. - Insert multiple inheritance notetags to inherit from more than one parent object for this child object. --- <Inherit Next Parameters> - Used for: Weapon, Armor, Enemy Notetags - This will inherit and extend the parameters from the parent object. - This will inherit from next object of the same database. - Insert multiple inheritance notetags to inherit from more than one parent object for this child object. --- Enemy Action Patterns-Related Notetags--- <Inherit Action Patterns From: id> <Inherit Action Patterns From: id, id, id> <Inherit Action Patterns From: name> <Inherit Action Patterns From: name, name, name> - Used for: Enemy Notetags - This will inherit and extend the action patterns from the parent object. - Replace 'id' with the ID of the database object to inherit from. - Replace 'name' with the name of the database object to inherit from. - The database object must exist within the same database. - You cannot inherit data from objects of a different database. - Insert multiple inheritance notetags to inherit from more than one parent object for this child object. --- <Inherit First Action Patterns> - Used for: Enemy Notetags - This will inherit and extend the action patterns from the parent object. - This will inherit from the first object of the same database. - Insert multiple inheritance notetags to inherit from more than one parent object for this child object. --- <Inherit Last Action Patterns> - Used for: Enemy Notetags - This will inherit and extend the action patterns from the parent object. - This will inherit from last object of the same database. - Insert multiple inheritance notetags to inherit from more than one parent object for this child object. --- <Inherit Previous Action Patterns> - Used for: Enemy Notetags - This will inherit and extend the action patterns from the parent object. - This will inherit from previous object of the same database. - Insert multiple inheritance notetags to inherit from more than one parent object for this child object. --- <Inherit Next Action Patterns> - Used for: Enemy Notetags - This will inherit and extend the action patterns from the parent object. - This will inherit from next object of the same database. - Insert multiple inheritance notetags to inherit from more than one parent object for this child object. --- Trait Inheritance-Related Notetags--- <Inherit Traits From: id> <Inherit Traits From: id, id, id> <Inherit Traits From: name> <Inherit Traits From: name, name, name> - Used for: Actor, Class, Weapon, Armor, Enemy, and State Notetags - This will inherit and extend the traits from the parent object. - Replace 'id' with the ID of the database object to inherit from. - Replace 'name' with the name of the database object to inherit from. - The database object must exist within the same database. - You cannot inherit data from objects of a different database. - Insert multiple inheritance notetags to inherit from more than one parent object for this child object. --- <Inherit First Traits> - Used for: Actor, Class, Weapon, Armor, Enemy, and State Notetags - This will inherit and extend the traits from the parent object. - This will inherit from the first object of the same database. - Insert multiple inheritance notetags to inherit from more than one parent object for this child object. --- <Inherit Last Traits> - Used for: Actor, Class, Weapon, Armor, Enemy, and State Notetags - This will inherit and extend the traits from the parent object. - This will inherit from last object of the same database. - Insert multiple inheritance notetags to inherit from more than one parent object for this child object. --- <Inherit Previous Traits> - Used for: Actor, Class, Weapon, Armor, Enemy, and State Notetags - This will inherit and extend the traits from the parent object. - This will inherit from previous object of the same database. - Insert multiple inheritance notetags to inherit from more than one parent object for this child object. --- <Inherit Next Traits> - Used for: Actor, Class, Weapon, Armor, Enemy, and State Notetags - This will inherit and extend the traits from the parent object. - This will inherit from next object of the same database. - Insert multiple inheritance notetags to inherit from more than one parent object for this child object. --- Effects Inheritance-Related Notetags--- <Inherit Effects From: id> <Inherit Effects From: id, id, id> <Inherit Effects From: name> <Inherit Effects From: name, name, name> - Used for: Skill and Item Notetags - This will inherit and extend the effects from the parent object. - Replace 'id' with the ID of the database object to inherit from. - Replace 'name' with the name of the database object to inherit from. - The database object must exist within the same database. - You cannot inherit data from objects of a different database. - Insert multiple inheritance notetags to inherit from more than one parent object for this child object. --- <Inherit First Effects> - Used for: Skill and Item Notetags - This will inherit and extend the effects from the parent object. - This will inherit from the first object of the same database. - Insert multiple inheritance notetags to inherit from more than one parent object for this child object. --- <Inherit Last Effects> - Used for: Skill and Item Notetags - This will inherit and extend the effects from the parent object. - This will inherit from last object of the same database. - Insert multiple inheritance notetags to inherit from more than one parent object for this child object. --- <Inherit Previous Effects> - Used for: Skill and Item Notetags - This will inherit and extend the effects from the parent object. - This will inherit from previous object of the same database. - Insert multiple inheritance notetags to inherit from more than one parent object for this child object. --- <Inherit Next Effects> - Used for: Skill and Item Notetags - This will inherit and extend the effects from the parent object. - This will inherit from next object of the same database. - Insert multiple inheritance notetags to inherit from more than one parent object for this child object. --- Date and Time VisuStella MZThe following are notetags that have been added through this plugin. These notetags will not work with your game if this plugin is OFF or not present. --- Time-Type-Related Notetags--- <Time System: None> <Time System: Game> <Time System: Real> - Used for: Map Notetags - Insert one of these notetags into your map's notebox and it will change the time type to the desired type. - If this notetag is not used, use the default Time System type declared in the Plugin Parameters. --- <Pause Game Time> - Used for: Map Notetags - While the player is on this map, prevent Game Time from progressing forward. - This does NOT apply to Real Time. - The Plugin Command to pause/unpause Game Time will have no effect on any map that has this notetag. --- Time Tone-Related Notetags--- <No Time Tone>
<Time Tone>
- Used for: Map Notetags
- Insert one of these notetags into your map to decide if you want the map
to use the time-based screen tone (or overlay for those using the
VisuMZ_2_LightingEffects plugin).
- Places where you wouldn't want time tones would be indoor areas where
the screen tone/overlay wouldn't matter.
- Places where you would want to use time tones would be outdoor areas
where the screen tone/overlay would matter.
- If this notetag is not used, use the default Time Tone type declared in
the Plugin Parameters.
--- HUD-Related Notetags--- <Show Date Time HUD>
<Hide Date Time HUD>
- Used for: Map Notetags
- Insert one of these notetags into your map to decide if you want the map
to show the Date/Time HUD or not.
- If the player has opted to hide the Date/Time HUD in the options, that
will take priority over the map notetag deciding to show it.
- If the game dev opted to hide the Date/Time HUD through Plugin Commands,
that will take priority over the map notetag deciding to show it.
- If this notetag is not used, use the default setting visuals declared in
the Plugin Parameters.
--- Battle-Related Notetags--- <Encounter Hour: x>
<Encounter Hours: x, x, x>
<Encounter Weekday: x>
<Encounter Weekdays: x, x, x>
<Encounter Date: x>
<Encounter Dates: x, x, x>
<Encounter Month: x>
<Encounter Months: x, x, x>
- Used for: Troop Page Comment Tags
- Requires VisuMZ_1_BattleCore!
- Makes this encounter only appear during the specified hours, weekdays,
dates, and/or months.
- Replace 'x' with a number representing the hour, weekday, date, or month.
- Hours start at 0.
- Weekdays, dates, and months start at 1.
- Insert multiple 'x' values to cover more instances.
- You can use multiple combinations of types together, like in order to make
a troop encounter that only occurs during the last day of the year by
using the Month and Date comment tags together.
- This will NOT work with a Base Troop. You will get an alert saying so.
- Why? Because this can cause all of the troops in the game to just shut
off and you don't want that.
--- <Encounter Season: type>
<Encounter Seasons: type, type, type>
<Encounter Cycle: type>
<Encounter Cycle: type, type, type>
- Used for: Troop Page Comment Tags
- Requires VisuMZ_1_BattleCore!
- Makes this encounter only appear during the specified seasons or parts of
the day cycle.
- Replace 'type' with a string representing the season or day cycle type.
- Seasons are: "spring", "summer", "autumn", "winter" (no quotes).
- Cycles are: "dawn", "day", "dusk", "night" (no quotes).
- Insert multiple 'type' values to cover more instances.
- You can use multiple combinations of types together, like in order to make
a troop encounter that only occurs during winter and at night by using the
two comment tags together.
- This will NOT work with a Base Troop. You will get an alert saying so.
- Why? Because this can cause all of the troops in the game to just shut
off and you don't want that.
--- <season Battleback1: filename>
<season Battleback2: filename>
- Used for: Map Notetags
- Requires VisuMZ_1_BattleCore!
- Changes the primary map battleback(s) to the designated 'filename' when
the player has entered the map at a specific 'season'.
- If the player has entered the map at a specific 'season', but time has
moved forward and the season has changed, the season will be whatever it
was upon the time the player has entered in order to prevent any weird
and out of place transitions from happening.
- Replace 'season' with a string representing the season.
- Seasons are: "spring", "summer", "autumn", "winter" (no quotes).
- Replace 'filename' with the filename of the graphic to use. Do not insert
any extensions. This means the file 'Castle1.png' will be only inserted
as 'Castle1' without the '.png' at the end.
- Insert multiples of these notetags to declare different settings for
different seasons.
- *NOTE: This will override any specified battleback settings.
--- <season Region x Battleback1: filename>
<season Region x Battleback2: filename>
- Used for: Map Notetags
- Requires VisuMZ_1_BattleCore!
- Changes the primary map battleback(s) to the designated 'filename' when
the player has entered the map at a specific 'season' and while on a
specific 'region' on the map.
- If the player has entered the map at a specific 'season', but time has
moved forward and the season has changed, the season will be whatever it
was upon the time the player has entered in order to prevent any weird
and out of place transitions from happening.
- Replace 'season' with a string representing the season.
- Seasons are: "spring", "summer", "autumn", "winter" (no quotes).
- Replace 'x' with a number representing the region ID you wish to use.
- Replace 'filename' with the filename of the graphic to use. Do not insert
any extensions. This means the file 'Castle1.png' will be only inserted
as 'Castle1' without the '.png' at the end.
- Insert multiples of these notetags to declare different settings for
different season and region combinations.
- *NOTE: This will override any specified battleback settings.
--- Tileset-Related Notetags--- <type Swap To: x> - Used for: Tileset Notetags - If a map loads a tileset with this notetag and it happens to be that season, swap to 'x' tileset instead and repeat the check. - The repeated check will only last for 5 checks max for each map loading. - Replace 'type' with a string representing the season or cycle. - Seasons are: "spring", "summer", "autumn", "winter" (no quotes). - Cycles are: "dawn", "day", "dusk", "night" (no quotes). - Priority will be given to seasons first before cycles. - Insert multiples of this notetag to cover different cases. - Each successful check will result in another check on the newer tileset for up to 5 times. - This can be chained in such a way where an "Outdoor" tileset can chain into something like "Summer Outdoor", which can then be chained into "Summer Outdoor Day" or "Summer Outdoor Night" for more accuracy. - Priority will be given to seasons first, then the day cycles (dawn, day, dusk, night). This way, you can ensure that the tileset you're using matches the conditions of the season or time of day if so desired. - If time changes into a new season or day cycle while on the map, there won't be any changes made immediately. Instead, the player must exit and reenter the map for the changes to be seen. This is to prevent any awkward changes and transitions that may occur otherwise. --- <Bypass Tileset Swap> - Used for: Map Notetags - If a map with this notetag loads a tileset that would normally swap out, this will prevent it from happening. - This can be used for things like flashbacks where it would make sense for a specific tileset to be used as opposed to the current season's variant. --- Shop-Related Notetags--- <Shop Buy Hour: x> <Shop Buy Hours: x, x, x> <Shop Buy Weekday: x> <Shop Buy Weekdays: x, x, x> <Shop Buy Date: x> <Shop Buy Dates: x, x, x> <Shop Buy Month: x> <Shop Buy Months: x, x, x> - Used for: Item, Weapon, Armor Notetags - Requires VisuMZ_1_ItemsEquipsCore! - These shop listings can only be bought at specific hours, weekdays, dates, and/or months. - Replace 'x' with a number representing the hour, weekday, date, or month. - Hours start at 0. - Weekdays, dates, and months start at 1. - Insert multiple 'x' values to cover more instances. - You can use multiple combinations of types together, like in order to make a shop listing that only appears during the last day of the year by using the Month and Date notetags together. --- <Shop Buy Season: type> <Shop Buy Seasons: type, type, type> <Shop Buy Cycle: type> <Shop Buy Cycle: type, type, type> - Used for: Item, Weapon, Armor Notetags - Requires VisuMZ_1_ItemsEquipsCore! - Makes this shop listing only appear during the specified seasons or parts of the day cycle. - Replace 'type' with a string representing the season or day cycle type. - Seasons are: "spring", "summer", "autumn", "winter" (no quotes). - Cycles are: "dawn", "day", "dusk", "night" (no quotes). - Insert multiple 'type' values to cover more instances. - You can use multiple combinations of types together, like in order to make a shop listing that onlappears occurs during winter and at night by using the two notetags together. --- <Shop Price Hour x: y%>
<Shop Price Hours x, x, x: y%>
<Shop Price Weekday x: y%>
<Shop Price Weekdays x, x, x: y%>
<Shop Price Date x: y%>
<Shop Price Dates x, x, x: y%>
<Shop Price Month x: y%>
<Shop Price Months x, x, x: y%>
- Used for: Item, Weapon, Armor Notetags
- Requires VisuMZ_1_ItemsEquipsCore!
- These shop listings will have their (gold only) prices affected by 'y%'
when it is the specific hour, weekday, date, and/or month.
- This ONLY affects gold prices and does not affect anything else that may
be added by other plugins such as VisuMZ_2_MoreCurrencies.
- Replace 'x' with a number representing the hour, weekday, date, or month.
- Hours start at 0.
- Weekdays, dates, and months start at 1.
- Insert multiple 'x' values to cover more instances.
- Replace 'y' with a number representing the percent change for the price.
- If multiples of these notetags are used together, the effects will be
multiplicative.
- For example, if price drops by 50% at the last hours of the work day,
and the price also drops by 50% at the last day of the week, then the
last hours of the last day of the week will have the price drop to 25%.
--- <Shop Price Spring Months: y%>
<Shop Price Summer Months: y%>
<Shop Price Autumn Months: y%>
<Shop Price Winter Months: y%>
<Shop Price Weekdays Only: y%>
<Shop Price Weekends Only: y%>
<Shop Price Dawn Hours: y%>
<Shop Price Day Hours: y%>
<Shop Price Dusk Hours: y%>
<Shop Price Night Hours: y%>
- Used for: Item, Weapon, Armor Notetags
- Requires VisuMZ_1_ItemsEquipsCore!
- These shop listings will have their (gold only) prices affected by 'y%'
when it is the specific season, weekday type, or day cycle.
- This ONLY affects gold prices and does not affect anything else that may
be added by other plugins such as VisuMZ_2_MoreCurrencies.
- Replace 'y' with a number representing the percent change for the price.
- If multiples of these notetags are used together, the effects will be
multiplicative.
- For example, if price drops by 50% at the dusk hours of the work day,
and the price also drops by 50% at the weekend, then the dusk hours of a
weekend will have the price drop to 25%.
--- Skill-Related Notetags--- <Require Hour x: y%> <Require Hours x, x, x: y%> <Require Weekday x: y%> <Require Weekdays x, x, x: y%> <Require Date x: y%> <Require Dates x, x, x: y%> <Require Month x: y%> <Require Months x, x, x: y%> - Used for: Skill Notetags - Requires VisuMZ_1_SkillsStatesCore! - These skills can only be used during specific hours, weekdays, dates, and/or months. - Replace 'x' with a number representing the hour, weekday, date, or month. - Hours start at 0. - Weekdays, dates, and months start at 1. - Insert multiple 'x' values to cover more instances. - You can use multiple combinations of types together, like in order to make a skill that can only be used during the first month of the year and the first few days of the year by using those specific notetags together. --- <Require Season: type> <Require Seasons: type, type, type> <Require Cycle: type> <Require Cycle: type, type, type> - Used for: Skill Notetags - Requires VisuMZ_1_SkillsStatesCore! - These skills can only be used during specific seasons or day cycles. - Replace 'type' with a string representing the season or day cycle type. - Seasons are: "spring", "summer", "autumn", "winter" (no quotes). - Cycles are: "dawn", "day", "dusk", "night" (no quotes). - Insert multiple 'type' values to cover more instances. - You can use multiple combinations of types together, like in order to make a skill that can only be used during winter nights by using those specific notetags together. --- <type Cost If Hour x: y%>
<type Cost If Hours x, x, x: y%>
<type Cost If Weekday x: y%>
<type Cost If Weekdays x, x, x: y%>
<type Cost If Date x: y%>
<type Cost If Dates x, x, x: y%>
<type Cost If Month x: y%>
<type Cost If Months x, x, x: y%>
- Used for: Item, Weapon, Armor Notetags
- Requires VisuMZ_1_SkillsStatesCore!
- This skill's cost 'type' will be affected by 'y%' when it is the specific
hour, weekday, date, and/or month.
- Replace 'type' with either 'HP', 'MP', or 'TP' to represent the cost type
that you wish to affect.
- Replace 'x' with a number representing the hour, weekday, date, or month.
- Hours start at 0.
- Weekdays, dates, and months start at 1.
- Insert multiple 'x' values to cover more instances.
- Replace 'y' with a number representing the percent change for the skill
cost type.
- If multiples of these notetags are used together, the effects will be
multiplicative.
- For example, if skill cost drops by 50% at the last hours of the day,
and the skill cost also drops by 50% at the last day of the week, then
the last hours of the last day of the week will have the cost drop to
a multiplicative 25%.
--- <type Cost If Spring Months: y%>
<type Cost If Summer Months: y%>
<type Cost If Autumn Months: y%>
<type Cost If Winter Months: y%>
<type Cost If Weekdays Only: y%>
<type Cost If Weekends Only: y%>
<type Cost If Dawn Hours: y%>
<type Cost If Day Hours: y%>
<type Cost If Dusk Hours: y%>
<type Cost If Night Hours: y%>
- Used for: Item, Weapon, Armor Notetags
- Requires VisuMZ_1_SkillsStatesCore!
- This skill's cost 'type' will be affected by 'y%' when it is the specific
season, weekday type, or day cycle.
- Replace 'type' with either 'HP', 'MP', or 'TP' to represent the cost type
that you wish to affect.
- Replace 'y' with a number representing the percent change for the skill
cost type.
- If multiples of these notetags are used together, the effects will be
multiplicative.
- For example, if skill cost drops by 50% at the dusk hours of the day,
and the skill cost also drops by 50% at the weekend, then the dusk hours
of a weekend will have the skill cost drop to 25%.
--- <Damage If Hour x: y%>
<Damage If Hours x, x, x: y%>
<Healing If Hour x: y%>
<Healing If Hours x, x, x: y%>
<Damage If Weekday x: y%>
<Damage If Weekdays x, x, x: y%>
<Healing If Weekday x: y%>
<Healing If Weekdays x, x, x: y%>
<Damage If Date x: y%>
<Damage If Dates x, x, x: y%>
<Healing If Date x: y%>
<Healing If Dates x, x, x: y%>
<Damage If Month x: y%>
<Damage If Months x, x, x: y%>
<Healing If Month x: y%>
<Healing If Months x, x, x: y%>
- Used for: Item, Weapon, Armor Notetags
- Requires VisuMZ_1_SkillsStatesCore!
- This skill's damage or healing dealt will be affected by 'y%' when it is
the specific hour, weekday, date, and/or month.
- Replace 'x' with a number representing the hour, weekday, date, or month.
- Hours start at 0.
- Weekdays, dates, and months start at 1.
- Insert multiple 'x' values to cover more instances.
- Replace 'y' with a number representing the percent change for the skill's
dealt damage or healing.
- If multiples of these notetags are used together, the effects will be
multiplicative.
- For example, if skill damage/healing drops by 50% at the last hours of
the day, and the skill damage/healing also drops by 50% at the last day
of the week, then the last hours of the last day of the week will have
the damage/healing drop to a multiplicative 25%.
--- <Damage If Spring Months: y%>
<Damage If Summer Months: y%>
<Damage If Autumn Months: y%>
<Damage If Winter Months: y%>
<Healing If Spring Months: y%>
<Healing If Summer Months: y%>
<Healing If Autumn Months: y%>
<Healing If Winter Months: y%>
<Damage If Weekdays Only: y%>
<Damage If Weekends Only: y%>
<Healing If Weekdays Only: y%>
<Healing If Weekends Only: y%>
<Damage If Dawn Hours: y%>
<Damage If Day Hours: y%>
<Damage If Dusk Hours: y%>
<Damage If Night Hours: y%>
<Healing If Dawn Hours: y%>
<Healing If Day Hours: y%>
<Healing If Dusk Hours: y%>
<Healing If Night Hours: y%>
- Used for: Item, Weapon, Armor Notetags
- Requires VisuMZ_1_SkillsStatesCore!
- This skill's damage or healing dealt will be affected by 'y%' when it is
the specific season, weekday type, or day cycle.
- Replace 'y' with a number representing the percent change for the skill
cost type.
- If multiples of these notetags are used together, the effects will be
multiplicative.
- For example, if skill damage/healing drops by 50% at the dusk hours of
the day, and the skill damage/healing also drops by 50% at the weekend,
then the dusk hours of a weekend will have the damage/heal drop to 25%.
--- State-Related Notetags--- <Turns If Hour x: +y>
<Turns If Hour x: -y>
<Turns If Hours x, x, x: +y>
<Turns If Hours x, x, x: -y>
<Turns If Weekday x: +y>
<Turns If Weekday x: -y>
<Turns If Weekdays x, x, x: +y>
<Turns If Weekdays x, x, x: -y>
<Turns If Date x: +y>
<Turns If Date x: -y>
<Turns If Dates x, x, x: +y>
<Turns If Dates x, x, x: -y>
<Turns If Month x: +y>
<Turns If Month x: -y>
<Turns If Months x, x, x: +y>
<Turns If Months x, x, x: -y>
- Used for: State Notetags
- Requires VisuMZ_1_SkillsStatesCore!
- These state durations will have their turn counts affected by '+y' or '-y'
when it is the specific hour, weekday, date, and/or month.
- Replace 'x' with a number representing the hour, weekday, date, or month.
- Hours start at 0.
- Weekdays, dates, and months start at 1.
- Insert multiple 'x' values to cover more instances.
- Replace 'y' with a number representing the turn count change.
- If multiples of these notetags are used together, the effects will be
additive.
- For example, if state's turn count drops by -1 at the last hours of the
day, and state's turn count also drops by -1 at the last day of the
week, then the last hours of the last day of the week will have the
state's turn count drop by -2.
--- <Turns If Spring Months: +y>
<Turns If Spring Months: -y>
<Turns If Summer Months: +y>
<Turns If Summer Months: -y>
<Turns If Autumn Months: +y>
<Turns If Autumn Months: -y>
<Turns If Winter Months: +y>
<Turns If Winter Months: -y>
<Turns If Weekdays Only: +y>
<Turns If Weekdays Only: -y>
<Turns If Weekends Only: +y>
<Turns If Weekends Only: -y>
<Turns If Dawn Hours: +y>
<Turns If Dawn Hours: -y>
<Turns If Day Hours: +y>
<Turns If Day Hours: -y>
<Turns If Dusk Hours: +y>
<Turns If Dusk Hours: -y>
<Turns If Night Hours: +y>
<Turns If Night Hours: -y>
- Used for: State Notetags
- Requires VisuMZ_1_SkillsStatesCore!
- These state durations will have their turn counts affected by '+y' or '-y'
when it is the specific season, weekday type, or day cycle.
- Replace 'y' with a number representing the turn count change.
- If multiples of these notetags are used together, the effects will be
additive.
- For example, if state's turn count drops by -1 at the dusk hours of the
day, and state's turn count also drops by -1 on weekends, then the dusk
hours of a weekend day will have the state's turn count drop by -2.
--- Dragonbones Union VisuStella MZThe following are notetags that have been added through this plugin. These notetags will not work with your game if this plugin is OFF or not present. --- Dragonbones Battler NotetagsThe following notetags are to be assigned to either actors and/or enemies. An assigned actor/enemy will have their original sprite hidden from view in favor of the Dragonbones armature to be displayed. Use these notetags to declare various settings for your Dragonbones armatures. --- <Dragonbones Battler: filename> - Used for: Actor, Enemy Notetags - Sets the DragonBones associated with this actor/enemy to be 'filename'. - The name will be associated with the assets used. - It will be used to check for associated filenames that end with _ske.json, _tex.json, and _tex.png. - The listed assets must be found in the assigned assets folder. Examples: <Dragonbones Battler: Demon> <Dragonbones Battler: DragonBoy> <Dragonbones Battler: Swordsman> <Dragonbones Battler: Ubbie> --- <Dragonbones Battler Scale: x, y> <Dragonbones Battler Scale X: x> <Dragonbones Battler Scale Y: x> - Used for: Actor, Enemy Notetags - Sets the base scale for the Dragonbones associated with this actor/enemy. This is for those instances where a Dragonbones armature is too large or small and needs to be scaled down/up. - This scale will be amplified by the actor/enemy's sprite's scale value. - Use the 1st notetag to assign values to both Scale X and Scale Y. - Use the 2nd/3rd notetags to assign Scale X and Y values separately. - Use negative values to flip the Dragonbones armature around. Examples: <Dragonbones Battler Scale: -0.3, 0.3> <Dragonbones Battler Scale X: -0.3> <Dragonbones Battler Scale Y: 0.3> --- <Dragonbones Battler Offset: x, y> <Dragonbones Battler Offset X: x> <Dragonbones Battler Offset Y: x> - Used for: Actor, Enemy Notetags - When a Dragonbones armature is attached to an actor/enemy's sprite, it will always be attached at the root point assigned within the Dragonbones data. If a Dragonbones armature has a root point that does not fit well with your battler sprite, you can offset it using these notetags. - Replace 'x' and 'y' with number values representing how many pixels you want to offset the Dragonbones armature by. - Use the 1st notetag to assign values to both Offset X and Offset Y. - Use the 2nd/3rd notetags to assign Offset X and Y values separately. - Use negative values to offset to the left (X) or up (Y) directions. Examples: <Dragonbones Battler Offset: -10, 5> <Dragonbones Battler Offset X: -10> <Dragonbones Battler Offset Y: 5> --- <Dragonbones Battler Size: width, height> <Dragonbones Battler Width: x> <Dragonbones Battler Height: x> - Used for: Actor, Enemy Notetags - Dragonbones armatures have no standard width or height. This makes it problematic when trying to calculate the sprite's width/height for Action Sequences and the like. These notetags allow you to assign a width and height value to the sprite, despite the fact the Dragonbones armatures have no such thing. - Replace 'width', 'height', or 'x' with number values representing the dimension values in pixels. - Use the 1st notetag to assign values to both Width and Height. - Use the 2nd/3rd notetags to assign Width and Height values separately. - If these notetags aren't used, then use the values defined by default in Plugin Parameters => Battler Settings => Default => Width/Height. Examples: <Dragonbones Battler Size: 50, 100> <Dragonbones Battler Width: 50> <Dragonbones Battler Height: 100> --- <Dragonbones Battler Time Scale: x> - Used for: Actor, Enemy Notetags - Lets you adjust the time scale for the Dragonbones armature. - Replace 'x' with a number value depicting how fast the armature should animate. - 1.0 is the default value. - Higher numbers animate faster. - Lower numbers animate slower. - If a number is too small, it may not animate at all. Example: <Dragonbones Battler Time Scale: 1.5> --- <Dragonbones Battler Motion Walk: animation> <Dragonbones Battler Motion Wait: animation> <Dragonbones Battler Motion Chant: animation> <Dragonbones Battler Motion Guard: animation> <Dragonbones Battler Motion Damage: animation> <Dragonbones Battler Motion Evade: animation> <Dragonbones Battler Motion Thrust: animation> <Dragonbones Battler Motion Swing: animation> <Dragonbones Battler Motion Missile: animation> <Dragonbones Battler Motion Skill: animation> <Dragonbones Battler Motion Spell: animation> <Dragonbones Battler Motion Item: animation> <Dragonbones Battler Motion Escape: animation> <Dragonbones Battler Motion Victory: animation> <Dragonbones Battler Motion Dying: animation> <Dragonbones Battler Motion Abnormal: animation> <Dragonbones Battler Motion Sleep: animation> <Dragonbones Battler Motion Dead: animation> - Used for: Actor, Enemy Notetags - Use these notetags to assign Dragonbones animations to play when the actor/enemy sprite is supposed to play such a motion. - Replace 'animation' with the name of the Dragonbones animation. - If this notetag is not used, when such a motion is rquested, it will default to attempting to play the animation name equal to the motion. - Animation names do not need to be case sensitive. - If no animation is found, then no animation will be played. Examples: <Dragonbones Battler Motion Wait: idle> <Dragonbones Battler Motion Swing: attack> <Dragonbones Battler Motion Thrust: attack> <Dragonbones Battler Motion Missle: attack> <Dragonbones Battler Motion Skill: special> <Dragonbones Battler Motion Spell: special> <Dragonbones Battler Motion Dead: defeated> --- <Dragonbones Battler Settings> Battler: filename Scale: x, y Scale X: x Scale Y: x Offset: x, y Offset X: x Offset Y: x Size: width, height Width: x Height: x Time Scale: x Motion Walk: animation Motion Wait: animation Motion Chant: animation Motion Guard: animation Motion Damage: animation Motion Evade: animation Motion Thrust: animation Motion Swing: animation Motion Missile: animation Motion Skill: animation Motion Spell: animation Motion Item: animation Motion Escape: animation Motion Victory: animation Motion Dying: animation Motion Abnormal: animation Motion Sleep: animation Motion Dead: animation </Dragonbones Battler Settings> - Used for: Actor, Enemy Notetags - The above notetag allows to wrap up all the information you'd like to set for Dragonbones battler armatures needed inside a single notetag container. - The settings are the same as the notetags listed above it. - You may remove the settings you don't wish to change. - The only necessary data is the 'Battler: filename' line. Example: <Dragonbones Battler Settings> Battler: Demon Scale: 0.3, 0.3 Size: 80, 80 Motion Wait: idle Motion Damage: hit Motion Swing: attack Motion Thrust: attack Motion Missile: attack Motion Skill: special Motion spell: special Motion Dead: defeated </Dragonbones Battler Settings> --- <Dragonbones Hue Affected> - Used for: Enemy Notetags - The above notetag enables hues to affect enemy battlers. - This will bypass the Plugin Parameter default settings. --- <Dragonbones No Hue> - Used for: Enemy Notetags - The above notetag disables hues to affect enemy battlers. - This will bypass the Plugin Parameter default settings. --- Dragonbones Map Sprite Notetags & Comment TagsYou can also use Dragonbones armatures as map sprites. When used, any of the original sprites before will become invisible and will be replaced with the Dragonbones armature. These notetags can be used for actors and events. In the case of events, both notetags and comment tags can be used to determine what settings to use for the Dragonbones armatures. Be cautious when using Comment Tags for event pages since comments contain a maximum line count of 6. --- <Dragonbones Sprite: filename> - Used for: Actor, Event Notetags and Event Page Comment Tags - Sets the DragonBones associated with this map sprite to be 'filename'. - The name will be associated with the assets used. - It will be used to check for associated filenames that end with _ske.json, _tex.json, and _tex.png. - The listed assets must be found in the assigned assets folder. Examples: <Dragonbones Sprite: Demon> <Dragonbones Sprite: DragonBoy> <Dragonbones Sprite: Swordsman> <Dragonbones Sprite: Ubbie> --- <Dragonbones Sprite Scale: x, y> <Dragonbones Sprite Scale X: x> <Dragonbones Sprite Scale Y: x> - Used for: Actor, Event Notetags and Event Page Comment Tags - Sets the base scale for the Dragonbones associated with this map sprite. This is for those instances where a Dragonbones armature is too large or small and needs to be scaled down/up. - This scale will be amplified by the character's sprite's scale value. - Use the 1st notetag to assign values to both Scale X and Scale Y. - Use the 2nd/3rd notetags to assign Scale X and Y values separately. - Use negative values to flip the Dragonbones armature around. Examples: <Dragonbones Sprite Scale: -0.3, 0.3> <Dragonbones Sprite Scale X: -0.3> <Dragonbones Sprite Scale Y: 0.3> --- <Dragonbones Sprite Offset: x, y> <Dragonbones Sprite Offset X: x> <Dragonbones Sprite Offset Y: x> - Used for: Actor, Event Notetags and Event Page Comment Tags - When a Dragonbones armature is attached to an character's map sprite, it will always be attached at the root point assigned within the Dragonbones data. If a Dragonbones armature has a root point that does not fit well with your battler sprite, you can offset it using these notetags. - Replace 'x' and 'y' with number values representing how many pixels you want to offset the Dragonbones armature by. - Use the 1st notetag to assign values to both Offset X and Offset Y. - Use the 2nd/3rd notetags to assign Offset X and Y values separately. - Use negative values to offset to the left (X) or up (Y) directions. Examples: <Dragonbones Sprite Offset: -10, 5> <Dragonbones Sprite Offset X: -10> <Dragonbones Sprite Offset Y: 5> --- <Dragonbones Sprite Time Scale: x> - Used for: Actor, Event Notetags and Event Page Comment Tags - Lets you adjust the time scale for the Dragonbones armature. - Replace 'x' with a number value depicting how fast the armature should animate. - 1.0 is the default value. - Higher numbers animate faster. - Lower numbers animate slower. - If a number is too small, it may not animate at all. Example: <Dragonbones Sprite Time Scale: 1.5> --- <Dragonbones Sprite Walk Rate: x> - Used for: Actor, Event Notetags and Event Page Comment Tags - Lets you adjust the animation speed for the Dragonbones armature only when it is walking. - Replace 'x' with a number value depicting how fast the armature should animate. - 1.0 is the default value. - Higher numbers animate faster. - Lower numbers animate slower. - If a number is too small, it may not animate at all. - If used with the <Dragonbones Sprite Time Scale: x>, the speed will stack multiplicatively. Example: <Dragonbones Sprite Walk Rate: 1.5> --- <Dragonbones Sprite Dash Rate: x> - Used for: Actor, Event Notetags and Event Page Comment Tags - Lets you adjust the animation speed for the Dragonbones armature only when it is dashing. - Replace 'x' with a number value depicting how fast the armature should animate. - 1.0 is the default value. - Higher numbers animate faster. - Lower numbers animate slower. - If a number is too small, it may not animate at all. - If used with the <Dragonbones Sprite Time Scale: x>, the speed will stack multiplicatively. Example: <Dragonbones Sprite Dash Rate: 1.5> --- <Dragonbones Sprite Size: width, height> <Dragonbones Sprite Width: x> <Dragonbones Sprite Height: x> - Used for: Actor, Enemy Notetags - Dragonbones armatures have no standard width or height. This makes it problematic when trying to calculate the sprite's width/height for various plugins that use it. These notetags allow you to assign a width and height value to the sprite, despite the fact the Dragonbones armatures have no such thing. - Replace 'width', 'height', or 'x' with number values representing the dimension values in pixels. - Use the 1st notetag to assign values to both Width and Height. - Use the 2nd/3rd notetags to assign Width and Height values separately. - If these notetags aren't used, then use the values defined by default in the Plugin Parameters. Examples: <Dragonbones Sprite Size: 48, 64> <Dragonbones Sprite Width: 48> <Dragonbones Sprite Height: 64> --- <Dragonbones Sprite Flip Left> <Dragonbones Sprite Flip Right> <Dragonbones Sprite No Flip Left> <Dragonbones Sprite No Flip Right> - Used for: Actor, Event Notetags and Event Page Comment Tags - Lets the map sprite know to flip itself when facing either the left/right directions in order to reuse animations. - The 'No' variants will prevent flipping from occuring. - These notetags will override settings applied in the Plugin Parameters. --- <Dragonbones Sprite Motion Idle: animation> <Dragonbones Sprite Motion Walk: animation> <Dragonbones Sprite Motion Dash: animation> <Dragonbones Sprite Motion Jump: animation> <Dragonbones Sprite Motion LadderIdle: animation> <Dragonbones Sprite Motion LadderClimb: animation> <Dragonbones Sprite Motion RopeIdle: animation> <Dragonbones Sprite Motion RopeClimb: animation> - Used for: Actor, Event Notetags and Event Page Comment Tags - Lets you set specific animations different from the ones listed in the Plugin Parameters for specific motions. - Replace 'animation' with the name of the Dragonbones animation. - If this notetag is not used, when such a motion is rquested, it will default to attempting to play the animation name equal to the motion. - Animation names do not need to be case sensitive. - If no animation is found, then no animation will be played. Example: <Dragonbones Sprite Motion Idle: stand> <Dragonbones Sprite Motion Walk: move> <Dragonbones Sprite Motion Dash: run> <Dragonbones Sprite Motion Jump: hop> --- <Dragonbones Sprite Settings> Filename: filename Scale: x, y Scale X: x Scale Y: x Offset: x, y Offset X: x Offset Y: x Time Scale: x Width: x Height: x Flip Left Flip Right No Flip Left No Flip Right Motion Idle: animation Motion Walk: animation Motion Dash: animation Motion Jump: animation Motion LadderIdle: animation Motion LadderClimb: animation Motion RopeIdle: animation Motion RopeClimb: animation </Dragonbones Sprite Settings> - Used for: Actor, Event Notetags and Event Page Comment Tags - The above notetag allows to wrap up all the information you'd like to set for Dragonbones battler armatures needed inside a single notetag container. - The settings are the same as the notetags listed above it. - You may remove the settings you don't wish to change. - The only necessary data is the 'Filename: filename' line. Example: <Dragonbones Sprite Settings> Filename: Ubbie Scale: 0.1, 0.1 Flip Right Motion Idle: stand Motion Walk: walk </Dragonbones Sprite Settings> --- Dice Rolls and RNG Seeds VisuStella MZThe following are notetags that have been added through this plugin. These notetags will not work with your game if this plugin is OFF or not present. --- Action-Related Notetags--- <RNG Seed: x>
<Daily Seed: x>
<Unique Seed: x>
<Daily Unique Seed: x>
- Used for: Skill, Item Notetags
- Causes the skill or item to utilize Random Number Seeds to yield
predictable outcomes for damage, hit rate, critical rate, etc.
- Replace 'x' with the "seed" you would like to use.
- Replace 'x' with "auto" to automatically name the seed based on the
skill/item's name.
- Seed will be furthered modified by the plugin based on the user, the
target, and the action used as to prevent RNG manipulation.
- "RNG Seed" variant is a generalized seed.
- "Daily Seed" variant will have results vary based on the day.
- "Unique Seed" variant will have results vary based on save marker.
- "Daily Unique Seed" variant will have results vary based on the day and
and save marker.
- Only applies to the happenings of inside Game_Action.prototype.apply and
Action Sequence - MECH: Action Effect.
- For all other things, utilize the Plugin Commands for this plugin to
grab RNG-generated values within variables and use that or use the
script calls to access RNG-generated results.
- If this notetag is not used, default to the settings found in the Plugin
Parameters for the default action Random Number Generator seed.
Example:
<Unique Seed: RpgTsukuru>
--- <No RNG Seed> - Used for: Skill, Item Notetags - Used to suppress the Plugin Parameter's default action Random Number Generator seed and to prevent this skill/item from using RNG seeds. --- Elements and Status Menu Core VisuStella MZThe following are notetags that have been added through this plugin. These notetags will not work with your game if this plugin is OFF or not present. Element-Related NotetagsThe following are element-related notetags. --- <Multi-Element: x> <Multi-Element: x,x,x> <Multi-Element: name> <Multi-Element: name, name, name> - Used for: Skill, Item Notetags - Gives this action an additional element (alongside the Damage element) when calculating damage. - Replace 'x' with the ID of the element from Database > Types. - For 'name' notetag variant, replace 'name' with the element's name. Remove any \I[x] in the 'name' replacement. - Insert multiples of this notetag to allow unit to assign more elements. --- <Multi-Element Rule: Maximum> <Multi-Element Rule: Minimum> <Multi-Element Rule: Multiply> <Multi-Element Rule: Additive> <Multi-Element Rule: Average> - Used for: Skill, Item Notetags - Changes the multi-element ruling for this action to either 'Maximum', 'Minimum', 'Multiply', 'Additive', or 'Average'. - If this notetag is not used, refer to the default ruling set by the Plugin Parameters. --- <Force Action Element: Null> <Force Action Element: x> <Force Action Element: x,x,x> <Force Action Element: name> <Force Action Element: name, name, name> - Used for: Actor, Class, Weapon, Armor, Enemy, State Notetags - Forces any actions performed by this unit to be the specific element(s). - Replace 'x' with the ID of the element from Database > Types. - For 'name' notetag variant, replace 'name' with the element's name. Remove any \I[x] in the 'name' replacement. - If multiples of this notetag are found across various Database objects, priority will go in the order of states, actor, enemy, class, equips. --- <Force Received Element id Rate: x%> <Force Received Element id Rate: x.x> <Force Received Element name Rate: x%> <Force Received Element name Rate: x.x> - Used for: Actor, Class, Weapon, Armor, Enemy, State Notetags - Forces the unit to receive elemental damage at x multiplier. - Replace 'id' with the ID of the element. - For 'name' notetag variant, replace 'name' with the element's name. Remove any \I[x] in the 'name' replacement. - Insert multiples of this notetag to allow unit to assign more elements. --- <Received Element id Plus: +x%> <Received Element id Plus: +x.x> <Received Element name Plus: +x%> <Received Element name Plus: +x.x> - Used for: Actor, Class, Weapon, Armor, Enemy, State Notetags - Alters the received elemental damage additively before applying rates and flat bonuses. - Replace 'id' with the ID of the element. - For 'name' notetag variant, replace 'name' with the element's name. Remove any \I[x] in the 'name' replacement. - Insert multiples of this notetag to allow unit to assign more elements. - Formula works as follows: (base + plus) * rate + flat - Formula may vary if changed up in the Plugin Parameters. - This does not add on flat bonus damages after calculating elemental rates. This merely adds onto it at the end after applying rates if the formula from above is unchanged. --- <Received Element id Rate: x%> <Received Element id Rate: x.x> <Received Element name Rate: x%> <Received Element name Rate: x.x> - Used for: Actor, Class, Weapon, Armor, Enemy, State Notetags - Alters the received elemental damage multiplicatively after applying plus and before applying flat bonuses. - Replace 'id' with the ID of the element. - For 'name' notetag variant, replace 'name' with the element's name. Remove any \I[x] in the 'name' replacement. - Insert multiples of this notetag to allow unit to assign more elements. - Formula works as follows: (base + plus) * rate + flat - Formula may vary if changed up in the Plugin Parameters. --- <Received Element id Flat: +x%> <Received Element id Flat: +x.x> <Received Element name Flat: +x%> <Received Element name Flat: +x.x> - Used for: Actor, Class, Weapon, Armor, Enemy, State Notetags - Alters the received elemental damage additively after applying rates and plus bonuses. - Replace 'id' with the ID of the element. - For 'name' notetag variant, replace 'name' with the element's name. Remove any \I[x] in the 'name' replacement. - Insert multiples of this notetag to allow unit to assign more elements. - Formula works as follows: (base + plus) * rate + flat - Formula may vary if changed up in the Plugin Parameters. - This does not add on flat bonus damages after calculating elemental rates. This merely adds onto it at the end after applying rates if the formula from above is unchanged. --- <Dealt Element id Plus: +x%> <Dealt Element id Plus: +x.x> <Dealt Element name Plus: +x%> <Dealt Element name Plus: +x.x> - Used for: Actor, Class, Weapon, Armor, Enemy, State Notetags - Alters the dealt elemental damage additively before applying rates and flat bonuses. - Replace 'id' with the ID of the element. - For 'name' notetag variant, replace 'name' with the element's name. Remove any \I[x] in the 'name' replacement. - Insert multiples of this notetag to allow unit to assign more elements. - Formula works as follows: (base + plus) * rate + flat - Formula may vary if changed up in the Plugin Parameters. - This does not add on flat bonus damages after calculating elemental rates. This merely adds onto it at the end after applying rates if the formula from above is unchanged. --- <Dealt Element id Rate: x%> <Dealt Element id Rate: x.x> <Dealt Element name Rate: x%> <Dealt Element name Rate: x.x> - Used for: Actor, Class, Weapon, Armor, Enemy, State Notetags - Alters the dealt elemental damage multiplicatively after applying plus and before applying flat bonuses. - Replace 'id' with the ID of the element. - For 'name' notetag variant, replace 'name' with the element's name. Remove any \I[x] in the 'name' replacement. - Insert multiples of this notetag to allow unit to assign more elements. - Formula works as follows: (base + plus) * rate + flat - Formula may vary if changed up in the Plugin Parameters. --- <Dealt Element id Flat: +x%> <Dealt Element id Flat: +x.x> <Dealt Element name Flat: +x%> <Dealt Element name Flat: +x.x> - Used for: Actor, Class, Weapon, Armor, Enemy, State Notetags - Alters the dealt elemental damage additively after applying rates and plus bonuses. - Replace 'id' with the ID of the element. - For 'name' notetag variant, replace 'name' with the element's name. Remove any \I[x] in the 'name' replacement. - Insert multiples of this notetag to allow unit to assign more elements. - Formula works as follows: (base + plus) * rate + flat - Formula may vary if changed up in the Plugin Parameters. - This does not add on flat bonus damages after calculating elemental rates. This merely adds onto it at the end after applying rates if the formula from above is unchanged. --- <Element Absorb: x> <Element Absorb: x,x,x> <Element Absorb: name> <Element Absorb: name, name, name> - Used for: Actor, Class, Weapon, Armor, Enemy, State Notetags - Gives the unit the ability to absorb damage from element. - Replace 'x' with the ID of the element from Database > Types. - For 'name' notetag variant, replace 'name' with the element's name. Remove any \I[x] in the 'name' replacement. - Insert multiples of this notetag to allow unit to absorb more elements. - Absorption is calculated after all other element rates have been made. --- <Element Reflect: x> <Element Reflect: x,x,x> <Element Reflect: name> <Element Reflect: name, name, name> - Used for: Actor, Class, Weapon, Armor, Enemy, State Notetags - Gives the unit the ability to reflect damage from element. - Replace 'x' with the ID of the element from Database > Types. - For 'name' notetag variant, replace 'name' with the element's name. Remove any \I[x] in the 'name' replacement. - Insert multiples of this notetag to allow unit to reflect more elements. - Reflection occurs before any damage is calculated and dealt. - Elemental Reflection will take priority over Magic Reflection. --- <Bypass Element Reflect> - Used for: Skill, Item Notetags - Makes this skill/item unable to be reflected by Element Reflect effect. --- <Element Pierce: x> <Element Pierce: x,x,x> <Element Pierce: name> <Element Pierce: name, name, name> - Used for: Actor, Class, Weapon, Armor, Enemy, State Notetags - Gives the unit the ability to attack with the element and bypass any kinds of damage immunities, reflections, and absorptions. - Actions can still miss or be countered, however. - If an action has multiple elements, as long as one element has pierce, the action will go through. - Replace 'x' with the ID of the element from Database > Types. - For 'name' notetag variant, replace 'name' with the element's name. Remove any \I[x] in the 'name' replacement. - Insert multiples of this notetag to allow unit to reflect more elements. --- <Element Pierce> - Used for: Skill, Item Notetags - Makes this skill/item bypass any kinds of damage immunities, reflections, and absorptions. - Action can still miss or be countered, however. --- JavaScript Notetags: Element-RelatedThe following are notetags made for users with JavaScript knowledge to determine dynamic element-related effects. --- <JS Force Received Element id Rate: code> <JS Force Received Element name Rate: code> - Used for: Actor, Class, Weapon, Armor, Enemy, State Notetags - Forces the unit to receive elemental damage at a code-determined rate. - Replace 'id' with the ID of the element. - For 'name' notetag variant, replace 'name' with the element's name. - Replace 'code' with JavaScript code to determine the change. - Insert multiples of this notetag to allow unit to assign more elements. --- <JS Received Element id Plus: code> <JS Received Element name Plus: code> - Used for: Actor, Class, Weapon, Armor, Enemy, State Notetags - Alters the received elemental damage additively before applying rates and flat bonuses. - Replace 'id' with the ID of the element. - For 'name' notetag variant, replace 'name' with the element's name. - Replace 'code' with JavaScript code to determine the change. - Insert multiples of this notetag to allow unit to assign more elements. --- <JS Received Element id Rate: code> <JS Received Element name Rate: code> - Used for: Actor, Class, Weapon, Armor, Enemy, State Notetags - Alters the received elemental damage additively after applying plus and before applying flat bonuses. - Replace 'id' with the ID of the element. - For 'name' notetag variant, replace 'name' with the element's name. - Replace 'code' with JavaScript code to determine the change. - Insert multiples of this notetag to allow unit to assign more elements. --- <JS Received Element id Flat: code> <JS Received Element name Flat: code> - Used for: Actor, Class, Weapon, Armor, Enemy, State Notetags - Alters the received elemental damage additively after applying rates and plus bonuses. - Replace 'id' with the ID of the element. - For 'name' notetag variant, replace 'name' with the element's name. - Replace 'code' with JavaScript code to determine the change. - Insert multiples of this notetag to allow unit to assign more elements. --- <JS Dealt Element id Plus: code> <JS Dealt Element name Plus: code> - Used for: Actor, Class, Weapon, Armor, Enemy, State Notetags - Alters the dealt elemental damage additively before applying rates and flat bonuses. - Replace 'id' with the ID of the element. - For 'name' notetag variant, replace 'name' with the element's name. - Replace 'code' with JavaScript code to determine the change. - Insert multiples of this notetag to allow unit to assign more elements. --- <JS Dealt Element id Rate: code> <JS Dealt Element name Rate: code> - Used for: Actor, Class, Weapon, Armor, Enemy, State Notetags - Alters the dealt elemental damage additively after applying plus and before applying flat bonuses. - Replace 'id' with the ID of the element. - For 'name' notetag variant, replace 'name' with the element's name. - Replace 'code' with JavaScript code to determine the change. - Insert multiples of this notetag to allow unit to assign more elements. --- <JS Dealt Element id Flat: code> <JS Dealt Element name Flat: code> - Used for: Actor, Class, Weapon, Armor, Enemy, State Notetags - Alters the dealt elemental damage additively after applying rates and plus bonuses. - Replace 'id' with the ID of the element. - For 'name' notetag variant, replace 'name' with the element's name. - Replace 'code' with JavaScript code to determine the change. - Insert multiples of this notetag to allow unit to assign more elements. --- Trait Set NotetagsTrait Sets are used to apply various properties to actor and enemy units as a whole depending on what the trait set is. Use the following notetags to determine how to properly assign the desired Trait Set. WARNING: Trait Sets only work if they are enabled in the Plugin Parameters: ElementStatusCore => General Trait Set Settings => Enable Trait Sets? --- <Element: name> <SubElement: name> <Gender: name> <Race: name> <Nature: name> <Alignment: name> <Blessing: name> <Curse: name> <Zodiac: name> <Variant: name> - Used for: Actor, Enemy Notetags - Determines the specific Trait Set(s) for the actor or enemy unit. - Replace 'name' with the name of an associated Trait Set type found in the Plugin Parameters. - If any of these notetags are unused, the Trait Set will default to the one determined in the Plugin Parameters. Examples: <Element: Fire> <SubElement: Thunder> <Gender: Male> <Nature: Jolly> <Alignment: Chaotic Good> <Zodiac: Aries> --- <Trait Sets> Element: name SubElement: name Gender: name Race: name Nature: name Alignment: name Blessing: name Curse: name Zodiac: name Variant: name </Trait Sets> - Used for: Actor, Enemy Notetags - Determines the Trait Set(s) for the actor or enemy unit. - Replace 'name' with the name of an associated Trait Set type found in the Plugin Parameters. - You may remove the Trait Set types (ie. Blessing and Curse) that you don't want to assign anything to from the list. - If any of these sets are unused, the Trait Set will default to the one determined in the Plugin Parameters. Example: <Trait Sets> Element: Fire SubElement: Thunder Gender: Male Nature: Jolly Alignment: Chaotic Good Zodiac: Aries </Trait Sets> --- <Random type> name: weight name: weight name: weight </Random type> - Used for: Actor, Enemy Notetags - Assigns a random Trait Set for this Trait Set 'type'. - Replace 'type' with 'Element', 'SubElement', 'Gender', 'Race', 'Nature', 'Alignment', 'Blessing', 'Curse', 'Zodiac', or 'Variant' depending on which you're trying to randomize. - Replace 'name' with the name of an associated Trait Set type found in the Plugin Parameters. - Replace 'weight' with a number value representing how often the 'name' would come up. The higher the weight, the more often. You may omit this and the colon(:) and just type in the 'name' instead. - This would bypass the innate settings determined in the Plugin Parameters. Examples: <Random Gender> Male: 75 Female: 25 </Random Gender> <Random Variant> Mighty: 10 Major: 20 Greater: 60 Normal: 200 Lesser: 10 Minor Puny </Random Variant> --- <No Random Trait Sets> - Used for: Actor, Enemy Notetags - Prevents random Trait Sets from being assigned to this actor/enemy unit. --- <Trait Set Name Format> text </Trait Set Name Format> - Used for: Enemy Notetags - Enemy names can be affected by the Trait Sets they have. Replace 'text' with the format you wish to see them have. - Insert [Name] into 'text' to determine where the enemy's name goes. - Insert [Letter] into 'text' to determine where the enemy's letter goes. - Insert [Element] into 'text' to determine where the format text goes. - Insert [SubElement] into 'text' to determine where the format text goes. - Insert [Gender] into 'text' to determine where the format text goes. - Insert [Race] into 'text' to determine where the format text goes. - Insert [Nature] into 'text' to determine where the format text goes. - Insert [Alignment] into 'text' to determine where the format text goes. - Insert [Blessing] into 'text' to determine where the format text goes. - Insert [Curse] into 'text' to determine where the format text goes. - Insert [Zodiac] into 'text' to determine where the format text goes. - Insert [Variant] into 'text' to determine where the format text goes. Example: <Trait Set Name Format> [Alignment] [Nature] [Element] [Name][Gender] [Letter] </Trait Set Name Format> --- <traitname Battler Name: filename> <traitname Battler Names> filename: weight filename: weight filename: weight </traitname Battler Names> - Used for: Enemy Notetags - Allows certain Trait Sets to cause battlers to have a unique appearance. - Replace 'traitname' with the name of the Trait Set (ie. Male, Female). - Replace 'filename' with the battler graphic to associate with that - Replace 'weight' with a number value representing how often the 'name' would come up. The higher the weight, the more often. You may omit this and the colon(:) and just type in the 'name' instead. Trait Set. Examples: <Male Battler Name: Spider1> <Female Battler Name: Spider2> <Male Battler Names> Rogue: 25 Fighter: 10 Warrior </Male Battler Names> --- <traitname Battler Hue: x> <traitname Battler Hues> x: weight x: weight x: weight </traitname Battler Hues> - Used for: Enemy Notetags - Allows certain Trait Sets to cause battlers to use a different hue. - Replace 'traitname' with the name of the Trait Set (ie. Male, Female). - Replace 'x' with a number from 0 to 360 depicting the hue to become. - Replace 'weight' with a number value representing how often the 'name' would come up. The higher the weight, the more often. You may omit this and the colon(:) and just type in the 'name' instead. Examples: <Male Battler Hue: 160> <Female Battler Hue: 275> <Female Battler Hues> 275: 10 325: 5 345 </Female Battler Hues> --- <Equip Trait Requirement: name> <Equip Trait Requirement: name, name, name> - Used for: Weapon, Armor Notetags - Makes this piece of equipment equippable by only actors with those traits. - If there are multiple traits required, all of them have to be met. - If multiple trait types share the same trait name, the listed name will count for all of them. - Replace 'name' with the name of an associated Trait Set type found in the Plugin Parameters. - Changing trait sets mid-game will remove unmatched traits. - Usage Example: <Equip Trait Requirement: Female> makes the item only equippable by female actors as long as they are tagged as female. --- <Damage VS name Trait: x%> - Used for: Actor, Class, Skill, Item, Weapon, Armor, Enemy, State Notetags - If used on a skill or item, the action will perform 'x%' damage versus any targets with 'name' trait sets (any of them). - If present in an actor, class, weapon, armor, enemy, or state's notebox, all damage types will be multiplied by 'x%' versus targets with 'name' trait sets (any of them). - This notetag does not affect healing. - Replace 'name' with the name of an associated Trait Set type found in the Plugin Parameters. - Replace 'x' with a number representing a percentage value to augment damage by. - Use multiple notetags to affect multiple trait types. If multiple effects manage to stack, they will stack multiplicatively. --- <Healing VS name Trait: x%> - Used for: Actor, Class, Skill, Item, Weapon, Armor, Enemy, State Notetags - If used on a skill or item, the action will perform 'x%' heals versus any targets with 'name' trait sets (any of them). - If present in an actor, class, weapon, armor, enemy, or state's notebox, all heal types will be multiplied by 'x%' versus targets with 'name' trait sets (any of them). - This notetag does not affect damage. - Replace 'name' with the name of an associated Trait Set type found in the Plugin Parameters. - Replace 'x' with a number representing a percentage value to augment heals by. - Use multiple notetags to affect multiple trait types. If multiple effects manage to stack, they will stack multiplicatively. --- <Accuracy VS name Trait: x%> <Accuracy VS name Trait: +x%> <Accuracy VS name Trait: -x%> - Used for: Actor, Class, Skill, Item, Weapon, Armor, Enemy, State Notetags - If used on a skill or item, the action will have 'x%', '+x%', or '-x%' accuracy against any targets with 'name' trait sets (any of them). - If present in an actor, class, weapon, armor, enemy, or state's notebox, all actions will have 'x%', '+x%', or '-x%' accuracy against any targets with 'name' trait sets (any of them). - Replace 'name' with the name of an associated Trait Set type found in the Plugin Parameters. - Replace 'x' respectively for percentile or additive/subtractive values. - 'x%' means an action with an accuracy rate of 20% will be (20% * x%). - '+x%' means an action with an accuracy rate of 20% will be (20% + x%). - '-x%' means an action with an accuracy rate of 20% will be (20% - x%). - Multiple 'x%' notetags will stack multiplicatively. - Multiple '+x' and '-x' notetags will stack additively. --- <Critical VS name Trait: x%> <Critical VS name Trait: +x%> <Critical VS name Trait: -x%> - Used for: Actor, Class, Skill, Item, Weapon, Armor, Enemy, State Notetags - If used on a skill or item, the action will have 'x%', '+x%', or '-x%' crtical rate against any targets with 'name' trait sets (any of them). - If present in an actor, class, weapon, armor, enemy, or state's notebox, all actions will have 'x%', '+x%', or '-x%' crtical rate against any targets with 'name' trait sets (any of them). - Replace 'name' with the name of an associated Trait Set type found in the Plugin Parameters. - Replace 'x' respectively for percentile or additive/subtractive values. - 'x%' means an action with a critical rate of 20% will be (20% * x%). - '+x%' means an action with a critical rate of 20% will be (20% + x%). - '-x%' means an action with a critical rate of 20% will be (20% - x%). - Multiple 'x%' notetags will stack multiplicatively. - Multiple '+x' and '-x' notetags will stack additively. --- Actor Biography NotetagThe following notetag is used for the Status Menu if the updated Status Menu Layout option has been enabled from the Plugin Parameters. --- <Biography> text text text </Biography> - Used for: Actor Notetags - Determines the actor's biography shown in the Status Menu. - Replace 'text' with the text intended. - Text Codes are allowed. - The biography can be changed mid-game through Plugin Commands. - If this notetag isn't used, then the actor's profile message is displayed as the biography. --- Encounter Effects VisuStella MZThe following are notetags that have been added through this plugin. These notetags will not work with your game if this plugin is OFF or not present. --- Battle Advantage-Related Tags--- <Preemptive> - Used for: Troop Name Tag - Any troop with this tag in its name will have the battle start off with the preemptive advantage (in favor of the player party). --- <Surprise> - Used for: Troop Name Tag - Any troop with this tag in its name will have the battle start off with the surprise advantage (in favor of the enemy party). --- <No Advantage> - Used for: Troop Name Tag - Any troop with this tag in its name will have the battle start off with no advantage at all. --- <Chance> - Used for: Troop Name Tag - Any troop with this tag in its name will have the battle start off with a chance for preemptive, surprise, or no advantages (calculated normally). --- Event Encounter-Related Notetags--- <Follower Trigger> - Used for: Event Notetags and Event Page Comment Tags - This event can trigger by touching a follower instead of only the player. --- <Encounter Direction Lock> - Used for: Event Notetags and Event Page Comment Tags - Normally when an event triggers without Direction Fix, it will face the player character. This tag prevents the event from facing the player, but still allows the event to freely turn directions. - This is best used in conjunction with the Conditional Branch scripts. --- Alert-Related Notetags--- <Alert> - Used for: Event Notetags and Event Page Comment Tags - Enables alert detection towards the player on the event. - This will use the default settings unless changed by other tags. --- <Alert Range: x> - Used for: Event Notetags and Event Page Comment Tags - Enables alert detection towards the player on the event. - Changes the event's alert detection range to 'x' tiles. - Replace 'x' with a number value representing the number of tiles to use for its detection range. --- <Alert Dash> <Alert Walk> - Used for: Event Notetags and Event Page Comment Tags - Enables alert detection towards the player on the event. - If alerted, the event will dash/walk instead of whatever is set as a default setting within the Plugin Parameters. --- <Alert Time: x> - Used for: Event Notetags and Event Page Comment Tags - Enables alert detection towards the player on the event. - This determines the amount of time in frames for the event to chase the player continuously while the player is outside of the detection range. - Replace 'x' with a number value representing the number of frames for the event to keep chasing the player with. - If the player steps back into the alert detection range, the timer will be reset. --- <Alert FoV Angle: x> - Used for: Event Notetags and Event Page Comment Tags - Changes the Field of View angle to 'x' for the event. - Replace 'x' with a number value representing the degrees of for the field of view angle used by the event to detect players. - The angle will always be centered to the event's line of sight. --- <Alert Show FoV> <Alert Hide FoV> - Used for: Event Notetags and Event Page Comment Tags - Shows/hides the field of view for the event. - If an event's field of view is hidden, it can still chase players when entering the event's range. --- <Alert Response: chase> <Alert Response: rush> <Alert Response: flee> <Alert Response: random> - Used for: Event Notetags and Event Page Comment Tags - Enables alert detection towards the player on the event. - This determines how an alerted event will react. - Chase: Use path finding to find a route to the player - Rush: Rush directly at the player - Flee: Run away from the player - Random: Move in random directions --- <Response Balloon: name> - Used for: Event Notetags and Event Page Comment Tags - Enables alert detection towards the player on the event. - Determines the balloon displayed when initially alerted and responding. - Replace 'name' with any of the following: - None - Exclamation - Question - Music Note - Heart - Angle - Sweat - Frustration - Silence - Light Bulb - Zzz - User-defined 1 - User-defined 2 - User-defined 3 - User-defined 4 - User-defined 5 --- <Alert React Delay: x> - Used for: Event Notetags and Event Page Comment Tags - Enables alert detection towards the player on the event. - When initially alerted, there is a small window of waiting before starting the chase. - Replace 'x' with a number representing the number of frames for the initial reaction delay. --- <Alert Common Event: x> - Used for: Event Notetags and Event Page Comment Tags - Enables alert detection towards the player on the event. - Runs a Common Event when initially alerted. - Replace 'x' with a number representing the ID of the Common Event to run. - Use 0 to run no Common Events. --- <Alert Sound Name: name> <Alert Sound Volume: x> <Alert Sound Pitch: y> <Alert Sound Pan: z> - Used for: Event Notetags and Event Page Comment Tags - Enables alert detection towards the player on the event. - Play this sound effect when the event is initially alerted. - Replace 'name' with the filename of the sound effect found in /audio/se/ to play. Do NOT include the file extension. - Replace 'x' with a number representing the volume of the sound effect. - Replace 'y' with a number representing the pitch of the sound effect. - Replace 'z' with a number representing the pan of the sound effect. --- <Return Position> <Stay Position> - Used for: Event Notetags and Event Page Comment Tags - Enables alert detection towards the player on the event. - Decide if the event will return back to its initial position after an alert chase is over. - Or if it will stay where it currently is. --- <Return Time: x> - Used for: Event Notetags and Event Page Comment Tags - Enables alert detection towards the player on the event. - This is the amount of time spent (in frames) after an alert chase is over but returning back to the event's original position. - Replace 'x' with a number representing the number of frames for the duration between idling and returning. --- <Idle Balloon: name> - Used for: Event Notetags and Event Page Comment Tags - Enables alert detection towards the player on the event. - Determines the balloon displayed when beginning the idle phase after an alert chase is over but before returning back to the original position. - Replace 'name' with any of the following: - None - Exclamation - Question - Music Note - Heart - Angle - Sweat - Frustration - Silence - Light Bulb - Zzz - User-defined 1 - User-defined 2 - User-defined 3 - User-defined 4 - User-defined 5 --- <Returning Balloon: name> - Used for: Event Notetags and Event Page Comment Tags - Enables alert detection towards the player on the event. - Determines the balloon displayed when the event starts returning back to the event's original position. - Replace 'name' with any of the following: - None - Exclamation - Question - Music Note - Heart - Angle - Sweat - Frustration - Silence - Light Bulb - Zzz - User-defined 1 - User-defined 2 - User-defined 3 - User-defined 4 - User-defined 5 --- Alert Vision Blocking-Related Notetags--- <Block Vision Tag: x> <Block Vision Tags: x, x, x> - Used for: Tileset and Map Notetags - When using a specific tileset or on a specific map, tiles marked with the terrain tag 'x' will obscure the line of sight from the event to the player character. - Replace 'x' with a number value representing the terrain tag used. - This does NOT change the Field of View Alert Detection Range graphic. --- <Block Vision Region: x> <Block Vision Regions: x, x, x> - Used for: Tileset and Map Notetags - When using a specific tileset or on a specific map, tiles marked with the region ID 'x' will obscure the line of sight from the event to the player character. - Replace 'x' with a number value representing the region ID used. - This does NOT change the Field of View Alert Detection Range graphic. --- Enhanced TP System VisuStella MZThe following are notetags that have been added through this plugin. These notetags will not work with your game if this plugin is OFF or not present. --- General TP Mode NotetagsThese are TP Mode-related notatags that affect both actors and enemies. --- <TP Mode: name> - Used for: Actor Enemy, State Notetags - Sets the starting TP Mode for this actor/enemy to be 'name'. - Replace 'name' with the name of a TP Mode from the Plugin Parameters => TP Modes listing. --- <Starting TP Modes> name name name name </Starting TP Modes> - Used for: Actor Notetags - Adds TP Modes to the actor's available list of TP Modes from the start. - Replace 'name' with the name of a TP Mode from the Plugin Parameters => TP Modes listing. - Insert more 'name' entries for more TP Modes. --- <Change Target TP Mode: name> <Change User TP Mode: name> - Used for: Skill, Item Notetags - Changes the target/user's TP Mode to the target TP Mode upon using this item/skill. - For <Change Target TP Mode: name>, the action must successfully hit the target in order for the TP Mode to change. - Replace 'name' with the name of a TP Mode from the Plugin Parameters => TP Modes listing. --- Actor-Only TP Mode NotetagsThese are TP Mode-related notetags that only affect actors. --- <Learn TP Mode: name> - Used for: Skill Notetags - Causes the target selected actor to learn the specific TP Mode when the skill is learned. - Insert multiple copies of this notetag to have the skill learn more TP Modes for the target actor. - Replace 'name' with the name of a TP Mode from the Plugin Parameters => TP Modes listing. - Keep in mind that learning the skill is required for the TP Mode to be learned. Adding the skill through a trait will not teach the TP Mode. --- <Learn TP Modes> name name name </Learn TP Modes> - Used for: Skill Notetags - Causes the target selected actor to learn the specific TP Mode when the skill is learned. - Replace 'name' with the name of a TP Mode from the Plugin Parameters => TP Modes listing. - Insert more 'name' entries for more TP Modes. --- <Unlock TP Mode: name> - Used for: Skill, Item Notetags - Causes the target selected actor to unlock the specific TP Mode. - Insert multiple copies of this notetag to have the item/skill unlock more TP Modes for the target actor. - Replace 'name' with the name of a TP Mode from the Plugin Parameters => TP Modes listing. --- <Unlock TP Modes> name name name </Unlock TP Modes> - Used for: Skill, Item Notetags - Causes the target selected actor to unlock the specific TP Mode. - Replace 'name' with the name of a TP Mode from the Plugin Parameters => TP Modes listing. - Insert more 'name' entries for more TP Modes. --- <Force TP Mode: name> - Used for: Actor, Class, Weapon, Armor, Enemy, State Notetags - Forces the affected battler to use the specific named TP Mode in battle. - Priority is given based the ordering of trait objects if multiple forced TP Mode effects are present. - Replace 'name' with the name of a TP Mode from the Plugin Parameters => TP Modes listing. --- Enemy Levels VisuStella MZThe following are notetags that have been added through this plugin. These notetags will not work with your game if this plugin is OFF or not present. --- Setup Enemy Level NotetagsThese are the notetags that determine an enemy's level upon creation. --- <Show Level> <Hide Level> - Used for: Enemy Notetags - Lets you show or hide an enemy's level from their name. - This will override the Plugin Parameters => General => Show Enemy Level? setting. --- <Level: x> - Used for: Enemy Notetags - Sets the enemy's level to a static level of 'x' whenever it's created. - Replace 'x' with a numeric value representing its level. - This will bypass the default level settings and ignore map levels. - This is affected by the Level Bonus and Level Variance modifiers. --- <Level: x to y> - Used for: Enemy Notetags - Sets the enemy's level to a level between 'x' and 'y' whenever the enemy is created. - Replace 'x' and 'y' with a numeric values representing its level range. - This will bypass the default level settings and ignore map levels. - This is affected by the Level Bonus and Level Variance modifiers. --- <Level Variable: x> - Used for: Enemy Notetags - Sets the enemy's level to a level represented by the value used inside Game Variable x. - Replace 'x' with the ID of the Game Variable to reference its value. - This will bypass the default level settings and ignore map levels. - This is affected by the Level Bonus and Level Variance modifiers. --- <Level: Highest Actor Level> <Level: Highest Party Level> <Level: Average Actor Level> <Level: Average Party Level> <Level: Lowest Actor Level> <Level: Lowest Party Level> - Used for: Enemy Notetags - Sets the base level of this enemy equal to either (respectively: - The highest level of any actor in the player's party. - The highest level of any actor in the battling party. - The average level of any actor in the player's party. - The average level of any actor in the battling party. - The lowest level of any actor in the player's party. - The lowest level of any actor in the battling party. - This will bypass the default level settings and ignore map levels. - This is affected by the Level Bonus and Level Variance modifiers. --- <Level Bonus: +x> <Level Bonus: -x> - Used for: Enemy - This will add/subtrack the base level decided using the above notetags with a specific value. - Replace 'x' with a numeric value on how much to adjust the base level by. --- <Level Variance: x> - Used for: Enemy Notetags - This can allow the level range for the enemy to be anywhere from 'x' less than the base to 'x' more than the base. - Replace 'x' with a numeric value indicating how much level variance there is from the base level. --- <Positive Level Variance: x> <Negative Level Variance: x> - Used for: Enemy Notetags - This specifies the positive and negative level variances applied to the base level, specifying a change anywhere between the negative and positive modifiers to the base level. - Replace 'x' with a numeric value indicating how much level variance there is from the base level (negatively or positively). --- <Minimum Level: x> <Maximum Level: x> - Used for: Enemy Notetags - These notetags determine the absolute lowest and absolute highest level the enemy can be after all other modifiers. - Even if the bonus, variance, and manual level changes are applied, the enemy's level cannot be less than the minimum or larger than the maximum. - Replace 'x' with numeric values representing the limits of the enemy's level ranges. --- JavaScript Notetags: Setup Enemy LevelThe following are notetags made for users with JavaScript knowledge to determine dynamic enemy level setup notetags. --- <JS Level: code> - Used for: Enemy Notetags - Sets the enemy's level to a static level determined by code whenever it's created. - Replace 'code' with JavaScript code to determine the enemy's base level. --- <JS Level Bonus: code> - Used for: Enemy Notetags - This will add/subtrack the base level decided using the above notetags by a value determined by JavaScript code. - Replace 'code' with JavaScript code to determine the level bonus. --- <JS Level Variance: code> - Used for: Enemy Notetags - This can allow the level range for the enemy determined by JavaScript code as variance. - Replace 'code' with JavaScript code to determine the level variance. --- <JS Positive Level Variance: code> <JS Negative Level Variance: code> - Used for: Enemy Notetags - This specifies the positive and negative level variances applied to the base level, specifying a change anywhere between the negative and positive modifiers to the base level. - Replace 'code' with JavaScript code to determine the level variance. --- Enemy Appearance-Related NotetagsThese notetags allow you to adjust how enemies look based on their level. These settings will always start with level 1 being the default appearance while changing appearances once they reach a specific level. --- <Level x Image: filename> - Used for: Enemy Notetags - Once the enemy reaches level 'x' and above, its image will change to whatever 'filename' is used until it reaches the next appearance setting. - Replace 'x' with a number representing the level required to reach. - Replace 'filename' with the filename of the enemy in the img/enemies/ and/or img/sv_enemies folder. - Insert multiples of these notetags to give them different image settings throughout various levels. - If multiple notetags are used, the settings will be arranged from lowest to highest, giving priority to the highest met level. --- <Level Images> x: filename x: filename x: filename </Level Images> - Used for: Enemy Notetags - Once the enemy reaches level 'x' and above, its image will change to whatever 'filename' is used until it reaches the next appearance setting. - Replace 'x' with a number representing the level required to reach. - Replace 'filename' with the filename of the enemy in the img/enemies/ and/or img/sv_enemies folder. - Insert multiple lines of the 'x: filename' portion of the notetag to designate multiple settings. - If multiple settings are used, the settings will be arranged from lowest to highest, giving priority to the highest met level. --- Map Notetags that Determine Enemy LevelsThe following are notetags that are placed inside of a map's notebox to determine the levels of enemies fought on that map. These notetags cannot bypass the <Level: x> notetags but will take priority over the default Plugin Parameter settings. --- <Enemy Level: x> - Used for: Map Notetags - Sets the levels of the map's enemies to a static level of 'x' whenever they're created. - Replace 'x' with a numeric value representing its level. - This will bypass the default level settings but cannot bypass any of the <Level: x> notetags. - This is affected by the Level Bonus and Level Variance modifiers. --- <Enemy Level: x to y> - Used for: Map Notetags - Sets the map's enemy levels to a level between 'x' and 'y' whenever they are created. - Replace 'x' and 'y' with a numeric values representing its level range. - This will bypass the default level settings but cannot bypass any of the <Level: x> notetags. - This is affected by the Level Bonus and Level Variance modifiers. --- <Enemy Level: Highest Actor Level> <Enemy Level: Highest Party Level> <Enemy Level: Average Actor Level> <Enemy Level: Average Party Level> <Enemy Level: Lowest Actor Level> <Enemy Level: Lowest Party Level> - Used for: Map Notetags - Sets the base level of this map's levels equal to either (respectively: - The highest level of any actor in the player's party. - The highest level of any actor in the battling party. - The average level of any actor in the player's party. - The average level of any actor in the battling party. - The lowest level of any actor in the player's party. - The lowest level of any actor in the battling party. - This will bypass the default level settings but cannot bypass any of the <Level: x> notetags. - This is affected by the Level Bonus and Level Variance modifiers. --- JavaScript Notetags: Map Notetags that Determine Enemy LevelsThe following are notetags made for users with JavaScript knowledge to make map-related notetags that determine enemy levels. These notetags cannot bypass the <Level: x> notetags but will take priority over the default Plugin Parameter settings. --- <JS Enemy Level: code> - Used for: Map Notetags - Sets the levels of the map enemies to a static level determined by code whenever it's created. - Replace 'code' with JavaScript code to determine the enemy's base level. --- Enemy Level Parameter NotetagsThe growth rate and flat growth amounts can be determined by default in Plugin Parameters => Parameters Growth. However, if you wish for enemies to have special or unique growth, use the following notetags. --- <Growth Rate Per Level> MaxHP: +x.x MaxMP: +x.x ATK: +x.x DEF: +x.x MAT: +x.x MDF: +x.x AGI: +x.x LUK: +x.x EXP: +x.x Gold: +x.x Drop: +x.x </Growth Rate Per Level> - Used for: Enemy Notetags - Changes the rate of growth per level for the enemy. - Replace 'x.x' with a positive or negative value on how much to raise the parameter by for each level relative to the base value. --- <Growth Flat Per Level> MaxHP: +x.x MaxMP: +x.x ATK: +x.x DEF: +x.x MAT: +x.x MDF: +x.x AGI: +x.x LUK: +x.x EXP: +x.x Gold: +x.x Drop: +x.x </Growth Flat Per Level> - Used for: Enemy Notetags - Changes the flat growth value per level for the enemy. - Replace 'x.x' with a positive or negative value on how much to raise the parameter by for each level as a flat value. --- <Static Level Parameters> - Used for: Enemy Notetags - Insert this notetag if you do not wish for the growth modifiers to affect the enemy and just use the database's parameters as its current parameters no matter the level. --- Enemy Level Skill Requirement Notetags--- <Enemy Skill id Require Level: x> <Enemy Skill name Require Level: x> - Used for: Enemy Notetags - To make actions for enemies require specific levels, use the above notetag to define what level the enemy can use the identified skill at. - Replace 'id' with the ID of the skill to assign a level to. - Replace 'name' with the name of the skill to assign a level to. - Insert multiples of this notetag to assign levels to multiple skills. --- Enemy Level Change NotetagsThese notetags affect mid-battle level changing effects for enemies. --- <Change Enemy Level: +x> <Change Enemy Level: -x> - Used for: Skill, Item Notetags - Changes the enemy's level by 'x' positively or negatively mid-battle. - This will also alter the enemy's parameters. - Replace 'x' with the amount to raise/drop the level by. --- <Reset Enemy Level> - Used for: Skill, Item Notetags - Resets any level changes made to the enemy from the start of battle. --- <Resist Level Change> - Used for: Enemy, State Notetags - Makes the affected enemy resist level changes. --- JavaScript Notetags: Enemy Level ChangeThe following are notetags made for users with JavaScript knowledge to affect mid-battle level changing effects for enemies. --- <JS Change Enemy Level: code> - Used for: Skill, Item Notetags - Changes the enemy's level by a value determined by JavaScript code either positively or negatively mid-battle. - This will also alter the enemy's parameters. - Replace 'code' with JavaScript code to determine the amount to change the enemy's level by. --- Equip Battle Skills VisuStella MZThe following are notetags that have been added through this plugin. These notetags will not work with your game if this plugin is OFF or not present. --- Max Slots-Related Notetags--- <Equip Skill Base Slots: x> - Used for: Actor, Class Notetags - Determines the base equip battle skill slots an actor can have. - Priority will be given to the actor notetag over the class notetag if both notetags are present. - Replace 'x' with a number representing the base slots amount. - If this notetag is not used, use the Plugin Parameters default value. --- <Equip Skill Slots: +x> <Equip Skill Slots: -x> - Used for: Actor, Class, Weapon, Armor, State Notetags - Alters the maximum amount of equip battle skill slots an actor can have on top of the base value. - Replace 'x' with a number representing the increase or decrease in maximum equip battle skill slots. --- Skill Tier-Related Notetags--- <Skill Tier: key> - Used for: Skill Notetags - Determines the skill tier the skill belongs to. - Replace 'key' with the 'Tier ID Key' of the tier. You can find this data in the 'Skill Tiers' Plugin Parameters. --- <Skill Tier key Base Slots: x> - Used for: Actor, Class Notetags - Determines the base skill slots associated with the 'key' skill tier that an actor can have. - Priority will be given to the actor notetag over the class notetag if both notetags are present. - Replace 'key' with the 'Tier ID Key' of the tier. You can find this data in the 'Skill Tiers' Plugin Parameters. - Replace 'x' with a number representing the base slots amount. - Insert multiple copies of this notetag to provide different base amounts for different skill tiers. --- <Skill Tier key Slots: +x> <Skill Tier key Slots: -x> - Used for: Actor, Class, Weapon, Armor, State Notetags - Alters the maximum amount of skill slots associated with the 'key' skill tier that an actor can have. - Replace 'key' with the 'Tier ID Key' of the tier. You can find this data in the 'Skill Tiers' Plugin Parameters. - Replace 'x' with a number representing the increase or decrease in maximum equip battle skill slots. - Insert multiple copies of this notetag to provide different bonus amounts for different skill tiers. --- Equip Bonuses-Related Notetags--- <Equip param: +x> <Equip param: -x> - Used for: Skill Notetags - If this skill is equipped as a battle skill, it will also provide a flat stat increase/decrease to 'param' by 'x' amount. - Replace 'param' with 'MaxHP', 'MaxMP', 'ATK', 'DEF', 'MAT', 'MDF', 'AGI', or 'LUK' to determine which parameter to alter. - Replace 'x' with an integer to determine the flat increase or decrease to the designated parameter. - Insert multiple copies of this notetag to provide different bonus amounts for different parameters. --- <Equip State: id> <Equip States: id, id, id> <Equip State: name> <Equip States: name, name, name> - Used for: Skill Notetags - If this skill is equipped as a battle skill, it will also provide the designated state(s) as passive state(s) as long as the skill is equipped. - Replace 'id' with a number representing the ID of the state to add as a passive state that is only active while this equipped as a battle skill. - Replace 'name' with the name of the state to add as a passive state that is only active while this equipped as a battle skill. - Separate multiple names with commas. Case is not sensitive. - This differs from <Passive State: x> in how <Passive State: x> will always be providing the passive state regardless if the skill is equipped or not. This notetag requires the skill to be equipped in order to work. --- Actor Restriction-Related Notetags--- <Can Equip Battle Skills> <Cannot Equip Battle Skills> - Used for: Class Notetags - Determines if certain classes can equip battle skills or not. - If a class can equip battle skills, then the actor can utilize the equip battle skill mechanics. - If a class cannot, then they will behave as normally. --- Skill Restriction-Related Notetags--- <Cannot Equip> - Used for: Skill Notetags - This skill cannot be equipped as a battle skill. --- <Hide Equippable> - Used for: Skill Notetags - This skill cannot be equipped as a battle skill and will also be hidden from the equip skill list. --- <Access Equippable> <Access Only Equippable> - Used for: Skill Notetags - This skill can only be equipped as a battle skill if the actor would normally have access to its skill type(s). - The notetag variants do the same thing. Which you choose to use is entirely up to personal preference. --- <Always Equippable> <All Access Equippable> - Used for: Skill Notetags - This skill can always be equipped as a battle skill regardless if the actor would normally have access to its skill type(s). - The notetag variants do the same thing. Which you choose to use is entirely up to personal preference. --- Equip Medal System VisuStella MZThe following are notetags that have been added through this plugin. These notetags will not work with your game if this plugin is OFF or not present. --- Setup-Related Notetags--- <Equip Medal Cost: x> - Used for: Armor Notetags - Determines the Medal Slot cost of the Equippable Medal. - Replace 'x' with a number representing the Medal Slot cost. - If this notetag is not used, the Medal Slot cost will default to the setting found in the Plugin Parameters. --- <Learnable Equip Medal: id> <Learnable Equip Medals: id, id, id> <Learnable Equip Medal: name> <Learnable Equip Medals: name, name, name> <Learnable Equip Medals> name name name </Learnable Equip Medals> - Used for: Actor, Class Notetags - Determines which Equippable Medals that actors and classes can learn. - Replace 'id' with a number representing the ID of the medal. - Replace 'name' with the name of the medal. --- <Equip Medal Icon: x> <Equip Medal Name: name> - Used for: Armor Notetags - Changes the icon and name of the Equippable Medal to something different than how it is listed in the database or found in other menus. - Replace 'x' with a number representing the icon index you want. - Replace 'name' with the text of the name you want used. --- <Equip Medal Help Description> text text </Equip Medal Help Description> - Used for: Armor Notetags - Changes the help description of the Equippable Medal to something different than how it is listed in the database or found in other menus. - Replace 'text' with text you want displayed when this medal is selected and can be possibly equipped. --- <Learned Equip Medal: id> <Learned Equip Medals: id, id, id> <Learned Equip Medal: name> <Learned Equip Medals: name, name, name> - Used for: Actor Notetags - Allows this actor to already have learned this Equippable Medal by default so that it is available when the actor joins your party. - These Equippable Medals do not have to be listed through the learnable notetags. - Replace 'id' with a number representing the ID of the medal. - Replace 'name' with the name of the medal. --- <Already Equip Medal: id> <Already Equip Medals: id, id, id> <Already Equip Medal: name> <Already Equip Medals: name, name, name> - Used for: Actor Notetags - Allows this actor to already have learned this Equippable Medal and has it equipped by default so that it is available when the actor joins your party. - These Equippable Medals do not have to be listed through the learnable notetags. - Replace 'id' with a number representing the ID of the medal. - Replace 'name' with the name of the medal. --- <Branch Learn Equip Medal: id> <Branch Learn Equip Medals: id, id, id> <Branch Learn Equip Medal: name> <Branch Learn Equip Medals: name, name, name> - Used for: Armor Notetags - When this Equippable Medal is learned, also learn target medal(s). - Target medal(s) does not have to be learnable listed. - Replace 'id' with a number representing the ID of the target medal. - Replace 'name' with the name of the target medal. --- <Branch Learnable Equip Medal: id> <Branch Learnable Equip Medals: id, id, id> <Branch Learnable Equip Medal: name> <Branch Learnable Equip Medals: name, name, name> - Used for: Armor Notetags - When this Equippable Medal is learned, add target medal(s) to the actor's learnable medal list. - Replace 'id' with a number representing the ID of the target medal. - Replace 'name' with the name of the target medal. --- <Link Learn Equip Medal: id> <Link Learn Equip Medals: id, id, id> <Link Learn Equip Medal: name> <Link Learn Equip Medals: name, name, name> - Used for: Item, Weapon, Armor Notetags - When this item, weapon, or armor is gained, also learn target medal(s). - Target medal(s) does not have to be learnable listed. - Replace 'id' with a number representing the ID of the target medal. - Replace 'name' with the name of the target medal. --- <Link Learnable Equip Medal: id> <Link Learnable Equip Medals: id, id, id> <Link Learnable Equip Medal: name> <Link Learnable Equip Medals: name, name, name> - Used for: Item, Weapon, Armor Notetags - When this item, weapon, or armor is gained, add target medal(s) to the actor's learnable medal list. - Replace 'id' with a number representing the ID of the target medal. - Replace 'name' with the name of the target medal. --- Hiding-Related Notetags--- <Hide If Not Learned Equip Medal> - Used for: Armor Notetags - Bypasses Medals listing and hides the medal regardless of the Plugin Parameter settings. --- <Hide If Learned Equip Medal: id> <Hide If Learned Equip Medal: name> <Hide If Learned All Equip Medals: id, id, id> <Hide If Learned All Equip Medals: name, name, name> <Hide If Learned Any Equip Medals: id, id, id> <Hide If Learned Any Equip Medals: name, name, name> - Used for: Armor Notetags - Hides the medal from the Medals listing based on whether or not other medals are learned. - Replace 'id' with a number representing the ID of the medal. - Replace 'name' with the name of the medal. - The 'All' notetag variant requires all of the listed medals to be learned in order for this medal to be hidden. - The 'Any' notetag variant requires only one of the listed medals to be learned in order for this medal to be hidden. --- Masking-Related Notetags--- <Mask If Not Learned Equip Medal> <No Mask If Not Learned Equip Medal> - Used for: Armor Notetags - Bypasses the masking settings determined in the Plugin Parameters to mask or not mask the Equippable Medal if the medal is not learned. --- <Equip Medal Mask Name: name> - Used for: Armor Notetags - Instead of displaying ?'s for the mask name, this allows you to insert custom mask names instead. - Replace 'name' with the text you want for the mask name. --- Medal Evolution-Related Notetags--- <Equip Medal Evolves Into id: exp> <Equip Medal Evolves Into name: exp> - Used for: Armor Notetags - Allows this Equippable Medal to evolve into target medal upon reaching 'exp' Medal EXP. - Equipped Medal must be equipped in order to receive Medal EXP. - Replace 'id' with a number representing the ID of the evolution medal ID (armor ID). - Replace 'name' with text representing the evolution medal (armor) name. - Replace 'exp' with a number representing the amount of Medal EXP needed for this Equippable Medal to evolve. - If no evolve notetags are used, the Equippable Medal will not evolve and won't receive any Medal EXP. --- <Equip Medal Evolves Into Next: exp>
- Used for: Armor Notetags
- Allows this Equippable Medal to evolve into the next available armor as
a medal in the database upon reaching 'exp' Medal EXP.
- The target armor/medal is just whatever this Equippable Medal's ID is
but +1.
- Equipped Medal must be equipped in order to receive Medal EXP.
- Replace 'exp' with a number representing the amount of Medal EXP needed
for this Equippable Medal to evolve.
- If no evolve notetags are used, the Equippable Medal will not evolve and
won't receive any Medal EXP.
--- <Medal EXP: x> - Used for: Enemy Notetags - Determines how much Medal EXP this enemy will give when defeated. - Replace 'x' with a number representing the amount of Medal EXP given. - If this notetag is not used, the Medal EXP given will be determined by the Plugin Parameters. --- <Medal EXP Rate: x%> - Used for: Actor, Class, Weapon, Armor, State Notetags - Increases the amount of Medal EXP the affected actor will gain by a percentile value. - Replace 'x' with a percentage number representing the amount of Medal EXP that will be acquired. - This stacks multiplicatively with each other. - This does not apply when Medal EXP are directly added. --- <Equip Medal Full EXP Gauge> - Used for: Armor Notetags - If you want an Equippable Medal to have a gauge but it does not evolve, this will allow a full gauge to appear. - Useful for medals at the end of an evolution track. --- <Equip Medal EXP Gauge Color 1: x> <Equip Medal EXP Gauge Color 2: x> - Used for: Armor Notetags - Allows you to adjust the gauge colors used for this Equippable Medal. - Replace 'x' with a number representing the text color you want (ranges from 0 to 31). - Alternatively, use '#rrggbb' for custom colors in hex color format. --- Unlock Conditions-Related Notetags--- <Equip Medal Learn Condition Text> text text </Equip Medal Learn Condition Text> - Used for: Armor Notetags - Assigns text to the Equip Medals learn unlock conditions. - Replace 'text' with text you want displayed when this medal is selected and has not yet been learned. - If this notetag is not used, the help description will default be automatically constructed through the plugin using Plugin Parameters. --- <Equip Medal Learn Level: x> - Used for: Armor Notetags - Adds an unlock condition that the actor must reach level 'x'. - If this Equippable Medal is found in the learnable list and all unlock conditions in addition to this unlock condition are met, then the actor will learn the Equippable Medal. - Replace 'x' with a number representing the level the actor must reach. --- <Equip Medal Learn Battles: x>
<Equip Medal Learn Victories: x>
<Equip Medal Learn Escapes: x>
<Equip Medal Learn Defeats: x>
- Used for: Armor Notetags
- Adds a battle result-related unlock condition that the actor must fulfill
in order to learn this Equippable Medal.
- If this Equippable Medal is found in the learnable list and all unlock
conditions in addition to this unlock condition are met, then the actor
will learn the Equippable Medal.
- Replace 'x' with a number representing the number of battle results that
must be fulfilled.
- The number counter will start from the moment Equippable Medal is
listed in the learnable list.
- This does NOT take into account previous battle results before listing.
- The 'Battles' notetag variant requires participating in any battles.
- The 'Victories' notetag variant requires winning battles.
- The 'Escapes' notetag variant requires successfully escaping battles.
- The 'Defeats' notetag variant requires losing battles.
--- <Equip Medal Learn Attack Times: x>
<Equip Medal Learn Guard Times: x>
- Used for: Armor Notetags
- Adds an unlock condition that the actor must attack or guard 'x' times.
- If this Equippable Medal is found in the learnable list and all unlock
conditions in addition to this unlock condition are met, then the actor
will learn the Equippable Medal.
- Replace 'x' with a number representing the number of times the actor must
attack or guard.
- The number counter will start from the moment Equippable Medal is
listed in the learnable list.
- This does NOT take into account previous actions before listing.
--- <Equip Medal Learn Use Skills: x>
<Equip Medal Learn Use Physical Skills: x>
<Equip Medal Learn Use Magical Skills: x>
<Equip Medal Learn Use Certain Hit Skills: x>
- Used for: Armor Notetags
- Adds an unlock condition that the actor must use 'x' skills.
- If this Equippable Medal is found in the learnable list and all unlock
conditions in addition to this unlock condition are met, then the actor
will learn the Equippable Medal.
- Replace 'x' with a number representing the number of times the actor must
use skills.
- The number counter will start from the moment Equippable Medal is
listed in the learnable list.
- This does NOT take into account previous actions before listing.
- The 'Skills' notetag variant allows any kind of skill usage.
- The 'Physical Skills' notetag variant requires physical hit skills.
- The 'Magical Skills' notetag variant requires magical hit skills.
- The 'Certain Hit Skills' notetag variant requires certain hit skills.
--- <Equip Medal Learn SType id: x> <Equip Medal Learn SType name: x> - Used for: Armor Notetags - Adds an unlock condition that the actor must use 'x' skills that belong to a specific skill type. - If this Equippable Medal is found in the learnable list and all unlock conditions in addition to this unlock condition are met, then the actor will learn the Equippable Medal. - Replace 'id' with a number representing the needed skill type's ID number. - Replace 'name' with text representing the needed skill type's name. - Replace 'x' with a number representing the number of times the actor must use skills belonging to the needed skill type. --- <Equip Medal Learn Use Items: x>
- Used for: Armor Notetags
- Adds an unlock condition that the actor must use 'x' items.
- If this Equippable Medal is found in the learnable list and all unlock
conditions in addition to this unlock condition are met, then the actor
will learn the Equippable Medal.
- Replace 'x' with a number representing the number of times the actor must
use items.
- The number counter will start from the moment Equippable Medal is
listed in the learnable list.
- This does NOT take into account previous actions before listing.
- Any kind of item can be used.
--- <Equip Medal Learn Inflict Critical Times: x>
<Equip Medal Learn Receive Critical Times: x>
- Used for: Armor Notetags
- Adds an unlock condition that the actor must inflict or receive 'x'
critical hits from actions.
- If this Equippable Medal is found in the learnable list and all unlock
conditions in addition to this unlock condition are met, then the actor
will learn the Equippable Medal.
- Replace 'x' with a number representing the number of times the actor must
inflict or receive critical hits.
- The number counter will start from the moment Equippable Medal is
listed in the learnable list.
- This does NOT take into account previous actions before listing.
- The 'Inflict' notetag variant requires the critical hit to be caused by
the actor.
- The 'Receive' notetag variant requires the critical hit to be caused
against the actor.
--- <Equip Medal Learn Miss Times: x>
<Equip Medal Learn Evade Times: x>
- Used for: Armor Notetags
- Adds an unlock condition that the actor must miss or evade 'x' actions.
- If this Equippable Medal is found in the learnable list and all unlock
conditions in addition to this unlock condition are met, then the actor
will learn the Equippable Medal.
- Replace 'x' with a number representing the number of times the actor must
miss or evade actions.
- The number counter will start from the moment Equippable Medal is
listed in the learnable list.
- This does NOT take into account previous actions before listing.
- The 'Miss' notetag variant requires the actor to miss an action.
- The 'Evade' notetag variant requires the actor to evade an action.
--- <Equip Medal Learn Inflict Element id Damage: x>
<Equip Medal Learn Inflict Element name Damage: x>
<Equip Medal Learn Receive Element id Damage: x>
<Equip Medal Learn Receive Element name Damage: x>
- Used for: Armor Notetags
- Adds an unlock condition that the actor must inflict or receive damage
from a specific element 'x' times.
- If this Equippable Medal is found in the learnable list and all unlock
conditions in addition to this unlock condition are met, then the actor
will learn the Equippable Medal.
- Replace 'id' with a number representing the element ID number.
- Replace 'name' with text representing the element's name.
- Replace 'x' with a number representing the number of times the actor must
inflict or receive damage from a specific element.
- The number counter will start from the moment Equippable Medal is
listed in the learnable list.
- This does NOT take into account previous actions before listing.
- The 'Inflict' notetag variant requires the elemental damage to be caused
by the actor.
- The 'Receive' notetag variant requires the elemental damage to be caused
against the actor.
--- <Equip Medal Learn Inflict State id: x>
<Equip Medal Learn Inflict State name: x>
<Equip Medal Learn Receive State id: x>
<Equip Medal Learn Receive State name: x>
- Used for: Armor Notetags
- Adds an unlock condition that the actor must inflict or receive a specific
state 'x' times.
- If this Equippable Medal is found in the learnable list and all unlock
conditions in addition to this unlock condition are met, then the actor
will learn the Equippable Medal.
- Replace 'id' with a number representing the state ID number.
- Replace 'name' with text representing the state's name.
- Replace 'x' with a number representing the number of times the actor must
inflict or receive a specific state.
- The number counter will start from the moment Equippable Medal is
listed in the learnable list.
- This does NOT take into account previous actions before listing.
- The 'Inflict' notetag variant requires the target state damage to be caused
by the actor.
- The 'Receive' notetag variant requires the target state damage to be caused
against the actor.
--- <Equip Medal Learn Defeat name Trait: x> - Used for: Armor Notetags - Requires VisuMZ_1_ElementStatusCore! - Adds an unlock condition that the actor must defeat enemies with specific trait sets 'x' times. - If this Equippable Medal is found in the learnable list and all unlock conditions in addition to this unlock condition are met, then the actor will learn the Equippable Medal. - Replace 'name' with text representing the trait set's name. - Replace 'x' with a number representing the number of times the actor must defeat enemies with the target trait set. --- <Equip Medal Learn Inflict Total Damage: x>
<Equip Medal Learn Receive Total Damage: x>
<Equip Medal Learn Inflict Total Healing: x>
<Equip Medal Learn Receive Total Healing: x>
- Used for: Armor Notetags
- Adds an unlock condition that the actor must inflict or receive a total
amounts of damage or healing since the time the medal is listed.
- If this Equippable Medal is found in the learnable list and all unlock
conditions in addition to this unlock condition are met, then the actor
will learn the Equippable Medal.
- Replace 'x' with a number representing the total number of damage and
healing the actor must reach.
- The number counter will start from the moment Equippable Medal is
listed in the learnable list.
- This does NOT take into account previous actions before listing.
- The 'Inflict' notetag variant requires the damage/healing to be caused
by the actor.
- The 'Receive' notetag variant requires the damage/healing to be caused
against the actor.
--- <Equip Medal Learn Kill Count: x>
<Equip Medal Learn Death Count: x>
<Equip Medal Learn Assist Count: x>
- Used for: Armor Notetags
- Adds an unlock condition that the actor must fulfill the needed amount of
kills, suffer the amount of deaths, or partake in the number of assists
since the time the medal is listed.
- If this Equippable Medal is found in the learnable list and all unlock
conditions in addition to this unlock condition are met, then the actor
will learn the Equippable Medal.
- Replace 'x' with a number representing the number of kills, deaths, or
assists the actor must reach.
- The number counter will start from the moment Equippable Medal is
listed in the learnable list.
- This does NOT take into account previous actions before listing.
- The 'Kill' notetag variant refers to the number of enemies directly
defeated by the actor (death via slip damage or events do not count).
- The 'Death' notetag variant refers to the number of times the actor must
die (ie reaching 0 HP or receiving the Death state).
- The 'Assist' notetag variant refers to the number of times the actor is
present in battle when an enemy is defeated and not directly by the actor.
--- <Equip Medal Learn Have Gold: x> - Used for: Armor Notetags - Adds an unlock condition that the party must have 'x' gold present at the moment. - If this Equippable Medal is found in the learnable list and all unlock conditions in addition to this unlock condition are met, then the actor will learn the Equippable Medal. - Replace 'x' with a number representing the needed amount of gold. --- <Equip Medal Learn Have Item id: x> <Equip Medal Learn Have Item name: x> <Equip Medal Learn Have Weapon id: x> <Equip Medal Learn Have Weapon name: x> <Equip Medal Learn Have Armor id: x> <Equip Medal Learn Have Armor name: x> - Used for: Armor Notetags - Adds an unlock condition that the party must have 'x' quantities of a specific item, weapon, or armor present at the moment. - If this Equippable Medal is found in the learnable list and all unlock conditions in addition to this unlock condition are met, then the actor will learn the Equippable Medal. - Replace 'id' with a number representing the ID of the item, weapon, or armor needed for the medal. - Replace 'name' with text representing the name of the item, weapon, or armor needed for the medal. - Replace 'x' with a number representing the needed amount of the item, weapon, or armor. --- <Equip Medal Learn Reach Param name: x> - Used for: Armor Notetags - Adds an unlock condition that the actor must have 'x' value for its base parameter value at the moment. - If this Equippable Medal is found in the learnable list and all unlock conditions in addition to this unlock condition are met, then the actor will learn the Equippable Medal. - Replace 'name' with 'MaxHP', 'MaxMP', 'ATK', 'DEF', 'MAT', 'MDF', 'AGI', or 'LUK' to determine which parameter to be referenced. - Replace 'x' with a number representing the needed parameter value. --- <Equip Medal Learn Reach XParam name: x%> - Used for: Armor Notetags - Adds an unlock condition that the actor must have 'x' value for its X-parameter value at the moment. - If this Equippable Medal is found in the learnable list and all unlock conditions in addition to this unlock condition are met, then the actor will learn the Equippable Medal. - Replace 'name' with 'HIT', 'EVA', 'CRI', 'CEV', 'MEV', 'MRF', 'CNT', 'HRG', 'MRG', 'TRG' to determine which parameter to be referenced. - Replace 'x' with a number representing the needed parameter percent value. --- <Equip Medal Learn Reach SParam name: x%> - Used for: Armor Notetags - Adds an unlock condition that the actor must have 'x' value for its S-parameter value at the moment. - If this Equippable Medal is found in the learnable list and all unlock conditions in addition to this unlock condition are met, then the actor will learn the Equippable Medal. - Replace 'name' with 'TGR', 'GRD', 'REC', 'PHA', 'MCR', 'TCR', 'PDR', 'MDR', 'FDR', 'EXR' to determine which parameter to be referenced. - Replace 'x' with a number representing the needed parameter percent value. --- Equip Passive System VisuStella MZThe following are notetags that have been added through this plugin. These notetags will not work with your game if this plugin is OFF or not present. --- Setup-Related Notetags--- <Equip Passive Cost: x> - Used for: State Notetags - Determines the Passive Capacity cost of the Equippable Passive. - Replace 'x' with a number representing the Passive Capacity cost. - If this notetag is not used, the Passive Capacity cost will default to the setting found in the Plugin Parameters. --- <Learnable Equip Passive: id> <Learnable Equip Passives: id, id, id> <Learnable Equip Passive: name> <Learnable Equip Passives: name, name, name> <Learnable Equip Passives> name name name </Learnable Equip Passives> - Used for: Actor, Class Notetags - Determines which Equippable Passives that actors and classes can learn. - Replace 'id' with a number representing the ID of the passive state. - Replace 'name' with the name of the passive state. - This does NOT put the passives in the Skill Learn System. This only adds them to the Passives command where they are learnable through meeting any necessary unlock conditions. --- <Equip Passive Icon: x> <Equip Passive Name: name> - Used for: State Notetags - Changes the icon and name of the Equippable Passive to something different than how it is listed in the database or found in other menus. - This can be used for states that you may want to hide icons for so that they do not show up in the states list when the passive is equipped. - If these notetags are not used, the passive will refer to the state's original icon and name. - Replace 'x' with a number representing the icon index you want. - Replace 'name' with the text of the name you want used. --- <Learned Equip Passive: id> <Learned Equip Passives: id, id, id> <Learned Equip Passive: name> <Learned Equip Passives: name, name, name> - Used for: Actor Notetags - Allows this actor to already have learned this Equippable Passive by default so that it is available when the actor joins your party. - These Equippable Passives do not have to be listed through the learnable notetags. - Replace 'id' with a number representing the ID of the passive state. - Replace 'name' with the name of the passive state. --- <Already Equip Passive: id> <Already Equip Passives: id, id, id> <Already Equip Passive: name> <Already Equip Passives: name, name, name> - Used for: Actor Notetags - Allows this actor to already have learned this Equippable Passive and has it equipped by default so that it is available when the actor joins your party. - These Equippable Passives do not have to be listed through the learnable notetags. - Replace 'id' with a number representing the ID of the passive state. - Replace 'name' with the name of the passive state. --- <Branch Learn Equip Passive: id> <Branch Learn Equip Passives: id, id, id> <Branch Learn Equip Passive: name> <Branch Learn Equip Passives: name, name, name> - Used for: State Notetags - When this Equippable Passive is learned, also learn target passive(s). - Target passive(s) does not have to be learnable listed. - Replace 'id' with a number representing the ID of the target passive. - Replace 'name' with the name of the target passive. --- <Branch Learnable Equip Passive: id> <Branch Learnable Equip Passives: id, id, id> <Branch Learnable Equip Passive: name> <Branch Learnable Equip Passives: name, name, name> - Used for: State Notetags - When this Equippable Passive is learned, add target passive(s) to the actor's learnable passive list. - Replace 'id' with a number representing the ID of the target passive. - Replace 'name' with the name of the target passive. --- <Link Learn Equip Passive: id> <Link Learn Equip Passives: id, id, id> <Link Learn Equip Passive: name> <Link Learn Equip Passives: name, name, name> - Used for: Skill Notetags - When this skill is learned, also learn target passive(s). - Target passive(s) does not have to be learnable listed. - Replace 'id' with a number representing the ID of the target passive. - Replace 'name' with the name of the target passive. --- <Link Learnable Equip Passive: id> <Link Learnable Equip Passives: id, id, id> <Link Learnable Equip Passive: name> <Link Learnable Equip Passives: name, name, name> - Used for: Skill Notetags - When this skill is learned, add target passive(s) to the actor's learnable passive list. - Replace 'id' with a number representing the ID of the target passive. - Replace 'name' with the name of the target passive. --- <Help Description> text text </Help Description> - Used for: State Notetags - Assigns a help description for the passive state. - Replace 'text' with text you want displayed for the help window. - This best works with one line to best fit other plugins. --- Hiding-Related Notetags--- <Hide If Not Learned Equip Passive> - Used for: State Notetags - Bypasses Passives listing and hides the passive state regardless of the Plugin Parameter settings. --- <Hide If Learned Equip Passive: id> <Hide If Learned Equip Passive: name> <Hide If Learned All Equip Passives: id, id, id> <Hide If Learned All Equip Passives: name, name, name> <Hide If Learned Any Equip Passives: id, id, id> <Hide If Learned Any Equip Passives: name, name, name> - Used for: State Notetags - Hides the passive state from the Passives listing based on whether or not other passives are learned. - Replace 'id' with a number representing the ID of the passive state. - Replace 'name' with the name of the passive state. - The 'All' notetag variant requires all of the listed passives to be learned in order for this passive to be hidden. - The 'Any' notetag variant requires only one of the listed passives to be learned in order for this passive to be hidden. --- Masking-Related Notetags--- <Mask If Not Learned Equip Passive> <No Mask If Not Learned Equip Passive> - Used for: State Notetags - Bypasses the masking settings determined in the Plugin Parameters to mask or not mask the Equippable Passive if the passive is not learned. --- <Equip Passive Mask Name: name> - Used for: State Notetags - Instead of displaying ?'s for the mask name, this allows you to insert custom mask names instead. - Replace 'name' with the text you want for the mask name. --- Unlock Conditions-Related Notetags--- <Equip Passive Learn Condition Text> text text </Equip Passive Learn Condition Text> - Used for: State Notetags - Assigns text to the Equip Passives learn unlock conditions. - Replace 'text' with text you want displayed when this passive is selected and has not yet been learned. - If this notetag is not used, the help description will default be automatically constructed through the plugin using Plugin Parameters. --- <Equip Passive Learn Level: x> - Used for: State Notetags - Adds an unlock condition that the actor must reach level 'x'. - If this Equippable Passive is found in the learnable list and all unlock conditions in addition to this unlock condition are met, then the actor will learn the Equippable Passive. - Replace 'x' with a number representing the level the actor must reach. --- <Equip Passive Learn Battles: x>
<Equip Passive Learn Victories: x>
<Equip Passive Learn Escapes: x>
<Equip Passive Learn Defeats: x>
- Used for: State Notetags
- Adds a battle result-related unlock condition that the actor must fulfill
in order to learn this Equippable Passive.
- If this Equippable Passive is found in the learnable list and all unlock
conditions in addition to this unlock condition are met, then the actor
will learn the Equippable Passive.
- Replace 'x' with a number representing the number of battle results that
must be fulfilled.
- The number counter will start from the moment Equippable Passive is
listed in the learnable list.
- This does NOT take into account previous battle results before listing.
- The 'Battles' notetag variant requires participating in any battles.
- The 'Victories' notetag variant requires winning battles.
- The 'Escapes' notetag variant requires successfully escaping battles.
- The 'Defeats' notetag variant requires losing battles.
--- <Equip Passive Learn Attack Times: x>
<Equip Passive Learn Guard Times: x>
- Used for: State Notetags
- Adds an unlock condition that the actor must attack or guard 'x' times.
- If this Equippable Passive is found in the learnable list and all unlock
conditions in addition to this unlock condition are met, then the actor
will learn the Equippable Passive.
- Replace 'x' with a number representing the number of times the actor must
attack or guard.
- The number counter will start from the moment Equippable Passive is
listed in the learnable list.
- This does NOT take into account previous actions before listing.
--- <Equip Passive Learn Use Skills: x>
<Equip Passive Learn Use Physical Skills: x>
<Equip Passive Learn Use Magical Skills: x>
<Equip Passive Learn Use Certain Hit Skills: x>
- Used for: State Notetags
- Adds an unlock condition that the actor must use 'x' skills.
- If this Equippable Passive is found in the learnable list and all unlock
conditions in addition to this unlock condition are met, then the actor
will learn the Equippable Passive.
- Replace 'x' with a number representing the number of times the actor must
use skills.
- The number counter will start from the moment Equippable Passive is
listed in the learnable list.
- This does NOT take into account previous actions before listing.
- The 'Skills' notetag variant allows any kind of skill usage.
- The 'Physical Skills' notetag variant requires physical hit skills.
- The 'Magical Skills' notetag variant requires magical hit skills.
- The 'Certain Hit Skills' notetag variant requires certain hit skills.
--- <Equip Passive Learn SType id: x> <Equip Passive Learn SType name: x> - Used for: State Notetags - Adds an unlock condition that the actor must use 'x' skills that belong to a specific skill type. - If this Equippable Passive is found in the learnable list and all unlock conditions in addition to this unlock condition are met, then the actor will learn the Equippable Passive. - Replace 'id' with a number representing the needed skill type's ID number. - Replace 'name' with text representing the needed skill type's name. - Replace 'x' with a number representing the number of times the actor must use skills belonging to the needed skill type. --- <Equip Passive Learn Use Items: x>
- Used for: State Notetags
- Adds an unlock condition that the actor must use 'x' items.
- If this Equippable Passive is found in the learnable list and all unlock
conditions in addition to this unlock condition are met, then the actor
will learn the Equippable Passive.
- Replace 'x' with a number representing the number of times the actor must
use items.
- The number counter will start from the moment Equippable Passive is
listed in the learnable list.
- This does NOT take into account previous actions before listing.
- Any kind of item can be used.
--- <Equip Passive Learn Inflict Critical Times: x>
<Equip Passive Learn Receive Critical Times: x>
- Used for: State Notetags
- Adds an unlock condition that the actor must inflict or receive 'x'
critical hits from actions.
- If this Equippable Passive is found in the learnable list and all unlock
conditions in addition to this unlock condition are met, then the actor
will learn the Equippable Passive.
- Replace 'x' with a number representing the number of times the actor must
inflict or receive critical hits.
- The number counter will start from the moment Equippable Passive is
listed in the learnable list.
- This does NOT take into account previous actions before listing.
- The 'Inflict' notetag variant requires the critical hit to be caused by
the actor.
- The 'Receive' notetag variant requires the critical hit to be caused
against the actor.
--- <Equip Passive Learn Miss Times: x>
<Equip Passive Learn Evade Times: x>
- Used for: State Notetags
- Adds an unlock condition that the actor must miss or evade 'x' actions.
- If this Equippable Passive is found in the learnable list and all unlock
conditions in addition to this unlock condition are met, then the actor
will learn the Equippable Passive.
- Replace 'x' with a number representing the number of times the actor must
miss or evade actions.
- The number counter will start from the moment Equippable Passive is
listed in the learnable list.
- This does NOT take into account previous actions before listing.
- The 'Miss' notetag variant requires the actor to miss an action.
- The 'Evade' notetag variant requires the actor to evade an action.
--- <Equip Passive Learn Inflict Element id Damage: x>
<Equip Passive Learn Inflict Element name Damage: x>
<Equip Passive Learn Receive Element id Damage: x>
<Equip Passive Learn Receive Element name Damage: x>
- Used for: State Notetags
- Adds an unlock condition that the actor must inflict or receive damage
from a specific element 'x' times.
- If this Equippable Passive is found in the learnable list and all unlock
conditions in addition to this unlock condition are met, then the actor
will learn the Equippable Passive.
- Replace 'id' with a number representing the element ID number.
- Replace 'name' with text representing the element's name.
- Replace 'x' with a number representing the number of times the actor must
inflict or receive damage from a specific element.
- The number counter will start from the moment Equippable Passive is
listed in the learnable list.
- This does NOT take into account previous actions before listing.
- The 'Inflict' notetag variant requires the elemental damage to be caused
by the actor.
- The 'Receive' notetag variant requires the elemental damage to be caused
against the actor.
--- <Equip Passive Learn Inflict State id: x>
<Equip Passive Learn Inflict State name: x>
<Equip Passive Learn Receive State id: x>
<Equip Passive Learn Receive State name: x>
- Used for: State Notetags
- Adds an unlock condition that the actor must inflict or receive a specific
state 'x' times.
- If this Equippable Passive is found in the learnable list and all unlock
conditions in addition to this unlock condition are met, then the actor
will learn the Equippable Passive.
- Replace 'id' with a number representing the state ID number.
- Replace 'name' with text representing the state's name.
- Replace 'x' with a number representing the number of times the actor must
inflict or receive a specific state.
- The number counter will start from the moment Equippable Passive is
listed in the learnable list.
- This does NOT take into account previous actions before listing.
- The 'Inflict' notetag variant requires the target state to be caused
by the actor.
- The 'Receive' notetag variant requires the target state to be caused
against the actor.
--- <Equip Passive Learn Defeat name Trait: x> - Used for: State Notetags - Requires VisuMZ_1_ElementStatusCore! - Adds an unlock condition that the actor must defeat enemies with specific trait sets 'x' times. - If this Equippable Passive is found in the learnable list and all unlock conditions in addition to this unlock condition are met, then the actor will learn the Equippable Passive. - Replace 'name' with text representing the trait set's name. - Replace 'x' with a number representing the number of times the actor must defeat enemies with the target trait set. --- <Equip Passive Learn Inflict Total Damage: x>
<Equip Passive Learn Receive Total Damage: x>
<Equip Passive Learn Inflict Total Healing: x>
<Equip Passive Learn Receive Total Healing: x>
- Used for: State Notetags
- Adds an unlock condition that the actor must inflict or receive a total
amounts of damage or healing since the time the passive is listed.
- If this Equippable Passive is found in the learnable list and all unlock
conditions in addition to this unlock condition are met, then the actor
will learn the Equippable Passive.
- Replace 'x' with a number representing the total number of damage and
healing the actor must reach.
- The number counter will start from the moment Equippable Passive is
listed in the learnable list.
- This does NOT take into account previous actions before listing.
- The 'Inflict' notetag variant requires the damage/healing to be caused
by the actor.
- The 'Receive' notetag variant requires the damage/healing to be caused
against the actor.
--- <Equip Passive Learn Kill Count: x>
<Equip Passive Learn Death Count: x>
<Equip Passive Learn Assist Count: x>
- Used for: State Notetags
- Adds an unlock condition that the actor must fulfill the needed amount of
kills, suffer the amount of deaths, or partake in the number of assists
since the time the passive is listed.
- If this Equippable Passive is found in the learnable list and all unlock
conditions in addition to this unlock condition are met, then the actor
will learn the Equippable Passive.
- Replace 'x' with a number representing the number of kills, deaths, or
assists the actor must reach.
- The number counter will start from the moment Equippable Passive is
listed in the learnable list.
- This does NOT take into account previous actions before listing.
- The 'Kill' notetag variant refers to the number of enemies directly
defeated by the actor (death via slip damage or events do not count).
- The 'Death' notetag variant refers to the number of times the actor must
die (ie reaching 0 HP or receiving the Death state).
- The 'Assist' notetag variant refers to the number of times the actor is
present in battle when an enemy is defeated and not directly by the actor.
--- <Equip Passive Learn Have Gold: x> - Used for: State Notetags - Adds an unlock condition that the party must have 'x' gold present at the moment. - If this Equippable Passive is found in the learnable list and all unlock conditions in addition to this unlock condition are met, then the actor will learn the Equippable Passive. - Replace 'x' with a number representing the needed amount of gold. --- <Equip Passive Learn Have Item id: x> <Equip Passive Learn Have Item name: x> <Equip Passive Learn Have Weapon id: x> <Equip Passive Learn Have Weapon name: x> <Equip Passive Learn Have Armor id: x> <Equip Passive Learn Have Armor name: x> - Used for: State Notetags - Adds an unlock condition that the party must have 'x' quantities of a specific item, weapon, or armor present at the moment. - If this Equippable Passive is found in the learnable list and all unlock conditions in addition to this unlock condition are met, then the actor will learn the Equippable Passive. - Replace 'id' with a number representing the ID of the item, weapon, or armor needed for the passive. - Replace 'name' with text representing the name of the item, weapon, or armor needed for the passive. - Replace 'x' with a number representing the needed amount of the item, weapon, or armor. --- <Equip Passive Learn Reach Param name: x> - Used for: State Notetags - Adds an unlock condition that the actor must have 'x' value for its base parameter value at the moment. - If this Equippable Passive is found in the learnable list and all unlock conditions in addition to this unlock condition are met, then the actor will learn the Equippable Passive. - Replace 'name' with 'MaxHP', 'MaxMP', 'ATK', 'DEF', 'MAT', 'MDF', 'AGI', or 'LUK' to determine which parameter to be referenced. - Replace 'x' with a number representing the needed parameter value. --- <Equip Passive Learn Reach XParam name: x%> - Used for: State Notetags - Adds an unlock condition that the actor must have 'x' value for its X-parameter value at the moment. - If this Equippable Passive is found in the learnable list and all unlock conditions in addition to this unlock condition are met, then the actor will learn the Equippable Passive. - Replace 'name' with 'HIT', 'EVA', 'CRI', 'CEV', 'MEV', 'MRF', 'CNT', 'HRG', 'MRG', 'TRG' to determine which parameter to be referenced. - Replace 'x' with a number representing the needed parameter percent value. --- <Equip Passive Learn Reach SParam name: x%> - Used for: State Notetags - Adds an unlock condition that the actor must have 'x' value for its S-parameter value at the moment. - If this Equippable Passive is found in the learnable list and all unlock conditions in addition to this unlock condition are met, then the actor will learn the Equippable Passive. - Replace 'name' with 'TGR', 'GRD', 'REC', 'PHA', 'MCR', 'TCR', 'PDR', 'MDR', 'FDR', 'EXR' to determine which parameter to be referenced. - Replace 'x' with a number representing the needed parameter percent value. --- Skill Learn System Integration-Related Notetags--- <Learn Passive: id> <Learn Passives: id, id, id> <Learn Passive: name> <Learn Passives: name, name, name> - Used for: Class Notetags - Requires VisuMZ_2_SkillLearnSystem! - Determines what Equippable Passives the class can learn through the Skill Learn System. - Replace 'id' with a number representing the ID of the passive state that can be learned through the Skill Learn System menu. - Replace 'name' with the name of the passive state that can be learned through the Skill Learn System menu. - Multiple entries are permited. --- <Learn Passives> id id id name name name </Learn Passives> - Used for: Class Notetags - Requires VisuMZ_2_SkillLearnSystem! - Determines what Equippable Passives the class can learn through the Skill Learn System. - Replace 'id' with a number representing the ID of the passive state that can be learned through the Skill Learn System menu. - Replace 'name' with the name of the passive state that can be learned through the Skill Learn System menu. - Multiple middle entries are permited. --- <Learn AP Cost: x> - Used for: State Notetags - Requires VisuMZ_2_SkillLearnSystem! - Determines the Ability Point cost needed for an actor to learn the passive state through the Skill Learn System. - Replace 'x' with a number representing the amount of Ability Points needed to learn this passive state. - If this notetag is not used, then the Ability Point cost will default to the value found in the settings. --- <Learn CP Cost: x> - Used for: State Notetags - Requires VisuMZ_2_SkillLearnSystem! - Requires VisuMZ_2_ClassChangeSystem! - Determines the Class Point cost needed for an actor to learn the passive state through the Skill Learn System. - Replace 'x' with a number representing the amount of Skill Points needed to learn this passive state. - If this notetag is not used, then the Skill Point cost will default to the value found in the settings. --- <Learn JP Cost: x> - Used for: State Notetags - Requires VisuMZ_2_SkillLearnSystem! - Requires VisuMZ_2_ClassChangeSystem! - Determines the Job Point cost needed for an actor to learn the passive state through the Skill Learn System. - Replace 'x' with a number representing the amount of Skill Points needed to learn this passive state. - If this notetag is not used, then the Skill Point cost will default to the value found in the settings. --- <Learn SP Cost: x> - Used for: State Notetags - Requires VisuMZ_2_SkillLearnSystem! - Determines the Skill Point cost needed for an actor to learn the passive state through the Skill Learn System. - Replace 'x' with a number representing the amount of Skill Points needed to learn this passive state. - If this notetag is not used, then the Skill Point cost will default to the value found in the settings. --- <Learn Item id Cost: x> <Learn Item name Cost: x> - Used for: State Notetags - Requires VisuMZ_2_SkillLearnSystem! - Determines the items needed to be consumed for an actor to learn the passive state through the Skill Learn System. - Replace 'id' with a number representing the ID of the item needed to be consumed. - Replace 'name' with the name of the item needed to be consumed. - Replace 'x' with a number representing the amount of the item needed to learn this passive state. - You may insert multiple copies of this notetag. --- <Learn Weapon id Cost: x> <Learn Weapon name Cost: x> - Used for: State Notetags - Requires VisuMZ_2_SkillLearnSystem! - Determines the weapons needed to be consumed for an actor to learn the passive state through the Skill Learn System. - Replace 'id' with a number representing the ID of the weapon needed to be consumed. - Replace 'name' with the name of the weapon needed to be consumed. - Replace 'x' with a number representing the amount of the weapon needed to learn this passive state. - You may insert multiple copies of this notetag. --- <Learn Armor id Cost: x> <Learn Armor name Cost: x> - Used for: State Notetags - Requires VisuMZ_2_SkillLearnSystem! - Determines the armors needed to be consumed for an actor to learn the passive state through the Skill Learn System. - Replace 'id' with a number representing the ID of the armor needed to be consumed. - Replace 'name' with the name of the armor needed to be consumed. - Replace 'x' with a number representing the amount of the armor needed to learn this passive state. - You may insert multiple copies of this notetag. --- <Learn Gold Cost: x> - Used for: State Notetags - Requires VisuMZ_2_SkillLearnSystem! - Determines the gold cost needed for an actor to learn the passive state through the Skill Learn System. - Replace 'x' with a number representing the amount of gold needed to learn this passive state. - If this notetag is not used, then the gold cost will default to the value found in the settings. --- <Learn Show Level: x> - Used for: State Notetags - Requires VisuMZ_2_SkillLearnSystem! - Actors must be at least the required level in order for the passive state to even appear visibly in the Skill Learn System menu. - Replace 'x' with a number representing the required level for the actor in order for the passive state to visibly appear. --- <Learn Show Skill: id> <Learn Show Skill: name> <Learn Show All Skills: id, id, id> <Learn Show All Skills: name, name, name> <Learn Show Any Skills: id, id, id> <Learn Show Any Skills: name, name, name> - Used for: State Notetags - Requires VisuMZ_2_SkillLearnSystem! - The actor must have already learned the above skills in order for the learnable passive state to appear visibly in the Skill Learn System menu. - Replace 'id' with a number representing the ID of the skill required to be known by the actor in order to appear visibly in the menu. - Replace 'name' with the name of the skill required to be known by the actor in order to appear visibly in the menu. - The 'All' notetag variant requires all of the listed skills to be known before the learnable passive state will appear visibly in the menu. - The 'Any' notetag variant requires any of the listed skills to be known before the learnable passive state will appear visibly in the menu. --- <Learn Show Switch: x> <Learn Show All Switches: x, x, x> <Learn Show Any Switches: x, x, x> - Used for: State Notetags - Requires VisuMZ_2_SkillLearnSystem! - The switches must be in the ON position in order for the learnable passive state to appear visibly in the Skill Learn System menu. - Replace 'x' with a number representing the ID of the switch required to be in the ON position in order to appear visibly in the menu. - The 'All' notetag variant requires all of the switches to be in the ON position before the learnable passive state will appear visibly in the menu. - The 'Any' notetag variant requires any of the switches to be in the ON position before the learnable passive state will appear visibly in the menu. --- <Learn Require Level: x> - Used for: State Notetags - Requires VisuMZ_2_SkillLearnSystem! - Actors must be at least the required level in order for the passive state to be enabled in the Skill Learn System menu. - Replace 'x' with a number representing the required level for the actor in order for the passive state to visibly appear. --- <Learn Require Skill: id> <Learn Require Skill: name> <Learn Require All Skills: id, id, id> <Learn Require All Skills: name, name, name> <Learn Require Any Skills: id, id, id> <Learn Require Any Skills: name, name, name> - Used for: State Notetags - Requires VisuMZ_2_SkillLearnSystem! - The actor must have already learned the above skills in order for the learnable passive state to be enabled in the Skill Learn System menu. - Replace 'id' with a number representing the ID of the skill required to be known by the actor in order to be enabled in the menu. - Replace 'name' with the name of the skill required to be known by the actor in order to be enabled in the menu. - The 'All' notetag variant requires all of the listed skills to be known before the learnable passive state will be enabled in the menu. - The 'Any' notetag variant requires any of the listed skills to be known before the learnable passive state will be enabled in the menu. --- <Learn Require Switch: x> <Learn Require All Switches: x, x, x> <Learn Require Any Switches: x, x, x> - Used for: State Notetags - Requires VisuMZ_2_SkillLearnSystem! - The switches must be in the ON position in order for the learnable passive state to be enabled in the Skill Learn System menu. - Replace 'x' with a number representing the ID of the switch required to be in the ON position in order to be enabled in the menu. - The 'All' notetag variant requires all of the switches to be in the ON position before the learnable passive state will be enabled in the menu. - The 'Any' notetag variant requires any of the switches to be in the ON position before the learnable passive state will be enabled in the menu. --- <Learn Skill Animation: id> <Learn Skill Animation: id, id, id> - Used for: State Notetags - Requires VisuMZ_2_SkillLearnSystem! - Plays the animation(s) when this passive state is learned through the Skill Learn System's menu. - This will override the default animation settings found in the plugin parameters and use the unique one set through notetags instead. - Replace 'id' with the ID of the animation you wish to play. - If multiple ID's are found, then each animation will play one by one in the order they are listed. --- <Learn Skill Fade Speed: x> - Used for: State Notetags - Requires VisuMZ_2_SkillLearnSystem! - This determines the speed at which the passive state's icon fades in during the skill learning animation. - Replace 'x' with a number value to determine how fast the icon fades in. - Use lower numbers for slower fade speeds and higher numbers for faster fade speeds. --- <Learn Skill Picture: filename> <Picture: filename> - Used for: State Notetags - Requires VisuMZ_2_SkillLearnSystem! - Uses a picture from your project's /img/pictures/ folder instead of the passive state's icon during learning instead. - Replace 'filename' with the filename of the image. - Do not include the file extension. - Scaling will not apply to the picture. - Use the <Picture: filename> version for any other plugins that may be using this as an image outside of learning skills, too. - The size used for the image will vary based on your game's resolution. --- Equipment Set Bonuses VisuStella MZThe following are notetags that have been added through this plugin. These notetags will not work with your game if this plugin is OFF or not present. --- Equipment Set Declaration-Related Notetags--- <Equip Set: name> - Used for: Weapon, Armor Notetags - This assigns this item to an equipment set. - Replace 'name' with the set name you're going to associate this equip with. Names must equal the Equipment Set names declared in the Plugin Parameters or else they will not have any effect. - If you want to make a piece of equipment be a part of two different equipment sets, use multiple copies of this notetag. --- Equipment Set Graphics-Related Notetags--- <name Set, x Pieces Face: filename, index> <name Set, x+ Pieces Face: filename, index> <name Set, x to y Pieces Face: filename, index> - Used for: Actor Notetags - Gives this actor an Equipment Set face graphic. - Replace 'name' with the Equipment Set name to apply to. Use the set names that are declared in the Plugin Parameters or there will be no effect. - Replace 'x' with the exact number of pieces to apply this graphic to. This does NOT apply to larger number numbers, only exactly that amount. - The 'x+' variant will apply the graphic from 'x' to higher numbers. - The 'x to y' variant will apply the graphic for a range of pieces to be equipped in order to apply the graphic. - Replace 'filename' with the filename of the graphic found inside the img/faces/ folder. Do not include the file extension. - Replace 'index' with the index of the graphic. Index values start at 0. - --- <name Set, x Pieces Character: filename, index> <name Set, x+ Pieces Character: filename, index> <name Set, x to y Pieces Character: filename, index> - Used for: Actor Notetags - Gives this actor an Equipment Set face graphic. - Replace 'name' with the Equipment Set name to apply to. Use the set names that are declared in the Plugin Parameters or there will be no effect. - Replace 'x' with the exact number of pieces to apply this graphic to. This does NOT apply to larger number numbers, only exactly that amount. - The 'x+' variant will apply the graphic from 'x' to higher numbers. - The 'x to y' variant will apply the graphic for a range of pieces to be equipped in order to apply the graphic. - Replace 'filename' with the filename of the graphic found inside the img/characters/ folder. Do not include the file extension. - Replace 'index' with the index of the graphic. Index values start at 0. - --- <name Set, x Pieces Battler: filename> <name Set, x+ Pieces Battler: filename> <name Set, x to y Pieces Battler: filename> - Used for: Actor Notetags - Gives this actor an Equipment Set face graphic. - Replace 'name' with the Equipment Set name to apply to. Use the set names that are declared in the Plugin Parameters or there will be no effect. - Replace 'x' with the exact number of pieces to apply this graphic to. This does NOT apply to larger number numbers, only exactly that amount. - The 'x+' variant will apply the graphic from 'x' to higher numbers. - The 'x to y' variant will apply the graphic for a range of pieces to be equipped in order to apply the graphic. - Replace 'filename' with the filename of the graphic found inside the img/sv_actors/ folder. Do not include the file extension. - --- <name Set, x Pieces Menu Portrait: filename> <name Set, x+ Pieces Menu Portrait: filename> <name Set, x to y Pieces Menu Portrait: filename> - Used for: Actor Notetags - Requires VisuMZ_1_MainMenuCore! - Gives this actor an Equipment Set face graphic. - Replace 'name' with the Equipment Set name to apply to. Use the set names that are declared in the Plugin Parameters or there will be no effect. - Replace 'x' with the exact number of pieces to apply this graphic to. This does NOT apply to larger number numbers, only exactly that amount. - The 'x+' variant will apply the graphic from 'x' to higher numbers. - The 'x to y' variant will apply the graphic for a range of pieces to be equipped in order to apply the graphic. - Replace 'filename' with the filename of the graphic found inside the img/pictures/ folder. Do not include the file extension. - --- <name Set, x Pieces Battle Portrait: filename> <name Set, x+ Pieces Battle Portrait: filename> <name Set, x to y Pieces Battle Portrait: filename> - Used for: Actor Notetags - Requires VisuMZ_1_BattleCore! - Gives this actor an Equipment Set face graphic. - Replace 'name' with the Equipment Set name to apply to. Use the set names that are declared in the Plugin Parameters or there will be no effect. - Replace 'x' with the exact number of pieces to apply this graphic to. This does NOT apply to larger number numbers, only exactly that amount. - The 'x+' variant will apply the graphic from 'x' to higher numbers. - The 'x to y' variant will apply the graphic for a range of pieces to be equipped in order to apply the graphic. - Replace 'filename' with the filename of the graphic found inside the img/pictures/ folder. Do not include the file extension. - --- Event Chain Reactions VisuStella MZThe following are notetags that have been added through this plugin. These notetags will not work with your game if this plugin is OFF or not present. --- Positioning-Related Notetags--- <Push> - Used for: Event Notetags and Event Page Comment Tags - Allows this event to be pushed when using the Plugin Command: "Positioning: Push Player Front". - If this is placed inside a page's comment, the effect will only occur if that event page is currently active. --- <Pull> - Used for: Actor, Class, Skill, Item, Weapon, Armor, Enemy, State Notetags - Allows this event to be pushed when using the Plugin Command: "Positioning: Pull Player Front". - If this is placed inside a page's comment, the effect will only occur if that event page is currently active. --- <Push Pull> <Pull Push> - Used for: Event Notetags and Event Page Comment Tags - Allows this event to be pushed when using the Plugin Commands: "Positioning: Push Player Front" and "Positioning: Pull Player Front". - The notetag variants do the same thing. Which you choose to use is entirely up to personal preference. - If this is placed inside a page's comment, the effect will only occur if that event page is currently active. --- Catalyst and Reactor-Related Notetags--- <type speed Catalyst: range>
- Used for: Event Notetags and Event Page Comment Tags
- Makes this event into a 'type' catalyst source that spreads at 'speed'
intervals onto events within 'range'.
- Replace 'type' with a string representing the reaction type to be spread
to other event reactors of the same 'type'.
- This is NOT case sensitive.
- Replace 'speed' with any of the following text to represent the repeating
interval at which the catalyst event spreads:
- 'tick', 'fast', 'quick', 'short', 'average', 'slow', 'long', 'late'
- Do NOT include the quotes.
- Faster speeds can potentially cause lag, so use slower speeds to ensure
FPS stability.
- Replace 'range' with any of the following to determine the range:
- 'exact' - Coordinates must equal the catalyst event's X, Y position.
- 'front' - Coordinates equal the tile in front of the catalyst.
- 'back' - Coordinates equal the tile behind the catalyst.
- 'cw' - Coordinates equal the tile clockwise from catalyst.
- 'ccw' - Coordinates equal the tile counterclockwise from catalyst.
- 'adjacent' - Any of the 4 tiles surrounding the catalyst.
- 'near' - Any of the 8 tiles surrounding the catalyst.
- 'down' - Coordinates equal the tile below the catalyst on the map.
- 'left' - Coordinates equal the tile left of the catalyst on the map.
- 'right' - Coordinates equal the tile right of the catalyst on the map.
- 'up' - Coordinates equal the tile above the catalyst on the map.
- 'lower left' - Coordinates equal the tile to catalyst's lower left.
- 'lower right' - Coordinates equal the tile to catalyst's lower right.
- 'upper left' - Coordinates equal the tile to catalyst's upper left.
- 'upper right' - Coordinates equal the tile to catalyst's upper right.
- Do NOT include the quotes.
- If this is placed inside a page's comment, the effect will only occur
if that event page is currently active.
--- <type x Frames Catalyst: range>
- Used for: Event Notetags and Event Page Comment Tags
- Makes this event into a 'type' catalyst source that spreads at 'x' frame
intervals onto events within 'range'.
- Replace 'type' with a string representing the reaction type to be spread
to other event reactors of the same 'type'.
- This is NOT case sensitive.
- Replace 'x' with a number representing the number of frames that determine
the ongoing intervals the catalysts cycle through.
- Faster speeds can potentially cause lag, so use slower speeds to ensure
FPS stability.
- Replace 'range' with any of the following to determine the range:
- 'exact' - Coordinates must equal the catalyst event's X, Y position.
- 'front' - Coordinates equal the tile in front of the catalyst.
- 'back' - Coordinates equal the tile behind the catalyst.
- 'cw' - Coordinates equal the tile clockwise from catalyst.
- 'ccw' - Coordinates equal the tile counterclockwise from catalyst.
- 'adjacent' - Any of the 4 tiles surrounding the catalyst.
- 'near' - Any of the 8 tiles surrounding the catalyst.
- 'down' - Coordinates equal the tile below the catalyst on the map.
- 'left' - Coordinates equal the tile left of the catalyst on the map.
- 'right' - Coordinates equal the tile right of the catalyst on the map.
- 'up' - Coordinates equal the tile above the catalyst on the map.
- 'lower left' - Coordinates equal the tile to catalyst's lower left.
- 'lower right' - Coordinates equal the tile to catalyst's lower right.
- 'upper left' - Coordinates equal the tile to catalyst's upper left.
- 'upper right' - Coordinates equal the tile to catalyst's upper right.
- Do NOT include the quotes.
- If this is placed inside a page's comment, the effect will only occur
if that event page is currently active.
--- <type Reactor Switch On: x>
<type Reactor Switches On: x, x, x>
<type Reactor Switch Off: x>
<type Reactor Switches Off: x, x, x>
- Used for: Event Notetags and Event Page Comment Tags
- Makes this event into a 'type' reactor that upon a catalyst creating a
reaction will turn any linked switch(es) or self switch(es) ON or OFF.
- The ON variant will turn the linked switch ON when a reaction occurs.
- The OFF variant will turn the linked switch OFF when a reaction occurs.
- Replace 'type' with a string representing the reaction type to be react
to from catalysts of the same 'type'.
- Replace 'x' with either a number to represent a numeric global switch or
a letter to represent a native RPG Maker MZ self switch.
- If a numeric switch value happens to be a self switch or map switch due
to VisuMZ_1_EventsMoveCore, then it will be treated as such.
- Insert multiple 'x' values to change multiple switches or self switches
upon a successful reaction.
- If this is placed inside a page's comment, the effect will only occur
if that event page is currently active.
--- Pressure Plate and Heavy Object-Related Notetags--- <Pressure Plate Switch: x>
<Pressure Plate Switches: x, x, x>
- Used for: Event Notetags and Event Page Comment Tags
- Turns this event into a pressure plate that upon having a heavy object on
it will trigger any linked switch(es) and self switch(es) to turn ON and
upon stepping off will also turn them OFF.
- Using this notetag will set the event's priority to "Below characters".
- Replace 'x' with either a number to represent a numeric global switch or
a letter to represent a native RPG Maker MZ self switch.
- If a numeric switch value happens to be a self switch or map switch due
to VisuMZ_1_EventsMoveCore, then it will be treated as such.
- Insert multiple 'x' values to change multiple switches or self switches
upon a successful activation.
- If this is placed inside a page's comment, the effect will only occur
if that event page is currently active.
--- <Heavy> <Heavy Object> - Used for: Event Notetags and Event Page Comment Tags - Marks this event as a heavy object that can stand on top of and activate pressure plate events. - Using this notetag will set the event's priority to "Same as characters". - If this is placed inside a page's comment, the effect will only occur if that event page is currently active. --- <Not Heavy> <Not Heavy Object> - Used for: Event Notetags and Event Page Comment Tags - Marks this event as an object not heavy enough to activate pressure plates events. - This is used to offset the Plugin Parameter that sets "Same as characters" events as heavy objects. - If this is placed inside a page's comment, the effect will only occur if that event page is currently active. --- <All Pressure Plates Switch: x>
<All Pressure Plates Switches: x, x, x>
- Used for: Map Notetags
- If all native pressure plate events on the map has been stepped on, turn
ON the switch(es). Otherwise, set the switch(es) to OFF.
- Erased and spawned pressure plate events do not count.
- Replace 'x' with a number to represent a numeric global switch.
- If a numeric switch value happens to be a map switch or map self due to
VisuMZ_1_EventsMoveCore, then it will be treated as such.
--- Charger and Conductor-Related Notetags--- <type Charger> - Used for: Event Notetags and Event Page Comment Tags - Marks this event as a charger event that produces a 'type' current that can be received by same 'type' conductors. - Replace 'type' with a string representing the current type released from this charger event to other conductor events of the same 'type'. - This is NOT case sensitive. - If this is placed inside a page's comment, the effect will only occur if that event page is currently active. --- <type Conductor Switch: x>
<type Conductor Switches: x, x, x>
- Used for: Event Notetags and Event Page Comment Tags
- Marks this event as a conductor event that receives a 'type' current and
will turn on any linked switch(es) or self switch(es) based on its current
conduction state.
- Conductor events will also transfer its current to other conductors of the
same 'type'.
- Replace 'type' with a string representing the current type released from
this charger event to other conductor events of the same 'type'.
- This is NOT case sensitive.
- Replace 'x' with either a number to represent a numeric global switch or
a letter to represent a native RPG Maker MZ self switch.
- If a numeric switch value happens to be a self switch or map switch due
to VisuMZ_1_EventsMoveCore, then it will be treated as such.
- Insert multiple 'x' values to apply multiple switches or self switches
based on the conduction state.
- If this is placed inside a page's comment, the effect will only occur
if that event page is currently active.
--- <Current Direction: range> <Charge Direction: range> <Conduct Direction: range> - Used for: Event Notetags and Event Page Comment Tags - Used for charger events and conductor events to determine which direction the current will travel. - The notetag variants do the same thing. Which you choose to use is entirely up to personal preference. - Replace 'range' with any of the following to determine the range: - 'exact' - Coordinates must equal the catalyst event's X, Y position. - 'front' - Coordinates equal the tile in front of the catalyst. - 'back' - Coordinates equal the tile behind the catalyst. - 'cw' - Coordinates equal the tile clockwise from catalyst. - 'ccw' - Coordinates equal the tile counterclockwise from catalyst. - 'adjacent' - Any of the 4 tiles surrounding the catalyst. - 'near' - Any of the 8 tiles surrounding the catalyst. - 'down' - Coordinates equal the tile below the catalyst on the map. - 'left' - Coordinates equal the tile left of the catalyst on the map. - 'right' - Coordinates equal the tile right of the catalyst on the map. - 'up' - Coordinates equal the tile above the catalyst on the map. - 'lower left' - Coordinates equal the tile to catalyst's lower left. - 'lower right' - Coordinates equal the tile to catalyst's lower right. - 'upper left' - Coordinates equal the tile to catalyst's upper left. - 'upper right' - Coordinates equal the tile to catalyst's upper right. - Do NOT include the quotes. - If this is placed inside a page's comment, the effect will only occur if that event page is currently active. --- Decay-Related Notetags--- <speed Decay Switch On: x>
<speed Decay Switches On: x, x, x>
<speed Decay Switch Off: x>
<speed Decay Switches On: x, x, x>
- Used for: Event Notetags and Event Page Comment Tags
- Marks this event as one that upon availability, will start decaying and
start a countdown timer, where upon reaching 0, any linked switch(es) and
self switch(es) will have their values changed.
- The ON variant will turn the linked switch ON when the decay occurs.
- The OFF variant will turn the linked switch OFF when the decay occurs.
- Replace 'speed' with any of the following text to represent the duration
time of the decay countdown:
- 'tick', 'fast', 'quick', 'short', 'average', 'slow', 'long', 'late'
- Do NOT include the quotes.
- Replace 'x' with either a number to represent a numeric global switch or
a letter to represent a native RPG Maker MZ self switch.
- If a numeric switch value happens to be a self switch or map switch due
to VisuMZ_1_EventsMoveCore, then it will be treated as such.
- Insert multiple 'x' values to change multiple switches or self switches
upon the decay countdown reaching 0.
- If this is placed inside a page's comment, the effect will only occur
if that event page is currently active.
--- <x Frames Decay Switch On: id>
<x Frames Decay Switches On: id, id, id>
<x Frames Decay Switch Off: id>
<x Frames Decay Switches Off: id, id, id>
- Used for: Event Notetags and Event Page Comment Tags
- Marks this event as one that upon availability, will start decaying and
after x frames, any linked switch(es) and self switch(es) will have their
values changed.
- The ON variant will turn the linked switch ON when the decay occurs.
- The OFF variant will turn the linked switch OFF when the decay occurs.
- Replace 'x' with a number representing the number of frames that determine
the total frames before the decay occurs.
- Faster speeds can potentially cause lag, so use slower speeds to ensure
FPS stability.
- Replace 'id' with either a number to represent a numeric global switch or
a letter to represent a native RPG Maker MZ self switch.
- If a numeric switch value happens to be a self switch or map switch due
to VisuMZ_1_EventsMoveCore, then it will be treated as such.
- Insert multiple 'id' values to change multiple switches or self switches
upon the decay countdown reaching 0.
- If this is placed inside a page's comment, the effect will only occur
if that event page is currently active.
--- Submerge-Related Notetags--- <Submerge Switch On: x>
<Submerge Switches On: x, x, x>
<Submerge Switch Off: x>
<Submerge Switches Off: x, x, x>
- Used for: Event Notetags and Event Page Comment Tags
- Marks this event as a submersive event, which upon being on top of a water
tile, will instantly alter any linked switch(es) and self switch(es).
- The ON variant will turn the linked switch ON when the decay occurs.
- The OFF variant will turn the linked switch OFF when the decay occurs.
- This notetag variant will treat both shallow water and deep water tiles
the same as one another.
- Replace 'x' with either a number to represent a numeric global switch or
a letter to represent a native RPG Maker MZ self switch.
- If a numeric switch value happens to be a self switch or map switch due
to VisuMZ_1_EventsMoveCore, then it will be treated as such.
- Insert multiple 'x' values to change multiple switches or self switches
upon being submerged into water.
- If this is placed inside a page's comment, the effect will only occur
if that event page is currently active.
--- <Shallow Submerge Switch On: x>
<Shallow Submerge Switches On: x, x, x>
<Shallow Submerge Switch Off: x>
<Shallow Submerge Switches Off: x, x, x>
- Used for: Event Notetags and Event Page Comment Tags
- Marks this event as a submersive event, which upon being on top of a water
tile, will instantly alter any linked switch(es) and self switch(es).
- The ON variant will turn the linked switch ON when the decay occurs.
- The OFF variant will turn the linked switch OFF when the decay occurs.
- This notetag variant will only trigger on shallow water tiles and not
deep water tiles.
- Replace 'x' with either a number to represent a numeric global switch or
a letter to represent a native RPG Maker MZ self switch.
- If a numeric switch value happens to be a self switch or map switch due
to VisuMZ_1_EventsMoveCore, then it will be treated as such.
- Insert multiple 'x' values to change multiple switches or self switches
upon being submerged into shallow water.
- If this is placed inside a page's comment, the effect will only occur
if that event page is currently active.
--- <Deep Submerge Switch On: x>
<Deep Submerge Switches On: x, x, x>
<Deep Submerge Switch Off: x>
<Deep Submerge Switches Off: x, x, x>
- Used for: Event Notetags and Event Page Comment Tags
- Marks this event as a submersive event, which upon being on top of a water
tile, will instantly alter any linked switch(es) and self switch(es).
- The ON variant will turn the linked switch ON when the decay occurs.
- The OFF variant will turn the linked switch OFF when the decay occurs.
- This notetag variant will only trigger on deep water tiles and not
shallow water tiles.
- Replace 'x' with either a number to represent a numeric global switch or
a letter to represent a native RPG Maker MZ self switch.
- If a numeric switch value happens to be a self switch or map switch due
to VisuMZ_1_EventsMoveCore, then it will be treated as such.
- Insert multiple 'x' values to change multiple switches or self switches
upon being submerged into deep water.
- If this is placed inside a page's comment, the effect will only occur
if that event page is currently active.
--- <Submerged Effect> <Submerged Effect: x> - Used for: Event Notetags and Event Page Comment Tags - Adds a visual effect to the event, making it bob up and down like at the surface of the water. - Use the <Submerged Effect: x> variant to visually submerge the event further, making it appear heavier and deeper in the water. - Replace 'x' with a number representing how many pixels deep to submerge the event visually. - If this is placed inside a page's comment, the effect will only occur if that event page is currently active. --- <Bridge> - Used for: Event Notetags and Event Page Comment Tags - Marks the event as a bridge, allowing the player and other events to walk on top of it, even if it is over water. - Using this notetag will set the event's priority to "Below characters". - If this is placed inside a page's comment, the effect will only occur if that event page is currently active. --- Useful-Related Notetags--- <Exit Reset Self Data> - Used for: Event Notetags ONLY - When the player leaves the current map, all Self Switches and Self Variables related to this event will be reset. - This notetag is a part of VisuMZ_1_EventsMoveCore but is recommended to be listed here with this plugin. --- Event Signals VisuStella MZThe following are notetags that have been added through this plugin. These notetags will not work with your game if this plugin is OFF or not present. --- Signal-Related Notetags--- <Responds to Signal: text>
<Responds to Signals: text, text, text>
- Used for: Event Comment Tags
- Must be used in an event's page comments and NOT its note box.
- Causes this specific event page to be a response to receiving 'text'
signal(s) as long as its other page conditions are met.
- This page becomes the active page and the event commands will be ran as
a parallel from start to finish.
- Once the events finished, the event returns to its normal behavior.
- Replace 'text' with the signal being emitted.
- Insert multiple 'text' entries for this page to respond to multiple
signals being emitted.
--- <Immune to Signal: text>
<Immune to Signals: text, text, text>
- Used for: Event Comment Tags
- Must be used in an event's page comments and NOT its note box.
- While this page is the active event page, it will not respond to 'text'
signal even if the other signal respond conditions are met.
- Replace 'text' with the signal that this active event page will ignore.
- Insert multiple 'text' entires for this active event page to ignore as
signal emissions.
--- Events and Movement Core VisuStella MZThe following are notetags that have been added through this plugin. These notetags will not work with your game if this plugin is OFF or not present. Some of these are comment tags. Comment tags are used for events to mark and affect individual event pages rather than the whole event. Map NotetagsThe following notetags are used for maps only. While some of these options are also available in the Plugin Parameters, some of these notetags extend usage to specific maps marked by these notetags as well. --- <Diagonal Movement: On> <Diagonal Movement: Off> - Used for: Map Notetags - Turns on/off diagonal movement for those maps. - If notetag isn't present, use Plugin Parameter setting. --- <type Allow Region: x> <type Allow Region: x, x, x> <type Forbid Region: x> <type Forbid Region: x, x, x> <type Dock Region: x> <type Dock Region: x, x, x> - Used for: Map Notetags - Replace 'type' with 'All', 'Walk', 'Player', 'Event', 'Vehicle', 'Boat', 'Ship', or 'Airship'. - 'Allow' notetag variants allow that type to pass through them no matter what other passability settings are in place. - 'Forbid' notetag variants forbid that type from passing through at all. - 'Dock' notetag variants allow vehicles to dock there. Boats and ships must face the region direction while airships must land directly on top. --- <Map Load Common Event: x> <Map Load Common Events: x, x, x> - Used for: Map Notetags - When this map is loaded, run the specified Common Events once available. - Does NOT trigger if you transfer to a different part of the same map. - Replace 'x' with a number representing the ID of the Common Event you wish to reserve and run once ready. --- <Save Event Locations> - Used for: Maps Notetags - Saves the locations of all events on the map so that when you return to that map at a later point, the events will be in the position they were last in. --- <Hide Player> <Show Player> - Used for: Map Notetags - Forcefully hides or shows the player sprite. This is so you don't need to manually turn the setting on/off each time you enter a specific map. - These settings will take priority over the event commands. - If the player sprite is hidden, so are the player's followers. - If the player sprite is visible, the player's followers will still depend on their settings. - These notetags are mutually exclusive from each other. --- <Hide Followers> <Show Followers> - Used for: Map Notetags - Forcefully hides or shows the player's followers. This is so you don't need to manually turn them on/off each time you enter a specific map. - These settings will take priority over the event commands. - These notetags are mutually exclusive from each other. --- Page Comment TagsThe following comment tags are to be put inside of the pages of events, troops, and common events for them to work! --- <Page Conditions> conditions conditions conditions </Page Conditions> - Used for: Map Event Page, Troop Page, and Common Event Page Comment Tags - This allows you to create custom page conditions that utilize the Conditional Branch event command to see if the additional page conditions are met. --- <Conditions Met> - Used for: Map Event Page, Troop Page, and Common Event Page Comment Tags - If used between the <Page Conditions> and </Page Conditions> comment tag, upon reaching this part of event command list, the custom page conditions will be considered met. --- Example: ◆Comment:<Page Conditions> ◆If:Reid has equipped Potion Sword ◆Comment:If Reid has equipped the Potion Sword : :<Condition Met> ◆ :End ◆Comment:</Page Conditions> If Reid has the "Potion Sword" weapon equipped, then the additional custom page conditions are met and the event page will be present/active. If this is a troop condition, the troop page event will activate. If this is a common event, there will be a parallel common event active. --- Event and Event Page NotetagsThe following notetags have comment tag variants (with a few exceptions). If a notetag is used for an event, it will affect the event constantly. If a comment tag is used, it will only affect the page the comment tag is on and only that page. --- <Activation Region: x> <Activation Regions: x,x,x> - Used for: Event Notetags and Event Page Comment Tags - Allows this event to be remotely activated as long as the player is standing within a tile marked by a designated region. - Replace 'x' with the regions you wish to remotely activate this event in. - Action Button: Player must press OK while being in the region. - Player/Event Touch: Player must step onto the region. - Autorun/Parallel: Player be in the region. - If this is placed in a notetag, the effect will be present across all event pages used. - If this is placed inside a page's comment, the effect will only occur if that event page is currently active. - NOTE: This cannot be used with any other activation tags. --- <Activation Square: x> <Activation Circle: x> <Activation Delta: x> <Activation Row: x> <Activation Column: x> - Used for: Event Notetags and Event Page Comment Tags - Allows this event to be remotely activated as long as the player is within range of its activation type. - Replace 'x' with a number stating the range in tiles. - Square: A square-shaped range with the event at the center. - Circle: A circle-shaped range with the event at the center. - Delta: A diamond-shaped range with the event at the center. - Row: Spans horizontally across the map. 'x' expands up and down. - Column: Spans vertically across the map. 'x' expands left and right. - If this is placed in a notetag, the effect will be present across all event pages used. - If this is placed inside a page's comment, the effect will only occur if that event page is currently active. - NOTE: This cannot be used with any other activation tags. --- <Always Update Movement> - Used for: Event Notetags and Event Page Comment Tags - Events normally have to be within screen range for them to update their self movement. If this tag is present, the event is always updating. - If this is placed in a notetag, the effect will be present across all event pages used. - If this is placed inside a page's comment, the effect will only occur if that event page is currently active. --- <Click Trigger> - Used for: Event Notetags and Event Page Comment Tags - Allows this event to activate upon being clicked on with the mouse. - If this is placed in a notetag, the effect will be present across all event pages used. - If this is placed inside a page's comment, the effect will only occur if that event page is currently active. --- <Copy Event: Map x, Event y> <Copy Event: x, y> <Copy Event: template> - Used for: Event Notetags ONLY - Makes this event copy all of the event settings from a different event that can be found on a different map (as long as that map is registered inside of Plugin Parameters => Event Template Settings => Preloaded Maps). - Replace 'x' with a number representing the copied event's Map ID. - If '0' is used for the Map ID, reference the current map. - Replace 'y' with a number representing the copied event's Event ID. - For the 'template' variant, replace 'template' with the name of the template made in Plugin Parameters => Event Template Settings => Event Template List. - If this is placed in a notetag, the effect will be present across all event pages used. --- <Custom Z: x>
- Used for: Event Notetags and Event Page Comment Tags
- Replace 'x' with a number value to determine the event sprite's Z value
relative to the tilemap.
- For reference from rmmz_core.js:
- 0 : Lower tiles
- 1 : Lower characters
- 3 : Normal characters
- 4 : Upper tiles
- 5 : Upper characters
- 6 : Airship shadow
- 7 : Balloon
- 8 : Animation
- 9 : Destination
- You can use numbers below 0 and above 9.
- Values under 0 go below the tilemap.
- Values above 9 go above everything else on the tilemap.
- These values do NOT go below or above other screen objects that are
NOT attached to the tilemap layer such as parallaxes or weather or
windows because that's simply not how z-axis work with sprite layers.
--- <Encounter Half Square: x> <Encounter Half Circle: x> <Encounter Half Delta: x> <Encounter Half Row: x> <Encounter Half Column: x> - Used for: Event Notetags and Event Page Comment Tags - If the player is within the 'x' area effect of this event, the random encounter rate will be halved. - Replace 'x' with a number stating the range in tiles. - Square: A square-shaped range with the event at the center. - Circle: A circle-shaped range with the event at the center. - Delta: A diamond-shaped range with the event at the center. - Row: Spans horizontally across the map. 'x' expands up and down. - Column: Spans vertically across the map. 'x' expands left and right. - If this is placed in a notetag, the effect will be present across all event pages used. - If this is placed inside a page's comment, the effect will only occur if that event page is currently active. Script Call Check: $isTileEncounterHalf(x, y) - This can be used to check if a certain map tile (x, y) has an encounter rate halving effect on it. - Returns a boolean (true or false) when used. --- <Encounter None Square: x> <Encounter None Circle: x> <Encounter None Delta: x> <Encounter None Row: x> <Encounter None Column: x> - Used for: Event Notetags and Event Page Comment Tags - If the player is within the 'x' area effect of this event, the random encounter rate will be suppressed completely. - Replace 'x' with a number stating the range in tiles. - Square: A square-shaped range with the event at the center. - Circle: A circle-shaped range with the event at the center. - Delta: A diamond-shaped range with the event at the center. - Row: Spans horizontally across the map. 'x' expands up and down. - Column: Spans vertically across the map. 'x' expands left and right. - If this is placed in a notetag, the effect will be present across all event pages used. - If this is placed inside a page's comment, the effect will only occur if that event page is currently active. Script Call Check: $isTileEncounterNone(x, y) - This can be used to check if a certain map tile (x, y) has an encounter rate suppression effect on it. - Returns a boolean (true or false) when used. --- <Erase if Encounter Half> <Erase if Encounter None> - Used for: Event Notetags ONLY - Automatically erase this event if the player's party has an encounter half or encounter none effect, or if the event has spawned in an encounter half or encounter none area. - This check only occurs in two situations: when the map is first loaded after being teleported into or when the player leaves a menu and returns back to the map. - Events that have been erased due to this effect will NOT return even if the encounter half/none effect is removed while the player is still on the map. The event will return if the player exits the map and comes back. --- <Exit Reset Self Data> - Used for: Event Notetags ONLY - When the player leaves the current map, all Self Switches and Self Variables related to this event will be reset. --- <Hitbox Left: x> <Hitbox Right: x> <Hitbox Up: x> <Hitbox Down: x> - Used for: Event Notetags and Event Page Comment Tags - Replace 'x' with a number to extend the hitbox of the event by that many tiles towards the listed direction. - Use multiples of this notetag to extend them to different directions. - If this is placed in a notetag, the effect will be present across all event pages used. - If this is placed inside a page's comment, the effect will only occur if that event page is currently active. --- <Icon: x> - Used for: Event Notetags and Event Page Comment Tags - Replace 'x' with the Icon ID you wish to put above this event. - This will not override any Icons designated to the ID through a Plugin Command. - If this is placed in a notetag, the effect will be present across all event pages used. - If this is placed inside a page's comment, the effect will only occur if that event page is currently active. --- <Icon Buffer X: +x> <Icon Buffer X: -x> <Icon Buffer Y: +x> <Icon Buffer Y: -x> <Icon Buffer: +x, +y> <Icon Buffer: -x, -y> - Used for: Event Notetags and Event Page Comment Tags - Allows you to adjust the positions of the icon on the envent by buffers. - Replace 'x' and 'y' with the values to adjust the position buffers by. - If this is placed in a notetag, the effect will be present across all event pages used. - If this is placed inside a page's comment, the effect will only occur if that event page is currently active. --- <Label: text> - Used for: Event Notetags and Event Page Comment Tags - Puts a label over the event's head displaying 'text'. - Text codes can be used. - If text codes are used, avoid text codes that use < and > wrappers. - If this is placed in a notetag, the effect will be present across all event pages used. - If this is placed inside a page's comment, the effect will only occur if that event page is currently active. --- <Label> text text </Label> - Used for: Event Notetags and Event Page Comment Tags - Puts a label over the event's head displaying 'text'. - This can display multiple lines. - Text codes can be used. - You can use text codes with < and > wrappers. - If this is placed in a notetag, the effect will be present across all event pages used. - If this is placed inside a page's comment, the effect will only occur if that event page is currently active. --- <Label Range: x> - Used for: Event Notetags and Event Page Comment Tags - Sets a range requirement for the player to be in order for the event's label to appear. - Replace 'x' with a number value depicting the range in tiles. - If this is placed in a notetag, the effect will be present across all event pages used. - If this is placed inside a page's comment, the effect will only occur if that event page is currently active. --- <Label Offset X: +x> <Label Offset X: -x> <Label Offset Y: +x> <Label Offset Y: -x> <Label Offset: +x, +y> <Label Offset: -x, -y> - Used for: Event Notetags and Event Page Comment Tags - Allows you to adjust the positions of the label on the envent by offsets. - Replace 'x' and 'y' with the values to adjust the position offsets by. - If this is placed in a notetag, the effect will be present across all event pages used. - If this is placed inside a page's comment, the effect will only occur if that event page is currently active. --- <Label Hue Shift: +x>
<Label Hue Shift: -x>
- Used for: Event Notetags and Event Page Comment Tags
- Changes the hue of the event label by +x or -x every frame.
- Keep in mind that since this is changing hue, this will appear to have
no effect if you are using black and white labels.
- Use labels with text codes that add color to them like '\C[4]text'
- This only works with the sprite version of event labels and does not work
with the legacy version.
--- <Mirror Sprite> - Used for: Event Notetags and Event Page Comment Tags - The event sprite's visual appearance is mirrored. --- <Move Only Region: x> <Move Only Regions: x,x,x> - Used for: Event Notetags and Event Page Comment Tags - Sets the move range of this event to only the region(s) marked by the notetag(s) or comment tag(s). - This will bypass terrain passability. - This will not bypass event collision. - If this is placed in a notetag, the effect will be present across all event pages used. - If this is placed inside a page's comment, the effect will only occur if that event page is currently active. --- <Move Synch Target: Player> <Move Synch Target: Event x> - Used for: Event Notetags and Event Page Comment Tags - Synchronizes the movement of this event with a target (either the player or another event). This event will only move whenever the synchronized target moves. - For 'Event x' variant, replace 'x' with the ID of the event to synch to. - If this is placed in a notetag, the effect will be present across all event pages used. - If this is placed inside a page's comment, the effect will only occur if that event page is currently active. --- <Move Synch Type: Random> <Move Synch Type: Approach> <Move Synch Type: Away> <Move Synch Type: Custom> <Move Synch Type: Mimic> <Move Synch Type: Reverse Mimic> <Move Synch Type: Mirror Horizontal> <Move Synch Type: Mirror Vertical> - Used for: Event Notetags and Event Page Comment Tags - Choose the type of movement the event will have if it is synchronized to a target. - Random: Move to a random position. - Approach: Approaches target. - Away: Flees from target. - Custom: Follows a custom move route. - Mimic: Imitates the target's movement style. - Reverse Mimic: Does the opposite of the target's movement. - Mirror Horizontal: Moves as if a mirror is placed horizontally. - Mirror Vertical: Moves as if a mirror is placed vertically. - If this is placed in a notetag, the effect will be present across all event pages used. - If this is placed inside a page's comment, the effect will only occur if that event page is currently active. --- <Move Synch Delay: x> - Used for: Event Notetags and Event Page Comment Tags - If this tag is present, the event will wait a bit after each move before moving again. - Replace 'x' with the number of movement instances in between. - If this is placed in a notetag, the effect will be present across all event pages used. - If this is placed inside a page's comment, the effect will only occur if that event page is currently active. --- <Move Synch Distance Opacity: x> - Used for: Event Notetags and Event Page Comment Tags - Changes the opacity of the event based on the distance between it and its move synched target. Closer means more opaque. Further away means more transparent. - Replace 'x' with a number representing the opacity change per pixel distance away. 'x' can use decimal values like 1.05 and 1.5. --- <Picture Filename: filename>
- Used for: Event Notetags and Event Page Comment Tags
- Applies a picture graphic from the /img/pictures/ folder of your project.
- This graphic will be on top of the character sprite but below the event
icon sprite.
- The picture priority will be the same as the event's priority.
- If it is "below characters", the player can walk on top of it.
- If it is "above characters", the player will behind it.
- If it is "same as characters", the priority will be based on the
current relative Y position. This also means, if the picture is big
enough, it can clip into the top of tree tiles and such.
- Replace 'filename' with a filename from the game project's /img/pictures/
folder. This is case sensitive. Do NOT include the file extension.
- If this is placed in a notetag, the effect will be present across
all event pages used.
- If this is placed inside a page's comment, the effect will only occur
if that event page is currently active.
--- <Picture Max Size: x> <Picture Scale: y%> - Used for: Event Notetags and Event Page Comment Tags - Used with <Picture Filename: filename> notetag. - If the "Max Size" or "Scale" supplementary notetags are used, the picture graphic will be scaled proportionally to fit either the exact pixel size for "Max Size" or the "Scale" ratio. - Both the "Max Size" and "Scale" notetags require the "Filename" notetag. - Replace 'x' with a number value representing the exact pixel size for the "Max Size" notetag. - Replace 'y' with a number value representing the scale on which to shrink or enlarge the picture. 100% is normal size. 50% is half size. 200% is double size. - If this is placed in a notetag, the effect will be present across all event pages used. - If this is placed inside a page's comment, the effect will only occur if that event page is currently active. --- <Picture Offset X: +x> <Picture Offset X: -x> <Picture Offset Y: +x> <Picture Offset Y: -x> <Picture Offset: +x, +y> <Picture Offset: -x, -y> - Used for: Event Notetags and Event Page Comment Tags - Used with <Picture Filename: filename> notetag. - Offsets the X and Y position of the event picture relative to the event sprite's own position. - Replace 'x' and 'y' with numbers indicating the offset in pixels. - If this is placed in a notetag, the effect will be present across all event pages used. - If this is placed inside a page's comment, the effect will only occur if that event page is currently active. --- <Picture Wait Frames: x> - Used for: Event Notetags and Event Page Comment Tags - Used with <Picture Filename: filename> notetag. - Requires VisuMZ_4_AnimatedPictures! - "Wait Frames" is used with VisuMZ's Animated Pictures plugin. This determines the delay inbetween frame changes. - Replace 'x' with a number representing the amount of frames to wait inbetween frame changes. - If this is placed in a notetag, the effect will be present across all event pages used. - If this is placed inside a page's comment, the effect will only occur if that event page is currently active. --- <Playtest> - Used for: Event Notetags. - This does NOT work when it's in the Event Page Comment Tags. - If this notetag is found in the event's notebox (NOT comments), then the event will only appear during a playtest session. It will not appear in a deployed game where the playtest flag is not on. --- <Random Move Weight: x> - Used for: Event Notetags and Event Page Comment Tags - If this tag is used on an event with random-type autonomous movement, then the event will stick closer to their home location (where they are located upon spawning on the map). How close they stick to their home location will depend on the weighted 'x' value. - Replace 'x' with a number between 0 and 1. Numbers closer to 0 give the event more freedom when moving randomly while numbers closer to 1 cause the event to stick closer to their home position. --- <True Random Move> - Used for: Event Notetags and Event Page Comment Tags - If this tag is used on an event with random-type autonomous movement, then that event will ignore the effects of weighted randomized movement. --- <Save Event Location> - Used for: Event Notetags ONLY - Saves the locations of the event on the map so that when you return to that map at a later point, the event will be in the position it was last in. --- <Hide Shadow> - Used for: Event Notetags and Event Page Comment Tags - Hides the shadow for the event. - If this is placed in a notetag, the effect will be present across all event pages used. - If this is placed inside a page's comment, the effect will only occur if that event page is currently active. --- <Scale: x%> <Scale X: x%> <Scale Y: y%> - Used for: Event Notetags and Event Page Comment Tags - Changes the scale of the sprite to the designated size. - For <Scale: x%> variant: replace 'x' with a number representing the scaling overall percentage to be used. - For <Scale X: x%> variant, replace 'x' with a number representing the x factor for the horizontal scaling percentage to be used. - For <Scale Y: y%> variant, replace 'y' with a number representing the y factor for the vertical scaling percentage to be used. - If this is placed in a notetag, the effect will be present across all event pages used. - If this is placed inside a page's comment, the effect will only occur if that event page is currently active. --- <Shadow Filename: filename> - Used for: Event Notetags and Event Page Comment Tags - Replaces the shadow graphic used with 'filename' found in the img/system/ project folder. - If this is placed in a notetag, the effect will be present across all event pages used. - If this is placed inside a page's comment, the effect will only occur if that event page is currently active. --- <Sprite Offset X: +x> <Sprite Offset X: -x> <Sprite Offset Y: +x> <Sprite Offset Y: -x> <Sprite Offset: +x, +y> <Sprite Offset: -x, -y> - Used for: Event Notetags and Event Page Comment Tags - Changes how much the event's sprite is visibly offset by. - Replace 'x' and 'y' with numbers indicating the offset in pixels. - If this is placed in a notetag, the effect will be present across all event pages used. - If this is placed inside a page's comment, the effect will only occur if that event page is currently active. --- <Step Pattern: Left to Right>
<Step Pattern: Right to Left>
<Step Pattern: Spin Clockwise>
<Step Pattern: Spin CW>
<Step Pattern: Spin CounterClockwise>
<Step Pattern: Spin CCW>
<Step Pattern: Spin AntiClockwise>
<Step Pattern: Spin ACW>
- Used for: Event Notetags and Event Page Comment Tags
- Changes the way the event animates if a tag is present.
- Left to Right: Makes the event sprite's step behavior go from frame 0 to
1 to 2, then back to 0 instead of looping backward.
- Right to Left: Makes the event sprite's step behavior go from frame 2 to
1 to 0, then back to 2 instead of looping forward.
- Spin Clockwise: Makes the event sprite's step behavior spin CW.
- Spin CounterClockwise: Makes the event sprite's step behavior spin CCW.
- If this is placed in a notetag, the effect will be present across
all event pages used.
- If this is placed inside a page's comment, the effect will only occur
if that event page is currently active.
--- Evolution Matrix Skills VisuStella MZThe following are notetags that have been added through this plugin. These notetags will not work with your game if this plugin is OFF or not present. --- Evolution Matrix-Related Notetags--- <Matrix Skill key: id>
<Matrix Skill key: name>
<Available Matrix Skill key: id>
<Available Matrix Skill key: name>
- Used for: Skill Notetags
- Adds an evolution matrix to a skill when the specific 'key' is pressed.
This variant requires the actor to either have learned the skill or have
it temporarily accessible through traits.
- There are no differences between the <Matrix Skill key: id> and
<Available Matrix Skill key: id> notetags, it's a matter of preference of
which you want to use.
- Replace 'key' with a string representing the key trigger you wish to bind
this chain skill with.
- 'down', 'left', 'right', 'up'
- You can substitute the above for the NumPad values: 'down' with '2',
'left' with '4', 'right' with '6', and 'up' with '8'
- 'cancel', 'pageup', 'pagedown', 'shift'
- You can substitute the above for the Keyboard inputs: 'cancel' with 'x',
'pageup' with 'q', 'pagedown' with 'w', and 'shift' for 's'
- 'ok' and/or 'z' is not available since it's for the Center Skill.
- Do not include the quotes.
- For 'id' variant: replace 'id' with the ID of the skill to evolve using
the marked key.
- For 'name' variant: replace 'name' with the name of the skill to evolve
using the marked key.
- Insert multiple copies of this notetag to bind different keys.
Examples:
<Matrix Skill up: Fire II>
<Matrix Skill left: 108>
<Available Matrix Skill right: Fire III>
<Available Matrix Skill down: 110>
--- <Learned Matrix Skill key: id>
<Learned Matrix Skill key: name>
<Known Matrix Skill key: id>
<Known Matrix Skill key: name>
- Used for: Skill Notetags
- Adds an evolution matrix to a skill when the specific 'key' is pressed.
This variant requires the actor to have learned the skill in order to
evolve to it regardless of whether or not the actor has temporary trait
access to the skill.
- There are no differences between the <Learned Matrix Skill key: id> and
<Known Matrix Skill key: id> notetags, it's a matter of preference of
which you want to use.
- Replace 'key' with a string representing the key trigger you wish to bind
this chain skill with.
- 'down', 'left', 'right', 'up'
- You can substitute the above for the NumPad values: 'down' with '2',
'left' with '4', 'right' with '6', and 'up' with '8'
- 'cancel', 'pageup', 'pagedown', 'shift'
- You can substitute the above for the Keyboard inputs: 'cancel' with 'x',
'pageup' with 'q', 'pagedown' with 'w', and 'shift' for 's'
- 'ok' and/or 'z' is not available since it's for the Center Skill.
- Do not include the quotes.
- For 'id' variant: replace 'id' with the ID of the skill to evolve using
the marked key.
- For 'name' variant: replace 'name' with the name of the skill to evolve
using the marked key.
- Insert multiple copies of this notetag to bind different keys.
Examples:
<Learned Matrix Skill up: Fire II>
<Learned Matrix Skill left: 108>
<Known Matrix Skill right: Fire III>
<Known Matrix Skill down: 110>
--- <Always Matrix Skill key: id>
<Always Matrix Skill key: name>
<Forced Matrix Skill key: id>
<Forced Matrix Skill key: name>
- Used for: Skill Notetags
- Adds an evolution matrix to a skill when the specific 'key' is pressed.
This variant will always have the skill available for evolution.
- There are no differences between the <Always Matrix Skill key: id> and
<Forced Matrix Skill key: id> notetags, it's a matter of preference of
which you want to use.
- Replace 'key' with a string representing the key trigger you wish to bind
this chain skill with.
- 'down', 'left', 'right', 'up'
- You can substitute the above for the NumPad values: 'down' with '2',
'left' with '4', 'right' with '6', and 'up' with '8'
- 'cancel', 'pageup', 'pagedown', 'shift'
- You can substitute the above for the Keyboard inputs: 'cancel' with 'x',
'pageup' with 'q', 'pagedown' with 'w', and 'shift' for 's'
- 'ok' and/or 'z' is not available since it's for the Center Skill.
- Do not include the quotes.
- For 'id' variant: replace 'id' with the ID of the skill to evolve using
the marked key.
- For 'name' variant: replace 'name' with the name of the skill to evolve
using the marked key.
- Insert multiple copies of this notetag to bind different keys.
Examples:
<Always Matrix Skill up: Fire II>
<Always Matrix Skill left: 108>
<Forced Matrix Skill right: Fire III>
<Forced Matrix Skill down: 110>
--- Animation-Related Notetags--- <Evo Matrix Animation: x> - Used for: Skill Notetags - Changes the animation played when evolving into this skill or initially using it to create an Evolution Matrix. - Requires VisuMZ_0_CoreEngine! - Replace 'x' with a number representing the ID of the animation to play when selecting this skill in the Evolution Matrix. - If this notetag is not used, play the animation found in the Plugin Parameters instead. --- Extra Enemy Drops VisuStella MZThe following are notetags that have been added through this plugin. These notetags will not work with your game if this plugin is OFF or not present. General Drop-Related NotetagsThe following notetags are related to giving enemies additional drops with more control over probability rates. --- <Item Drop id: x%>
<Item Drop id To id: x%>
<Item Drop name: x%>
<Weapon Drop id: x%>
<Weapon Drop id To id: x%>
<Weapon Drop name: x%>
<Armor Drop id: x%>
<Armor Drop id To id: x%>
<Armor Drop name: x%>
- Used for: Enemy Notetags
- Gives the enemy 'x' percent chance to drop the designated item, weapon,
or armor.
- Replace 'id' with the ID of the item, weapon, or armor you wish to assign
to the enemy as a potential drop.
- For 'id To id' variants, insert the starting ID and ending ID for the
items, weapons, and/or armors you wish to add as a batch. This will
ignore any entries without a name or with ----- in its name.
- With the 'name' notetag variant, replace 'name' with the name of the item,
weapon, or armor you wish to assign to the enemy as a potential drop.
- Replace 'x' with a number representing the percentile probability chance
of successfully acquiring that item as a drop.
- Insert multiple copies of these notetags if you wish to include more drops
for the enemies.
Examples:
<Item Drop 5: 20%>
<Item Drop 5 To 10: 20%>
<Item Drop Potion: 30%>
<Weapon Drop 27: 45%>
<Weapon Drop 27 To 37: 45%>
<Weapon Drop Blade of Reckoning: 55%>
<Armor Drop 19: 72%>
<Armor Drop 19 To 23: 72%>
<Armor Drop Flame Shield: 90%>
--- <Drops>
Item id: x%
Item id To id: x%
Item name: x%
Weapon id: x%
Weapon id To id: x%
Weapon name: x%
Armor id: x%
Armor id To id: x%
Armor name: x%
</Drops>
- Used for: Actor, Class, Skill, Item, Weapon, Armor, Enemy, State Notetags
- Creates a batch list of item, weapon, armor drops.
- This isn't any different than creating individual copies of the above
notetags as far as results go, but some may prefer this approach to make
the drop table look "cleaner".
- Replace 'id' with the ID of the item, weapon, or armor you wish to assign
to the enemy as a potential drop.
- For 'id To id' variants, insert the starting ID and ending ID for the
items, weapons, and/or armors you wish to add as a batch. This will
ignore any entries without a name or with ----- in its name.
- With the 'name' notetag variant, replace 'name' with the name of the item,
weapon, or armor you wish to assign to the enemy as a potential drop.
- Replace 'x' with a number representing the percentile probability chance
of successfully acquiring that item as a drop.
Example:
<Drops>
Item 5: 20%
Item Potion: 30%
Weapon 27: 45%
Weapon Blade of Reckoning: 55%
Armor 72: 72%
Armor Flame Shield: 90%
</Drops>
--- Conditional Drop-Related NotetagsConditional drops are drops that only appear once specific conditions have been met. For each condition met, their chances of dropping can be raised higher or lower. --- <Conditional Item id Drop>
condition: +x%
condition: +x%
condition: -x%
condition: -x%
</Conditional Item id Drop>
<Conditional Item id To id Drops>
condition: +x%
condition: +x%
condition: -x%
condition: -x%
</Conditional Item id To id Drops>
<Conditional Item name Drop>
condition: +x%
condition: +x%
condition: -x%
condition: -x%
</Conditional Item name Drop>
<Conditional Weapon id Drop>
condition: +x%
condition: +x%
condition: -x%
condition: -x%
</Conditional Weapon id Drop>
<Conditional Weapon id To id Drop>
condition: +x%
condition: +x%
condition: -x%
condition: -x%
</Conditional Weapon id To id Drop>
<Conditional Weapon name Drop>
condition: +x%
condition: +x%
condition: -x%
condition: -x%
</Conditional Weapon name Drop>
<Conditional Armor id Drop>
condition: +x%
condition: +x%
condition: -x%
condition: -x%
</Conditional Armor id Drop>
<Conditional Armor id To id Drop>
condition: +x%
condition: +x%
condition: -x%
condition: -x%
</Conditional Armor id To id Drop>
<Conditional Armor name Drop>
condition: +x%
condition: +x%
condition: -x%
condition: -x%
</Conditional Armor name Drop>
- Used for: Enemy Notetags
- Create conditional item, weapon, and/or armor drops for this enemy.
- Insert multiples of these notetags if you want more than one conditional
drop for this enemy.
- Use the associated item, weapon, or armor type notetag for the type of
conditional drop you want for the enemy.
- Replace 'id' with the ID number of the item, weapon, or armor to drop.
- For 'id To id' variants, insert the starting ID and ending ID for the
items, weapons, and/or armors you wish to add as a batch. This will
ignore any entries without a name or with ----- in its name.
- Replace 'name' with the name of the item, weapon, or armor to drop.
- Replace 'condition' with any of the conditions listed in below section.
- Replace 'x' with the increase or decrease in percentage drop chance.
--- Condition ListReplace 'condition' in the notetags in the above section with any of the following to make conditions. These conditions are also used in the Plugin Parameters for the default conditions, too. --- x >= y x > y x === y x !== y x < y x <= y - Replace 'x' and 'y' with any of the following: - 'Switch x' (replace 'x' with a number) for switch x's current state. - 'TRUE', 'FALSE', 'ON', 'OFF' for the opposite x/y value. - Using any of these boolean modifiers must be paired with '===' or '!==' - 'Variable x' (replace 'x' with a number) for variable x's current value. - A numeric value representing a hard number. - '50%' or any other percentile number to represent a rate. - '0.5' or any other float number to represent a rate. - 'Item id Count' for the number of specific items the party owns. - Replace 'id' with the ID of the item. - 'Item name Count' for the number of specific items the party owns. - Replace 'name' with the ID of the item. - 'Weapon id Count' for the number of specific weapons the party owns. - Replace 'id' with the ID of the weapon. - 'Weapon name Count' for the number of specific weapons the party owns. - Replace 'name' with the ID of the weapon. - 'Armor id Count' for the number of specific armors the party owns. - Replace 'id' with the ID of the armor. - 'Armor name Count' for the number of specific armors the party owns. - Replace 'name' with the ID of the armor. - 'Alive Members' for the number of alive party members when drops are being determined. - 'Battle Members' for the number of participating party members in battle. - 'Battle Turns' for the number of turns passed in battle when drops are being determined. - 'Dead Members' for the number of dead party members when drops are being determined. - 'Death Turn' for the turn the enemy died. If an enemy was revived during battle, then take the most recent turn the enemy has died. - 'Enemy Level' for the current level of the enemy if using the 'level' property for the Game_Enemy object. - 'Party Gold' for the party's current gold value when drops are being determined. - 'Party Members' for the number of total party members in battle. - 'Times type id Struck' for the number of times the enemy was struck with 'type' 'id' during battle. - Replace 'type' with 'Element' for the number of times the enemy was struck with specific elemental damage. - Replace 'type' with 'Item' for the number of times the enemy was struck with a specific item. - Replace 'type' with 'Skill' for the number of times the enemy was struck with a specific skill. - Replace 'type' with 'SType' for the number of times the enemy was struck by any skill of a specifici skill type. - Replace 'type' with 'State' for the number of times the enemy was struck with a specific state. - Replace 'id' with the type's ID. - 'Times type name Struck' for the number of times the enemy was struck with 'type' 'name' during battle. - Replace 'type' with 'Element' for the number of times the enemy was struck with specific elemental damage. - Replace 'type' with 'Item' for the number of times the enemy was struck with a specific item. - Replace 'type' with 'Skill' for the number of times the enemy was struck with a specific skill. - Replace 'type' with 'SType' for the number of times the enemy was struck by any skill of a specifici skill type. - Replace 'type' with 'State' for the number of times the enemy was struck with a specific state. - Replace 'name' with the type's name in the database. --- Always - This condition is always met. Use this to set a base drop chance. --- Random x% - Offers a random 'x' chance to increase/decrease drop chance. --- Last Strike type id Last Strike type name - Checks the condition to see if the last struck action against the enemy was done by a specific action. - Replace 'type' with 'Element' for the last struck element. - Replace 'type' with 'Item' for the last struck item if it was an item. This will override the 'Skill' and 'SType' types. - Replace 'type' with 'Skill' for the last struck skill if it was a skill. This will override the 'Item' type. - Replace 'type' with 'SType' for the last struck skill type if it was a skill. This will override the 'Item' type. - Replace 'type' with 'State' for the last struck state. --- Examples: The following are some examples on how these conditional drops are used: --- <Conditional Item Potion Drop> Always: +20% Death Turn <= 3: +50% </Conditional Item Potion Drop> - Conditional drop is the Potion item. - It has a base chance of 20%. - If the enemy was defeated during or before turn 3, increase the drop chance by another 50%. --- <Conditional Weapon Mithril Sword Drop> Always: +100% Times SType Magic Struck: -10% Times SType Spell Struck: -10% </Conditional Weapon Mithril Sword Drop> - Conditional drop is the Mithril Sword weapon. - It starts off with a 100% chance of a drop. - Each time the enemy is struck with 'Magic' or 'Spell' type attacks, the drop chance decreases by 10%. --- <Conditional Armor Elemental Cloak Drop> Times Element Fire Struck: +10% Times Element Ice Struck: +10% Times Element Thunder Struck: +10% Times Element Physical Struck: -20% Times Skill Element Force Struck: +50% </Conditional Armor Elemental Cloak Drop> - Conditional drop is the Elemental Cloak armor. - Each time the enemy is struck by 'Fire', 'Ice', or 'Thunder' damage, increase the drop chance by 10%. - Each time the enemy is struck by 'Physical' damage, decrease the drop chance by 10%. - Each time the enemy is struck by the specific skill 'Element Force', increase the drop chance by +50%. --- JavaScript Notetags: DropsThe following are notetags made for users with JavaScript knowledge to give more control over conditional enemy drop manipulation. --- <JS Drops> code code drops.push($dataItems[1]); drops.push($dataWeapons[2]); drops.push($dataArmors[3]); </JS Drops> - Used for: Enemy Notetags - Replace 'code' with JavaScript code to make conditional checks in order to determine which items, weapons, and/or armors would be added to the drop pool. - The 'drops' variable is an array which contains all of the currently existing drops from the enemy this notetag is on. It will be returned as an array upon running the notetag's JavaScript code. - Add to or remove from the 'drops' variable to change up its contents. --- Visual Drop-Related NotetagsFor those who want to customize how some items, weapons, or armors appear as visual drops, use the following notetags. --- <Visual Drop Icon: x> - Used for: Item, Weapon, Armor Notetags - Forces the drop item, weapon, or armor to appear as a different icon. - Replace 'x' with the ID of the icon you wish to show. --- <Visual Drop Rarity: x> - Used for: Item, Weapon, Armor Notetags - Sets the item, weapon, or armor drop to be a specific rarity. - Replace 'x' with a rarity value between 0 and 10. The settings applied to the visual drop will be based on their Plugin Parameter settings. - This is mutually exclusive from the <Visual Drop Tint Color: r, g, b, k> and <Visual Drop Tint Duration: x> notetags. --- <Visual Drop Tint Color: r, g, b, k> - Used for: Item, Weapon, Armor Notetags - Sets the tint of visual drop item when it's visible on the battlefield. - Replace 'r' with a red value between -255 and 255. - Replace 'g' with a green value between -255 and 255. - Replace 'b' with a blue value between -255 and 255. - Replace 'k' with a gray value between 0 and 255. - This does not work with the <Visual Drop Rarity: x> notetag. --- <Visual Drop Tint Duration: x> - Used for: Item, Weapon, Armor Notetags - Sets the duration of the tint effect. - Replace 'x' with the number of frames to tint the visual drop. The lower the number, the faster the tint pulses. The higher the number, the slower the tint pulses. --- <Visual Drop Spawn SFX: filename> - Used for: Item, Weapon, Armor Notetags - When the item, weapon, or armor's visual drop spawns on the battlefield, play a sound effect. - Replace 'filename' with the name of a sound effect from the game project's /audio/se/ folder. Do not include the file extension. - Example: <Visual Drop Spawn SFX: Float1> --- <Visual Drop Bounce Height: x%> - Used for: Item, Weapon, Armor Notetags - Alters how bouncy this visual drop is as it spawns on the battlefield. - Replace 'x' with a percentage value on how much higher the visual drop should bounce than normal (whatever is set in the Plugin Parameters). --- <Visual Drop Bounce SFX: filename> - Used for: Item, Weapon, Armor Notetags - When the item, weapon, or armor's visual drop bounces on the battlefield, play a sound effect. - Replace 'filename' with the name of a sound effect from the game project's /audio/se/ folder. Do not include the file extension. - Example: <Visual Drop Bounce SFX: Float1> --- <Visual Drop Flag: Rainbow> <Visual Drop Flag: Additive> <Visual Drop Flag: Multiply> <Visual Drop Flag: Screen> - Used for: Item, Weapon, Armor Notetags - Adds visual effects to visual drop when it's on the battlefield. - The 'Rainbow' effect causes the icon's hue to constantly change. - The 'Additive', 'Multiply', and 'Screen', effects are blend modes. --- Field Skills VisuStella MZThe following are notetags that have been added through this plugin. These notetags will not work with your game if this plugin is OFF or not present. --- Field Skill-Related Notetags--- <Field Skill Common Event: x>
- Used for: Skill Notetags
- Makes the skill into a Field Skill that activates Common Event 'x'.
- If this is used for a "Battle Only" or "Never" skill while the Plugin
Parameter for "Scene_Skill > Usable Field Skills?" is on, the skill can
now be activated through the Skill scene.
- Field Skills will have a different effect from their battle variants.
- Replace 'x' with a number representing the ID of the Common Event to
activate for this Field Skill.
--- <Field Skill Help Description> text text </Field Skill Help Description> - Used for: Skill Notetags - When usable as a Field Skill, display different help description. - Replace 'text' with the text data you'd like displayed in place of the default skill description if this skill can be used as a Field Skill. --- <Disable Field Skills> - Used for: Map Notetags - Disables Field Skills from being able to be used on this map. --- <Show Field Skill Switch: x> <Show Field Skill All Switches: x,x,x> <Show Field Skill Any Switches: x,x,x> - Used for: Skill Notetags - Determines the visibility of the Field Skill based on switches. - The invisibility will only affect the map Field Skill List Window. - However, invisibility will disable the Field Skill in the Skill scene. - Replace 'x' with the switch ID to determine the skill's visibility. - Insert multiple 'x' values to cover more ID's. - If 'All' notetag variant is used, skill will be hidden until all switches are ON. Then, it would be shown. - If 'Any' notetag variant is used, skill will be shown if any of the switches are ON. Otherwise, it would be hidden. --- <Show Field Skill Region ID: x> <Show Field Skill Region ID: x,x,x> - Used for: Skill Notetags - If the player's current standing tile's Region ID is listed, then the Field Skill is considered visible and shown. - The invisibility will only affect the map Field Skill List Window. - However, invisibility will disable the Field Skill in the Skill scene. - Replace 'x' with the ID of the region to determine the skill's visibility. - Insert multiple 'x' values to cover more ID's. --- <Hide Field Skill Switch: x> <Hide Field Skill All Switches: x,x,x> <Hide Field Skill Any Switches: x,x,x> - Used for: Skill Notetags - Determines the visibility of the Field Skill based on switches. - The invisibility will only affect the map Field Skill List Window. - However, invisibility will disable the Field Skill in the Skill scene. - Replace 'x' with the switch ID to determine the skill's visibility. - Insert multiple 'x' values to cover more ID's. - If 'All' notetag variant is used, skill will be shown until all switches are ON. Then, it would be hidden. - If 'Any' notetag variant is used, skill will be hidden if any of the switches are ON. Otherwise, it would be shown. --- <Hide Field Skill Region ID: x> <Hide Field Skill Region ID: x,x,x> - Used for: Skill Notetags - If the player's current standing tile's Region ID is listed, then the Field Skill is considered invisible and hidden. - The invisibility will only affect the map Field Skill List Window. - However, invisibility will disable the Field Skill in the Skill scene. - Replace 'x' with the ID of the region to determine the skill's visibility. - Insert multiple 'x' values to cover more ID's. --- <Enable Field Skill Switch: x>
<Enable Field Skill All Switches: x,x,x>
<Enable Field Skill Any Switches: x,x,x>
- Used for: Skill Notetags
- Determines the enabled status of the Field Skill based on switches.
- The usability only affects the Field Skill as a Field Skill and does
not affect its usability as a battle skill.
- Replace 'x' with the switch ID to determine the skill's enabled status.
- Insert multiple 'x' values to cover more ID's.
- If 'All' notetag variant is used, skill will be disabled until all
switches are ON. Then, it would be enabled.
- If 'Any' notetag variant is used, skill will be enabled if any of the
switches are ON. Otherwise, it would be disabled.
--- <Enable Field Skill Region ID: x>
<Enable Field Skill Region ID: x,x,x>
- Used for: Skill Notetags
- If the player's current standing tile's Region ID is listed, then the
Field Skill is considered enabled.
- The usability only affects the Field Skill as a Field Skill and does
not affect its usability as a battle skill.
- Replace 'x' with the ID of the region to enable the skill.
- Insert multiple 'x' values to cover more ID's.
--- <Disable Field Skill Switch: x>
<Disable Field Skill All Switches: x,x,x>
<Disable Field Skill Any Switches: x,x,x>
- Used for: Skill Notetags
- Determines the enabled status of the Field Skill based on switches.
- The usability only affects the Field Skill as a Field Skill and does
not affect its usability as a battle skill.
- Replace 'x' with the switch ID to determine the skill's enabled status.
- Insert multiple 'x' values to cover more ID's.
- If 'All' notetag variant is used, skill will be enabled until all switches
are ON. Then, it would be disabled.
- If 'Any' notetag variant is used, skill will be disabled if any of the
switches are ON. Otherwise, it would be enabled.
--- <Disable Field Skill Region ID: x>
<Disable Field Skill Region ID: x,x,x>
- Used for: Skill Notetags
- If the player's current standing tile's Region ID is listed, then the
Field Skill is considered disabled.
- The usability only affects the Field Skill as a Field Skill and does
not affect its usability as a battle skill.
- Replace 'x' with the ID of the region to disable the skill.
- Insert multiple 'x' values to cover more ID's.
--- Fluctuating Shop Prices VisuStella MZThe following are notetags that have been added through this plugin. These notetags will not work with your game if this plugin is OFF or not present. --- Price-Related Notetags--- <Price Base Variable: x>
<Buy Base Variable: x>
<Sell Base Variable: x>
- Used for: Item, Weapon, Armor Notetags
- Determines the 'base' price for the affected item, weapon, or armor.
- By default, the price formula goes (base + plus) * rate + flat
- With 'Price', the notetag will affect both 'Buy' and 'Sell' prices.
- 'Buy' version of the notetag will only affect price when buying.
- 'Sell' version of the notetag will only affect price when selling.
- When selling, the base price is affected by the Sell Price Rate modifier
if you decide to let it affect it. These settings can be altered in the
Plugin Parameters.
- Replace 'x' with the ID of the game variable whose value determines the
'base' price of this item, weapon, or armor.
--- <Price Plus Variable: x>
<Buy Plus Variable: x>
<Sell Plus Variable: x>
<Price Plus Variable: x, x, x>
<Buy Plus Variable: x, x, x>
<Sell Plus Variable: x, x, x>
- Used for: Item, Weapon, Armor Notetags
- Determines the 'plus' price for the affected item, weapon, or armor.
- By default, the price formula goes (base + plus) * rate + flat
- With 'Price', the notetag will affect both 'Buy' and 'Sell' prices.
- 'Buy' version of the notetag will only affect price when buying.
- 'Sell' version of the notetag will only affect price when selling.
- When selling, the plus price is affected by the Sell Price Rate modifier
if you decide to let it affect it. These settings can be altered in the
Plugin Parameters.
- Replace 'x' with the ID of the game variable whose value determines the
'plus' price of this item, weapon, or armor.
- Insert multiple 'x' for more variables to contribute additively to the
total 'plus' value amount when determining the price.
- By default, finalized prices will round up.
--- <Price Rate Variable: x>
<Buy Rate Variable: x>
<Sell Rate Variable: x>
<Price Plus Variable: x, x, x>
<Buy Plus Variable: x, x, x>
<Sell Plus Variable: x, x, x>
- Used for: Item, Weapon, Armor Notetags
- Determines the 'rate' price for the affected item, weapon, or armor.
- By default, the price formula goes (base + plus) * rate + flat
- With 'Price', the notetag will affect both 'Buy' and 'Sell' prices.
- 'Buy' version of the notetag will only affect price when buying.
- 'Sell' version of the notetag will only affect price when selling.
- When selling, the rate price is normally NOT affected by the Sell Price
Rate modifier unless you decide to let it affect it. These settings can
be altered in the Plugin Parameters.
- Replace 'x' with the ID of the game variable whose value determines the
'rate' price of this item, weapon, or armor.
- Insert multiple 'x' for more variables to contribute multiplicatively to
the total 'rate' value amount when determining the price.
- When the value of the marked variable is called upon, divide the value by
100 in order to determine the rate.
- This means that if this variable's value is 250, it will have a
multiplier rate of 2.50 and not 250.0.
- By default, finalized prices will round up.
--- <Price Flat Variable: x>
<Buy Flat Variable: x>
<Sell Flat Variable: x>
<Price Flat Variable: x, x, x>
<Buy Flat Variable: x, x, x>
<Sell Flat Variable: x, x, x>
- Used for: Item, Weapon, Armor Notetags
- Determines the 'flat' price for the affected item, weapon, or armor.
- By default, the price formula goes (base + plus) * rate + flat
- With 'Price', the notetag will affect both 'Buy' and 'Sell' prices.
- 'Buy' version of the notetag will only affect price when buying.
- 'Sell' version of the notetag will only affect price when selling.
- When selling, the flat price is affected by the Sell Price Rate modifier
if you decide to let it affect it. These settings can be altered in the
Plugin Parameters.
- Replace 'x' with the ID of the game variable whose value determines the
'flat' price of this item, weapon, or armor.
- Insert multiple 'x' for more variables to contribute additively to the
total 'flat' value amount when determining the price.
- By default, finalized prices will round up.
--- Frontview Battle UI VisuStella MZThe following are notetags that have been added through this plugin. These notetags will not work with your game if this plugin is OFF or not present. --- Portrait-Related Notetags--- <Battle Portrait: filename> - Used for: Actor Notetag - Sets the battle portrait image for the actor to 'filename'. - Replace 'filename' with a picture found within your game project's img/pictures/ folder. Filenames are case sensitive. Leave out the filename extension from the notetag. - This will override any menu images used for battle only. --- <Frontview UI Portraits>
key: filename
key: filename
key: filename
</Frontview UI Portraits>
- Used for: Actor Notetags
- Allows varying portraits to be displayed when certain 'key' elements are
selected or used.
- Replace 'key' with a setting from the following (without the quotes):
- When performing actions (priority from top to bottom):
- The exact name of the skill or item being used.
- "Item" - When actor uses an item.
- "Friendly" - When actor performs an action that targets allies.
- "Certain Hit" - When actor uses an action that is Certain Hit type.
- "Physical" - When actor uses an action that is Physical hit type.
- "Magical" - When actor uses an action that is Magical hit type.
- "Opponent" - When actor performs an action that targets enemies.
- "Magic" - When actor performs a magic-type skill.
- "Skill" - When actor performs a general skill.
- "Normal" - Everything else.
- "Default" - Everything else.
- When choosing during input (priority from top to bottom):
- The exact name of the skill or item being used.
- The 'symbol' used for the command item.
- "Attack", "Guard", "Skill", "Item", "Escape", "AutoBattle"
- "Brave" - From VisuMZ_2_BattleSystemBTB
- "Formation" - From VisuMZ_2_PartySystem
- "WeaponSwap" - From VisuMZ_2_WeaponSwapSystem
- "Boost" - From VisuMZ_3_BoostAction
- "CombatLog" - From VisuMZ_4_CombatLog
- "Normal" - Everything else.
- "Default" - Everything else.
- Replace 'filename' with a picture found within your game project's
img/pictures/ folder. Filenames are case sensitive. Leave out the filename
extension from the notetag.
--- Map-Related Notetags--- <Show Frontview UI> <Hide Frontview UI> - Used for: Map Notetags - Show or hide the Frontview Battle UI when entering this specific map. - The visibility can be changed via Plugin Command. --- Full Field Recovery VisuStella MZThe following are notetags that have been added through this plugin. These notetags will not work with your game if this plugin is OFF or not present. --- Map-Related Notetags--- <Disable Full Field Recovery> - Used for: Map Notetags - Disables Full Field Recovery from being used on this map. --- Item-Related Notetags--- <Exclude Field Recovery> <Exclude Field HP Recovery> <Exclude Field MP Recovery> <Exclude Field State Recovery> - Used for: Item Notetags - Excludes this specific item from being included into the automatically generated lists of field recovery items. - If using a planned priority list, ignore this notetag. - The general <Exclude Field Recovery> notetag will exclude from all three lists while the HP, MP, and State specific ones target only those lists. --- <Include Field HP Recovery> <Include Field MP Recovery> <Include Field State Recovery> - Used for: Item Notetags - Includes this specific item into the automatic field recovery item list. - If using a planned priority list, ignore this notetag. - This still requires the item to have an occassion type of "Always" or "Menu Only" in order to be usable via Full Field Recovery. --- Furniture System VisuStella MZThe following are notetags that have been added through this plugin. These notetags will not work with your game if this plugin is OFF or not present. --- Map-Related Notetags--- <Allow Furniture> - Used for: Map Notetags - Allows furniture objects to be placed on this map by the player. - If this notetag is not present, the furniture-accessibility for the player is depending on the settings found in the Plugin Parameters. --- <No Furniture> - Used for: Map Notetags - Prevents furniture objects from being placed on this map by the player. - You can still spawn furniture objects onto the map via Plugin Command. - If this notetag is not present, the furniture-accessibility for the player is depending on the settings found in the Plugin Parameters. --- <Furniture Type: type>
<Furniture Types: type, type, type>
- Used for: Map Notetags
- Determines which furniture types are allowed on the map to be placed from
the item menu.
- Furniture items with those any of matching furniture types are allowed to
be placed on the map.
- This does NOT affect the furniture types placed through the Plugin
Commands or pre-existing pieces of furniture placed there.
- Replace 'type' with text categories explaining the type.
- All maps allow the 'any' furniture type.
- This will also provide the effect of the <Allow Furniture> notetag.
Example:
<Furniture Type: Outdoor>
<Furniture Types: Outdoor, Lighting>
--- Furniture-Related Notetags--- <Furniture Template: name>
<Furniture Templates: name, name, name>
- Used for: Item Notetags
- Marks this item database object as a furniture piece of item.
- Replace 'name' with the name of a stored Event Template found within the
Events and Movement Core's Plugin Parameters.
- Insert multiple names if you want more variations associated with this
furniture item.
- These variations can be different rotations of the item or different
colors of them, or maybe even both. The choice is yours.
- This notetag is absolutely needed in order to mark this database object as
a piece of furniture item.
--- <Furniture Type: type>
<Furniture Types: type, type, type>
- Used for: Items Notetags
- Determines which furniture types this furniture item is considered to be
when being placed by the player from the item menu.
- Furniture items can only be placed on maps that allow any of the matching
furniture types.
- This does NOT affect the furniture types placed through the Plugin
Commands or pre-existing pieces of furniture placed there.
- Replace 'type' with text categories explaining the type.
- If no 'type' is used, this furniture item will default to the 'any' type.
Example:
<Furniture Type: Outdoor>
<Furniture Types: Outdoor, Lighting>
--- <Furniture Allow Region: x>
<Furniture Allow Regions: x, x, x>
- Used for: Item Notetags
- Dictates the regions that the player can ONLY place this piece of
furniture on. In other words, you cannot place furniture on tiles without
the region.
- This will bypass passability rules (so that you can use them for wall
decorations).
- Replace 'x' with a number between 1 and 255 representing the Region ID
associated with this notetag effect.
- Insert multiple numbers to expand the regions that the furniture can
be placed on.
- This notetag CANNOT be used together on the same object with the notetag:
<Furniture Forbid Region: x> and variants.
- If this notetag is not used, then the Allowed Regions settings will
default to whatever setting is found in this plugin's Plugin Parameters.
--- <Furniture Forbid Region: x>
<Furniture Forbid Regions: x, x, x>
- Used for: Item Notetags
- Dictates the regions that the player CANNOT place this piece of furniture
on. In other words, you cannot place furniture on tiles with this region.
- Replace 'x' with a number between 1 and 255 representing the Region ID
associated with this notetag effect.
- Insert multiple numbers to expand the regions that the furniture cannot
be placed on.
- This notetag CANNOT be used together on the same object with the notetag:
<Furniture Allow Region: x> and variants.
- If this notetag is not used, then the Forbid Regions settings will
default to whatever setting is found in this plugin's Plugin Parameters.
--- <Furniture Allow Terrain Tag: x>
<Furniture Allow Terrain Tags: x, x, x>
- Used for: Item Notetags
- Dictates the terrain tag tiles that the player can ONLY place this piece
of furniture on. In other words, you cannot place furniture on tiles
without the terrain tag.
- This will bypass passability rules (so that you can use them for wall
decorations).
- Replace 'x' with a number between 1 and 7 representing the Terrain Tag
associated with this notetag effect.
- Insert multiple numbers to expand the tiles that the furniture can
be placed on.
- This notetag CANNOT be used together on the same object with the notetag:
<Furniture Allow Terrain Tag: x> and variants.
- If this notetag is not used, then the Allowed Terrain Tag settings will
default to whatever setting is found in this plugin's Plugin Parameters.
--- <Furniture Forbid Terrain Tag: x>
<Furniture Forbid Terrain Tags: x, x, x>
- Used for: Item Notetags
- Dictates the terrain tag tiles that the player CANNOT place this piece of
furniture on. In other words, you cannot place furniture on tiles with
this terrain tag.
- Replace 'x' with a number between 1 and 7 representing the Terrain Tag
associated with this notetag effect.
- Insert multiple numbers to expand the tiles that the furniture cannot
be placed on.
- This notetag CANNOT be used together on the same object with the notetag:
<Furniture Forbid Terrain Tag: x> and variants.
- If this notetag is not used, then the Forbid Terrain Tag settings will
default to whatever setting is found in this plugin's Plugin Parameters.
--- <Furniture Check Event Collision> <Furniture Allow Event Stacking> - Used for: Item Notetags - Causes the furniture object to check for event collision or let the player stack events on a single tile infinitely. - We recommend not using the "Allow" version. Best leave this notetag alone unless you absolutely know what you're doing with it. - If either of these notetags are not used, then the default settings will be determined by the setting found in this plugin's Plugin Parameters. --- <Furniture Need Passability> <Furniture Free Passability> - Used for: Item Notetags - The "Need" notetag variant determines if the furniture object checks if the tile it's placed on must have passability in order to be valid. - The "Free" notetag variant version does the opposite; it does not need any passability settings. - This effect is ignored with the Allowed Region/Terrain Tag notetags. - If either of these notetags are not used, then the default settings will be determined by the setting found in this plugin's Plugin Parameters. - *NOTE!* The passability check does not work well with the A4 Tiles. Unfortunately, there is not much we can do about this because of the way RPG Maker MZ handles it. No matter how you mark them in the database, RPG Maker MZ will decide that they are passable. You have to work around this with Forbid Region notetags or Forbid Terrain Tag notetags. --- <Furniture Place Common Event: x> - Used for: Item Notetags - Runs a Common Event when the furniture object is placed. - Replace 'x' with a number representing the ID of the Common Event to run. - If this notetag is not used, then the default settings for this effect will be determined by this plugin's Plugin Parameters. --- <Furniture Place Once> <Furniture Place Until Empty> - Used for: Item Notetags - Automatically exit "Furniture Mode" once a furniture object is placed or only exit after the items placing them have been emptied out (or until the player presses cancel). - If this notetag is not used, then the default settings for this effect will be determined by this plugin's Plugin Parameters. --- <Furniture Prevent Cancel Exit> - Used for: Item Notetags - For those weird times where you don't want the player to be able to cancel out of furniture mode when using this item. - There is no Plugin Parameter default for this. --- JavaScript-Furniture Notetags--- <JS On Place Furniture> code code code </JS On Place Furniture> - Used for: Item Notetags - When this furniture item is placed, run JavaScript 'code'. - The 'item' variable will refer to this item. - This JS code will run when the furniture item is placed down be it directly from the inventory or upon being moved and stamped down. --- <JS On Remove Furniture> code code code </JS On Remove Furniture> - Used for: Item Notetags - When this furniture item is removed, run JavaScript 'code'. - The 'item' variable will refer to this item. - This JS code will run when the furniture item is removed after originally being placed down from an item. - This code will also run at the start of a furniture item being moved. --- Event-Related Notetags--- <Furniture Not Movable> - Used for: Event Notetags - NOTE! This does NOT work if you put it inside an event's comments. - Prevents the furniture from being movable by either player interaction or Plugin Command. - Use for things like crops. --- Hospital Shop VisuStella MZThe following are notetags that have been added through this plugin. These notetags will not work with your game if this plugin is OFF or not present. --- State-Related Notetags--- <Hospital Cost: x> - Used for: State Notetags - Changes the cost to recover this state in the hospital to 'x'. - Replace 'x' with a number representing the amount of gold needed to help the actor remove this state in the hospital scene. - If this notetag is not used, use the default cost found in the Plugin Parameters. --- <No Recover All Clear> - Used for: State Notetags - Requires VisuMZ_1_SkillsStatesCore! - This notetag will prevent the hospital and the "Recover All" event command from removing this state nor charging for it. --- Input Combo Skills VisuStella MZThe following are notetags that have been added through this plugin. These notetags will not work with your game if this plugin is OFF or not present. --- Input Combo Origin-Related Notetags--- <Combo Skill key: id>
<Combo Skill key: name>
- Used for: Skill Notetags
- Declares this skill as an Input Combo origin skill. This notetag sets
an input skill to the specific 'key' when pressed.
- The input skills do not need to be learned or available through traits
in order to be used.
- Replace 'key' with a string representing the key trigger you wish to bind
this chain skill with.
- 'down', 'left', 'right', 'up'
- You can substitute the above for the NumPad values: 'down' with '2',
'left' with '4', 'right' with '6', and 'up' with '8'
- 'ok', 'cancel', 'pageup', 'pagedown', 'shift'
- You can substitute the above for the Keyboard inputs: 'ok' with 'z',
'cancel' with 'x', 'pageup' with 'q', 'pagedown' with 'w', and
'shift' for 's'
- Do not include the quotes.
- For 'id' variant: replace 'id' with the ID of the skill to combo using
the marked key.
- For 'name' variant: replace 'name' with the name of the skill to combo
using the marked key.
- Insert multiple copies of this notetag to bind different keys.
Examples:
<Combo Skill Down: Leg Sweep>
<Combo Skill Left: 107>
<Input Combo Skill Right: Hook Punch>
<Input Combo Skill Up: 123>
--- <Combo Max: x> <Input Combo Max: x> - Used for: Skill Notetags - Sets a maximum combo count that this Input Combo origin skill can have. - There are no differences between the two <Combo Max: x> and <Input Combo Max: x> notetags, it's a matter of preference of which you want to use. - Replace 'x' with a number representing the max combo inputs you want to allow the player to input. - If this notetag is not used, the combo max will default to the value found in the Plugin Parameters. - The max combo will NOT include any special skills added through a specific sequence string, meaning that a special skill from a combo sequence can go past the designated combo max. --- <Combo Start Animation: x> <Input Combo Start Animation: x> - Used for: Skill Notetags - Changes the animation played when initiating the Input Combo origin skill. - Replace 'x' with a number representing the ID of the animation to play. - If this notetag is not used, play the animation found in the Plugin Parameters instead. --- <Combo Special sequence: id> <Combo Special sequence: name> <Available Combo Special sequence: id> <Available Combo Special sequence: name> - Used for: Skill Notetags - If the player inputs a matching 'sequence', this Input Combo origin skill will add the target skill to the combo queue. This variant requires the actor to either have learned the target skill or have it temporarily accessible through traits. - There are no differences between the <Combo Special sequence: id> and the <Available Combo Special sequence: id> notetags, it's a matter of preference of which you want to use. - Replace 'sequence' with any of the below: - '2' for 'down' - '4' for 'left' - '6' for 'right' - '8' for 'up' - 'Z' for 'ok' - 'X' for 'cancel' - 'Q' for 'pageup' - 'W' for 'pagedown' - 'S' for 'shift' - Insert multiple copies of this notetag to add more special combos. Examples: <Combo Special 226Z: Hadoken> <Combo Special 4268: 360> <Available Combo Special QWQWQ: Dempsey Roll> <Available Combo Special ZXSQW: 123> --- <Learned Combo Special sequence: id> <Learned Combo Special sequence: name> <Known Combo Special sequence: id> <Known Combo Special sequence: name> - Used for: Skill Notetags - If the player inputs a matching 'sequence', this Input Combo origin skill will add the target skill to the combo queue. This variant requires the actor to have learned in order to special combo into it regardless of whether or not the actor has temporary trait access. - There are no differences between the <Learned Combo Special sequence: id> and the <Known Combo Special sequence: id> notetags, it's a matter of preference of which you want to use. - Replace 'sequence' with any of the below: - '2' for 'down' - '4' for 'left' - '6' for 'right' - '8' for 'up' - 'Z' for 'ok' - 'X' for 'cancel' - 'Q' for 'pageup' - 'W' for 'pagedown' - 'S' for 'shift' - Insert multiple copies of this notetag to add more special combos. Examples: <Learned Combo Special 226Z: Hadoken> <Learned Combo Special 4268: 360> <Known Combo Special QWQWQ: Dempsey Roll> <Known Combo Special ZXSQW: 123> --- <Always Combo Special sequence: id> <Always Combo Special sequence: name> <Forced Combo Special sequence: id> <Forced Combo Special sequence: name> - Used for: Skill Notetags - If the player inputs a matching 'sequence', this Input Combo origin skill will add the target skill to the combo queue. This variant will always allow the target skill to be used as a special combo skill. - There are no differences between the <Always Combo Special sequence: id> and the <Forced Combo Special sequence: id> notetags, it's a matter of preference of which you want to use. - Replace 'sequence' with any of the below: - '2' for 'down' - '4' for 'left' - '6' for 'right' - '8' for 'up' - 'Z' for 'ok' - 'X' for 'cancel' - 'Q' for 'pageup' - 'W' for 'pagedown' - 'S' for 'shift' - Insert multiple copies of this notetag to add more special combos. Examples: <Always Combo Special 226Z: Hadoken> <Always Combo Special 4268: 360> <Forced Combo Special QWQWQ: Dempsey Roll> <Forced Combo Special ZXSQW: 123> --- Input Combo Special Skill-Related Notetags--- <Combo Only> <Input Combo Only> - Used for: Skill Notetags - Causes this skill to only become usable during an Input Combo sequence as a special combination skill. --- Items and Equips Core VisuStella MZThe following are notetags that have been added through this plugin. These notetags will not work with your game if this plugin is OFF or not present. GeneralThese notetags affect the Items, Weapons, and Armors on a general scale. --- <Max: x> - Used for: Item, Weapon, Armor Notetags - Determines the maximum quantity that can be held for this item. - Replace 'x' with a number value to determine the maximum amount. --- <Color: x> <Color: #rrggbb> - Used for: Item, Weapon, Armor, Skill Notetags - Determines the color of the object inside the in-game menus. - Replace 'x' with a number value depicting a window text color. - Replace 'rrggbb' with a hex color code for a more custom color. --- <Category: x> - Used for: Item, Weapon, Armor Notetags - Arranges items into certain/multiple categories to work with the Category Plugin Parameter setting: "Category:x". - Replace 'x' with a category name to mark this item as. --- <Categories> x x </Categories> - Used for: Item, Weapon, Armor Notetags - Arranges items into certain/multiple categories to work with the Category Plugin Parameter setting: "Category:x". - Replace each 'x' with a category name to mark this item as. --- <Conserve: x%> - Used for: Item - Gives the item a percent chance when used to not consume the item. - Replace 'x' with a number representing the percent chance to successfully conserve the item. - If an item cannot be consumed, conserve chance will be 100% regardless. --- Item Accessibility NotetagsThe following notetags allow you to choose when items can/cannot be used based on switches. --- <Enable Switch: x> <Enable All Switches: x,x,x> <Enable Any Switches: x,x,x> - Used for: Item Notetags - Determines the enabled status of the item based on switches. - Replace 'x' with the switch ID to determine the item's enabled status. - If 'All' notetag variant is used, item will be disabled until all switches are ON. Then, it would be enabled. - If 'Any' notetag variant is used, item will be enabled if any of the switches are ON. Otherwise, it would be disabled. --- <Disable Switch: x> <Disable All Switches: x,x,x> <Disable Any Switches: x,x,x> - Used for: Item Notetags - Determines the enabled status of the item based on switches. - Replace 'x' with the switch ID to determine the item's enabled status. - If 'All' notetag variant is used, item will be enabled until all switches are ON. Then, it would be disabled. - If 'Any' notetag variant is used, item will be disabled if any of the switches are ON. Otherwise, it would be enabled. --- JavaScript Notetags: Item AccessibilityThe following are notetags made for users with JavaScript knowledge to determine if an item can be accessible by code. --- <JS Item Enable>
code
code
enabled = code;
</JS Item Enable>
- Used for: Item Notetags
- Determines the enabled status of the item based on JavaScript code.
- If the actor this is disabled for is the only party member, it will not be
visible in the item list unless the VisuStella Battle Core is installed.
- If the VisuStella Battle Core is installed, then all battle scope items
will be visible even if they're disabled.
- Replace 'code' to determine the type enabled status of the item.
- The 'enabled' variable returns a boolean (true/false) to determine if the
item will be enabled or not.
- The 'user' variable refers to the user with the item.
- The 'item' variable refers to the item being checked.
- All other item conditions must be met in order for this to code to count.
--- Equipment NotetagsThe following notetags provide equipment-related effects from deciding what equip slots can be given to classes to the base parameter changes asigned to weapons and armors. --- <Equip Slots> slotName slotName slotName </Equip Slots> - Used for: Class Notetags - Changes the equipment slot loadout for any actor who is that class. - Replace 'slotName' with an Equipment Type name from Database > Types. This is case-sensitive. - Insert or remove as many "slotName" equipment types as needed. --- <param: +x>
<param: -x>
- Used for: Weapon, Armor Notetags
- Changes the base parameter value for the equip item.
- Replace 'param' with any of the following: 'MaxHP', 'MaxMP', 'ATK', 'DEF',
'MAT', 'MDF', 'AGI', or 'LUK' to change that specific parameter's value.
- These notetags do NOT work with X Parameters, S Parameters, or any
custom parameters. These notetags ONLY work with the base parameters.
- Replace 'x' with a number value to set the parameter value to.
- This allows you to bypass the Database Editor's number limitations.
--- <Equip Copy Limit: x> - Used for: Weapon, Armor Notetags - Sets a maximum number of copies that the actor can wear of this equipment. - Replace 'x' with a number value to determine the copy limit. - This can be bypassed using Event Commands and/or Script Calls. - Usage Example: Actors can only equip one copy of the "One-of-a-Kind Ring" on at any time despite having empty accessory slots because the ring has a <Equip Copy Limit: 1> notetag. --- <Equip Weapon Type Limit: x> - Used for: Weapon - This weapon cannot be equipped with other weapons of the same type once the limited amount has been reached. - Replace 'x' with a number value to determine the weapon type limit. - This can be bypassed using Event Commands and/or Script Calls. - Usage Example: A dualwielding warrior who can only equip one sword and a dagger but never two swords or two daggers because the swords and daggers all have the <Equip Weapon Type Limit: 1> notetags on them. --- <Equip Armor Type Limit: x> - Used for: Armor - This armor cannot be equipped with other armors of the same type once the limited amount has been reached. - Replace 'x' with a number value to determine the armor type limit. - This can be bypassed using Event Commands and/or Script Calls. - Usage Example: People cannot equip more than two glove accessories on at a time because the glove is a "Glove" armor-type and each glove item has the <Equip Armor Type Limit: 2> notetags on them. --- <Party Artifact> <Troop Artifact> <Stackable Party Artifact> <Stackable Troop Artifact> - Used for: Armor - This armor cannot be equipped at all. However, by simply being in the party's inventory, its parameter bonuses and traits will be applied globally throughout the whole party or troop (depending on the notetag). - Add both notetags to affect both groups. - The normal versions of the notetag is only applied once regardless of the number of copies are found in the party's inventory. - The stackable versions of the notetag will have the bonuses and traits stacked multiple times relative to the number of copies found in the party's inventory. - This item will NOT be added during the setup phase for Battle Tests. - If you want to add the item, do it manually. --- <Equip For Class Only: x> <Equip For Classes Only: x, x, x> <Equip For Class Only: name> <Equip For Classes Only: name, name, name> - Used for: Weapon, Armor Notetags - This piece of equipment can only be worn by members with 'x' as the main class. If there are multiple classes listed, at least one of them need to be the actor's main class. - Replace 'x' with a number representing the ID of the class required. - For the 'name' variant, replace 'name' with the name of the required class the actor needs to have in order to equip this object. --- <Equip Requirements>
requirement
requirement
requirement
</Equip Requirements>
- Used for: Weapon, Armor Notetags
- Defines a requirement(s) for the actor to meet in order for the equip item
to be equippable.
- Failure to meet these requirements will cause the equipment to unequip
automatically.
- Keep in mind that in some cases, this will not happen immediately.
Things like switches will require the actor to meet its cache clear
in order to trigger the automatic unequip.
- Some ways to trigger a cache clear would be to change the actor's HP/MP,
or adding and then removing a state for the actor (preferrably an unused
state that has no real effect).
- Replace 'requirement' with one of the settings bellow:
- Add multiple 'requirement' lines for more requirements.
Requirements:
param > x
param >= x
param === x
param <= x
param < x
- Replace 'param' with 'level', 'maxhp', 'maxmp', 'atk', 'def', 'mat',
'mdf', 'agi', or 'luk'.
- This will make the piece of equipment require the actor's base parameter
to be greater than (>), greater than or equal to (>=), equal to (===),
less than or equal to (<=), or less than (<).
- This is NOT the value for the total parameter, only the base parameter.
- The base parameter is calculated by the user's class parameter value and
any bonuses received through permanent stat increases.
learned skill: x
learned skill: name
- This will make the piece of equipment require the actor to have learned
skill 'x'.
- If 'name' is used, priority will be given to the skill with the highest
ID in the database.
- The actor needs to have LEARNED the skill. This means that if you have
added a skill to the actor's kit through a trait, it will not count.
switch: x
- This will require switch X to be on.
- If it isn't, the piece of equipment cannot be worn.
- Insert multiple of these to add more switches that are are required to
be on.
***NOTE 1***
There is no "class: x" for these equip requirements. Instead, use the
<Equip For Class Only: x> notetags.
***NOTE 2***
For those wondering where "unique only" is, that does not exist in this
plugin. Instead, use the <Equip Copy Limit: x> notetag listed above.
Example A:
<Equip Requirements>
level >= 20
</Equip Requirements>
- Requires the user to be at least level 20 in order to equip.
Example B:
<Equip Requirements>
atk >= 50
def <= 50
</Equip Requirements>
- Requires the user have at least 50 base ATK to equip.
- Requires the user to be under 50 base DEF to equip.
--- <Added EType: x> <Added ETypes: x, x, x> - Used for: Armor Notetags - This is for armors only and does NOT work with weapons! - Allows a piece of armor to belong to multiple ETypes. This means a glove can be equipped as "Armgear" or as an "Accessory" if you so choose. - Replace 'x' with a number representing the ID of the EType you wish to add to the list of ETypes. - Insert multiple 'x' entries to add more than one EType ID. --- <Cursed>
- Used for: Weapon, Armor Notetags
- If this weapon or armor is equipped, it cannot manually be removed by the
player until it is purified.
- To remove it, it must be done by event commands, script calls, or through
the Purify-related Plugin Commands provided by this plugin.
- Once purified, the weapon or armor will become unequipped unless it has a
purify transformation.
- If the newly transformed weapon/armor is equippable, it will remain in
the actor's equipment slots.
- If you are using VisuMZ_2_WeaponSwapSystem, weapons cannot become cursed
in order to allow free weapon swapping. Weaponry will not be cursed
if VisuMZ_2_WeaponSwapSystem is installed.
--- <Purify Transform: id> <Purify Transform: name> - Used for: Weapon, Armor Notetags - If this notetag is present on a <Cursed> weapon or armor, then upon the actor receiving purification, the weapon or armor will transform into a different item. - Replace 'id' with a number representing the transformed weapon/armor's ID. - Replace 'name' with text representing the transformed weapon/armor's name. - Weapons can only transform into weapons. - Armors can only transform into armors. --- JavaScript Notetags: EquipmentThe following are notetags made for users with JavaScript knowledge to adjust the parameter through code. --- <JS Parameters> MaxHP = code; MaxMP = code; ATK = code; DEF = code; MAT = code; MDF = code; AGI = code; LUK = code; </JS Parameters> - Used for: Weapon, Armor Notetags - Uses JavaScript to determine the values for the basic parameters based on the code used to calculate its value. - The variables 'MaxHP', 'MaxMP', 'ATK', 'DEF', 'MAT', 'MDF', 'AGI', and 'LUK' are used to determine the finalized value of the parameter. This variable is case sensitive. - If a parameter is not present, its value will be treated as +0. --- Status Window NotetagsThe following notetags will affect the Shop Status Window info. If for any reason the data that is displayed is not to your liking or insufficient, you can change it up using the following notetags. --- <Status Info> key: data key: data key: data </Status Info> - Used for: Skill, Item Notetags - If you do not like the generated data that's displayed, you can change it using this notetag to display what you want. - Replace 'key' with one of the following: - Consumable - Quantity - Occasion - Scope - Speed - Success Rate - Repeat - Hit Type - Element - Damage Multiplier - HP Recovery - MP Recovery - TP Recovery - HP Damage - MP Damage - TP Damage - User TP Gain - Added Effects - Removed Effects - Replace 'data' with the text data you want to visually appear. You may use text codes for this. - This only affects info entries that are already visible and won't make other categories suddenly appear. - Insert or remove as many "key: data" lines as needed. --- <Custom Status Info> key: data key: data key: data </Custom Status Info> - Used for: Skill, Item Notetags - If you want custom categories and data to be displayed for your items that aren't provided by the Shop Status Window Info to begin with, you can use this notetag to add in your own entries. - Replace 'key' with text of the exact label you want. You may use text codes for this. - Replace 'data' with text of the exact text data you want. You may use text codes for this. - Insert or remove as many "key: data" lines as needed. --- <Shop Picture Name: filename> - Used for: Skill, Item, Weapon, Armor Notetags - Enables a shop picture for the status window. This image can be seen in the item scene, shop scene, and skill scene if enabled. - If this notetag is not used, there will be no image. - Replace 'filename' with the filename of the graphic to use from the game project's img/pictures/ folder. Filenames are case sensitive. Leave out the filename extension from the notetag. - Use the supporting notetags to determine where the image appears. If not, they will default to the background, fit to the window dimensions, centered at the middle of the window. --- <Shop Picture Layer: Background> <Shop Picture Layer: Foreground> - Used for: Skill, Item, Weapon, Armor Notetags - Determines which layer the graphic will be drawn on. - If the background layer is selected, the picture will appear behind the data text. - If the foreground layer is selected, the picture will appear in front of the data text. - If this notetag is not used, it will default to the background layer. --- <Shop Picture Max Width: x> <Shop Picture Max Height: y> <Shop Picture Max Dimensions: x, y> - Used for: Skill, Item, Weapon, Armor Notetags - Determines the maximum width and/or height for the image. - This means the image will be automatically scaled proportionally to that width or height as long as everything else does not break boundaries. - Replace 'x' and 'y' with number values representing the maximum dimensions the image can be in pixels. - If these notetags are not used, the image will be automatically scaled to the dimensions of the shop status window. --- <Shop Picture Alignment: Left> <Shop Picture Alignment: Center> <Shop Picture Alignment: Right> - Used for: Skill, Item, Weapon, Armor Notetags - Adjusts the horizontal alignment for the image. - Left, center, right determines how it's aligned horizontally if the image does not horizontally fit in the width of the window. - If any of these notetags are not used, the image will default to the 'center' alignment. --- <Shop Picture Position: Top> <Shop Picture Position: Middle> <Shop Picture Position: Bottom> - Used for: Skill, Item, Weapon, Armor Notetags - Adjusts the vertical position for the image. - Top, middle, bottom determines how it's positioned vertically if the image does not vertically fit in the width of the window. - If any of these notetags are not used, the image will default to the 'middle' position. --- <Shop Picture Offset X: +x> <Shop Picture Offset X: -x> <Shop Picture Offset Y: +y> <Shop Picture Offset Y: -y> <Shop Picture Offset: +x, +y> <Shop Picture Offset: -y, -y> - Used for: Skill, Item, Weapon, Armor Notetags - Offsets the X and Y positions of the image in the shop status window. - X offsets adjust the horizontal position by x pixels. - Positive goes right. - Negative goes left. - Y offsets adjust the horizontal position by y pixels. - Positive goes down. - Negative goes up. - Replace 'x' and 'y' with number values representing the pixels to offset the image by. The '+' and '-' signs are required. - If none of these notetags are used, there will be no offsets. --- <Shop Picture Opacity: x> <Shop Picture Opacity: x%> - Used for: Skill, Item, Weapon, Armor Notetags - Adjusts the opacity of the image used. - When using 'x' and not 'x%', use a number between 0 and 255. - The closer to 0, the more transparent the image is. - The closer to 255, the more opaque the image is. - When using 'x%' and not 'x', use a number between 0% and 100%. - The closer to 0%, the more transparent the image is. - The closer to 100%, the more opaque the image is. --- Shop Menu NotetagsThese notetags adjust how prices and such are managed inside the Shop Menu as well as whether or not some items are visible depending on switch states. --- <Price: x> - Used for: Item, Weapon, Armor Notetags - Adjusts the buying price for this item. - Replace 'x' with a number depicting the desired value for the buy price. - This allows you to bypass the RPG Maker MZ editor's limitation of 999,999. --- <Can Sell> <Cannot Sell> - Used for: Item, Weapon, Armor Notetags - Makes the item either always sellable or cannot be sold. - This bypasses the game's internal hard-coding to prevent items with a price of 0 from being able to be sold. - This bypasses the game's internal hard-coding to always allow items with a price value of being able to be sold. --- <Sell Price: x> - Used for: Item, Weapon, Armor Notetags - Changes the sell price to be something different than the default amount. - Replace 'x' with a number depicting the desired value for the sell price. --- <Show Shop Switch: x> <Show Shop All Switches: x,x,x> <Show Shop Any Switches: x,x,x> - Used for: Item, Weapon, Armor Notetags - Determines the visibility of the shop item based on switches. - Replace 'x' with the switch ID to determine the shop item's visibility. - If 'All' notetag variant is used, item will be hidden until all switches are ON. Then, it would be shown. - If 'Any' notetag variant is used, item will be shown if any of the switches are ON. Otherwise, it would be hidden. --- <Hide Shop Switch: x> <Hide Shop All Switches: x,x,x> <Hide Shop Any Switches: x,x,x> - Used for: Item, Weapon, Armor Notetags - Determines the visibility of the shop item based on switches. - Replace 'x' with the switch ID to determine the shop item's visibility. - If 'All' notetag variant is used, item will be shown until all switches are ON. Then, it would be hidden. - If 'Any' notetag variant is used, item will be hidden if any of the switches are ON. Otherwise, it would be shown. --- <Cannot Sell Switch: x> <Cannot Sell All Switches: x,x,x> <Cannot Sell Any Switches: x,x,x> - Used for: Item, Weapon, Armor Notetags - Determines the sellability of the shop item based on switches. - Replace 'x' with the switch ID to determine the shop item's sellability. - If 'All' notetag variant is used, item cannot be sold until all switches are ON. Otherwise, it can be sold. - If 'Any' notetag variant is used, item cannot be sold if any of the switches are ON. Otherwise, it can be sold. --- <Buy Turn On Switch: x> <Buy Turn On Switches: x, x, x> - Used for: Item, Weapon, Armor Notetags - When this item, weapon, or armor is bought in the shop scene, turn on the switch(es) 'x'. - Replace 'x' with a number representing the ID of the switch to turn on. - Insert multiple 'x' values to turn on multiple switches upon buying. --- <Buy Turn Off Switch: x> <Buy Turn Off Switches: x, x, x> - Used for: Item, Weapon, Armor Notetags - When this item, weapon, or armor is bought in the shop scene, turn off the switch(es) 'x'. - Replace 'x' with a number representing the ID of the switch to turn off. - Insert multiple 'x' values to turn off multiple switches upon buying. --- <Sell Turn On Switch: x> <Sell Turn On Switches: x, x, x> - Used for: Item, Weapon, Armor Notetags - When this item, weapon, or armor is sold in the shop scene, turn on the switch(es) 'x'. - Replace 'x' with a number representing the ID of the switch to turn on. - Insert multiple 'x' values to turn on multiple switches upon selling. --- <Sell Turn Off Switch: x> <Sell Turn Off Switches: x, x, x> - Used for: Item, Weapon, Armor Notetags - When this item, weapon, or armor is sold in the shop scene, turn off the switch(es) 'x'. - Replace 'x' with a number representing the ID of the switch to turn off. - Insert multiple 'x' values to turn off multiple switches upon selling. --- JavaScript Notetags: Shop MenuThe following are notetags made for users with JavaScript knowledge. These notetags are primarily aimed at Buy and Sell prices. --- <JS Buy Price> code code price = code; </JS Buy Price> - Used for: Item, Weapon, Armor Notetags - Replace 'code' to determine the buying 'price' of the item. - Insert the final buy price into the 'price' variable. - The 'item' variable refers to the item being bought. --- <JS Sell Price> code code price = code; </JS Sell Price> - Used for: Item, Weapon, Armor Notetags - Replace 'code' to determine the selling 'price' of the item. - Insert the final sell price into the 'price' variable. - The 'item' variable refers to the item being sold. --- Item Crafting System VisuStella MZThe following are notetags that have been added through this plugin. These notetags will not work with your game if this plugin is OFF or not present. General NotetagsThese notetags are used to mark the item as a craftable item or as items that can only be crafted through a custom crafting list. --- <Crafting Ingredients> Item id: x Item name: x Weapon id: x Weapon name: x Armor id: x Armor name: x Gold: x Category name: x </Crafting Ingredients> - Used for: Item, Weapon, Armor Notetags - Turns this item/weapon/armor into a craftable item by using the listed ingredients to craft with. - If the 'Category name' variant is used, it will draw from all items, weapons, and armors that have matching <Category: x> notetag data. - Insert/delete any number of copies of the ingredients as needed. - Replace 'id' with the item/weapon/armor ID of the ingredient to be used. - Replace 'name' with the name of the item/weapon/armor/category to be used. - Replace 'x' with the number of ingredients needed to be used for crafting. Category Rules: - If the 'Category name' variant is used, it will draw from all items, weapons, and armors that have matching <Category: x> notetag data. - Multiples of the same category name can be used. However, the player must select different items each time. - If the selected category item already exists as a static ingredient, that item cannot be selected either. Examples: <Crafting Ingredients> Item 5: 1 Item 6: 3 Gold: 100 </Crafting Ingredients> <Crafting Ingredients> Item Potion: 1 Item Magic Water: 3 Gold: 100 </Crafting Ingredients> <Crafting Ingredients> Weapon 1: 4 Armor 2: 2 </Crafting Ingredients> <Crafting Ingredients> Weapon Sword: 4 Armor Hat: 2 </Crafting Ingredients> <Crafting Ingredients> Category Fruit: 2 Category Meat: 3 </Crafting Ingredients> --- <Custom Crafting Only> - Used for: Item, Weapon, Armor Notetags - This item can only be crafted with custom crafting lists selected through the Plugin Command. --- Proxy Notetags--- <Proxy: id> <Proxy: name> - Used for: Item, Weapon, Armor Notetags - REQUIRES the most up to date VisuMZ Items and Equips Core! - Turns this item, weapon, or armor into a proxy for another item, allowing you to create recipes with different ingredients in <Crafting Ingredients> notetag contents and yield the same item. - The proxy item itself will take on the name, icon, and description of the original item it is supposed to represent. - No other properties are carried over from the original. - When viewed through the Window_ShopStatus window, the contents will reference the original item and not the proxy item. - Proxy items themselves cannot be acquired. This includes event commands, item drops, or equips. - When crafted, the item yielded won't be the proxy item but the item it is a proxy for. - Replace 'id' with a number representing the item, weapon, or armor ID of the same item type. If the proxy is an item, this will reference an item. If the proxy is a weapon, this will reference a weapon. Same for armors. - Replace 'name' with text representing the item, weapon, or armor's name. The referenced item needs to be the same item type as the proxy. Item for item, weapon for weapon, armor for armor. --- Switch-Related NotetagsThese notetags can make item crafting require certain switches to be on, or turn switches on/off upon crafting items. --- <Crafting Show Switch: x> <Crafting Show All Switches: x,x,x> <Crafting Show Any Switches: x,x,x> - Used for: Item, Weapon, Armor Notetags - Determines the visibility of the craftable item in the crafting scene. - Replace 'x' with the switch ID to determine the item's visibility. - If 'All' notetag variant is used, item will be hidden until all switches are ON. Then, it would be shown. - If 'Any' notetag variant is used, item will be shown if any of the switches are ON. Otherwise, it would be hidden. - Insert as many switch ID's as needed. - This can be bypassed with the custom Item Crafting list plugin command option if enabled. --- <Crafting Turn On Switch: x> <Crafting Turn On Switches: x,x,x> <Crafting Turn Off Switch: x> <Crafting Turn Off Switches: x,x,x> - Used for: Item, Weapon, Armor Notetags - Upon crafting this item, turn on/off the marked switch(es). - Replace 'x' with the switch ID to turn on/off. --- Masking-Related NotetagsThese notetags can are used to determine name-masking properties for uncrafted items. --- <Crafting Mask: text> - Used for: Item, Weapon, Armor Notetags - Displays the specific 'text' when the item has not yet been crafted. - Replace 'text' with the text you wish to display if the item has not yet been crafted by the player. - This can be bypassed with the custom Item Crafting list plugin command option if enabled. --- <Crafting No Mask> - Used for: Item, Weapon, Armor Notetags - Bypasses name masking even if the item has not yet been crafted. --- JavaScript Notetag: Effect-RelatedThe following are notetags made for users with JavaScript knowledge to make custom effects that occur upon crafting the item. --- <JS Crafting Effect> code code code </JS Crafting Effect> - Used for: Item, Weapon, Armor Notetags - Replace 'code' with JavaScript code to determine what kinds of effects you want to occur upon crafting this item. - The 'item' variable represents the item being crafted. - The 'number' variable represents the number of items being crafted. --- Crafting Animation-Related NotetagsThese notetags let you set custom crafting animations when a specific item, weapon, or armor is crafted so that way, they don't all have to use the default crafting animation from the plugin parameters. --- <Crafting Animation: id> <Crafting Animation: id, id, id> - Used for: Item, Weapon, Armor Notetags - Plays the animation(s) when this item, weapon, or armor is crafted. - This will override the default animation settings found in the plugin parameters and use the unique one set through notetags instead. - Replace 'id' with the ID of the animation you wish to play. - If multiple ID's are found, then each animation will play one by one in the order they are listed. --- <Crafting Fade Speed: x> - Used for: Item, Weapon, Armor Notetags - This determines the speed at which the item's icon fades in during the crafting animation. - Replace 'x' with a number value to determine how fast the icon fades in. - Use lower numbers for slower fade speeds and higher numbers for faster fade speeds. --- <Crafting Picture: filename> <Picture: filename> - Used for: Item, Weapon, Armor Notetags - Uses a picture from your project's /img/pictures/ folder instead of the item, weapon, or armor's icon during crafting instead. - Replace 'filename' with the filename of the image. - Do not include the file extension. - Scaling will not apply to the picture. - Use the <Picture: filename> version for any other plugins that may be using this as an image outside of crafting, too. - The size used for the image will vary based on your game's resolution. --- Crafting Common Event NotetagsRequires: --- <Once Craft Common Event: id> <Repeat Craft Common Event: id> - Used for: Item, Weapon, Armor Notetags - Requires VisuMZ_2_ShopCommonEvents! - This will cause a specific Common Event to launch when crafted. - Replace 'id' with a number representing the ID of the Common Event that you wish to launch upon this item being crafted. - The "Once" notetag variant will only occur once when crafted. - Any subsequent purchases of the item will not launch the Common Event. - The "Repeat" notetag variant will occur repeatedly when crafted. - If both "Once" and "Repeat" notetags are present in the item, then the "Once" variant will take priority first. Any subsequent purchases will go to the "Repeat" variant. - Any switch requirement notetags need to be met in order for either notetag to have any effect. - Use the Plugin Command "Scene: Common Event Return" to return back to the last Item Crafting scene. --- Crafting Common Event Requirement-Related NotetagsRequires: --- <Once Craft Common Event Switch: id> <Once Craft Common Event All Switches: id, id, id> <Once Craft Common Event Any Switches: id, id, id> <Repeat Craft Common Event Switch: id> <Repeat Craft Common Event All Switches: id, id, id> <Repeat Craft Common Event Any Switches: id, id, id> - Used for: Item, Weapon, Armor Notetags - Requires VisuMZ_2_ShopCommonEvents! - Requires the respective Craft Common Events to have these Switches enabled in the "ON" position in order for them to launch. - "Once" variant will only affect the "Once" notetag variants. - "Repeat" variant will only affect the "Repeat" notetag variants. - The "All" variant will require all listed Switch ID's to be "ON". - The "Any" variant will require only one listed Switch ID to be "ON". - Replace 'id' with a number representing the Switch ID that needs to be in the "ON" position for the requirement to be met. - Insert multiple 'id' to require more Switch ID's. --- Batch-Related Notetags
--- <Craft Batch>
listing
listing
listing
</Craft Batch>
- Used for: Item, Weapon, Armor Notetags
- Requires VisuMZ_3_ShopBatches!
- Creates a list of items, weapons, and armors that the player will gain
when this batch object is crafted.
- This also means that in addition to this notetag, the notetag for
<Crafting Ingredients> is also needed.
- This item will also not be masked.
- Proxy items, weapons, or armors cannot be listed and will be bypassed.
- This item, weapon, or armor cannot be crafted if all of the listed items,
weapons, or armors are at max quantity within the party's inventory.
- The listed items will NOT utilize any on craft effects for the individual
listed items themselves.
- Replace 'listing' with any of the listing types found below:
Item id
Item name
Weapon id
Weapon name
Armor id
Armor name
Item id: quantity
Item name: quantity
Weapon id: quantity
Weapon name: quantity
Armor id: quantity
Armor name: quantity
- Replace 'id' with a number representing the ID of the item, weapon, or
armor that is to be listed.
- Replace 'name' with the associated item, weapon, or armor's name.
- Replace 'quantity' with a number representing the number of items,
weapons, or armors that will be acquired when the batch item is crafted.
- If the variant without 'quantity' is used, quantity will default to 1.
Examples:
---
<Craft Batch>
Item Potion: 10
Item Super Potion: 5
Weapon Short Sword: 3
Weapon Long Sword: 2
Armor Linen Clothing: 4
Armor Cloth Armor: 3
</Craft Batch>
---
<Craft Batch>
Item 7: 10
Item 8: 5
Weapon 1: 3
Weapon 2: 2
Armor 2: 4
Armor 8: 3
</Craft Batch>
---
--- Item Concoction Skills VisuStella MZThe following are notetags that have been added through this plugin. These notetags will not work with your game if this plugin is OFF or not present. --- Concoction-Related Notetags--- <Can Concoct: x>
<Can Concoct: x, x, x>
- Used for: Skill Notetags
- Sets this skill to be able to concoct items that have 'x' type as an item
base (or bases).
- Replace 'x' with text marking the type or category.
- Insert more 'x' entries to add more types.
- Use 'any' or 'all' in place of 'x' to use any kind of item base.
- Types are determined by the <Concoct Type: x> or <Category: x> notetags.
- This cannot be used with skills that are made to be used as Active Chain
Skills, Input Combo Skills, or Evolution Matrix Skills.
- Likewise, this cannot be used with Item Throw and Amplify effects.
- Concoctions will consume both of the selected items as well pay the skill
cost from the selected skill to initiate this effect.
- Key Items, nonconsumable items, and any items with a successful proc of
the <Concoct Conserve: x%> notetag will not be consumed.
--- <Concoct Type: x> <Concoct Types: x, x, x> - Used for: Item Notetags - These are the types that are used to determine what the Item Concoction skills can use as an item base. This does not affect item pairs. - Replace 'x' with text marking the type. - Insert more 'x' entries to add more types. - <Category: x> will also count as a concoct base type. However, this notetag will separate the concoction types from anything else that uses the <Category: x> notetag. --- <Concoctions> list list list list </Concoctions> - Used for: Item Notetags - Determines the list of items that can be paired with this item base. - Replace 'list' with the section below to determiner the formatting: 'list' can be formatted in any of these four ways: Item id: Item id Item id: name name: Item id name: name - If you are using 'Item id', replace 'id' with the ID of the item you wish to refer to. If you are using a name version, replace name with the full name of the item (it is case sensitive). The first item on the list before the : is the pair item for item concoctions. The second item on the list after the : is the item effect that will occur when the base and pair items are combined. The effects of the first and second items are unrelated to the combined item effect. Example: <Concoctions> Item 51: Item 61 Item 52: Item 62 Item 53: Lucid Mist Item 54: Healing Mist Plum Essence: Inspiriting Mist Tomato Essence: Boosting Mist Onion Bloom: Item 67 Curious Bloom: Item 68 </Concoctions> --- <Concoct Conserve: x%> - Used for: Item - When this item is selected and used as a base or pair item for concocting, there is a 'x' percent chance of it not being consumed. - Replace 'x' with a number representing the percent chance for this item to not be consumed. - 100% will mean it will never be consumed. - If this notetag is not used, then the item will always be consumed unless it is a non-consumable item set by the database. --- Item Throw Skills VisuStella MZThe following are notetags that have been added through this plugin. These notetags will not work with your game if this plugin is OFF or not present. --- Throw Skill-Related Notetags--- <Can Throw: x>
<Can Throw: x, x, x>
- Used for: Skill Notetags
- This notetag causes the skill to be able to throw items of 'x' type.
- Replace 'x' with text marking the type or category.
- Insert more 'x' entries to add more types.
- Use 'any' or 'all' in place of 'x' to throw any kind of item.
- Use 'weapon' or 'armor' in place of 'x' to throw any weapon or armor.
- Types are determined by the <Throw Type: x> or <Category: x> notetags.
- This cannot be used with skills that are made to be used as Active Chain
Skills, Input Combo Skills, or Evolution Matrix Skills.
- Likewise, this cannot be used with Item Concoction and Amplify effects.
- Throw will consume the selected item, weapon, or armor as well as pay the
throw skill's cost to initiate this effect.
- Key Items, nonconsumable items, and any items with a successful proc of
the <Throw Conserve: x%> notetag will not be consumed.
--- <Throw Type: x>
<Throw Types: x, x, x>
- Used for: Item, Weapon, Armor Notetags
- These are the types that are used to determine what the Item Throw skills
can throw.
- Replace 'x' with text marking the type.
- Insert more 'x' entries to add more types.
- <Category: x> will also count as a throwable type. However, this notetag
will separate the throwable types from anything else that uses the
<Category: x> notetag.
- Some types will be automatically incorporated:
- All items, weapons, and armors will have "Any" and "All" types.
- "Item" and "Items" will be automatically incorporated into item types.
- "Weapon" and "Weapons" will be automatically added into weapon types.
- Weapon types will also have their weapon type names added.
- "Armor" and "Armors" will be automatically added into weapon types.
- Armor types will also have their armor type names and equip type names
added to their throwable types.
--- <Throw Power: x>
- Used for: Item, Weapon, Armor Notetags
- Adjusts the throw power of the item to 'x'.
- Replace 'x' with a numeric value to determine its impact on the item throw
skill's damage formula.
- The 'x' value will replace the 'power' entry in the item throw skill's
damage formula.
- You can also use JavaScript in place of 'x' like the following:
<Throw Power: $gameVariables.value(5)>
- If this notetag is not used, then the throw power will default to a value.
- If an item, default throw power is found in the Plugin Parameters.
- If a weapon or armor, default throw power is this item's ATK parameter.
--- <Throw Impact Animation: x> - Used for: Item, Weapon, Armor Notetags - Changes the impact animation of this thrown item, weapon, or armor to 'x'. - Replace 'x' with a number representing the ID of the animation you wish to play as the impact animation. --- <Throw Conserve: x%> - Used for: Item, Weapon, Armor Notetags - When this item, weapon, or armor is selected and thrown, there is a 'x' percent chance of it not being consumed. - Replace 'x' with a number representing the percent chance for this item, weapon, or armor to not be consumed. - 100% will mean it will never be consumed. - If this notetag is not used, then the item, weapon, and armor will always be consumed unless it is a non-consumable item set by the database. --- Throw Properties-Related Notetags--- <Throw Hit Rate: x%> - Used for: Item, Weapon, Armor Notetags - When this item, weapon, or armor is selected and thrown, change the hit rate of the action to 'x' percent. - Replace 'x' with a number representing the percent chance to hit the skill target. - If this notetag is not used, refer to the hit rate of the skill itself. --- <Throw Critical: x%> - Used for: Item, Weapon, Armor Notetags - When this item, weapon, or armor is selected and thrown, change the critical hit rate of the action to 'x' percent. - Replace 'x' with a number representing the percent chance to land a critical hit on the skill target. - If this notetag is not used, refer to the critical rate of the skill user or the skill if applicable. --- <Throw Variance: x%> - Used for: Item, Weapon, Armor Notetags - When this item, weapon, or armor is selected and thrown, change the damage variance of the action to 'x' percent. - Replace 'x' with a number representing the damage variance. - If this notetag is not used, refer to the damage variance of the skill. --- <Throw Ignore Guard> - Used for: Item, Weapon, Armor Notetags - When this item, weapon, or armor is selected and thrown, ignore any damage modifiers if the target is guarding. - If this notetag is not used, the usual damage modifiers applied if the target is guarding will be normally applied. --- Throw Effects-Related Notetags--- <Throw Add Element: id> <Throw Add Elements: id, id, id> <Throw Add Element: name> <Throw Add Elements: name, name, name> - Used for: Item, Weapon, Armor Notetags - Requires VisuMZ_1_ElementStatusCore! - Adds the specified element(s) to the item throw. - For 'id' variant, replace 'id' with a number representing the ID of the element you wish to add with the thrown item. - Insert multiple 'id' entries to add more elements. - For 'name' variant, replace 'name' with the name of the element you wish to add with the thrown item. - Insert multiple 'name' entries to add more elements. --- <Throw Replace Element: id> <Throw Replace Elements: id, id, id> <Throw Replace Element: name> <Throw Replace Elements: name, name, name> - Used for: Item, Weapon, Armor Notetags - Requires VisuMZ_1_ElementStatusCore! - Replaces the specified element(s) to the item throw. Any element that the item throw skill had before will be replaced with the declared notetag's. - For 'id' variant, replace 'id' with a number representing the ID of the element you wish to replace with the thrown item. - Insert multiple 'id' entries to add more elements. - For 'name' variant, replace 'name' with the name of the element you wish to replace with the thrown item. - Insert multiple 'name' entries to add more elements. --- <Throw Add State: id> <Throw Add States: id, id, id> <Throw Add State: name> <Throw Add States: name, name, name> - Used for: Item, Weapon, Armor Notetags - When this item, weapon, or armor is thrown at the target, apply the state(s) listed in the notetag to the target. - For 'id' variant, replace 'id' with a number representing the ID of the state you wish to apply to the target. - Insert multiple 'id' entries to add more states. - For 'name' variant, replace 'name' with the name of the state you wish to apply to the target - Insert multiple 'name' entries to add more states. --- <Throw Remove State: id> <Throw Remove States: id, id, id> <Throw Remove State: name> <Throw Remove States: name, name, name> - Used for: Item, Weapon, Armor Notetags - When this item, weapon, or armor is thrown at the target, remove the state(s) listed in the notetag from the target. - For 'id' variant, replace 'id' with a number representing the ID of the state you wish to remove from the target. - Insert multiple 'id' entries to remove more states. - For 'name' variant, replace 'name' with the name of the state you wish to remove from the target - Insert multiple 'name' entries to remove more states. --- <Throw Add Buff: param For x Turns>
<Throw Add Buff: param, param, param For x Turns>
<Throw Add Debuff: param For x Turns>
<Throw Add Debuff: param, param, param For x Turns>
- Used for: Item, Weapon, Armor Notetags
- When this item, weapon, or armor is thrown at the target, apply a buff
or debuff to the target for the specified base parameter(s).
- Replace 'param' with 'MaxHP', 'MaxMP', 'ATK', 'DEF', 'MAT', 'MDF', 'AGI',
or 'LUK' to determine the type of buff or debuff to add.
- Insert multiple 'param' entries to add more buffs or debuffs.
- If you want to add multiple stacks of a parameter, insert that parameter
multiple times.
- Example: <Throw Add Debuff: DEF, DEF For 5 Turns>
- Replace 'x' with a number representing the number of turns to set the buff
or debuff to.
- Insert multiple copies of this notetag if you want to add a variety of
buffs and/or debuffs at different turn intervals.
--- <Throw Remove Buff: param> <Throw Remove Buff: param, param, param> <Throw Remove Debuff: param> <Throw Remove Debuff: param, param, param> - Used for: Item, Weapon, Armor Notetags - When this item, weapon, or armor is thrown at the target, remove a buff or debuff to the target for the specified base parameter(s). - Replace 'param' with 'MaxHP', 'MaxMP', 'ATK', 'DEF', 'MAT', 'MDF', 'AGI', or 'LUK' to determine the type of buff or debuff to remove. - Insert multiple 'param' entries to remove more states. --- JavaScript Notetag: Effect-Related--- <JS Throw Effect> code code </JS Throw Effect> - Used for: Item, Weapon, Armor Notetags - When this item, weapon, or armor is thrown at the target, run the 'code' found inside of the notetags. - The 'user' variable represents the battler throwing the item. - The 'target' variable represents the target the item is thrown at. - The 'item' variable represents the item, weapon, or armor being thrown. - The 'skill' variable represents the throw skill being used. - This effect will occur each time it hits a target. --- Action Sequence-Related Notetags--- <Throw Icon: x> - Used for: Item, Weapon, Armor Notetags - Requires VisuMZ_3_ActSeqProjectiles! - Changes the action sequence's projectile icon to 'x'. - Used for both custom action sequences and auto action sequences. - Replace 'x' with a number representing the icon index of the projectile being thrown to the target. - If this notetag is not used, the default icon used will be the item, weapon, or armor's icon. --- <Throw Duration: x> - Used for: Item, Weapon, Armor Notetags - Requires VisuMZ_3_ActSeqProjectiles! - Gives the projectile 'x' frames of air time for the action sequence. - Used for both custom action sequences and auto action sequences. - Replace 'x' with a number representing the duration in frames the projectile will spend flying through the air to the target. - 60 frames = 1 second. - If this notetag is not used, the duration will be set to the default value found in the Plugin Parameters or the Plugin Command. --- <Throw Auto Angle> <No Throw Auto Angle> - Used for: Item, Weapon, Armor Notetags - Requires VisuMZ_3_ActSeqProjectiles! - Turns on/off auto angle for the action sequence. - Used for both custom action sequences and auto action sequences. - If neither notetag is used, the setting will be the default value found in the Plugin Parameters or the Plugin Command. --- <Throw Angle Offset: +x> <Throw Angle Offset: -x> - Used for: Item, Weapon, Armor Notetags - Requires VisuMZ_3_ActSeqProjectiles! - Rotates the initial offset of the projectile icon by 'x' degrees. - Used for both custom action sequences and auto action sequences. - Replace 'x' with a number representing the initial angle degree offset. - If this notetag is not used, the offset will be set to the default value found in the Plugin Parameters or the Plugin Command. --- <Throw Arc: x> - Used for: Item, Weapon, Armor Notetags - Requires VisuMZ_3_ActSeqProjectiles! - Sets the projectile's arc peak to 'x' pixels. - Used for both custom action sequences and auto action sequences. - Replace 'x' with a number representing the arc peak in pixels. - If this notetag is not used, the arc peak will be set to the default value found in the Plugin Parameters or the Plugin Command. --- <Throw Hue: x> - Used for: Item, Weapon, Armor Notetags - Requires VisuMZ_3_ActSeqProjectiles! - Sets the projectile icon's hue to 'x'. - Used for both custom action sequences and auto action sequences. - Replace 'x' with a number representing the hue of the icon. - Use a number between 0 and 360. - If this notetag is not used, the hue will be set to the default value found in the Plugin Parameters or the Plugin Command. --- <Throw Scale: x> - Used for: Item, Weapon, Armor Notetags - Requires VisuMZ_3_ActSeqProjectiles! - Sets the projectile icon's scale to 'x' value. - Used for both custom action sequences and auto action sequences. - Replace 'x' with a number representing the scale of the icon. - 0.5 is 50% scale. - 1.0 is 100% scale. - 1.5 is 150% scale. - 2.0 is 200% scale. - If this notetag is not used, the scale will be set to the default value found in the Plugin Parameters or the Plugin Command. --- <Throw Spin: +x> <Throw Spin: -x> - Used for: Item, Weapon, Armor Notetags - Requires VisuMZ_3_ActSeqProjectiles! - Sets the projectile icon's spin speed to 'x'. - Used for both custom action sequences and auto action sequences. - Replace 'x' with a number representing the spin speed of the icon. - A positive spin speed rotates clockwise. - A negative spin speed rotates counterclockwise. - This cannot be used with auto angle. - If this notetag is not used, the spin will be set to the default value found in the Plugin Parameters or the Plugin Command. --- Life State Effects VisuStella MZThe following are notetags that have been added through this plugin. These notetags will not work with your game if this plugin is OFF or not present. --- State-Only Effects--- <Auto Life: x%> - Used for: State Notetags - When the affected battler dies with this state present, this state will automatically remove itself (and any other states with <Auto Life: x%>) to restore that much HP% for the battler. - Replace 'x' with a number representing that percentage of HP to heal the battler upon dying. --- <Doom> - Used for: State Notetags - When this state expires naturally (without direct removal), kill the affected battler. --- Trait-Object Effects--- <Curse HP> <Curse MP> <Curse TP> - Used for: Actor, Class, Skill, Weapon, Armor, Enemy, State Notetags - Prevents the affected battler from being able to recover HP, MP, and/or TP depending on which notetag is being used. --- <Fragile> - Used for: Actor, Class, Skill, Weapon, Armor, Enemy, State Notetags - If a battler affected by <Fragile> receives a direct attack and takes any HP damage (as opposed to event command damage or regeneration damage), then instantly kill the affected battler. --- <Guts> - Used for: Actor, Class, Skill, Weapon, Armor, Enemy, State Notetags - This will prevent the battler from taking any fatal damage and leaves them with only 1 HP. However, if the battler has 1 HP and receives damage, then the battler will actually die. --- <Undead> - Used for: Actor, Class, Skill, Weapon, Armor, Enemy, State Notetags - If the battler receives HP Healing, it receives damage instead. - If the battler is a target of an instant death skill or item, then the battler will recover full HP. - If the battler is the target of an HP Drain action, then the battler will drain HP from the attacker instead. - If the battler is the target of an elemental attack and the battler would absorb that element, the target will bypass the undead effect and recovers HP instead. Now your zombies can absorb "Darkness" elements. --- <Allow Undead Regen> - Used for: Actor, Class, Skill, Weapon, Armor, Enemy, State Notetags - If an undead battler gets affected by a trait object (such as a state) with this notetag, then HP Regeneration will no longer damage the undead enemy but instead, heal it. --- Enemy-Only Effects--- <Death Transform> name: weight name: weight name: weight </Death Transform> - Used for: Enemy Notetags - Upon death, the enemy will transform into another enemy with full HP/MP. - Replace 'name' with the name of the enemy to transform into. - Replace 'weight' with a number value representing how often the 'name' would come up. The higher the weight, the more often. You may omit this and the colon(: ) and just type in the 'name' instead. Examples: <Death Transform> Slime </Death Transform> <Death Transform> Slime: 75 Goblin: 25 </Death Transform> <Death Transform> Slime: 10 Goblin </Death Transform> <Death Transform> Slime Goblin </Death Transform> --- Lighting Effects VisuStella MZThe following are notetags that have been added through this plugin. These notetags will not work with your game if this plugin is OFF or not present. --- Auto-Tint-Related Notetags--- <Auto-Tint: Normal> <Auto-Tint: Dark> <Auto-Tint: Sepia> <Auto-Tint: Sunset> <Auto-Tint: Night> - Used for: Map Notetags - Automatically tints the screen upon map entry with a preset tone. - Screen tint preset values are based on RPG Maker MZ's default presets. - Keep in minds that lights do not pierce through tones. --- <Auto-Tint: r, g, b, k> - Used for: Map Notetags - Automatically tints the screen upon map entry with a custom tone. - Replace 'r' with a number representing the red tone value (-255 to 255). - Replace 'g' with a number representing the green tone value (-255 to 255). - Replace 'b' with a number representing the blue tone value (-255 to 255). - Replace 'k' with a number representing the grey tone value (0 to 255). - Values that exceed -255 or 255 will be automatically timmed down. - Grey values that are negative will have their absolute value taken of. - Keep in minds that lights do not pierce through tones. --- Darkness Overlay-Related Notetags--- <Overlay: name>
- Used for: Map Notetags
- Applies a darkness overlay to the map that lights can penetrate through.
- Replace 'name' with any of the following preset names:
- Normal, Dawn, Day, Dusk, Night
- White, Black, Red, Orange, Yellow, Green, Cyan, Blue, Purple, Magenta,
Pink, Brown
- Light Red, Light Orange, Light Yellow, Light Green, Light Cyan,
Light Blue, Light Purple, Light Magenta, Light Pink, Light Brown
- Dark Red, Dark Orange, Dark Yellow, Dark Green, Dark Cyan,
Dark Blue, Dark Purple, Dark Magenta, Dark Pink, Dark Brown
- Some of the above presets automatically adjust opacity levels to certain
values. Otherwise, they will be at 255.
--- <Overlay Color: #rrggbb> - Used for: Map Notetags - Applies a darkness overlay using a custom color. - Replace 'rr' with a hexadecimal value for red. - Replace 'gg' with a hexadecimal value for green. - Replace 'bb' with a hexadecimal value for blue. - Leave the '#' in place. - If you are unsure of what hexadecimal value your color is, please use an online site like: https://htmlcolorcodes.com/ - These settings do not adjust opacity levels. --- <Overlay Opacity: x> - Used for: Map Notetags - Adjusts the darkness overlay's opacity level. - Replace 'x' with a number value from 0 to 255, where 0 is transparent and 255 is opaque. --- <Overlay Opacity: x%> - Used for: Map Notetags - Adjusts the darkness overlay's opacity level by rate. - Replace 'x' with a number value from 0 to 100, where 0% is transparent and 100% is opaque. --- <No Overlay> - Used for: Map Notetags - For the maps where you don't want there to be any overlay, but you don't want this to affect the other maps using them. --- Anti-Light-Related Notetags--- <Hard Anti-Light Region: x>
<Hard Anti-Light Regions: x, x, x>
- Used for: Map Notetags
- Tiles marked by these regions won't have any light shown on them.
- This will use hard edges.
- This will override the settings found in the Plugin Parameters.
- If this notetag is not used, use the settings in the Plugin Parameters
instead for the map.
- This does NOT work with looping maps.
- This does NOT block light from going to the other side. If the light
radius is large enough, it will pierce through to the other side. It just
won't be visible on the region marked tiles.
- Replace 'x' with a number representing the region ID to function as an
anti-light tile marker.
- You cannot use region 0. Use a number from 1 to 255 instead.
--- <Hard Anti-Light Terrain Tag: x>
<Hard Anti-Light Terrain Tags: x, x, x>
- Used for: Map Notetags
- Tiles marked by these terrain tags won't have any light shown on them.
- This will use hard edges.
- This will override the settings found in the Plugin Parameters.
- If this notetag is not used, use the settings in the Plugin Parameters
instead for the map.
- This does NOT work with looping maps.
- This does NOT block light from going to the other side. If the light
radius is large enough, it will pierce through to the other side. It just
won't be visible on the terrain tag marked tiles.
- Replace 'x' with a number representing the terrain tag to function as an
anti-light tile marker.
- You cannot use terrain tag 0. Use a number from 1 to 7 instead.
--- <Soft Anti-Light Region: x>
<Soft Anti-Light Regions: x, x, x>
- Used for: Map Notetags
- Tiles marked by these regions won't have any light shown on them.
- This will use soft edges.
- This will override the settings found in the Plugin Parameters.
- If this notetag is not used, use the settings in the Plugin Parameters
instead for the map.
- This does NOT work with looping maps.
- This does NOT block light from going to the other side. If the light
radius is large enough, it will pierce through to the other side. It just
won't be visible on the region marked tiles.
- Replace 'x' with a number representing the region ID to function as an
anti-light tile marker.
- You cannot use region 0. Use a number from 1 to 255 instead.
--- <Soft Anti-Light Terrain Tag: x>
<Soft Anti-Light Terrain Tags: x, x, x>
- Used for: Map Notetags
- Tiles marked by these terrain tags won't have any light shown on them.
- This will use soft edges.
- This will override the settings found in the Plugin Parameters.
- If this notetag is not used, use the settings in the Plugin Parameters
instead for the map.
- This does NOT work with looping maps.
- This does NOT block light from going to the other side. If the light
radius is large enough, it will pierce through to the other side. It just
won't be visible on the terrain tag marked tiles.
- Replace 'x' with a number representing the terrain tag to function as an
anti-light tile marker.
- You cannot use terrain tag 0. Use a number from 1 to 7 instead.
--- Radial Light General-Related NotetagsUsing this notetag will override the default settings found in the Plugin Parameters provided that they are adjusting already present settings. --- <Radial Light>
- Used for: Actor, Enemy, Event Notetags, and Event Page Comment Tags
- Quick and simple setup to add radial lights to this event.
- Using this notetag will enable radial lights for this event.
- This will use the default settings found in the Plugin Parameters for
Event Radial Lights.
- When used for actors and/or enemies, the effects will occur in battle.
- Actor effects are NOT applied to the map.
- When on the map, the radial light settings used will be dependent on
the player and follower radial light settings instead of the individual
actor radial light settings.
--- <No Radial Light>
- Used for: Actor, Enemy, Event Notetags, and Event Page Comment Tags
- Disables radial lights for this event.
- Primarily used if the default settings for Event Radial Lights would have
the radial light enabled.
- When used for actors and/or enemies, the effects will occur in battle.
- Actor effects are NOT applied to the map.
- When on the map, the radial light settings used will be dependent on
the player and follower radial light settings instead of the individual
actor radial light settings.
--- <Radial Light Filename: filename>
- Used for: Actor, Enemy, Event Notetags, and Event Page Comment Tags
- Uses an image instead of generated radial lights.
- Using this notetag will lock out the usage of generated radial light
notetags found below.
- Replace 'filename' with a picture found within your game project's
img/pictures/ folder. Filenames are case sensitive. Leave out the filename
extension from the notetag.
- Image will be centered on the target where the center of the image is the
anchor point and will be rotated.
- Using this notetag will enable radial lights for this event.
- When used for actors and/or enemies, the effects will occur in battle.
- Actor effects are NOT applied to the map.
- When on the map, the radial light settings used will be dependent on
the player and follower radial light settings instead of the individual
actor radial light settings.
--- <Radial Light Color: name>
- Used for: Actor, Enemy, Event Notetags, and Event Page Comment Tags
- Creates a generated radial light using a preset color.
- This notetag cannot be used with <Radial Light Filename: filename>.
- Replace 'name' with any of the following:
- Normal, Dawn, Day, Dusk, Night
- White, Black, Red, Orange, Yellow, Green, Cyan, Blue, Purple, Magenta,
Pink, Brown
- Light Red, Light Orange, Light Yellow, Light Green, Light Cyan,
Light Blue, Light Purple, Light Magenta, Light Pink, Light Brown
- Dark Red, Dark Orange, Dark Yellow, Dark Green, Dark Cyan,
Dark Blue, Dark Purple, Dark Magenta, Dark Pink, Dark Brown
- Using this notetag will enable radial lights for this event.
- When used for actors and/or enemies, the effects will occur in battle.
- Actor effects are NOT applied to the map.
- When on the map, the radial light settings used will be dependent on
the player and follower radial light settings instead of the individual
actor radial light settings.
--- <Radial Light Color: #rrggbb>
- Used for: Actor, Enemy, Event Notetags, and Event Page Comment Tags
- Creates a generated radial light using a custom color.
- This notetag cannot be used with <Radial Light Filename: filename>.
- Replace 'rr' with a hexadecimal value for red.
- Replace 'gg' with a hexadecimal value for green.
- Replace 'bb' with a hexadecimal value for blue.
- Leave the '#' in place.
- If you are unsure of what hexadecimal value your color is, please use an
online site like: https://htmlcolorcodes.com/
- Using this notetag will enable radial lights for this event.
- When used for actors and/or enemies, the effects will occur in battle.
- Actor effects are NOT applied to the map.
- When on the map, the radial light settings used will be dependent on
the player and follower radial light settings instead of the individual
actor radial light settings.
--- <Radial Light Radius: r>
<Radial Light Diameter: d>
- Used for: Actor, Enemy, Event Notetags, and Event Page Comment Tags
- Determines the radius/diameter of the generated radial light.
- This notetag cannot be used with <Radial Light Filename: filename>.
- Replace 'r' with a number representing the pixel radius of the generated
radial light.
- Replace 'd' with a number representing the pixel diameter of the generated
radial light.
- Use one or the other.
- Using this notetag will enable radial lights for this event.
- When used for actors and/or enemies, the effects will occur in battle.
- Actor effects are NOT applied to the map.
- When on the map, the radial light settings used will be dependent on
the player and follower radial light settings instead of the individual
actor radial light settings.
- If this notetag is used, this will disable the "Auto-Calc Radius" Plugin
Parameter for this specific actor/enemy.
--- <Radial Light Intensity: x%>
- Used for: Actor, Enemy, Event Notetags, and Event Page Comment Tags
- Determines the light intensity of the generated radial light.
- This notetag cannot be used with <Radial Light Filename: filename>.
- Intensity determines how much of the light's luminosity extends outwards
at full strength between fading away.
- Replace 'x' with a number between 0 and 100 representing the intensity
percentage for the generated radial light.
- Using this notetag will enable radial lights for this event.
- When used for actors and/or enemies, the effects will occur in battle.
- Actor effects are NOT applied to the map.
- When on the map, the radial light settings used will be dependent on
the player and follower radial light settings instead of the individual
actor radial light settings.
--- <Radial Light Angle: x>
- Used for: Actor, Enemy, Event Notetags, and Event Page Comment Tags
- Determines the initial angle of the generated radial light.
- Can be used with both image and generated radial lights.
- Best used with the <Radial Light Filename: filename> notetag in order to
see any changes.
- Replace 'x' with a number between 0 and 360 representing the angle.
- Using this notetag will enable radial lights for this event.
- When used for actors and/or enemies, the effects will occur in battle.
- Actor effects are NOT applied to the map.
- When on the map, the radial light settings used will be dependent on
the player and follower radial light settings instead of the individual
actor radial light settings.
--- <Radial Light Rotate Speed: +x>
<Radial Light Rotate Speed: -x>
- Used for: Actor, Enemy, Event Notetags, and Event Page Comment Tags
- Determines the speed at which the radial light rotates.
- Can be used with both image and generated radial lights.
- Best used with the <Radial Light Filename: filename> notetag in order to
see any changes.
- Replace 'x' with a number representing how slow (smaller numbers) or fast
(larger numbers) the light rotates.
- Use negative numbers for a reverser rotation going counter-clockwise.
- Using this notetag will enable radial lights for this event.
- When used for actors and/or enemies, the effects will occur in battle.
- Actor effects are NOT applied to the map.
- When on the map, the radial light settings used will be dependent on
the player and follower radial light settings instead of the individual
actor radial light settings.
--- <Radial Light Blend Mode: Normal>
<Radial Light Blend Mode: Additive>
<Radial Light Blend Mode: Multiply>
<Radial Light Blend Mode: Screen>
- Used for: Actor, Enemy, Event Notetags, and Event Page Comment Tags
- Changes the blend mode of the radial light.
- Can be used with both image and generated radial lights.
- We recommend that you use 'screen'.
- Using this notetag will enable radial lights for this event.
- When used for actors and/or enemies, the effects will occur in battle.
- Actor effects are NOT applied to the map.
- When on the map, the radial light settings used will be dependent on
the player and follower radial light settings instead of the individual
actor radial light settings.
--- <Radial Light Opacity: x>
<Radial Light Opacity: x%>
- Used for: Actor, Enemy, Event Notetags, and Event Page Comment Tags
- Changes the opacity level of the radial light.
- Can be used with both image and generated radial lights.
- The opacity of a light determines how bright (larger numbers) or dim
(smaller numbers) it is.
- Replace 'x' with a number between 0 and 255 to determine how dim (smaller
numbers) or bright (larger numbers) the light is.
- Replace 'x%' with a percentage between 0% and 100% to determine how
dim (smaller numbers) or bright (larger numbers) the light is.
- Using this notetag will enable radial lights for this event.
- When used for actors and/or enemies, the effects will occur in battle.
- Actor effects are NOT applied to the map.
- When on the map, the radial light settings used will be dependent on
the player and follower radial light settings instead of the individual
actor radial light settings.
--- <Radial Light Offset: +x, +y>
<Radial Light Offset: -x, -y>
- Used for: Actor, Enemy, Event Notetags, and Event Page Comment Tags
- Offsets the position of the radial light, which is normally centered on
the sprite it is coming from.
- Can be used with both image and generated radial lights.
- Replace 'x' and 'y' with numeric values the exact number of pixels to
offset the radial light's x and y coordinates by.
- Using this notetag will enable radial lights for this event.
- When used for actors and/or enemies, the effects will occur in battle.
- Actor effects are NOT applied to the map.
- When on the map, the radial light settings used will be dependent on
the player and follower radial light settings instead of the individual
actor radial light settings.
--- Radial Light Behavior-Related NotetagsUsing this notetag will override the default settings found in the Plugin Parameters provided that they are adjusting already present settings. --- <Radial Light Blink Rate: x%>
- Used for: Actor, Enemy, Event Notetags, and Event Page Comment Tags
- Adjusts the frequency at which the radial light will blink.
- Replace 'x' with a percentage representing the frequency.
- Lower numbers mean less frequent.
- Higher numbers mean more frequent.
- When used for actors and/or enemies, the effects will occur in battle.
- Actor effects are NOT applied to the map.
- When on the map, the radial light settings used will be dependent on
the player and follower radial light settings instead of the individual
actor radial light settings.
--- <Radial Light Blink Modifier: +x%>
<Radial Light Blink Modifier: -x%>
- Used for: Actor, Enemy, Event Notetags, and Event Page Comment Tags
- Adjusts a static multiplicative opacity modifier at which lights will
become brighter (+) or dimmer (-) when flashing.
- Replace 'x' with a percentage representing the static multiplier increase.
- Positive numbers mean brighter.
- Negative numbers mean dimmer.
- When used for actors and/or enemies, the effects will occur in battle.
- Actor effects are NOT applied to the map.
- When on the map, the radial light settings used will be dependent on
the player and follower radial light settings instead of the individual
actor radial light settings.
--- <Radial Light Flicker Rate: x%>
- Used for: Actor, Enemy, Event Notetags, and Event Page Comment Tags
- Adjusts the frequency at which the radial light will flicker.
- Replace 'x' with a percentage representing the frequency.
- Lower numbers mean less frequent.
- Higher numbers mean more frequent.
- When used for actors and/or enemies, the effects will occur in battle.
- Actor effects are NOT applied to the map.
- When on the map, the radial light settings used will be dependent on
the player and follower radial light settings instead of the individual
actor radial light settings.
--- <Radial Light Flicker Modifier: +x%>
<Radial Light Flicker Modifier: -x%>
- Used for: Actor, Enemy, Event Notetags, and Event Page Comment Tags
- Adjusts a randomized multiplicative opacity modifier at which lights will
become brighter (+) or dimmer (-) when flashing.
- Replace 'x' with a percentage representing the randomized multiplier
increase.
- Randomized multiplier will range anywhere from 0 to the number itself.
- Positive numbers mean brighter.
- Negative numbers mean dimmer.
- When used for actors and/or enemies, the effects will occur in battle.
- Actor effects are NOT applied to the map.
- When on the map, the radial light settings used will be dependent on
the player and follower radial light settings instead of the individual
actor radial light settings.
--- <Radial Light Flash Rate: x%>
- Used for: Actor, Enemy, Event Notetags, and Event Page Comment Tags
- Adjusts the frequency at which the radial light will flash.
- Replace 'x' with a percentage representing the frequency.
- Lower numbers mean less frequent.
- Higher numbers mean more frequent.
- When used for actors and/or enemies, the effects will occur in battle.
- Actor effects are NOT applied to the map.
- When on the map, the radial light settings used will be dependent on
the player and follower radial light settings instead of the individual
actor radial light settings.
--- <Radial Light Flash Modifier: +x%>
<Radial Light Flash Modifier: -x%>
- Used for: Actor, Enemy, Event Notetags, and Event Page Comment Tags
- Adjusts a static additive opacity modifier at which lights will become
brighter (+) or dimmer (-) when flashing.
- Replace 'x' with a percentage representing the static additional change.
- Positive numbers mean brighter.
- Negative numbers mean dimmer.
- When used for actors and/or enemies, the effects will occur in battle.
- Actor effects are NOT applied to the map.
- When on the map, the radial light settings used will be dependent on
the player and follower radial light settings instead of the individual
actor radial light settings.
--- <Radial Light Flare Rate: x%>
- Used for: Actor, Enemy, Event Notetags, and Event Page Comment Tags
- Adjusts the frequency at which the radial light will flare.
- Replace 'x' with a percentage representing the frequency.
- Lower numbers mean less frequent.
- Higher numbers mean more frequent.
- When used for actors and/or enemies, the effects will occur in battle.
- Actor effects are NOT applied to the map.
- When on the map, the radial light settings used will be dependent on
the player and follower radial light settings instead of the individual
actor radial light settings.
--- <Radial Light Flare Modifier: +x%>
<Radial Light Flare Modifier: -x%>
- Used for: Actor, Enemy, Event Notetags, and Event Page Comment Tags
- Adjusts a randomized additive opacity modifier at which lights will become
brighter (+) or dimmer (-) when flaring up.
- Replace 'x' with a percentage representing the randomized multiplier
increase.
- Randomized multiplier will range anywhere from 0 to the number itself.
- Positive numbers mean brighter.
- Negative numbers mean dimmer.
- When used for actors and/or enemies, the effects will occur in battle.
- Actor effects are NOT applied to the map.
- When on the map, the radial light settings used will be dependent on
the player and follower radial light settings instead of the individual
actor radial light settings.
--- <Radial Light Glow Rate: x%>
- Used for: Actor, Enemy, Event Notetags, and Event Page Comment Tags
- Adjusts how much the radial light will oscillate its brightness back and
forth in a glow-like fashion.
- Replace 'x' with a percentage representing the change in brightness.
- Lower numbers mean less fluctuation.
- Higher numbers mean more fluctuation.
- When used for actors and/or enemies, the effects will occur in battle.
- Actor effects are NOT applied to the map.
- When on the map, the radial light settings used will be dependent on
the player and follower radial light settings instead of the individual
actor radial light settings.
--- <Radial Light Glow Speed: x%>
- Used for: Actor, Enemy, Event Notetags, and Event Page Comment Tags
- Adjusts the speed at which the glow oscillates back and forth.
- Replace 'x' with a percentage representing the speed.
- Lower numbers mean slower.
- Higher numbers mean faster.
- When used for actors and/or enemies, the effects will occur in battle.
- Actor effects are NOT applied to the map.
- When on the map, the radial light settings used will be dependent on
the player and follower radial light settings instead of the individual
actor radial light settings.
--- <Radial Light Glow Random>
<Radial Light Glow No Random>
- Used for: Actor, Enemy, Event Notetags, and Event Page Comment Tags
- Adds a random seed (or not) to the glow oscillation. This can be used to
put multiple lights glowing at different starting points.
- This is used to offset the default RNG settings found in the default
Plugin Parameters.
- When used for actors and/or enemies, the effects will occur in battle.
- Actor effects are NOT applied to the map.
- When on the map, the radial light settings used will be dependent on
the player and follower radial light settings instead of the individual
actor radial light settings.
--- <Radial Light Pulse Rate: x%>
- Used for: Actor, Enemy, Event Notetags, and Event Page Comment Tags
- Adjusts how much the radial light will oscillate its radius back and
forth in a pulse-like fashion.
- Replace 'x' with a percentage representing the change in size.
- Lower numbers mean less shrinking.
- Higher numbers mean more shrinking.
- When used for actors and/or enemies, the effects will occur in battle.
- Actor effects are NOT applied to the map.
- When on the map, the radial light settings used will be dependent on
the player and follower radial light settings instead of the individual
actor radial light settings.
--- <Radial Light Pulse Speed: x%>
- Used for: Actor, Enemy, Event Notetags, and Event Page Comment Tags
- Adjusts the speed at which the pulse oscillates back and forth.
- Replace 'x' with a percentage representing the speed.
- Lower numbers mean slower.
- Higher numbers mean faster.
- When used for actors and/or enemies, the effects will occur in battle.
- Actor effects are NOT applied to the map.
- When on the map, the radial light settings used will be dependent on
the player and follower radial light settings instead of the individual
actor radial light settings.
--- <Radial Light Pulse Random>
<Radial Light Pulse No Random>
- Used for: Actor, Enemy, Event Notetags, and Event Page Comment Tags
- Adds a random seed (or not) to the pulse oscillation. This can be used to
put multiple lights pulsing at different starting points.
- This is used to offset the default RNG settings found in the default
Plugin Parameters.
- When used for actors and/or enemies, the effects will occur in battle.
- Actor effects are NOT applied to the map.
- When on the map, the radial light settings used will be dependent on
the player and follower radial light settings instead of the individual
actor radial light settings.
--- <Radial Light Pattern Type: name>
- Used for: Actor, Enemy, Event Notetags, and Event Page Comment Tags
- Uses a premade pattern by this plugin. The pattern will change the
brightness of the light in a sequenced pattern.
- Replace 'name' with any of the following text:
- none, normal
- fluorescent, halogen, incandescent
- candle, torch, campfire
- fast strobe, slow strobe
- strong pulse, medium pulse, slow pulse
- underwater
- When used for actors and/or enemies, the effects will occur in battle.
- Actor effects are NOT applied to the map.
- When on the map, the radial light settings used will be dependent on
the player and follower radial light settings instead of the individual
actor radial light settings.
--- <Radial Light Custom Pattern: x>
- Used for: Actor, Enemy, Event Notetags, and Event Page Comment Tags
- Uses a custom pattern determined by you, the game dev, on how the light's
brightness will change over time.
- Replace 'x' with letters of the alphabet from 'a' to 'z'.
- 'a' is completely transparent.
- 'm' is midway in brightness.
- 'z' is the brightest the light can be.
- When used for actors and/or enemies, the effects will occur in battle.
- Actor effects are NOT applied to the map.
- When on the map, the radial light settings used will be dependent on
the player and follower radial light settings instead of the individual
actor radial light settings.
- Examples:
- <Radial Light Custom Pattern: mmmmmaaaaammmmmaaaaaabcdefgabcdefg>
- <Radial Light Custom Pattern: nmonqnmomnmomomno>
- <Radial Light Custom Pattern: abcdefghijklmnopqrrqponmlkjihgfedcba>
--- <Radial Light Pattern Delay: x>
- Used for: Actor, Enemy, Event Notetags, and Event Page Comment Tags
- Determines how many frames to wait before going to the next part of the
preset pattern and/or custom pattern.
- Replace 'x' with a number representing the frames the radial light needs
to wait before moving forward in the pattern.
- Lower numbers mean faster (minimum: 1).
- Higher numbers mean slower.
- When used for actors and/or enemies, the effects will occur in battle.
- Actor effects are NOT applied to the map.
- When on the map, the radial light settings used will be dependent on
the player and follower radial light settings instead of the individual
actor radial light settings.
--- Conical Light General-Related NotetagsUsing this notetag will override the default settings found in the Plugin Parameters provided that they are adjusting already present settings. --- <Conical Light> - Used for: Event Notetags and Event Page Comment Tags - Quick and simple setup to add conical lights to this event. - Using this notetag will enable conical lights for this event. - This will use the default settings found in the Plugin Parameters for Event Conical Lights. --- <No Conical Light> - Used for: Event Notetags and Event Page Comment Tags - Disables conical lights for this event. - Primarily used if the default settings for Event Conical Lights would have the conical light enabled. --- <Conical Light Filename: filename>
- Used for: Event Notetags and Event Page Comment Tags
- Uses an image instead of generated conical lights.
- Using this notetag will lock out the usage of generated conical light
notetags found below.
- By default, you should have your conical light image face the right at
"0 degrees".
- Replace 'filename' with a picture found within your game project's
img/pictures/ folder. Filenames are case sensitive. Leave out the filename
extension from the notetag.
- Using this notetag will enable conical lights for this event.
--- <Conical Light File Angle Offset: +x> <Conical Light File Angle Offset: -x> - Used for: Event Notetags and Event Page Comment Tags - Determines how much to offset the angle of the conical light image by. - Replace 'x' with a number from 0 to 360 representing the angle offset. - Negatives are allowed in order to quickly go the other way. - Using this notetag will enable conical lights for this event. --- <Conical Light File Anchor: x, y> - Used for: Event Notetags and Event Page Comment Tags - Determine the anchor points for the conical light image. - Replace 'x' and 'y' with numbers between 0 and 1. - For x: 0.0 is left-aligned, 0.5 is center-aligned, 1.0 is right-aligned. - For y: 0.0 is top-aligned, 0.5 is middle-aligned, 1.0 is bottom-aligned. - Using this notetag will enable conical lights for this event. --- <Conical Light Color: name>
- Used for: Event Notetags and Event Page Comment Tags
- Creates a generated conical light using a preset color.
- This notetag cannot be used with <Conical Light Filename: filename>.
- Replace 'name' with any of the following:
- Normal, Dawn, Day, Dusk, Night
- White, Black, Red, Orange, Yellow, Green, Cyan, Blue, Purple, Magenta,
Pink, Brown
- Light Red, Light Orange, Light Yellow, Light Green, Light Cyan,
Light Blue, Light Purple, Light Magenta, Light Pink, Light Brown
- Dark Red, Dark Orange, Dark Yellow, Dark Green, Dark Cyan,
Dark Blue, Dark Purple, Dark Magenta, Dark Pink, Dark Brown
- Using this notetag will enable conical lights for this event.
--- <Conical Light Color: #rrggbb> - Used for: Event Notetags and Event Page Comment Tags - Creates a generated conical light using a custom color. - This notetag cannot be used with <Conical Light Filename: filename>. - Replace 'rr' with a hexadecimal value for red. - Replace 'gg' with a hexadecimal value for green. - Replace 'bb' with a hexadecimal value for blue. - Leave the '#' in place. - If you are unsure of what hexadecimal value your color is, please use an online site like: https://htmlcolorcodes.com/ - Using this notetag will enable conical lights for this event. --- <Conical Light Radius: r> <Conical Light Diameter: d> - Used for: Event Notetags and Event Page Comment Tags - Determines the radius/diameter of the generated conical light. - This notetag cannot be used with <Conical Light Filename: filename>. - Replace 'r' with a number representing the pixel radius of the generated conical light. - Replace 'd' with a number representing the pixel diameter of the generated conical light. - Use one or the other. - Using this notetag will enable conical lights for this event. --- <Conical Light Source Radius: r> <Conical Light Source Diameter: d> - Used for: Event Notetags and Event Page Comment Tags - Determines the radius/diameter of the generated conical light's light source, creating a little circle from where the cone starts. - This notetag cannot be used with <Conical Light Filename: filename>. - Replace 'r' with a number representing the pixel radius of the generated conical light. - Replace 'd' with a number representing the pixel diameter of the generated conical light. - Use one or the other. - Using this notetag will enable conical lights for this event. --- <Conical Light Intensity: x%>
- Used for: Event Notetags and Event Page Comment Tags
- Determines the light intensity of the generated conical light.
- This notetag cannot be used with <Conical Light Filename: filename>.
- Intensity determines how much of the light's luminosity extends outwards
at full strength between fading away.
- Replace 'x' with a number between 0 and 100 representing the intensity
percentage for the generated conical light.
- Using this notetag will enable conical lights for this event.
--- <Conical Light Blend Mode: Normal> <Conical Light Blend Mode: Additive> <Conical Light Blend Mode: Multiply> <Conical Light Blend Mode: Screen> - Used for: Event Notetags and Event Page Comment Tags - Changes the blend mode of the conical light. - Can be used with both image and generated conical lights. - We recommend that you use 'screen'. - Using this notetag will enable conical lights for this event. --- <Conical Light Opacity: x>
<Conical Light Opacity: x%>
- Used for: Event Notetags and Event Page Comment Tags
- Changes the opacity level of the conical light.
- Can be used with both image and generated conical lights.
- The opacity of a light determines how bright (larger numbers) or dim
(smaller numbers) it is.
- Replace 'x' with a number between 0 and 255 to determine how dim (smaller
numbers) or bright (larger numbers) the light is.
- Replace 'x%' with a percentage between 0% and 100% to determine how
dim (smaller numbers) or bright (larger numbers) the light is.
- Using this notetag will enable conical lights for this event.
--- <Conical Light Angle: x> - Used for: Event Notetags and Event Page Comment Tags - Determines the arc angle of the generated conical light. - The larger the angle, the wider the arc. - Replace 'x' with a number between 0 and 360 representing the angle. - Using this notetag will enable conical lights for this event. --- <Conical Light Angle Sway: x> - Used for: Event Notetags and Event Page Comment Tags - Determines how many degrees the light will sway back and forth. - The larger the angle, the wider the sway. - Replace 'x' with a number between 0 and 360 representing the degrees the light will sway. - Use 0 for no sway. - Using this notetag will enable conical lights for this event. --- <Conical Light Sway Speed: x%> - Used for: Event Notetags and Event Page Comment Tags - Determines how fast the light will sway back and forth. - Replace 'x' with a percentage from 1% to 100%. - Lower numbers mean slower. - Higher numbers mean faster. - Using this notetag will enable conical lights for this event. --- <Conical Light Sway Random> <Conical Light Sway No Random> - Used for: Event Notetags and Event Page Comment Tags - Adds a random seed (or not) to the sway oscillation. This can be used to put multiple lights swaying at different starting points. - This is used to offset the default RNG settings found in the default Plugin Parameters. - Using this notetag will enable conical lights for this event. --- <Conical Light Force Direction: x>
- Used for: Event Notetags and Event Page Comment Tags
- Forces the conical light to face a certain direction.
- This is primarily used for tile events or direction fixed events that
would otherwise lock a conical light to face a certain direction.
- Replace 'x' with any of the following:
- none
- down, left, right, up
- lower left, lower right, upper left, upper right
- Use 'none' to remove any forced directions.
- Using this notetag will enable conical lights for this event.
--- <Conical Light Follow Cursor> <Conical Light Not Follow Cursor> - Used for: Event Notetags and Event Page Comment Tags - Causes the conical light to face towards the direction of the mouse cursor if it's within the game client window. - This is used to offset the default settings found in the default Plugin Parameters. - Using this notetag will enable conical lights for this event. --- <Conical Light Hand Offset> <Conical Light Center Offset> - Used for: Event Notetags and Event Page Comment Tags - Causes the conical light to follow either the hand-focused offsets or base the offset at the center of the character. - This is used to offset the default settings found in the default Plugin Parameters. - Using this notetag will enable conical lights for this event. --- <Conical Light Offset: +x, +y> <Conical Light Offset: -x, -y> - Used for: Event Notetags and Event Page Comment Tags - Offsets the position of the conical light, which is normally centered on the sprite it is coming from. - Can be used with both image and generated conical lights. - This is NOT used with the <Conical Light Hand Offset> notetag. - Replace 'x' and 'y' with numeric values the exact number of pixels to offset the conical light's x and y coordinates by. - Using this notetag will enable conical lights for this event. --- <Conical Light d Pattern p: +x, +y> <Conical Light d Pattern p: -x, -y> <Conical Light d Pattern p: +x, -y> <Conical Light d Pattern p: -x, +y> - Used for: Actor Notetags, Event Notetags, and Event Page Comment Tags - When using hand-based offsets for the conical light, this will cause the light source to come from the target's hand instead of their chest/face. - For actors, the light source origin will vary depending on who is in the lead, in case certain actors may be left or right handed, or if happen to be a robot that has the light shining from their eyes. - Replace 'd' with text representing the direction the offset is for. Use any of the directions below: - down, left, right, up - lower left, lower right, upper left, upper right - Replace 'p' with a number representing the pattern index. Patterns are the individual frames used in the sprite when walking. - By default, RPG Maker MZ sprites have the following patterns: - Left frame is pattern 0. - Center frame is pattern 1. - Right frame is pattern 2. - Replace 'x' and 'y' with numeric values the exact number of pixels to offset the conical light's x and y coordinates by. - Examples: - <Conical Light Down Pattern 0: +12, +14> - <Conical Light Left Pattern 1: +4, +16> - <Conical Light Right Pattern 2: -6, +16> --- Conical Light Behavior-Related NotetagsUsing this notetag will override the default settings found in the Plugin Parameters provided that they are adjusting already present settings. --- <Conical Light Blink Rate: x%> - Used for: Event Notetags and Event Page Comment Tags - Adjusts the frequency at which the conical light will blink. - Replace 'x' with a percentage representing the frequency. - Lower numbers mean less frequent. - Higher numbers mean more frequent. --- <Conical Light Blink Modifier: +x%> <Conical Light Blink Modifier: -x%> - Used for: Event Notetags and Event Page Comment Tags - Adjusts a static multiplicative opacity modifier at which lights will become brighter (+) or dimmer (-) when flashing. - Replace 'x' with a percentage representing the static multiplier increase. - Positive numbers mean brighter. - Negative numbers mean dimmer. --- <Conical Light Flicker Rate: x%> - Used for: Event Notetags and Event Page Comment Tags - Adjusts the frequency at which the conical light will flicker. - Replace 'x' with a percentage representing the frequency. - Lower numbers mean less frequent. - Higher numbers mean more frequent. --- <Conical Light Flicker Modifier: +x%> <Conical Light Flicker Modifier: -x%> - Used for: Event Notetags and Event Page Comment Tags - Adjusts a randomized multiplicative opacity modifier at which lights will become brighter (+) or dimmer (-) when flashing. - Replace 'x' with a percentage representing the randomized multiplier increase. - Randomized multiplier will range anywhere from 0 to the number itself. - Positive numbers mean brighter. - Negative numbers mean dimmer. --- <Conical Light Flash Rate: x%> - Used for: Event Notetags and Event Page Comment Tags - Adjusts the frequency at which the conical light will flash. - Replace 'x' with a percentage representing the frequency. - Lower numbers mean less frequent. - Higher numbers mean more frequent. --- <Conical Light Flash Modifier: +x%> <Conical Light Flash Modifier: -x%> - Used for: Event Notetags and Event Page Comment Tags - Adjusts a static additive opacity modifier at which lights will become brighter (+) or dimmer (-) when flashing. - Replace 'x' with a percentage representing the static additional change. - Positive numbers mean brighter. - Negative numbers mean dimmer. --- <Conical Light Flare Rate: x%> - Used for: Event Notetags and Event Page Comment Tags - Adjusts the frequency at which the conical light will flare. - Replace 'x' with a percentage representing the frequency. - Lower numbers mean less frequent. - Higher numbers mean more frequent. --- <Conical Light Flare Modifier: +x%> <Conical Light Flare Modifier: -x%> - Used for: Event Notetags and Event Page Comment Tags - Adjusts a randomized additive opacity modifier at which lights will become brighter (+) or dimmer (-) when flaring up. - Replace 'x' with a percentage representing the randomized multiplier increase. - Randomized multiplier will range anywhere from 0 to the number itself. - Positive numbers mean brighter. - Negative numbers mean dimmer. --- <Conical Light Glow Rate: x%> - Used for: Event Notetags and Event Page Comment Tags - Adjusts how much the conical light will oscillate its brightness back and forth in a glow-like fashion. - Replace 'x' with a percentage representing the change in brightness. - Lower numbers mean less fluctuation. - Higher numbers mean more fluctuation. --- <Conical Light Glow Speed: x%> - Used for: Event Notetags and Event Page Comment Tags - Adjusts the speed at which the glow oscillates back and forth. - Replace 'x' with a percentage representing the speed. - Lower numbers mean slower. - Higher numbers mean faster. --- <Conical Light Glow Random> <Conical Light Glow No Random> - Used for: Event Notetags and Event Page Comment Tags - Adds a random seed (or not) to the glow oscillation. This can be used to put multiple lights glowing at different starting points. - This is used to offset the default RNG settings found in the default Plugin Parameters. --- <Conical Light Pulse Rate: x%> - Used for: Event Notetags and Event Page Comment Tags - Adjusts how much the conical light will oscillate its radius back and forth in a pulse-like fashion. - Replace 'x' with a percentage representing the change in size. - Lower numbers mean less shrinking. - Higher numbers mean more shrinking. --- <Conical Light Pulse Speed: x%> - Used for: Event Notetags and Event Page Comment Tags - Adjusts the speed at which the pulse oscillates back and forth. - Replace 'x' with a percentage representing the speed. - Lower numbers mean slower. - Higher numbers mean faster. --- <Conical Light Pulse Random> <Conical Light Pulse No Random> - Used for: Event Notetags and Event Page Comment Tags - Adds a random seed (or not) to the pulse oscillation. This can be used to put multiple lights pulsing at different starting points. - This is used to offset the default RNG settings found in the default Plugin Parameters. --- <Conical Light Pattern Type: name> - Used for: Event Notetags and Event Page Comment Tags - Uses a premade pattern by this plugin. The pattern will change the brightness of the light in a sequenced pattern. - Replace 'name' with any of the following text: - none, normal - fluorescent, halogen, incandescent - candle, torch, campfire - fast strobe, slow strobe - strong pulse, medium pulse, slow pulse - underwater --- <Conical Light Custom Pattern: x> - Used for: Event Notetags and Event Page Comment Tags - Uses a custom pattern determined by you, the game dev, on how the light's brightness will change over time. - Replace 'x' with letters of the alphabet from 'a' to 'z'. - 'a' is completely transparent. - 'm' is midway in brightness. - 'z' is the brightest the light can be. - Examples: - <Conical Light Custom Pattern: mmmmmaaaaammmmmaaaaaabcdefgabcdefg> - <Conical Light Custom Pattern: nmonqnmomnmomomno> - <Conical Light Custom Pattern: abcdefghijklmnopqrrqponmlkjihgfedcba> --- <Conical Light Pattern Delay: x> - Used for: Event Notetags and Event Page Comment Tags - Determines how many frames to wait before going to the next part of the preset pattern and/or custom pattern. - Replace 'x' with a number representing the frames the conical light needs to wait before moving forward in the pattern. - Lower numbers mean faster (minimum: 1). - Higher numbers mean slower. --- Limited Skill Uses VisuStella MZThe following are notetags that have been added through this plugin. These notetags will not work with your game if this plugin is OFF or not present. --- Basic Limited Use-Related Notetags--- <Limited Uses: x> - Used for: Skill Notetags - Sets the limited use maximum base amount for this skill. - This value will override the Plugin Parameter settings for a base value if "All Skills Limited?" is turned on. - Replace 'x' with a number value representing the base maximum uses this skill can have. --- <Unlimited Use> - Used for: Skill Notetags - If the Plugin Parameter "All Skills Limited?" is turned on, this will disable limited uses for this skill, allowing it to be used in unlimited amounts independent of the Limited Use base. --- Use Recovery-Related Notetags--- <Victory Uses Recover: x> <Escape Uses Recover: x> <Defeat Uses Recover: x> <After Battle Uses Recover: x> - Used for: Skill Notetags - Determines how many limited uses are recovered at the end of each battle depending on the result. - Victory notetag variant requires winning the battle. - Escape notetag variant requires escaping the battle. - Defeat notetag variant requires losing the battle. - After Battle notetag variant applies to all cases. - Replace 'x' with how many uses are restored upon completing a battle. --- <Bypass Recover All Uses> - Used for: Skill Notetags - This prevents the skill from recovering all uses with the "Recover All" event command. --- <Allow Recover All Uses> - Used for: Skill Notetags - This allows the skill to recover all uses with the "Recover All" event command when the "Recover All?" plugin parameter is disabled. --- Use Alteration-Related Notetags--- <User Global Uses: +x> <User Global Uses: -x> <User SType id Uses: +x> <User SType id Uses: -x> <User SType name Uses: +x> <User SType name Uses: -x> <User Skill id Uses: +x> <User Skill id Uses: -x> <User Skill name Uses: +x> <User Skill name Uses: -x> - Used for: Skill, Item Notetags - Alters the limited use amounts for the action's user. - Global notetag variant affects all limited uses. - SType notetag variant effects all skills with a matching type. - Skill notetag viarant effects a specific matching skill. - This effect will only trigger once per action even if there are multiple hits as long as it successfully hits one target. - Replace 'id' with the ID of the skill type. - Replace 'name' with the name of the skill type (without text codes). - Replace 'x' with the amount to alter the remaining uses by. Positive values restore uses while negative values reduce remaining uses. --- <Target Global Uses: +x>
<Target Global Uses: -x>
<Target SType id Uses: +x>
<Target SType id Uses: -x>
<Target SType name Uses: +x>
<Target SType name Uses: -x>
<Target Skill id Uses: +x>
<Target Skill id Uses: -x>
<Target Skill name Uses: +x>
<Target Skill name Uses: -x>
- Used for: Skill, Item Notetags
- Alters the limited use amounts for the action's target.
- Global notetag variant affects all limited uses.
- SType notetag variant effects all skills with a matching type.
- Replace 'id' with the ID of the skill type.
- Replace 'name' with the name of the skill type (without text codes).
- Skill notetag viarant effects a specific matching skill.
- Replace 'id' with the ID of the skill.
- Replace 'name' with the name of the skill.
- This effect will trigger with each successful hit against its target.
- Replace 'x' with the amount to alter the remaining uses by. Positive
values restore uses while negative values reduce remaining uses.
--- Trait Based-Related Notetags--- <Gloal Use Max: +x>
<Gloal Use Max: -x>
<SType id Use Max: +x>
<SType id Use Max: -x>
<SType name Use Max: +x>
<SType name Use Max: -x>
<Skill id Use Max: +x>
<Skill id Use Max: -x>
<Skill name Use Max: +x>
<Skill name Use Max: -x>
- Used for: Actor, Class, Weapon, Armor, Enemy, State Notetags
- Changes the maximum limited uses for all skills, skills of a particular
type, or individual skills.
- Global notetag variant affects all limited uses.
- SType notetag variant effects all skills with a matching type.
- Replace 'id' with the ID of the skill type.
- Replace 'name' with the name of the skill type (without text codes).
- Skill notetag viarant effects a specific matching skill.
- Replace 'id' with the ID of the skill.
- Replace 'name' with the name of the skill.
- Replace 'x' with the amount to adjust the maximum uses by. Positive values
increase the maximum uses while negative values decrease them.
- These will be hard capped by the settings found in the Plugin Parmeters.
--- Main Menu Core VisuStella MZThe following are notetags that have been added through this plugin. These notetags will not work with your game if this plugin is OFF or not present. --- Portrait-Related Notetags<Menu Portrait: filename> - Used for: Actor - This is used with the "Portrait" style Main Menu List. - Sets the menu image for the actor to 'filename'. - Replace 'filename' with a picture found within your game project's img/pictures/ folder. Filenames are case sensitive. Leave out the filename extension from the notetag. --- <Menu Portrait Offset: +x, +y> <Menu Portrait Offset: -x, -y> <Menu Portrait Offset X: +x> <Menu Portrait Offset X: -x> <Menu Portrait Offset Y: +y> <Menu Portrait Offset Y: -y> - Used for: Actor - This is used with the "Portrait" style Main Menu List. - Offsets the X and Y coordinates for the menu image. - Replace 'x' with a number value that offsets the x coordinate. - Negative x values offset left. Positive x values offset right. - Replace 'y' with a number value that offsets the y coordinate. - Negative y values offset up. Positive x values offset down. - This only applies to the Main Menu portraits. --- Map Camera Zoom VisuStella MZ
--- Map-Related Notetags--- <Zoom: x%>
<AutoZoom: x%>
<Auto Zoom: x%>
- Used for: Map Notetags
- Causes the game camera to automatically zoom to x% when entering a map
with this notetag.
- This does NOT reverse itself when exiting the map. The zoom settings
will carry over to other maps unless those maps have their own auto-zoom
notetag present.
- The notetag variants do the same thing. Which you choose to use is
entirely up to personal preference.
- Replace 'x' with a percentage value above 100% to represent the zoom scale
you wish to change to when entering this map.
- 'x' cannot be under 100%! Read the "Cannot Go Under 100%" section for
more information as to why.
--- Map Damage Effect VisuStella MZThe following are notetags that have been added through this plugin. These notetags will not work with your game if this plugin is OFF or not present. --- Custom Tile Effect-Related Notetags--- <Floor State Region x: id> <Floor State Region x: id, id, id> <Floor State Region x: name> <Floor State Region x: name, name, name> - Used for: Map Notetags - When stepping onto a tile marked by region 'x', afflict all party members with the associated state(s). - The notetag variants do the same thing. Which you choose to use is entirely up to personal preference. - Replace 'x' with a number (0 to 255) representing the Region ID used to mark the floor damage tiles with this Map Damage Effect. - Replace 'id' with a number representing the ID of the state to afflict upon all party members. - Replace 'name' with the name of the state(s) to afflict all party members. --- JavaScript Notetags: Custom Floor Damage--- <Floor Damage Formula Region x> code code damage = code </Floor Damage Formula Region x> - Used for: Map Notetags - Determines the amount of damage to deal to each actor when this Map Damage Effect triggers. Also changes any tile marked by region 'x' into a damage tile regardless of its setting in the database's tileset. - Replace 'x' with a number (0 to 255) representing the Region ID used to mark the floor damage tiles with this Map Damage Effect. - The 'damage' variable is returned to determine how much damage the actor will receive as floor damage (before being affected by the actor's FDR). - Replace 'code' with JavaScript code used to calculate the 'damage'. - The 'a' variable represents the actor receiving the damage. - The 'user' variable represents the actor receiving the damage. --- Floor Damage Effect-Related Notetags--- <Map Damage Effect Region x Color: #rrggbb> <Damage Region x Color: #rrggbb> - Used for: Map Notetags - When taking damage from tiles marked by 'x' region, play a custom color. - The notetag variants do the same thing. Which you choose to use is entirely up to personal preference. - Replace 'x' with a number (0 to 255) representing the Region ID used to mark the floor damage tiles with this Map Damage Effect. - Replace 'rr' with a hexadecimal value for red. - Replace 'gg' with a hexadecimal value for green. - Replace 'bb' with a hexadecimal value for blue. - Leave the '#' in place. - If you are unsure of what hexadecimal value your color is, please use an online site like: https://htmlcolorcodes.com/ - When using this notetag, custom images won't be used. --- <Map Damage Effect Region x Gradient Length: y> <Damage Region x Gradient Length: y> - Used for: Map Notetags - Changes the gradient length of the pre-render effect. - The notetag variants do the same thing. Which you choose to use is entirely up to personal preference. - Replace 'x' with a number (0 to 255) representing the Region ID used to mark the floor damage tiles with this Map Damage Effect. - Replace 'y' with a number representing in pixels how long the gradient length is. --- <Map Damage Effect Region x Image: filename> <Damage Region x Image: filename> - Used for: Map Notetags - Uses a custom image found in the img/pictures/ folder of your game project to use when taking floor damage on these region-marked tiles. - The notetag variants do the same thing. Which you choose to use is entirely up to personal preference. - Replace 'x' with a number (0 to 255) representing the Region ID used to mark the floor damage tiles with this Map Damage Effect. - Replace 'filename' with a picture found within your game project's img/pictures/ folder. Filenames are case sensitive. Leave out the filename extension from the notetag. - If this notetag is used, ignore the hex color and gradient notetags. --- <Map Damage Effect Region x Opacity: y> <Damage Region x Opacity: y> - Used for: Map Notetags - Adjusts the starting opacity to 'y' for this region-marked-tile's Map Damage Effect. - The notetag variants do the same thing. Which you choose to use is entirely up to personal preference. - Replace 'x' with a number (0 to 255) representing the Region ID used to mark the floor damage tiles with this Map Damage Effect. - Replace 'y' with a number (0 to 255) representing the starting opacity used by the region-marked-tile's Map Damage Effect. --- <Map Damage Effect Region x Opacity: y%> <Damage Region x Opacity: y%> - Used for: Map Notetags - Adjusts the starting opacity to 'y%' for this region-marked-tile's Map Damage Effect. - The notetag variants do the same thing. Which you choose to use is entirely up to personal preference. - Replace 'x' with a number (0 to 255) representing the Region ID used to mark the floor damage tiles with this Map Damage Effect. - Replace 'y' with a percent (0% to 100%) representing the starting opacity used by the region-marked-tile's Map Damage Effect. --- <Map Damage Effect Region x Duration: y> <Damage Region x Duration: y> - Used for: Map Notetags - Alters the duration for this region-marked-tile's Map Damage Effect. - The notetag variants do the same thing. Which you choose to use is entirely up to personal preference. - Replace 'x' with a number (0 to 255) representing the Region ID used to mark the floor damage tiles with this Map Damage Effect. - Replace 'y' with a number representing the duration of the Map Damage Effect in frames where 60 frames is equal to 1 second. --- <Map Damage Effect Region x Blend Mode: Normal> <Map Damage Effect Region x Blend Mode: Additive> <Map Damage Effect Region x Blend Mode: Multiply> <Map Damage Effect Region x Blend Mode: Screen> <Damage Region x Blend Mode: Normal> <Damage Region x Blend Mode: Additive> <Damage Region x Blend Mode: Multiply> <Damage Region x Blend Mode: Screen> - Used for: Map Notetags - Changes the blend mode used for the region-marked-tile's Map Damage Effect sprite to mesh with the map screen differently. - The notetag variants do the same thing. Which you choose to use is entirely up to personal preference. - Replace 'x' with a number (0 to 255) representing the Region ID used to mark the floor damage tiles with this Map Damage Effect. --- <Map Damage Effect Region x Once Parallel: y>
<Damage Region x Once Parallel: y>
- Used for: Map Notetags
- Requires VisuMZ_0_CoreEngine!
- Causes a region-marked-tile's Map Damage Effect to also launch a Once
Parallel from the VisuMZ Core Engine.
- A Once Parallel is a Common Event that occurs as a one-time parallel
process event that does not loop.
- The notetag variants do the same thing. Which you choose to use is
entirely up to personal preference.
- Replace 'x' with a number (0 to 255) representing the Region ID used to
mark the floor damage tiles with this Map Damage Effect.
- Replace 'y' with a number representing the ID of the Common Event to run
as a Once Parallel.
--- State Damage-Related Notetags--- <Map Damage Effect Color: #rrggbb> <Damage Color: #rrggbb> - Used for: State Notetags - When taking damage from states on the map, play a custom color. - The notetag variants do the same thing. Which you choose to use is entirely up to personal preference. - Replace 'rr' with a hexadecimal value for red. - Replace 'gg' with a hexadecimal value for green. - Replace 'bb' with a hexadecimal value for blue. - Leave the '#' in place. - If you are unsure of what hexadecimal value your color is, please use an online site like: https://htmlcolorcodes.com/ - When using this notetag, custom images won't be used. - If an actor has multiple damage states, the damage state with a Map Damage Effect and the highest priority will take effect. --- <Map Damage Effect Gradient Length: y> <Damage Gradient Length: y> - Used for: State Notetags - Changes the gradient length of the pre-render effect. - The notetag variants do the same thing. Which you choose to use is entirely up to personal preference. - Replace 'y' with a number representing in pixels how long the gradient length is. - If an actor has multiple damage states, the damage state with a Map Damage Effect and the highest priority will take effect. --- <Map Damage Effect Image: filename> <Damage Image: filename> - Used for: State Notetags - Uses a custom image found in the img/pictures/ folder of your game project to use when taking damage from states on the map. - The notetag variants do the same thing. Which you choose to use is entirely up to personal preference. - Replace 'filename' with a picture found within your game project's img/pictures/ folder. Filenames are case sensitive. Leave out the filename extension from the notetag. - If an actor has multiple damage states, the damage state with a Map Damage Effect and the highest priority will take effect. - If this notetag is used, ignore the hex color and gradient notetags. --- <Map Damage Effect Opacity: y> <Damage Opacity: y> - Used for: State Notetags - Adjusts the starting opacity to 'y' for this damage state's Map Damage Effect. - The notetag variants do the same thing. Which you choose to use is entirely up to personal preference. - Replace 'y' with a number (0 to 255) representing the starting opacity used by the region-marked-tile's Map Damage Effect. - If an actor has multiple damage states, the damage state with a Map Damage Effect and the highest priority will take effect. --- <Map Damage Effect Opacity: y%> <Damage Opacity: y%> - Used for: State Notetags - Adjusts the starting opacity to 'y%' for this damage state's Map Damage Effect. - The notetag variants do the same thing. Which you choose to use is entirely up to personal preference. - Replace 'y' with a percent (0% to 100%) representing the starting opacity used by the region-marked-tile's Map Damage Effect. - If an actor has multiple damage states, the damage state with a Map Damage Effect and the highest priority will take effect. --- <Map Damage Effect Duration: y> <Damage Duration: y> - Used for: State Notetags - Alters the duration for this damage state's Map Damage Effect. - The notetag variants do the same thing. Which you choose to use is entirely up to personal preference. - Replace 'y' with a number representing the duration of the Map Damage Effect in frames where 60 frames is equal to 1 second. - If an actor has multiple damage states, the damage state with a Map Damage Effect and the highest priority will take effect. --- <Map Damage Effect Blend Mode: Normal> <Map Damage Effect Blend Mode: Additive> <Map Damage Effect Blend Mode: Multiply> <Map Damage Effect Blend Mode: Screen> <Damage Blend Mode: Normal> <Damage Blend Mode: Additive> <Damage Blend Mode: Multiply> <Damage Blend Mode: Screen> - Used for: State Notetags - Changes the blend mode used for the damage state's Map Damage Effect sprite to mesh with the map screen differently. - The notetag variants do the same thing. Which you choose to use is entirely up to personal preference. - If an actor has multiple damage states, the damage state with a Map Damage Effect and the highest priority will take effect. --- <Map Damage Effect Once Parallel: y>
<Damage Once Parallel: y>
- Used for: State Notetags
- Requires VisuMZ_0_CoreEngine!
- Causes the damage state's Map Damage Effect to also launch a Once
Parallel from the VisuMZ Core Engine.
- A Once Parallel is a Common Event that occurs as a one-time parallel
process event that does not loop.
- The notetag variants do the same thing. Which you choose to use is
entirely up to personal preference.
- Replace 'y' with a number representing the ID of the Common Event to run
as a Once Parallel.
- If an actor has multiple damage states, the damage state with a Map Damage
Effect and the highest priority will take effect.
--- Map Event Effects VisuStella MZThe following are notetags that have been added through this plugin. These notetags will not work with your game if this plugin is OFF or not present. --- Breathing-Related Notetags
--- <Breathing Rate: x%> <Breathing Rate X: x%> <Breathing Rate Y: y%> - Used for: Event Notetags and Event Page Comment Tags - Changes the breathing rate of the sprite to the percentile amount. - For <Breathing Rate: x%> variant: replace 'x' with a number representing the general breathing percentage to be used. - For <Breathing Rate X: x%> variant: replace 'x' with a number representing the horizontal breathing percentage to be used. - For <Breathing Rate Y: y%> variant: replace 'y' with a number representing the vertical breathing percentage to be used. - If this is placed in a notetag, the effect will be present across all event pages used. - If this is placed inside a page's comment, the effect will only occur if that event page is currently active. --- <Breathing Speed: x> <Breathing Speed X: x> <Breathing Speed Y: y> - Used for: Event Notetags and Event Page Comment Tags - Changes the breathing speed of the sprite. - For <Breathing Speed: x%> variant: replace 'x' with a number representing the general breathing speed rate to be used. - For best results, use numbers between 0 and 1. - For <Breathing Speed X: x%> variant: replace 'x' with a number representing the horizontal breathing speed rate to be used. - For best results, use numbers between 0 and 1. - For <Breathing Speed Y: y%> variant: replace 'y' with a number representing the vertical breathing speed rate to be used. - For best results, use numbers between 0 and 1. - If this is placed in a notetag, the effect will be present across all event pages used. - If this is placed inside a page's comment, the effect will only occur if that event page is currently active. --- <Breathing Random Offset> <Breathing Random Offset X> <Breathing Random Offset Y> - Used for: Event Notetags and Event Page Comment Tags - Makes the event's breathing rate effect different from other events by having different starting points. - This effect does NOT work with <Breathing Static Offset: x> variants. - For <Breathing Random Offset> variant, this will affect both breathing rates for horizontal and vertical directions. - For <Breathing Random Offset X> variant, this will affect only breathing rates for the horizontal direction. - For <Breathing Random Offset Y> variant, this will affect only breathing rates for the vertical direction. - If this is placed in a notetag, the effect will be present across all event pages used. - If this is placed inside a page's comment, the effect will only occur if that event page is currently active. --- <Breathing Static Offset: x> <Breathing Static Offset X: x> <Breathing Static Offset Y: y> - Used for: Event Notetags and Event Page Comment Tags - Makes the event's breathing rate starting count begin at 'x' and will share similar starting float height offsets with other events that use the same offset number. - This effect does NOT work with <Breathing Random Offset> variants. - For <Breathing Static Offset: x> variant, replace 'x' with a number that adjusts the starting point for both horizontal and vertical breathing. - For <Breathing Static Offset X: x> variant, replace 'x' with a number that adjusts the starting point for only horizontal breathing. - For <Breathing Static Offset Y: y> variant, replace 'y' with a number that adjusts the starting point for only vertical breathing. - If this is placed in a notetag, the effect will be present across all event pages used. - If this is placed inside a page's comment, the effect will only occur if that event page is currently active. --- Flash-Related Notetags
--- <Flash Color: r, g, b, a> - Used for: Event Notetags and Event Page Comment Tags - Gives the event an effect that will periodically flash a custom color. - Replace 'r' with a number representing the red color value (0 to 255). - Replace 'g' with a number representing the green color value (0 to 255). - Replace 'b' with a number representing the blue color value (0 to 255). - Replace 'a' with a number representing the alpha value (0 to 255). - If this is placed in a notetag, the effect will be present across all event pages used. - If this is placed inside a page's comment, the effect will only occur if that event page is currently active. --- <Flash Duration: x> - Used for: Event Notetags and Event Page Comment Tags - Sets the duration of the flash effect to 'x' frames. - Replace 'x' with a number representing how long the flash lasts in frames. - 60 frames per second. - If this is placed in a notetag, the effect will be present across all event pages used. - If this is placed inside a page's comment, the effect will only occur if that event page is currently active. - If this notetag is not used, use the default flash duration found within the Plugin Parameters. --- <Flash Cycle: x> - Used for: Event Notetags and Event Page Comment Tags - Sets the cycle time of the flash effect to 'x' frames. - Replace 'x' with a number representing how long the flash cycle begins anew again. - 60 frames per second. - If this is placed in a notetag, the effect will be present across all event pages used. - If this is placed inside a page's comment, the effect will only occur if that event page is currently active. - If this notetag is not used, use the default flash cycle found within the Plugin Parameters. --- Floating-Related Notetags
--- <Float Height: x> <Float Height: x to y> - Used for: Event Notetags and Event Page Comment Tags - Sets the event's float height to 'x' or hover between 'x' and 'y'. - With the <Float Height: x> variant: replace 'x' with a number representing the pixels off the ground. - With the <Float Height: x to y> variant, replace 'x' and 'y' with numbers representing what pixel heights to shift between. - If this is placed in a notetag, the effect will be present across all event pages used. - If this is placed inside a page's comment, the effect will only occur if that event page is currently active. --- <Float Speed: x> - Used for: Event Notetags and Event Page Comment Tags - Sets the event's float speed to 'x' for the hovering float effect. - Replace 'x' with a number representing the speed at which the event floats between heights with. - For best results, use a number between 0 and 1. - If this is placed in a notetag, the effect will be present across all event pages used. - If this is placed inside a page's comment, the effect will only occur if that event page is currently active. --- <Float Random Offset> - Used for: Event Notetags and Event Page Comment Tags - Makes the event's floating height effect different from other events by having different starting points. - This effect does NOT work with <Float Static Offset: x>. - If this is placed in a notetag, the effect will be present across all event pages used. - If this is placed inside a page's comment, the effect will only occur if that event page is currently active. --- <Float Static Offset: x> - Used for: Event Notetags and Event Page Comment Tags - Makes the event's floating height starting count begin at 'x' and will share similar starting float height offsets with other events that use the same offset number. - This effect does NOT work with <Float Random Offset>. - If this is placed in a notetag, the effect will be present across all event pages used. - If this is placed inside a page's comment, the effect will only occur if that event page is currently active. --- Hue-Related Notetags
--- <Hue: x> - Used for: Event Notetags and Event Page Comment Tags - Sets the event's hue color to 'x'. - Replace 'x' with a number representing the hue shift. - For best results, use a number between 0 and 360. - If this is placed in a notetag, the effect will be present across all event pages used. - If this is placed inside a page's comment, the effect will only occur if that event page is currently active. --- <Random Hue> - Used for: Event Notetags and Event Page Comment Tags - Sets the event's hue color to a random amount between 0 and 360. - If this is placed in a notetag, the effect will be present across all event pages used. - If this is placed inside a page's comment, the effect will only occur if that event page is currently active. --- <Random Hue: x to y> - Used for: Event Notetags and Event Page Comment Tags - Sets the event's hue color to a random amount between 'x' and 'y'. - Replace 'x' and 'y' with numbers representing the hue shifts. - For best results, use numbers between 0 and 360. - If this is placed in a notetag, the effect will be present across all event pages used. - If this is placed inside a page's comment, the effect will only occur if that event page is currently active. --- <Hue Per Frame: +x> <Hue Per Frame: -x> - Used for: Event Notetags and Event Page Comment Tags - The event will constantly shift hue values by 'x' each frame. - Replace 'x' with a number representing the hue shift. - For best results, use a number between 0 and 360. - If this is placed in a notetag, the effect will be present across all event pages used. - If this is placed inside a page's comment, the effect will only occur if that event page is currently active. ---
Repeat Animation-Related Notetags
--- <Repeat Animation: x>
- Used for: Event Notetags and Event Page Comment Tags
- Plays animation 'x' on event over and over.
- Replace 'x' with a number representing the ID of the animation to be
played on this event repeatedly.
- Keep in mind that if an event changes pages to one that does not have an
animation or if the event is erased, the animation will still have to
finish up playing.
- If this is placed in a notetag, the effect will be present across
all event pages used.
- If this is placed inside a page's comment, the effect will only occur
if that event page is currently active.
--- <Repeat Animation Cycle: x> - Used for: Event Notetags and Event Page Comment Tags - Determines the animation cycle used for repeated animations. Animations will be repeated every 'x' frames. - Replace 'x' with a number representing the frame count between each animation playthrough. 60 frames = 1 second. - If this is placed in a notetag, the effect will be present across all event pages used. - If this is placed inside a page's comment, the effect will only occur if that event page is currently active. --- <Repeat Animation Mirror: On> <Repeat Animation Mirror: Off> - Used for: Event Notetags and Event Page Comment Tags - Determines if the repeating animation is mirrored or not. - If this is placed in a notetag, the effect will be present across all event pages used. - If this is placed inside a page's comment, the effect will only occur if that event page is currently active. --- <Repeat Animation Mute: On> <Repeat Animation Mute: Off> - Used for: Event Notetags and Event Page Comment Tags - Determines if the repeating animation is muted or not. - If this is placed in a notetag, the effect will be present across all event pages used. - If this is placed inside a page's comment, the effect will only occur if that event page is currently active. --- Scale-Related Notetags
--- <Scale: x%> <Scale X: x%> <Scale Y: y%> - Used for: Event Notetags and Event Page Comment Tags - Changes the scale of the sprite to the designated size. - For <Scale: x%> variant: replace 'x' with a number representing the scaling overall percentage to be used. - For <Scale X: x%> variant, replace 'x' with a number representing the x factor for the horizontal scaling percentage to be used. - For <Scale Y: y%> variant, replace 'y' with a number representing the y factor for the vertical scaling percentage to be used. - If this is placed in a notetag, the effect will be present across all event pages used. - If this is placed inside a page's comment, the effect will only occur if that event page is currently active. --- Shake-Related Notetags
--- <Shake Power: x> <Shake Power X: x> <Shake Power Y: y> - Used for: Event Notetags and Event Page Comment Tags - Sets the event's shaking to 'x' and/or 'y' power. - For <Shake Power: x> variant: replace 'x' with a number representing the shake power used for both horizontal and vertical shaking. - For <Shake Power X: x> variant: replace 'x' with a number representing the shake power used for only horizontal shaking. - For <Shake Power Y: y> variant: replace 'y' with a number representing the shake power used for only vertical shaking. - If this is placed in a notetag, the effect will be present across all event pages used. - If this is placed inside a page's comment, the effect will only occur if that event page is currently active. --- Sidestepping-Related Notetags
--- <Sidestep: x> <Sidestep: x to y> - Used for: Event Notetags and Event Page Comment Tags - Sets the event's sidestep distance to 'x' or hover between 'x' and 'y'. - With the <Sidestep: x> variant: replace 'x' with a number representing the pixels to the side. - Negative numbers go left. Positive numbers go right. - With the <Sidestep: x to y> variant, replace 'x' and 'y' with numbers representing what pixel heights to shift between. - Negative numbers go left. Positive numbers go right. - If this is placed in a notetag, the effect will be present across all event pages used. - If this is placed inside a page's comment, the effect will only occur if that event page is currently active. --- <Sidestep Speed: x> - Used for: Event Notetags and Event Page Comment Tags - Sets the event's shifting speed to 'x' for the sidestepping effect. - Replace 'x' with a number representing the speed at which the event will sidestep between. - For best results, use a number between 0 and 1. - If this is placed in a notetag, the effect will be present across all event pages used. - If this is placed inside a page's comment, the effect will only occur if that event page is currently active. --- <Sidestep Random Offset> - Used for: Event Notetags and Event Page Comment Tags - Makes the event's sidestepping effect different from other events by having different starting points. - This effect does NOT work with <Sidestep Static Offset: x>. - If this is placed in a notetag, the effect will be present across all event pages used. - If this is placed inside a page's comment, the effect will only occur if that event page is currently active. --- <Sidestep Static Offset: x> - Used for: Event Notetags and Event Page Comment Tags - Makes the event's sidestepping distance starting count begin at 'x' and will share similar starting sidestep static offsets with other events that use the same offset number. - This effect does NOT work with <Sidestep Random Offset>. - If this is placed in a notetag, the effect will be present across all event pages used. - If this is placed inside a page's comment, the effect will only occur if that event page is currently active. --- Tint-Related Notetags
--- <Tint Color: r, g, b, k> - Used for: Event Notetags and Event Page Comment Tags - Tints the event with a custom tone. - Replace 'r' with a number representing the red tone value (-255 to 255). - Replace 'g' with a number representing the green tone value (-255 to 255). - Replace 'b' with a number representing the blue tone value (-255 to 255). - Replace 'k' with a number representing the grey tone value (0 to 255). - If this is placed in a notetag, the effect will be present across all event pages used. - If this is placed inside a page's comment, the effect will only occur if that event page is currently active. --- More Currencies VisuStella MZThe following are notetags that have been added through this plugin. These notetags will not work with your game if this plugin is OFF or not present. --- Cost-Related Notetags--- <Item id Buy Cost: x>
<Item name Buy Cost: x>
<Item id Sell Cost: x>
<Item name Sell Cost: x>
<Item id Cost: x>
<Item name Cost: x>
- Used for: Item, Weapon, Armor Notetags
- The "buy" variant determines the item and quantity needed to purchase this
object in the shop.
- The "sell" variant determines the item and quantity acquired when selling
this object in the shop.
- The neither variant will determine both buy/sell transactions related to
the item and quantities when selling.
- Selling the object will yield a lower quantity determined by the sell
rate found in Plugin Parameters > General > Automatic Sell Rate.
- This variant cannot be used with the Buy/Sell notetag variants. If
either the buy or sell notetag variants are detected, this doesn't work.
- Replace 'id' with a number representing the ID of the item to be taken
(when bought) or acquired (when sold).
- Replace 'name' with the name of the item to be taken (when bought) or
acquired (when sold).
- Replace 'x' with the quantity of the item that will be taken (when bought)
or acquired (when sold).
- Insert multiple copies of these notetags to add more item costs.
--- <Weapon id Buy Cost: x>
<Weapon name Buy Cost: x>
<Weapon id Sell Cost: x>
<Weapon name Sell Cost: x>
<Weapon id Cost: x>
<Weapon name Cost: x>
- Used for: Item, Weapon, Armor Notetags
- The "buy" variant determines the weapon and quantity needed to purchase
this object in the shop.
- The "sell" variant determines the weapon and quantity acquired when
selling this object in the shop.
- The neither variant will determine both buy/sell transactions related to
the weapon and quantities when selling.
- Selling the object will yield a lower quantity determined by the sell
rate found in Plugin Parameters > General > Automatic Sell Rate.
- This variant cannot be used with the Buy/Sell notetag variants. If
either the buy or sell notetag variants are detected, this doesn't work.
- Replace 'id' with a number representing the ID of the weapon to be taken
(when bought) or acquired (when sold).
- Replace 'name' with the name of the weapon to be taken (when bought) or
acquired (when sold).
- Replace 'x' with the quantity of the weapon that will be taken (when
bought) or acquired (when sold).
- Insert multiple copies of these notetags to add more weapon costs.
--- <Armor id Buy Cost: x>
<Armor name Buy Cost: x>
<Armor id Sell Cost: x>
<Armor name Sell Cost: x>
<Armor id Cost: x>
<Armor name Cost: x>
- Used for: Item, Weapon, Armor Notetags
- The "buy" variant determines the armor and quantity needed to purchase
this object in the shop.
- The "sell" variant determines the armor and quantity acquired when
selling this object in the shop.
- The neither variant will determine both buy/sell transactions related to
the armor and quantities when selling.
- Selling the object will yield a lower quantity determined by the sell
rate found in Plugin Parameters > General > Automatic Sell Rate.
- This variant cannot be used with the Buy/Sell notetag variants. If
either the buy or sell notetag variants are detected, this doesn't work.
- Replace 'id' with a number representing the ID of the armor to be taken
(when bought) or acquired (when sold).
- Replace 'name' with the name of the armor to be taken (when bought) or
acquired (when sold).
- Replace 'x' with the quantity of the armor that will be taken (when
bought) or acquired (when sold).
- Insert multiple copies of these notetags to add more armor costs.
--- <Variable id Buy Cost: x>
<Variable id Sell Cost: x>
<Variable id Cost: x>
- Used for: Item, Weapon, Armor Notetags
- The "buy" variant determines the variable and quantity needed to purchase
this object in the shop.
- The "sell" variant determines the variable and quantity acquired when
selling this object in the shop.
- The neither variant will determine both buy/sell transactions related to
the variable and quantities when selling.
- Selling the object will yield a lower quantity determined by the sell
rate found in Plugin Parameters > General > Automatic Sell Rate.
- This variant cannot be used with the Buy/Sell notetag variants. If
either the buy or sell notetag variants are detected, this doesn't work.
- Replace 'id' with a number representing the ID of the variable to be taken
(when bought) or acquired (when sold).
- Replace 'name' with the name of the variable to be taken (when bought) or
acquired (when sold).
- Replace 'x' with the quantity of the variable that will be taken (when
bought) or acquired (when sold).
- Insert multiple copies of these notetags to add more variable costs.
--- Proxy Notetags--- <Proxy: id> <Proxy: name> - Used for: Item, Weapon, Armor Notetags - REQUIRES the most up to date VisuMZ Items and Equips Core! - Turns this item, weapon, or armor into a proxy for another item, allowing you to create trades with different components using the above notetag contents and yield the same item. - The proxy item itself will take on the name, icon, and description of the original item it is supposed to represent. - No other properties are carried over from the original. - When viewed through the Window_ShopStatus window, the contents will reference the original item and not the proxy item. - Proxy items themselves cannot be acquired. This includes event commands, item drops, or equips. - When bought, the item yielded won't be the proxy item but the item it is a proxy for. - Replace 'id' with a number representing the item, weapon, or armor ID of the same item type. If the proxy is an item, this will reference an item. If the proxy is a weapon, this will reference a weapon. Same for armors. - Replace 'name' with text representing the item, weapon, or armor's name. The referenced item needs to be the same item type as the proxy. Item for item, weapon for weapon, armor for armor. - Insert multiple copies of these notetags to add more variables costs. --- Movement Effects VisuStella MZThe following are notetags that have been added through this plugin. These notetags will not work with your game if this plugin is OFF or not present. --- Dust Cloud-Related Notetags--- <Force Dust Cloud> - Used for: Map Notetags - Forces Dust Clouds to be kicked up whenever characters are dashing regardless of whatever settings are found in the Plugin Parameters for this particular map. - Plugin Command changes won't bypass this notetag either. - However, if the player turns off Dust Clouds in the options menu, then this setting will be turned off. --- <No Dust Cloud> - Used for: Map Notetags - This disables Dust Clouds from being kicked up whenever characters are dashing regardless of whatever settings are found in the Plugin Parameters for this particular map. - Plugin Command changes won't bypass this notetag either. --- Footprints-Related Notetags--- <Footprint Region: x> <Footprint Regions: x, x, x> - Used for: Map Notetags - This declares which regions will have visible footprints when characters walk over those areas. - Replace 'x' with a number (0 to 255) representing the region used to mark tiles that can have footprints. - Insert multiple 'x' values to add multiple regions. - If this notetag is used, ignore the default settings found in the Plugin Parameters. --- <No Footprint Region: x> <No Footprint Regions: x, x, x> - Used for: Map Notetags - This declares which regions CANNOT have footprints when characters walk over those areas. - This is primarily used to offset the default settings found in the Plugin Parameters. - Replace 'x' with a number (0 to 255) representing the region used to mark tiles that CANNOT have footprints. - Insert multiple 'x' values to add multiple regions. --- <Region x Footprint Opacity: y> - Used for: Map Notetags - This changes the opacity of the footprints that spawn in region 'x' to have an opacity value of 'y' instead of the default settings found in the Plugin Parameters. - Replace 'x' with a number (0 to 255) to indicate which region is being modified. - Replace 'y' with a number (0 to 255) to represent the starting opacity value of the footprints made in that region. --- <Region x Footprint Duration: y> - Used for: Map Notetags - This changes the duration of the footprints that spawn in region 'x' to have a duration time of 'y' instead of the default settings found in the Plugin Parameters. - Replace 'x' with a number (0 to 255) to indicate which region is being modified. - Replace 'y' with a number in frames to represent the starting duration time of the footprints made in that region. --- <Footprint Terrain Tag: x> <Footprint Terrain Tags: x, x, x> - Used for: Tileset Notetags - This declares which terrain tag marked tiles will have visible footprints when characters walk over those areas. - Replace 'x' with a number (0 to 7) representing the terrain tag used to mark tiles that can have footprints. - Insert multiple 'x' values to add multiple terrain tags. - If this notetag is used, ignore the default settings found in the Plugin Parameters. --- <No Footprint Terrain Tag: x> <No Footprint Terrain Tags: x, x, x> - Used for: Tileset Notetags - This declares which terrain tag marked tiles CANNOT have footprints when characters walk over those areas. - This is primarily used to offset the default settings found in the Plugin Parameters. - Replace 'x' with a number (0 to 7) representing the terrain tag used to mark tiles that CANNOT have footprints. - Insert multiple 'x' values to add multiple terrain tags. --- <Terrain Tag x Footprint Opacity: y> - Used for: Tileset Notetags - This changes the opacity of the footprints that spawn in tiles with terrain tag 'x' to have an opacity value of 'y' instead of the default settings found in the Plugin Parameters. - Replace 'x' with a number (0 to 7) to indicate which terrain tag is being modified. - Replace 'y' with a number (0 to 255) to represent the starting opacity value of the footprints made in that tile. --- <Terrain Tag x Footprint Duration: y> - Used for: Tileset Notetags - This changes the duration of the footprints that spawn in tiles with terrain tag 'x' to have a duration time of 'y' instead of the default settings found in the Plugin Parameters. - Replace 'x' with a number (0 to 7) to indicate which terrain tag is being modified. - Replace 'y' with a number in frames to represent the starting duration time of the footprints made in that tile. --- <Disable Footprints> - Used for: Actor Notetags, Event Notetags, or Event Page Comment Tags - Prevents the character from being able to leave behind footprints. --- <Footprint d Pattern p Filename: filename> - Used for: Actor Notetags, Event Notetags, or Event Page Comment Tags - Allows you to set a specific image to be used in place of a generated footprint for 'd' direction 'p' pattern. - Using this will bypass any settings made for generated footprints. - Replace 'd' with text representing the direction the setting is for. Use any of the directions below: - down, left, right, up - lower left, lower right, upper left, upper right - Replace 'p' with a number representing the pattern index. Patterns are the individual frames used in the sprite when walking. - By default, RPG Maker MZ sprites have the following patterns: - Left frame is pattern 0. - Center frame is pattern 1. - Right frame is pattern 2. - Replace 'filename' with a picture found within your game project's img/pictures/ folder. Filenames are case sensitive. Leave out the filename extension from the notetag. - Examples: - <Footprint Down Pattern 0 Filename: FootprintDownA> - <Footprint Left Pattern 2 Filename: FootprintLeftB> - <Footprint Right Pattern 0 Filename: FootprintRightA> --- <Footprint d Pattern p Width: x> <Footprint d Pattern p Height: y> - Used for: Actor Notetags, Event Notetags, or Event Page Comment Tags - For non-image generated footprints, these notetags let you set the width and/or height of the footprint for 'd' direction and 'p' pattern. - Replace 'd' with text representing the direction the setting is for. Use any of the directions below: - down, left, right, up - lower left, lower right, upper left, upper right - Replace 'p' with a number representing the pattern index. Patterns are the individual frames used in the sprite when walking. - By default, RPG Maker MZ sprites have the following patterns: - Left frame is pattern 0. - Center frame is pattern 1. - Right frame is pattern 2. - Replace 'x' with a number representing the width of footprint in pixels. - Replace 'y' with a number representing the height of footprint in pixels. - Examples: - <Footprint Down Pattern 0 Width: 6> - <Footprint Left Pattern 2 Height: 4> --- <Footprint d Pattern p Offset: +x, +x> <Footprint d Pattern p Offset: -x, -x> <Footprint d Pattern p Offset: +x, -x> <Footprint d Pattern p Offset: -x, +x> - Used for: Actor Notetags, Event Notetags, or Event Page Comment Tags - For non-image generated footprints, these notetags let you set the offsets X and Y of the footprint for 'd' direction and 'p' pattern. - Replace 'd' with text representing the direction the setting is for. Use any of the directions below: - down, left, right, up - lower left, lower right, upper left, upper right - Replace 'p' with a number representing the pattern index. Patterns are the individual frames used in the sprite when walking. - By default, RPG Maker MZ sprites have the following patterns: - Left frame is pattern 0. - Center frame is pattern 1. - Right frame is pattern 2. - Replace 'x' and 'y' with numeric values the exact number of pixels to offset the footprint's x and y coordinates by. - Examples: - <Footprint Up Pattern 0 Width: +4, +2> - <Footprint Right Pattern 2 Height: -6, -4> --- Footsteps-Related Notetags--- <Force Footsteps> - Used for: Map Notetags - Forces footstep sounds to be played whenever characters are walking on the screen, regardless of the settings found in the Plugin Parameters for the particular map. - Plugin Command changes won't bypass this notetag either. - However, if the player turns off Footstep Sounds in the options menu, then this setting will be turned off. --- <No Footsteps> - Used for: Map Notetags - Prevents footstep sounds from being played whenever characters are walking on the screen, regardless of the settings found in the Plugin Parameters for the particular map. - Plugin Command changes won't bypass this notetag either. --- <Region x Footstep Sound: filename> <Region x Footstep Sound: filename, volume> <Region x Footstep Sound: filename, volume, pitch> <Region x Footstep Sound: filename, volume, pitch, pan> - Used for: Map Notetags - Causes a different sound effect to be played in place of the default footstep sound if a character walks on a map tile marked by region 'x'. - Replace 'x' with a number (0-255) representing the region. - Replace 'volume' with a number (0 to 100) representing the volume. - Replace 'pitch' with a number (50 to 150) representing the pitch. - Replace 'pan' with a number (-100 to 100) representing the pan. - If 'volume', 'pitch', or 'pan' aren't present, then the values used for them will be based off the default settings in the Plugin Parameters. - This will take priority over any terrain tags with unique footstep sounds. --- <No Region x Footsteps> - Used for: Map Notetags - No sound effects will be played when a character walks over a map tile marked by region 'x'. - Replace 'x' with a number (0-255) representing the region. --- <Terrain Tag x Footsteps: filename> <Terrain Tag x Footsteps: filename, volume> <Terrain Tag x Footsteps: filename, volume, pitch> <Terrain Tag x Footsteps: filename, volume, pitch, pan> - Used for: Tileset Notetags - Causes a different sound effect to be played in place of the default footstep sound if a character walks on a map tile with terrain tag 'x'. - Replace 'x' with a number (0-7) representing the terrain tag. - Replace 'volume' with a number (0 to 100) representing the volume. - Replace 'pitch' with a number (50 to 150) representing the pitch. - Replace 'pan' with a number (-100 to 100) representing the pan. - If 'volume', 'pitch', or 'pan' aren't present, then the values used for them will be based off the default settings in the Plugin Parameters. - This will have LESS priority than any regions with unique footstep sounds. --- <No Terrain Tag x Footsteps> - Used for: Tileset Notetags - No sound effects will be played when a character walks over a map tile marked by terrain tag 'x'. - Replace 'x' with a number (0-7) representing the terrain tag. --- <Enable Footsteps> - Used for: Actor Notetags, Event Notetags, or Event Page Comment Tags - If actor or event footstep sounds are normally disabled, this will enable them when moving. - Footstep sounds coming from actors will be given priority to the party leader first before anyone else. --- <Disable Footsteps> - Used for: Actor Notetags, Event Notetags, or Event Page Comment Tags - If actor or event footstep sounds are normally enabled, this will disable them when moving. --- <Footsteps Volume: x%> - Used for: Actor Notetags, Event Notetags, or Event Page Comment Tags - Changes the volume for any footstep sounds made by this actor/event. - Replace 'x' with a number (0 to 100) representing the percentile modifier, a multiplicative rate from the usual footstep volume. --- <Footsteps Pitch: x%> - Used for: Actor Notetags, Event Notetags, or Event Page Comment Tags - Changes the pitch for any footstep sounds made by this actor/event. - Replace 'x' with a number (0 to 100) representing the percentile modifier, a multiplicative rate from the usual footstep pitch. --- <Footsteps Frame: x> <Footsteps Frames: x, x, x> - Used for: Actor Notetags, Event Notetags, or Event Page Comment Tags - For those using the "Sound by Frame?" Plugin Parameter, this will cause the footstep sounds to trigger whenever the sprite changes to the listed frame(s) in order to match up the sound with the image of the sprite stepping on the ground. - This will override the setting found in the Plugin Parameters for this specific actor or event. - Replace 'x' with a number representing the frame. Frames start at 0 and increase by 1 going left to right. --- Smart Blink-Related Notetags--- <No Smart Blink> - Used for: Map Notetags - Prevents Smart Blink from being used at all on this map. --- <Smart Blink Non-Land Region: x>
<Smart Blink Non-Land Regions: x, x, x>
- Used for: Map Notetags
- Use this notetag to mark tiles on the map where Smart Blink cannot land.
- This is primarily used for things like rooftops, which if characters can
land on there, can blink onto.
- Replace 'x' with a number (0 to 255) representing the region ID used to
mark the non-landable tiles.
- Insert multiple numbers to mark more regions.
- This will override the region settings found in the Plugin Parameters for
this specific map.
- However, it will not override custom settings found in Smart Blink
Plugin Command.
- The Smart Blink Plugin Command's restrictions will be added onto these.
--- <Smart Blink Non-Land Terrain Tags: x>
<Smart Blink Non-Land Terrain Tags: x, x, x>
- Used for: Tileset Notetags
- Use this notetag to mark tiles on the map where Smart Blink cannot land.
- This is primarily used for things like rooftops, which if characters can
land on there, can blink onto.
- Replace 'x' with a number (0 to 7) representing the terrain tag ID used to
mark the non-landable tiles.
- Insert multiple numbers to mark more terrain tags.
- This will override the terrain tag settings found in the Plugin Parameters
for this specific map.
- However, it will not override custom settings found in Smart Blink
Plugin Command.
- The Smart Blink Plugin Command's restrictions will be added onto these.
--- <Smart Blink Non-Pass Region: x>
<Smart Blink Non-Pass Regions: x, x, x>
- Used for: Map Notetags
- Use this notetag to mark tiles on the map where Smart Blink cannot pass.
- This is primarily used for things like barriers, preventing the player
from being able to teleport past it or on it.
- Replace 'x' with a number (0 to 255) representing the region ID used to
mark the non-passable tiles.
- Insert multiple numbers to mark more regions.
- This will override the region settings found in the Plugin Parameters for
this specific map.
- However, it will not override custom settings found in Smart Blink
Plugin Command.
- The Smart Blink Plugin Command's restrictions will be added onto these.
--- <Smart Blink Non-Pass Terrain Tags: x>
<Smart Blink Non-Pass Terrain Tags: x, x, x>
- Used for: Tileset Notetags
- Use this notetag to mark tiles on the map where Smart Blink cannot land.
- This is primarily used for things like barriers, preventing the player
from being able to teleport past it or on it.
- Replace 'x' with a number (0 to 7) representing the terrain tag ID used to
mark the non-passable tiles.
- Insert multiple numbers to mark more terrain tags.
- This will override the terrain tag settings found in the Plugin Parameters
for this specific map.
- However, it will not override custom settings found in Smart Blink
Plugin Command.
- The Smart Blink Plugin Command's restrictions will be added onto these.
--- Smart Jump-Related Notetags--- <No Smart Jump> - Used for: Map Notetags - Prevents Smart Jump from being used at all on this map. --- <Smart Jump Non-Land Region: x>
<Smart Jump Non-Land Regions: x, x, x>
- Used for: Map Notetags
- Use this notetag to mark tiles on the map where Smart Jump cannot land.
- This is primarily used for things like rooftops, which if characters can
land on there, can jump onto.
- Replace 'x' with a number (0 to 255) representing the region ID used to
mark the non-landable tiles.
- Insert multiple numbers to mark more regions.
- This will override the region settings found in the Plugin Parameters for
this specific map.
- However, it will not override custom settings found in Smart Jump
Plugin Command.
- The Smart Jump Plugin Command's restrictions will be added onto these.
--- <Smart Jump Non-Land Terrain Tags: x>
<Smart Jump Non-Land Terrain Tags: x, x, x>
- Used for: Tileset Notetags
- Use this notetag to mark tiles on the map where Smart Jump cannot land.
- This is primarily used for things like rooftops, which if characters can
land on there, can jump onto.
- Replace 'x' with a number (0 to 7) representing the terrain tag ID used to
mark the non-landable tiles.
- Insert multiple numbers to mark more terrain tags.
- This will override the terrain tag settings found in the Plugin Parameters
for this specific map.
- However, it will not override custom settings found in Smart Jump
Plugin Command.
- The Smart Jump Plugin Command's restrictions will be added onto these.
--- <Smart Jump Non-Pass Region: x>
<Smart Jump Non-Pass Regions: x, x, x>
- Used for: Map Notetags
- Use this notetag to mark tiles on the map where Smart Jump cannot pass.
- This is primarily used for things like barriers, preventing the player
from being able to leap past it or on it.
- Replace 'x' with a number (0 to 255) representing the region ID used to
mark the non-passable tiles.
- Insert multiple numbers to mark more regions.
- This will override the region settings found in the Plugin Parameters for
this specific map.
- However, it will not override custom settings found in Smart Jump
Plugin Command.
- The Smart Jump Plugin Command's restrictions will be added onto these.
--- <Smart Jump Non-Pass Terrain Tags: x>
<Smart Jump Non-Pass Terrain Tags: x, x, x>
- Used for: Tileset Notetags
- Use this notetag to mark tiles on the map where Smart Jump cannot land.
- This is primarily used for things like barriers, preventing the player
from being able to leap past it or on it.
- Replace 'x' with a number (0 to 7) representing the terrain tag ID used to
mark the non-passable tiles.
- Insert multiple numbers to mark more terrain tags.
- This will override the terrain tag settings found in the Plugin Parameters
for this specific map.
- However, it will not override custom settings found in Smart Jump
Plugin Command.
- The Smart Jump Plugin Command's restrictions will be added onto these.
--- <Smart Jump Height-Based Regions: x, x>
<Smart Jump Height-Based Regions: x, x, x>
- Used for: Map Notetags
- Allows you to assign certain tiles to be marked as a specific height for
Smart Jump to interact with.
- Replace 'x' with a number (0 to 255) representing the region ID to use as
a height marker.
- Insert multiple numbers to mark more regions.
- Height-Based Region interactions work as follows:
- Players can jump from a height-based region to another height-based
region of the same or lower value as long as that region is listed, too.
- Regions listed: 10, 13, 15.
- ie. The player can jump from Region 15 to 15.
- ie. The player can jump from Region 15 to 13.
- ie. The player can jump from Region 15 to 10.
- ie. The player CANNOT jump from Region 13 to 15.
- ie. The player CANNOT jump from Region 10 to 13.
- ie. The player CANNOT jump from Region 10 to 15.
- The lowest value number in the list is considered a "ledge" and the
lowest possible level.
- Players can jump in and out of the lowest level regions into non-height
marked regions.
- If the player is jumping towards the up, left, right directions, they
cannot jump directly into a "ledge" region unless they are adjacent to
the marked tile. A distance greater than 1 tile apart cannot be and the
jump will be cut short.
- If the player is jumping upward towards a "ledge", the player will jump
directly onto the next available tile.
- If the player is jumping towards the left or right directions into a
"ledge" region, the player will "fall" a tile distance equal to the
difference from the region height they're jumping from.
- Regions listed: 10, 13, 15.
- If the player is on Region 15 and jumps into a ledge (10), the player
will drop 5 tiles downward.
- If the player is on Region 13 and jumps into a ledge (10), the player
will drop 3 tiles downward.
- If the player is jumping downward towards a "ledge", the player will
jump the full distance.
- Examples:
- <Smart Jump Height-Based Regions: 10, 13, 15>
- Region 10 will be considered the "ledge" region.
Keep in mind that despite the fact that there is Height-Based Region support
for Smart Jump, maps in RPG Maker MZ are still inherently 2D. Therefore, not
everything will look correct for every jump-related scenario involving
region heights. You may need to make adjustments to maps that work best for
the limited 2D nature of mapping in order to adhere to what Height-Based
Region support can handle.
--- <Smart Jump Non-Land> - Used for: Event Notetags or Event Page Comment Tags - Prevents the player from being able to land on this event. --- <Smart Jump Non-Pass> <Illegal Jump> - Used for: Event Notetags or Event Page Comment Tags - Prevents the player from being able to leap past this event or on it. --- Smart Rush-Related Notetags--- <No Smart Rush> - Used for: Map Notetags - Prevents Smart Rush from being used at all on this map. --- <Smart Rush Non-Crash Region: x> <Smart Rush Non-Crash Region: x, x, x> - Used for: Map Notetags - Prevents a screen shake crash effect when crashing into tiles marked by 'x' region(s) after using a Smart Rush. - This is primarily used for tiles such as water tiles so that it doesn't look like there's an invisible wall where the player is crashing into. - Replace 'x' with a number (0 to 255) representing the region ID used to mark the non-crashable tiles. - Insert multiple numbers to mark more regions. - This will override the region settings found in the Plugin Parameters for this specific map. --- <Smart Rush Non-Crash Terrain Tag: x> <Smart Rush Non-Crash Terrain Tag: x, x, x> - Used for: Tileset Notetags - Prevents a screen shake crash effect when crashing into tiles marked by 'x' terrain tag(s) after using a Smart Rush. - This is primarily used for tiles such as water tiles so that it doesn't look like there's an invisible wall where the player is crashing into. - Replace 'x' with a number (0 to 7) representing the terrain tag ID used to mark the non-crashable tiles. - Insert multiple numbers to mark more terrain tags. - This will override the region settings found in the Plugin Parameters for this specific tileset. --- Smooth Camera-Related Notetags--- <Force Smooth Camera> - Used for: Map Notetags - This forcefully enables Smooth Camera scrolling regardless of whatever settings are found in the Plugin Parameters for this particular map. - Plugin Command changes won't bypass this notetag either. - However, if the player turns off Smooth Camera scrolling in the options menu, then this setting will be turned off. --- <No Smooth Camera> - Used for: Map Notetags - This disables Smooth Camera scrolling regardless of whatever settings are found in the Plugin Parameters for this particular map. - Plugin Command changes won't bypass this notetag either. --- Multi-Layer HP Gauge VisuStella MZThe following are notetags that have been added through this plugin. These notetags will not work with your game if this plugin is OFF or not present. --- Enemy-Related Notetags--- <Show Multi-Layer HP Gauge> <Hide Multi-Layer HP Gauge> - Used for: Enemy Notetags - Determines if the enemy will have the Multi-Layer HP Gauge visible or not and bypasses the default setting found in the Plugin Parameters. - Keep in mind that using any of the other notetags found below will also prompt the Multi-Layer HP Gauge to 'Show'. This makes the 'Show' notetag a bit redundant but it is there for those who want extra clarity in their note boxes. --- <Multi-Layer HP Gauge Persist> <Multi-Layer HP Gauge Temporal> - Used for: Enemy Notetags - Determines if the Multi-Layer HP Gauge is persistant or temporal and will bypass the default settings found in the Plugin Parameters. - When 'Persist' is used, the Multi-Layer HP Gauge will stay visible even after the enemy tied to it has died in combat. - When 'Temporal' is used, the Multi-Layer HP Gauge will vanish after the enemy tied to it has died in combat, although it will reappear if it is revived later. - Also sets the visibility of the Multi-Layer HP Gauge to 'Show'. --- <Multi-Layer HP Gauge Layers: x> - Used for: Enemy Notetags - Sets the total number of layers used for the enemy as 'x' layers. - Replace 'x' with a number representing a number between 1 and 10 as the total number of layers used. - Also sets the visibility of the Multi-Layer HP Gauge to 'Show'. --- <Multi-Layer HP Gauge Face: filename, index> <Multi-Layer HP Gauge Graphic: filename, index> <Multi-Layer HP Gauge Face Graphic: filename, index> - Used for: Enemy Notetags - Changes the graphic used by the enemy to this face graphic. - Replace 'filename' with the name of the image file to pick from the game project's /img/faces/ folder. - Filenames are case sensitive. - Leave out the filename extension from the notetag. - Replace 'index' with a number representing the face graphic cell used. - Index values start at 0. - The notetag variants do the same thing. Which you choose to use is entirely up to personal preference. - Also sets the visibility of the Multi-Layer HP Gauge to 'Show'. --- <Multi-Layer HP Gauge BgColor: color1> <Multi-Layer HP Gauge BG Color: color1> <Multi-Layer HP Gauge Background Color: color1> <Multi-Layer HP Gauge BgColor: color1, color2> <Multi-Layer HP Gauge BG Color: color1, color2> <Multi-Layer HP Gauge Background Color: color1, color2> - Used for: Enemy Notetags - Adjusts the background color(s) used for the enemy graphic. - Replace 'color1' and/or 'color2' with either a number from 0 to 31 representing the text color or in the format of '#rrggbb' to custom pick a hex color. - If two colors are used, a vertical gradient will form. - The notetag variants do the same thing. Which you choose to use is entirely up to personal preference. - Also sets the visibility of the Multi-Layer HP Gauge to 'Show'. EXAMPLES: <Multi-Layer HP Gauge BgColor: 2> <Multi-Layer HP Gauge BgColor: #ff0000> <Multi-Layer HP Gauge BgColor: 2, 18> <Multi-Layer HP Gauge BgColor: #ff0000, #000000> --- <Multi-Layer HP Gauge Border Color: color> - Used for: Enemy Notetags - Adjusts the border color used for the enemy graphic. - Replace 'color' with either a number from 0 to 31 representing the text color or in the format of '#rrggbb' to custom pick a hex color. - Also sets the visibility of the Multi-Layer HP Gauge to 'Show'. EXAMPLES: <Multi-Layer HP Gauge Border Color: 2> <Multi-Layer HP Gauge Border Color: #ff0000> --- <Multi-Layer HP Gauge Border Size: x> <Multi-Layer HP Gauge Border Thick: x> <Multi-Layer HP Gauge Border Thickness: x> - Used for: Enemy Notetags - Determines the thickness of the color section of the border. - Replace 'x' with a number representing how thick the color section of the border is in pixels. - The notetag variants do the same thing. Which you choose to use is entirely up to personal preference. - Also sets the visibility of the Multi-Layer HP Gauge to 'Show'. --- New Game Plus VisuStella MZThe following are notetags that have been added through this plugin. These notetags will not work with your game if this plugin is OFF or not present. --- New Game+-Related Notetags--- <No New Game+ Carry Over> - Used for: Actor, Item, Weapon, Armor Notetags - This will prevent the item, weapon, or armor from being carried over to New Game+. If this is used on an actor, the actor will be in its default state as if a new game started. --- Proximity Compass VisuStella MZThe following are notetags that have been added through this plugin. These notetags will not work with your game if this plugin is OFF or not present. Some of these are comment tags. Comment tags are used for events to mark and affect individual event pages rather than the whole event. --- Map Notetags Tags--- <Hide Compass> - Used for: Map Notetags - Place this notetag inside maps where you don't want the compass to show. --- <Hide Minimap> - Used for: Map Notetags - Place this notetag inside maps where you don't want the minimap to show. - The compass, however, can show by itself. - However, if the compass does not show, neither will the minimap. --- <Minimap Image: filename> - Used for: Map Notetags - Place this notetag inside maps that you want to use custom minimaps for instead of the rendered passability map created by the plugin. - This image will appear in both the compass's minimap and the toggled large minimap. - This will remove any blend modes used by the large minimap to keep color consistency in line with the compass. - Replace 'filename' with a picture found within your game project's img/pictures/ folder. - Filenames are case sensitive. - Leave out the filename extension from the notetag. - If the compass does not show, neither will the minimap. --- <Explorable> - Used for: Map Notetags - Place this notetag inside maps that you want to be explorable. - The explorable portion will only appear with the toggled "large" minimap. - This has no effect on maps where the compass does not show. - This overrides the "Default Explorable?" Plugin Parameter settings. --- <Already Explored> - Used for: Map Notetags - Place this notetag inside maps that you want to be already explored. - The whole map will be visible from the getgo when viewing the "large" version of the minimap. - This has no effect on maps where the compass does not show. - This overrides the "Default Explorable?" Plugin Parameter settings. --- Event Notetags and Comment Tags--- <Compass Icon: x> - Used for: Event Notetags and Event Page Comment Tags - This will assign an icon to the event or the event's page. - Replace 'x' with a number representing the icon index you wish for this event or event page to appear as in the Proximity Compass. - If this is placed in a notetag, the effect will be present across all event pages used. - If this is placed inside a page's comment, the effect will only occur if that event page is currently active. --- <Compass Proximity: x> - Used for: Event Notetags and Event Page Comment Tags - This icon will only appear on the compass if the player is within range. - Replace 'x' with the number of tiles the player must be within range of this event or event page in order to appear in the Proximity Compass. - If this is placed in a notetag, the effect will be present across all event pages used. - If this is placed inside a page's comment, the effect will only occur if that event page is currently active. --- <Minimap Icon: x> - Used for: Event Notetags and Event Page Comment Tags - This icon will only appear if there is no designated compass icon AND will ONLY appear on the large minimap. - If <Compass Icon: x> is used, then <Compass Icon: x> will take priority. - This is primarily used to mark NPC locations. - This will override the setting found in the Plugin Parameters. - Minimap icons will appear a different size (by default smaller) than events with <Compass Icon: x>. --- <Hide Minimap Icon> - Used for: Event Notetags and Event Page Comment Tags - Makes it so that it will not show an icon while on the minimap. - If <Compass Icon: x> is used, then <Compass Icon: x> will take priority. - This is primarily used to hide event locations that would be marked by default due to the Plugin Parameters. - This will override the setting found in the Plugin Parameters. --- Proximity Messages VisuStella MZThe following are notetags that have been added through this plugin. These notetags will not work with your game if this plugin is OFF or not present. --- Proximity Message-Related Tags--- <Proximity Message> text text text text </Proximity Message> - Used for: Event Page Comment Tags - Displays 'text' in the event's Proximity Message text window. - Replace 'text' with the text you would like displayed. - Text codes allowed. --- <Proximity Message Range Type: Circle> <Proximity Message Range Type: Radius> <Proximity Message Range Type: Square> - Used for: Event Notetags and Event Page Comment Tags - Changes the proximity range type for the event's Proximity Message. - Circle - Be within circular range of event with event at center. - Radius - Have to be x tiles within range of event. - Square - Within a square range with event at the center. - If this is placed in a notetag, the effect will be present across all event pages used. - If this is placed inside a page's comment, the effect will only occur if that event page is currently active. - If none of these tags are used, use the settings found in the Plugin Parameters. --- <Proximity Message Max Range: x>
<Proximity Message Min Range: x>
- Used for: Event Notetags and Event Page Comment Tags
- Changes the maximum and minimum range for the Proximity Message to dislay.
- For max range variant, replace 'x' with a number representing the
maximum range. If the player is outside of this range, hide the
Proximity Message.
- For min range variant, replace 'x' with a number representing the
minimum range. If the player is within this range, hide the
Proximity Message.
- If this is placed in a notetag, the effect will be present across
all event pages used.
- If this is placed inside a page's comment, the effect will only occur
if that event page is currently active.
- If none of these tags are used, use the settings found in the
Plugin Parameters.
--- <Proximity Message Offsets: +x, +y> <Proximity Message Offsets: -x, -y> <Proximity Message Offsets: +x, -y> <Proximity Message Offsets: -x, +y> - Used for: Event Notetags and Event Page Comment Tags - Offsets the Proximity Message text window for this event by 'x' and 'y'. - Replace 'x' and 'y' with numbers representing how much to offset the window position by. - For 'x', lower numbers move left and higher numbers move right. - For 'y', lower numbers move up and higher numbers move down. - If this is placed in a notetag, the effect will be present across all event pages used. - If this is placed inside a page's comment, the effect will only occur if that event page is currently active. - If none of these tags are used, use the settings found in the Plugin Parameters. --- <Proximity Message Scale: x%> - Used for: Event Notetags and Event Page Comment Tags - Changes the size scaling of the Proximity Message window to 'x' percent. - Replace 'x' with a number representing the scaling percent. - If this is placed in a notetag, the effect will be present across all event pages used. - If this is placed inside a page's comment, the effect will only occur if that event page is currently active. - If none of these tags are used, use the settings found in the Plugin Parameters. --- <Proximity Message Tail Type: Bottom Left> <Proximity Message Tail Type: Bottom Right> <Proximity Message Tail Type: None> - Used for: Event Notetags and Event Page Comment Tags - Changes the speech tail type used for the Proximity Message text window. - If this is placed in a notetag, the effect will be present across all event pages used. - If this is placed inside a page's comment, the effect will only occur if that event page is currently active. - If none of these tags are used, use the settings found in the Plugin Parameters. --- <Proximity Message Tail X: x> - Used for: Event Notetags and Event Page Comment Tags - Moves the position of the speech tail to 'x'. - Replace 'x' with a number representing the x position of the Proximity Message text window. - If this is placed in a notetag, the effect will be present across all event pages used. - If this is placed inside a page's comment, the effect will only occur if that event page is currently active. - If not used, the speech tail will be centered. --- Quest Journal System VisuStella MZThe following are notetags that have been added through this plugin. These notetags will not work with your game if this plugin is OFF or not present. --- Action Tracking-Related Notetags--- <Variable id On Use: +x> <Variable id On Use: -x> - Used for: Skill, Item Notetags - Whenever any actor uses this specific skill or item, increase or decrease the target variable by a certain amount. - Replace 'id' with the Variable ID you wish to alter. - Replace 'x' with the increase or decrease in value for the variable. --- Enemy Tracking-Related Notetags--- <Variable id On Death: +x> <Variable id On Death: -x> - Used for: Enemy Notetags - Whenever this specific enemy dies, increase or decrease the target variable by a certain amount. - Replace 'id' with the Variable ID you wish to alter. - Replace 'x' with the increase or decrease in value for the variable. --- Item Tracking-Related Notetags--- <Variable id On Gain: +x> <Variable id On Gain: -x> - Used Item, Weapon, Armor Notetags - Whenever the party gains the specific item, weapon, or armor, increase or decrease the target variable by a certai amount. - Replace 'id' with the Variable ID you wish to alter. - Replace 'x' with the increase or decrease in value for the variable. --- <Variable id On Lose: +x> <Variable id On Lose: -x> - Used Item, Weapon, Armor Notetags - Whenever the party loses the specific item, weapon, or armor, increase or decrease the target variable by a certai amount. - Replace 'id' with the Variable ID you wish to alter. - Replace 'x' with the increase or decrease in value for the variable. --- <Track With Variable id> - Used Item, Weapon, Armor Notetags - Whenever there is a change made to the specific item, weapon, or armor, set the value of the target variable to the number of items owned. - Replace 'id' with the Variable ID you wish to alter. --- QTE and Trigger System VisuStella MZThe following are notetags that have been added through this plugin. These notetags will not work with your game if this plugin is OFF or not present. --- Trigger-Related Notetags--- <Toggle Trigger Common Event: x> <Toggle Trigger Common Events: x, x, x> - Used for: Switch Names - Whenever this Switch is turned ON or OFF, trigger the Common Event(s) 'x'. - This is a constantly recurring effect. - Replace 'x' with a number representing the ID of the Common Event(s) you wish to trigger. - Insert multiple 'x' values to trigger multiple at a time. - A triggered Common Event can only be repeated once per availability. Refer to the "Major Changes" section for more information. --- <Change Trigger Common Event: x> <Change Trigger Common Events: x, x, x> - Used for: Variable Names - Whenever this Variable changes its value, trigger the Common Event(s) 'x'. - This is a constantly recurring effect. - Replace 'x' with a number representing the ID of the Common Event(s) you wish to trigger. - Insert multiple 'x' values to trigger multiple at a time. - A triggered Common Event can only be repeated once per availability. Refer to the "Major Changes" section for more information. --- <Change Trigger Common Event: x> <Change Trigger Common Events: x, x, x> - Used for: Item, Weapon, and Armor Notetags - Whenever this item, weapon, or armor gains or loses an item (any amount), then trigger the Common Event(s) 'x'. - This is a constantly recurring effect. - Replace 'x' with a number representing the ID of the Common Event(s) you wish to trigger. - Insert multiple 'x' values to trigger multiple at a time. - A triggered Common Event can only be repeated once per availability. Refer to the "Major Changes" section for more information. --- <Trigger on Switch: x> <Trigger on Switches: x, x, x> - Used for: Common Event Names - Whenever Switch(es) 'x' changes ON/OFF, trigger this Common Event. - This is a constantly recurring effect. - Replace 'x' with a number representing the ID of the Switch(es) you wish to trigger upon them changing ON/OFF. - Insert multiple 'x' values to register multiple Switch IDs at once. - A triggered Common Event can only be repeated once per availability. Refer to the "Major Changes" section for more information. --- <Trigger on Variable: x> <Trigger on Variables: x, x, x> - Used for: Common Event Names - Whenever Variable(s) 'x' changes its value, trigger this Common Event. - This is a constantly recurring effect. - Replace 'x' with a number representing the ID of the variable(s) you wish to trigger upon them changing values. - Insert multiple 'x' values to register multiple Switch IDs at once. - A triggered Common Event can only be repeated once per availability. Refer to the "Major Changes" section for more information. --- Game Over-Related Notetags--- <Game Over Common Event: x> - Used for: Map Notetags - If the player gets a game over through a battle on this map, then Common Event 'x' will run in place of a regular Game Over. - Replace 'x' with a number representing the ID of the Common Event you wish to run as a Game Over Common Event. --- <Game Over Common Event: x> - Used for: Troop Name Tags - If the player gets a game over through a battle fighting this troop, then Common Event 'x' will run in place of a regular Game Over. - Replace 'x' with a number representing the ID of the Common Event you wish to run as a Game Over Common Event. --- Random Dungeon Maps VisuStella MZThe following are notetags that have been added through this plugin. These notetags will not work with your game if this plugin is OFF or not present. --- Map Cell-Related Name Tags--- <Cell: x>
<Cells: x, x, x>
<Cell Exit: x>
<Cell Exits: x, x, x>
- Used for: Map Names
- These are for map NAMES only and NOT their noteboxes.
- These tags will have zero effect inside the notebox of the map.
- You can use any of the variations. They all do the same thing.
- These tags let the plugin know which parts of the map are exit points for
the individual cell.
- Replace 'x' with any of the following letters to represent the exit points
for that individual map cell. Order does not matter:
- Cardinal Format
- N - North / Up Exit Point
- E - East / Right Exit Point
- S - South / Down Exit Point
- W - West / Left Exit Point
- Z - Zero / No Exit Points
- Directional Format
- L - Left / West Exit Point
- R - Right / Right Exit Point
- D - Down / South Exit Point
- U - Up / North Exit Point
- X - No / Zero Exit Points
- Alternatively, you can replace 'x' with a number to represent the
direction of the exit based off the NumPad direction. Symbols can be
used too for those who have easy access to symbols or prefer to use the
plugin's auto creator.
- Numpad Format
- 2 - South / Down Exit Point
- 4 - West / Left Exit Point
- 6 - East / Right Exit Point
- 8 - North / Up Exit Point
- 0 - No / Zero Exit Points
- Symbol Format
- ↓ - South / Down Exit Point
- ← - West / Left Exit Point
- → - East / Right Exit Point
- ↑ - North / Up Exit Point
- ◌ - No / Zero Exit Points
- The commas , are optional.
- These map with these name tags MUST be a child map of the map container
that draws information out of it.
- It can also be a child map of a child map of the map container.
Examples:
<Cell: S> <Cell: WE> <Cell: N,S,W>
<Cell: D> <Cell: LR> <Cell: U,D,L>
<Cell: 2> <Cell: 46> <Cell: 8,2,4>
Exits: Exits: Exits:
- South/Down - West/Left - North/Up
- ... - East/Right - South/Down
- ... - ... - West/Left
--- Pick a type column. Each of those cells in that column need to be present as a child map to the Container Map. Cardinal Direction Numpad Symbol <Cell: X> <Cell: Z> <Cell: 0> <Cell: ◌> <Cell: S> <Cell: D> <Cell: 2> <Cell: ↓> <Cell: W> <Cell: L> <Cell: 4> <Cell: →> <Cell: E> <Cell: R> <Cell: 6> <Cell: ←> <Cell: N> <Cell: U> <Cell: 8> <Cell: ↑> <Cell: SW> <Cell: DL> <Cell: 24> <Cell: ↓←> <Cell: SE> <Cell: DR> <Cell: 26> <Cell: ↓→> <Cell: SN> <Cell: DU> <Cell: 28> <Cell: ↓↑> <Cell: WE> <Cell: LR> <Cell: 46> <Cell: ←→> <Cell: WN> <Cell: LU> <Cell: 48> <Cell: ←↑> <Cell: EN> <Cell: RU> <Cell: 68> <Cell: →↑> <Cell: SWE> <Cell: DLR> <Cell: 246> <Cell: ↓←→> <Cell: SWN> <Cell: DLU> <Cell: 248> <Cell: ↓←↑> <Cell: SEN> <Cell: DRU> <Cell: 268> <Cell: ↓→↑> <Cell: WEN> <Cell: LRU> <Cell: 468> <Cell: ←→↑> <Cell: SWEN> <Cell: DLRU> <Cell: 2468> <Cell: ↓←→↑> Any duplicates will be counted as variations. --- <Switch: x> - Used for: Map Names - These are for map NAMES only and NOT their noteboxes. - This map cell variation can only appear if the switch 'x' is ON. - Replace 'x' with a number representing the ID of the Switch that must be ON in order for this map cell variation to appear. Possible Uses: - Player can invest in a shop. Shop cells become enabled and can appear. - Player angered certain monster factions. Monster nest cells can appear. --- <All Switches: x, x, x> - Used for: Map Names - These are for map NAMES only and NOT their noteboxes. - This map cell variation can only appear if ALL of the listed switches are in the ON position. - Replace 'x' with a number representing the ID(s) of the Switches that must be ON in order for this map cell variation to appear. Possible Uses: - Player can invest in a shop. Shop cells become enabled and can appear. - Player angered certain monster factions. Monster nest cells can appear. --- <Any Switches: x, x, x>
- Used for: Map Names
- These are for map NAMES only and NOT their noteboxes.
- This map cell variation can only appear if ANY of the listed switches
are in the ON position.
- This means as long as one of them are on, this map cell variation
becomes a valid variation.
- Replace 'x' with a number representing the ID(s) of the Switches that must
be ON in order for this map cell variation to be considered.
Possible Uses:
- Player can invest in a shop. Shop cells become enabled and can appear.
- Player angered certain monster factions. Monster nest cells can appear.
--- <Floor Only: x> <Floors Only: x, x, x> - Used for: Map Names - These are for map NAMES only and NOT their noteboxes. - This map cell variation can only appear if the current floor number matches the listed number. - Replace 'x' with a number representing the exact floor number that the cell variation can appear in. - This is used for floors that use numeric values. Possible Uses: - Specific event cell that only appears in a specific floor(s). - Specific layout that can be seen only in a specific floor(s). --- <Floor Name: x> <Floor Names: x, x, x> - Used for: Map Names - These are for map NAMES only and NOT their noteboxes. - This map cell variation can only appear if the current floor name matches the listed text. - Replace 'x' with a string representing the exact floor name that the cell variation can appear in. - This is used for floors that use strings instead of numbers. Possible Uses: - Specific event cell that only appears in a specific floor(s). - Specific layout that can be seen only in a specific floor(s). --- <Floor Multiple of: x>
<Floor Multiples of: x, x, x>
<Floor Multiple Buffer: y>
- Used for: Map Names
- These are for map NAMES only and NOT their noteboxes.
- This map cell variation can only appear if the current floor ID is a
multiple of any of the listed values.
- Replace 'x' with a number representing the floor multiples that can be
allowed for the cell variation.
- To offset the range of the multiples by a flat amount, use the
<Floor Multiple Buffer: y> notetag.
- Replace 'y' with a number representing the amount to offset the values by.
- For example, <Floor Multiple of: 3> with <Floor Multiple Buffer: 1> will
allow for floors 1, 4, 7, 10 to be acceptable.
Possible Uses:
- Certain cells that appear only in staggering formations.
- Cells that show certain patterns that only appear in certain floors.
--- <Floor Ends In: x> <Floor Ends In: x, x, x> - Used for: Map Names - These are for map NAMES only and NOT their noteboxes. - This map cell variation can only appear if the current floor number's last digit ends in x. - Replace 'x' with a number presenting an acceptable floor number to end in for this cell variation to appear. Possible Uses: - Designate a mini-boss room to appear in every floor that ends in 5. - Designate a big boss room to appear in every floor that ends in 0. --- <Unique> - Used for: Map Names - These are for map NAMES only and NOT their noteboxes. - This map cell variation can only appear once per floor layout when generating the floor. - There is an equal chance of other cell variations appearing. - If used with the Switch notetags, the Switch conditions must be met first. Possible Uses: - Healing fountain cells can appear and only at once per floor. - NPC gatherings can appear and only at once per floor. --- <Unique Priority> - Used for: Map Names - These are for map NAMES only and NOT their noteboxes. - This map cell variation can only appear once per floor layout when generating the floor. - This cell will appear first for this cell layout before other non-priority cell variations are considered. - If used with the Switch notetags, the Switch conditions must be met first. - If used with the Floor notetags, the Floor conditions must be met first. - <Unique Priority> cells will have priority than <Priority> cells. Possible Uses: - Healing fountain cells can appear and only at once per floor. - NPC gatherings can appear and only at once per floor. --- <Priority> - Used for: Map Names - These are for map NAMES only and NOT their noteboxes. - Makes these cells have priority if they are available. - If used with the Switch notetags, the Switch conditions must be met first. - If used with the Floor notetags, the Floor conditions must be met first. - If multiple cells have priorities with the same exit type, the plugin will select the priority cells at random. - <Unique Priority> cells will have priority than <Priority> cells. Possible Uses: - Make certain cell junction types appear on specific floors. - Player upgraded certain cell junctions to be more reinforced. --- Map Display Name-Related Tags--- <Floor> - Used for: Map Display Names - Replaces the <Floor> text with the floor number generated for the map. - The way the floor text appears can be changed in Plugin Parameters' General Settings. - Only works for Container Maps when used as Randomized Dungeon Maps. - Does NOT work for non-Randomized Dungeon Maps. - Purely randomized dungeons will start with Floor 1. Example: - Display Name: "Dark Dungeon <Floor>" - Can appear ingame as "Dark Dungeon F1" if the Floor ID is positive 1. - Can appear ingame as "Dark Dungeon B5" if the Floor ID is negative 5. - Can appear ingame as "Dark Dungeon [Rest]" if the Floor ID is "Rest" as a text value. --- Random Dungeon Event-Related Notetags--- <Spawn Region: x>
<Spawn Regions: x, x, x>
- Used for: Event Notetags (NOT Comment Tags)
- Used for: Container Map Events ONLY
- Determines which tiles marked by region(s) 'x' to spawn the event from the
Container Map upon the creation of the Random Dungeon Map. Each event is
only spawned once.
- This only applies upon the initial creation of the map. Any subsequent
visits to any saved randomized dungeon maps will yield the same
positions as the initial creation.
- This notetag only applies to the events found in the Container Map.
- It does NOT apply to those found in the Individual Cell Maps as they are
already in the position they need to be in.
- Replace 'x' with a number from 1 to 255 representing the Region ID to
reference where the event will spawn upon the creation of the randomized
dungeon map.
Possible Uses:
- Spawns events to where they need to go.
- Signs that appear in cross roads.
- Treasure chests that appear dead ends.
--- <Spawn on Player>
<Spawn over Player>
<Spawn under Player>
- Used for: Event Notetags (NOT Comment Tags)
- Used for: Container Map Events ONLY
- Whereever the player initially spawns, this event will also spawn on/under
the same tile as the player.
- This only applies upon the initial creation of the map. Any subsequent
visits to any saved randomized dungeon maps will yield the same
positions as the initial creation.
- The position won't change even if the player revisits the map and is
transferred to a different coordinate. The spawn effect only applies to
the very first initial spawning.
- This notetag only applies to the events found in the Container Map.
- It does NOT apply to those found in the Individual Cell Maps as they are
already in the position they need to be in.
Possible Uses:
- Stairs leading back.
- A teleportation circle event.
--- <Spawn Chance: x%>
- Used for: Event Notetags (NOT Comment Tags)
- Used for: BOTH Container Map Events and Individual Cell Map Events
- Makes the event have a x% chance to spawn within the newly created
randomized dungeon map for current and future visits.
- This only applies upon the initial creation of the map. Any subsequent
visits to any saved randomized dungeon map will retain the same result.
- The effect is the same when placed inside the noteboxes of events inside
the Container Map or the Individual Cell Maps.
- When used with the Container Map, pair it with the <Spawn Regions: x>
notetag or <Spawn on Player> notetag to determine where it goes.
- This does NOT mean the event will have a x% chance to spawn in each of
the regions. It only means that individual event has a x% chance to
spawn for the whole map.
- Replace 'x' with a number from 0 to 100 representing the percent chance
that the event will spawn upon the creation of the randomized dungeon map.
Possible Uses:
- Changing up the number of treasure chests that appear.
- Changing up the number of enemies that appear.
--- <Cell X Only: x, x, x>
<Cell Y Only: y, y, y>
- Used for: Event Notetags (NOT Comment Tags)
- Used for: BOTH Container Map Events and Individual Cell Map Events
- Makes the event spawn only on cells with matching X or Y values.
- Any subsequent visits to any saved randomized dungeon maps will retain
the same event positions as before.
- Replace 'x' with a number value from 1 and up where 1 is the left-most
cell column that the event can spawn in.
- Replace 'y' with a number value from 1 and up where 1 is the top-most
cell column that the event can spawn in.
- The effects between Container Maps and Individual Cell Maps are different.
- Container Map Events will use this data to reference which cells they
can potentially spawn in. Used with <Spawn Region: x> notetag.
- Individual Cell Map Events will use this data to only spawn if that cell
is used in the listed rows and/or columns.
Possible Uses:
- Making certain strong enemies that only appear at the middle of a map.
- Placing weaker enemies that border the edges of the map.
--- <Left Cell Col Only>
<Center Cell Col Only>
<Right Cell Col Only>
- Used for: Event Notetags (NOT Comment Tags)
- Used for: BOTH Container Map Events and Individual Cell Map Events
- Makes the event spawn only in the left-most, center, or right-most cell
columns for the randomized dungeon map map.
- Any subsequent visits to any saved randomized dungeon maps will retain
the same event positions as before.
- The effects between Container Maps and Individual Cell Maps are different.
- Container Map Events will use this data to reference which cell columns
they can potentially spawn in. Used with <Spawn Region: x> notetag.
- Individual Cell Map Events will use this data to only spawn if that cell
is in the left-most, center, or right-most cell column depending on the
notetag used.
- If the center notetag is used and there are an even number of columns,
then both of the center columns are potential spawn points.
Possible Uses:
- Determine the positions of stairs.
- Determine the positions of strong monsters.
--- <Top Cell Row Only>
<Middle Cell Row Only>
<Bottom Cell Row Only>
- Used for: Event Notetags (NOT Comment Tags)
- Used for: BOTH Container Map Events and Individual Cell Map Events
- Makes the event spawn only in the top-most, middle, or bottom-most cell
rows for the randomized dungeon map map.
- Any subsequent visits to any saved randomized dungeon maps will retain
the same event positions as before.
- The effects between Container Maps and Individual Cell Maps are different.
- Container Map Events will use this data to reference which cell rows
they can potentially spawn in. Used with <Spawn Region: x> notetag.
- Individual Cell Map Events will use this data to only spawn if that cell
is in the top-most, middle, or bottom-most cell row depending on the
notetag used.
- If the middle notetag is used and there are an even number of rows,
then both of the middle columns are potential spawn points.
Possible Uses:
- Determine the positions of stairs.
- Determine the positions of strong monsters.
--- <Left-Half Cell Col Only>
<Right-Half Cell Col Only>
- Used for: Event Notetags (NOT Comment Tags)
- Used for: BOTH Container Map Events and Individual Cell Map Events
- Makes the event spawn only in specific halves of the map (or corners if
a column and row notetag combination is used).
- The effects between Container Maps and Individual Cell Maps are different.
- Container Map Events will use this data to reference which cell columns
they can potentially spawn in. Used with <Spawn Region: x> notetag.
- Individual Map Cell Events will use this data to only spawn if the cell
they're normally in is a part of the specified halves.
- The horizontal notetags can be used with the vertical notetags.
- If a cell has an odd number for dimensions, the center is not
counted as a part of the half.
Possible Uses:
- Territorial monsters that spawn on different sides of the map.
- Making a corner of the map where all the NPC's spawn.
--- <Top-Half Cell Row Only>
<Bottom-Half Cell Row Only>
- Used for: Event Notetags (NOT Comment Tags)
- Used for: BOTH Container Map Events and Individual Cell Map Events
- Makes the event spawn only in specific halves of the map (or corners if
a column and row notetag combination is used).
- The effects between Container Maps and Individual Cell Maps are different.
- Container Map Events will use this data to reference which cell rows
they can potentially spawn in. Used with <Spawn Region: x> notetag.
- Individual Map Cell Events will use this data to only spawn if the cell
they're normally in is a part of the specified halves.
- The horizontal notetags can be used with the vertical notetags.
- If a cell has an odd number for dimensions, the middle is not
counted as a part of the half.
Possible Uses:
- Territorial monsters that spawn on different sides of the map.
- Making a corner of the map where all the NPC's spawn.
--- <Inner Cell Col Only>
<Inner Cell Row Only>
- Used for: Event Notetags (NOT Comment Tags)
- Used for: BOTH Container Map Events and Individual Cell Map Events
- Makes the event spawn in cells that are not on the border columns and/or
rows of the map.
- The effects between Container Maps and Individual Cell Maps are different.
- Container Map Events will use this data to reference which cell that
they can potentially spawn in. Used with <Spawn Region: x> notetag.
- Individual Map Cell Events will use this data to only spawn if the cell
they're normally in is within the inner cells of the map.
- Both notetags can be used together to limit away the outer border cells.
Possible Uses:
- Spawning larger monsters that prefer being towards the center of the map.
- Spawning structures that are located towards the center of the map.
--- <Outer Cell Col Only>
<Outer Cell Row Only>
- Used for: Event Notetags (NOT Comment Tags)
- Used for: BOTH Container Map Events and Individual Cell Map Events
- Makes the event spawn in cells that are on the border columns and/or rows
of the map.
- The effects between Container Maps and Individual Cell Maps are different.
- Container Map Events will use this data to reference which cell that
they can potentially spawn in. Used with <Spawn Region: x> notetag.
- Individual Map Cell Events will use this data to only spawn if the cell
they're normally in is within the outer cells of the map.
- Both notetags can be used together to limit to only corner cells.
Possible Uses:
- Spawning minerals that are found towards the outer edges of the map.
- Spawning windows or external light sources towards the edges of the map.
--- <Same Cell As Player>
- Used for: Event Notetags (NOT Comment Tags)
- Used for: BOTH Container Map Events and Individual Cell Map Events
- Restricts the event spawning to only appear in the cell that the player's
initial spawn point is in.
- Any subsequent visits to any saved randomized dungeon maps will retain
the same event positions as before, even if the player transfer into the
returning map at a different location.
- The effects between Container Maps and Individual Cell Maps are different.
- Container Map Events will use this data to transfer the event into the
cell the player initially spawns. Used with <Spawn Region: x> notetag.
- Individual Cell Map Events will use this data to only spawn if that cell
has the initial spawn point of the player.
Possible Uses:
- Spawn save points into the same initial starting cell as the player.
- Spawn NPC's into the same initial starting cell as the player.
--- <Not Cell With Player>
- Used for: Event Notetags (NOT Comment Tags)
- Used for: BOTH Container Map Events and Individual Cell Map Events
- Restricts the event spawning to only appear in cells that the player's
initial spawn point is NOT in.
- Any subsequent visits to any saved randomized dungeon maps will retain
the same event positions as before, even if the player transfer into the
returning map at a different location.
- The effects between Container Maps and Individual Cell Maps are different.
- Container Map Events will use this data to transfer the event into the
cell the player does NOT initially spawn. This is to be used with the
<Spawn Region: x> notetag.
- Individual Cell Map Events will use this data to only spawn if that cell
does NOT have the initial spawn point of the player.
Possible Uses:
- Spawn the floor exit into a different cell from the player's initial cell.
- Spawn mid-bosses into a different cell from the player's initial cell.
--- <Same Cell As Event: name>
<Same Cell As Event: name, name, name>
- Used for: Event Notetags (NOT Comment Tags)
- Used for: BOTH Container Map Events and Individual Cell Map Events
- Restricts the event spawning to only appear in the cell that the event(s)
initial spawn point is in.
- Any subsequent visits to any saved randomized dungeon maps will retain
the same event positions as before.
- If multiple names are used, then the plugin picks a cell with at least
one of the events present (not all of them).
- The effects between Container Maps and Individual Cell Maps are different.
- Container Map Events will use this data to transfer the event into the
cell the event(s) exist in. Used with <Spawn Region: x> notetag.
- Individual Cell Map Events will use this data to only spawn if that cell
has the specified event(s) spawned in.
- Events spawn in the order of their ID's from the Container Map first to
the Individual Cell Maps later.
- If an event requires another event to spawn and that required event's ID
is after the initial event's, the initial event will NOT spawn.
- Replace 'name' with the name text of the event(s) required.
- Separate multiple names with commas. Case is not sensitive.
Possible Uses:
- Spawn baby monsters with their mother monsters.
- Spawn NPC's to be in the same room with others as a gathering.
--- <Not Cell With Event: name>
- Used for: Event Notetags (NOT Comment Tags)
- Used for: BOTH Container Map Events and Individual Cell Map Events
- Restricts the event spawning to only appear in the cell that the event(s)
do NOT spawn in.
- Any subsequent visits to any saved randomized dungeon maps will retain
the same event positions as before.
- If multiple names are used, then the plugin picks potential cells where
NONE of the events are present in.
- The effects between Container Maps and Individual Cell Maps are different.
- Container Map Events will use this data to transfer the event into the
cell where none of the listed events are. Used with <Spawn Region: x>.
- Individual Cell Map Events will use this data to only spawn if that cell
does NOT have any of the listed events.
- Events spawn in the order of their ID's from the Container Map first to
the Individual Cell Maps later.
- Events can share a cell their notetags say to not share with if an event
with that name spawns AFTER the non-shared event based on ID order.
- Replace 'name' with the name text of the event(s) required.
- Separate multiple names with commas. Case is not sensitive.
Possible Uses:
- Spawn monsters in different rooms from NPC's.
- Spawn monsters in different rooms from the floor exit.
--- <Floor Only: x>
<Floors Only: x, x, x>
- Used for: Event Notetags (NOT Comment Tags)
- Used for: BOTH Container Map Events and Individual Cell Map Events
- This event can only appear if the current floor number matches the listed
number.
- The effects between Container Maps and Individual Cell Maps are different.
- Container Map Events will use this data to transfer the event into a
cell as long as the floor conditions are met. Other spawning methods
such as <Spawn Region: x> or <Spawn on Player> are still needed.
- Individual Cell Map Events will use this data to determine if it will
spawn as long as the floor conditions are met.
- Replace 'x' with a number representing the exact floor number that the
event can appear in.
- This is used for floors that use numeric values.
Possible Uses:
- Specific story NPC's that only appear at a certain floor(s).
- Specific cutscene trigger that only appears after traveling to floor x.
--- <Floor Name: x>
<Floor Names: x, x, x>
- Used for: Event Notetags (NOT Comment Tags)
- Used for: BOTH Container Map Events and Individual Cell Map Events
- This event can only appear if the current floor name matches the listed
text name.
- The effects between Container Maps and Individual Cell Maps are different.
- Container Map Events will use this data to transfer the event into a
cell as long as the floor conditions are met. Other spawning methods
such as <Spawn Region: x> or <Spawn on Player> are still needed.
- Individual Cell Map Events will use this data to determine if it will
spawn as long as the floor conditions are met.
- Replace 'x' with a string representing the exact floor name that the
event can appear in.
- This is used for floors that use strings instead of numbers.
Possible Uses:
- Specific story NPC's that only appear at a certain floor(s).
- Specific cutscene trigger that only appears after traveling to floor x.
--- <Floor Multiple of: x>
<Floor Multiples of: x, x, x>
<Floor Multiple Buffer: y>
- Used for: Event Notetags (NOT Comment Tags)
- Used for: BOTH Container Map Events and Individual Cell Map Events
- This event can only appear if the current floor ID is a multiple of any of
the listed values.
- The effects between Container Maps and Individual Cell Maps are different.
- Container Map Events will use this data to transfer the event into a
cell as long as the floor conditions are met. Other spawning methods
such as <Spawn Region: x> or <Spawn on Player> are still needed.
- Individual Cell Map Events will use this data to determine if it will
spawn as long as the floor conditions are met.
- Replace 'x' with a number representing the floor multiples that can be
allowed for the event to spawn in.
- To offset the range of the multiples by a flat amount, use the
<Floor Multiple Buffer: y> notetag.
- Replace 'y' with a number representing the amount to offset the values by.
- For example, <Floor Multiple of: 3> with <Floor Multiple Buffer: 1> will
allow for floors 1, 4, 7, 10 to be acceptable.
Possible Uses:
- Save Points that appear every 3 floors.
- Treasure chests that appear every 4 floors.
--- <Floor Ends In: x>
<Floor Ends In: x, x, x>
- Used for: Event Notetags (NOT Comment Tags)
- Used for: BOTH Container Map Events and Individual Cell Map Events
- This event can only appear if the current floor number's last digit ends
in x number.
- The effects between Container Maps and Individual Cell Maps are different.
- Container Map Events will use this data to transfer the event into a
cell as long as the floor conditions are met. Other spawning methods
such as <Spawn Region: x> or <Spawn on Player> are still needed.
- Individual Cell Map Events will use this data to determine if it will
spawn as long as the floor conditions are met.
- Replace 'x' with a number presenting an acceptable floor number to end in
for this event to spawn in.
Possible Uses:
- Special exit locations that appear on floors ending in 4 and 9.
- Unique merchant NPC's that appear on floors ending in 8.
--- Recruiting Board VisuStella MZThe following are notetags that have been added through this plugin. These notetags will not work with your game if this plugin is OFF or not present. --- Recruit-Related Notetags--- <Recruit Cost Per Level: x> - Used for: Actor Notetags - Adjusts how much this actor will cost to recruit by 'x' gold per level. - Replace 'x' with a number representing how much gold is needed per level in order for the player to recruit this actor. - If this notetag is not used, use the default setting found in the Plugin Parameters. --- <Item id Recruit Cost: x> <Item name Recruit Cost: x> <Weapon id Recruit Cost: x> <Weapon name Recruit Cost: x> <Armor id Recruit Cost: x> <Armor name Recruit Cost: x> <Variable id Recruit Cost: x> - Used for: Actor Notetags - Requires Imported.VisuMZ_2_MoreCurrencies! - Allows recruiting of actor using items, weapons, armors, or variables as extended currency. - Replace 'id' with a number representing the ID of the item, weapon, armor, or variable to be taken (when recruited). - Replace 'name' with the name of the item, weapon, armor, or variable to be taken (when recruited). - Replace 'x' with the quantity of the item, weapon, armor, or variable that will be taken (when recruited). - Insert multiple copies of these notetags to add more item, weapon, armor, or variable costs. --- <Fixed Recruit Cost: x> - Used for: Actor Notetags - Regardless of level, this actor can be recruited for 'x' gold. - Replace 'x' with a number representing the fixed gold cost needed for the player to recruit this actor. - This will take priority over <Recruit Cost Per Level: x>. --- Shop Batches VisuStella MZThe following are notetags that have been added through this plugin. These notetags will not work with your game if this plugin is OFF or not present. --- Batch-Related Notetags--- <Shop Batch>
listing
listing
listing
</Shop Batch>
- Used for: Item, Weapon, Armor Notetags
- Creates a list of items, weapons, and armors that the player will gain
when this batch object is bought.
- Proxy items, weapons, or armors cannot be listed and will be bypassed.
- This item, weapon, or armor cannot be sold if all of the listed items,
weapons, or armors are at max quantity within the party's inventory.
- The listed items will NOT utilize any buy/sell effects for the individual
listed items themselves.
- Replace 'listing' with any of the listing types found below:
Item id
Item name
Weapon id
Weapon name
Armor id
Armor name
Item id: quantity
Item name: quantity
Weapon id: quantity
Weapon name: quantity
Armor id: quantity
Armor name: quantity
- Replace 'id' with a number representing the ID of the item, weapon, or
armor that is to be listed.
- Replace 'name' with the associated item, weapon, or armor's name.
- Replace 'quantity' with a number representing the number of items,
weapons, or armors that will be acquired when the batch item is bought.
- If the variant without 'quantity' is used, quantity will default to 1.
Examples:
---
<Shop Batch>
Item Potion: 10
Item Super Potion: 5
Weapon Short Sword: 3
Weapon Long Sword: 2
Armor Linen Clothing: 4
Armor Cloth Armor: 3
</Shop Batch>
---
<Shop Batch>
Item 7: 10
Item 8: 5
Weapon 1: 3
Weapon 2: 2
Armor 2: 4
Armor 8: 3
</Shop Batch>
---
--- Shop Common Events VisuStella MZThe following are notetags that have been added through this plugin. These notetags will not work with your game if this plugin is OFF or not present. --- Shop Common Event-Related Notetags--- <Once Buy Common Event: id> <Repeat Buy Common Event: id> - Used for: Item, Weapon, Armor Notetags - This will cause a specific Common Event to launch when bought. - Replace 'id' with a number representing the ID of the Common Event that you wish to launch upon this item being bought. - The "Once" notetag variant will only occur once when bought. - Any subsequent purchases of the item will not launch the Common Event. - The "Repeat" notetag variant will occur repeatedly when bought. - If both "Once" and "Repeat" notetags are present in the item, then the "Once" variant will take priority first. Any subsequent purchases will go to the "Repeat" variant. - Any switch requirement notetags need to be met in order for either notetag to have any effect. - Use the Plugin Command "Return: To Last Shop" to return back to the last shop scene. --- <Once Sell Common Event: id> <Repeat Sell Common Event: id> - Used for: Item, Weapon, Armor Notetags - This will cause a specific Common Event to launch when sold. - Replace 'id' with a number representing the ID of the Common Event that you wish to launch upon this item being sold. - The "Once" notetag variant will only occur once when sold. - Any subsequent sellings of the item will not launch the Common Event. - The "Repeat" notetag variant will occur repeatedly when sold. - If both "Once" and "Repeat" notetags are present in the item, then the "Once" variant will take priority first. Any subsequent sellings will go to the "Repeat" variant. - Any switch requirement notetags need to be met in order for either notetag to have any effect. - Use the Plugin Command "Return: To Last Shop" to return back to the last shop scene. --- Requirement Switch-Related Notetags--- <Once Buy Common Event Switch: id> <Once Buy Common Event All Switches: id, id, id> <Once Buy Common Event Any Switches: id, id, id> <Repeat Buy Common Event Switch: id> <Repeat Buy Common Event All Switches: id, id, id> <Repeat Buy Common Event Any Switches: id, id, id> - Used for: Item, Weapon, Armor Notetags - Requires the respective Buy Common Events to have these Switches enabled in the "ON" position in order for them to launch. - "Once" variant will only affect the "Once" notetag buy variants. - "Repeat" variant will only affect the "Repeat" notetag buy variants. - The "All" variant will require all listed Switch ID's to be "ON". - The "Any" variant will require only one listed Switch ID to be "ON". - Replace 'id' with a number representing the Switch ID that needs to be in the "ON" position for the requirement to be met. - Insert multiple 'id' to require more Switch ID's. --- <Once Sell Common Event Switch: id> <Once Sell Common Event All Switches: id, id, id> <Once Sell Common Event Any Switches: id, id, id> <Repeat Sell Common Event Switch: id> <Repeat Sell Common Event All Switches: id, id, id> <Repeat Sell Common Event Any Switches: id, id, id> - Used for: Item, Weapon, Armor Notetags - Requires the respective Sell Common Events to have these Switches enabled in the "ON" position in order for them to launch. - "Once" variant will only affect the "Once" notetag sell variants. - "Repeat" variant will only affect the "Repeat" notetag sell variants. - The "All" variant will require all listed Switch ID's to be "ON". - The "Any" variant will require only one listed Switch ID to be "ON". - Replace 'id' with a number representing the Switch ID that needs to be in the "ON" position for the requirement to be met. - Insert multiple 'id' to require more Switch ID's. --- Shop Listing Unlock VisuStella MZThe following are notetags that have been added through this plugin. These notetags will not work with your game if this plugin is OFF or not present. --- Shop Unlock-Related Notetags--- <Shop Unlock Requirements>
requirement
requirement
requirement
</Shop Unlock Requirements>
- Used for: Item, Weapon, Armor Notetags
- Creates a list of requirements before the listed item, weapon, or armor
will appear in the shop.
- These items still have to be listed normally inside of "Shop Processing"
event. They just don't become available until the unlock requirements
have been met.
- Replace 'requirement' with any of the requirement types found below.
Buy Item id: quantity
Buy Item name: quantity
Buy Weapon id: quantity
Buy Weapon name: quantity
Buy Armor id: quantity
Buy Armor name: quantity
Buy Gold: quantity
Sell Item id: quantity
Sell Item name: quantity
Sell Weapon id: quantity
Sell Weapon name: quantity
Sell Armor id: quantity
Sell Armor name: quantity
Sell Gold: quantity
- Replace 'id' with a number representing the ID of the item, weapon, or
armor that is required to be bought or sold.
- Replace 'name' with the associated item, weapon, or armor's name.
- Replace 'quantity' with a number representing the number of items,
weapons, or armors bought or sold.
- For gold, "Buy Gold" refers to the amount of gold spent when buying
items of any sort. "Sell Gold" refers to the amount of gold earned after
selling items of any sort.
- Insert multiple lines to add more shop unlock requirements.
Examples:
---
<Shop Unlock Requirements>
Buy Item Potion: 5
Buy Gold: 2000
</Shop Unlock Requirements>
- This makes the item with this notetag require at least 5 Potions to be
bought and at least 2000 gold has to be spent inside any shop for this
item to become unlocked for the player to purchase.
---
<Shop Unlock Requirements>
Sell Item Tiger Fang: 10
Sell Item Tiger Claw: 5
</Shop Unlock Requirements>
- This makes the item with this notetag require at least 10 Tiger Fangs
and at least 5 Tiger Claws to be sold to any shop before this item
becomes unlocked for the player to purchase.
---
--- <Shop Unlock Visible: Always> <Shop Unlock Visible: Progress> <Shop Unlock Visible: Never> - Used for: Item, Weapon, Armor Notetags - Requires <Shop Unlock Requirements> notetag present, too. - An item, weapon, or armor with this notetag will change the shop listing unlock visibility requirements to something else. - Always - Always show unlockable items regardless of progress. - Progress - Show unlockable items as long as there is progress. - Never - Don't show items until fully unlocked. - If this notetag is not used, refer to the default ruling set up in the Plugin Parameters. --- Skill Containers VisuStella MZThe following are notetags that have been added through this plugin. These notetags will not work with your game if this plugin is OFF or not present. --- Skill Container-Related Notetags--- <Known Skill List: id> <Known Skills List: id, id, id> <Known Skill List: name> <Known Skills List: name, name, name> <Known Skills List: id To id> - Used for: Skill Notetags - Turns the skill into a skill container, accessible to actors and players. - Replace 'id' with a number representing the ID of the skill you wish to add to the skill container. - Replace 'name' with the name of the skill you wish to add to the skill container. - Use the 'id To id' version to get a range of skills to add to the list. - This will ignore any skills with no names or have ----- in their name. - These skills require the actor to have learned the skill or to have access to the skill - Insert multiple copies of the notetag to add more. - Skill Containers cannot be used as Single Skill Commands for the VisuMZ Battle Core's Actor Command Window (just use a Skill Type instead). - Skill Containers can be stacked inside one another. Examples: <Known Skills List: 51, 52, 53> <Known Skills List: Heal I, Heal II, Heal III> <Known Skills List: 51 To 53> --- <Force Skill List: id> <Force Skills List: id, id, id> <Force Skill List: name> <Force Skills List: name, name, name> <Force Skills List: id To id> - Used for: Skill Notetags - Turns the skill into a skill container, accessible to actors and players. - Replace 'id' with a number representing the ID of the skill you wish to add to the skill container. - Replace 'name' with the name of the skill you wish to add to the skill container. - Use the 'id To id' version to get a range of skills to add to the list. - This will ignore any skills with no names or have ----- in their name. - These skills do NOT require the actor to have learned the skill. These listed skills will always be accessible. - Insert multiple copies of the notetag to add more. - Skill Containers cannot be used as Single Skill Commands for the VisuMZ Battle Core's Actor Command Window (just use a Skill Type instead). - Skill Containers can be stacked inside one another. Examples: <Force Skills List: 51, 52, 53> <Force Skills List: Heal I, Heal II, Heal III> <Force Skills List: 51 To 53> --- Skill Cooldowns VisuStella MZThe following are notetags that have been added through this plugin. These notetags will not work with your game if this plugin is OFF or not present. Skill-Only NotetagsThe following notetags are used for skills and are related to setting the primary uses of Cooldowns and Warmups. --- <Bypass Cooldowns> <Bypass Warmups> - Used for: Skill Notetags - Lets the skill bypass cooldowns and/or warmups. --- <Cooldown: x> - Used for: Skill Notetags - The skill will gain a cooldown upon usage. - Replace 'x' with the number of turns to set the cooldown to. --- <Skill id Cooldown: x> <Skill name Cooldown: x> - Used for: Skill Notetags - The skill will cause listed skills to gain a cooldown upon usage. - Replace 'x' with the number of turns to set the cooldown to. - Replace 'id' with the ID of the skill found in Database => Skills. - Replace 'name' with the name of the skill found in Database => Skills. --- <Stype id Cooldown: x> <Stype name Cooldown: x> - Used for: Skill Notetags - The skill will cause all skills with the skill type to gain a cooldown upon usage. - Replace 'x' with the number of turns to set the cooldown to. - Replace 'id' with the ID of the skill type found in Database => Types. - Replace 'name' with the name of the skill type found in Database => Types. --- <Global Cooldown: x> - Used for: Skill Notetags - The skill will cause all skills to gain a cooldown upon usage. - Replace 'x' with the number of turns to set the cooldown to. --- <Warmup: x> - Used for: Skill Notetags - The skill will gain a warmup upon the start of battle. - Replace 'x' with the number of turns to set the warmup to. --- JavaScript Notetags: Skill-OnlyThe following are notetags made for users with JavaScript knowledge to give skills dynamic cooldown or warmup durations. --- <JS Cooldown> code code turns = code </JS Cooldown> - Used for: Skill Notetags - Replace 'code' with JavaScript code used to determine the base cooldown for this skill. - The 'user' variable refers to the user about to perform the skill. - The 'skill' variable refers to the skill being used. - The 'turns' variable refers to the finalized cooldown value. --- <JS On Cooldown Update> code code code </JS On Cooldown Update> - Used for: Skill Notetags - Replace 'code' with JavaScript code to perform various actions whenever the skill's cooldown updates. - The 'user' variable refers to the user about to perform the skill. - The 'skill' variable refers to the skill being used. - The 'turns' variable refers to the finalized cooldown value. --- <JS On Cooldown Ready> code code code </JS On Cooldown Ready> - Used for: Skill Notetags - Replace 'code' with JavaScript code to perform various actions whenever the skill's cooldown hits 0 and becomes ready. - The 'user' variable refers to the user about to perform the skill. - The 'skill' variable refers to the skill being used. --- <JS Warmup> code code turns = code </JS Warmup> - Used for: Skill Notetags - Replace 'code' with JavaScript code used to determine the base warmup for this skill. - The 'user' variable refers to the user about to perform the skill. - The 'skill' variable refers to the skill being used. - The 'turns' variable refers to the finalized warmup value. --- <JS On Warmup Update> code code code </JS On Warmup Update> - Used for: Skill Notetags - Replace 'code' with JavaScript code to perform various actions whenever the skill's warmup updates. - The 'user' variable refers to the user about to perform the skill. - The 'skill' variable refers to the skill being used. - The 'turns' variable refers to the finalized warmup value. --- <JS On Warmup Ready> code code code </JS On Warmup Ready> - Used for: Skill Notetags - Replace 'code' with JavaScript code to perform various actions whenever the skill's warmup hits 0 and becomes ready. - The 'user' variable refers to the user about to perform the skill. - The 'skill' variable refers to the skill being used. --- Cooldown/Warmup Notetag TraitsThese Notetag Traits help modify the finalized value of a cooldown/warmup. The final cooldown/warmup duration is calculated by the following formula: (base + plus) * rate + flat The base value is the amount calculated through the <Cooldown: x> and <Warmup: x> notetags found in the section above. --- <Skill id Cooldown Plus: +x> <Skill id Cooldown Plus: -x> <Skill name Cooldown Plus: +x> <Skill name Cooldown Plus: -x> - Used for: Actor, Class, Item, Weapon, Armor, Enemy, State Notetags - Affects specific cooldown changes towards this specific skill. - Replace 'x' with the numeric value to change duration by. - Replace 'id' with the ID of the skill found in Database => Skills. - Replace 'name' with the name of the skill found in Database => Skills. --- <Skill id Cooldown Rate: x%> <Skill id Cooldown Rate: x.x> <Skill name Cooldown Rate: x%> <Skill name Cooldown Rate: x.x> - Used for: Actor, Class, Item, Weapon, Armor, Enemy, State Notetags - Affects specific cooldown changes towards this specific skill. - Replace 'x' with the percentile value to change duration by. - Replace 'x.x' with the float value to change duration by. - Replace 'id' with the ID of the skill found in Database => Skills. - Replace 'name' with the name of the skill found in Database => Skills. --- <Skill id Cooldown Flat: +x> <Skill id Cooldown Flat: -x> <Skill name Cooldown Flat: +x> <Skill name Cooldown Flat: -x> - Used for: Actor, Class, Item, Weapon, Armor, Enemy, State Notetags - Affects specific cooldown changes towards this specific skill. - Replace 'x' with the numeric value to change duration by. - Replace 'id' with the ID of the skill found in Database => Skills. - Replace 'name' with the name of the skill found in Database => Skills. --- <Stype id Cooldown Plus: +x> <Stype id Cooldown Plus: -x> <Stype name Cooldown Plus: +x> <Stype name Cooldown Plus: -x> - Used for: Actor, Class, Item, Weapon, Armor, Enemy, State Notetags - Affects specific cooldown changes towards skills with this skill type. - Replace 'x' with the numeric value to change duration by. - Replace 'id' with the ID of the skill type found in Database => Types. - Replace 'name' with the name of the skill type found in Database => Types. --- <Stype id Cooldown Rate: x%> <Stype id Cooldown Rate: x.x> <Stype name Cooldown Rate: x%> <Stype name Cooldown Rate: x.x> - Used for: Actor, Class, Item, Weapon, Armor, Enemy, State Notetags - Affects specific cooldown changes towards skills with this skill type. - Replace 'x' with the percentile value to change duration by. - Replace 'x.x' with the float value to change duration by. - Replace 'id' with the ID of the skill type found in Database => Types. - Replace 'name' with the name of the skill type found in Database => Types. --- <Stype id Cooldown Flat: +x> <Stype id Cooldown Flat: -x> <Stype name Cooldown Flat: +x> <Stype name Cooldown Flat: -x> - Used for: Actor, Class, Item, Weapon, Armor, Enemy, State Notetags - Affects specific cooldown changes towards skills with this skill type. - Replace 'x' with the numeric value to change duration by. - Replace 'id' with the ID of the skill type found in Database => Types. - Replace 'name' with the name of the skill type found in Database => Types. --- <Global Cooldown Plus: +x> <Global Cooldown Plus: -x> - Used for: Actor, Class, Item, Weapon, Armor, Enemy, State Notetags - Affects specific cooldown changes towards all skills. - Replace 'x' with the numeric value to change duration by. --- <Global Cooldown Rate: x%> <Global Cooldown Rate: x.x> - Used for: Actor, Class, Item, Weapon, Armor, Enemy, State Notetags - Affects specific cooldown changes towards all skills. - Replace 'x' with the percentile value to change duration by. - Replace 'x.x' with the float value to change duration by. --- <Global Cooldown Flat: +x> <Global Cooldown Flat: -x> - Used for: Actor, Class, Item, Weapon, Armor, Enemy, State Notetags - Affects specific cooldown changes towards all skills. - Replace 'x' with the numeric value to change duration by. --- <Skill id Warmup Plus: +x> <Skill id Warmup Plus: -x> <Skill name Warmup Plus: +x> <Skill name Warmup Plus: -x> - Used for: Actor, Class, Item, Weapon, Armor, Enemy, State Notetags - Affects specific warmup changes towards this specific skill. - Replace 'x' with the numeric value to change duration by. - Replace 'id' with the ID of the skill found in Database => Skills. - Replace 'name' with the name of the skill found in Database => Skills. --- <Skill id Warmup Rate: x%> <Skill id Warmup Rate: x.x> <Skill name Warmup Rate: x%> <Skill name Warmup Rate: x.x> - Used for: Actor, Class, Item, Weapon, Armor, Enemy, State Notetags - Affects specific warmup changes towards this specific skill. - Replace 'x' with the percentile value to change duration by. - Replace 'x.x' with the float value to change duration by. - Replace 'id' with the ID of the skill found in Database => Skills. - Replace 'name' with the name of the skill found in Database => Skills. --- <Skill id Warmup Flat: +x> <Skill id Warmup Flat: -x> <Skill name Warmup Flat: +x> <Skill name Warmup Flat: -x> - Used for: Actor, Class, Item, Weapon, Armor, Enemy, State Notetags - Affects specific warmup changes towards this specific skill. - Replace 'x' with the numeric value to change duration by. - Replace 'id' with the ID of the skill found in Database => Skills. - Replace 'name' with the name of the skill found in Database => Skills. --- <Stype id Warmup Plus: +x> <Stype id Warmup Plus: -x> <Stype name Warmup Plus: +x> <Stype name Warmup Plus: -x> - Used for: Actor, Class, Item, Weapon, Armor, Enemy, State Notetags - Affects specific warmup changes towards skills with this skill type. - Replace 'x' with the numeric value to change duration by. - Replace 'id' with the ID of the skill type found in Database => Types. - Replace 'name' with the name of the skill type found in Database => Types. --- <Stype id Warmup Rate: x%> <Stype id Warmup Rate: x.x> <Stype name Warmup Rate: x%> <Stype name Warmup Rate: x.x> - Used for: Actor, Class, Item, Weapon, Armor, Enemy, State Notetags - Affects specific warmup changes towards skills with this skill type. - Replace 'x' with the percentile value to change duration by. - Replace 'x.x' with the float value to change duration by. - Replace 'id' with the ID of the skill type found in Database => Types. - Replace 'name' with the name of the skill type found in Database => Types. --- <Stype id Warmup Flat: +x> <Stype id Warmup Flat: -x> <Stype name Warmup Flat: +x> <Stype name Warmup Flat: -x> - Used for: Actor, Class, Item, Weapon, Armor, Enemy, State Notetags - Affects specific warmup changes towards skills with this skill type. - Replace 'x' with the numeric value to change duration by. - Replace 'id' with the ID of the skill type found in Database => Types. - Replace 'name' with the name of the skill type found in Database => Types. --- <Global Warmup Plus: +x> <Global Warmup Plus: -x> - Used for: Actor, Class, Item, Weapon, Armor, Enemy, State Notetags - Affects specific warmup changes towards all skills. - Replace 'x' with the numeric value to change duration by. --- <Global Warmup Rate: x%> <Global Warmup Rate: x.x> - Used for: Actor, Class, Item, Weapon, Armor, Enemy, State Notetags - Affects specific warmup changes towards all skills. - Replace 'x' with the percentile value to change duration by. - Replace 'x.x' with the float value to change duration by. --- <Global Warmup Flat: +x> <Global Warmup Flat: -x> - Used for: Actor, Class, Item, Weapon, Armor, Enemy, State Notetags - Affects specific warmup changes towards all skills. - Replace 'x' with the numeric value to change duration by. --- Cooldown/Warmup Notetag ActionsThe following notetags are actively altering effects that target cooldowns and/or warmups. Cooldown effects may be applied at any moment through these while warmup effects will only affect skills on warmup currently. --- <Clear User Cooldowns> <Clear Target Cooldowns> - Used for: Skill, Item Notetags - Clears all cooldowns for the user/target. --- <Clear User Warmups> <Clear Target Warmups> - Used for: Skill, Item Notetags - Clears all warmups for the user/target. --- <User Skill id Cooldown: +x> <User Skill id Cooldown: -x> <User Skill name Cooldown: +x> <User Skill name Cooldown: -x> <Target Skill id Cooldown: +x> <Target Skill id Cooldown: -x> <Target Skill name Cooldown: +x> <Target Skill name Cooldown: -x> - Used for: Skill, Item Notetags - Alters the user/target's cooldown duration for this specific skill. - Replace 'x' with the amount to change the duration by. - Replace 'id' with the ID of the skill found in Database => Skills. - Replace 'name' with the name of the skill found in Database => Skills. --- <User Stype id Cooldown: +x> <User Stype id Cooldown: -x> <User Stype name Cooldown: +x> <User Stype name Cooldown: -x> <Target Stype id Cooldown: +x> <Target Stype id Cooldown: -x> <Target Stype name Cooldown: +x> <Target Stype name Cooldown: -x> - Used for: Skill, Item Notetags - Alters the user/target's cooldown duration for all skills with this type. - Replace 'x' with the amount to change the duration by. - Replace 'id' with the ID of the skill type found in Database => Types. - Replace 'name' with the name of the skill type found in Database => Types. --- <User Global Cooldown: +x> <User Global Cooldown: -x> <Target Global Cooldown: +x> <Target Global Cooldown: -x> - Used for: Skill, Item Notetags - Alters the user/target's cooldown duration for all skills. - Replace 'x' with the amount to change the duration by. --- <User Skill id Warmup: +x> <User Skill id Warmup: -x> <User Skill name Warmup: +x> <User Skill name Warmup: -x> <Target Skill id Warmup: +x> <Target Skill id Warmup: -x> <Target Skill name Warmup: +x> <Target Skill name Warmup: -x> - Used for: Skill, Item Notetags - Alters the user/target's warmup duration for this specific skill. - Replace 'x' with the amount to change the duration by. - Replace 'id' with the ID of the skill found in Database => Skills. - Replace 'name' with the name of the skill found in Database => Skills. - NOTE: Warmup changes only apply to skills that are still in warmup. --- <User Stype id Warmup: +x> <User Stype id Warmup: -x> <User Stype name Warmup: +x> <User Stype name Warmup: -x> <Target Stype id Warmup: +x> <Target Stype id Warmup: -x> <Target Stype name Warmup: +x> <Target Stype name Warmup: -x> - Used for: Skill, Item Notetags - Alters the user/target's warmup duration for all skills with this type. - Replace 'x' with the amount to change the duration by. - Replace 'id' with the ID of the skill type found in Database => Types. - Replace 'name' with the name of the skill type found in Database => Types. - NOTE: Warmup changes only apply to skills that are still in warmup. --- <User Global Warmup: +x> <User Global Warmup: -x> <Target Global Warmup: +x> <Target Global Warmup: -x> - Used for: Skill, Item Notetags - Alters the user/target's warmup duration for all skills. - Replace 'x' with the amount to change the duration by. - NOTE: Warmup changes only apply to skills that are still in warmup. --- Skill Learn System VisuStella MZThe following are notetags that have been added through this plugin. These notetags will not work with your game if this plugin is OFF or not present. --- Ability Points-Related Notetags--- <Starting AP: x> - Used for: Actor Notetags - Determines the amount of Ability Points the actor starts with in his/her starting class. - Replace 'x' with a numeric value representing the amount of Ability Points to start out with. --- <Class id Starting AP: x> <Class name Starting AP: x> - Used for: Actor Notetags - Determines the amount of Ability Points the actor starts with in a specific class if Ability Points aren't shared across all classes. - Replace 'x' with a numeric value representing the amount of Ability Points to start out with. - Replace 'id' with the ID of the class to set starting Ability Points for. - Replace 'name' with the name of the class to set starting Ability Points for. --- <AP Gain: x> <User AP Gain: x> - Used for: Skill, Item Notetags - When this skill/item is used in battle, the user will acquire 'x' amount of Ability Points. - Replace 'x' with a number representing the amount of Ability Points for the user to earn upon usage. - This effect will trigger each time per "hit". - This effect will take over the "Per Action Hit" Ability Points gain from the Plugin Parameters. --- <Target AP Gain: x> - Used for: Skill, Item Notetags - When this skill/item is used in battle, the target will acquire 'x' amount of Ability Points. - Replace 'x' with a number representing the amount of Ability Points for the target to earn upon usage. - This effect will trigger each time per "hit". --- <AP: x> - Used for: Enemy Notetags - Determines the amount of Ability Points the enemy will give the player's party upon being defeated. - Replace 'x' with a number representing the amount of Ability Points to grant the player's party each. - This effect will take over the "Per Enemy" Ability Points gain from the Plugin Parameters. --- <AP Rate: x%> - Used for: Actor, Class, Weapon, Armor, State Notetags - Increases the amount of Ability Points the affected battler will gain by a percentile value. - Replace 'x' with a percentage number representing the amount of Ability Points that will be acquired. - This stacks multiplicatively with each other. - This does not apply when Ability Points are directly added, lost, or set. --- Skill Points-Related Notetags--- <Starting SP: x> - Used for: Actor Notetags - Determines the amount of Skill Points the actor starts with in his/her starting class. - Replace 'x' with a numeric value representing the amount of Skill Points to start out with. --- <Class id Starting SP: x> <Class name Starting SP: x> - Used for: Actor Notetags - Determines the amount of Skill Points the actor starts with in a specific class if Skill Points aren't shared across all classes. - Replace 'x' with a numeric value representing the amount of Skill Points to start out with. - Replace 'id' with the ID of the class to set starting Skill Points for. - Replace 'name' with the name of the class to set starting Skill Points for. --- <SP Gain: x> <User SP Gain: x> - Used for: Skill, Item Notetags - When this skill/item is used in battle, the user will acquire 'x' amount of Skill Points. - Replace 'x' with a number representing the amount of Skill Points for the user to earn upon usage. - This effect will trigger each time per "hit". - This effect will take over the "Per Action Hit" Skill Points gain from the Plugin Parameters. --- <Target SP Gain: x> - Used for: Skill, Item Notetags - When this skill/item is used in battle, the target will acquire 'x' amount of Skill Points. - Replace 'x' with a number representing the amount of Skill Points for the target to earn upon usage. - This effect will trigger each time per "hit". --- <SP: x> - Used for: Enemy Notetags - Determines the amount of Skill Points the enemy will give the player's party upon being defeated. - Replace 'x' with a number representing the amount of Skill Points to grant the player's party each. - This effect will take over the "Per Enemy" Skill Points gain from the Plugin Parameters. --- <SP Rate: x%> - Used for: Actor, Class, Weapon, Armor, State Notetags - Increases the amount of Skill Points the affected battler will gain by a percentile value. - Replace 'x' with a percentage number representing the amount of Skill Points that will be acquired. - This stacks multiplicatively with each other. - This does not apply when Skill Points are directly added, lost, or set. --- Learnable Skills-Related Notetags--- <Learn Skill: id> <Learn Skills: id, id, id> <Learn Skill: name> <Learn Skills: name, name, name> - Used for: Class Notetags - Determines what skills the class can learn through the Skill Learn System. - Replace 'id' with a number representing the ID of the skill that can be learned through the Skill Learn System menu. - Replace 'name' with the name of the skill that can be learned through the Skill Learn System menu. - Multiple entries are permited. --- <Learn Skills> id id id name name name </Learn Skills> - Used for: Class - Determines what skills the class can learn through the Skill Learn System. - Replace 'id' with a number representing the ID of the skill that can be learned through the Skill Learn System menu. - Replace 'name' with the name of the skill that can be learned through the Skill Learn System menu. - Multiple middle entries are permited. --- Skill Learn Cost-Related Notetags--- <Learn AP Cost: x> - Used for: Skill Notetags - Determines the Ability Point cost needed for an actor to learn the skill through the Skill Learn System. - Replace 'x' with a number representing the amount of Ability Points needed to learn this skill. - If this notetag is not used, then the Ability Point cost will default to the value found in the settings. --- <Learn CP Cost: x> - Used for: Skill Notetags - Requires VisuMZ_2_ClassChangeSystem - Determines the Class Point cost needed for an actor to learn the skill through the Skill Learn System. - Replace 'x' with a number representing the amount of Skill Points needed to learn this skill. - If this notetag is not used, then the Skill Point cost will default to the value found in the settings. --- <Learn JP Cost: x> - Used for: Skill Notetags - Requires VisuMZ_2_ClassChangeSystem - Determines the Job Point cost needed for an actor to learn the skill through the Skill Learn System. - Replace 'x' with a number representing the amount of Skill Points needed to learn this skill. - If this notetag is not used, then the Skill Point cost will default to the value found in the settings. --- <Learn SP Cost: x> - Used for: Skill Notetags - Determines the Skill Point cost needed for an actor to learn the skill through the Skill Learn System. - Replace 'x' with a number representing the amount of Skill Points needed to learn this skill. - If this notetag is not used, then the Skill Point cost will default to the value found in the settings. --- <Learn Item id Cost: x> <Learn Item name Cost: x> - Used for: Skill Notetags - Determines the items needed to be consumed for an actor to learn the skill through the Skill Learn System. - Replace 'id' with a number representing the ID of the item needed to be consumed. - Replace 'name' with the name of the item needed to be consumed. - Replace 'x' with a number representing the amount of the item needed to learn this skill. - You may insert multiple copies of this notetag. --- <Learn Weapon id Cost: x> <Learn Weapon name Cost: x> - Used for: Skill Notetags - Determines the weapons needed to be consumed for an actor to learn the skill through the Skill Learn System. - Replace 'id' with a number representing the ID of the weapon needed to be consumed. - Replace 'name' with the name of the weapon needed to be consumed. - Replace 'x' with a number representing the amount of the weapon needed to learn this skill. - You may insert multiple copies of this notetag. --- <Learn Armor id Cost: x> <Learn Armor name Cost: x> - Used for: Skill Notetags - Determines the armors needed to be consumed for an actor to learn the skill through the Skill Learn System. - Replace 'id' with a number representing the ID of the armor needed to be consumed. - Replace 'name' with the name of the armor needed to be consumed. - Replace 'x' with a number representing the amount of the armor needed to learn this skill. - You may insert multiple copies of this notetag. --- <Learn Gold Cost: x> - Used for: Skill Notetags - Determines the gold cost needed for an actor to learn the skill through the Skill Learn System. - Replace 'x' with a number representing the amount of gold needed to learn this skill. - If this notetag is not used, then the gold cost will default to the value found in the settings. --- <Learn Skill Costs> AP: x SP: x Item id: x Item name: x Weapon id: x Weapon name: x Armor id: x Armor name: x Gold: x </Learn Skill Costs> - Used for: Skill Notetags - Determines a group of resources needed for an actor to learn the skill through the Skill Learn System. - Replace 'id' with the ID's of items, weapons, armors to be consumed. - Replace 'name' with the names of items, weapons, armors to be consumed. - Replace 'x' with the quantities of the designated resource to be consumed. - Insert multiple entries of items, weapons, and armors inside the notetags to add more resource entries. --- JavaScript Notetags: Skill CostsThe following are notetags made for users with JavaScript knowledge to create dynamic Ability Point and Skill Point costs. --- <JS Learn AP Cost> code code cost = code; </JS Learn AP Cost> - Used for: Skill Notetags - Replace 'code' with JavaScript code to create dynamically calculated cost for the required Ability Points in order to learn this skill. - The 'cost' variable will be returned to determine the finalized Ability Points cost to learn this skill. - The 'user' variable can be used to reference the actor who will be learning the skill. - The 'skill' variable can be used to reference the skill that will be learned by the actor. - If the <Learn AP Cost: x> is present, this notetag will be ignored. --- <JS Learn CP Cost> code code cost = code; </JS Learn CP Cost> - Used for: Skill Notetags - Requires VisuMZ_2_ClassChangeSystem - Replace 'code' with JavaScript code to create dynamically calculated cost for the required Class Points in order to learn this skill. - The 'cost' variable will be returned to determine the finalized Skill Points cost to learn this skill. - The 'user' variable can be used to reference the actor who will be learning the skill. - The 'skill' variable can be used to reference the skill that will be learned by the actor. - If the <Learn CP Cost: x> is present, this notetag will be ignored. --- <JS Learn JP Cost> code code cost = code; </JS Learn JP Cost> - Used for: Skill Notetags - Requires VisuMZ_2_ClassChangeSystem - Replace 'code' with JavaScript code to create dynamically calculated cost for the required Job Points in order to learn this skill. - The 'cost' variable will be returned to determine the finalized Skill Points cost to learn this skill. - The 'user' variable can be used to reference the actor who will be learning the skill. - The 'skill' variable can be used to reference the skill that will be learned by the actor. - If the <Learn JP Cost: x> is present, this notetag will be ignored. --- <JS Learn SP Cost> code code cost = code; </JS Learn SP Cost> - Used for: Skill Notetags - Replace 'code' with JavaScript code to create dynamically calculated cost for the required Skill Points in order to learn this skill. - The 'cost' variable will be returned to determine the finalized Skill Points cost to learn this skill. - The 'user' variable can be used to reference the actor who will be learning the skill. - The 'skill' variable can be used to reference the skill that will be learned by the actor. - If the <Learn SP Cost: x> is present, this notetag will be ignored. --- Show Condition-Related Notetags--- <Learn Show Level: x> - Used for: Skill Notetags - Actors must be at least the required level in order for the skill to even appear visibly in the Skill Learn System menu. - Replace 'x' with a number representing the required level for the actor in order for the skill to visibly appear. --- <Learn Show Skill: id> <Learn Show Skill: name> <Learn Show All Skills: id, id, id> <Learn Show All Skills: name, name, name> <Learn Show Any Skills: id, id, id> <Learn Show Any Skills: name, name, name> - Used for: Skill Notetags - The actor must have already learned the above skills in order for the learnable skill to appear visibly in the Skill Learn System menu. - Replace 'id' with a number representing the ID of the skill required to be known by the actor in order to appear visibly in the menu. - Replace 'name' with the name of the skill required to be known by the actor in order to appear visibly in the menu. - The 'All' notetag variant requires all of the listed skills to be known before the learnable skill will appear visibly in the menu. - The 'Any' notetag variant requires any of the listed skills to be known before the learnable skill will appear visibly in the menu. --- <Learn Show Switch: x> <Learn Show All Switches: x, x, x> <Learn Show Any Switches: x, x, x> - Used for: Skill Notetags - The switches must be in the ON position in order for the learnable skill to appear visibly in the Skill Learn System menu. - Replace 'x' with a number representing the ID of the switch required to be in the ON position in order to appear visibly in the menu. - The 'All' notetag variant requires all of the switches to be in the ON position before the learnable skill will appear visibly in the menu. - The 'Any' notetag variant requires any of the switches to be in the ON position before the learnable skill will appear visibly in the menu. --- JavaScript Notetags: Show ConditionsThe following are notetags made for users with JavaScript knowledge to create dynamic determined show conditions. --- <JS Learn Show> code code visible = code; </JS Learn Show> - Used for: Skill Notetags - Replace 'code' with JavaScript code to determine if the skill will be visibly shown in the Skill Learn System menu. - The 'visible' variable must result in a 'true' or 'false' value to determine if the skill will be visible. - The 'user' variable can be used to reference the actor who will be learning the skill. - The 'skill' variable can be used to reference the skill that will be learned by the actor. - Any other show conditions must be met, too. --- <JS Learn Show List Text> code code text = code; </JS Learn Show List Text> - Used for: Skill Notetags - Replace 'code' with JavaScript code to create custom text that will be displayed when the skill is shown in the Skill Learn System skill list. - The 'text' variable will determine the text to be shown if it is a string. - The 'user' variable can be used to reference the actor who will be learning the skill. - The 'skill' variable can be used to reference the skill that will be learned by the actor. --- <JS Learn Show Detail Text> code code text = code; </JS Learn Show Detail Text> - Used for: Skill Notetags - Replace 'code' with JavaScript code to create custom text that will be displayed when the skill is selected and the Detailed Skill Learn System resource cost window is opened. - The 'text' variable will determine the text to be shown if it is a string. - The 'user' variable can be used to reference the actor who will be learning the skill. - The 'skill' variable can be used to reference the skill that will be learned by the actor. --- Require Condition-Related Notetags--- <Learn Require Level: x> - Used for: Skill Notetags - Actors must be at least the required level in order for the skill to be enabled in the Skill Learn System menu. - Replace 'x' with a number representing the required level for the actor in order for the skill to visibly appear. --- <Learn Require Skill: id> <Learn Require Skill: name> <Learn Require All Skills: id, id, id> <Learn Require All Skills: name, name, name> <Learn Require Any Skills: id, id, id> <Learn Require Any Skills: name, name, name> - Used for: Skill Notetags - The actor must have already learned the above skills in order for the learnable skill to be enabled in the Skill Learn System menu. - Replace 'id' with a number representing the ID of the skill required to be known by the actor in order to be enabled in the menu. - Replace 'name' with the name of the skill required to be known by the actor in order to be enabled in the menu. - The 'All' notetag variant requires all of the listed skills to be known before the learnable skill will be enabled in the menu. - The 'Any' notetag variant requires any of the listed skills to be known before the learnable skill will be enabled in the menu. --- <Learn Require Switch: x> <Learn Require All Switches: x, x, x> <Learn Require Any Switches: x, x, x> - Used for: Skill Notetags - The switches must be in the ON position in order for the learnable skill to be enabled in the Skill Learn System menu. - Replace 'x' with a number representing the ID of the switch required to be in the ON position in order to be enabled in the menu. - The 'All' notetag variant requires all of the switches to be in the ON position before the learnable skill will be enabled in the menu. - The 'Any' notetag variant requires any of the switches to be in the ON position before the learnable skill will be enabled in the menu. --- JavaScript Notetags: Requirement ConditionsThe following are notetags made for users with JavaScript knowledge to create dynamic determined learning requirement conditions. --- <JS Learn Requirements> code code enabled = code; </JS Learn Requirements> - Used for: Skill Notetags - Replace 'code' with JavaScript code to determine if the skill will be enabled for learning in the Skill Learn System menu. - The 'enabled' variable must result in a 'true' or 'false' value to determine if the skill will be enabled. - The 'user' variable can be used to reference the actor who will be learning the skill. - The 'skill' variable can be used to reference the skill that will be learned by the actor. - Any other requirement conditions must be met, too. --- <JS Learn Requirements List Text> code code text = code; </JS Learn Requirements List Text> - Used for: Skill Notetags - Replace 'code' with JavaScript code to create custom text that will be displayed when the skill is shown in the Skill Learn System skill list as long as the requirements have to be met. - The 'text' variable will determine the text to be shown if it is a string. - The 'user' variable can be used to reference the actor who will be learning the skill. - The 'skill' variable can be used to reference the skill that will be learned by the actor. --- <JS Learn Requirements Detail Text> code code text = code; </JS Learn Requirements Detail Text> - Used for: Skill Notetags - Replace 'code' with JavaScript code to create custom text that will be displayed when the skill is selected and the Detailed Skill Learn System resource cost window is opened as long as the requirements have to be met. - The 'text' variable will determine the text to be shown if it is a string. - The 'user' variable can be used to reference the actor who will be learning the skill. - The 'skill' variable can be used to reference the skill that will be learned by the actor. --- Animation-Related Notetags--- <Learn Skill Animation: id> <Learn Skill Animation: id, id, id> - Used for: Skill Notetags - Plays the animation(s) when this skill is learned through the Skill Learn System's menu. - This will override the default animation settings found in the plugin parameters and use the unique one set through notetags instead. - Replace 'id' with the ID of the animation you wish to play. - If multiple ID's are found, then each animation will play one by one in the order they are listed. --- <Learn Skill Fade Speed: x> - Used for: Skill Notetags - This determines the speed at which the skill's icon fades in during the skill learning animation. - Replace 'x' with a number value to determine how fast the icon fades in. - Use lower numbers for slower fade speeds and higher numbers for faster fade speeds. --- <Learn Skill Picture: filename> <Picture: filename> - Used for: Skill Notetags - Uses a picture from your project's /img/pictures/ folder instead of the skill's icon during learning instead. - Replace 'filename' with the filename of the image. - Do not include the file extension. - Scaling will not apply to the picture. - Use the <Picture: filename> version for any other plugins that may be using this as an image outside of learning skills, too. - The size used for the image will vary based on your game's resolution. --- JavaScript Notetags: On Learning ConditionsThe following are notetags made for users with JavaScript knowledge to produce special effects when the skill is learned. --- <JS On Learn Skill> code code code </JS On Learn Skill> - Used for: Skill Notetags - Replace 'code' with JavaScript code to perform the desired actions when the skill is learned. - This will apply to any time the skill is learned by an actor, even if it is through natural leveling or through the Skill Learn System menu. - The 'user' variable can be used to reference the actor who will be learning the skill. - The 'skill' variable can be used to reference the skill that will be learned by the actor. --- Skill Mastery VisuStella MZThe following are notetags that have been added through this plugin. These notetags will not work with your game if this plugin is OFF or not present. --- Mastery-Related Notetags--- <Max Skill Mastery Level: x> - Used for: Skill Notetags - Sets the maximum skill mastery level for this skill to 'x'. - Replace 'x' with a number representing the max skill mastery level. - If this notetag is not used, refer to the default max level found in the Plugin Parameters. --- <JS Skill Mastery EXP> code code exp = code; </JS Skill Mastery EXP> - Used for: Skill Notetags - Create a custom skill mastery EXP formula for this skill. - The variable 'user' refers to user of the skill. - The variable 'targetLevel' refers to the target level whose EXP is being calculated for. - The variable 'exp' is returned and determines how much EXP is needed to achieve the target level. --- <Starting Skill Masteries> Skill id: level Skill id: level, exp name: level name: level, exp </Starting Skill Masteries> - Used for: Actor, Enemy Notetags - Allows you to adjust the starting skill mastery levels for actors and enemies. Initialized actors will also reset their mastery levels to these values. - Replace 'id' with a number presenting the ID of the skill to set the mastery level for. - Replace 'name' with the name of the skill to set the mastery level for. - Replace 'level' with a number representing the starting mastery level. - Replace 'exp' with a number representing the current mastery level EXP. --- Mastery Effect-Related Notetags--- <Mastery Effect: +x HP Cost Per Level> <Mastery Effect: -x HP Cost Per Level> <Mastery Effect: +x% HP Cost Per Level> <Mastery Effect: -x% HP Cost Per Level> <Mastery Effect: +x MP Cost Per Level> <Mastery Effect: -x MP Cost Per Level> <Mastery Effect: +x% MP Cost Per Level> <Mastery Effect: -x% MP Cost Per Level> <Mastery Effect: +x TP Cost Per Level> <Mastery Effect: -x TP Cost Per Level> <Mastery Effect: +x% TP Cost Per Level> <Mastery Effect: -x% TP Cost Per Level> - Used for: Skill Notetags - Alters the HP, MP, and/or TP costs of the skill per mastery level. - Replace 'x' with a number representing either a flat change or percentile change in skill cost. - Skill costs cannot be altered unless the base cost is at least above 0. - Depending on the Plugin Parameter settings, skill costs cannot reach 0. - If these notetags are not used, refer to the default settings found in the Plugin Parameters. --- <Mastery Effect: +x Damage Per Level> <Mastery Effect: -x Damage Per Level> <Mastery Effect: +x% Damage Per Level> <Mastery Effect: -x% Damage Per Level> <Mastery Effect: +x Healing Per Level> <Mastery Effect: -x Healing Per Level> <Mastery Effect: +x% Healing Per Level> <Mastery Effect: -x% Healing Per Level> - Used for: Skill Notetags - Alters the damage/healing of the skill per mastery level. - Replace 'x' with a number representing either a flat change or percentile change in damage/healing. - If these notetags are not used, refer to the default settings found in the Plugin Parameters. --- <Mastery Effect: +x Cooldown Turns Per Level> <Mastery Effect: -x Cooldown Turns Per Level> <Mastery Effect: +x Buff Turns Per Level> <Mastery Effect: -x Buff Turns Per Level> <Mastery Effect: +x Debuff Turns Per Level> <Mastery Effect: -x Debuff Turns Per Level> <Mastery Effect: +x State Turns Per Level> <Mastery Effect: -x State Turns Per Level> - Used for: Skill Notetags - Alters the cooldown, buff, debuff, or state turns of the skill per mastery level. - Replace 'x' with a number representing either the turn change. - Depending on the Plugin Parameters, cooldowns may or may not be able to reach zero due to this effect. - Buffs, debuffs, and state turns are able to reach zero values because they can still hold an effect at zero turns. - If these notetags are not used, refer to the default settings found in the Plugin Parameters. --- Skill Shop VisuStella MZThe following are notetags that have been added through this plugin. These notetags will not work with your game if this plugin is OFF or not present. --- Skill Shop-Related Notetags--- <Skill Shop Cost: x> - Used for: Skill Notetags - Changes the cost of this skill to 'x' in order for it to be learned from a skill shop. - Replace 'x' with a number representing the cost of the skill to be learned from a skill shop. - If this notetag is not used, use the default cost value found in the Plugin Parameters. --- <Item id Learn Cost: x> <Item name Learn Cost: x> <Weapon id Learn Cost: x> <Weapon name Learn Cost: x> <Armor id Learn Cost: x> <Armor name Learn Cost: x> <Variable id Learn Cost: x> - Used for: Skill Notetags - Requires Imported.VisuMZ_2_MoreCurrencies! - Allows purchase of skill using items, weapons, armors, or variables as extended currency. - Replace 'id' with a number representing the ID of the item, weapon, armor, or variable to be taken (when bought). - Replace 'name' with the name of the item, weapon, armor, or variable to be taken (when bought). - Replace 'x' with the quantity of the item, weapon, armor, or variable that will be taken (when bought). - Insert multiple copies of these notetags to add more item, weapon, armor, or variable costs. --- <Skill Shop Require Class: id> <Skill Shop Require Classes: id, id, id> <Skill Shop Require Class: name> <Skill Shop Require Classes: name, name, name> - Used for: Skill Notetags - This skill can only be learned by actors with the specified class(es) when taught through the skill shop. - For 'id' variant, replace 'id' with a number representing the class ID. - For 'name' variant, replace 'name' with the class's name. --- <Skill Shop Require Level: x> - Used for: Skill Notetags - This skill can only be learned by actors who are at least level 'x'. - Replace 'x' with a number representing the required level. --- <Skill Shop Require Learned Skill: id> <Skill Shop Require Learned Skills: id, id, id> <Skill Shop Require Learned Skill: name> <Skill Shop Require Learned Skills: name, name, name> - Used for: Skill Notetags - This skill can only be learned by actors who have learned the listed skill(s). All of the skills must be learned. - For 'id' variant, replace 'id' with a number representing the skill ID. - For 'name' variant, replace 'name' with the skill's name. --- Skill Stealer VisuStella MZThe following are notetags that have been added through this plugin. These notetags will not work with your game if this plugin is OFF or not present. --- Stealable Skills-Related Notetags--- <Stealable Skill> - Used for: Skill Notetags - Marks this skill as a stealable skill. If this skill is found in the enemy's action list, actors can steal it with the proper skills/items. --- <Stealable Skill: x%> - Used for: Skill Notetags - Marks this skill as a stealable skill with a 'x' percent change to be successfully stolen. If this skill is found in the enemy's action list, actors can steal it with the proper skills/items. - Replace 'x' with a number representing the percent chance to successfully steal this skill. --- <Stealable For Class: id> <Stealable For Classes: id, id, id> <Stealable For Class: name> <Stealable For Classes: name, name, name> - Used for: Skill Notetags - Used together with <Stealable Skill>. - This skill only becomes a valid steal target if the actor using it is one of the listed classes. - For 'id' variant, replace 'id' with a number representing the class. - For 'name' variant, replace 'name' with the name of the class. --- Stealing Skills-Related Notetags--- <Steal Skills> - Used for: Skill, Item Notetags - When this skill/item is used by an actor to target an enemy, and if that enemy has stealable skills, the actor can learn one of those skills permanently. - If an enemy has multiple stealable skills, the skill to be stolen will be picked randomly out of available learnable skills. - Stealable skills that have already been learned or not valid for learning are automatically filtered out. --- <Steal stype Skills> - Used for: Skill, Item Notetags - Allows the actor to steal specific 'stype' skills from the target enemy as along as the enemy has skills of the matching skill type permanently. - Replace 'stype' with the name of the Skill Type. - If an enemy has multiple stealable skills, the skill to be stolen will be picked randomly out of available learnable skills. - Stealable skills that have already been learned or not valid for learning are automatically filtered out. --- <Temporary Steal Skills> - Used for: Skill, Item Notetags - When this skill/item is used by an actor to target an enemy, and if that enemy has stealable skills, the actor can learn one of those skills temporarily for the battle. - If an enemy has multiple stealable skills, the skill to be stolen will be picked randomly out of available learnable skills. - Stealable skills that have already been learned or not valid for learning are automatically filtered out. - At the end of the battle, the actor will have forgotten the skill. --- <Temporary Steal stype Skills> - Used for: Skill, Item Notetags - Allows the actor to steal specific 'stype' skills from the target enemy as along as the enemy has skills of the matching skill type temporarily for the battle. - Replace 'stype' with the name of the Skill Type. - If an enemy has multiple stealable skills, the skill to be stolen will be picked randomly out of available learnable skills. - Stealable skills that have already been learned or not valid for learning are automatically filtered out. - At the end of the battle, the actor will have forgotten the skill. --- Skills and States Core VisuStella MZThe following are notetags that have been added through this plugin. These notetags will not work with your game if this plugin is OFF or not present. General Skill NotetagsThe following are general notetags that are skill-related. --- <Skill Type: x> <Skill Types: x,x,x> <Skill Type: name> <Skill Types: name, name, name> - Used for: Skill Notetags - Marks the skill to have multiple Skill Types, meaning they would appear under different skill types without needing to create duplicate skills. - Replace 'x' with a number value representing the Skill Type's ID. - If using 'name' notetag variant, replace 'name' with the Skill Type(s) name desired to be added. --- <List Name: name> - Used for: Skill Notetags - Makes the name of the skill appear different when show in the skill list. - Using \V[x] as a part of the name will display that variable. --- Skill Cost NotetagsThe following are notetags that can be used to adjust skill costs. Some of these notetags are added through the Plugin Parameter: Skill Cost Types and can be altered there. This also means that some of these notetags can have their functionality altered and/or removed. --- <type Cost: x> <type Cost: x%> - Used for: Skill Notetags - These notetags are used to designate costs of custom or already existing types that cannot be made by the Database Editor. - Replace 'type' with a resource type. Existing ones found in the Plugin Parameters are 'HP', 'MP', 'TP', 'Gold', and 'Potion'. More can be added. - Replace 'x' with a number value to determine the exact type cost value. This lets you bypass the Database Editor's limit of 9,999 MP and 100 TP. - The 'x%' version is replaced with a percentile value to determine a cost equal to a % of the type's maximum quantity limit. - Functionality for these notetags can be altered in the Plugin Parameters. Examples: <HP Cost: 500> <MP Cost: 25%> <Gold Cost: 3000> <Potion Cost: 5> --- <type Cost Max: x> <type Cost Min: x> - Used for: Skill Notetags - These notetags are used to ensure conditional and % costs don't become too large or too small. - Replace 'type' with a resource type. Existing ones found in the Plugin Parameters are 'HP', 'MP', 'TP', 'Gold', and 'Potion'. More can be added. - Replace 'x' with a number value to determine the maximum or minimum values that the cost can be. - Functionality for these notetags can be altered in the Plugin Parameters. Examples: <HP Cost Max: 1500> <MP Cost Min: 5> <Gold Cost Max: 10000> <Potion Cost Min: 3> --- <type Cost: +x> <type Cost: -x> <type Cost: x%> - Used for: Actor, Class, Weapon, Armor, Enemy, State Notetags - The related actor will raise/lower the cost of any skill that uses the 'type' cost by a specified amount. - Replace 'type' with a resource type. Existing ones found in the Plugin Parameters are 'HP', 'MP', 'TP', 'Gold', and 'Potion'. More can be added. - For % notetag variant: Replace 'x' with a number value to determine the rate to adjust the Skill Cost Type by as a rate value. This is applied before <type Cost: +x> and <type Cost: -x> notetags. - For + and - notetag variants: Replace 'x' with a number value to determine how much to adjust the Skill Cost Type by as a flat value. This is applied after <type Cost: x%> notetags. - Functionality for these notetags can be altered in the Plugin Parameters. Examples: <HP Cost: +20> <MP Cost: -10> <Gold Cost: 50%> <Potion Cost: 200%> --- <Custom Cost Text> text </Custom Cost Text> - Used for: Skill Notetags - Allows you to insert custom text into the skill's cost area towards the end of the costs. - Replace 'text' with the text you wish to display. - Text codes may be used. --- JavaScript Notetags: Skill CostsThe following are notetags made for users with JavaScript knowledge to determine any dynamic Skill Cost Types used for particular skills. --- <JS type Cost> code code cost = code; </JS type Cost> - Used for: Skill Notetags - Replace 'type' with a resource type. Existing ones found in the Plugin Parameters are 'HP', 'MP', 'TP', 'Gold', and 'Potion'. More can be added. - Replace 'code' to determine the type 'cost' of the skill. - Insert the final type cost into the 'cost' variable. - The 'user' variable refers to the user about to perform the skill. - The 'skill' variable refers to the skill being used. - Functionality for the notetag can be altered in the Plugin Parameters. --- Gauge Replacement NotetagsCertain classes can have their gauges swapped out for other Skill Cost Types. This is especially helpful for the classes that don't utilize those Skill Cost Types. You can mix and match them however you want. --- <Replace HP Gauge: type> <Replace MP Gauge: type> <Replace TP Gauge: type> - Used for: Class Notetags - Replaces the HP (1st), MP (2nd), or TP (3rd) gauge with a different Skill Cost Type. - Replace 'type' with a resource type. Existing ones found in the Plugin Parameters are 'HP', 'MP', 'TP', 'Gold', and 'Potion'. More can be added. - Replace 'type' with 'none' to not display any gauges there. - The <Replace TP Gauge: type> will require 'Display TP in Window' setting to be on in the Database > System 1 tab. - Functionality for the notetags can be altered by changes made to the Skill & States Core Plugin Parameters. --- Item Cost-Related Notetags--- <Item Cost: x name> <Weapon Cost: x name> <Armor Cost: x name> - Used for: Skill Notetags - The skill will consume items, weapons, and/or armors in order to be used. - Even non-consumable items will be consumed. - Replace 'x' with a number representing the respective item cost. - Replace 'name' with text representing the respective item, weapon, or armor to be consumed. - Insert multiples of this notetag to consume multiple items, weapons, and/or armors. - Functionality for these notetags can be altered in the Plugin Parameters. Examples: <Item Cost: 5 Magic Water> <Item Cost: 2 Antidote> <Weapon Cost: 1 Short Sword> <Armor Cost: 3 Cloth Armor> --- <Item Cost Max: x name> <Item Cost Min: x name> <Weapon Cost Max: x name> <Weapon Cost Min: x name> <Armor Cost Max: x name> <Armor Cost Min: x name> - Used for: Skill Notetags - Sets up a maximum/minimum cost for the item, weapon, armor type costs. - Replace 'x' with a number representing the maximum or minimum cost. - Replace 'name' with text representing the respective item, weapon, or armor to be consumed. Examples: <Item Cost Max: 10 Magic Water> <Item Cost Min: 2 Antidote> <Weapon Cost Max: 3 Short Sword> <Armor Cost Min: 1 Cloth Armor> --- <Item Cost: +x name> <Item Cost: -x name> <Weapon Cost: +x name> <Weapon Cost: -x name> <Armor Cost: +x name> <Armor Cost: -x name> <Item Cost: x% name> <Weapon Cost: x% name> <Armor Cost: x% name> - Used for: Actor, Class, Weapon, Armor, Enemy, State Notetags - The related actor will raise/lower the item, weapon, and/or armor costs of any skill that costs those items, weapons, and/or armors by x%. - For % notetag variant: Replace 'x' with a number value to determine the rate to adjust the Skill Cost Type by as a rate value. This is applied before <type Cost: +x> and <type Cost: -x> notetags. - For + and - notetag variants: Replace 'x' with a number value to determine how much to adjust the Skill Cost Type by as a flat value. This is applied after <type Cost: x%> notetags. - Replace 'name' with text representing the respective item, weapon, or armor to be consumed. - Insert multiples of this notetag to consume multiple items, weapons, and/or armors. - Functionality for these notetags can be altered in the Plugin Parameters. Examples: <Item Cost: +1 Magic Water> <Item Cost: -2 Antidote> <Weapon Cost: 50% Short Sword> <Armor Cost: 200% Cloth Armor> --- <Replace Item name1 Cost: name2> <Replace Weapon name1 Cost: name2> <Replace Armor name1 Cost: name2> - Used for: Actor, Class, Weapon, Armor, Enemy, State Notetags - The related actor will not consume 'name1' items, weapons, or armors. Instead, the cost will be redirected to 'name2' items, weapons, or armors. - Even non-consumable items will be consumed. - Replace 'name1' with text representing the respective item, weapon, or armor that is the original cost type. - Replace 'name2' with text representing the respective item, weapon, or armor that will be consumed instead. Examples: <Replace Item Magic Water Cost: Potion> <Replace Item Antidote Cost: Dispel Herb> <Replace Weapon Short Sword Cost: Falchion> <Replace Armor Cloth Armor Cost: Leather Armor> --- Skill Accessibility NotetagsSometimes, you don't want all skills to be visible whether it be to hide menu-only skills during battle, until certain switches are turned ON/OFF, or until certain skills have been learned. --- <Hide in Battle> <Hide outside Battle> - Used for: Skill Notetags - Makes the specific skill visible or hidden depending on whether or not the player is currently in battle. --- <Show Switch: x> <Show All Switches: x,x,x> <Show Any Switches: x,x,x> - Used for: Skill Notetags - Determines the visibility of the skill based on switches. - Replace 'x' with the switch ID to determine the skill's visibility. - If 'All' notetag variant is used, skill will be hidden until all switches are ON. Then, it would be shown. - If 'Any' notetag variant is used, skill will be shown if any of the switches are ON. Otherwise, it would be hidden. --- <Hide Switch: x> <Hide All Switches: x,x,x> <Hide Any Switches: x,x,x> - Used for: Skill Notetags - Determines the visibility of the skill based on switches. - Replace 'x' with the switch ID to determine the skill's visibility. - If 'All' notetag variant is used, skill will be shown until all switches are ON. Then, it would be hidden. - If 'Any' notetag variant is used, skill will be hidden if any of the switches are ON. Otherwise, it would be shown. --- <Show if learned Skill: x> <Show if learned All Skills: x,x,x> <Show if learned Any Skills: x,x,x> <Show if learned Skill: name> <Show if learned All Skills: name, name, name> <Show if learned Any Skills: name, name, name> - Used for: Skill Notetags - Determines the visibility of the skill based on skills learned. - Determines the visibility of the skill based on skills learned. - This does not apply to skills added by traits on actors, classes, any equipment, or states. These are not considered learned skills. They are considered temporary skills. - Replace 'x' with the skill ID to determine the skill's visibility. - If 'name' notetag viarant is used, replace 'name' with the skill's name to be checked for the notetag. - If 'All' notetag variant is used, skill will be hidden until all skills are learned. Then, it would be shown. - If 'Any' notetag variant is used, skill will be shown if any of the skills are learned. Otherwise, it would be hidden. --- <Hide if learned Skill: x> <Hide if learned All Skills: x,x,x> <Hide if learned Any Skills: x,x,x> <Hide if learned Skill: name> <Hide if learned All Skills: name, name, name> <Hide if learned Any Skills: name, name, name> - Used for: Skill Notetags - Determines the visibility of the skill based on skills learned. - This does not apply to skills added by traits on actors, classes, any equipment, or states. These are not considered learned skills. They are considered temporary skills. - Replace 'x' with the skill ID to determine the skill's visibility. - If 'name' notetag viarant is used, replace 'name' with the skill's name to be checked for the notetag. - If 'All' notetag variant is used, skill will be shown until all skills are learned. Then, it would be hidden. - If 'Any' notetag variant is used, skill will be hidden if any of the skills are learned. Otherwise, it would be shown. --- <Show if has Skill: x> <Show if have All Skills: x,x,x> <Show if have Any Skills: x,x,x> <Show if has Skill: name> <Show if have All Skills: name, name, name> <Show if have Any Skills: name, name, name> - Used for: Skill Notetags - Determines the visibility of the skill based on skills available. - This applies to both skills that have been learned and/or temporarily added through traits on actors, classes, equipment, or states. - Replace 'x' with the skill ID to determine the skill's visibility. - If 'name' notetag viarant is used, replace 'name' with the skill's name to be checked for the notetag. - If 'All' notetag variant is used, skill will be hidden until all skills are learned. Then, it would be shown. - If 'Any' notetag variant is used, skill will be shown if any of the skills are learned. Otherwise, it would be hidden. --- <Hide if has Skill: x> <Hide if have All Skills: x,x,x> <Hide if have Any Skills: x,x,x> <Hide if has Skill: name> <Hide if have All Skills: name, name, name> <Hide if have Any Skills: name, name, name> - Used for: Skill Notetags - Determines the visibility of the skill based on skills available. - This applies to both skills that have been learned and/or temporarily added through traits on actors, classes, equipment, or states. - Replace 'x' with the skill ID to determine the skill's visibility. - If 'name' notetag viarant is used, replace 'name' with the skill's name to be checked for the notetag. - If 'All' notetag variant is used, skill will be shown until all skills are learned. Then, it would be hidden. - If 'Any' notetag variant is used, skill will be hidden if any of the skills are learned. Otherwise, it would be shown. --- <Enable Switch: x> <Enable All Switches: x,x,x> <Enable Any Switches: x,x,x> - Used for: Skill Notetags - Determines the enabled status of the skill based on switches. - Replace 'x' with the switch ID to determine the skill's enabled status. - If 'All' notetag variant is used, skill will be disabled until all switches are ON. Then, it would be enabled. - If 'Any' notetag variant is used, skill will be enabled if any of the switches are ON. Otherwise, it would be disabled. --- <Disable Switch: x> <Disable All Switches: x,x,x> <Disable Any Switches: x,x,x> - Used for: Skill Notetags - Determines the enabled status of the skill based on switches. - Replace 'x' with the switch ID to determine the skill's enabled status. - If 'All' notetag variant is used, skill will be enabled until all switches are ON. Then, it would be disabled. - If 'Any' notetag variant is used, skill will be disabled if any of the switches are ON. Otherwise, it would be enabled. --- JavaScript Notetags: Skill AccessibilityThe following are notetags made for users with JavaScript knowledge to determine if a skill can be accessible visibly or through usage. --- <JS Skill Visible> code code visible = code; </JS Skill Visible> - Used for: Skill Notetags - Determines the visibility of the skill based on JavaScript code. - Replace 'code' to determine the type visibility of the skill. - The 'visible' variable returns a boolean (true/false) to determine if the skill will be visible or not. - The 'user' variable refers to the user with the skill. - The 'skill' variable refers to the skill being checked. - All other visibility conditions must be met for this code to count. --- <JS Skill Enable> code code enabled = code; </JS Skill Enable> - Used for: Skill Notetags - Determines the enabled status of the skill based on JavaScript code. - Replace 'code' to determine the type enabled status of the skill. - The 'enabled' variable returns a boolean (true/false) to determine if the skill will be enabled or not. - The 'user' variable refers to the user with the skill. - The 'skill' variable refers to the skill being checked. - All other skill conditions must be met in order for this to code to count. --- General State-Related NotetagsThe following notetags are centered around states, such as how their turn counts are displayed, items and skills that affect state turns, if the state can avoid removal by death state, etc. --- <No Death Clear> - Used for: State Notetags - Prevents this state from being cleared upon death. - This allows this state to be added to an already dead battler, too. --- <No Recover All Clear> - Used for: State Notetags - Prevents this state from being cleared upon using the Recover All command. --- <Group Defeat> - Used for: State Notetags - If an entire party is affected by states with the <Group Defeat> notetag, they are considered defeated. - Usage for this includes party-wide petrification, frozen, etc. --- <Reapply Rules: Ignore> <Reapply Rules: Reset> <Reapply Rules: Greater> <Reapply Rules: Add> - Used for: State Notetags - Choose what kind of rules this state follows if the state is being applied to a target that already has the state. This affects turns specifically. - 'Ignore' will bypass any turn changes. - 'Reset' will recalculate the state's turns. - 'Greater' will choose to either keep the current turn count if it's higher than the reset amount or reset it if the current turn count is lower. - 'Add' will add the state's turn count to the applied amount. - If this notetag isn't used, it will use the rules set in the States > Plugin Parameters. --- <Positive State> <Negative State> - Used for: State Notetags - Marks the state as a positive state or negative state, also altering the state's turn count color to match the Plugin Parameter settings. - This also puts the state into either the 'Positive' category or 'Negative' category. --- <Category: name> <Category: name, name, name> - Used for: State Notetags - Arranges states into certain/multiple categories. - Replace 'name' with a category name to mark this state as. - Insert multiples of this to mark the state with multiple categories. --- <Categories> name name </Categories> - Used for: State Notetags - Arranges states into certain/multiple categories. - Replace each 'name' with a category name to mark this state as. --- <Resist State Category: name> <Resist State Categories: name, name, name> - Used for: Actor, Class, Weapon, Armor, Enemy, State Notetags - Causes the affected battler resist the listed categories. - Replace each 'name' with a category name to resist. - Insert multiple 'name' entries to add more categories. - This works exactly like how state resistances work in-game. If a battler who was originally NOT resistant to "Poison" before gaining a poison-resistant trait, the "Poison" state will remain because it was applied before poison-resistance as enabled. --- <Resist State Categories> name name name </Resist State Categories> - Used for: Actor, Class, Weapon, Armor, Enemy, State Notetags - Causes the affected battler resist the listed categories. - Replace each 'name' with a category name to resist. - Insert multiple 'name' entries to add more categories. - This works exactly like how state resistances work in-game. If a battler who was originally NOT resistant to "Poison" before gaining a poison-resistant trait, the "Poison" state will remain because it was applied before poison-resistance as enabled. --- <State x Category Remove: y> <State x Category Remove: All> - Used for: Skill, Item Notetags - Allows the skill/item to remove 'y' states from specific category 'x'. - Replace 'x' with a category name to remove from. - Replace 'y' with the number of times to remove from that category. - Use the 'All' variant to remove all of the states of that category. - Insert multiples of this to remove different types of categories. --- <Remove Other x States> - Used for: State Notetags - When the state with this notetag is added, remove other 'x' category states from the battler (except for the state being added). - Replace 'x' with a category name to remove from. - Insert multiples of this to remove different types of categories. - Useful for thing state types like stances and forms that there is usually only one active at a time. --- <Hide State Turns> - Used for: State Notetags - Hides the state turns from being shown at all. - This will by pass any Plugin Parameter settings. --- <Turn Color: x> <Turn Color: #rrggbb> - Used for: State Notetags - Hides the state turns from being shown at all. - Determines the color of the state's turn count. - Replace 'x' with a number value depicting a window text color. - Replace 'rrggbb' with a hex color code for a more custom color. --- <Max Turns: x> - Used for: State Notetags - Determines the upper limit on the maximum number of turns for this state. - Replace 'x' with a number representing the maximum number of turns used for this state. - If no notetag is used, refer to the default setting found in the Plugin Parameters under "State Settings". --- <State id Turns: +x> <State id Turns: -x> <Set State id Turns: x> <State name Turns: +x> <State name Turns: -x> <Set State name Turns: x> - Used for: Skill, Item Notetags - If the target is affected by state 'id' or state 'name', change the state turn duration for target. - For 'id' variant, replace 'id' with the ID of the state to modify. - For 'name' variant, replace 'name' with the name of the state to modify. - Replace 'x' with the value you wish to increase, decrease, or set to. - Insert multiples of this notetag to affect multiple states at once. --- <param Buff Turns: +x> <param Buff Turns: -x> <Set param Buff Turns: x> - Used for: Skill, Item Notetags - If the target is affected by a 'param' buff, change that buff's turn duration for target. - Replace 'param' with 'MaxHP', 'MaxMP', 'ATK', 'DEF', 'MAT', 'MDF', 'AGI', or 'LUK' to determine which parameter buff to modify. - Replace 'x' with the value you wish to increase, decrease, or set to. - Insert multiples of this notetag to affect multiple parameters at once. --- <param Debuff Turns: +x> <param Debuff Turns: -x> <Set param Debuff Turns: x> - Used for: Skill, Item Notetags - If the target is affected by a 'param' debuff, change that debuff's turn duration for target. - Replace 'param' with 'MaxHP', 'MaxMP', 'ATK', 'DEF', 'MAT', 'MDF', 'AGI', or 'LUK' to determine which parameter debuff to modify. - Replace 'x' with the value you wish to increase, decrease, or set to. - Insert multiples of this notetag to affect multiple parameters at once. --- JavaScript Notetags: On Add/Erase/ExpireUsing JavaScript code, you can use create custom effects that occur when a state has bee added, erased, or expired. --- <JS On Add State> code code </JS On Add State> - Used for: State Notetags - When a state is added, run the code added by this notetag. - The 'user' variable refers to the current active battler. - The 'target' variable refers to the battler affected by this state. - The 'origin' variable refers to the one who applied this state. - The 'state' variable refers to the current state being affected. --- <JS On Erase State> code code </JS On Erase State> - Used for: State Notetags - When a state is erased, run the code added by this notetag. - The 'user' variable refers to the current active battler. - The 'target' variable refers to the battler affected by this state. - The 'origin' variable refers to the one who applied this state. - The 'state' variable refers to the current state being affected. --- <JS On Expire State> code code </JS On Expire State> - Used for: State Notetags - When a state has expired, run the code added by this notetag. - The 'user' variable refers to the current active battler. - The 'target' variable refers to the battler affected by this state. - The 'origin' variable refers to the one who applied this state. - The 'state' variable refers to the current state being affected. --- JavaScript Notetags: Slip Damage/HealingSlip Damage, in RPG Maker vocabulary, refers to damage over time. The following notetags allow you to perform custom slip damage/healing. --- <JS type Slip Damage> code code damage = code; </JS type Slip Damage> - Used for: State Notetags - Code used to determine how much slip damage is dealt to the affected unit during each regeneration phase. - Replace 'type' with 'HP', 'MP', or 'TP'. - Replace 'code' with the calculations on what to determine slip damage. - The 'user' variable refers to the origin of the state. - The 'target' variable refers to the affected unit receiving the damage. - The 'state' variable refers to the current state being affected. - The 'damage' variable is the finalized slip damage to be dealt. - When these states are applied via action effects, the slip calculations are one time calculations made upon applying and the damage is cached to be used for future on regeneration calculations. - For that reason, do not include game mechanics here such as adding states, buffs, debuffs, etc. as this notetag is meant for calculations only. Use the VisuStella Battle Core's <JS Pre-Regenerate> and <JS Post-Regenerate> notetags for game mechanics instead. - Passive states and states with the <JS Slip Refresh> notetag are exempt from the one time calculation and recalculated each regeneration phase. --- <JS type Slip Heal> code code heal = code; </JS type Slip Heal> - Used for: State Notetags - Code used to determine how much slip healing is dealt to the affected unit during each regeneration phase. - Replace 'type' with 'HP', 'MP', or 'TP'. - Replace 'code' with the calculations on what to determine slip healing. - The 'user' variable refers to the origin of the state. - The 'target' variable refers to the affected unit receiving the healing. - The 'state' variable refers to the current state being affected. - The 'heal' variable is the finalized slip healing to be recovered. - When these states are applied via action effects, the slip calculations are one time calculations made upon applying and the damage is cached to be used for future on regeneration calculations. - For that reason, do not include game mechanics here such as adding states, buffs, debuffs, etc. as this notetag is meant for calculations only. Use the VisuStella Battle Core's <JS Pre-Regenerate> and <JS Post-Regenerate> notetags for game mechanics instead. - Passive states and states with the <JS Slip Refresh> notetag are exempt from the one time calculation and recalculated each regeneration phase. --- <JS Slip Refresh> - Used for: State Notetags - Refreshes the calculations made for the JS Slip Damage/Heal amounts at the start of each regeneration phase to allow for dynamic damage ranges. --- Passive State NotetagsPassive States are states that are always applied to actors and enemies provided that their conditions have been met. These can be granted through database objects or through the Passive States Plugin Parameters.
For those using the code "a.isStateAffected(10)" to check if a target is affected by a state or not, this does NOT check passive states. This only checks for states that were directly applied to the target. This is NOT a bug. Instead, use "a.states().includes($dataStates[10])" to check for them. This code will search for both directly applied states and passive states alike. --- As passive states are NOT considered directly applied to, they do NOT match a Conditional Branch's state check as well. The Conditional Branch effect checks for an affected state. --- Because passive states are NOT directly applied to a battler, the functions of "addNewState", "addState", "eraseState", "removeState" do NOT apply to passive states either. This means that any of the related JS notetags tied to those functions will not occur either. --- Why are passive states not considered affected by? Let's look at it differently. There are two ways to grant skills to actors. They can acquire skills by levels/items/events or they can equip gear that temporarily grants the skill in question. Learning the skill is direct. Temporarily granting the skill is indirect. These two factors have mechanical importance and require differentiation. Regular states and passive states are the same way. Regular states are directly applied, therefore, need to be distinguished in order for things like state turns and steps, removal conditionals, and similar to matter at all. Passive states are indirect and are therefore, unaffected by state turns, steps, and removal conditions. These mechanical differences are important for how RPG Maker works. --- Once again, it is NOT a bug that when using "a.isStateAffected(10)" to check if a target has a passive state will return false. --- <Passive State: x> <Passive States: x,x,x> <Passive State: name> <Passive States: name, name, name> - Used for: Actor, Class, Skill, Item, Weapon, Armor, Enemy Notetags - Adds passive state(s) x to trait object, applying it to affected actor or enemy unit(s). - Replace 'x' with a number to determine which state to add as a passive. - If using 'name' notetag variant, replace 'name' with the name of the state(s) to add as a passive. - Note: If you plan on applying a passive state through a skill, it must be through a skill that has been learned by the target and not a skill that is given through a trait. --- <Passive Stackable> - Used for: State Notetags - Makes it possible for this passive state to be added multiple times. - Otherwise, only one instance of the passive state can be available. --- <Passive Condition Class: id> <Passive Condition Classes: id, id, id> <Passive Condition Class: name> <Passive Condition Classes: name, name, name> - Used for: State Notetags - Determines the passive condition of the passive state based on the actor's current class. As long as the actor's current class matches one of the data entries, the passive condition is considered passed. - For 'id' variant, replace 'id' with a number representing class's ID. - For 'name' variant, replace 'name' with the class's name. - This does not affect enemies. --- <Passive Condition Multiclass: id> <Passive Condition Multiclass: id, id, id> <Passive Condition Multiclass: name> <Passive Condition Multiclass: name, name, name> - Used for: State Notetags - Requires VisuMZ_2_ClassChangeSystem! - Determines the passive condition of the passive state based on the actor's multiclasses. As long as the actor has any of the matching classes assigned as a multiclass, the passive condition is considered passed. - For 'id' variant, replace 'id' with a number representing class's ID. - For 'name' variant, replace 'name' with the class's name. - This does not affect enemies. --- <Passive Condition Switch ON: x> <Passive Condition All Switches ON: x,x,x> <Passive Condition Any Switch ON: x,x,x> - Used for: State Notetags - Determines the passive condition of the passive state based on switches. - Replace 'x' with the switch ID to determine the state's passive condition. - If 'All' notetag variant is used, conditions will not be met until all switches are ON. Then, it would be met. - If 'Any' notetag variant is used, conditions will be met if any of the switches are ON. Otherwise, it would not be met. --- <Passive Condition Switch OFF: x> <Passive Condition All Switches OFF: x,x,x> <Passive Condition Any Switch OFF: x,x,x> - Used for: State Notetags - Determines the passive condition of the passive state based on switches. - Replace 'x' with the switch ID to determine the state's passive condition. - If 'All' notetag variant is used, conditions will not be met until all switches are OFF. Then, it would be met. - If 'Any' notetag variant is used, conditions will be met if any of the switches are OFF. Otherwise, it would not be met. --- JavaScript Notetags: Passive StateThe following is a notetag made for users with JavaScript knowledge to determine if a passive state's condition can be met. --- <JS Passive Condition> code code condition = code; </JS Passive Condition> - Used for: State Notetags - Determines the passive condition of the state based on JavaScript code. - Replace 'code' to determine if a passive state's condition has been met. - The 'condition' variable returns a boolean (true/false) to determine if the passive state's condition is met or not. - The 'user' variable refers to the user affected by the passive state. - The 'state' variable refers to the passive state being checked. - All other passive conditions must be met for this code to count. **NOTE** Not everything can be used as a custom JS Passive Condition due to limitations of the code. There are failsafe checks to prevent infinite loops and some passive conditions will not register for this reason and the conditional checks will behave as if the passive states have NOT been applied for this reason. Such examples include the following: - A passive state that requires another passive state - A passive state that requires a trait effect from another state - A passive state that requires a parameter value altered by another state - A passive state that requires equipment to be worn but its equipment type access is provided by another state. - Anything else that is similar in style. --- State Tooltips VisuStella MZThe following are notetags that have been added through this plugin. These notetags will not work with your game if this plugin is OFF or not present. --- Description-Related Notetags--- <Help Description> text text </Help Description> - Used for: State Notetags - Assigns a help description for the state. - Replace 'text' with text you want displayed for the tooltip window. - This best works with one line. - If this notetag is not used, the help description will default to the setting found in the plugin's Plugin Parameters. - Insert %1 into the help description to show any data that would otherwise be shown as the state display, such as Absorption Barrier count. --- <Exclude From Tooltips> - Used for: State Notetags - Excludes the state from being displayed in the state tooltips. --- Steal Items VisuStella MZThe following are notetags that have been added through this plugin. These notetags will not work with your game if this plugin is OFF or not present. --- Steal Action-Related NotetagsThe following are notetags that are used to place on skills/items that you want to have stealing properties for. --- <Steal> <Steal type> <Steal type, type, type> - Used for: Skill, Item Notetags - Gives the skill/item stealing properties. - Replace 'type' with 'All', 'Gold', 'Item', 'Weapon', 'Armor' to restrict steal targets to those types. --- <Steal type: x%> - Used for: Skill, Item Notetags - Gives the skill/item stealing properties with increased/decreased multiplicative success rates. - Replace 'type' with 'All', 'Gold', 'Item', 'Weapon', 'Armor' to restrict steal targets to those types. - Replace 'x' with a number representing the percent value to alter the success rate multiplicatively by. --- <Steal type: +x%> <Steal type: -x%> - Used for: Skill, Item Notetags - Gives the skill/item stealing properties with increased/decreased additive success rates. - Replace 'type' with 'All', 'Gold', 'Item', 'Weapon', 'Armor' to restrict steal targets to those types. - Replace 'x' with a number representing the percent value to alter the success rate additively by. --- <Snatch> <Targeting Steal> - Used for: Skill, Item Notetags - Changes the steal action from targeting a random item from the stealable types pool to a specific item that the player can select. - If the snatch attempt fails, it will not attempt to steal other items. - Both the <Snatch> and <Targeting Steal> notetags do the same thing. - This does not work with abilities that target multiple enemies, random enemies, or actors. - Use this in addition to the <Steal>, <Steal type>, or <Steal type, type, type> notetags as this does not have any steal properties on its own. --- JavaScript Notetags: Steal Action-RelatedThe following are notetags made for users with JavaScript knowledge to apply special effects for steal-related skills/items. --- <JS Steal Rate>
code
code
rate = code;
</JS Steal Rate>
- Used for: Skill, Item Notetags
- Uses JavaScript code to determine the success rate of the steal action.
- The 'rate' value is multiplied against the success rate of the target
item being stolen. This is a multiplicative stack.
- This means an item's default steal rate of 5% and a 200% steal rate on
this notetag's 'rate' variable will yield 10%. Alternatively, if the
default steal rate is 0%, it will yield 0% regardless of this notetag's
'rate' variable value.
- This applies to all steal target types.
- The 'rate' variable starts at a value equal to the current success rate.
- The 'rate' variable will be returned as the declared success rate.
- The 'user' variable represents the user who will perform the skill/item.
- The 'target' variable represents the target who was stolen from.
--- <JS Steal Gold Rate>
code
code
rate = code;
</JS Steal Gold Rate>
- Used for: Skill, Item Notetags
- Uses JavaScript code to determine the success rate of the steal action.
- The 'rate' value is multiplied against the success rate of the target
item being stolen. This is a multiplicative stack.
- This means an item's default steal rate of 5% and a 200% steal rate on
this notetag's 'rate' variable will yield 10%. Alternatively, if the
default steal rate is 0%, it will yield 0% regardless of this notetag's
'rate' variable value.
- This applies to only the stealable gold type.
- The 'rate' variable starts at a value equal to the current success rate.
- The 'rate' variable will be returned as the declared success rate.
- The 'user' variable represents the user who will perform the skill/item.
- The 'target' variable represents the target who was stolen from.
--- <JS Steal Item Rate>
code
code
rate = code;
</JS Steal Item Rate>
- Used for: Skill, Item Notetags
- Uses JavaScript code to determine the success rate of the steal action.
- The 'rate' value is multiplied against the success rate of the target
item being stolen. This is a multiplicative stack.
- This means an item's default steal rate of 5% and a 200% steal rate on
this notetag's 'rate' variable will yield 10%. Alternatively, if the
default steal rate is 0%, it will yield 0% regardless of this notetag's
'rate' variable value.
- This applies to only the stealable item type.
- The 'rate' variable starts at a value equal to the current success rate.
- The 'rate' variable will be returned as the declared success rate.
- The 'user' variable represents the user who will perform the skill/item.
- The 'target' variable represents the target who was stolen from.
--- <JS Steal Weapon Rate>
code
code
rate = code;
</JS Steal Weapon Rate>
- Used for: Skill, Item Notetags
- Uses JavaScript code to determine the success rate of the steal action.
- The 'rate' value is multiplied against the success rate of the target
item being stolen. This is a multiplicative stack.
- This means an item's default steal rate of 5% and a 200% steal rate on
this notetag's 'rate' variable will yield 10%. Alternatively, if the
default steal rate is 0%, it will yield 0% regardless of this notetag's
'rate' variable value.
- This applies to only the stealable weapon type.
- The 'rate' variable starts at a value equal to the current success rate.
- The 'rate' variable will be returned as the declared success rate.
- The 'user' variable represents the user who will perform the skill/item.
- The 'target' variable represents the target who was stolen from.
--- <JS Steal Armor Rate>
code
code
rate = code;
</JS Steal Armor Rate>
- Used for: Skill, Item Notetags
- Uses JavaScript code to determine the success rate of the steal action.
- The 'rate' value is multiplied against the success rate of the target
item being stolen. This is a multiplicative stack.
- This means an item's default steal rate of 5% and a 200% steal rate on
this notetag's 'rate' variable will yield 10%. Alternatively, if the
default steal rate is 0%, it will yield 0% regardless of this notetag's
'rate' variable value.
- This applies to only the stealable armor type.
- The 'rate' variable starts at a value equal to the current success rate.
- The 'rate' variable will be returned as the declared success rate.
- The 'user' variable represents the user who will perform the skill/item.
- The 'target' variable represents the target who was stolen from.
--- <JS On Steal Success> code code code </JS On Steal Success> - Used for: Skill, Item Notetags - Runs the inserted JavaScript code upon successfully stealing. - The 'user' variable represents the user who will perform the skill/item. - The 'target' variable represents the target who was stolen from. - The 'item' variable represents the item that was stolen if there is one. This will return a null value if gold was stolen instead. - The 'gold' variable represents the gold quantity that was stolen if any. This will return a 0 value if there was no gold stolen. --- <JS On Steal Failure> code code code </JS On Steal Failure> - Used for: Skill, Item Notetags - Runs the inserted JavaScript code upon failing a stealth attempt. - The 'user' variable represents the user who will perform the skill/item. - The 'target' variable represents the target who was the theft target. --- <JS On Steal Empty> code code code </JS On Steal Empty> - Used for: Skill, Item Notetags - Runs the inserted JavaScript code if there was nothing to steal. - The 'user' variable represents the user who will perform the skill/item. - The 'target' variable represents the target who was the theft target. --- Steal Loot Setup-Related NotetagsThe following notetags are made for enemies and used to set up the loot that can be stolen. --- <Steal Gold value: x%> <Steal Item id: x%> <Steal Item name: x%> <Steal Weapon id: x%> <Steal Weapon name: x%> <Steal Armor id: x%> <Steal Armor name: x%> - Used for: Enemy Notetags - Sets up droppable loot for the enemy. - When setting up gold loot, replace 'value' with the amount of gold that will be stolen from this loot entry. - When setting up items, weapons, or armors, replace 'id' with the ID of the item, weapon, or armor for the loot entry. - When setting up items, weapons, or armors, replace 'name' with the name of the item, weapon, or armor for the loot entry. - Replace 'x' with a number value representing the base percent chance of successfully stealing this loot entry. - Insert multiple notetags for multiple loot entries to be stolen. --- <Steal> Gold value: x% Item id: x% Item name: x% Weapon id: x% Weapon name: x% Armor id: x% Armor name: x% </Steal> - Used for: Enemy Notetags - Sets up a batch setup of droppable loot for the enemy. - When setting up gold loot, replace 'value' with the amount of gold that will be stolen from this loot entry. - When setting up items, weapons, or armors, replace 'id' with the ID of the item, weapon, or armor for the loot entry. - When setting up items, weapons, or armors, replace 'name' with the name of the item, weapon, or armor for the loot entry. - Replace 'x' with a number value representing the base percent chance of successfully stealing this loot entry. - Insert/remove multiple copies of the loot entries inside the <Steal> notetags to add more or reduce entries. --- Steal Rate Traits-Related NotetagsThe following notetags are made for trait objects that can alter the success rates of steal skills/items. --- <Steal Rate: x%> - Used for: Actor, Class, Weapon, Armor, State Notetags - Alters the steal rate for the stealing actor multiplicatively. - Replace 'x' with a number representing the percent value to alter the success rate multiplicatively by. --- <Steal Rate: +x%> <Steal Rate: -x%> - Used for: Actor, Class, Weapon, Armor, State Notetags - Alters the steal rate for the stealing actor multiplicatively. - Replace 'x' with a number representing the percent value to alter the success rate additively by. --- <Steal Resist: +x%> <Steal Resist: -x%> - Used for: Enemy Notetags - Alters the steal resistance for enemies. Higher numbers mean higher steal resistance. - Replace 'x' with a number representing the percent value to alter the steal resistance by. --- Unique Tile Effects VisuStella MZThe following are notetags that have been added through this plugin. These notetags will not work with your game if this plugin is OFF or not present. --- Bounce Tile-Related NotetagsBounce tiles will cause affected characters that step over them to jump forward a specified amount of spaces based on their regions/terrain tags. This allows characters to scale past obstacles and/or other events! This jump effect has no rules other than it jumps forward that many spaces. The no rules bit means the jump tile is capable of launching characters into walls and/or on top of other events, so place your bounce tiles carefully! We are not responsible for any weird landing locations! If you are making maps where events can launch themselves with the aid of bounce tiles, we recommend putting either slippery tiles or force move tiles to move those events out of the way in the scenario where the player is following behind. This is to prevent the player from landing on top of the event. --- <Bounce d Region: x> <Bounce d Regions: x, x, x> - Used for: Map Notetags - Any map tiles marked with these regions will become bounce tiles, causing the characters to jump forward a specific 'distance'. - Replace 'd' with a number from 1 to 9 representing the distance to jump. Numbers above 10 will be ignored to prevent clipping bugs. - Replace 'x' with a number from 1 to 255 representing the ID of the region you wish to use as a bounce tile marker. - If you use this notetag, it will override the default region settings found in the Plugin Parameters. --- <Bounce d Terrain Tag: x> <Bounce d Terrain Tags: x, x, x> - Used for: Tileset Notetags - Any map tiles marked with these terrain tags will become bounce tiles, causing the characters to jump forward a specific 'distance'. - Replace 'd' with a number from 1 to 9 representing the distance to jump. Numbers above 10 will be ignored to prevent clipping bugs. - Replace 'x' with a number from 1 to 7 representing the ID of the terrain tag you wish to use as a bounce tile marker. --- <Can Bounce> - Used for: Event Notetags and Event Page Comment Tags - Makes the event capable of being affected by bounce tiles and jump. - This will override the default settings found in the Plugin Parameters. - If this is placed in a notetag, the effect will be present across all event pages used. - If this is placed inside a page's comment, the effect will only occur if that event page is currently active. --- <Anti-Bounce> - Used for: Event Notetags and Event Page Comment Tags - Makes the event unaffected by bounce tiles and not jump. - This will override the default settings found in the Plugin Parameters. - If this is placed in a notetag, the effect will be present across all event pages used. - If this is placed inside a page's comment, the effect will only occur if that event page is currently active. --- <Anti-Bounce> - Used for: Item, Weapon, Armor Notetags - If the party has an actor equipped a weapon or armor with this notetag, the player will become unaffected by bounce tiles and not jump. - If the party has a regular item with this notetag in their inventory, the player will become unaffected by bounce tiles and not jump. --- <Avoid Bounce> <Beware Bounce> - Used for: Event Notetags and Event Page Comment Tags - Causes the event to avoid stepping on bounce tiles when self moving. - The event can still step onto them when moved via event movement routes. - This will override the default settings found in the Plugin Parameters. - The notetag and comment tag variants do the same thing. Which you choose to use is entirely up to personal preference. - If this is placed in a notetag, the effect will be present across all event pages used. - If this is placed inside a page's comment, the effect will only occur if that event page is currently active. --- <Careless Bounce> <Ignore Bounce> - Used for: Event Notetags and Event Page Comment Tags - The event can carelessly move onto bounce tiles when self moving. - This will override the default settings found in the Plugin Parameters. - The notetag and comment tag variants do the same thing. Which you choose to use is entirely up to personal preference. - If this is placed in a notetag, the effect will be present across all event pages used. - If this is placed inside a page's comment, the effect will only occur if that event page is currently active. --- Force Move Tile-Related NotetagsForce move tiles cause affected characters on top of them to move in a specified direction continuously. This means that even if a character is stopped midway, transferred to the tile, or relocated to the force move tile, once the path is clear, the character will be sent automatically moving in the designated direction. --- <Force direction Region: x> <Force direction Regions: x, x, x> - Used for: Map Notetags - Any map tiles marked with these regions will become force move tiles, causing the characters on top of the go moving in the direction the tiles direct them to upon stepping on them. - Replace 'direction' with a string that is either 'down', 'left', 'right', or 'up' (without the quotes) to designate the direction the tile will automatically move the character. - Replace 'x' with a number from 1 to 255 representing the ID of the region you wish to use as a force move tile marker. - If you use this notetag, it will override the default region settings found in the Plugin Parameters. --- <Force direction Terrain Tag: x> <Force direction Terrain Tags: x, x, x> - Used for: Tileset Notetags - Any map tiles marked with these regions will become force move tiles, causing the characters on top of the go moving in the direction the tiles direct them to upon stepping on them. - Replace 'direction' with a string that is either 'down', 'left', 'right', or 'up' (without the quotes) to designate the direction the tile will automatically move the character. - Replace 'x' with a number from 1 to 7 representing the ID of the terrain tag you wish to use as a force move tile marker. --- <Can Force Move> - Used for: Event Notetags and Event Page Comment Tags - Makes the event capable of being affected by force move tiles. - This will override the default settings found in the Plugin Parameters. - If this is placed in a notetag, the effect will be present across all event pages used. - If this is placed inside a page's comment, the effect will only occur if that event page is currently active. --- <Anti-Force Move> - Used for: Event Notetags and Event Page Comment Tags - Makes the event unaffected by force move tiles. - This will override the default settings found in the Plugin Parameters. - If this is placed in a notetag, the effect will be present across all event pages used. - If this is placed inside a page's comment, the effect will only occur if that event page is currently active. --- <Anti-Force Move> - Used for: Item, Weapon, Armor Notetags - If the party has an actor equipped a weapon or armor with this notetag, the player will become unaffected by force move tiles. - If the party has a regular item with this notetag in their inventory, the player will become unaffected by force move tiles. --- <Avoid Force Move> <Beware Force Move> - Used for: Event Notetags and Event Page Comment Tags - Causes the event to avoid stepping on force move tiles when self moving. - The event can still step onto them when moved via event movement routes. - This will override the default settings found in the Plugin Parameters. - The notetag and comment tag variants do the same thing. Which you choose to use is entirely up to personal preference. - If this is placed in a notetag, the effect will be present across all event pages used. - If this is placed inside a page's comment, the effect will only occur if that event page is currently active. --- <Careless Force Move> <Ignore Force Move> - Used for: Event Notetags and Event Page Comment Tags - The event can carelessly move onto force move tiles when self moving. - This will override the default settings found in the Plugin Parameters. - The notetag and comment tag variants do the same thing. Which you choose to use is entirely up to personal preference. - If this is placed in a notetag, the effect will be present across all event pages used. - If this is placed inside a page's comment, the effect will only occur if that event page is currently active. --- Lava Tile-Related NotetagsLava tiles cause affected characters on top of them to continuously burn over time regardless of whether or not they're moving on the lava tile. When this happens to a player, the party will take lava burn damage, and events will be erased. When the character steps off a lava tile and is still surviving, the otherwise continuously lava effect wears off. However, the damage remains for the events and the number of times they can survive further lava burns has been reduced. --- <Lava Region: x> <Lava Regions: x, x, x> - Used for: Map Notetags - Any map tiles marked with these regions will become lava tiles, causing the characters on top to continuously take damage regardless of whether or not they're moving on the lava tile. - Replace 'x' with a number from 1 to 255 representing the ID of the region you wish to use as a lava tile marker. - If you use this notetag, it will override the default region settings found in the Plugin Parameters. --- <Lava Terrain Tag: x> <Lava Terrain Tags: x, x, x> - Used for: Tileset Notetags - Any map tiles marked with these terrain tags will become lava tiles, causing the characters on top to continuously take damage regardless of whether or not they're moving on the lava tile. - Replace 'x' with a number from 1 to 7 representing the ID of the terrain tag you wish to use as a lava tile marker. --- <Can Lava Burn> - Used for: Event Notetags and Event Page Comment Tags - Makes the event capable of being affected by lava tiles and burn. - This will override the default settings found in the Plugin Parameters. - If this is placed in a notetag, the effect will be present across all event pages used. - If this is placed inside a page's comment, the effect will only occur if that event page is currently active. --- <Anti-Lava Burn> - Used for: Event Notetags and Event Page Comment Tags - Makes the event unaffected by lava tiles and not burn. - This will override the default settings found in the Plugin Parameters. - If this is placed in a notetag, the effect will be present across all event pages used. - If this is placed inside a page's comment, the effect will only occur if that event page is currently active. --- <Anti-Lava Burn> - Used for: Item, Weapon, Armor Notetags - If the party has an actor equipped a weapon or armor with this notetag, the player will become unaffected by lava tiles and not burn. - If the party has a regular item with this notetag in their inventory, the player will become unaffected by lava tiles and not burn. --- <Lava Burn Max: x> - Used for: Event Notetags and Event Page Comment Tags - If the event can be affected by lava tiles and burn, this determines the maximum amount of times they can burn before erasure. - Replace 'x' with a number representing the maximum number of times the event can burn before erasure. - If this is placed in a notetag, the effect will be present across all event pages used. - If this is placed inside a page's comment, the effect will only occur if that event page is currently active. --- <Avoid Lava> <Beware Lava> - Used for: Event Notetags and Event Page Comment Tags - Causes the event to avoid stepping on lava tiles when self moving. - The event can still step onto them when moved via event movement routes. - This will override the default settings found in the Plugin Parameters. - The notetag and comment tag variants do the same thing. Which you choose to use is entirely up to personal preference. - If this is placed in a notetag, the effect will be present across all event pages used. - If this is placed inside a page's comment, the effect will only occur if that event page is currently active. --- <Careless Lava> <Ignore Lava> - Used for: Event Notetags and Event Page Comment Tags - The event can carelessly move onto lava tiles when self moving. - This will override the default settings found in the Plugin Parameters. - The notetag and comment tag variants do the same thing. Which you choose to use is entirely up to personal preference. - If this is placed in a notetag, the effect will be present across all event pages used. - If this is placed inside a page's comment, the effect will only occur if that event page is currently active. --- Pitfall Tile-Related NotetagsPitfalls (or bottomless pits) are tiles that when an affected character walks over it, the character will fall to its doom. Players will have their whole party take fall damage and return to a previously safe location. Events will be erased as if an event command took care of them. Characters can jump over pitfalls and be unharmed. Jumping directly into a pitfall will trigger a lethal reaction. --- <Pitfall Region: x> <Pitfall Regions: x, x, x> - Used for: Map Notetags - Any map tiles marked with these regions will become pitfall tiles, causing the characters that walk over them to fall in. - If the player character falls in, the party takes damage. - If an event falls in, it is erased. - Replace 'x' with a number from 1 to 255 representing the ID of the region you wish to use as a pitfall tile marker. - If you use this notetag, it will override the default region settings found in the Plugin Parameters. --- <Pitfall Terrain Tag: x> <Pitfall Terrain Tags: x, x, x> - Used for: Tileset Notetags - Any map tiles marked with these terrain tags will become pitfall tiles, causing the characters on top of the go sliding in the direction they're facing upon stepping on them. - Replace 'x' with a number from 1 to 7 representing the ID of the terrain tag you wish to use as a pitfall tile marker. --- <Pitfall Transfer: mapID>
<Pitfall Transfer: mapID, x, y>
- Used for: Map Notetags
- If the player falls into a pitfall tile on this specific map, the player
will be transferred to a different map (after taking damage).
- If the <Pitfall Transfer: mapID> variant is used, transfer the player to
the new map, but keep the current X, Y coordinates.
- If the <Pitfall Transfer: mapID, x, y> variant is used, transfer the
player to specific X, Y coordinates, too.
- The player's direction will be retained in both cases.
- Replace 'mapID' with a number representing the ID of the map to transfer
to. Use '0' to keep it to the current map.
- Replace 'x' and 'y' with numbers representing the respective target X and
Y coordinates on the new map. If these aren't used, then the player will
retain the current X and Y coordinates.
--- <Can Pitfall> - Used for: Event Notetags and Event Page Comment Tags - Makes the event capable of being affected by pitfall tiles and fall in. - This will override the default settings found in the Plugin Parameters. - If this is placed in a notetag, the effect will be present across all event pages used. - If this is placed inside a page's comment, the effect will only occur if that event page is currently active. --- <Anti-Pitfall> - Used for: Event Notetags and Event Page Comment Tags - Makes the event unaffected by pitfall tiles and can't fall in. They are also unable to walk into them without Through-state assistance. - This will override the default settings found in the Plugin Parameters. - If this is placed in a notetag, the effect will be present across all event pages used. - If this is placed inside a page's comment, the effect will only occur if that event page is currently active. --- <Anti-Pitfall> - Used for: Item, Weapon, Armor Notetags - If the party has an actor equipped a weapon or armor with this notetag, the player will become unaffected by pitfall tiles and can't fall in. - If the party has a regular item with this notetag in their inventory, the player will become unaffected by pitfall tiles and can't fall in. --- <Avoid Pitfall> <Beware Pitfall> - Used for: Event Notetags and Event Page Comment Tags - Causes the event to avoid stepping on pitfall tiles when self moving. - The event can still step onto them when moved via event movement routes. - This will override the default settings found in the Plugin Parameters. - The notetag and comment tag variants do the same thing. Which you choose to use is entirely up to personal preference. - If this is placed in a notetag, the effect will be present across all event pages used. - If this is placed inside a page's comment, the effect will only occur if that event page is currently active. --- <Careless Pitfall> <Ignore Pitfall> - Used for: Event Notetags and Event Page Comment Tags - The event can carelessly move onto pitfall tiles when self moving. - This will override the default settings found in the Plugin Parameters. - The notetag and comment tag variants do the same thing. Which you choose to use is entirely up to personal preference. - If this is placed in a notetag, the effect will be present across all event pages used. - If this is placed inside a page's comment, the effect will only occur if that event page is currently active. --- Quicksand Tile-Related NotetagsQuicksand tiles cause affected characters on top of them to slowly sink deeper with each step they take and visibly go deeper until they fully sink. When this happens to a player, the party will take sandsink damage and then return to a previously safe location. Events will be erased. When a character steps on a non-quicksand tile, the sandsink counter resets and the character fully resurfaces itself from the ground. --- <Quicksand Region: x> <Quicksand Regions: x, x, x> - Used for: Map Notetags - Any map tiles marked with these regions will become quicksand tiles, causing the characters to slowly sink deeper with each step. - Replace 'x' with a number from 1 to 255 representing the ID of the region you wish to use as a quicksand tile marker. - If you use this notetag, it will override the default region settings found in the Plugin Parameters. --- <Quicksand Terrain Tag: x> <Quicksand Terrain Tags: x, x, x> - Used for: Tileset Notetags - Any map tiles marked with these terrain tags will become quicksand tiles, causing the characters to slowly sink deeper with each step. - Replace 'x' with a number from 1 to 7 representing the ID of the terrain tag you wish to use as a quicksand tile marker. --- <Can Sandsink> - Used for: Event Notetags and Event Page Comment Tags - Makes the event capable of being affected by quicksand tiles and sandsink. - This will override the default settings found in the Plugin Parameters. - If this is placed in a notetag, the effect will be present across all event pages used. - If this is placed inside a page's comment, the effect will only occur if that event page is currently active. --- <Anti-Sandsink> - Used for: Event Notetags and Event Page Comment Tags - Makes the event unaffected by quicksand tiles and not sandsink. - This will override the default settings found in the Plugin Parameters. - If this is placed in a notetag, the effect will be present across all event pages used. - If this is placed inside a page's comment, the effect will only occur if that event page is currently active. --- <Anti-Sandsink> - Used for: Item, Weapon, Armor Notetags - If the party has an actor equipped a weapon or armor with this notetag, the player will become unaffected by quicksand tiles and not sandsink. - If the party has a regular item with this notetag in their inventory, the player will become unaffected by quicksand tiles and not sandsink. --- <Avoid Quicksand> <Beware Quicksand> - Used for: Event Notetags and Event Page Comment Tags - Causes the event to avoid stepping on quicksand tiles when self moving. - The event can still step onto them when moved via event movement routes. - This will override the default settings found in the Plugin Parameters. - The notetag and comment tag variants do the same thing. Which you choose to use is entirely up to personal preference. - If this is placed in a notetag, the effect will be present across all event pages used. - If this is placed inside a page's comment, the effect will only occur if that event page is currently active. --- <Careless Quicksand> <Ignore Quicksand> - Used for: Event Notetags and Event Page Comment Tags - The event can carelessly move onto quicksand tiles when self moving. - This will override the default settings found in the Plugin Parameters. - The notetag and comment tag variants do the same thing. Which you choose to use is entirely up to personal preference. - If this is placed in a notetag, the effect will be present across all event pages used. - If this is placed inside a page's comment, the effect will only occur if that event page is currently active. --- Shock Tile-Related NotetagsWhen characters that are affected by shock tiles and step over them, the tile will shock and zap them. The player will have the whole party take shock damage and then return to a previously safe location. Events will be erased immediately. --- <Shock Region: x> <Shock Regions: x, x, x> - Used for: Map Notetags - Any map tiles marked with these regions will become shock tiles, causing the characters to be shocked and zapped. - Replace 'x' with a number from 1 to 255 representing the ID of the region you wish to use as a shock tile marker. - If you use this notetag, it will override the default region settings found in the Plugin Parameters. --- <Shock Terrain Tag: x> <Shock Terrain Tags: x, x, x> - Used for: Tileset Notetags - Any map tiles marked with these terrain tags will become shock tiles, causing the characters to be shocked and zapped. - Replace 'x' with a number from 1 to 7 representing the ID of the terrain tag you wish to use as a shock tile marker. --- <Can Shock> - Used for: Event Notetags and Event Page Comment Tags - Makes the event capable of being affected by shock tiles and being zapped. - This will override the default settings found in the Plugin Parameters. - If this is placed in a notetag, the effect will be present across all event pages used. - If this is placed inside a page's comment, the effect will only occur if that event page is currently active. --- <Anti-Shock> - Used for: Event Notetags and Event Page Comment Tags - Makes the event unaffected by shock tiles and not be zapped. - This will override the default settings found in the Plugin Parameters. - If this is placed in a notetag, the effect will be present across all event pages used. - If this is placed inside a page's comment, the effect will only occur if that event page is currently active. --- <Anti-Sandsink> - Used for: Item, Weapon, Armor Notetags - If the party has an actor equipped a weapon or armor with this notetag, the player will become unaffected by shock tiles and not be zapped. - If the party has a regular item with this notetag in their inventory, the player will become unaffected by shock tiles and not be zapped. --- <Avoid Shock> <Beware Shock> - Used for: Event Notetags and Event Page Comment Tags - Causes the event to avoid stepping on shock tiles when self moving. - The event can still step onto them when moved via event movement routes. - This will override the default settings found in the Plugin Parameters. - The notetag and comment tag variants do the same thing. Which you choose to use is entirely up to personal preference. - If this is placed in a notetag, the effect will be present across all event pages used. - If this is placed inside a page's comment, the effect will only occur if that event page is currently active. --- <Careless Shock> <Ignore Shock> - Used for: Event Notetags and Event Page Comment Tags - The event can carelessly move onto shock tiles when self moving. - This will override the default settings found in the Plugin Parameters. - The notetag and comment tag variants do the same thing. Which you choose to use is entirely up to personal preference. - If this is placed in a notetag, the effect will be present across all event pages used. - If this is placed inside a page's comment, the effect will only occur if that event page is currently active. --- Slippery Tile-Related NotetagsSlippery tiles cause affected characters on top of them to slide forward until they hit a wall or another object. Once they stop, they can turn and move a different direction. If this new direction is still on the slippery tile, the character will continue sliding that direction, too. --- <Slippery Region: x> <Slippery Regions: x, x, x> - Used for: Map Notetags - Any map tiles marked with these regions will become slippery tiles, causing the characters on top of the go sliding in the direction they're facing upon stepping on them. - Replace 'x' with a number from 1 to 255 representing the ID of the region you wish to use as a slippery tile marker. - If you use this notetag, it will override the default region settings found in the Plugin Parameters. --- <Slippery Terrain Tag: x> <Slippery Terrain Tags: x, x, x> - Used for: Tileset Notetags - Any map tiles marked with these terrain tags will become slippery tiles, causing the characters on top of the go sliding in the direction they're facing upon stepping on them. - Replace 'x' with a number from 1 to 7 representing the ID of the terrain tag you wish to use as a slippery tile marker. --- <Can Slip> - Used for: Event Notetags and Event Page Comment Tags - Makes the event capable of being affected by slippery tiles and slide. - This will override the default settings found in the Plugin Parameters. - If this is placed in a notetag, the effect will be present across all event pages used. - If this is placed inside a page's comment, the effect will only occur if that event page is currently active. --- <Anti-Slip> - Used for: Event Notetags and Event Page Comment Tags - Makes the event unaffected by slippery tiles and not slide. - This will override the default settings found in the Plugin Parameters. - If this is placed in a notetag, the effect will be present across all event pages used. - If this is placed inside a page's comment, the effect will only occur if that event page is currently active. --- <Anti-Slip> - Used for: Item, Weapon, Armor Notetags - If the party has an actor equipped a weapon or armor with this notetag, the player will become unaffected by slippery tiles and not slide. - If the party has a regular item with this notetag in their inventory, the player will become unaffected by slippery tiles and not slide. --- <Avoid Slippery> <Beware Slippery> - Used for: Event Notetags and Event Page Comment Tags - Causes the event to avoid stepping on slippery tiles when self moving. - The event can still step onto them when moved via event movement routes. - This will override the default settings found in the Plugin Parameters. - The notetag and comment tag variants do the same thing. Which you choose to use is entirely up to personal preference. - If this is placed in a notetag, the effect will be present across all event pages used. - If this is placed inside a page's comment, the effect will only occur if that event page is currently active. --- <Careless Slippery> <Ignore Slippery> - Used for: Event Notetags and Event Page Comment Tags - The event can carelessly move onto slippery tiles when self moving. - This will override the default settings found in the Plugin Parameters. - The notetag and comment tag variants do the same thing. Which you choose to use is entirely up to personal preference. - If this is placed in a notetag, the effect will be present across all event pages used. - If this is placed inside a page's comment, the effect will only occur if that event page is currently active. --- Water Tile-Related NotetagsWater tiles are anything that a boat or ship can pass over and do not need to be marked by regions or terrain tags. Water tiles can cause affected characters to drown in them when walking over them. Players will have their whole party take drowning damage and then return to a previously safe location. Events will be erased. If the player is given the ability to swim, the player can traverse water tiles without any drowning problems. --- <Can Drown> - Used for: Event Notetags and Event Page Comment Tags - Makes the event capable of being affected by water tiles and drown. - This will override the default settings found in the Plugin Parameters. - If this is placed in a notetag, the effect will be present across all event pages used. - If this is placed inside a page's comment, the effect will only occur if that event page is currently active. --- <Anti-Drown> - Used for: Event Notetags and Event Page Comment Tags - Makes the event unaffected by water tiles and not drown. They are also unable to naturally walk into them withou Through-state assistance. - This will override the default settings found in the Plugin Parameters. - If this is placed in a notetag, the effect will be present across all event pages used. - If this is placed inside a page's comment, the effect will only occur if that event page is currently active. --- <Can Swim> - Used for: Item, Weapon, Armor Notetags - If the party has an actor equipped a weapon or armor with this notetag, the player will become able to swim in water and traverse them. - If the party has a regular item with this notetag in their inventory, the player will become able to swim in water and traverse them. --- <Avoid Drown> <Beware Drown> - Used for: Event Notetags and Event Page Comment Tags - Causes the event to avoid stepping on water tiles when self moving. - The event can still step onto them when moved via event movement routes. - This will override the default settings found in the Plugin Parameters. - The notetag and comment tag variants do the same thing. Which you choose to use is entirely up to personal preference. - If this is placed in a notetag, the effect will be present across all event pages used. - If this is placed inside a page's comment, the effect will only occur if that event page is currently active. --- <Careless Drown> <Ignore Drown> - Used for: Event Notetags and Event Page Comment Tags - The event can carelessly move onto water tiles when self moving. - This will override the default settings found in the Plugin Parameters. - The notetag and comment tag variants do the same thing. Which you choose to use is entirely up to personal preference. - If this is placed in a notetag, the effect will be present across all event pages used. - If this is placed inside a page's comment, the effect will only occur if that event page is currently active. --- Variable Gauges VisuStella MZThe following are notetags that have been added through this plugin. These notetags will not work with your game if this plugin is OFF or not present. --- Map-Related Notetags--- <Hide Variable Gauges> - Used for: Map Notetags - Prevents Variable Gauges from being visible on the current map. --- <Force Variable Gauge: key> <Force Variable Gauges: key, key, key> - Used for: Map Notetags - Overrides map settings for the visible Variable Gauges and makes it so that only the listed Variable Gauges (marked by their keys) are visible while on this map. - No other Variable Gauges are visible while on this map. - Replace 'key' with a string representing the Variable Gauge that should be visible on the map. --- <Extra Variable Gauge: key> <Extra Variable Gauges: key, key, key> - Used for: Map Notetags - Shows extra Variable Gauge(s) in addition to the ones that are normally visible on the map while on this map. - Replace 'key' with a string representing the Variable Gauge that is also visible on the map. --- Victory Aftermath VisuStella MZThe following are notetags that have been added through this plugin. These notetags will not work with your game if this plugin is OFF or not present. --- <Level Up Quotes> text text text text <New Quote> text text text text <New Quote> text text text text </Level Up Quotes> - Used for: Actor Notetags - Description - Replace 'text' with the text you'd want the actor to say when leveling up. - The <New Quote> tag is used between the <Level Up Quotes> notetags to separate quotes. - If an actor has multiple quotes (due to the <New Quote> notetag), then a random quote will be selected upon level up. - If this notetag is not found inside an actor's notebox, a random level up quote will be selected from the Plugin Parameters => Level Up => Quotes => Level Up Quotes plugin parameter. --- <New Skill Quotes> text text text text <New Quote> text text text text <New Quote> text text text text </New Skill Quotes> - Used for: Actor Notetags - Description - Replace 'text' with the text you'd want the actor to say when leveling up in addition to learning a new skill upon leveling up. - The <New Quote> tag is used between the <New Skill Quotes> notetags to separate quotes. - If an actor has multiple quotes (due to the <New Quote> notetag), then a random quote will be selected upon level up and learning a new skill. - If this notetag is not found inside an actor's notebox, a random new skill quote will be selected from the Plugin Parameters => Level Up => Quotes => New Skill Quotes plugin parameter. Visual Cutin Effect VisuStella MZThe following are notetags that have been added through this plugin. These notetags will not work with your game if this plugin is OFF or not present. --- Enemy-Related Notetags--- <Cutin Portrait: filename> - Used for: Enemy Notetags - Gives the enemy a portrait to use when using Visual Cutin Effects. - Replace 'filename' with a picture found within your game project's img/pictures/ folder. Filenames are case sensitive. Leave out the filename extension from the notetag. --- <Cutin Flip Horz> <Cutin Flip Horzontal> <Cutin Flip Horzontally> - Used for: Enemy Notetags - Flips the enemy's portrait horizontally. - There are no differences between the variations in notetags. The one you use is entirely up to your own personal preferences. --- <Cutin Flip Vert> <Cutin Flip Vertical> <Cutin Flip Vertically> - Used for: Enemy Notetags - Flips the enemy's portrait vertically. - There are no differences between the variations in notetags. The one you use is entirely up to your own personal preferences. --- Visual Fogs VisuStella MZThe following are notetags that have been added through this plugin. These notetags will not work with your game if this plugin is OFF or not present. --- Fog-Related Notetags--- <Fog id Settings>
Name: filename
optional property
optional property
optional property
</Fog id Settings>
- Used for: Map Notetags
- Creates a regular fog layer for this map by default.
- Replace 'id' with a number value to assign to the fog.
- Plugin Commands will refer to this ID for changes and removal.
- The 'Name' setting is required. Without it, no fog will be made.
- Replace 'filename' with the filename of the image you want to use as
a fog found in the game project's img/parallaxes/ folder.
- Do not include the file extension.
- Insert as many of the optional properties as you want. You can find a list
of them in the section below.
--- Optional PropertiesReplace the 'optional property' segment of the notetags above with any of the text below to acquire their effects. You can add/remove as many of the optional properties as you need. --- Horz Scroll: x Vert Scroll: y - This enables horizontal or vertical scrolling for the fog. - Replace 'x' or 'y' with a Number value to determine how fast they will scroll across the screen. - Use a negative value to make them scroll the other way. - These effects are mutually exclusive from the "Map Locked" property. --- Map Locked - This will cause the fog to only scroll when the map scrolls. - This has the same effect as naming a fog with "!" in front of its filename. - If the filename used for this fog has "!" in front of it, the Map Locked effect will be automatically turned on. - These effect is mutually exclusive from the "Horz Scroll" and "Vert Scroll" properties. --- Opacity: x Opacity: x% - Changes the opacity level of the fog. - Replace 'x' with a number from 0 to 255 representing the opacity level. - Replace 'x%' with a percentage from 0% to 100% representing the opacity. --- Blend Mode: Normal Blend Mode: Additive Blend Mode: Multiply Blend Mode: Screen - Sets the blend mode for the icon on the fog. - Use only one of the above. --- Hue: x Hue Shift: x - Changes the hue of the fog to 'x' so that you don't need to create multiple copies of the files with different colors. - Replace 'x' with a number value between 0 and 360. - If the "Hue Shift" property is also used, then adjust the hue of the fog each frame by 'x' amount. - 'x' can be positive or negative. --- Color Tone: red, green, blue, gray - Changes the color tone or tint of the fog. - Replace 'red', 'green', 'blue' with a value between -255 and 255. - Replace 'gray' with a value between 0 and 255. --- Region: id Regions: id, id, id - Forces the fog to only become visible on tiles marked regions with a matching ID (alongside valid terrain tags). - If this isn't used, then the fog will be as large as the screen. - Replace 'id' with a region ID between 1 and 255. - Region 0 is ignored and will not work. - Insert multiple ID's to mark more tiles the fog can appear on. - This feature cannot be used with Vignettes. - WARNING: This WILL cause longer load times on larger maps. --- Terrain Tag: id Terrain Tags: id, id, id - Forces the fog to only become visible on tiles marked terrain tags with a matching ID (alongside valid regions). - If this isn't used, then the fog will be as large as the screen. - Replace 'id' with a terrain tag ID between 1 and 7. - Terrain tag 0 is ignored and will not work. - Insert multiple ID's to mark more tiles the fog can appear on. - This feature cannot be used with Vignettes. - WARNING: This WILL cause longer load times on larger maps. --- Tile Blur: x - Determines how soft the borders are around the revealed fog tiles. - Use larger numbers to blur them more. - Use a value of zero to remove any blur. --- Tile Spill: x - Determines how much larger to make the revealed fog tiles. - Use larger numbers to spill more and make the tiles larger. - Use a value of zero to not spill at all and use the exact tile sizes. --- Vignette: type - Makes the fog appear along the edge of the screen rather than the entire visible game screen. - Replace 'type' with any of the following: - Border - Horizontal - Vertical - Upper - Lower - Left - Right --- Custom Vignette: filename - Allows you to use a custom parallax image as a vignette. - Replace 'filename' with the filename of the image you want to use as a vignette found in the game project's img/parallaxes/ folder. - Do not include the file extension. - Custom vignettes are used as masks. - White areas on the image determine the visible parts of the fog. - Black areas on the image determine the invisible parts of the fog. --- Visual Item Inventory VisuStella MZThe following are notetags that have been added through this plugin. These notetags will not work with your game if this plugin is OFF or not present. --- Picture-Related Notetags--- <Visual Item Picture: filename> <Picture: filename> - Used for: Item, Weapon, Armor Notetags - Uses a picture from your project's /img/pictures/ folder instead of the item's icon inside the item windows instead. - Replace 'filename' with the filename of the image. - Do not include the file extension. - Scaling will not apply to the picture. - Use the <Picture: filename> version for any other plugins that may be using this as an image outside of this plugin, too. - The size used for the image will vary based on the icon size settings. --- Background Colors-Related Notetags--- <Visual Item BG Color 1: x> <Visual Item BG Color 2: x> - Used for: Item, Weapon, Armor Notetags - Changes the background color(s) for the item to text color 'x'. - Replace 'x' with a number from 0 to 31 to represent a text color. --- <Visual Item BG Color 1: #rrggbb> <Visual Item BG Color 2: #rrggbb> - Used for: Item, Weapon, Armor Notetags - Changes the background color(s) for the item to a hex color. - Use #rrggbb for custom colors. - You can find out what hex codes belong to which color from this website: https://htmlcolorcodes.com/ --- Visual State Effects VisuStella MZThe following are notetags that have been added through this plugin. These notetags will not work with your game if this plugin is OFF or not present. State-Related NotetagsThe following notetags are made for states. --- <Hide State Popup> - Used for: State Notetags - Don't display any of the popups for this state. --- <State Popup> text color: c flash color: r, g, b, a flash duration: d </State Popup> - Used for: State Notetags - Changes the settings of the state popup from the defaults declared by the Plugin Parameters. Each of the settings are optional. If the lines do not appear in the notetag, then the default values from the Plugin Parameters will be used instead. - Replace 'c' #rrggbb for custom colors or insert a regular number for text colors from the Window Skin. - Replace 'r', 'g', 'b', 'a' with number values ranging from 0 to 255 for 'red', 'green', 'blue', and 'alpha' to determine the flash color. - Replace 'd' with a number representing the amount of frames you want the flash duration to last for. Examples: <State Popup> text color: 3 </State Popup> <State Popup> text color: #abcdef flash color: 255, 255, 0, 160 </State Popup> <State Popup> flash color: 0, 255, 255, 160 flash duration: 90 </State Popup> <State Popup> flash duration: 777 </State Popup> --- <Add Animation: x> - Used for: State Notetags - Determines the battle animation to play when the state is applied. - Replace 'x' with a number representing the ID of the animation you wish to play when the state is added. - This does not work for states without icons nor the death state. --- <Erase Animation: x> - Used for: State Notetags - Determines the battle animation to play when the state is removed. - Replace 'x' with a number representing the ID of the animation you wish to play when the state is removed. - This does not work for states without icons nor the death state. --- <Repeat Animation: x> - Used for: State Notetags - Determines the battle animation to play in intervals when the battler is affected by it. - Replace 'x' with a number representing the ID of the animation you wish to play on repeat while the battler is affected by the state. - The battler will cycle through the various repeating state animations available through states. - NOTE: Using this with Passive State Conditions will make this effect update at the next battler refresh cycle. This is due to the effect being cached in order to prevent lag and overloading the engine. - WARNING: Abusing Repeat Animations can jeopardize game performance. --- <Repeat Animation Cycle: x> - Used for: State Notetags - Determines the cycle/duration of this specific state's repeating animation if you do not wish to use the plugin parameter's default setting. - Replace 'x' with the number of frames you wish to play this animation for before moving onto the next animation. - WARNING: Lower numbers can jeopardize game performance. --- <Custom Overlay: filename>
- Used for: State Notetags
- For those who don't want to use the img/system/ folder's "States" image
file and want something custom, this notetag will do exactly that.
- Custom state overlays will follow similar dimensions to the original
States image:
- Pixel Width: 768
- Pixel Height: 96
- Total Frames: 8
- If you want to use different sizes, we recommend you look into Effekseer
custom animations with the <Repeat Animation: x> notetag instead.
- Replace 'filename' with the filename of the image you want to use as
a state overlay found in the game project's img/system/ folder.
- Do not include the file extension.
--- <State Motion: Walk> <State Motion: Wait> <State Motion: Chant> <State Motion: Guard> <State Motion: Damage> <State Motion: Evade> <State Motion: Thrust> <State Motion: Swing> <State Motion: Missile> <State Motion: Skill> <State Motion: Spell> <State Motion: Item> <State Motion: Escape> <State Motion: Victory> <State Motion: Dying> <State Motion: Abnormal> <State Motion: Sleep> <State Motion: Dead> - Used for: State Notetags - Lets you determine what kind of state motion to play when the battler is affected by the state. - The battler will only play the highest priority state motion. - NOTE: Using this with Passive State Conditions will make this effect update at the next battler refresh cycle. This is due to the effect being cached in order to prevent lag and overloading the engine. --- <State Motion Lock> - Used for: State Notetags - If an actor or animated sideview enemy is affected by a state that has this notetag, their animation will be locked in place while this state is in effect. - NOTE: Using this with Passive State Conditions will make this effect update at the next battler refresh cycle. This is due to the effect being cached in order to prevent lag and overloading the engine. --- <State Tone: red, green, blue, gray> - Used for: State Notetags - Tints the battler with a tone determined by the state. - Replace 'red', 'green', 'blue' with a value between -255 and 255. - Replace 'gray' with a value between 0 and 255. - If a battler has multiple states with tones, then the state with the highest priority value is applied to the battler. - NOTE: Using this with Passive State Conditions will make this effect update at the next battler refresh cycle. This is due to the effect being cached in order to prevent lag and overloading the engine. --- <Visual Opacity: x> <Visual Opacity: x%> - Used for: State Notetags - When a battler is affected by this state, change the opacity of their main battler sprite to 'x' or 'x%'. - Replace 'x' with a number from 0 to 255 representing the opacity level. - Replace 'x%' with a percentage from 0% to 100% representing the opacity. - This does NOT affect UI elements like the HP Gauges, State Icons, or their positioning markers such as the battler's shadow as this is only to used to represent a change in their opacity through a state. - To change the whole battler's opacity including everything from the UI elements, State Icons, etc., use the Action Sequence Plugin Command to visually alter the whole opacity level instead. - The Visual Opacity level will compound with the opacity level adjusted by the Action Sequence Plugin Command. Keep this in mind when using both of them together. - NOTE: Using this with Passive State Conditions will make this effect update at the next battler refresh cycle. This is due to the effect being cached in order to prevent lag and overloading the engine. --- <Visual Rainbow: +x> <Visual Rainbow: -x> - Used for: State Notetags - When a battler is affected by this state, the battler has a colorful rainbow shifting effect. - Replace 'x' with a number representing how fast the colors shift for the battler. Higher numbers are faster. Lower numbers are slower. - This does NOT affect UI elements like the HP Gauges, State Icons, or their positioning markers such as the battler's shadow as this is only to used to represent a change in their opacity through a state. - The Visual Rainbow shift will be stacked on top of any battlers/enemies that already have a hue change. - NOTE: Using this with Passive State Conditions will make this effect update at the next battler refresh cycle. This is due to the effect being cached in order to prevent lag and overloading the engine. --- Hover Notetags--- <Visual Hover Effect> Base: x Speed: y Rate: z Death: case </Visual Hover Effect> - Used for: Actor, Class, Weapon, Armor, Enemy, State Notetags - Creates a hover effect when tied to a trait object. - The 'base' value determines the minimum height above the ground for the hover effect. Replace 'x' with a number representing the pixel height. - The 'speed' value determines the flat adjustment towards the wobbling change. Replace 'y' with a number representing the speed. Lower values move faster while higher values move slower. - The 'rate' determines the fluctuation rate when the hover effect bobbles up and down. Replace 'z' with a number representing the fluctuation rate. - The 'death' scenario lets you decide if you want the hovering battler to remain hovering if they're dead or fall down to the floor. Replace 'case' with 'Hover' or 'Floor'. - NOTE: Using this with Passive State Conditions will make this effect update at the next battler refresh cycle. This is due to the effect being cached in order to prevent lag and overloading the engine. Example: <Visual Hover Effect> Base: 100 Speed: 20 Rate: 5.0 Death: floor </Visual Hover Effect> --- Breathing-Related NotetagsThe following notetags are purely EXPERIMENTAL. There is a high likelihood of unintended graphical glitches when using them. Use them at your own risk. --- <Visual Breathing Effect> Speed: x Speed X: x Speed Y: x Rate: x.y Rate X: x.y Rate Y: x.y HP Link: On HP Link: Off </Visual Breathing Effect> - Used for: Actor, Class, Weapon, Armor, Enemy, State Notetags - Creates a hover effect when tied to a trait object. - The 'speed' value determines how long each cycle is. - When using 'Speed', this will apply to both 'Speed X' and 'Speed Y' - 'Speed X' refers to the horizontal breathing cycle - 'Speed Y' refers to the vertical breathing cycle - If not declared, both will default to a value of '10' - The 'rate' value determines how exaggerated the breathing distortion looks for the affected target. - When using 'Rate', this will apply to both 'Rate X' and 'Rate Y - 'Rate X' refers to horizontal breathing distortion effect - 'Rate Y' refers to vertical breathing distortion effect - If not declared, 'Rate X' will default to 0.000 and 'Rate Y' to 0.020. - HP Link refers to the breathing speed relative to the target's HP rate where the lower the rate, the slower the speed becomes. - 'On' means it's enabled. - 'Off' means it's disabled. - If not declared, this will default to 'OFF' - NOTE: Using this with Passive State Conditions will make this effect update at the next battler refresh cycle. This is due to the effect being cached in order to prevent lag and overloading the engine. Examples: <Visual Breathing Effect> Speed: 10 Rate Y: 0.050 HP Link: On </Visual Breathing Effect> <Visual Breathing Effect> Speed X: 15 Speed Y: 10 Rate X: 0.01 Rate Y: 0.050 </Visual Breathing Effect> --- <No Breathing> - Used for: Actor, Class, Weapon, Armor, Enemy, State Notetags - Removes any breathing effects for the affected target. --- Visual Parallaxes VisuStella MZThe following are notetags that have been added through this plugin. These notetags will not work with your game if this plugin is OFF or not present. --- Parallax-Related Notetags--- <Parallax id Settings>
Name: filename
optional property
optional property
optional property
</Parallax id Settings>
- Used for: Map Notetags
- Creates a regular parallax layer for this map by default.
- Replace 'id' with a number value to assign to the parallax.
- Plugin Commands will refer to this ID for changes and removal.
- The 'Name' setting is required. Without it, no parallax will be made.
- Replace 'filename' with the filename of the image you want to use as
a parallax found in the game project's img/parallaxes/ folder.
- Do not include the file extension.
- Insert as many of the optional properties as you want. You can find a list
of them in the section below.
--- <Water Parallax id Settings>
Name: filename
optional property
optional property
optional property
</Water Parallax id Settings>
- Used for: Map Notetags
- Creates a water-based parallax layer for this map by default.
- This will utilize the water reflection properties and will only appear
on water-marked regions and terrain tags.
- Replace 'id' with a number value to assign to the parallax.
- Plugin Commands will refer to this ID for changes and removal.
- The 'Name' setting is required. Without it, no parallax will be made.
- Replace 'filename' with the filename of the image you want to use as
a parallax found in the game project's img/parallaxes/ folder.
- Do not include the file extension.
- Insert as many of the optional properties as you want. You can find a list
of them in the section below.
- WARNING: This WILL cause longer load times on larger maps.
--- <Solid Parallax id Settings>
Name: filename
optional property
optional property
optional property
</Solid Parallax id Settings>
- Used for: Map Notetags
- Creates a solid-based parallax layer for this map by default.
- This will utilize the solid reflection properties and will only appear
on solid-marked regions and terrain tags.
- Replace 'id' with a number value to assign to the parallax.
- Plugin Commands will refer to this ID for changes and removal.
- The 'Name' setting is required. Without it, no parallax will be made.
- Replace 'filename' with the filename of the image you want to use as
a parallax found in the game project's img/parallaxes/ folder.
- Do not include the file extension.
- Insert as many of the optional properties as you want. You can find a list
of them in the section below.
- WARNING: This WILL cause longer load times on larger maps.
--- Optional PropertiesReplace the 'optional property' segment of the notetags above with any of the text below to acquire their effects. You can add/remove as many of the optional properties as you need. --- Horz Scroll: x Vert Scroll: y - This enables horizontal or vertical scrolling for the parallax. - Replace 'x' or 'y' with a Number value to determine how fast they will scroll across the screen. - Use a negative value to make them scroll the other way. - These effects are mutually exclusive from the "Map Locked" property. --- Map Locked - This will cause the parallax to only scroll when the map scrolls. - This has the same effect as naming a parallax with "!" in front of its filename. - If the filename used for this parallax has "!" in front of it, the Map Locked effect will be automatically turned on. - These effect is mutually exclusive from the "Horz Scroll" and "Vert Scroll" properties. --- Opacity: x Opacity: x% - Changes the opacity level of the parallax. - Replace 'x' with a number from 0 to 255 representing the opacity level. - Replace 'x%' with a percentage from 0% to 100% representing the opacity. --- Blend Mode: Normal Blend Mode: Additive Blend Mode: Multiply Blend Mode: Screen - Sets the blend mode for the icon on the parallax. - Use only one of the above. --- Hue: x Hue Shift: x - Changes the hue of the parallax to 'x' so that you don't need to create multiple copies of the files with different colors. - Replace 'x' with a number value between 0 and 360. - If the "Hue Shift" property is also used, then adjust the hue of the parallax each frame by 'x' amount. - 'x' can be positive or negative. --- Color Tone: red, green, blue, gray - Changes the color tone or tint of the parallax. - Replace 'red', 'green', 'blue' with a value between -255 and 255. - Replace 'gray' with a value between 0 and 255. --- Region: id Regions: id, id, id - Forces the parallax to only become visible on tiles marked regions with a matching ID (alongside valid terrain tags). - If this isn't used, then the parallax will be as large as the screen. - Replace 'id' with a region ID between 1 and 255. - Region 0 is ignored and will not work. - Insert multiple ID's to mark more tiles the parallax can appear on. - WARNING: This WILL cause longer load times on larger maps. --- Terrain Tag: id Terrain Tags: id, id, id - Forces the parallax to only become visible on tiles marked terrain tags with a matching ID (alongside valid regions). - If this isn't used, then the parallax will be as large as the screen. - Replace 'id' with a terrain tag ID between 1 and 7. - Terrain tag 0 is ignored and will not work. - Insert multiple ID's to mark more tiles the parallax can appear on. - WARNING: This WILL cause longer load times on larger maps. --- Event Reflection-Related Notetags--- <No Reflection> - Used for: Event Notetags and Event Page Comment Tags - This will cause the event to not show any reflection on reflective tiles. - If this is placed in a notetag, the effect will be present across all event pages used. - If this is placed inside a page's comment, the effect will only occur if that event page is currently active. --- Reflection-Related NotetagsIn order to use reflections, you need to use tiles that are semi-transparent or fully transparent. For example, water reflections need to come from tiles that have been modified to be semi-transparent or fully transparent. If the tile is completely opaque, the reflection will not show through. This rule also applies to ground surfaces. --- <Water Reflection Region: id> <Water Reflection Regions: id, id, id> <Solid Reflection Region: id> <Solid Reflection Regions: id, id, id> - Used for: Map Notetags - Sets the tiles marked by the region ID's to become reflective. - This will override the Plugin Parameter settings for this map. - This does not add upon them. - Replace 'id' with a region ID between 1 and 255. - Region 0 is ignored and will not work. - Insert multiple ID's to mark more tiles the parallax can appear on. - If these tags aren't used, refer to the settings found in the Plugin Parameter defaults. - WARNING: This WILL cause longer load times on larger maps. --- <Water Reflection Terrain Tag: id> <Water Reflection Terrain Tags: id, id, id> <Solid Reflection Terrain Tag: id> <Solid Reflection Terrain Tags: id, id, id> - Used for: Map Notetags - Sets the tiles marked by the terrain tag ID's to become reflective. - This will override the Plugin Parameter settings for this map. - This does not add upon them. - Replace 'id' with a terrain tag ID between 1 and 7. - Terrain Tag 0 is ignored and will not work. - Insert multiple ID's to mark more tiles the parallax can appear on. - If these tags aren't used, refer to the settings found in the Plugin Parameter defaults. - WARNING: This WILL cause longer load times on larger maps. --- <No Reflections> - Used for: Map Notetags - Disable water and map reflections on the current map. --- <Water Reflection Top>
<Water Reflection Bottom>
<Solid Reflection Top>
<Solid Reflection Bottom>
- Used for: Map Notetags
- This will put the reflection layer either above all of the newly added
parallaxes or below them.
- If placed below, the reflection layer will not appear below the map
editor's parallax layer.
- If you change them to appear below the parallaxes, then pay attention to
the opacity level of the parallaxes. If the parallaxes are too opaque,
you will barely see the reflection.
- If these tags aren't used, refer to the settings found in the Plugin
Parameter defaults.
--- <Water Reflection Blur: x> <Solid Reflection Blur: x> - Used for: Map Notetags - Changes how much the water/solid tiles will blur the reflection for this map. - Replace 'x' with a decimal Number value. Use a number between 0 and 1 for the best results. - If these tags aren't used, refer to the settings found in the Plugin Parameter defaults. --- <Water Reflection Opacity: x> <Water Reflection Opacity: x%> <Solid Reflection Opacity: x> <Solid Reflection Opacity: x%> - Used for: Map Notetags - Changes the opacity level of the tile's reflection. - Replace 'x' with a number from 0 to 255 representing the opacity level. - Replace 'x%' with a percentage from 0% to 100% representing the opacity. - If these tags aren't used, refer to the settings found in the Plugin Parameter defaults. --- <Water Reflection Boundary: x>
<Water Reflection Amplitude: start, end>
<Water Reflection Wavelength: start, end>
- Used for: Map Notetags
- Requires Pixi JS Filters installed for the game project.
- These settings adjust the water reflection's ripple intensity.
- Replace Boundary's 'x' with a number value between 0 and 1.
- Vertical position of the reflection point, default is 50% (middle)
smaller numbers produce a larger reflection, larger numbers produce a
smaller reflection. This also means that reflections closer to the edges
will also have a different visual ripple effect than those towards the
middle of the reflection.
- Replace Amplitude's 'start' and 'end' with number values representing how
much to alter the intensity by.
- Starting and ending amplitude of waves allows you to control the
intensity of the reflection ripples.
- Use larger numbers for more intensity.
- Replace Wavelength's 'start' and 'end' with number values representing the
wave size.
- Starting and ending wavelength values determine the size of the ripples
for the reflection filter.
- Use larger numbers for larger wave sizes.
--- Weakness Display VisuStella MZThe following are notetags that have been added through this plugin. These notetags will not work with your game if this plugin is OFF or not present. --- Analyze-Related Notetags--- <Analyze Weakness: x> <Analyze Weaknesses: x> - Used for: Skill, Item Notetags - Reveals 'x' amount of elemental weaknesses the target enemy may have without needing to hit the enemy with the said elemental weakness first. - Replace 'x' with a number representing the number of weaknesses to reveal through this action. - This has no effect on actors. --- Weapon Animation VisuStella MZThe following are notetags that have been added through this plugin. These notetags will not work with your game if this plugin is OFF or not present. --- Weapon Image-Related Notetags--- <Weapon Image: x> - Used for: Actor, Class, Weapon, Armor, Enemy, State Notetags - Changes the weapon image used for the affected battler to a numeric type. - Replace 'x' with a number representing the weapon image's ID. - You'll get an image from "img/system/" folder's weapon sheets. - Each sheet contains 12 weapon images. If you wish to load a weapon from the first sheet, it'll be within 1-12. - If you wish to load a weapon from the second sheet, it'll be within 13-24, and so on. - The weapon sheets increase in increments of 12, which means that if you wish to load a weapon from weapon sheet 50, x will be between 589 to 600. By default, these are the number values associated with each: 1 - Dagger 7 - Long Bow 13 - Mace 19 - Slingshot 25 - Book 2 - Sword 8 - Crossbow 14 - Rod 20 - Shotgun 26 - Custom 3 - Flail 9 - Gun 15 - Club 21 - Rifle 27 - Custom 4 - Axe 10 - Claw 16 - Chain 22 - Chainsaw 28 - Custom 5 - Whip 11 - Glove 17 - Sword#2 23 - Railgun 29 - Custom 6 - Staff 12 - Spear 18 - Iron Pipe 24 - Stun Rod 30 - Custom --- <Weapon Image: filename> - Used for: Actor, Class, Weapon, Armor, Enemy, State Notetags - Changes the weapon image used for the affected battler to a unique file. - Replace 'filename' with the name of the file found in the "img/weapons/" folder (or whichever folder you've set it to in the plugin parameters). - This is case sensitive. - Do not include the file extension. Example: <Weapon Image: Beam Sword> --- <Weapon Motion: thrust> <Weapon Motion: swing> <Weapon Motion: missile> - Used for: Actor, Class, Weapon, Armor, Enemy, State Notetags - This notetag requires a <Weapon Image: x> or <Weapon Image: filename> notetag on the same trait object. - Forces the weapon to play a specific motion when attacking. - If this is not defined, the played motion will be the custom motion declared in the plugin parameters. - You can also replace the motion type with the following: walk wait chant guard damage evade thrust swing missile skill spell item escape victory dying abnormal sleep dead --- <Weapon Hue: x> - Used for: Actor, Class, Weapon, Armor, Enemy, State Notetags - This notetag requires a <Weapon Image: x> or <Weapon Image: filename> notetag on the same trait object. - Changes the hue of the custom weapon image. - Replace 'x' with a hue number between 0 and 255. --- State Attack Animation-Related Notetags--- <Attack Animation: x> <Weapon Animation: x> - Used for: State Notetags - When the battler attacks while having a state with this notetag, the battler's attack animation will be changed to 'x'. - This can be used for things like a "Burning Weapon" state that turns the attack animation into a flame attack instead of the normal attack. - This only applies when a skill/item's animation is set to "Normal Attack". - Replace 'x' with a number representing the animation's ID. - If a battler is affected by multiple states with these notetags, then the state with the highest priority number will have its effect take place. - There are no differences between the notetags. They both achieve the same functionality. <Weapon Animation: x> happens to be a legacy notetag carried from YEP's library. --- Weapon Swap System VisuStella MZThe following are notetags that have been added through this plugin. These notetags will not work with your game if this plugin is OFF or not present. --- Skill Usage-Related Notetags--- <Require Any Weapon> - Used for: Skill Notetags - Requires the actor to have any weapon equipped in order to use the skill, regardless of the weapon's type. - This does not affect enemies. --- <Switch to Weapon Type: id> <Switch to Weapon Type: name> - Used for: Skill Notetags - When using the skill, the actor will switch to the equipped weapon of the matching type. - Replace 'id' with a number representing the weapon type's ID. - Replace 'name' with the name of the weapon type. - Weapon types are not the same as weapons. Weapon types are found in the Database > Types tab. - This does not affect enemies. --- Weapon Unleash VisuStella MZThe following are notetags that have been added through this plugin. These notetags will not work with your game if this plugin is OFF or not present. Unleash-Related NotetagsThe following notetags are related to Unleashes, which have a percent chance of trigger upon selecting "Attack" or "Guard" commands in-battle. --- <Weapon Unleash id: x%> <Weapon Unleash name: x%> - Used for: Actor, Class, Skill, Weapon, Armor, Enemy, State Notetags - Gives this object a trait that allows the affiliated battler a chance to perform an action other than "Attack" when selected. - Replace 'id' with either the skill's ID or name you wish for the "Attack" command to have a chance of activating. - Replace 'x' with a number representing the percentile chance to activate the Unleash skill. - If a battler has multiple Weapon Unleash traits, the game will go through each trait one by one, taking whichever Unleash skill succeeds first. --- <Guard Unleash id: x%> <Guard Unleash name: x%> - Used for: Actor, Class, Skill, Weapon, Armor, Enemy, State Notetags - Gives this object a trait that allows the affiliated battler a chance to perform an action other than "Guard" when selected. - Replace 'id' with either the skill's ID or name you wish for the "Guard" command to have a chance of activating. - Replace 'x' with a number representing the percentile chance to activate the Unleash skill. - If a battler has multiple Guard Unleash traits, the game will go through each trait one by one, taking whichever Unleash skill succeeds first. --- <Weapon Unleash: +x%> <Weapon Unleash: -x%> - Used for: Actor, Class, Skill, Weapon, Armor, Enemy, State Notetags - Raises/Lowers the activation chance of all Weapon Unleashes by x%. - Replace 'x' with a number representing the additive increase/decrease of all Weapon Unleash success rates. --- <Weapon Unleash id: +x%> <Weapon Unleash id: -x%> - Used for: Actor, Class, Skill, Weapon, Armor, Enemy, State Notetags - Raises/Lowers the activation chance of the listed Weapon Unleash by x%. - Replace 'id' with either the skill's ID or name you wish to increase the Weapon Unleash success rate for. - Replace 'x' with a number representing the additive increase/decrease of the specified Weapon Unleash success rates. --- <Guard Unleash: +x%> <Guard Unleash: -x%> - Used for: Actor, Class, Skill, Weapon, Armor, Enemy, State Notetags - Raises/Lowers the activation chance of all Guard Unleashes by x%. - Replace 'x' with a number representing the additive increase/decrease of all Guard Unleash success rates. --- <Guard Unleash id: +x%> <Guard Unleash id: -x%> - Used for: Actor, Class, Skill, Weapon, Armor, Enemy, State Notetags - Raises/Lowers the activation chance of the listed Guard Unleash by x%. - Replace 'id' with either the skill's ID or name you wish to increase the Guard Unleash success rate for. - Replace 'x' with a number representing the additive increase/decrease of the specified Guard Unleash success rates. --- JavaScript Notetags: Unleash-RelatedThe following notetags are made for users with JavaScript knowledge to determine which Unleash skill will be used (if at all). --- <JS Weapon Unleash> code code id = code; </JS Weapon Unleash> - Used for: Actor, Class, Skill, Weapon, Armor, Enemy, State Notetags - Determines the Weapon Unleash skill ID to use. - Replace 'code' with JavaScript code to determine the skill ID to use. - The 'user' is the battler who is attempting to unleash the skill. - The 'id' variable is the skill ID that the character will use for the "Weapon Unleash". - Hint: The Unleashes occur at a 100% success rate. If you wish to make a percent chance success rate, check for a random number, and make it use the desired skill ID if it passes, and the default attack skill ID if it does not pass. --- <JS Guard Unleash> code code id = code; </JS Guard Unleash> - Used for: Actor, Class, Skill, Weapon, Armor, Enemy, State Notetags - Determines the Guard Unleash skill ID to use. - Replace 'code' with JavaScript code to determine the skill ID to use. - The 'user' is the battler who is attempting to unleash the skill. - The 'id' variable is the skill ID that the character will use for the "Guard Unleash". - Hint: The Unleashes occur at a 100% success rate. If you wish to make a percent chance success rate, check for a random number, and make it use the desired skill ID if it passes, and the default attack skill ID if it does not pass. --- <JS On Unleash> code code code </JS On Unleash> - Used for: Actor, Class, Skill, Weapon, Armor, Enemy, State Notetags - This code runs when any kind of Unleash, Weapon or Guard, triggers. - Runs 'code' with JavaScript code to determine any effects that occur. - The 'user' is the battler who is currently using the unleash skill. - The 'id' variable is the skill ID being unleashed. - The 'skill' variable is the skill being unleashed. --- <JS On Weapon Unleash> code code code </JS On Weapon Unleash> - Used for: Actor, Class, Skill, Weapon, Armor, Enemy, State Notetags - This code runs when a Weapon Unleash triggers. - Runs 'code' with JavaScript code to determine any effects that occur. - The 'user' is the battler who is currently using the unleash skill. - The 'id' variable is the skill ID being unleashed. - The 'skill' variable is the skill being unleashed. --- <JS On Guard Unleash> code code code </JS On Guard Unleash> - Used for: Actor, Class, Skill, Weapon, Armor, Enemy, State Notetags - This code runs when a Guard Unleash triggers. - Runs 'code' with JavaScript code to determine any effects that occur. - The 'user' is the battler who is currently using the unleash skill. - The 'id' variable is the skill ID being unleashed. - The 'skill' variable is the skill being unleashed. --- Replace-Related NotetagsSkill replacement traits will replace the "Attack" and "Guard" commands in battle with other skills. They will always be replaced unless an Unleash successfully triggers and overrides them. --- <Replace Attack: id> - Used for: Actor, Class, Skill, Weapon, Armor, Enemy, State Notetags - Replaces the battler's Attack command in battle with a different skill. - Replace 'id' with the skill's ID or name you wish to replace the battler's Attack command with. - If a Weapon Unleash occurs, the Weapon Unleash will take priority over the Replace Attack skill. - If a battler has multiple Replace Attack traits, the game will go through each trait one by one, taking whichever replaced skill is found first. --- <Replace Guard: id> - Used for: Actor, Class, Skill, Weapon, Armor, Enemy, State Notetags - Replaces the battler's Guard command in battle with a different skill. - Replace 'id' with the skill's ID or name you wish to replace the battler's Guard command with. - If a Weapon Unleash occurs, the Weapon Unleash will take priority over the Replace Guard skill. - If a battler has multiple Replace Guard traits, the game will go through each trait one by one, taking whichever replaced skill is found first. --- JavaScript Notetags: Replace-RelatedThe following notetags are made for users with JavaScript knowledge to determine which replacement skill will be used (if at all). --- <JS Replace Attack> code code id = code; </JS Replace Attack> - Used for: Actor, Class, Skill, Weapon, Armor, Enemy, State Notetags - Determines the Replace Attack skill ID to use. - Replace 'code' with JavaScript code to determine the skill ID to use. - The 'id' variable is the skill ID that the character will use for the attack replacement. --- <JS Replace Guard> code code id = code; </JS Replace Guard> - Used for: Actor, Class, Skill, Weapon, Armor, Enemy, State Notetags - Determines the Replace Guard skill ID to use. - Replace 'code' with JavaScript code to determine the skill ID to use. - The 'id' variable is the skill ID that the character will use for the attack replacement. --- Weather Effects VisuStella MZThe following are notetags that have been added through this plugin. These notetags will not work with your game if this plugin is OFF or not present. --- Convenience-Related Notetags--- <No Weather> - Used for: Map Notetags - Sets the map to not show any weather effects regardless of what's actually being set currently. Weather effects will resume once the player leaves the map and enters one that does not forbid weather effects. - This is useful for indoor maps when you don't want to turn weather effects on and off constantly. --- End of List |
Pages in category "Notetags (MZ)"
The following 104 pages are in this category, out of 104 total.
A
B
- Battle AI VisuStella MZ
- Battle Command - Talk VisuStella MZ
- Battle Core VisuStella MZ
- Battle Cursor VisuStella MZ
- Battle Grid System VisuStella MZ
- Battle System - ATB VisuStella MZ
- Battle System - BTB VisuStella MZ
- Battle System - CTB VisuStella MZ
- Battle System - ETB VisuStella MZ
- Battle System - FTB VisuStella MZ
- Battle System - OTB VisuStella MZ
- Battle System - PTB VisuStella MZ
- Battle System - STB VisuStella MZ
- Battle Voices VisuStella MZ
- Bestiary VisuStella MZ
- Boost Action VisuStella MZ
- Break Shields VisuStella MZ
- Bright Effects VisuStella MZ
- Button Common Events VisuStella MZ
- Button Trigger Events VisuStella MZ
C
D
E
- Elements and Status Menu Core VisuStella MZ
- Encounter Effects VisuStella MZ
- Enemy Levels VisuStella MZ
- Enhanced TP System VisuStella MZ
- Equip Battle Skills VisuStella MZ
- Equip Medal System VisuStella MZ
- Equip Passive System VisuStella MZ
- Equipment Set Bonuses VisuStella MZ
- Event Chain Reactions VisuStella MZ
- Event Signals VisuStella MZ
- Events and Movement Core VisuStella MZ
- Evolution Matrix Skills VisuStella MZ
- Extra Enemy Drops VisuStella MZ
F
I
M
S
- Shop Batches VisuStella MZ
- Shop Common Events VisuStella MZ
- Shop Listing Unlock VisuStella MZ
- Skill Containers VisuStella MZ
- Skill Cooldowns VisuStella MZ
- Skill Learn System VisuStella MZ
- Skill Mastery VisuStella MZ
- Skill Shop VisuStella MZ
- Skill Stealer VisuStella MZ
- Skills and States Core VisuStella MZ
- State Tooltips VisuStella MZ
- Steal Items VisuStella MZ
