Grid-Free Doodads VisuStella MZ
|
VisuStella, Caz Wolf, Fallen Angel Olivia, Atelier Irina, and other affiliated content creators.
Download | ||
SystemThis is a plugin created for RPG Maker MZ. | ||
|
Click here for help on how to install plugins and an explanation on the Tier Hierarchy System. |
Click here to learn how to update plugins. |
Click here for how to troubleshoot plugins if you get an error. |
|
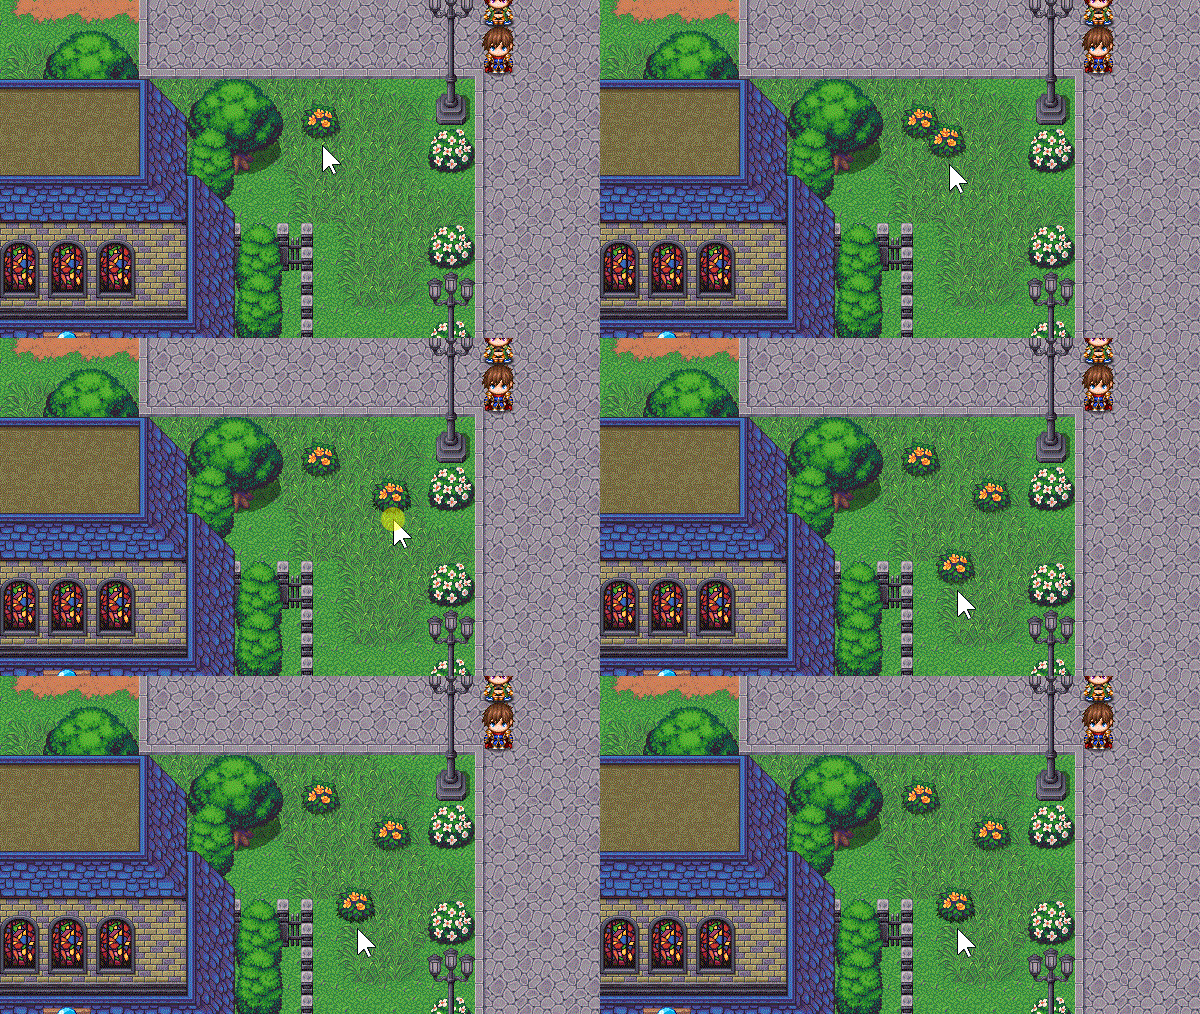
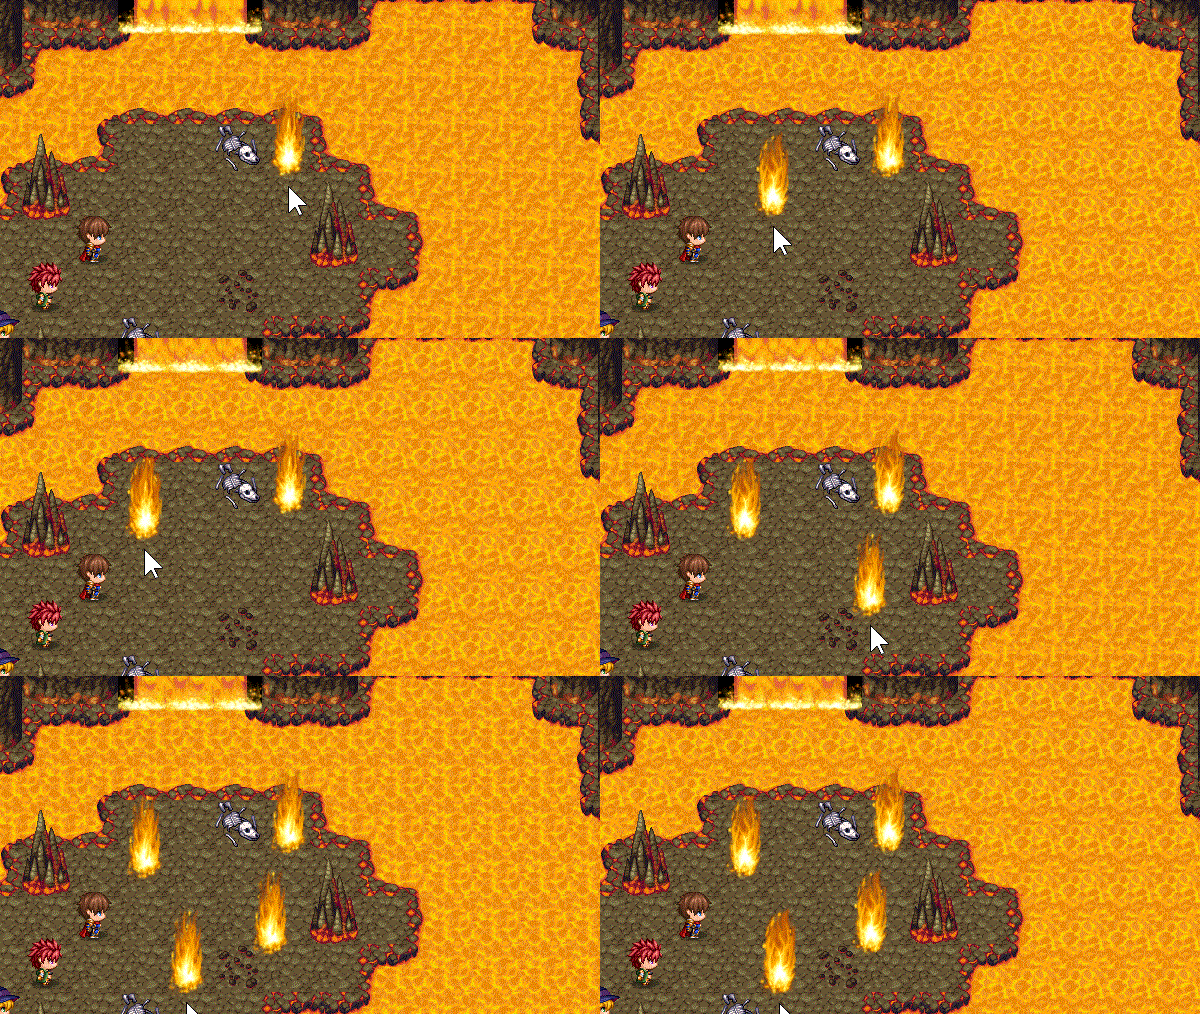
VisuStella MZThis plugin is a part of the VisuStella MZ Plugin Library. Click here if you want to help support VisuStella on Patreon. IntroductionIn RPG Maker MZ, tilesets are used for mapping purposes. Tileset A is used for drawing land while Tilesets B through E are used to add doodads. But in RPG Maker MZ, doodads added by Tilesets B through E are locked to the grid and add a rather unnatural feel to it. This plugin will allow you to break free of the grid and add doodads unbound by the grid. Doodads can come in all forms, from large to small, static and animated, you name it! There are two plugins for Grid-Free Doodads. One is the system, which has all of the data contained for how doodads are handled in-game. The other is the in-game editor, which allows you to add, remove, and edit doodads during Playtest mode. These are separate so that when you deploy the game and want just the doodad data to remain without the in-game editor, you can leave the editor out. Or in the event there's ever an external editor, you can use that instead. Features include all (but not limited to) the following:
RequirementsThis plugin is made for RPG Maker MZ. This will not work in other iterations of RPG Maker. ---
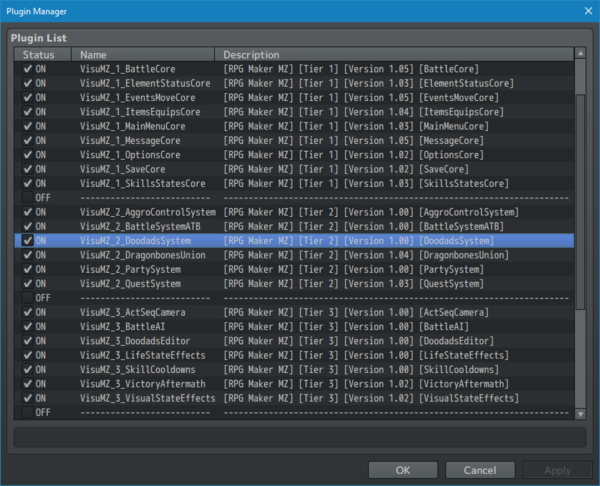
This plugin is a Tier 2 plugin. Place it under other plugins of lower tier value on your Plugin Manager list (ie: 0, 1, 2, 3, 4, 5). This is to ensure that your plugins will have the best compatibility with the rest of the VisuStella MZ Plugin library.
Required Plugin List
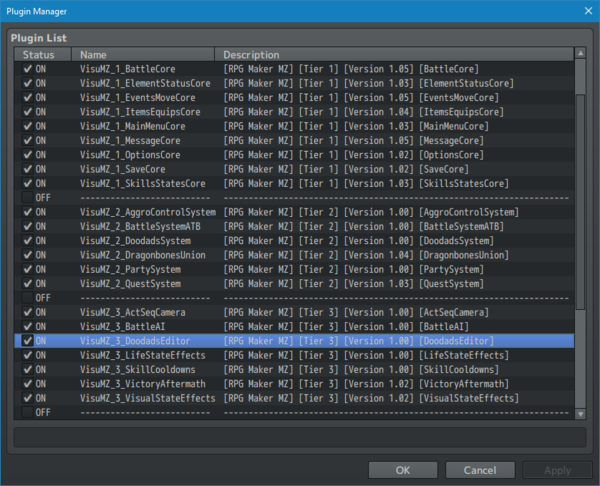
This plugin is a Tier 3 plugin. Place it under other plugins of lower tier value on your Plugin Manager list (ie: 0, 1, 2, 3, 4, 5). This is to ensure that your plugins will have the best compatibility with the rest of the VisuStella MZ Plugin library.
InstructionsInstalling the Grid-Free Doodads SystemPlease follow these instructions in order to start working on putting doodads into your game! ---
--- Installing the Grid-Free Doodads In-Game EditorPlease follow these instructions in order to gain access to the Grid-Free Doodads In-Game Editor! ---
--- Adding New DoodadsPlease follow these instructions to add new doodads to your game. ---
--- Opening the In-Game Doodads EditorPlease follow these instructions on how to open up the in-game editor. ---
--- WARNING: Doodads do not have collision detection! Your player and events will walk through them! If you do not want the player and events to walk through them, use the Events and Movement Core region restriction features to make custom collision maps! Making Your Own DoodadsDoodads have only two requirements. ---
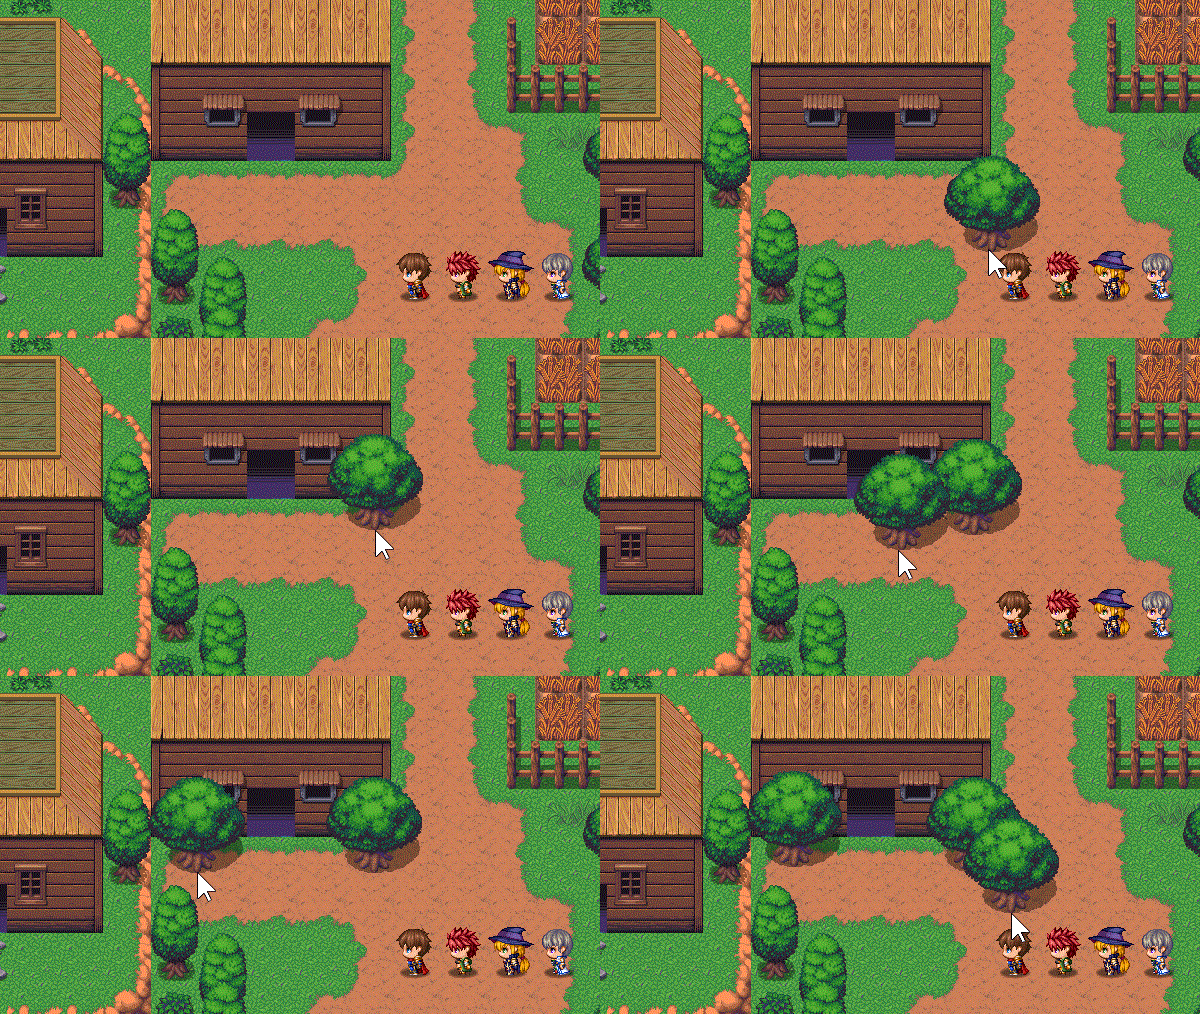
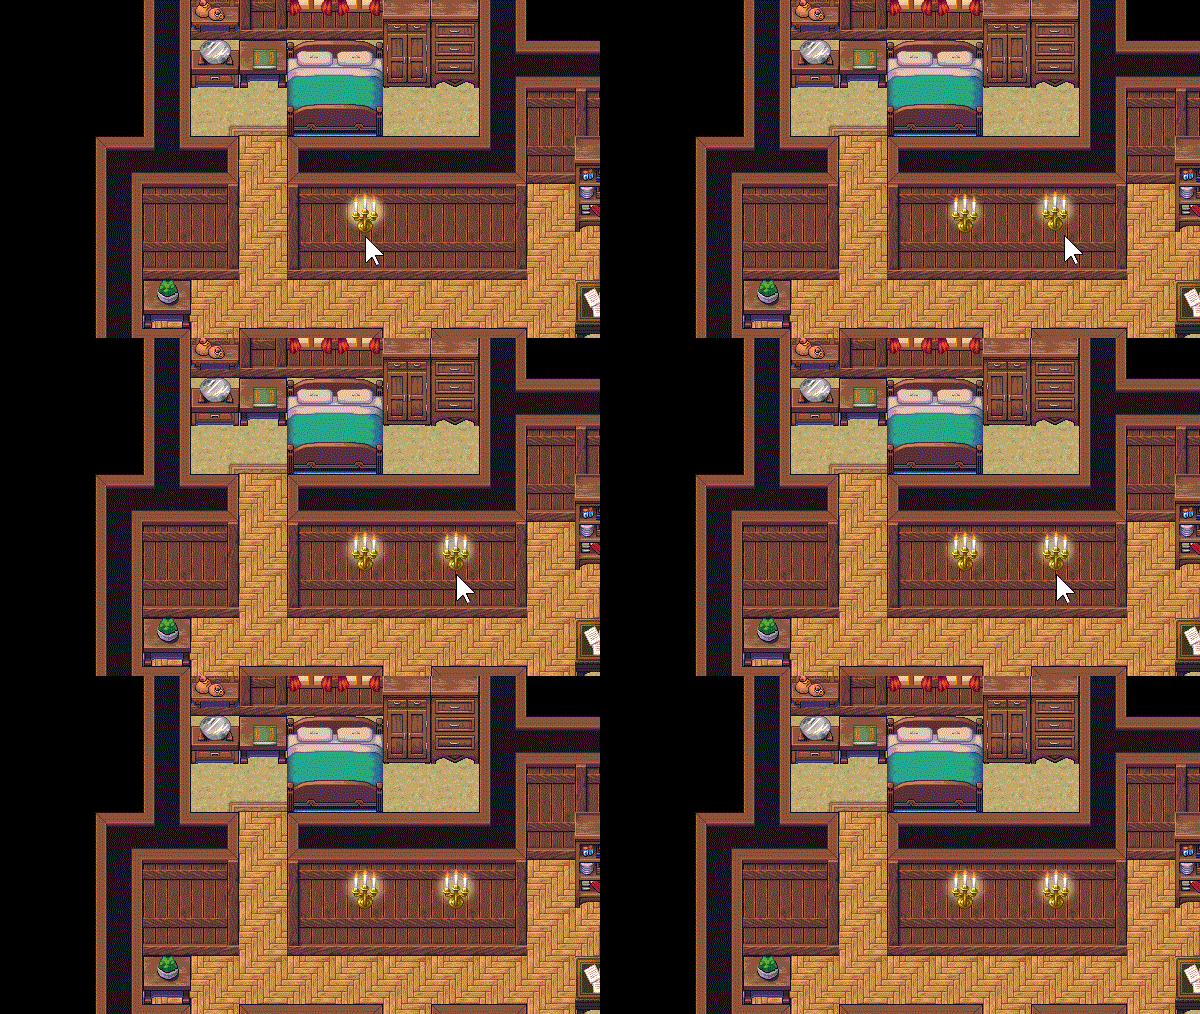
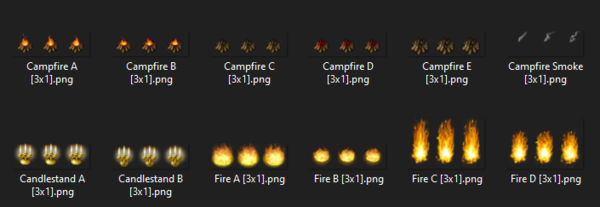
--- If a folder is placed inside of the 'doodads' folder, it will be listed as on the doodads list as a directory tree to navigate through. --- Making Animated DoodadsDoodads can be made into animated doodads. An animated doodad is one that will animate whenever the game's graphics update. Follow these steps to make an animated doodad: ---
     0   1   2
     3   4   5
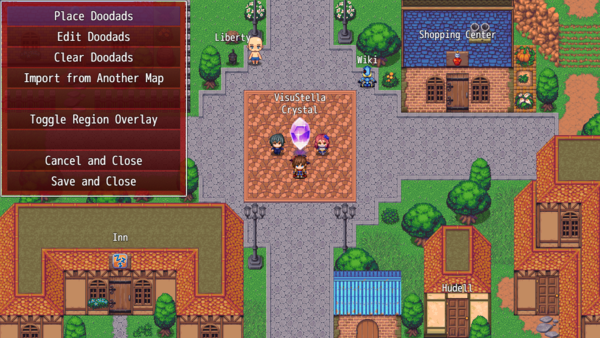
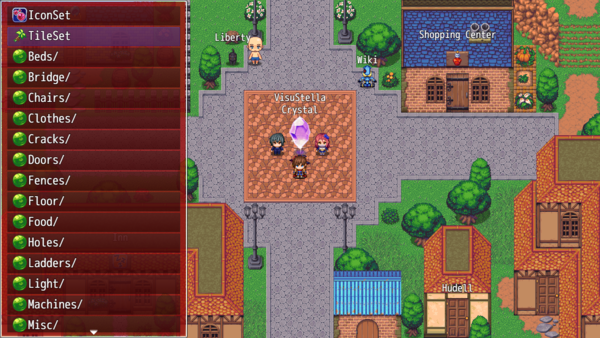
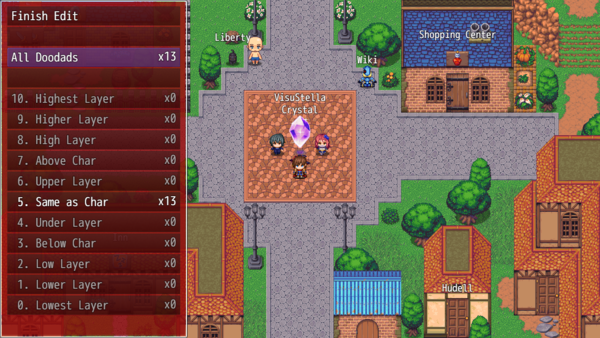
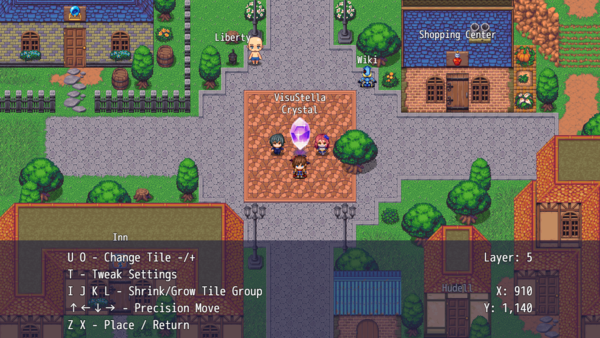
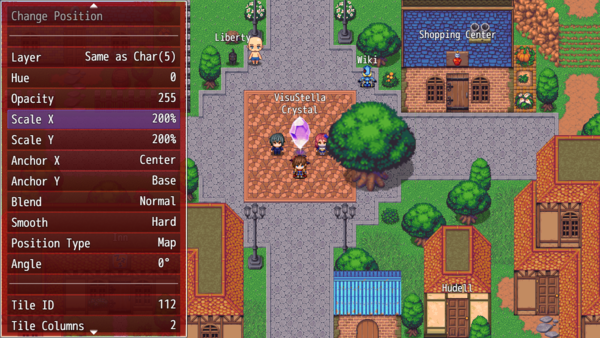
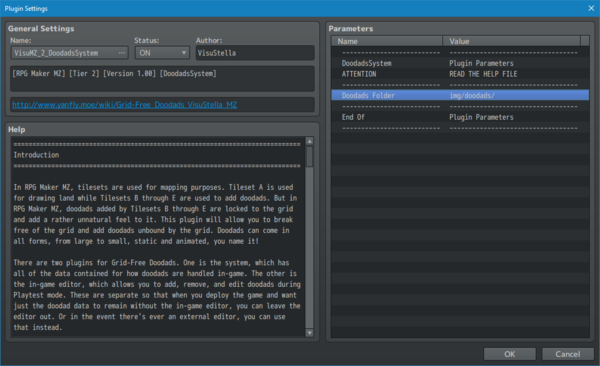
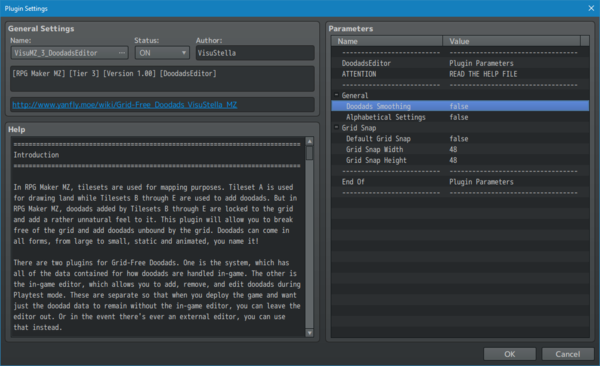
--- In-Game Editor MenusMain MenuThis section will explain what each part of the in-game edtiro's main menu items do. --- Place Doodads - This will take you do your doodads folder, where you can select a doodad to place on the map. --- Edit Doodads - This will allow you to edit the doodads that you have already placed on the map. Here, you can select which doodads based on the layer they're on or from all doodads at once. Doodads are ordered based on their position from top to bottom, left to right. --- Clear Doodads - This will clear all doodads on the map. --- Import from Another Map - This allows you to import doodad settings from another map. --- Toggle Region Overlay - This will cause an overlay of the regions to appear on your screen to show you what tiles are affected by which regions. Use it again to hide the regions. WARNING: Using this on large maps for the first time will cause a bit of lag as the regions have to load. The larger the map, the longer the amount of time is required for it to load. --- Cancel and Close - This will remove any changes made to the doodad settings on the map and close out of the Doodad Menu. --- Save and Close - This will save any changes made to the doodad settings on the map and close out of the Doodad Menu. --- Place DoodadsYou will enter this menu from selecting "Place Doodads" in the in-game editor's main menu. The doodad list will show a list of all the doodads you can use for your map based on the current folder it's in. There are three types of options you can select from here: --- IconSet - This will let you make a doodad out of an icon from the iconset. --- TileSet - This will let you make a doodad out of an icon from the current map's tileset. These are all of the B through E tilesets. --- Folders - Folders will be marked with a / at the end of the name and will have an icon shared by all other folders. Selecting a folder will go into that folder's contents (and further). --- Images - Images will show a small preview of themselves to the left of the name. These images can be used as doodads without any restrictions. Selecting an image will take you to the Doodad Placing Mode. --- Edit DoodadsYou will enter this menu from selecting "Edit Doodads" in the in-game editor's main menu. This menu allows you to select specific doodads from the current map and alter their settings or even delete them. --- Finish Edit - Closes out of the "Edit Doodads" menu and returns to the main menu. --- All Doodads - Loads an entire list of doodads for you to select to work with. --- Layers 0 through 10 - Loads a specific layer of doodads for you to select to work with. --- Placement ModeOnce you've selected a doodad to place, you'll be in "placement mode" where you can use your mouse or the arrow keys (for pixel precision) to place doodads where you see fit. At the bottom of the screen, there will be a small section with some instructional text as to the various keyboard shortcuts on controls. --- Q and E: Layer -/+ - This allows you to decrease or increase the doodad's current layer. --- T: Tweak Settings - Pressing this will open up the settings menu for the current doodad. --- W A S D: Move Screen - This will move the screen around so you can have a clear view of the map without needing to reposition the player character. --- ↑←↓→: Precision Move - Pressing the directional keys will allow you to move the doodad using the keyboard instead of the mouse. If you wish to move using the mouse, just click on the map somewhere to return control back to the mouse. --- Z and X: Place or Cancel - Pressing Z will place the doodad in its current state on the map. - Pressing X will return you back to the Doodad List, Icon Picker, or Tileset Picker depending on which screen you came from. --- These are keys that are only usable if a TileSet doodad is to be placed. These will not work with other settings. --- U and O: Change Icon -/+ - Switches between the icon to be placed. - Usable only with Icons. --- U and O: Change Tile -/+ - Switches between the tile to be placed. - Usable only with Tiles. --- I J K L: Shrink/Grow Tile Group - Allows you to shrink/grow the tile. This will grow from the upper left corner of the tile selected. - Usable only with Tiles. --- There are some hidden keyboard commands that you can use. These are rewarded to the users who read these instructions carefully. Hooray for you! --- H: Hide/Show the Instruction Window - Pressing H will hide the instructional window so you can get a clear view of where you're placing the doodad. Pressing it again will make it show back up. --- 1 2 3 4 5 6 7 8 9 0: Quick Opacity Change - The 1 through 0 keys (not NumPad) will allow you to quickly adjust the opacity level of the doodad. 1 will set 10%, 2 sets 20%, 3 sets 30%, etc. However, 0 will set 100%. --- G: Grid Snap Menu - This opens up the Grid Snap Menu where you can activate or deactivate Grid Snapping and the grid snapping parameters. --- R: Region Overlay - This will cause an overlay of the regions to appear on your screen to show you what tiles are affected by which regions. Press R again to hide the regions. WARNING: Using this on large maps for the first time will cause a bit of lag as the regions have to load. The larger the map, the longer the amount of time is required for it to load. --- Doodad SettingsYou can tweak the settings of individual doodads you want to place or have placed on the map. The Doodad Settings menu can be accessed a number of ways, from pressing the "T" button during Placement Mode or going to the "Edit Doodads" option through the in-game editor's main menu. --- Accept Settings - Accepts all of the settings made and returns back to your previous mode. --- Revert Settings - Cancels all of the settings made and returns back to your previous mode. --- Delete Doodad - Only selectable if accessed from individual doodad management. - This will let you delete the doodad and then return to the doodad management list. --- Change Position - Only selectable if accessed from individual doodad management. - This will allow you to reposition the doodad. --- Layer - This allows you to change the layer of the doodad. Higher layers will make the doodad appear above others (and characters) and lower layers will cause doodads to appear below. --- Hue - Changing to hue will change the doodad's current color shift. Be warned as this process takes up a lot of processing power, and I highly advise against using doodads of different hues if you plan to export to mobile. --- Opacity - Changes the opacity of the doodad. When the opacity value is higher, the doodad will be less transparent. When the opacity value is lower, it will be more transparent. --- Scale X Scale Y - This changes the amount of stretch on a doodad. X will cause a doodad to stretch horizontally while Y will cause the doodad to stretch vertically. If you decide to use a negative value, it will cause the doodad to mirror. --- Anchor X Anchor Y - This sets the base coordinates of the doodad to be located. How other doodads/objects of the same layer interact with this doodad will be based on its coordinates. --- Frame Speed - If the doodad is animated, you can adjust the frame speed of the doodad here. The number represents the number of frames that must pass before the doodad updates to the next animation cell. This means lower numbers have faster animations while higher numbers have slower animations. --- Blend - Allows you to change the blend modes of the doodads. Blend modes will cause color differences based on the blend mode type to fit in with the visual effects behind it. --- Smooth - Let's you choose whether or not you want to load the doodad with either smooth or hard edges. --- Position Type - Lets you decide how the doodad is positioned. A map-locked position means it will scroll with the map. A screen-locked position means it will stick to its exact position on the screen (like a HUD). --- Angle - Allows you to adjust the angle of the doodad. --- Icon Index - If the doodad is an icon, you can change the icon index here. --- Tile ID Tile Columns Tile Rows - If the doodad is a tile, you can change the tile ID and the number of columns and/or rows it expands with. --- Blur - Lets you decide if the doodad has the blur filter or not. --- Contrast - Changes the contrast of the doodad. High contrast makes colors sharper and brighter while normal will have the colors displayed as they're intended. --- Sepia - This gives you the option to appliy a sepia color schema to the doodad. --- Party - If you would like for certain doodads to appear or disappear if a certain actor has joined the party or is missing from the party, you can use this setting to do so. This way, you can add doodads to a vacant room (if a party member has joined) and remove doodads from their original room. This will count for if the party member is in the active party or the reserve party. There is no differentiation for it. - These doodads will be visible from the in-game editor mode, but will vanish once out of it unless its conditions are met. --- Switch - For those who would like for some doodads to appear while certain switches are on/off, you can make use of this option. Here, you can set conditions for multiple switches per doodad. All the conditions must be met for the doodad to appear visibly. If a doodad requires a switch to be ON and that switch is OFF, the doodad will be invisible until it is on. The same will apply if reversed. If a doodad requires a switch to be OFF, it will remain visible until the switch turns on, which will cause the doodad to disappear. - These doodads will be visible from the in-game editor mode, but will vanish once out of it unless its conditions are met. --- Tone Preset - Select from a list of tones to set the doodad to. --- Tone: Red Tone: Green Tone: Blue Tone: Grey - The tone is the doodad sprite's tone after all hues are applied. This can be used to provide a different shade of colors that hues won't be able to support, thus giving you more options on how to make your doodads appear in the game without the need to create a bunch of resources. This is also very light on memory usage compared to hues, too, which may make it potentially more favorable to use. - Allows you to adjust the individual values of the each of the four tone properties. Use the left/right keys to adjust them manually or press OK on them to quickly select from common number ranges. - Left and Right will adjust them by values of 5. Holding down shift will allow you to adjust them by values of 1 instead. --- Tone: Randomize - Allows you to randomize a specific tone value or all of them. --- Plugin ParametersSystem General SettingsThere is only one plugin parameter for the Grid-Free Doodads System plugin. --- General Doodads Folder: - This is the path to your doodads folder. --- In-Game Editor General SettingsThere aren't too many settings for the in-game editor, but here they are! --- General Doodads Smoothing: - Default smooth out doodad edges or give them hard edges? Alphabetical Settings: - List doodad settings in alphabetical order? --- Grid Snap Default Grid Snap: - Do you want Grid Snap enabled by default? Grid Snap Width: - The default grid snap width. Grid Snap Height: - The default grid snap height. ---
Terms of Use1. These plugins may be used in free or commercial games provided that they have been acquired through legitimate means at VisuStella.com and/or any other official approved VisuStella sources. Exceptions and special circumstances that may prohibit usage will be listed on VisuStella.com. 2. All of the listed coders found in the Credits section of this plugin must be given credit in your games or credited as a collective under the name: "VisuStella". 3. You may edit the source code to suit your needs, so long as you do not claim the source code belongs to you. VisuStella also does not take responsibility for the plugin if any changes have been made to the plugin's code, nor does VisuStella take responsibility for user-provided custom code used for custom control effects including advanced JavaScript notetags and/or plugin parameters that allow custom JavaScript code. 5. VisuStella is not responsible for problems found in your game due to unintended usage, incompatibility problems with plugins outside of the VisuStella MZ library, plugin versions that aren't up to date, nor responsible for the proper working of compatibility patches made by any third parties. VisuStella is not responsible for errors caused by any user-provided custom code used for custom control effects including advanced JavaScript notetags and/or plugin parameters that allow JavaScript code. 8. Any extensions and/or addendums made to this plugin's Terms of Use can be found on VisuStella.com and must be followed. Terms of Use: Japanese『VisuStella MZ』利用規約 1. これらのプラグインは、VisuStella.comおよび/または公式に承認されたVisuStellaのソースから合法的な手段で入手したものである限り、フリーゲームや商用ゲームに使用することができます。例外的に使用が禁止される場合については、VisuStella.comの記載をご確認ください。 2. 本プラグインの「クレジット」部分に記載されているすべてのコーダーの名前は、ゲーム内にクレジット表記を行うか、もしくは「VisuStella」という名前の下にまとめて表記する必要があります。 3. ソースコードを自分のものだと主張しない限りは、必要に応じて編集することが可能です。ただしプラグインのコードに変更が加えられた場合、VisuStellaはそのプラグインに対して一切の責任を負いません。高度なJavaScriptのノートタグやJavaScriptコードを許可するプラグインのパラメータを含む、カスタムコントロールエフェクトに使用される、ユーザー提供のカスタムコードについても、VisuStellaは一切の責任を負いません。 5. VisuStellaは、意図しない使用方法による問題、VisuStella MZライブラリ以外のプラグインとの非互換性の問題、プラグインのバージョンが最新でないことによる問題、第三者による互換性パッチが適切に動作していないことなどが原因でゲーム内で発生した問題については、一切の責任を負いません。VisuStellaは、高度なJavaScriptのノートタグやJavaScriptコードを許可するプラグインのパラメータを含む、カスタムコントロールエフェクトに使用される、ユーザー提供のカスタムコードに起因するエラーについても、一切の責任を負いません。 8. このプラグインの利用規約の追加項目や補足については、VisuStella.comに掲載されていますので、それを参照し従ってください。 CreditsIf you are using this plugin, credit the following people in your game: Team VisuStella ChangelogSystem (Tier 2)Version 1.02: August 4, 2022
Version 1.01: July 7, 2022
Version 1.00: October 5, 2020
Editor (Tier 3)Version 1.02: January 8, 2021
Version 1.01: November 1, 2020
Version 1.00: October 5, 2020
See Also
End of File |
