Quest Journal System (YEP)






|
VisuStella, Caz Wolf, Fallen Angel Olivia, Atelier Irina, and other affiliated content creators.
Download
System
This is a plugin created for RPG Maker MV.
For help on how to install plugins, click here.
For help on how to update plugins, click here.
Got errors with your RPG Maker MV plugin? Click here.
Extension Plugins
The following plugins are Extension Plugins that require this plugin as its Parent Plugin.
Place the following plugins below this plugin located in the Plugin Manager if you plan on using them.
Yanfly Engine Plugins
This plugin is a part of the Yanfly Engine Plugins library.
Introduction
WARNING: This plugin is to be used with RPG Maker MV 1.5.0 or above! This is
because the MV 1.5.0 editor allows for this plugin to be made in an orderly
and efficient manner. Please make sure your RPG Maker MV software is up to
date before using this plugin.

---

A quest journal is a very important tool provided by game developers for the
players. It lists various quests, missions, and objectives that the player
can pursue in order to progress further into the game. This can be helpful
in reminding the player what needs to be done in the event the player can
forget what things there are to do in a vast and large RPG world.

This plugin places a quest journal system into your RPG Maker MV game. You
can set up how the quest journal appears, move its windows around and/or
reshape them to fit your game. There are 100 quest slots provided by this
plugin (more can be obtained through extension plugins) and each one of them
requires your attention in constructing individually.

You can adjust the quest's title, display a difficulty level, remind the
player who the quest is from, where that quest is from, various dynamic
descriptions explaining the quest, a list of objectives to make, a list of
rewards that will be given to the player once the quest is complete, and any
subtext footnotes you may wish to insert into each quest.

---

Keep in mind that while this plugin does enable a quest journal system into
your game, this plugin will NOT automate it. If you have a quest enabled, it
is still up to you to add the quest properly into the journal, set its many
objectives, when the other objectives appear, what the rewards are, and then
giving out the rewards yourself manually. The purpose of this plugin is to
simply serve as a visual record for your player to see what quests have been
handed down to him or her.
Instructions
Setting Up the Quest Category Window
The plugin parameter 'Quest Category Window' can actually be left as is by
default, but should you wish to customize it, here's what there is to know.

---

Category Order
- This is the order in which the following categories appear in the menu:
available, completed, failed, all, cancel. Moving these around will let you
adjust how the menu is structured. If you do move them around, by default,
the first item will be selected at the start.
Default: ["available","completed","failed","all"]

Available Text
- How the entry for the 'available' category appears. You can use text codes
here to give the appearance of icons and/or color. The %1 is a format option
that will allow you to display how many available quests there are.
Default: \i[192]Available (%1)

Completed Text
- How the entry for the 'completed' category appears. You can use text codes
here to give the appearance of icons and/or color. The %1 is a format option
that will allow you to display how many completed quests there are.
Default: \i[191]Completed (%1)

Failed Text
- How the entry for the 'failed' category appears. You can use text codes
here to give the appearance of icons and/or color. The %1 is a format option
that will allow you to display how many failed quests there are.
Default: \i[194]Failed (%1)

All Text
- How the entry for the 'all' category appears. You can use text codes
here to give the appearance of icons and/or color. The %1 is a format option
that will allow you to display how many quests there are in total.
Default: \i[189]All Quests (%1)

Cancel Text
- How the entry for the 'cancel' option appears. You can use text codes
here to give the appearance of icons and/or color. There is no format option
to be used with this text.
Default: \i[161]Close

---

Window Settings
- If you wish to customize the category window, you can adjust the various
settings here to adjust its properties. However, keep in mind that unless
you are familiar with JavaScript, you can make errors here that can make the
windows not work in your game.

Default:

X: 0
Y: 0
Width: Graphics.boxWidth / 3
Height: this.fittingHeight(this.numVisibleRows())
Rows: 4
Columns: 1
Line Height: 36
Font Face: GameFont
Font Size: 28
Standard Padding: 18
Text Padding: 6
Text Alignment: left
Standard Opacity: 255
Back Opacity: 192
Window Skin: Window
Setting Up the Quest List Window
The plugin parameter 'Quest List Window' can be modified to show the various
quest types. By default, the plugin will have the following quest types:
Main Quests, Side Quests, Character Quests, and Tutorial Quests. Here's what
there is to know about the Quest List Window.

---

Show Types
- If this is enabled, it will allow for the Quest List Window to display the
various quest types. If this is disabled, then those quest types will not
appear and all quests will be displayed without their quest type as their
individual header.
Default: true

Type Order
- This is the order for the quest list types and it also enables which types
will be available in the quest journal to display. You can use text codes
here to add icons and/or colors to the quest types. When you are typing out
the quest type names for the individual quest types to fall under, you can
omit the \i[x] and \c[x] codes, but everything else must be in tact.
Default: ["\\c[6]Main Quests","\\c[4]Side Quests","\\c[3]Character Quests",
          "\\c[5]Tutorial Quests"]

List Open Symbol
- The symbol used to display to show a quest type is opened (showing all of
the quests listed under it) and not closed (not showing any of the quests
listed under it).
Default: -

List Closed Symbol
- The symbol used to display to show a quest type is closed (not showing any
of the quests listed under it) and not opened (showing all of the quests
listed under it).
Default: +

Type Text Format
- The text formating type display the quest types in the Quest List Window.
%1 will refer to the Open/Closed Symbol. %2 will be the quest type's name.
%3 will reveal the number of quests that are listed under this quest type.
Default: %1%2 (%3)

Quest Indent
- This is how much to indent the regular quests if quest types are shown.
This is to help players distinguish quest types from regular quests, though
it isn't necessary if you plan on using icons for your quests and none for
your quest types.
Default: 0

Show Empty
- If enabled, this will show quest types that are empty and have no quests
under them. Otherwise, if it is disabled, quest types that have no quests
will not appear in the quest list and can help reduce clutter.
Default: false

Read Quest
- This is how the text appears for the 'Read Quest' command. This command
will only appear in the List Window if an extension plugin prompting the
extra actions list to appear.
Default: \i[121]Read Quest

Cancel
- This is how the text appears for the 'Cancel' command. This command will
only appear in the List Window if an extension plugin prompting the extra
actions list to appear.
Default: \i[16]Cancel

---

Window Settings
- If you wish to customize the category window, you can adjust the various
settings here to adjust its properties. However, keep in mind that unless
you are familiar with JavaScript, you can make errors here that can make the
windows not work in your game.

Default:

X: 0
Y: Graphics.boxHeight - height
Width: Graphics.boxWidth / 3
Height: Graphics.boxHeight - this.fittingHeight(4)
Line Height: 36
Font Face: GameFont
Font Size: 28
Standard Padding: 18
Text Padding: 6
Standard Opacity: 255
Back Opacity: 192
Type Alignment: left
Quest Alignment: left
Window Skin: Window
Setting Up the Quest Title Window
The plugin parameter 'Quest Title Window' can also be left alone by default,
but should you wish to alter it to fit your game's settings, here's what you
need to know.

---

No Quest Title
- When there's no quest selected in the quest list window, this text will
appear in the quest title window. Otherwise, the selected quest's name will
appear above the data window. Text codes may be used here.
Default: \c[4]Quest Journal

---

Window Settings
- If you wish to customize the category window, you can adjust the various
settings here to adjust its properties. However, keep in mind that unless
you are familiar with JavaScript, you can make errors here that can make the
windows not work in your game.

X: Graphics.boxWidth - width
Y: 0
Width: Graphics.boxWidth * 2 / 3
Height: this.fittingHeight(1)
Line Height: 36
Font Face: GameFont
Font Size: 28
Standard Padding: 18
Text Padding: 6
Text Alignment: center
Standard Opacity: 255
Back Opacity: 192
Window Skin: Window
Setting Up the Quest Data Window
The plugin parameter 'Quest Data Window' can be modified to show the various
information contained inside of a quest. This data is used by the player to
understand just what is required of the player to do in order to fulfill and
complete the quest. This window's settings can be left as is, but should you
wish to alter it to fit your game, read below:

---

No Data Text
- This is the text to be displayed in the data window when there is no quest
currently selected by the quest list window. You can use text codes here to
make the text appear more vivid to your players.

Default:
Welcome to the \c[4]Quest Journal\c[0].

Here, you can review over the various
quests given to you by people from all
over the world.

Word Wrap Version (Requires YEP_MessageCore.js):
<WordWrap>Welcome to the \c[4]Quest Journal\c[0].
<br>
<br>Here, you can review over the various
quests given to you by people from all
over the world.

Quest Data Format
- This format is how the data in the quest data window is shown to your
players. You can use various text codes to make your quest data window more
vivid to your players. %1 will reference the title without any icons or
color text codes. %2 will reference the quest's difficulty level. %3 will be
who the quest is from. %4 will display where the quest is from. %5 will show
the quest's current description, which can change midway through the quest.
%6 will show the various objectives the player needs to achieve. %7 will
show any rewards the player can earn. And if there are any, %8 will show the
subtext for the quest.

Default:
\{%1\}
\c[4]Level:\c[0] %2
\c[4]From:\c[0] %3
\c[4]Location:\c[0] %4

\c[4]Description:\c[0]
%5

\c[4]Objectives:\c[0]
%6

\c[4]Rewards:\c[0]
%7

%8

Word Wrap Version (Requires YEP_MessageCore.js):
<WordWrap>\{%1\}
<br>\c[4]Level:\c[0] %2
<br>\c[4]From:\c[0] %3
<br>\c[4]Location:\c[0] %4
<br>
<br>\c[4]Description:\c[0]
<br>%5
<br>
<br>\c[4]Objectives:\c[0]
<br>%6
<br>
<br>\c[4]Rewards:\c[0]
<br>%7
<br>
<br>%8

Uncleared Objective
- This is the text format that appears for each objective that is neither
completed nor failed. %1 will be replaced with the objective's text.
Default: \i[160]%1

Completed Objective
- If an objective is completed, this text format will be used instead.
%1 will be replaced with the objective's text.
Default: \i[165]%1

Failed Objective
- If an objective is failed, this text format will be used instead.
%1 will be replaced with the objective's text.
Default: \i[162]%1

Unclaimed Reward
- This is the text format that appears for each reward item that is neither
claimed nor denied. %1 will be replaced with the reward's text.
Default: \i[160]%1

Claimed Reward
- If a reward has been claimed, this text format will be used instead.
%1 will be replaced with the reward's text.
Default: \i[163]%1

Denied Reward
- If a reward has been denied, this text format will be used instead.
%1 will be replaced with the reward's text.
Default: \i[161]%1

Load Delay
- This is the amount of frames the data window will wait before loading a
quest's data onto the window itself. This is to prevent overburdening the
game engine by loading every single quest that the cursor passes through,
and instead, waits until the cursor has settled on a particular quest entry
for x amount of frames before loading it.
Default: 30

---

Window Settings
- If you wish to customize the category window, you can adjust the various
settings here to adjust its properties. However, keep in mind that unless
you are familiar with JavaScript, you can make errors here that can make the
windows not work in your game.

X: Graphics.boxWidth - width
Y: Graphics.boxHeight - height
Width: Graphics.boxWidth * 2 / 3
Height: Graphics.boxHeight - this.fittingHeight(1)
Line Height: 36
Font Face: GameFont
Font Size: 28
Standard Padding: 18
Text Padding: 6
Standard Opacity: 255
Back Opacity: 192
Window Skin: Window
Scroll Speed: 4
Setting Up New Quests
By default, there aren't any quests made for you. You must set each one up
manually. Go into the plugin parameters for YEP_QuestJournal.js and look for
the ---Quest List--- section. Each of those entries starts off empty.
However, if you decide to modify it, you'll be greeted with a template that
explains how to set up your quests. Here is what each parameter does:

---

Title
- This is the title of your quest. It will show up in three places: the
quest list, the quest title window, and if you format it to show in the data
window, it will appear there as well. You can use text codes to change the
color of the quest or to give the quest icons.

Type
- This is the quest type. If you decide to show quest types from the list
window, this will be where this quest will be listed under. The template has
a drop down window for a few of the popular quest types, but you can enter
in your own quest type. Keep in mind that this is case sensitive and will
require you to type out the quest type correctly. You can, however, omit any
\i[x] or \c[x] text codes.

Difficulty
- No mechanical purpose. It's just there to label a certain difficulty level
for the quest. You can insert any kind of text you wish here and it will be
displayed in the quest data window if you decide to keep it in there.

From
- No mechanical purpose. This can be used to state which character in your
game issued this quest so the player can have a reference point in knowing
who to return to when it becomes time to deliver the quest results.

Location
- No mechanical purpose. This can be used to state where the quest has
originated from, and can reduce the amount of effort the player needs to in
order to figure out where the quest came from.

Description
- No mechanical purpose. This is often used to describe the contents of the
quest to the player and provide a set of general instructions as to what the
player has to actually do. You can provide multiple descriptions. However,
only the first description will be visible by default. If you do provide
multiple descriptions, you can change the entry using the plugin command:
'Quest x Change Description Entry To y' to alter the description entry to
display something else midway through a quest.

Objectives List
- No mechanical purpose to the game but does have mechanical aspects. The
objectives list is commonly used to display a specific set of instructions
the player needs to do in order to complete the quest. Multiple sets of
objectives can be displayed to indicate multiple objectives that need to be
fulfilled by the player.

Visible Objectives
- This is a list of the set of objectives that will be visible by default
when the quest is added to the game's quest journal. Each number entry in
there refers to the objective ID (their order position) found in the
'Objectives List' plugin parameter.

Rewards List
- No mechanical purpose to the game but does have mechanical aspects. The
rewards list is to show what the player has to gain as a result of finishing
the quest. Multiple sets of rewards can be displayed to indicate the player
will receive more than just one type of reward.

Visible Rewards
- This is a list of the set of rewards that will be visible by default when
the quest is added to the game's quest journal. Each number entry in there
refers to the reward ID (their order position) found in the 'Rewards List'
plugin parameter.

Subtext
- No mechanical purpose. This is usually used as a footer to provide the
player a message that doesn't fit elsewhere in the data window. You can use
this however you like or don't use it at all. Multiple sets of subtexts can
be used here in case you wish to update the subtext midway through a quest.
Main Menu Manager Integration
To integrate access to a scene from this plugin into Yanfly's Main Menu Manager, use the settings below:
For those using the Main Menu Manager and would like to position the Quest
command in a place you'd like, use the following format:

      Name: Yanfly.Param.QuestCmdName
    Symbol: quest
      Show: $gameSystem.isShowQuest()
   Enabled: $gameSystem.isEnableQuest()
       Ext:
 Main Bind: this.commandQuest.bind(this)
Actor Bind:

Insert the above setup within a Main Menu Manager slot. Provided you copy
the exact settings to where you need it, it will appear there while using
all of the naming, enabling, disabling, hiding, and showing effects done by
the plugin parameters.

Remember to turn off 'Auto Place Command' from the plugin parameters.
Script Calls
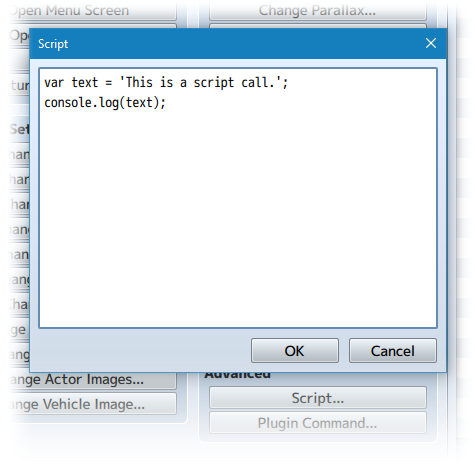
Script Calls are event commands that are used to run JavaScript code during an event to call upon unique functions, usually added by the related plugin.
Here is a list of Script Call(s) that you may use:
For this plugin, you can use various script calls for certain events to make
checks on a quest's progress. Here are the different event types and the
various script calls you can use with them:


--- Control Variables Event's Script Calls ---


$gameSystem.totalQuestsAvailable()
- Sets the variable's value to the number of available quests.

$gameSystem.totalQuestsCompleted()
- Sets the variable's value to the number of completed quests.

$gameSystem.totalQuestsFailed()
- Sets the variable's value to the number of failed quests.

$gameSystem.totalQuestsKnown()
- Sets the variable's value to the total number of quests known.

$gameSystem.totalQuestsInGame()
- Sets the variable's value to the total number of quests in the game.

$gameSystem.totalQuestTypes(category, type)
- Replace 'category' with either 'available', 'completed', 'failed', or
'all' to designate the category. Replace 'type' with the quest type
(ie. 'Main Quests', 'Side Quests', 'Character Quests', etc). Include the
quotes around the category and type
Example: $gameSystem.totalQuestTypes('all', 'Main Quests')

$gameSystem.getQuestDescriptionIndex(questId)
- Replace 'questId' with the ID of the quest you're looking for. This will
set the variable to show which description is being used currently.
Example: $gameSystem.getQuestDescriptionIndex(50)

$gameSystem.totalVisibleQuestObjectives(questId)
- Replace 'questId' with the ID of the quest you're looking for. This will
set the variable to show how many quest objectives are visible currently for
the selected quest.
Example: $gameSystem.totalVisibleQuestObjectives(50)

$gameSystem.totalQuestObjectives(questId)
- Replace 'questId' with the ID of the quest you're looking for. This will
set the variable to show how many quest objectives are total for the
selected quest's settings.
Example: $gameSystem.totalQuestObjectives(50)

$gameSystem.totalVisibleQuestRewards(questId)
- Replace 'questId' with the ID of the quest you're looking for. This will
set the variable to show how many quest rewards are visible currently for
the selected quest.
Example: $gameSystem.totalVisibleQuestRewards(50)

$gameSystem.totalQuestRewards(questId)
- Replace 'questId' with the ID of the quest you're looking for. This will
set the variable to show how many quest rewards are total for the selected
quest's settings.
Example: $gameSystem.totalQuestRewards(50)

$gameSystem.getQuestSubtextIndex(questId)
- Replace 'questId' with the ID of the quest you're looking for. This will
set the variable to show which subtext is being used currently.
Example: $gameSystem.getQuestSubtextIndex(50)


--- Conditional Branch Event's Script Calls ---


$gameSystem.isQuestObjectiveCompleted(questId, objectiveId)
- Replace 'questId' with the ID of the quest you're looking for. Replace
'objectiveId' with the ID of the objective you're intending to check. This
will make a check in the conditional branch's script call to see if an
objective's status is completed (true) or not (false).
Example: $gameSystem.isQuestObjectiveCompleted(50, 1)

$gameSystem.isQuestObjectiveFailed(questId, objectiveId)
- Replace 'questId' with the ID of the quest you're looking for. Replace
'objectiveId' with the ID of the objective you're intending to check. This
will make a check in the conditional branch's script call to see if an
objective's status is failed (true) or not (false).
Example: $gameSystem.isQuestObjectiveFailed(50, 1)

$gameSystem.isQuestObjectiveUncleared(questId, objectiveId)
- Replace 'questId' with the ID of the quest you're looking for. Replace
'objectiveId' with the ID of the objective you're intending to check. This
will make a check in the conditional branch's script call to see if an
objective's status is neither completed nor failed (true) or either (false).
Example: $gameSystem.isQuestObjectiveUncleared(50, 1)

$gameSystem.isQuestRewardClaimed(questId, rewardId)
- Replace 'questId' with the ID of the quest you're looking for. Replace
'rewardId' with the ID of the reward you're intending to check. This will
make a check in the conditional branch's script call to see if a reward's
status is claimed (true) or not (false).
Example: $gameSystem.isQuestRewardClaimed(50, 1)

$gameSystem.isQuestRewardDenied(questId, rewardId)
- Replace 'questId' with the ID of the quest you're looking for. Replace
'rewardId' with the ID of the reward you're intending to check. This will
make a check in the conditional branch's script call to see if a reward's
status is denied (true) or not (false).
Example: $gameSystem.isQuestRewardDenied(50, 1)

$gameSystem.isQuestRewardUnclaimed(questId, rewardId)
- Replace 'questId' with the ID of the quest you're looking for. Replace
'rewardId' with the ID of the reward you're intending to check. This will
make a check in the conditional branch's script call to see if a reward's
status is neither claimed nor denied (true) or either (false).
Example: $gameSystem.isQuestRewardUnclaimed(50, 1)
Plugin Commands
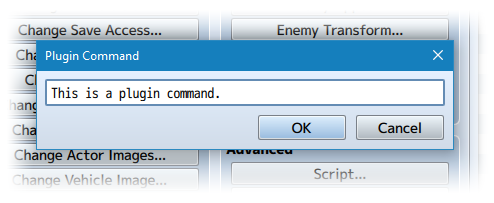
Plugin Commands are event commands that are used to call upon functions added by a plugin that aren't inherently a part of RPG Maker MV.
Here is a list of Plugin Command(s) that you may use:
There are various plugin commands you can use to control the quest journal
system in your game.

=-=-=-=-=-=-=-=-=-=-=-=-=-=-=-=-=-=-=-=-=-=-=-=-=-=-=-=-=-=-=-=-=-=-=-=-=-=-
Plugin Commands:
=-=-=-=-=-=-=-=-=-=-=-=-=-=-=-=-=-=-=-=-=-=-=-=-=-=-=-=-=-=-=-=-=-=-=-=-=-=-

  Quest Journal Open
  - Opens the quest journal system menu with no quest selected.

  Quest Journal Open To x
  - Replace 'x' with the quest ID you wish to open the quest journal system
  to. If the quest isn't known to the player at the time this plugin command
  takes place, then the quest will be added to the player's quest journal.

  ---

  Quest Journal Show
  Quest Journal Hide
  - Show or hide the Quest Journal option from the main menu.

  Quest Journal Enable
  Quest Journal Disable
  - Enable or disable the Quest Journal option in the main menu.

  ---

  Quest Add x
  - Replace 'x' with an integer. Adds quest ID 'x' to the quest journal as
  an available quest. This will make it viewable from the in-game quest
  journal system menu.

  Quest Add x to y
  - Replace 'x' and 'y' with integer values determining the quest ID range
  you wish to add in mass amounts to the quest journal.

  Quest Add x, x, x
  - Replace 'x' values with integer values representing the quest ID's you
  wish to add to the quest journal.

  ---

  Quest Remove x
  - Replace 'x' with an integer. This will remove quest ID 'x' from the
  quest journal.

  Quest Remove x to y
  - Replace 'x' and 'y' with integer values determining the quest ID range
  you wish to remove in mass amounts from the quest journal.

  Quest Remove x, x, x
  - Replace 'x' values with integer values representing the quest ID's you
  wish to remove from the quest journal.

  ---

  Quest Set Completed x
  Quest Set Failed x
  Quest Set Available x
  - Replace 'x' with the quest ID you wish to change the quest status to
  'completed', 'failed', or 'available'.

  Quest Set Completed x to y
  Quest Set Failed x to y
  Quest Set Available x to y
  - Replace 'x' and 'y' with integer values determining the quest ID range
  you wish to set as completed, failed, or available.

  Quest Set Completed x, x, x
  Quest Set Failed x, x, x
  Quest Set Available x, x, x
  - Replace 'x' values with integer values representing the quest ID's you
  wish to set as completed, failed, or available.

  ---

  Quest x Change Description Entry To y
  - Replace 'x' with the Quest ID you want to modify the description of.
  Replace 'y' with the description entry ID you wish to change the quest to.
  This will make the description, when viewed in-game in the quest journal,
  to display the description entry ID 'y' found in the plugin parameters for
  quest 'x'. This is used for times you wish to update the description text
  midway through a quest.

  ---

  Quest x Show Objective y
  Quest x Hide Objective y
  - Replace 'x' with the Quest ID you wish to alter the objective of.
  Replace 'y' with the objective ID you wish to make visible/hidden. Quests
  can show multiple objectives at once.

  Quest x Show Objective y to z
  Quest x Hide Objective y to z
  - Replace 'x' with the Quest ID you wish to alter the objective of.
  Replace 'y' and 'z' with the objective ID range you wish to make
  visible/hidden. Quests can show multiple objectives at once.

  Quest x Show Objective y, y, y
  Quest x Hide Objective y, y, y
  - Replace 'x' with the Quest ID you wish to alter the objective of.
  Replace 'y' values with integer values representing the objective ID's you
  wish to make visible/hidden. Quests can show multiple objectives at once.

  Quest X Show All Objectives
  Quest X Hide All Objectives
  - Replace 'x' with the Quest ID you wish to alter the objectives of.
  This will show/hide all of the quest's objectives.

  Quest x Complete Objective y
  Quest x Fail Objective y
  Quest x Normalize Objective y
  - Replace 'x' with the Quest ID you wish to alter the objective of.
  Replace 'y' with the objective ID you wish to change the status of.
  Using 'Complete' will mark the objective as completed. Using 'Fail' will
  mark the objective as failed. Using 'Normalize' will set the objective's
  status to neither completed or failed.

  Quest x Complete Objective y to z
  Quest x Fail Objective y to z
  Quest x Normalize Objective y to z
  - Replace 'x' with the Quest ID you wish to alter the objective of.
  Replace 'y' and 'z' with the objective ID range you wish to change the
  status of. Using 'Complete' will mark the objective as completed. Using
  'Fail' will mark the objective as failed. Using 'Normalize' will set the
  objective's status to neither completed or failed.

  Quest x Complete Objective y, y, y
  Quest x Fail Objective y, y, y
  Quest x Normalize Objective y, y, y
  - Replace 'x' with the Quest ID you wish to alter the objective of.
  Replace 'y' values with integer values representing the objective ID's you
  wish to change the status of. Using 'Complete' will mark the objective as
  completed. Using 'Fail' will mark the objective as failed. Using
  'Normalize' will set the objective's status to neither completed or
  failed.

  Quest x Complete All Objectives
  Quest x Fail All Objectives
  Quest x Normalize All Objectives
  - Replace 'x' with the Quest ID you wish to alter the objectives of.
  This will complete/fail/normalize all of the quest's objectives.

  ---

  Quest x Show Reward y
  Quest x Hide Reward y
  - Replace 'x' with the Quest ID you wish to alter the reward of. Replace
  'y' with the reward ID you wish to make visible/hidden. Quests can show
  multiple reward at once.

  Quest x Show Reward y to z
  Quest x Hide Reward y to z
  - Replace 'x' with the Quest ID you wish to alter the reward of. Replace
  'y' and 'z' with the reward ID range you wish to make visible/hidden.
  Quests can show multiple reward at once.

  Quest x Show Reward y, y, y
  Quest x Hide Reward y, y, y
  - Replace 'x' with the Quest ID you wish to alter the reward of. Replace
  'y' values with integer values representing the reward ID's you wish to
  make visible/hidden. Quests can show multiple reward at once.

  Quest x Show All Rewards
  Quest x Hide All Rewards
  - Replace 'x' with the Quest ID you wish to alter the rewards of. This
  will show/hide all of the quest's rewards.

  Quest x Claim Reward y
  Quest x Deny Reward y
  Quest x Normalize Reward y
  - Replace 'x' with the Quest ID you wish to alter the reward of. Replace
  'y' with the reward ID you wish to change the status of. Using 'Claim'
  will mark the reward as claimed. Using 'Deny' will mark the reward as
  denied. Using 'Normalize' will set the reward's status to neither claimed
  or denied.

  Quest x Claim Reward y to z
  Quest x Deny Reward y to z
  Quest x Normalize Reward y to z
  - Replace 'x' with the Quest ID you wish to alter the reward of. Replace
  'y' and 'z' with the reward ID range you wish to change the status of.
  Using 'Claim' will mark the reward as claimed. Using 'Deny' will mark the
  reward as denied. Using 'Normalize' will set the reward's status to
  neither claimed or denied.

  Quest x Claim Reward y, y, y
  Quest x Deny Reward y, y, y
  Quest x Normalize Reward y, y, y
  - Replace 'x' with the Quest ID you wish to alter the reward of. Replace
  'y' values with integer values representing the reward ID you wish to
  change the status of. Using 'Claim' will mark the reward as claimed. Using
  'Deny' will mark the reward as denied. Using 'Normalize' will set the
  reward's status to neither claimed or denied.

  Quest x Claim All Rewards
  Quest x Deny All Rewards
  Quest x Normalize All Rewards
  - Replace 'x' with the Quest ID you wish to alter the rewards of. This
  will claim/deny/normalize all of the quest's rewards.

  ---

  Quest x Change Subtext Entry To y
  - Replace 'x' with the Quest ID you want to modify the subtext of. Replace
  'y' with the subtext entry ID you wish to change the quest to. This will
  make the subtext, when viewed in-game in the quest journal, to display the
  subtext entry ID 'y' found in the plugin parameters for quest 'x'. This is
  used for times you wish to update the subtext text midway through a quest.

  ---
Lunatic Mode
For advanced users who have an understanding of JavaScript, you can use the following features added by the plugin to further enhance what you can do with your game project.
The plugin parameter 'Lunatic Mode' is made for users who are familiar with
JavaScript. These parameters allow you to add additional lines of code to
their respective functions whenever the respective quest journal function
occurs in-game. The timing for them will occur after the function occurred
and only if it was successful in delivering a change.

  ---

  Before Create Windows
  After Create Windows
  Close Quest Menu

  ---

  Quest Add
  Quest Remove
  Quest Complete
  Quest Fail
  Quest Available

  ---

  Change Description

  ---

  Show Objective
  Hide Objective
  Complete Objective
  Fail Objective
  Normalize Objective

  ---

  Show Reward
  Hide Reward
  Claim Reward
  Deny Reward
  Normalize Reward

  ---

  Change Subtext

  ---

There are a few rules to note. The code for each of those plugin functions
will only run if it meets these rules:

  1. The code will run for each quest or quest property changed. This means
     that if you used a plugin command that alters a group of quests or
     quest properties at once, the code will run multiple times individually
     for each quest or quest property.

  2. The code will only run if there has been successful changes to a quest
     or quest property. For example, if a quest is already set to 'Failed',
     running the plugin command to fail that quest again will not trigger
     the Lunatic Mode code to run again.

  3. When a quest is first added, any default properties added to the quest
     will not trigger the Lunatic Mode to run. For example, if the quest
     being added has objectives 1 and 2 already visible from the start, then
     the Lunatic Mode code will not run for 1 and 2.

Make sure you understand these rules so that you know what governs whether
or not the custom code runs.
Changelog
Version 1.02:
- Fixed a bug that caused a game freeze when using the Quest Journal Open
plugin command.

Version 1.01:
- Fixed some bugs regarding certain plugin commands not working properly.

Version 1.00:
- Finished Plugin!
