Row Formation (YEP)






|
VisuStella, Caz Wolf, Fallen Angel Olivia, Atelier Irina, and other affiliated content creators.
Download
System
This is a plugin created for RPG Maker MV.
For help on how to install plugins, click here.
For help on how to update plugins, click here.
Got errors with your RPG Maker MV plugin? Click here.
Yanfly Engine Plugins
This plugin is a part of the Yanfly Engine Plugins library.
Introduction
This plugin places party members into row formations to give them distinct
advantages based on row location in the form of states for maximum control.
Skills and items are capable of moving targets to different row locations.

If you are using YEP_BattleEngineCore.js, place this plugin under the
YEP_BattleEngineCore.js plugin in the Plugin Manager list to receive extra
features such as being able to change Rows mid-battle.
What are Rows?
Rows are positions your party members are placed in. Depending on how you
set up the rows for your project (and how many), rows can provide different
advantages to the party members for just simply being in that row.

These advantages are granted through the states that are given to the party
members from the plugin parameter settings. How you set up these advantages
is entirely up to you.

---

An example of some setups:

Front Row:
Members in the front row will receive full damage from the Melee element.

Middle Row:
Members in the middle row will receive slightly less damage from the Melee
element, but the Attack command is sealed unless they have a ranged weapon.

Back Row:
Members in the back row will receive a lot less damage fom the Melee element
and also cannot use the Attack command unless equipped with a ranged weapon.

---

How you choose to set up your rows is dependent on how you can set up your
states that affect those rows. These states cannot be removed by skills and
are considered a passive effective.
Notetags
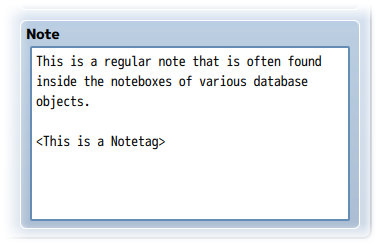
RPG Maker MV's editor is unable to allow for custom traits/properties that a game dev may wish to associate with a database object, event, map, etc. Notetags are used to work around such limitations by allowing the game dev to tag certain traits/properties using specific Notetags declared by the related plugin.
Here is a list of Notetag(s) that you may use.
---
You can use these notetags to modify the various aspects of row formations.

Actor and Enemy Notetags:
  <Default Row: x>
  <Default Row: x, x, x>
  This is the default row assigned to the battler by default. This will
  override the default parameter settings. If multiple x values are assigned
  then the battler can start in any of those rows. If multiple rows are
  included, then at the start of the game (for actors) or start of battle
  (for enemies), the battler will start in a random row included.

Actor, Class, Enemy, Weapon, Armor, and State Notetags:
  <Row Lock>
  This causes the affected battler to be row locked and unable to switch
  rows. For enemies, this will override the default parameters.

  <Not Row Lock>
  This causes the affected battler to be not be row locked and able to
  switch rows. This is primarily for enemies since all non-enemies are not
  row locked by default. This will override the default parameters.

Skill and Item Notetags:
  <Row Only: x>
  <Row Only: x, x, x>
  <Row Only: x to y>
  This makes it so that this skill/item can only be used by the battler if
  the battler is in row x. If multiple rows are used, the battler can be in
  any of those rows. If you use the x to y notetag, this will account for
  all the rows from x to y.

  <Change Target Row: x>
  Changes target's current row to x. This cannot go under 1 nor can it go
  past the designated maximum row set in the parameters.

  <Push Back Target Row: x>
  This will push the target back x rows. This cannot exceed the maximum row
  set in the parameters.

  <Pull Forward Target Row: x>
  This will pull the target forward x rows. This cannot exceed the maximum
  rows set in the parameters.

  <Change User Row: x>
  Changes user's current row to x. This cannot go under 1 nor can it go
  past the designated maximum row set in the parameters.

  <Push Back User Row: x>
  This will push the user back x rows. This cannot exceed the maximum row
  set in the parameters.

  <Pull Forward User Row: x>
  This will pull the user forward x rows. This cannot exceed the maximum
  rows set in the parameters.
Lunatic Mode
For advanced users who have an understanding of JavaScript, you can use the following features added by the plugin to further enhance what you can do with your game project.
Conditional Row Modification
To the users who have a bit of JavaScript proficiency, you can use these
notetags to give your skills and items custom row modification properties.

Skill and Item Notetags

  <Custom Target Row>
   if (user.hpRate() > 0.50) {
     row += 1;
   } else {
     row = 1;
   }
  </Custom Target Row>
  The 'row' variable refers to the target's row. This will allow you to set
  or alter the target's row based on values. Remember that the lower the row
  number, the closer the target is to the opposing party.

  <Custom User Row>
   if (user.hpRate() > 0.50) {
     row += 1;
   } else {
     row = 1;
   }
  </Custom User Row>
  The 'row' variable refers to the user's row. This will allow you to set or
  alter the user's row based on values. Remember that the lower the row
  number, the closer the user is the the opposing party.
Conditional Row State
To the users who have a bit of JavaScript proficiency, you can use these
notetags to give your row states conditional activation properities, you can
use these notetags. These states have to be applied via the Row States in
the plugin parameters. However, they will not be applied to the battler
unless the conditions are met.

State Notetags:
  <Custom Row Condition>
  if (user.hp / user.mhp <= 0.25) {
    condition = true;
  } else {
    condition = false;
  }
  </Custom Row Condition>
  The 'condition' variable determines if the condition is met or not. If the
  condition is true, the condition is met and this state will be applied to
  the battler as a row state. If the 'condition' variable is false, then the
  row state will not be applied to the battler.
Script Calls
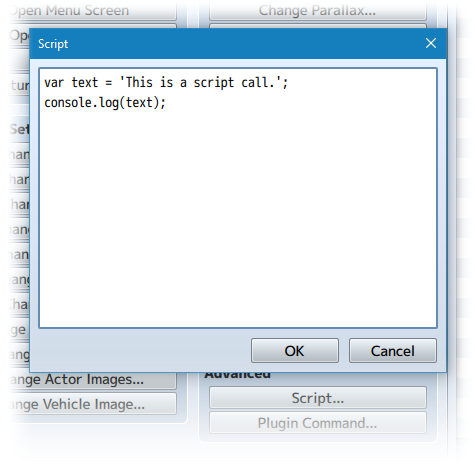
Script Calls are event commands that are used to run JavaScript code during an event to call upon unique functions, usually added by the related plugin.
Here is a list of Script Call(s) that you may use:
For those with JavaScript proficiency, you can make use of some of these
newly added functions when you do an eval check for the battler info:

battler.row()
This will return the row the battler is currently resided in.

battler.rowIndex()
This will return the battler's index in relation to the other battlers of
the same team in the same row.

battler.isRowLocked()
This will return a true/false if the battler is row locked.

battler.setRow(x)
This will set the battler's row to x. In battle, this will visually move
the battler there, unless the battler is the active battler.

battler.alterRow(x)
This will alter the battler's row by x. In battle, this will visually move
the battler there, unless the battler is the active battler.

$gameParty.rowSize(x)
$gameTroop.rowSize(x)
This will return the number of members found in that group in row x.

$gameParty.rowAliveSize(x)
$gameTroop.rowAliveSize(x)
This will return the number of alive members found in that group in row x.

$gameParty.rowDeadSize(x)
$gameTroop.rowDeadSize(x)
This will return the number of dead members found in that group in row x.

$gameParty.rowMembers(x)
$gameTroop.rowMembers(x)
This will return each member of the group in row x.

$gameParty.rowAliveMembers(x)
$gameTroop.rowAliveMembers(x)
This will return each alive member of the group in row x.

$gameParty.rowDeadMembers(x)
$gameTroop.rowDeadMembers(x)
This will return each dead member of the group in row x.

$gameParty.updateRows();
$gameTroop.updateRows();
This is a special command. This will check each row in the party. If a row
is empty and/or doesn't have any alive members, all the remaining members
behind that row will move forward one row until all the empty rows are gone.
Main Menu Manager Integration
To integrate access to a scene from this plugin into Yanfly's Main Menu Manager, use the settings below:
For those using the Main Menu Manager and would like to position the Row
command in a place you'd like, use the following format:

      Name: Yanfly.Param.RowCmdName
    Symbol: row
      Show: $gameSystem.isShowRowMenu()
   Enabled: $gameSystem.isEnabledRowMenu()
       Ext:
 Main Bind: this.commandRow.bind(this)
Actor Bind:

Insert the above setup within a Main Menu Manager slot. Provided you copy
the exact settings to where you need it, it will appear there while using
all of the naming, enabling, disabling, hiding, and showing effects done by
the plugin parameters.

Remember to turn off 'Auto Add Menu' from the plugin parameters.
Plugin Commands
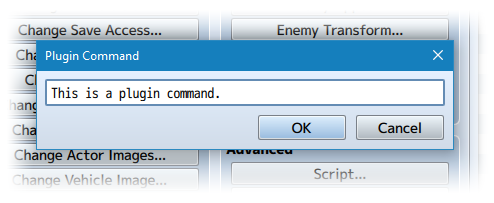
Plugin Commands are event commands that are used to call upon functions added by a plugin that aren't inherently a part of RPG Maker MV.
Here is a list of Plugin Command(s) that you may use:
The following are some plugin commands you can use to adjust rows mid-game.

Plugin Command:

  ShowMenuRow
  HideMenuRow
  This will either show or hide the Row command from the main menu.

  EnableMenuRow
  DisableMenuRow
  This will either enable or disable the Row command from the main menu.

  ShowBattleRow
  HideBattleRow
  This will either show or hide the Row command from the battle party menu.
  This requires the YEP_BattleEngineCore plugin to take effect.

  EnableBattleRow
  DisableBattleRow
  This will either enable or disable the Row command from the battle party
  menu. This requires the YEP_BattleEngineCore plugin to take effect.

  SetActorRow actorId x
  This will set the actor represented by actorId to move to row x. If you
  want to move actor 3 to the 2nd row, the plugin command would look like:
  SetActorRow 3 2

  SetPartyRow slotId x
  This will set the party member in slotId to move to row x. If you want to
  move the 3rd party member to the 2nd row, the plugin command would look
  like: SetPartyRow 3 2

  SetEnemyRow slotId x
  This will set the enemy member in slotId to move to row x. If you want to
  move the 3rd enemy member to the 2nd row, the plugin command would look
  like: SetEnemyRow 3 2
  * Note: If you use this plugin command during turn 0 and the parameter
  'Adjust Relative' is set to false, the enemies will not move and
  automatically assume the position they are in will be the row they'll be
  in. On the other hand, using this plugin on anything after turn 0 will
  move the enemy visually to a different position on the screen. If the
  parameter 'Adjust Relative' is true, the enemies will move.
Tips & Tricks
The following Tips & Tricks effects use this plugin:
Changelog
Version 1.16:
- Bypass the isDevToolsOpen() error when bad code is inserted into a script
call or custom Lunatic Mode code segment due to updating to MV 1.6.1.

Version 1.15:
- Updated for RPG Maker MV version 1.5.0.
- Added new 'Row x States 1.5.0' plugin parameters.
- Added new 'Alive Row Index' plugin parameter.

Version 1.14:
- Game now refreshes all battlers upon reentry into the battle after
entering and leaving the Row formation menu mid-battle.

Version 1.13:
- Bug fixed where setting an actor's home position didn't mark their
original index value.

Version 1.12:
- Lunatic Mode fail safes added.

Version 1.11:
- Updated the conditional passives for rows to occur more frequently.

Version 1.10:
- Updated <Default Row: x> notetag to also include <Default Row: x, x, x> so
that actors or enemies can start in any of those default rows. If multiple
rows are included, then at the start of the game (for actors) or start of
battle (for enemies), the battler will start in a random row included.

Version 1.09b:
- Updated Lunatic Mode to have an innate 'user' variable.
- Added 'Auto Add Menu' to plugin parameters. This way, users don't have to
make conflict with it if manually positioning the command with the Main Menu
Manager plugin.
- Documentation update for 'SetEnemyRow slotId x' plugin command.

Version 1.08:
- Updated for RPG Maker MV version 1.1.0.

Version 1.07b:
- Fixed a bug that prevented the Row command in-battle from updating.
- Optimization update.
- Disabled Row States from being applied outside of battle.

Version 1.06a:
- Fixed a bug where Lunatic Mode effects weren't working properly.
- Added a 'Use Map Sprite' plugin parameter for those using battlers that
are too big for the Row changing menu.
- Added new section to Help File on how to place Row Formation into the
Main Menu Manager.

Version 1.05:
- Fixed a bug with user row changing notetags not working properly.

Version 1.04:
- Fixed a bug with the SetPartyRow slotId x plugin command.
- Added 'Adjust Relative' plugin parameter for enemy rows.
If this value is set to false, their positions in the Troops tab is where
their designated row is. Meaning if you have a Wisp in Row 3, its current
location in the Troops tab is where it would be if it be if it was in Row 3.
If this value is set to true, their positions in the Troops tab is where
their row 1 is. Meaning if you have a Wisp in Row 3, upon starting battle,
it will be pushed back in positioning relative to its Troops tab position,
which is row 1.

Version 1.03a:
- More positioning fixes. Enemies no longer shift when entering and exiting
the in-battle menu.

Version 1.02:
- Made a change where enemies of different default rows don't automatically
move positions at the start of battle.
- Fixed an incompatibility issue for those using larger screen resolutions
and battle repositioning.

Version 1.01:
- Fixed a bug that caused music to not replay properly when accessing the
Row change menu from battle.

Version 1.00:
- Finished Plugin!
