Template:VisuMZ Items and Equips Core Notetags
The following are notetags that have been added through this plugin. These notetags will not work with your game if this plugin is OFF or not present.
Contents
General
These notetags affect the Items, Weapons, and Armors on a general scale.
---
<Max: x>

- Used for: Item, Weapon, Armor Notetags
- Determines the maximum quantity that can be held for this item.
- Replace 'x' with a number value to determine the maximum amount.
---
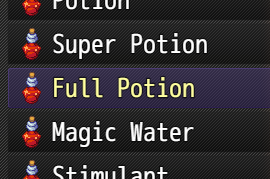
<Color: x>
<Color: #rrggbb>

- Used for: Item, Weapon, Armor, Skill Notetags
- Determines the color of the object inside the in-game menus.
- Replace 'x' with a number value depicting a window text color.
- Replace 'rrggbb' with a hex color code for a more custom color.
---
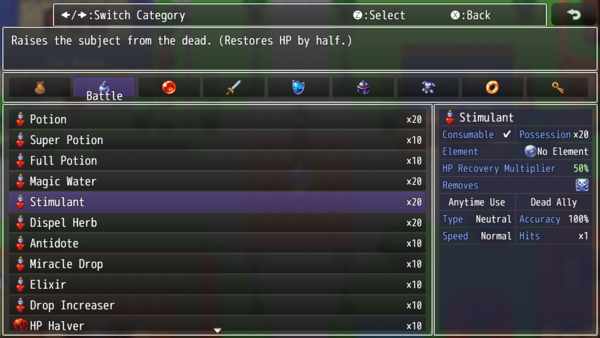
<Category: x>

- Used for: Item, Weapon, Armor Notetags
- Arranges items into certain/multiple categories to work with the Category
  Plugin Parameter setting: "Category:x".
- Replace 'x' with a category name to mark this item as.
---
<Categories>
 x
 x
</Categories>

- Used for: Item, Weapon, Armor Notetags
- Arranges items into certain/multiple categories to work with the Category
  Plugin Parameter setting: "Category:x".
- Replace each 'x' with a category name to mark this item as.
---
<Conserve: x%>

- Used for: Item
- Gives the item a percent chance when used to not consume the item.
- Replace 'x' with a number representing the percent chance to successfully
  conserve the item.
- If an item cannot be consumed, conserve chance will be 100% regardless.
---
Item Accessibility Notetags
The following notetags allow you to choose when items can/cannot be used based on switches.
---
<Enable Switch: x>

<Enable All Switches: x,x,x>
<Enable Any Switches: x,x,x>

- Used for: Item Notetags
- Determines the enabled status of the item based on switches.
- Replace 'x' with the switch ID to determine the item's enabled status.
- If 'All' notetag variant is used, item will be disabled until all
  switches are ON. Then, it would be enabled.
- If 'Any' notetag variant is used, item will be enabled if any of the
  switches are ON. Otherwise, it would be disabled.
---
<Disable Switch: x>

<Disable All Switches: x,x,x>
<Disable Any Switches: x,x,x>

- Used for: Item Notetags
- Determines the enabled status of the item based on switches.
- Replace 'x' with the switch ID to determine the item's enabled status.
- If 'All' notetag variant is used, item will be enabled until all switches
  are ON. Then, it would be disabled.
- If 'Any' notetag variant is used, item will be disabled if any of the
  switches are ON. Otherwise, it would be enabled.
---
JavaScript Notetags: Item Accessibility
The following are notetags made for users with JavaScript knowledge to determine if an item can be accessible by code.
---
<JS Item Enable>
 code
 code
 enabled = code;
</JS Item Enable>

- Used for: Item Notetags
- Determines the enabled status of the item based on JavaScript code.
- If the actor this is disabled for is the only party member, it will not be
  visible in the item list unless the VisuStella Battle Core is installed.
  - If the VisuStella Battle Core is installed, then all battle scope items
    will be visible even if they're disabled.
- Replace 'code' to determine the type enabled status of the item.
- The 'enabled' variable returns a boolean (true/false) to determine if the
  item will be enabled or not.
- The 'user' variable refers to the user with the item.
- The 'item' variable refers to the item being checked.
- All other item conditions must be met in order for this to code to count.
---
Equipment Notetags
The following notetags provide equipment-related effects from deciding what equip slots can be given to classes to the base parameter changes asigned to weapons and armors.
---
<Equip Slots>
 slotName
 slotName
 slotName
</Equip Slots>

- Used for: Class Notetags
- Changes the equipment slot loadout for any actor who is that class.
- Replace 'slotName' with an Equipment Type name from Database > Types.
  This is case-sensitive.
- Insert or remove as many "slotName" equipment types as needed.
---
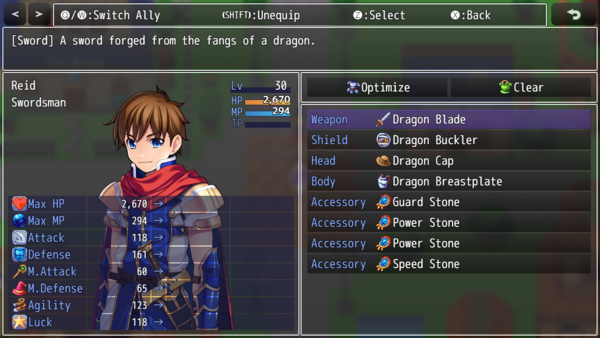
<param: +x>
<param: -x>

- Used for: Weapon, Armor Notetags
- Changes the base parameter value for the equip item.
- Replace 'param' with any of the following: 'MaxHP', 'MaxMP', 'ATK', 'DEF',
  'MAT', 'MDF', 'AGI', or 'LUK' to change that specific parameter's value.
  - These notetags do NOT work with X Parameters, S Parameters, or any
    custom parameters. These notetags ONLY work with the base parameters.
- Replace 'x' with a number value to set the parameter value to.
- This allows you to bypass the Database Editor's number limitations.
---
<Equip Copy Limit: x>

- Used for: Weapon, Armor Notetags
- Sets a maximum number of copies that the actor can wear of this equipment.
- Replace 'x' with a number value to determine the copy limit.
- This can be bypassed using Event Commands and/or Script Calls.
- Usage Example: Actors can only equip one copy of the "One-of-a-Kind Ring"
  on at any time despite having empty accessory slots because the ring has a
  <Equip Copy Limit: 1> notetag.
---
<Equip Weapon Type Limit: x>

- Used for: Weapon
- This weapon cannot be equipped with other weapons of the same type once
  the limited amount has been reached.
- Replace 'x' with a number value to determine the weapon type limit.
- This can be bypassed using Event Commands and/or Script Calls.
- Usage Example: A dualwielding warrior who can only equip one sword and a
  dagger but never two swords or two daggers because the swords and daggers
  all have the <Equip Weapon Type Limit: 1> notetags on them.
---
<Equip Armor Type Limit: x>

- Used for: Armor
- This armor cannot be equipped with other armors of the same type once the
  limited amount has been reached.
- Replace 'x' with a number value to determine the armor type limit.
- This can be bypassed using Event Commands and/or Script Calls.
- Usage Example: People cannot equip more than two glove accessories on at a
  time because the glove is a "Glove" armor-type and each glove item has the
  <Equip Armor Type Limit: 2> notetags on them.
---
<Party Artifact>
<Troop Artifact>

<Stackable Party Artifact>
<Stackable Troop Artifact>

- Used for: Armor
- This armor cannot be equipped at all. However, by simply being in the
  party's inventory, its parameter bonuses and traits will be applied
  globally throughout the whole party or troop (depending on the notetag).
- Add both notetags to affect both groups.
- The normal versions of the notetag is only applied once regardless of the
  number of copies are found in the party's inventory.
- The stackable versions of the notetag will have the bonuses and traits
  stacked multiple times relative to the number of copies found in the
  party's inventory.
- This item will NOT be added during the setup phase for Battle Tests.
  - If you want to add the item, do it manually.
---
<Equip For Class Only: x>
<Equip For Classes Only: x, x, x>
<Equip For Class Only: name>
<Equip For Classes Only: name, name, name>

- Used for: Weapon, Armor Notetags
- This piece of equipment can only be worn by members with 'x' as the main
  class. If there are multiple classes listed, at least one of them need to
  be the actor's main class.
- Replace 'x' with a number representing the ID of the class required.
- For the 'name' variant, replace 'name' with the name of the required class
  the actor needs to have in order to equip this object.
---
<Equip Requirements>
 requirement
 requirement
 requirement
</Equip Requirements>

- Used for: Weapon, Armor Notetags
- Defines a requirement(s) for the actor to meet in order for the equip item
  to be equippable.
- Failure to meet these requirements will cause the equipment to unequip
  automatically.
  - Keep in mind that in some cases, this will not happen immediately.
    Things like switches will require the actor to meet its cache clear
    in order to trigger the automatic unequip.
  - Some ways to trigger a cache clear would be to change the actor's HP/MP,
    or adding and then removing a state for the actor (preferrably an unused
    state that has no real effect).
- Replace 'requirement' with one of the settings bellow:
- Add multiple 'requirement' lines for more requirements.

  Requirements:

  param > x
  param >= x
  param === x
  param <= x
  param < x
  - Replace 'param' with 'level', 'maxhp', 'maxmp', 'atk', 'def', 'mat',
    'mdf', 'agi', or 'luk'.
  - This will make the piece of equipment require the actor's base parameter
    to be greater than (>), greater than or equal to (>=), equal to (===),
    less than or equal to (<=), or less than (<).
  - This is NOT the value for the total parameter, only the base parameter.
  - The base parameter is calculated by the user's class parameter value and
    any bonuses received through permanent stat increases.

  learned skill: x
  learned skill: name
  - This will make the piece of equipment require the actor to have learned
    skill 'x'.
  - If 'name' is used, priority will be given to the skill with the highest
    ID in the database.
  - The actor needs to have LEARNED the skill. This means that if you have
    added a skill to the actor's kit through a trait, it will not count.

  switch: x
  - This will require switch X to be on.
  - If it isn't, the piece of equipment cannot be worn.
  - Insert multiple of these to add more switches that are are required to
    be on.

  ***NOTE 1***
  There is no "class: x" for these equip requirements. Instead, use the
  <Equip For Class Only: x> notetags.

  ***NOTE 2***
  For those wondering where "unique only" is, that does not exist in this
  plugin. Instead, use the <Equip Copy Limit: x> notetag listed above.

  Example A:

    <Equip Requirements>
    level >= 20
    </Equip Requirements>

    - Requires the user to be at least level 20 in order to equip.

  Example B:

    <Equip Requirements>
    atk >= 50
    def <= 50
    </Equip Requirements>
    - Requires the user have at least 50 base ATK to equip.
    - Requires the user to be under 50 base DEF to equip.
---
<Added EType: x>
<Added ETypes: x, x, x>

- Used for: Armor Notetags
- This is for armors only and does NOT work with weapons!
- Allows a piece of armor to belong to multiple ETypes. This means a glove
  can be equipped as "Armgear" or as an "Accessory" if you so choose.
- Replace 'x' with a number representing the ID of the EType you wish to add
  to the list of ETypes.
  - Insert multiple 'x' entries to add more than one EType ID.
---
<Cursed>

- Used for: Weapon, Armor Notetags
- If this weapon or armor is equipped, it cannot manually be removed by the
  player until it is purified.
- To remove it, it must be done by event commands, script calls, or through
  the Purify-related Plugin Commands provided by this plugin.
- Once purified, the weapon or armor will become unequipped unless it has a
  purify transformation.
  - If the newly transformed weapon/armor is equippable, it will remain in
    the actor's equipment slots.
- If you are using VisuMZ_2_WeaponSwapSystem, weapons cannot become cursed
  in order to allow free weapon swapping. Weaponry will not be cursed
  if VisuMZ_2_WeaponSwapSystem is installed.
---
<Purify Transform: id>
<Purify Transform: name>

- Used for: Weapon, Armor Notetags
- If this notetag is present on a <Cursed> weapon or armor, then upon the
  actor receiving purification, the weapon or armor will transform into a
  different item.
- Replace 'id' with a number representing the transformed weapon/armor's ID.
- Replace 'name' with text representing the transformed weapon/armor's name.
- Weapons can only transform into weapons.
- Armors can only transform into armors.
---
JavaScript Notetags: Equipment
The following are notetags made for users with JavaScript knowledge to adjust the parameter through code.
---
<JS Parameters>
 MaxHP = code;
 MaxMP = code;
 ATK = code;
 DEF = code;
 MAT = code;
 MDF = code;
 AGI = code;
 LUK = code;
</JS Parameters>

- Used for: Weapon, Armor Notetags
- Uses JavaScript to determine the values for the basic parameters based on
  the code used to calculate its value.
- The variables 'MaxHP', 'MaxMP', 'ATK', 'DEF', 'MAT', 'MDF', 'AGI', and
  'LUK' are used to determine the finalized value of the parameter. This
  variable is case sensitive.
- If a parameter is not present, its value will be treated as +0.
---
Status Window Notetags
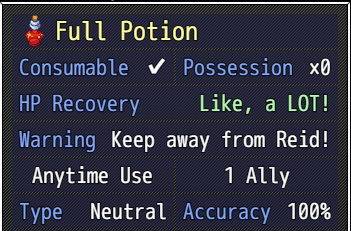
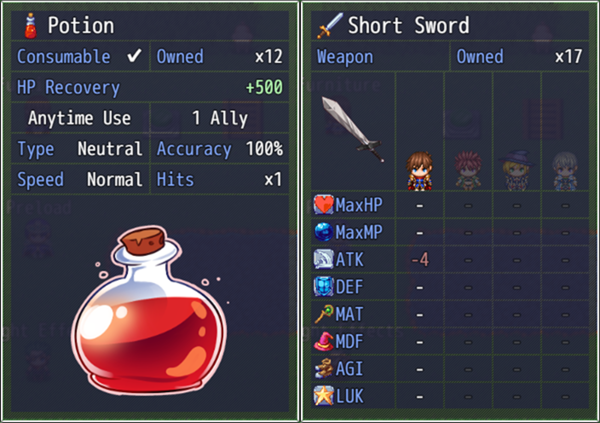
The following notetags will affect the Shop Status Window info. If for any reason the data that is displayed is not to your liking or insufficient, you can change it up using the following notetags.
---
<Status Info>
 key: data
 key: data
 key: data
</Status Info>

- Used for: Skill, Item Notetags
- If you do not like the generated data that's displayed, you can change it
  using this notetag to display what you want.
- Replace 'key' with one of the following:
  - Consumable
  - Quantity
  - Occasion
  - Scope
  - Speed
  - Success Rate
  - Repeat
  - Hit Type
  - Element
  - Damage Multiplier
  - HP Recovery
  - MP Recovery
  - TP Recovery
  - HP Damage
  - MP Damage
  - TP Damage
  - User TP Gain
  - Added Effects
  - Removed Effects
- Replace 'data' with the text data you want to visually appear. You may use
  text codes for this.
- This only affects info entries that are already visible and won't make
  other categories suddenly appear.
- Insert or remove as many "key: data" lines as needed.
---
<Custom Status Info>
 key: data
 key: data
 key: data
</Custom Status Info>

- Used for: Skill, Item Notetags
- If you want custom categories and data to be displayed for your items that
  aren't provided by the Shop Status Window Info to begin with, you can use
  this notetag to add in your own entries.
- Replace 'key' with text of the exact label you want. You may use text
  codes for this.
- Replace 'data' with text of the exact text data you want. You may use text
  codes for this.
- Insert or remove as many "key: data" lines as needed.
---
<Shop Picture Name: filename>

- Used for: Skill, Item, Weapon, Armor Notetags
- Enables a shop picture for the status window. This image can be seen in
  the item scene, shop scene, and skill scene if enabled.
- If this notetag is not used, there will be no image.
- Replace 'filename' with the filename of the graphic to use from the game
  project's img/pictures/ folder. Filenames are case sensitive. Leave out
  the filename extension from the notetag.
- Use the supporting notetags to determine where the image appears. If not,
  they will default to the background, fit to the window dimensions,
  centered at the middle of the window.
---
<Shop Picture Layer: Background>
<Shop Picture Layer: Foreground>

- Used for: Skill, Item, Weapon, Armor Notetags
- Determines which layer the graphic will be drawn on.
- If the background layer is selected, the picture will appear behind the
  data text.
- If the foreground layer is selected, the picture will appear in front of
  the data text.
- If this notetag is not used, it will default to the background layer.
---
<Shop Picture Max Width: x>
<Shop Picture Max Height: y>
<Shop Picture Max Dimensions: x, y>

- Used for: Skill, Item, Weapon, Armor Notetags
- Determines the maximum width and/or height for the image.
- This means the image will be automatically scaled proportionally to that
  width or height as long as everything else does not break boundaries.
- Replace 'x' and 'y' with number values representing the maximum dimensions
  the image can be in pixels.
- If these notetags are not used, the image will be automatically scaled to
  the dimensions of the shop status window.
---
<Shop Picture Alignment: Left>
<Shop Picture Alignment: Center>
<Shop Picture Alignment: Right>

- Used for: Skill, Item, Weapon, Armor Notetags
- Adjusts the horizontal alignment for the image.
- Left, center, right determines how it's aligned horizontally if the
  image does not horizontally fit in the width of the window.
- If any of these notetags are not used, the image will default to the
  'center' alignment.
---
<Shop Picture Position: Top>
<Shop Picture Position: Middle>
<Shop Picture Position: Bottom>

- Used for: Skill, Item, Weapon, Armor Notetags
- Adjusts the vertical position for the image.
- Top, middle, bottom determines how it's positioned vertically if the
  image does not vertically fit in the width of the window.
- If any of these notetags are not used, the image will default to the
  'middle' position.
---
<Shop Picture Offset X: +x>
<Shop Picture Offset X: -x>

<Shop Picture Offset Y: +y>
<Shop Picture Offset Y: -y>

<Shop Picture Offset: +x, +y>
<Shop Picture Offset: -y, -y>

- Used for: Skill, Item, Weapon, Armor Notetags
- Offsets the X and Y positions of the image in the shop status window.
- X offsets adjust the horizontal position by x pixels.
  - Positive goes right.
  - Negative goes left.
- Y offsets adjust the horizontal position by y pixels.
  - Positive goes down.
  - Negative goes up.
- Replace 'x' and 'y' with number values representing the pixels to offset
  the image by. The '+' and '-' signs are required.
- If none of these notetags are used, there will be no offsets.
---
<Shop Picture Opacity: x>
<Shop Picture Opacity: x%>

- Used for: Skill, Item, Weapon, Armor Notetags
- Adjusts the opacity of the image used.
- When using 'x' and not 'x%', use a number between 0 and 255.
  - The closer to 0, the more transparent the image is.
  - The closer to 255, the more opaque the image is.
- When using 'x%' and not 'x', use a number between 0% and 100%.
  - The closer to 0%, the more transparent the image is.
  - The closer to 100%, the more opaque the image is.
---
Shop Menu Notetags
These notetags adjust how prices and such are managed inside the Shop Menu as well as whether or not some items are visible depending on switch states.
---
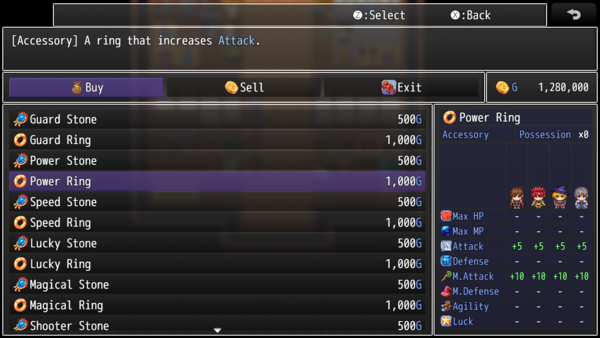
<Price: x>

- Used for: Item, Weapon, Armor Notetags
- Adjusts the buying price for this item.
- Replace 'x' with a number depicting the desired value for the buy price.
- This allows you to bypass the RPG Maker MZ editor's limitation of 999,999.
---
<Can Sell>
<Cannot Sell>

- Used for: Item, Weapon, Armor Notetags
- Makes the item either always sellable or cannot be sold.
- This bypasses the game's internal hard-coding to prevent items with a
  price of 0 from being able to be sold.
- This bypasses the game's internal hard-coding to always allow items with
  a price value of being able to be sold.
---
<Sell Price: x>

- Used for: Item, Weapon, Armor Notetags
- Changes the sell price to be something different than the default amount.
- Replace 'x' with a number depicting the desired value for the sell price.
---
<Show Shop Switch: x>

<Show Shop All Switches: x,x,x>
<Show Shop Any Switches: x,x,x>

- Used for: Item, Weapon, Armor Notetags
- Determines the visibility of the shop item based on switches.
- Replace 'x' with the switch ID to determine the shop item's visibility.
- If 'All' notetag variant is used, item will be hidden until all switches
  are ON. Then, it would be shown.
- If 'Any' notetag variant is used, item will be shown if any of the
  switches are ON. Otherwise, it would be hidden.
---
<Hide Shop Switch: x>

<Hide Shop All Switches: x,x,x>
<Hide Shop Any Switches: x,x,x>

- Used for: Item, Weapon, Armor Notetags
- Determines the visibility of the shop item based on switches.
- Replace 'x' with the switch ID to determine the shop item's visibility.
- If 'All' notetag variant is used, item will be shown until all switches
  are ON. Then, it would be hidden.
- If 'Any' notetag variant is used, item will be hidden if any of the
  switches are ON. Otherwise, it would be shown.
---
<Cannot Sell Switch: x>

<Cannot Sell All Switches: x,x,x>
<Cannot Sell Any Switches: x,x,x>

- Used for: Item, Weapon, Armor Notetags
- Determines the sellability of the shop item based on switches.
- Replace 'x' with the switch ID to determine the shop item's sellability.
- If 'All' notetag variant is used, item cannot be sold until all switches
  are ON. Otherwise, it can be sold.
- If 'Any' notetag variant is used, item cannot be sold if any of the
  switches are ON. Otherwise, it can be sold.
---
<Buy Turn On Switch: x>
<Buy Turn On Switches: x, x, x>

- Used for: Item, Weapon, Armor Notetags
- When this item, weapon, or armor is bought in the shop scene, turn on the
  switch(es) 'x'.
- Replace 'x' with a number representing the ID of the switch to turn on.
  - Insert multiple 'x' values to turn on multiple switches upon buying.
---
<Buy Turn Off Switch: x>
<Buy Turn Off Switches: x, x, x>

- Used for: Item, Weapon, Armor Notetags
- When this item, weapon, or armor is bought in the shop scene, turn off the
  switch(es) 'x'.
- Replace 'x' with a number representing the ID of the switch to turn off.
  - Insert multiple 'x' values to turn off multiple switches upon buying.
---
<Sell Turn On Switch: x>
<Sell Turn On Switches: x, x, x>

- Used for: Item, Weapon, Armor Notetags
- When this item, weapon, or armor is sold in the shop scene, turn on the
  switch(es) 'x'.
- Replace 'x' with a number representing the ID of the switch to turn on.
  - Insert multiple 'x' values to turn on multiple switches upon selling.
---
<Sell Turn Off Switch: x>
<Sell Turn Off Switches: x, x, x>

- Used for: Item, Weapon, Armor Notetags
- When this item, weapon, or armor is sold in the shop scene, turn off the
  switch(es) 'x'.
- Replace 'x' with a number representing the ID of the switch to turn off.
  - Insert multiple 'x' values to turn off multiple switches upon selling.
---
JavaScript Notetags: Shop Menu
The following are notetags made for users with JavaScript knowledge. These notetags are primarily aimed at Buy and Sell prices.
---
<JS Buy Price>
 code
 code
 price = code;
</JS Buy Price>

- Used for: Item, Weapon, Armor Notetags
- Replace 'code' to determine the buying 'price' of the item.
- Insert the final buy price into the 'price' variable.
- The 'item' variable refers to the item being bought.
---
<JS Sell Price>
 code
 code
 price = code;
</JS Sell Price>

- Used for: Item, Weapon, Armor Notetags
- Replace 'code' to determine the selling 'price' of the item.
- Insert the final sell price into the 'price' variable.
- The 'item' variable refers to the item being sold.
---
