Category:Script Calls (MV)


|
VisuStella, Caz Wolf, Fallen Angel Olivia, Atelier Irina, and other affiliated content creators.
Contents
- 1 Absorption Barrier
- 2 Action Cutin
- 3 Base Parameter Control
- 4 Battle Impact
- 5 Buffs & States Core
- 6 Collectible Card Game
- 7 Dragonbones Map Sprites
- 8 Enemy Levels
- 9 Enhanced TP
- 10 Equip Battle Skills
- 11 Event Chase Player
- 12 Event Encounter Aid
- 13 Event Morpher
- 14 Event Spawner
- 15 Event Sprite Offset
- 16 Extra Enemy Drops
- 17 Extra Parameter Formula
- 18 Forced + Bonus Battle Drops
- 19 Horror Effects
- 20 Icons on Events
- 21 Map Display Name Core
- 22 Message Core
- 23 Move Route Core
- 24 Notification Window
- 25 Picture Spritesheets
- 26 Quest Journal System
- 27 Recruiting Board
- 28 Row Formation
- 29 Self Switches & Variables
- 30 Script Call Plugin Commands
- 31 Skill Core
- 32 Skill Mastery Levels
- 33 Special Parameter Formula
- 34 Stat Allocation
- 35 Unison Attack
- 36 Visual Novel Busts
- 37 Weakness Display
|
Script Calls are event commands that are used to run JavaScript code during an event to call upon unique functions, usually added by the related plugin. Here is a list of Script Call(s) that you may use: Absorption BarrierFor those familiar with JavaScript, here is a quick reference list of new JavaScript functions you can use for your own code and/or Lunatic Mode. JavaScript functions: battler.barrierPoints() - Returns the total amount of Barrier Points the battler has. battler.barrierPoints(-1) - Returns the amount of unexpiring Barrier Points the battler has. battler.barrierPoints(x) - Returns the amount of Barrier Points the battler has for that turn. battler.gainBarrier(value, turn) - Makes battler gain barrier points equal to 'value' that lasts a certain amount of 'turns'. If turns is left at 0, the value will be unexpiring Barrier Points. battler.loseBarrier(value) - Makes the battler lose 'value' worth of Barrier Points. battler.startBarrierAnimation() - Makes the battler play the barrier struck animation. battler.updateBarrierTurns() - Makes the battler's Barrier Points update their turns. Action Cutin
Action cutins can be called upon and used in either in battle or on the map screen. To call them, there's various ways of doing so. Look below for instructions on how to get each one working. These require knowledge of how to use JavaScript to utilize. I am not responsible for improper usage or teaching you how to use JavaScript so you can further use these. If you wish to understand how to use RPG Maker MV's JavaScript base, I suggest taking a look at Trihan's "Jump Into JavaScript" article found here: https://rpgmaker.net/tutorials/1230/
var battler = $gameActors.actor(1);
var settings = $actionCutinSettings();
$actionCutin(battler, settings);
- This will create a singular cutin of the designated battler while using the default cutin settings defined in the Plugin Parameters. In the above example, it creates a singular action cutin of actor 1 while using the default cutin settings.

var battler = $gameActors.leader();
var settings = $actionCutinSettings($dataSkills[10]);
$actionCutin(battler, settings);
- This will create a singular cutin of the designated battler while using the cutin settings associated with a skill's notetags in the database. In the above example, it creates a singular action cutin of the party leader while using skill 10's notetag settings.

var battler = $gameTroop.members()[0];
var settings = $actionCutinSettings($dataItems[20]);
$actionCutin(battler, settings);
- This will create a singular cutin of the designated battler while using the cutin settings associated with an item's notetags in the database. In the above example, it creates a singular action cutin of the game troop member with index 0 while using item 20's notetag settings.
var battlers = [];
battlers.push($gameActors.actor(1));
battlers.push($gameActors.actor(2));
battlers.push($gameActors.actor(3));
battlers.push($gameActors.actor(4));
var settings = $actionCutinSettings($dataSkills[10]);
var template = 'Horizontal';
$actionCutinTemplate(battlers, settings, template);
- This uses the templates found in the Plugin Parameters to create multiple cutins of battlers at a time and using certain notetag settings from a designated skill selected by the game dev. In the above example, actors 1 through 4 are listed as a part of the battlers, with notetag settings from skill 10 in the database, and the 'Horizontal' template that's defined in the Plugin Parameters.

var battlers = [];
battlers.push($gameParty.members()[0]);
battlers.push($gameParty.members()[1]);
battlers.push($gameParty.members()[2]);
battlers.push($gameParty.members()[3]);
var settings = $actionCutinSettings($dataItems[20]);
var template = 'Vertical';
$actionCutinTemplate(battlers, settings, template);
- This uses the templates found in the Plugin Parameters to create multiple cutins of battlers at a time and using certain notetag settings from a designated item selected by the game dev. In the above example, party members with an index value between 0 and 3 are listed as a part of the battlers, with notetag settings from item 20 in the database, and the 'Vertical' template that's defined in the Plugin Parameters.

var battlers = [];
battlers.push($gameTroop.members()[0]);
battlers.push($gameTroop.members()[1]);
battlers.push($gameTroop.members()[2]);
battlers.push($gameTroop.members()[3]);
var settings = $actionCutinSettings();
var template = 'Horizontal';
$actionCutinTemplate(battlers, settings, template);
- This uses the templates found in the Plugin Parameters to create multiple cutins of battlers at a time and using the default cutin settings defined in the Plugin Parameters. In the above example, enemy troop members with an index value between 0 and 3 are listed as a part of the battlers, with default cutin settings, and the 'Horizontal' template that's defined in the Plugin Parameters.
If you don't like the settings made in certain skills/items or would just like to create your own without having to create new skills/items, then start with the following code. var settings = $actionCutinSettings(); This grabs the default cutin settings. As long as you modify it before inserting it into $actionCutin or $actionCutinTemplate, then the settings will behave differently from the default. Below is a list of the various things you can do to your code to change it up. You're not required to use all of them. Just pick the settings alterations that need changing. settings.backgroundImg = 'Speedlines'; settings.backgroundHue = 0; settings.blendMode = 1; settings.borderThickness = 5; settings.borderColor = 'black'; settings.x = 0; settings.y = Graphics.boxHeight / 2; settings.width = Graphics.boxWidth; settings.height = 300; settings.speedX = 40; settings.speedY = 0; settings.shiftDistanceX = 480; settings.shiftDistanceY = 0; settings.shiftFrames = 16; settings.flash = true; settings.flashColor = [255, 255, 255, 170]; settings.flashDuration = 20; settings.shake = true; settings.shakePower = 5; settings.shakeSpeed = 5; settings.shakeDuration = 20; settings.sound = true; settings.soundName = 'Magic3'; settings.soundVolume = 90; settings.soundPitch = 150; settings.soundPan = 0; settings.duration = 90; settings.opacitySpeed = 16; settings.forcedScale = 2.0; settings.forcedAntiAlias = false; settings.forcedOffsetX = 0; settings.forcedOffsetY = 0; Pick and choose the setting changes you want before inserting them into $actionCutin or $actionCutinTemplate's arguments. Below is an example of how to use it in a complete script call. var battler = $gameParty.leader(); var settings = $actionCutinSettings(); settings.backgroundHue = 180; settings.blendMode = 0; $actionCutin(battler, settings); The above script call changes the speedlines to have a hue of 180 while changing the blend mode to 'Normal'. A regular single battler action cutin is then used through the $actionCutin function.
var battler = $gameActors.actor(1);
battler.changeActionCutinFaceData(type, filename, index, hue);
- Replace 'type' with 'picture', 'face', 'svbattler', or 'battler' (keep the quotes). This determines the type of asset to use.
- Replace 'filename' with the filename of the associated graphic.
- The filename is case sensitive!
- Replace 'index' with a numeric value starting from 0 to determine the cell.
- Index is used with 'face' and 'svbattler'.
- Replace 'hue' with a numeric value (0 to 360) to determine its hue.
- Hue is used with 'battler'.

var battler = $gameActors.actor(1);
battler.changeActionCutinFaceScale(scale);
- Replace 'scale' with a numeric value to determine the cutin's scale.
- 1.0 is 100%. 0.5 is 50%. 2.25 is 225%.

var battler = $gameActors.actor(1);
battler.changeActionCutinFaceOffset(offsetX, offsetY);
- Replace 'offsetX' and 'offsetY' with numeric values to determine how many pixels to offset the face cutin by.

var battler = $gameActors.actor(1);
battler.changeActionCutinFaceAntiAlias(boolean);
- Replace 'boolean' with 'true' or 'false' (remove the quotes) to determine if the face cutin graphic will use anti-alias or not.

var battler = $gameActors.actor(1);
battler.clearActionCutinFaceData();
- Removes all changes made to the designated battler regarding face cutins. This will revert the battler to using its original face cutin data that's made through notetags or through the plugin's defaults.
Base Parameter ControlYou can use the following JavaScript functions to alter the base parameter
values of the battlers. In these listed functions, the 'battler' variable
is to be referenced by an actor:
ie. battler = $gameActors.actor(3);
- or -
battler = $gameTroop.members()[2];
Function:
battler.clearParamPlus()
- This will clear all 'plus' variable modifiers for all base parameters.
battler.setMaxHp(x)
battler.setMaxMp(x)
battler.setAtk(x)
battler.setDef(x)
battler.setMat(x)
battler.setMdf(x)
battler.setAgi(x)
battler.setLuk(x)
- Sets the battler's respective base parameter value to x. This will alter
the 'plus' variable to fit this setting as best as possible without taking
into consideration the rates and flats.
battler.setMaxHpPlus(x)
battler.setMaxMpPlus(x)
battler.setAtkPlus(x)
battler.setDefPlus(x)
battler.setMatPlus(x)
battler.setMdfPlus(x)
battler.setAgiPlus(x)
battler.setLukPlus(x)
- Sets the battler's respective base parameter plus value to x.
battler.addMaxHp(x)
battler.addMaxMp(x)
battler.addAtk(x)
battler.addDef(x)
battler.addMat(x)
battler.addMdf(x)
battler.addAgi(x)
battler.addLuk(x)
- Adds x value to battler's respective base parameter plus value.
battler.minusMaxHp(x)
battler.minusMaxMp(x)
battler.minusAtk(x)
battler.minusDef(x)
battler.minusMat(x)
battler.minusMdf(x)
battler.minusAgi(x)
battler.minusLuk(x)
- Subtracts x value to battler's respective base parameter plus value.
battler.clearCustomParamLimits();
- Clears any custom parameter limits placed upon the battler through a
script call. This does not remove the custom parameter limits applied to
a battler through notetags.
battler.setCustomMaxHpMax(x)
battler.setCustomMaxMpMax(x)
battler.setCustomAtkMax(x)
battler.setCustomDefMax(x)
battler.setCustomMatMax(x)
battler.setCustomMdfMax(x)
battler.setCustomAgiMax(x)
battler.setCustomLukMax(x)
- Sets the maximum parameter limit of the respective base parameter to x.
This value is calculated against any <stat Max: x> notetags that the
battler may have. If there are multiple max values, the larges value is
used as the parameter maximum.
battler.setCustomMaxHpMin(x)
battler.setCustomMaxMpMin(x)
battler.setCustomAtkMin(x)
battler.setCustomDefMin(x)
battler.setCustomMatMin(x)
battler.setCustomMdfMin(x)
battler.setCustomAgiMin(x)
battler.setCustomLukMin(x)
- Sets the minimum parameter limit of the respective base parameter to x.
This value is calculated against any <stat Min: x> notetags that the
battler may have. If there are multiple min values, the larges value is
used as the parameter minimum.
Battle ImpactFor those who would like to manually make their own color break effects, you can use these script calls whereever you like:
var spriteset = SceneManager._scene._spriteset;
var intensity = Olivia.BattleImpact.CriticalBreakIntensity;
var duration = Olivia.BattleImpact.CriticalBreakDuration;
spriteset.setupRbgSplitImpactFilterEffect(intensity, duration);
var sprite = BattleManager.getBattlerSprite(battler);
var iconIndex = 123;
sprite.addIconToBeApplied(iconIndex);

var sprite = BattleManager.getBattlerSprite(battler);
var iconIndex = 123;
sprite.addIconToBeRemoved(iconIndex);
var sprite = BattleManager.getBattlerSprite(battler);
var scale = 1;
var brightness = 3.5;
var duration = 90;
sprite.setupHealAfterglowImpactFilter(scale, brightness, duration);
var spriteset = SceneManager._scene._spriteset;
var x = 640;
var y = 360;
var amp = 30;
var wave = 160;
var speed = 0.1;
spriteset.createGuardShockwaveAt(x, y, amp, wave, speed);
var sprite = BattleManager.getBattlerSprite(battler);
var velocityX = 90;
var velocityY = 90;
var offset = 20;
var duration = 30;
sprite.setupMotionBlurImpact(velocityX, velocityY, offset, duration);
Buffs & States CoreState CategoriesFor those with JavaScript experience, you can use the following functions
newly added with this plugin. The 'battler' variable refers to either an
actor or an enemy.
--- Functions ---
battler.removeStateCategoryAll('text');
- This will remove all states of the category 'text' from the battler.
Replace 'text' with the category name but keep the quotes. This will not
attempt to remove passive states.
battler.removeStateCategory('text', x);
- This will remove x states of the category 'text' from the battler. Replace
'text' with the category name but keep the quotes. Replace x with a number.
This will not attempt to remove passive states.
battler.isStateCategoryAffected('text')
- This will return a 'true' or 'false' after checking if battler is affected
by a state with category 'text'. Replace 'text' with the category name but
keep the quotes. This will check even passive states.
battler.getStateCategoryAffectedCount('text');
- This will return a number value to see how many states (passives included)
the battler is affected by with the category 'text'. Replace 'text' with the
category name but keep the quotes.
Collectible Card GameCard Game Core
var itemId = 10;
var times = 1;
var consume = true;
$openCardBoosterWindow(itemId, times, consume);
- This opens up a booster pack card list window (without the fancy scene).
- Replace 'itemId' with the ID of the booster pack you wish to open.
- Replace 'times' with the number of times to open this booster pack.
- Replace 'consume' with true or false (without quotes) to determine if the
booster pack item will be consumed the player's inventory.
var itemId = 10;
var times = 1;
var consume = true;
$openCardBoosterScene(itemId, times, consume);
- This opens up a booster pack card scene (the super fancy-looking one).
- Replace 'itemId' with the ID of the booster pack you wish to open.
- Replace 'times' with the number of times to open this booster pack.
- Replace 'consume' with true or false (without quotes) to determine if the
booster pack item will be consumed the player's inventory.
var itemId = 10;
var times = 1;
var consume = true;
$openCardBoosterPacks(itemId, times, consume);
- This opens up a booster pack card scene or list depending on the player's
selected option setting.
- Replace 'itemId' with the ID of the booster pack you wish to open.
- Replace 'times' with the number of times to open this booster pack.
- Replace 'consume' with true or false (without quotes) to determine if the
booster pack item will be consumed the player's inventory.
Card Game Deck Builder$hideCardGameDeckBuilder(); $showCardGameDeckBuilder(); - Use these script calls to hide/show the Deck Builder command in the main menu screen respectively. $disableCardGameDeckBuilder(); $enableCardGameDeckBuilder(); - Use these script calls to disable/enable the Deck Builder command in the main menu screen respectively. $openCardGameDeckBuilder(); - Use this script call to open up the Deck Builder scene unless the player is currently in battle. Card Game MechanicsUse these script calls to help mold your custom evented battle system.
$makeArrayOfCurrentDeck();
- Use this while you are in the Deck Builder scene.
- It will create an array of the currently selected deck, making it easier
for you to copy/paste array data when designing an opponent's deck.
-
$pickPlayerDeck(ruleset);
- Opens up a deck list for the player to pick from using a specific ruleset.
- Replace 'ruleset' with a ruleset from the Deck Builder plugin parameters.
- This must be a string so place quotes around it.
- Example: $pickPlayerDeck('Standard');
- $wait(x) - This will make the game wait 'x' frames. This can be used as a part of a JavaScript code effect. - The wait will not occur immediately in the code and make the rest of the code wait until it is done. Sadly, that is not how code works. Instead, it will run the entirity of the JavaScript code, then make the game wait 'x' frames. - If multiples of these are used, then the wait time will stack. - var deck = $newDeck(ruleset, name);
- This will create a new deck using the 'ruleset' and have a specific 'name'.
- This is primarily used for creating decks for your opponent.
- Example: $cardOpponent().deck = $newDeck('Standard', 'Burn Deck');
- $calc = {};
- This turns the $calc variable into an open object, allowing it to take on
any data needed.
- $selectedCard = null; - This clears the $selectedCard variable. -
$cardPlayer()
$cardOpponent()
- This will refer to the card player or opponent. Use it as a base class for
grabbing other necessary data.
- owner.deck - Returns the deck object used by the owner - Replace 'owner' with $cardPlayer() or $cardOpponent() - owner.startHealth = x; - Sets the starting health for that player to 'x'. - Use this before the start of a card game battle. - Replace 'owner' with $cardPlayer() or $cardOpponent() - owner.maxHealth - Returns the owner's maximum health (determined by startHealth) - Replace 'owner' with $cardPlayer() or $cardOpponent() - owner.currentHealth - Returns the owner's current health (determined by startHealth initially) - Replace 'owner' with $cardPlayer() or $cardOpponent() - owner.health - Same as currentHealth - Replace 'owner' with $cardPlayer() or $cardOpponent() - owner.shield - Returns the owner's shield count - Replace 'owner' with $cardPlayer() or $cardOpponent() - owner.shield = x - Replace 'x' to change how many shields the owner would have - Replace 'owner' with $cardPlayer() or $cardOpponent() - owner.actor - Returns the actor used to represent the owner - Replace 'owner' with $cardPlayer() or $cardOpponent() - owner.actor = x - Sets the actor used to represent the owner as someone else. - Replace 'x' with that actor's ID - Replace 'owner' with $cardPlayer() or $cardOpponent() - owner.ai = 'behavior' - Replace 'behavior' with an A.I. behavior pattern - Example: $cardOpponent().ai = 'STRONG'; - Replace 'owner' with $cardPlayer() or $cardOpponent() - owner.allCards - Returns an array of all the cards currently in the owner's possession including the Library, Hand, Discard, Exhaust, and all the custom Piles - Replace 'owner' with $cardPlayer() or $cardOpponent() - owner.library - Returns an array of all the cards currently in the owner's Library - Replace 'owner' with $cardPlayer() or $cardOpponent() - owner.discard - Returns an array of all the cards currently in the owner's Discard Pile - Replace 'owner' with $cardPlayer() or $cardOpponent() - owner.exhaust - Returns an array of all the cards currently in the owner's Exhaust Pile - Replace 'owner' with $cardPlayer() or $cardOpponent() - owner.hand - Returns an array of all the cards currently in the owner's hand - Replace 'owner' with $cardPlayer() or $cardOpponent() - owner.pileA - Returns an array of all the cards currently in pileA for the owner. - Replace 'owner' with $cardPlayer() or $cardOpponent() - Piles can go from A to Z. - owner.battleCard - Returns the card designated as the owner's battle card - Replace 'owner' with $cardPlayer() or $cardOpponent() - owner.prepareForCardBattle(); - Initialize the deck owners, making them ready to battle in the upcoming card game battle. - Replace 'owner' with $cardPlayer() or $cardOpponent() - owner.setLibraryLocation(x, y) owner.setDiscardLocation(x, y) owner.setExhaustLocation(x, y) - Sets the location of owner's specific pile so that all the sprites and such will be aligned to it. - Replace 'owner' with $cardPlayer() or $cardOpponent() - Replace 'x' with the X coordinates (center). - Replace 'y' with the Y coordinates (center). - owner.setPileLocation(letter, x, y)
- Sets the location of a custom pile so that the sprites and such will be
aligned to it.
- Replace 'owner' with $cardPlayer() or $cardOpponent()
- Replace 'letter' with a letter from A to Z. This is a string and must be
surrounded by quotes.
- Replace 'x' with the X coordinates (center).
- Replace 'y' with the Y coordinates (center).
- Example: $cardPlayer().setPileLocation('A', 256, 360)
- owner.pileLocationX(letter)
owner.pileLocationY(letter)
- Gets the stored X and Y locations of the custom piles.
- Replace 'owner' with $cardPlayer() or $cardOpponent()
- Replace 'letter' with a letter from A to Z. This is a string and must be
surrounded by quotes.
- Example: $cardPlayer().pileLocationX('A')
$cardPlayer().pileLocationY('A')
- var shuffle = true; var wait = false; owner.readyCurrentDeck(shuffle, wait); - Sets the deck location of an owner so that all the sprites and such will be created there. - Replace 'owner' with $cardPlayer() or $cardOpponent() - Set 'shuffle' to true/false to shuffle the deck/not. - Set 'wait' to true/false to apply wait frames. - owner.drawCard(cards, wait); - Participant draws a card if they can. - Replace 'owner' with $cardPlayer() or $cardOpponent() - Replace 'cards' with number of cards drawn at once. - Replace 'wait' with true or false - If true, wait 10 frames between each draw. - owner.drawCardFromLibrary(); - Replace 'owner' with $cardPlayer() or $cardOpponent() - Draws a card from the library. - owner.removeCardFromAllPiles(card); - This will remove the specific card from all of the owner's piles - Replace 'owner' with $cardPlayer() or $cardOpponent() - Replace 'card' with a card object to be removed - owner.removeCardFromLibrary(card); owner.removeCardFromDiscard(card); owner.removeCardFromExhaust(card); owner.removeCardFromHand(card); - This will remove the specific card from the library, discard, exhaust, or hand depending on which function is used. - Replace 'owner' with $cardPlayer() or $cardOpponent() - Replace 'card' with a card object to be removed - owner.removeCardFromCustomPile(card, letter) - This will remove the specific card from a custom pile - Replace 'owner' with $cardPlayer() or $cardOpponent() - Replace 'card' with a card object to be removed - Replace 'letter' with a string of the letter representing the pile - Example: owner.removeCardFromCustomPile(card, 'A') - ower.addCardToLibrary(card, bottom) - This will add a specific card to the library - Replace 'owner' with $cardPlayer() or $cardOpponent() - Replace 'card' with a card object to be added - Replace 'bottom' with true or false to determine if it will go to the bottom of the library or the top of the library. - owner.addCardToDiscard(card) owner.addCardToExhaust(card) owner.addCardToHand(card) - This will add a specific card to one of the owner's piles depending on which function is used. - Replace 'owner' with $cardPlayer() or $cardOpponent() - Replace 'card' with a card object to be added - owner.addCardToPile(card, letter) - This will add the specific card to a custom pile - Replace 'owner' with $cardPlayer() or $cardOpponent() - Replace 'card' with a card object to be added - Replace 'letter' with a string of the letter representing the pile - Example: owner.addCardToPile(card, 'A') - owner.startAnimation(animationId, mirror, delay) - This will play a battle animation on the owner - Replace 'owner' with $cardPlayer() or $cardOpponent() - Replace 'animationId' with the ID of the battle animation - Replace 'mirror' with true or false depending if you want to mirror it/not - Replace 'delay' with a number telling how many frames to delay it - owner.returnPileToLibrary(pile) - This will return an entire pile to the owner's library - Replace 'owner' with $cardPlayer() or $cardOpponent() - Replace 'pile' with an array of cards like the following: - owner.discard - owner.exhaust - owner.hand - owner.pileA - owner.shuffleCards(pile) - This will shuffle the selected pile - Replace 'owner' with $cardPlayer() or $cardOpponent() - Replace 'pile' with an array of cards like the following: - owner.library - owner.discard - owner.exhaust - owner.hand - owner.pileA -
- $scene().sortCardGameCardSprites(); - Sorts all the card sprites currently on the screen to make sure they are positioned properly with their aligned piles/hands/libraries. - $scene().createCardGameHUDWindow(); - Creates a HUD for the Card Game. - $scene().fadeOutCardGameHUDWindow(duration) - Fades out the HUD. - Replace 'duration' with the number of frames to fade it out by. - $scene().refreshCardGameHUD(); - Refreshes the card game HUD window. - $scene().fadeOutPlayableCards(duration) - Fades out all the playable cards on screen - Replace 'duration' with the number of frames to fade them out by. - $scene().createCardGameHandWindow(owner, x, y, width, height, cardScale); - Creates a window to hold the owner's cards in hand. - Replace 'owner' with $cardPlayer() or $cardOpponent() - Replace 'x' and 'y' with the x/y coordinates. - Replace 'width' and 'height' for window width/height. - Replace 'scale' with how small the cards are in hand. - $scene().activateCardGameHandWindow(owner); - Activates the card window of a participant's hand. - Replace 'owner' with $cardPlayer() or $cardOpponent() - Picked card is then saved onto $selectedCard. - $scene().moveCardGameHandWindow(owner, x, y, duration); - Moves the owner's hand window. - Replace 'owner' with $cardPlayer() or $cardOpponent() - Replace 'x' with the target X coordinate. - Replace 'y' with the target Y coordinate. - Replace 'duration' with the number of frames to move it by. - $scene().createCardGameBattleListWindow(); - Creates the card list window used when searching through card piles to pull out a picked card. - $scene().setupCardGameBattleListWindow(array, text); - Opens up the card list window with an array of cards and a text message. - Replace 'array' with an array of cards to put into the window. - Replace 'text' with the text to display. - $scene().removeCardGameBattleListWindow(); - This removes the card list window from the scene. - Use this after the card game battle is over. - $scene().createCardGameBattleBrowseWindow(); - Creates the card browser window used when the player wants to look through a Discard, Exhaust, etc. pile without interrupting gameplay. - $scene().registerCardGamePileLocation(pile, rect, text);
- Registers a pile into the card browser window.
- Replace 'pile' with the card pile that will be browsed into.
- Replcae 'rect' with a Rectangle object depicting the x, y, width, height
of the clickable space to trigger it with the mouse.
- Replace 'text' with the text message to be displayed if there is one.
- Example:
var pool = $cardPlayer().discard;
var rect = {
x: $cardPlayer()._discardLocation.x - 50,
y: $cardPlayer()._discardLocation.y - 50,
width: 100,
height: 100
}
var text = $cardPlayer().actor.name() + "'s Discarded Cards";
$scene().registerCardGamePileLocation(pool, rect, text);
- $scene().removeCardGameBattleBrowserWindow(); - Removes the card browser window from the scene. - Use this after the card game battle is over. - $scene().moveChoiceWindowToCard(card); - Moves the choice window (event command) to where the target card object is on the screen and shifted down a little bit. Dragonbones Map Sprites
Put this inside of a Move Route Script Call to make it play a Dragonbones animation: this.dragonbonesAnimation = 'AnimationName'; Replace 'AnimationName' (keep the quotes) with the name of the Dragonbones animation. This is case sensitive. Enemy LevelsHere are some new JavaScript functions that have been added by this plugin. enemy.level - This will return the enemy's current level. enemy.originalLevel() - This will return the enemy's original level from the start of battle. enemy.changeLevel(x) - This will change the enemy's level to x. enemy.gainLevel(x) - This will cause the enemy to gain x levels. enemy.loseLevel(x) - This will cause the enemy to lose x levels. enemy.resetLevel() - Changes the enemy's level back to what it was at the start of battle. $gameParty.lowestLevelAllMembers() - This will return the lowest level of all party members. $gameParty.lowestLevelBattleMembers() - This will return the lowest level of all battle members. $gameParty.averageLevelAllMembers() - This will return the average level of all party members. $gameParty.averageLevelBattleMembers() - This will return the average level of all battle members. $gameParty.highestLevelAllMembers() - This will return the highest level of all party members. $gameParty.highestLevelBattleMembers() - This will return the highest level of all battle members. $gameTroop.changeLevel(x) - Changes the levels of all enemies to x. $gameTroop.gainLevel(x) - Raises the levels of all enemies by x. $gameTroop.loseLevel(x) - Lowers the levels of all enemies by x. $gameTroop.resetLevel() - Resets the levels of all enemies to their original levels at battle start. $gameTroop.lowestLevel() - This will return the lowest level of the enemy party. $gameTroop.averageLevel() - This will return the lowest level of the enemy party. $gameTroop.highestLevel() - This will return the lowest level of the enemy party. Enhanced TPFor those experienced with JavaScript, you can use these new functions to call upon and change various aspects related to TP Modes. battler.tpMode() This will return the current TP mode the battler is using. battler.tpModeId() This will return the current TP mode's ID the battler is using. battler.setTpMode(x) This will set the battler's TP mode to x. battler.unlockTpMode(x) This will unlock TP Mode x for the battler. battler.removeTpMode(x) This will remove TP Mode x for the battler unless the battler is currently using TP Mode x. battler.unlockAllTpModes() This will unlock all TP Modes for the battler. battler.removeAllTpModes() This will remove all TP Modes for the battler except for the TP Mode that the battler is currently using. Equip Battle SkillsFor those with JavaScript experience, you can use the following newly added functions from this plugin within script calls or Lunatic Mode notetags. JavaScript Function: actor.clearBattleSkillMaxPlus() - This clears any bonus skill equip slots available for the actor. actor.getBattleSkillMaxPlus() - This returns the amount of bonus equip slots available for the actor. actor.setBattleSkillMaxPlus(x) - This sets the amount of available bonus equip slots for the actor to x. This value can go negative, but it cannot force the actor to have less than 1 available equip slot. This can go positive but it cannot force the actor to have more than the 'Maximum Skills' plugin parameter value. actor.increaseBattleSkillSlots(x) - This will raise the maximum amount of equip skill slots for the actor to x but cannot go beyond the 'Maximum Skills' plugin parameter value. actor.decreaseBattleSkillSlots(x) - This will lower the maximum amount of equip skill slots for the actor to x but cannot go under a minimum of 1 battle equip slot. actor.maxBattleSkills() - This returns the amount of battle skills the actor can equip currently. actor.battleSkills() - This returns an array of the skills in their object form that the actor has equipped currently. actor.battleSkillsRaw() - This returns an array of the skills in their ID form that the actor has equipped currently. actor.equipSkill(id, slot) - This will cause the actor to equip skill ID into the specific slot. This will bypass whether or not the actor can equip the skill or not. Event Chase PlayerInsert these lines into the script call window within the Movement Route event to give an event the chase or flee flag. Note: This doesn’t work with players. Script Call lines this._chaseRange = x Event will chase player if reaching x range. this._fleeRange = x Event will flee from player if reaching x range. this._chaseSpeed = x Event's movement speed when chasing. this._fleeSpeed = x Event's movement speed when fleeing. this._sightLock = x Event will flee/chase player for x frames. this._seePlayer = true Requires the event to be able to see player. this._seePlayer = false Doesn't require event to be able to see player. this._alertBalloon = x This balloon will play when player is seen. this._alertSound = x This sound will play when player is seen. this._alertSoundVol = x The volume used by the alert sound. this._alertSoundPitch = x The pitch used by the alert sound. this._alertSoundPan = x The pan used by the alert sound. this._alertCommonEvent = x This event will play when player is seen. this._returnAfter = true Returns the event back to its original spot. this._returnAfter = false Event stays where it is when finished chasing. this._returnWait = x How long event waits after finishing chase/flee. It is best to play this inside of a custom move route for the event at a high frequency rate. Keep in mind these effects only occur after the setting is made and ran, which means upon loading a map, if the event with a low frequency hasn't loaded up 'this._chaseRange = x' in its movement queue yet, the event will not chase the player just yet. Event Chase StealthFor those who wish to use Script Calls for Conditional Branches and/or adjust Stealth Mode with Script Calls, you can use these new functions: $gamePlayer.isStealthMode() - This checks if the player is in Stealth Mode. If the player is, this will return true. If the player isn't, this will return false. $gamePlayer.setStealthMode(true) $gamePlayer.setStealthMode(false) - This will set the player to unlimited Stealth Mode if true. If false, this will remove Stealth Mode from the player even if the player is on a Stealth Mode timer. $gamePlayer.setStealthTimer(x) - This sets the amount of frames the player will be in Stealth Mode for. Replace x with the desired number of frames. $gameMap.isStealthRegion(x) - This will check if region x is a Stealth Region. If it is, this will return true. If it isn't, this will return false. Event Encounter Aid
When using the Conditional Branch event, you can use these following in the
'Script' check category:

Script Calls

  this.checkEventFacingPlayerFront()
  - Returns true if the event is facing the player's front.

  this.checkEventFacingPlayerBack()
  - Returns true if the event is facing the player's back.

  this.checkEventFacingPlayerSide()
  - Returns true if the event is facing the player's side.

  this.checkPlayerFacingEventFront()
  - Returns true if the player is facing the event's front.

  this.checkPlayerFacingEventBack()
  - Returns true if the player is facing the event's back.

  this.checkPlayerFacingEventSide()
  - Returns true if the player is facing the event's side.

Make sure these are spelled correctly. They are also case-sensitive. This
means that even if you were to misspell or put a single letter in the wrong
case, the effect will cease to work as this is code we're dealing with.
Event MorpherTo make events morph and change into something else, use the following
script call code:
- - - - - - - - - - - - - - - - - - - - - - - - - - - - - - - - - - - - - -
Morph Event - Script Calls
- - - - - - - - - - - - - - - - - - - - - - - - - - - - - - - - - - - - - -
Yanfly.MorphEvent(targetId, mapId, eventId, preserved)
- This will cause the target event to morph into the designated event.
- Replace 'targetId' with the ID of the target event you wish to morph.
- Replace 'mapId' with the ID of the map with the event to morph into.
- Replace 'eventId' with the ID of the event to morph the target into.
- Replace 'preserved' with 'true' or 'false' to preserve the morph.*
* Example: Yanfly.MorphEvent(15, 1, 5, true);
- Event 15 on the current Map will change into Map 1, Event 5's event.
- This event will be preserved.
* Example: Yanfly.MorphEvent(20, 2, 10, false);
- Event 20 on the current Map will change into Map 2, Event 10's event.
- This event will NOT be preserved.
- - -
Yanfly.MorphEventTemplate(targetId, template, preserved)
- This will cause the target event to morph based on the template name.
- Replace 'targetId' with the ID of the target event you wish to morph.
- Replace 'template' with a name from the 'Template Names' plugin param.
This must be in 'string' form (surround the name with quotes).
- Replace 'preserved' with 'true' or 'false' to preserve the morph.*
* Example: Yanfly.MorphEvent(15, 'StrawberryPlant', true);
- Event 15 on the current Map will change into event marked by the
'StrawberryPlant' template from the plugin parameters.
- This event will be preserved.
* Example: Yanfly.MorphEvent(20, 'MineralVein', false);
- Event 20 on the current Map will change into event marked by the
'MineralVein' template from the plugin parameters.
- This event will NOT be preserved.
- - -
* Note: If a morph is preserved, it will remain morphed the next time
the player reenters the map.
- - - - - - - - - - - - - - - - - - - - - - - - - - - - - - - - - - - - - -
Morph Removal - Script Calls
- - - - - - - - - - - - - - - - - - - - - - - - - - - - - - - - - - - - - -
Yanfly.RemoveMorph(targetId)
- This will remove any morphed (and preserved) effects from the target
on the current map.
- Replace 'targetId' with the ID of the target event to remove morphing.
* Example: Yanfly.RemoveMorph(15)
- The current map's event 15 will have its morphed effects removed.
- All preserved morphing effects for this event will be removed.
- - -
Yanfly.RemovePreserveMorph(targetMapId, targetEventId)
- This will remove any preserved morphed effect from a target event
located on different map.
- Replace 'targetMapId' with the ID of the map the target event is on.
- Replace 'targetEventId' with the ID of the target event.
* Example: Yanfly.RemovePreserveMorph(10, 20)
- Map 10's event 20 will have its morphed effects removed.
- All preserved morphing effects for this event will be removed.
Event SpawnerTo spawn events into your maps, use the following script calls:
- - - - - - - - - - - - - - - - - - - - - - - - - - - - - - - - - - - - - -
Spawn Event - Script Calls
- - - - - - - - - - - - - - - - - - - - - - - - - - - - - - - - - - - - - -
This will spawn a new event using the information from 'mapId' 'eventId'
as its base. The new event's ID will start at 1001 (or whatever you've
set the plugin parameter 'ID Starting Range' to) and onward.
- - -
Yanfly.SpawnEventAt(mapId, eventId, x, y, preserved)
- This will spawn the desired event into the specific coordinates.
- Replace 'mapId' with the ID of the map with the event to morph into.
- Replace 'eventId' with the ID of the event to morph the target into.
- Replace 'x' with the X position on the map to spawn the event at.
- Replace 'y' with the Y position on the map to spawn the event at.
- The X and Y positions MUST NOT have an event present at that location.
- Replace 'preserved' with 'true' or 'false' to preserve the spawn.
* Example: Yanfly.SpawnEventAt(1, 5, 30, 40, true)
- Map 1's Event 5 will be spawned at X, Y coordinates: 30, 40.
- This event will be preserved.
* Example: Yanfly.SpawnEventAt(2, 10, 50, 60, false)
- Map 2's Event 10 will be spawned at X, Y coordinates: 50, 60.
- This event will NOT be preserved.
- - -
Yanfly.SpawnEventTemplateAt(template, x, y, preserved)
- This will spawn the desired event by template name at the coordinates.
- Replace 'template' with a name from the 'Template Names' plugin param.
This must be in 'string' form (surround the name with quotes).
- Replace 'x' with the X position on the map to spawn the event at.
- Replace 'y' with the Y position on the map to spawn the event at.
- The X and Y positions MUST NOT have an event present at that location.
- Replace 'preserved' with 'true' or 'false' to preserve the spawn.
* Example: Yanfly.SpawnEventTemplateAt('StrawberryPlant', 30, 40, true)
- The 'StrawberryPlant' template from the plugin parameters will be
spawned at X, Y coordinates: 30, 40.
- This event will be preserved.
* Example: Yanfly.SpawnEventTemplateAt('MineralVein', 50, 60, false)
- The 'MineralVein' template from the plugin parameters will be
spawned at X, Y coordinates: 50, 60.
- This event will NOT be preserved.
- - -
Yanfly.SpawnEventInRegion(mapId, eventId, region, preserved)
- This will spawn the desired event at a random place within a region(s).
- Replace 'mapId' with the ID of the map with the event to morph into.
- Replace 'eventId' with the ID of the event to morph the target into.
- Replace 'region' with the ID of the region to spawn the event into.
If you want to use multiple regions, place them in an array.
- Replace 'preserved' with 'true' or 'false' to preserve the spawn.
* Example: Yanfly.SpawnEventInRegion(1, 5, 20, true)
- Map 1's Event 5 will be spawned at a random point in region 20.
- This event will be preserved.
* Example: Yanfly.SpawnEventInRegion(2, 10, [20, 25], true)
- Map 2's Event 10 will be spawned at a random point in regions 20 or 25.
- This event will NOT be preserved.
- - -
Yanfly.SpawnEventTemplateInRegion(template, region, preserved)
- This will spawn the desired event at a random place within a region(s).
- Replace 'template' with a name from the 'Template Names' plugin param.
This must be in 'string' form (surround the name with quotes).
- Replace 'region' with the ID of the region to spawn the event into.
If you want to use multiple regions, place them in an array.
- Replace 'preserved' with 'true' or 'false' to preserve the spawn.
* Example: Yanfly.SpawnEventTemplateInRegion('StrawberryPlant', 20, true)
- The 'StrawberryPlant' template from the plugin parameters will be
spawned at a random point in region 20.
- This event will be preserved.
* Example: Yanfly.SpawnEventTemplateInRegion('MineralVein', [20, 25], true)
- The 'MineralVein' template from the plugin parameters will be
spawned at a random point in regions 20 or 25.
- This event will NOT be preserved.
- - -
* Note: If a spawned event is preserved, it will remain on that map when the
map is reloaded from a save file or revisited from a different map. If an
event is set up to not be preserved, it will automatically despawn itself
upon leaving the map.
- - - - - - - - - - - - - - - - - - - - - - - - - - - - - - - - - - - - - -
Obtaining Spawned Event Data - Script Calls
- - - - - - - - - - - - - - - - - - - - - - - - - - - - - - - - - - - - - -
$gameMap.event(eventId)
- This will grab the event as an object.
- Replace 'eventId' with the ID of the event you wish to grab.
- ID's past 1000 (or whatever you've set it to in the plugin parameters)
are spawned events.
- - -
$gameMap.FirstSpawnedEvent()
- This will grab the first available spawned event as an object.
- If the first event has been despawned, the next on in the list will be
returned as an object. If there are no spawned events left, this script
call will return an undefined value.
- - -
$gameMap.FirstSpawnedEventID()
- This will grab the first available spawned event's ID as a number.
- If the first event has been despawned, the next on in the list will be
returned as a number. If there are no spawned events left, this script
call will return a value of 0.
- - -
$gameMap.LastSpawnedEvent()
- This will grab the last available spawned event as an object.
- If the last event has been despawned, the previous event in the list
will be returned as an object. If there are no spawned events left, this
script call will return an undefined value.
- - -
$gameMap.LastSpawnedEventID()
- This will grab the last available spawned event's ID as a number.
- If the last event has been despawned, the previous event ID on in the
list will be returned as a number. If there are no spawned events left,
this script call will return a value of 0.
- - -
$gameSystem.getMapSpawnedEventTotal()
- Returns the total number of spawned events on that map ever (this number
will include the spawned events that have despawned).
- - - - - - - - - - - - - - - - - - - - - - - - - - - - - - - - - - - - - -
Despawn Event - Script Calls
- - - - - - - - - - - - - - - - - - - - - - - - - - - - - - - - - - - - - -
Yanfly.DespawnEventID(eventId)
- Despawn a target spawned event if you have the spawned event's ID.
- Replace 'eventId' with the spawned event's ID.
* Example: Yanfly.DespawnEventID(1001)
- This will despawn event 1001 on the current map.
- The latest spawned event is no longer preserved.
* Example: Yanfly.DespawnEventID($gameMap.LastSpawnedEventID())
- This will despawn the last spawned event based on ID on the current map.
- Event 1001 is no longer preserved.
- - -
Yanfly.DespawnEvent(event)
- Despawn a target spawned event object.
- Replace 'event' with the spawned event object.
* Example: Yanfly.DespawnEvent($gameMap.FirstSpawnedEvent())
- This will despawn the first spawned event on the current map.
- First spawned event is no longer preserved.
- - -
Yanfly.ClearSpawnedEvents()
- Clears the current map of all spawned events.
- - -
Yanfly.ClearSpawnedEvents(mapId)
- Clears a specific map of all spawned events.
- Replace 'mapId' with the mpa you wish to clear of spawned events.
* Example: Yanfly.ClearSpawnedEvents(10)
- Clears all spawned events on map 10.
* Note: When a spawned event is despawned, any preserved data will also be
removed in addition to the removed spawned event.
Event Sprite Offset
If you wish to change an event sprite's offset after a page has been loaded,
you can issue a custom movement route script calls to alter it:

Script Call:

  this._spriteOffsetX = n
  this._spriteOffsetY = n
  - This sets the sprite offset X or Y values to 'n'. The same rules apply
  as the comment tags. A positive X goes right, a negative X goes left. A
  positive Y goes down, a negative Y goes up.

  this._spriteOffsetX += n
  this._spriteOffsetY += n
  - Increases the sprite's offset X or Y by 'n'. The same rules apply as the
  comment tags. A positive X goes right, a negative X goes left. A positive
  Y goes down, a negative Y goes up.

  this._spriteOffsetX -= n
  this._spriteOffsetY -= n
  - Decreases the sprite's offset X or Y by 'n'. The same rules apply as the
  comment tags. A positive X goes right, a negative X goes left. A positive
  Y goes down, a negative Y goes up.
Extra Enemy DropsFor those with JavaScript proficiency, you can make use of some of these newly added functions when you do an eval check for the enemy: enemy.deathTurn() This will return the turn the enemy died as an integer. enemy.killer() This will return the enemy's killer. If you would like to reference the killer's HP, it'd be enemy.killer().hp enemy.lastStruckAction() This will return either a skill or item that the enemy was last struck with. enemy.timesStruckSkill(skill ID) This will return a number value for the number of times it was struck by the skill referenced by the skill ID. enemy.timesStruckItem(item ID) This will return a number value for the number of times it was struck by the item referenced by the item ID. enemy.timesStruckSType(skill type ID) This will return a number value for the number of times it was struck by skills of the skill type ID. enemy.timesStruckState(state ID) This will return a number value for the number of times it was struck by the state referenced by the state ID. enemy.timesStruckElement(element ID) This will return a number value for the number of times it was struck by the element referenced by the element ID. Extra Parameter FormulaYou can use the following JavaScript functions to alter the extra parameter values of actors. In these listed functions, the 'actor' variable is to be referenced by an actor: ie. actor = $gameActors.actor(3)); Function: actor.clearXParamPlus() - Clears all of the actor's extra parameter plus bonuses. actor.setHit(x) actor.setEva(x) actor.setCri(x) actor.setCev(x) actor.setMev(x) actor.setMrf(x) actor.setCnt(x) actor.setHrg(x) actor.setMrg(x) actor.setTrg(x) - Sets the actor's respective extra parameter value to x. Keep in mind that 1 is equal to 100% and 0.1 would be equal to 10%. Negative values will apply here, too. actor.setHitPlus(x) actor.setEvaPlus(x) actor.setCriPlus(x) actor.setCevPlus(x) actor.setMevPlus(x) actor.setMrfPlus(x) actor.setCntPlus(x) actor.setHrgPlus(x) actor.setMrgPlus(x) actor.setTrgPlus(x) - Sets the actor's respective extra parameter plus value to x. Keep in mind that 1 is equal to 100% and 0.1 would be equal to 10%. Negative values will apply here, too. actor.addHit(x) actor.addEva(x) actor.addCri(x) actor.addCev(x) actor.addMev(x) actor.addMrf(x) actor.addCnt(x) actor.addHrg(x) actor.addMrg(x) actor.addTrg(x) - Adds x to the actor's respective extra parameter value. Keep in mind that 1 is equal to 100% and 0.1 would be equal to 10%. Negative values will decrease the extra parameter. actor.minusHit(x) actor.minusEva(x) actor.minusCri(x) actor.minusCev(x) actor.minusMev(x) actor.minusMrf(x) actor.minusCnt(x) actor.minusHrg(x) actor.minusMrg(x) actor.minusTrg(x) - Subtracts x from the actor's respective extra parameter value. Keep in mind that 1 is equal to 100% and 0.1 would be equal to 10%. Negative values will add to the extra parameter. Forced + Bonus Battle Drops
Run these script call(s) sometime during the battle. --- $gameTroop.clearForcedDrops() - Removes all forced and bonus EXP, Gold, and Drops. --- $gameTroop.setForcedExp(x) - Sets the forced EXP the player earns from this battle to 'x'. - Overrides the default EXP earned for the current battle. --- $gameTroop.setForcedGold(x) - Sets the forced Gold the player earns from this battle to 'x'. - Overrides the default Gold earned for the current battle. --- $gameTroop.addForcedItemDrop(itemID, x) - Sets the forced Drop the player earns from this battle to have the item listed with 'x' quantity. - Overrides default drops earned for the current battle. - Combines with other forced drop functions from this plugin. --- $gameTroop.addForcedWeaponDrop(itemID, x) - Sets the forced Drop the player earns from this battle to have the weapon listed with 'x' quantity. - Overrides default drops earned for the current battle. - Combines with other forced drop functions from this plugin. --- $gameTroop.addForcedArmorDrop(itemID, x) - Sets the forced Drop the player earns from this battle to have the armor listed with 'x' quantity. - Overrides default drops earned for the current battle. - Combines with other forced drop functions from this plugin. --- $gameTroop.setBonusExp(x) - Sets the bonus EXP the player earns from this battle to 'x'. - Bonus EXP is added onto default or forced EXP. --- $gameTroop.setBonusGold(x) - Sets the bonus Gold the player earns from this battle to 'x'. - Bonus Gold is added onto default or forced Gold. --- $gameTroop.addBonusItemDrop(itemID, x) - Sets the forced Drop the player earns from this battle to have the item listed with 'x' quantity. - Bonus drops are combined with default or forced drops. - Combines with other forced drop functions from this plugin. --- $gameTroop.addBonusWeaponDrop(itemID, x) - Sets the forced Drop the player earns from this battle to have the weapon listed with 'x' quantity. - Bonus drops are combined with default or forced drops. - Combines with other forced drop functions from this plugin. --- $gameTroop.addBonusArmorDrop(itemID, x) - Sets the forced Drop the player earns from this battle to have the armor listed with 'x' quantity. - Bonus drops are combined with default or forced drops. - Combines with other forced drop functions from this plugin. --- Horror Effects
These script calls are used to create, remove, and change horror effects.
target.createHorrorEffect('noise')
target.createHorrorEffect('glitch')
target.createHorrorEffect('tv')
- Replace 'target' with a compatible effect target. This will create a horror
noise, glitch, or TV effect on the sprite.

target.removeHorrorEffect('noise')
target.removeHorrorEffect('glitch')
target.removeHorrorEffect('tv')
- Replace 'target' with a compatible effect target. This will remove the
currently existing horror noise, glitch, or TV effect on the sprite.

target.clearHorrorEffects()
- Replace 'target' with a compatible effect target. This will remove all
noise, glitch, or TV effects from the sprite.

target.setHorrorEffectToValue('noise', 'noise', x)
- Replace 'target' with a compatible effect target. Replace 'x' with a number
value. The higher the number value, the more noise there is. The lower the
number value, the less noise there is. This can be a decimal value.

target.setHorrorEffectToValue('noise', 'animated', true)
target.setHorrorEffectToValue('noise', 'animated', false)
- Replace 'target' with a compatible effect target. This will animate the
horror noise if true is used and stop animating the horror noise if false
is used instead.

target.setHorrorEffectToValue('glitch', 'sliceMax', x)
- Replace 'target' with a compatible effect target. This will set the maximum
number of glitch slices to x.

target.setHorrorEffectToValue('glitch', 'sliceMin', x)
- Replace 'target' with a compatible effect target. This will set the minimum
number of glitch slices to x.

target.setHorrorEffectToValue('glitch', 'slices', x)
- Replace 'target' with a compatible effect target. This will set the maximum
and minimum number of glitch slices to x.

target.setHorrorEffectToValue('glitch', 'offset', x)
- Replace 'target' with a compatible effect target. This will set the glitch
offset (how wild it goes) to x. The higher the number, the further the glitch
can go. The lower the number, the closer to the base image it goes.

target.setHorrorEffectToValue('glitch', 'animated', true)
target.setHorrorEffectToValue('glitch', 'animated', false)
- Replace 'target' with a compatible effect target. This will animate (true)
or remove the animation (false) of the glitch effect.

target.setHorrorEffectToValue('glitch', 'aniFrequency', x)
- Replace 'target' with a compatible effect target. If animated, this will
set the glitch frequency to x frames.

target.setHorrorEffectToValue('glitch', 'aniStrength', x)
- Replace 'target' with a compatible effect target. If animated, this will
set the glitch strength to x. The higher the number, the stronger the glitch
effect will last. The lower the number, the weaker the effect.

target.setHorrorEffectToValue('tv', 'lineWidth', x)
- Replace 'target' with a compatible effect target. This will change the
line thickness of the TV effect. Larger numbers mean thicker lines.

target.setHorrorEffectToValue('tv', 'vignetting', x)
- Replace 'target' with a compatible effect target. This will change the
corner size. Use a value between 0 and 1. The larger the number, the larger
the corners will be.

target.setHorrorEffectToValue('tv', 'animated', true)
target.setHorrorEffectToValue('tv', 'animated', false)
- Replace 'target' with a compatible effect target. true will turn the TV
effect on. false will turn the TV effect off.

target.setHorrorEffectToValue('tv', 'aniSpeed', x)
- Replace 'target' with a compatible effect target. This will change the
speed at which the TV animates.
These are things you can replace 'target' with: target = $gameScreen - Target becomes the visible map target = $gameSystem - Target becomes the battle screen target = $gamePlayer - Target becomes the first party member target = $gameParty.members()[x] - Target becomes the party member with index x target = $gameMap.event(x) - Target becomes the map event with ID x target = $gameScreen.picture(x) - Target becomes the picture with ID x target = $gameActors.actor(actorId); - Target becomes the actor with ID x target = $gameTroop.members()[index]; - Target becomes the battle enemy with index x Icons on Events
Using a Movement Route event to attach an icon is a bit easier than using a
Script Call to attach an icon. Whichever is the target in the Movement Route
dropdown list is the target that will have an icon attached to it when the
following script command is used:

  this.setIconOnEvent(n)
  - Replace 'n' with the icon index you wish to use.

If you wish to change the X and Y buffers on the icon, use the following
script commands:

  this.setIconOnEventBufferX(n)
  this.setIconOnEventBufferY(n)
  - Replace 'n' with the positioning buffer you wish to alter X or Y by.
  For X, a negative number moves it left and a positive one moves it right.
  For Y, a negative number moves it up and a positive one moves it down.

To clear the icon or to reset the X and Y buffers, use the following
script commands:

  this.clearIconOnEvent()
  - This will clear the icon on the event.

  this.resetIconOnEventBuffers()
  - This will reset the X and Y buffers to what they are in the plugin
  parameter settings.
Using script calls are a little bit more difficult but they're more flexible
to use than Movement Route scripts.

  ---

  var target = $gameMap.event(i);
  target.setIconOnEvent(j);
  - This will grab event 'i' from the map and place icon 'j' on it.

  var target = $gamePlayer;
  target.setIconOnEvent(j);
  - This will place icon 'j' on the player character.

  var target = $gamePlayer.followers().follower(i);
  target.setIconOnEvent(j);
  - This will target follower 'i' and place icon 'j' on that follower.

  ---

To adjust the buffer values of the targets, try the following script calls.

  ---

  var target = $gameMap.event(i);
  target.setIconOnEventBufferX(x);
  target.setIconOnEventBufferY(y);
  - The target becomes event 'i'. The 'x' and 'y' values will determine
  the X and Y buffers of the icon on the target.

  var target = $gamePlayer;
  target.setIconOnEventBufferX(x);
  target.setIconOnEventBufferY(y);
  - The target becomes the player. The 'x' and 'y' values will determine
  the X and Y buffers of the icon on the target.

  var target = $gamePlayer.followers().follower(i);
  target.setIconOnEventBufferX(x);
  target.setIconOnEventBufferY(y);
  - The target becomes follower 'i'. The 'x' and 'y' values will determine
  the X and Y buffers of the icon on the target.

  ---

To clear the icon or to reset the X and Y buffers, use the following
script calls:

  ---

  var target = $gameMap.event(i);
  target.clearIconOnEvent();
  - The target becomes event 'i'. Clears the icon on the target.

  var target = $gamePlayer;
  target.clearIconOnEvent();
  - The target becomes the player. Clears the icon on the target.

  var target = $gamePlayer.followers().follower(i);
  target.clearIconOnEvent();
  - The target becomes follower 'i'. Clears the icon on the target.

  var target = $gameMap.event(i);
  target.resetIconOnEventBuffers();
  - The target becomes event 'i'. Resets the X and Y buffers.

  var target = $gamePlayer;
  target.resetIconOnEventBuffers();
  - The target becomes the player. Resets the X and Y buffers.

  var target = $gamePlayer.followers().follower(i);
  target.resetIconOnEventBuffers();
  - The target becomes follower 'i'. Resets the X and Y buffers.
Map Display Name Core
If you want to override the next map name that will be displayed, then use this Script Call event: var text = "Next Name Displayed"; $gameMap.overrideMapName(text); The next map you enter will have the map name displaying the string in the text variable you put inside the Script Call Event. Then, it will clear itself and the next map you enter will have its usual name again and will no longer have an override map name.
If you want to clear the override map name, then make a Script Call Event with this code: $gameMap.clearOverrideMapName(); This will clear the override map name that is currently stored and the next map you enter will have the regular name instead. Message CoreExtended Message Pack 1For those who would like to use script calls to alter Choice Settings, you can use the following script calls: $gameSystem.hideChoice(x) - This will cause choice x to be hidden. $gameSystem.showChoice(x) - This will cause choice x to be shown. $gameSystem.clearHiddenChoices() - This will clear all of the hidden choices and they will be shown. $gameSystem.disableChoice(x) - This will cause choice x to be disabled. $gameSystem.enableChoice(x) - This will cause choice x to be enabled. $gameSystem.clearDisabledChoices() - This will clear all of the disabled choices and they will all be enabled. $gameSystem.clearChoiceSettings() - This will clear all hidden and disabled settings. Move Route CoreFor those with JavaScript experience and would like to use the raw command functions without resorting to the simplified commands, you can use the following code inside of a Script: this.jumpForward(x) - Replace x with the amount of tiles you want the designated event to jump forward. x will be automatically rounded to the nearest integar value if it is a float value. this.jumpToPoint(x, y) - Replace x and y with the coordinates you wish for the designated event to jump towards. x and y will be automatically rounded to the nearest integar value if it is a float value. this.jumpToEvent(x) - Replace x with the ID of the event you wish for the designated event to jump towards. x will be automatically rounded to the nearest integar value if it is a float value. If 0 is used, it will refer to the player. this.moveRepeat(direction, times) - This will make the designated event move in 'direction' a certain amount of 'times'. Replace 'direction' with the number value you wish the event to move in (refer to NumPad) and replace 'times' with the number of times to step in that direction. this.moveToPoint(x, y) - This will calculate the best possible movement route for the designated event to reach coordinates x, y within 12 iterations. The designated event will keep repeating this command until it has reached the coordinates. This will cause the designated event to go around the player and followers on the map without colliding into them. this.moveToPoint(x, y, true) - This will calculate the best possible movement route for the designated event to reach coordinates x, y within 12 iterations. The designated event will keep repeating this command until it has reached the coordinates. This will cause the designated event to crash into the player and/or any followers if they are in the path way. this.moveToEvent(x) - This will calculate the best possible movement route for the designated event to reach event x within 12 iterations. The designated event will keep repeating this command until it has reached the coordinates. If 0 is used, it will refer to the player. This will cause the designated event to go around the player and followers on the map without colliding into them. this.moveToEvent(x, true) - This will calculate the best possible movement route for the designated event to reach event x within 12 iterations. The designated event will keep repeating this command until it has reached the coordinates. If 0 is used, it will refer to the player. This will cause the designated event to crash into the player and/or any followers if they are in the path way. this.requestAnimation(x) - Replace x with the animation ID you want to play on the designated event. x will be automatically rounded to the nearest integar value if it is a float value. this.requestBalloon(x) - Replace x with the balloon ID you want to play on the designated event. x will be automatically rounded to the nearest integar value if it is a float value. this.stepAwayFromPoint(x, y) - Replace x and y with the coordinates you wish for the designated event to step away from. x and y will be automatically rounded to the nearest integar value if it is a float value. this.stepAwayFromEvent(x) - Replace x with the ID of the event you wish for the designated event to step away from. x will be automatically rounded to the nearest integar value if it is a float value. If 0 is used, it will refer to the player. this.stepTowardPoint(x, y) - Replace x and y with the coordinates you wish for the designated event to step towards. x and y will be automatically rounded to the nearest integar value if it is a float value. this.stepTowardPoint(x, y) - Replace x and y with the coordinates you wish for the designated event to step towards. x and y will be automatically rounded to the nearest integar value if it is a float value. this.stepTowardEvent(x) - Replace x with the ID of the event you wish for the designated event to step towards. x will be automatically rounded to the nearest integar value if it is a float value. If 0 is used, it will refer to the player. this.teleportToPoint(x, y) - Replace x and y with the coordinates you wish for the designated event to teleport to. x and y will be automatically rounded to the nearest integar value if it is a float value. this.teleportToEvent(x) - Replace x with the ID of the event you wish for the designated event to teleport to. x will be automatically rounded to the nearest integar value if it is a float value. If 0 is used, it will refer to the player. this.turnAwayFromPoint(x, y) - Replace x and y with the coordinates you wish for the designated event to turn away from. x and y will be automatically rounded to the nearest integar value if it is a float value. this.turnAwayFromEvent(x) - Replace x with the ID of the event you wish for the designated event to turn away from. x will be automatically rounded to the nearest integar value if it is a float value. If 0 is used, it will refer to the player. this.turnTowardPoint(x, y) - Replace x and y with the coordinates you wish for the designated event to turn towards. x and y will be automatically rounded to the nearest integar value if it is a float value. this.turnTowardEvent(x) - Replace x with the ID of the event you wish for the designated event to turn towards. x will be automatically rounded to the nearest integar value if it is a float value. If 0 is used, it will refer to the player. Notification Window
Displaying a notification can be achieved through Script Calls. Notifications may appear in any scene. var text = 'Hello world!'; Notification.add(text); - 'text' variable is a string. - This can use text codes, but they must be in string format. - This will appear in the 'Default Location' set by the Plugin Parameter. - This will have black background by default. var text = 'Hello world!'; var location = 5; Notification.add(text, location); - 'text' variable is a string. - 'location' variable is a number 1 through 9 to determine screen location. - This can use text codes, but they must be in string format. - This will have black background by default. var text = 'Hello world!'; var location = 5; var color = 'rgba(255, 0, 0, 1)'; Notification.add(text, location); - 'text' variable is a string. - 'location' variable is a number 1 through 9 to determine screen location. - 'color' variable is a string using the rgba CSS JavaScript function. Read more about it here: https://www.w3schools.com/cssref/func_rgba.asp - This can use text codes, but they must be in string format. - This will have black background by default. Picture SpritesheetsFor those who wish to use JavaScript code instead of Plugin Commands, you can use the Script Call event command to do so: var pictureId = 5; var frame = 10; $gameScreen.picture(pictureId).setSpritesheetFrame(frame); The above code will adjust the designated picture to change to desired frame setting you would like. Quest Journal SystemFor this plugin, you can use various script calls for certain events to make
checks on a quest's progress. Here are the different event types and the
various script calls you can use with them:
--- Control Variables Event's Script Calls ---
$gameSystem.totalQuestsAvailable()
- Sets the variable's value to the number of available quests.
$gameSystem.totalQuestsCompleted()
- Sets the variable's value to the number of completed quests.
$gameSystem.totalQuestsFailed()
- Sets the variable's value to the number of failed quests.
$gameSystem.totalQuestsKnown()
- Sets the variable's value to the total number of quests known.
$gameSystem.totalQuestsInGame()
- Sets the variable's value to the total number of quests in the game.
$gameSystem.totalQuestTypes(category, type)
- Replace 'category' with either 'available', 'completed', 'failed', or
'all' to designate the category. Replace 'type' with the quest type
(ie. 'Main Quests', 'Side Quests', 'Character Quests', etc). Include the
quotes around the category and type
Example: $gameSystem.totalQuestTypes('all', 'Main Quests')
$gameSystem.getQuestDescriptionIndex(questId)
- Replace 'questId' with the ID of the quest you're looking for. This will
set the variable to show which description is being used currently.
Example: $gameSystem.getQuestDescriptionIndex(50)
$gameSystem.totalVisibleQuestObjectives(questId)
- Replace 'questId' with the ID of the quest you're looking for. This will
set the variable to show how many quest objectives are visible currently for
the selected quest.
Example: $gameSystem.totalVisibleQuestObjectives(50)
$gameSystem.totalQuestObjectives(questId)
- Replace 'questId' with the ID of the quest you're looking for. This will
set the variable to show how many quest objectives are total for the
selected quest's settings.
Example: $gameSystem.totalQuestObjectives(50)
$gameSystem.totalVisibleQuestRewards(questId)
- Replace 'questId' with the ID of the quest you're looking for. This will
set the variable to show how many quest rewards are visible currently for
the selected quest.
Example: $gameSystem.totalVisibleQuestRewards(50)
$gameSystem.totalQuestRewards(questId)
- Replace 'questId' with the ID of the quest you're looking for. This will
set the variable to show how many quest rewards are total for the selected
quest's settings.
Example: $gameSystem.totalQuestRewards(50)
$gameSystem.getQuestSubtextIndex(questId)
- Replace 'questId' with the ID of the quest you're looking for. This will
set the variable to show which subtext is being used currently.
Example: $gameSystem.getQuestSubtextIndex(50)
--- Conditional Branch Event's Script Calls ---
$gameSystem.isQuestObjectiveCompleted(questId, objectiveId)
- Replace 'questId' with the ID of the quest you're looking for. Replace
'objectiveId' with the ID of the objective you're intending to check. This
will make a check in the conditional branch's script call to see if an
objective's status is completed (true) or not (false).
Example: $gameSystem.isQuestObjectiveCompleted(50, 1)
$gameSystem.isQuestObjectiveFailed(questId, objectiveId)
- Replace 'questId' with the ID of the quest you're looking for. Replace
'objectiveId' with the ID of the objective you're intending to check. This
will make a check in the conditional branch's script call to see if an
objective's status is failed (true) or not (false).
Example: $gameSystem.isQuestObjectiveFailed(50, 1)
$gameSystem.isQuestObjectiveUncleared(questId, objectiveId)
- Replace 'questId' with the ID of the quest you're looking for. Replace
'objectiveId' with the ID of the objective you're intending to check. This
will make a check in the conditional branch's script call to see if an
objective's status is neither completed nor failed (true) or either (false).
Example: $gameSystem.isQuestObjectiveUncleared(50, 1)
$gameSystem.isQuestRewardClaimed(questId, rewardId)
- Replace 'questId' with the ID of the quest you're looking for. Replace
'rewardId' with the ID of the reward you're intending to check. This will
make a check in the conditional branch's script call to see if a reward's
status is claimed (true) or not (false).
Example: $gameSystem.isQuestRewardClaimed(50, 1)
$gameSystem.isQuestRewardDenied(questId, rewardId)
- Replace 'questId' with the ID of the quest you're looking for. Replace
'rewardId' with the ID of the reward you're intending to check. This will
make a check in the conditional branch's script call to see if a reward's
status is denied (true) or not (false).
Example: $gameSystem.isQuestRewardDenied(50, 1)
$gameSystem.isQuestRewardUnclaimed(questId, rewardId)
- Replace 'questId' with the ID of the quest you're looking for. Replace
'rewardId' with the ID of the reward you're intending to check. This will
make a check in the conditional branch's script call to see if a reward's
status is neither claimed nor denied (true) or either (false).
Example: $gameSystem.isQuestRewardUnclaimed(50, 1)
Recruiting Board
Use the following Script Call to open up the recruiting board in-game. var actors = [1, 2, 3, 4, 5, 6, 7]; var allowRetire = true; $OpenRecruitingBoard(actors, allowRetire); - Replace 'actors' with an array of the Actor ID's that the player can recruit into his/her party. - Replace 'allowRetire' with 'true' or 'false' (without the quotes) to determine if this scene allows for retiring actors. Row FormationFor those with JavaScript proficiency, you can make use of some of these newly added functions when you do an eval check for the battler info: battler.row() This will return the row the battler is currently resided in. battler.rowIndex() This will return the battler's index in relation to the other battlers of the same team in the same row. battler.isRowLocked() This will return a true/false if the battler is row locked. battler.setRow(x) This will set the battler's row to x. In battle, this will visually move the battler there, unless the battler is the active battler. battler.alterRow(x) This will alter the battler's row by x. In battle, this will visually move the battler there, unless the battler is the active battler. $gameParty.rowSize(x) $gameTroop.rowSize(x) This will return the number of members found in that group in row x. $gameParty.rowAliveSize(x) $gameTroop.rowAliveSize(x) This will return the number of alive members found in that group in row x. $gameParty.rowDeadSize(x) $gameTroop.rowDeadSize(x) This will return the number of dead members found in that group in row x. $gameParty.rowMembers(x) $gameTroop.rowMembers(x) This will return each member of the group in row x. $gameParty.rowAliveMembers(x) $gameTroop.rowAliveMembers(x) This will return each alive member of the group in row x. $gameParty.rowDeadMembers(x) $gameTroop.rowDeadMembers(x) This will return each dead member of the group in row x. $gameParty.updateRows(); $gameTroop.updateRows(); This is a special command. This will check each row in the party. If a row is empty and/or doesn't have any alive members, all the remaining members behind that row will move forward one row until all the empty rows are gone. Self Switches & VariablesFor those who'd rather deal altering self switches and/or self variables inside of the script call event instead, you can use these script calls: Script Call: this.getSelfSwitchValue(mapId, eventId, switchId) - Replace mapId with the map ID the event exists on. Replace eventId with the ID of the event. And replace the switchId with the ID of the switch. This will get the true/false value of that event's self switch. this.getSelfVariableValue(mapId, eventId, varId) - Replace mapId with the map ID the event exists on. Replace eventId with the ID of the event. And replace the varId with the ID of the variable. This will get the value of that event's self variable. this.setSelfSwitchValue(mapId, eventId, switchId, true) this.setSelfSwitchValue(mapId, eventId, switchId, false) - Replace mapId with the map ID the event exists on. Replace eventId with the ID of the event. And replace the switchId with the ID of the switch. This will set that self switch to true or false. this.setSelfVariableValue(mapId, eventId, varId, value) - Replace mapId with the map ID the event exists on. Replace eventId with the ID of the event. And replace the varId with the ID of the variable. This will set that self variable to the value inserted. Script Call Plugin CommandsThe script call to run plugin commands from script call is as follows:
CallPluginCommand('str');
- Replace 'str' with the Plugin Command you wish to run as a string.
Example:
var line = 'GainGold 1234567890';
CallPluginCommand(line);
This will run the plugin command 'GainGold' from YEP_CoreEngine and give the
player 1,234,567,890 gold.
-------
WARNING
-------
Not all plugin commands are compatible with script calls. What do I mean by
this? Well, certain plugin commands (for example, adjusting wait times)
will not necessarily work together with this method. This is due to the way
JavaScript works itself as all code inside a function and called functions
are instantaneous.
Skill CoreParty Limit GaugeThose using JavaScript functions can make some use out of some new functions added with this plugin. Whenever the word "unit" appears, replace it with either $gameParty or $gameTroop depending on which you want to affect. unit.partyLimitGauge() - Returns the raw value of the unit's Party Limit Gauge. unit.partyLimitGaugeMax() - Returns the raw maximum cap of the Party Limit Gauge. unit.setPartyLimitGauge(x) - Sets the raw value of the Party Limit Gauge to x for that unit. unit.gainPartyLimitGauge(x) - Causes the unit to gain x Party Limit Gauge in raw value. unit.losePartyLimitGauge(x) - Causes the unit to lose x Party Limit Gauge in raw value. unit.partyLimitGaugeCurrent() - Returns the unit's number of usable increments of the Party Limit Gauge. unit.partyLimitGaugeIncrements() - Returns the unit's number of max increments of the Party Limit Gauge. unit.setPartyLimitGaugeIncrement(x) - Sets the unit's Party Limit Gauge to exactly x increments. unit.gainPartyLimitGaugeIncrement(x) - Causes the unit to gain exactly x increments of the Party Limit Gauge. unit.losePartyLimitGaugeIncrement(x) - Causes the unit to lose exactly x increments of the Party Limit Gauge. Skill Mastery LevelsFor those with JavaScript experience, you can use the following script calls reference or alter skill mastery levels to your liking: Script Calls: battler.skillMasteryLevel(skillId) - 'battler' is a variable that represents an actor/enemy. Replace 'skillId' with the ID of the skill whose mastery level you wish to acquire. This will return the mastery level of that skill. battler.setSkillMasteryLevel(skillId, level) - 'battler' is a variable that represents an actor/enemy. Replace 'skillId' with the ID of the skill whose mastery level you wish to alter. Replace 'level' with the level of the skill you wish to set it to. This will not allow the skill mastery level to go below 0 or above its max level and the number of uses will be set to 0 for that level. battler.gainSkillMasteryLevel(skillId, value) - 'battler' is a variable that represents an actor/enemy. Replace 'skillId' with the ID of the skill whose mastery level you wish to increase. Replace 'value' with the amount of levels to increase (or decrease) the skill's current mastery level by. battler.skillMasteryUses(skillId) - 'battler' is a variable that represents an actor/enemy. Replace 'skillId' with the ID of the skill whose current mastery usage amount you wish to acquire the value of. This will return the current mastery usage amount of that skill. battler.setSkillMasteryUses(skillId, value) - 'battler' is a variable that represents an actor/enemy. Replace 'skillId' with the ID of the skill whose current mastery usage amount to be changed. Replace 'value' with the amount to set the amount to. If the usage amount exceeds the need to reach the next level, the skill automatically update to the next mastery level and set the mastery usage amount to 0. battler.gainSkillMasteryUses(skillId, value) - 'battler' is a variable that represents an actor/enemy. Replace 'skillId' with the ID of the skill whose current mastery usage amount to be changed. Replace 'value' with the amount to increase/decrease. If the usage amount exceeds the need to reach the next level, the skill automatically update to the next mastery level and set the mastery usage amount to 0. Special Parameter FormulaYou can use the following JavaScript functions to alter the special parameter values of actors. In these listed functions, the 'actor' variable is to be referenced by an actor: ie. actor = $gameActors.actor(3); Function: actor.clearSParamPlus() - Clears all of the actor's special parameter plus bonuses. actor.setTgr(x) actor.setGrd(x) actor.setRec(x) actor.setPha(x) actor.setMcr(x) actor.setTcr(x) actor.setPdr(x) actor.setMdr(x) actor.setFdr(x) actor.setExr(x) - Sets the actor's respective special parameter value to x. Keep in mind that 1 is equal to 100% and 0.1 would be equal to 10%. Negative values will apply here, too. actor.setTgrPlus(x) actor.setGrdPlus(x) actor.setRecPlus(x) actor.setPhaPlus(x) actor.setMcrPlus(x) actor.setTcrPlus(x) actor.setPdrPlus(x) actor.setMdrPlus(x) actor.setFdrPlus(x) actor.setExrPlus(x) - Sets the actor's respective special parameter plus value to x. Keep in mind that 1 is equal to 100% and 0.1 would be equal to 10%. Negative values will apply here, too. actor.addTgr(x) actor.addGrd(x) actor.addRec(x) actor.addPha(x) actor.addMcr(x) actor.addTcr(x) actor.addPdr(x) actor.addMdr(x) actor.addFdr(x) actor.addExr(x) - Adds x to the actor's respective special parameter value. Keep in mind that 1 is equal to 100% and 0.1 would be equal to 10%. Negative values will decrease the special parameter. actor.minusTgr(x) actor.minusGrd(x) actor.minusRec(x) actor.minusPha(x) actor.minusMcr(x) actor.minusTcr(x) actor.minusPdr(x) actor.minusMdr(x) actor.minusFdr(x) actor.minusExr(x) - Subtracts x from the actor's respective special parameter value. Keep in mind that 1 is equal to 100% and 0.1 would be equal to 10%. Negative values will add to the special parameter. Stat AllocationYou can use the following script calls to give actors extra AP to use. Script Calls: var actor = $gameActors.actor(actorId); actor.gainBonusAp(x, classId); - Replace 'actorId' with the ID of the actor you wish to affect. Replace 'x' with the amount of AP you wish to apply to the actor. Replace 'classId' with the ID of the class you wish to give AP to. You can keep 'classId' as 0 to make it affect the actor's current class. var actor = $gameActors.actor(actorId); actor.setBonusAp(x, classId); - Replace 'actorId' with the ID of the actor you wish to affect. Replace 'x' with the amount of AP you wish to set the actor's AP to. Replace 'classId' with the ID of the class you wish to set the AP to. You can keep 'classId' as 0 to make it affect the actor's current class. Unison AttackYou can also use these for the Damage Formula.
Those who want to grab specific Unison Skill participating members can use the following variables to grab them: $UnisonMember1
$UnisonMember2
$UnisonMember3
$UnisonMember4
Each number refers to the participant using the ordered skill in the <Unison Skill: x> notetag. Let's take a look below: If this notetag is used: <Unison Skill: 50, 40, 30, 20> then the members will refer to the following: $UnisonMember1 = User of Skill 50
$UnisonMember2 = User of Skill 40
$UnisonMember3 = User of Skill 30
$UnisonMember4 = User of Skill 20
This is used the same way in Script Calls. Once the skill has completed, these variables will be cleared. Visual Novel Busts
Does exactly what it means, display a bust. There are 11 busts that can be controlled. 0 is the Message Window's bust graphic. 1 through 10 are the busts that are shown on the screen behind the Message Window.
Insert [BUST] into the filenames of face graphics and they will be setup automatically to change as the bust graphic. Harold.png will become Harold[BUST].png. This makes it unnecessary for you to use \bust[0] every time you want to set a bust to the message window itself. This only works for images in the img/faces/ folder.
Script Call:
     $bust(id).loadBitmap('face', 'filename')
     $bust(id).loadBitmap('picture', 'filename')
     - Replace id with the bust ID you want to implant the face graphic on.
       - 0 if you want to use the message bust.
       - 1 through 10 if you want to use the screen busts.
     - Decide if you're going to load from img/faces/ or img/pictures/
     - Replace 'filename' with the exact case sensitive filename of the file
     while keeping the quotes.
     - Examples:
       - $bust(0).loadBitmap('face', 'Harold[BUST]')
       - $bust(1).loadBitmap('picture', 'Therese[BUST]')
Clearing a bust removes it from view and resets it to the default settings so that the next time it's used, it will be a fresh slate. This is done automatically for message busts after the Message Window closes. A plugin parameter setting can be turned on to make all busts clear after an event finishes running. Script Call:
$bust(id).clear(duration)
- Replace id with the bust ID you want to affect.
- 0 if you want to affect the message bust.
- 1 through 10 if you want to affect the screen busts.
- (Optional) Replace duration with how long it takes to clear.
- If no duration is used, then use the value in the plugin parameters
- Examples:
- $bust(0).clear()
- $bust(2).clear(20)
If you have set up a bust to use expressions, you can use this text code to change the expression of the bust. Please refer to the "Expression List" part of the help section up above to learn how to set up busts to make an expression sheet. Script Call:
$bust(id).setExpression(expression)
- Replace id with the bust ID you want to affect.
- 0 if you want to affect the message bust.
- 1 through 10 if you want to affect the screen busts.
- Replace expression with either a number index or the string that is
associated with that expression to display the wanted expression.
- Examples:
- $bust(0).setExpression(1)
- $bust(2).setExpression('Angry')
You can play battle animations on the busts to depict actions, emotions, whatever you want them to do. These will play the battle animation only once before closing out. Script Call:
$bust(id).startAnimation(ani, mirror, delay)
- Replace id with the bust ID you want to affect.
- 0 if you want to affect the message bust.
- 1 through 10 if you want to affect the screen busts.
- Replace ani with the ID of the battle animation
- Alternatively, you can type out the battle animation's name, too.
If you do, make it into a string for the Script Call.
- (Optional) Replace mirror with true/face to mirror the animation.
- (Optional) Replace delay with the frames to wait before playing.
- Examples:
- $bust(0).startAnimation(5)
- $bust(2).startAnimation('Healing One 2', true, 20)
Play battle animations repeatedly instead of one time. Otherwise, this is the same as playing regular battle animations. Repeating animations will stop automatically for message busts when the window closes. For screen busts, they will vanish once the event terminates. Script Call:
$bust(id).setupRepeatingAnimation(ani, mirror, delay)
- Replace id with the bust ID you want to affect.
- 0 if you want to affect the message bust.
- 1 through 10 if you want to affect the screen busts.
- Replace ani with the ID of the battle animation
- Alternatively, you can type out the battle animation's name, too.
If you do, make it into a string for the Script Call.
- (Optional) Replace mirror with true/face to mirror the animation.
- (Optional) Replace delay with the frames to wait before playing.
- Examples:
- $bust(0).setupRepeatingAnimation(5)
- $bust(2).setupRepeatingAnimation('Healing One 2', true, 20)
Put an end to a repeating battle animation because otherwise that is going to go on forever until the currently running event fully terminates. Script Call:
$bust(id).clearRepeatingAnimation();
- Replace id with the bust ID you want to affect.
- 0 if you want to affect the message bust.
- 1 through 10 if you want to affect the screen busts.
- Examples:
- $bust(0).clearRepeatingAnimation();
- $bust(3).clearRepeatingAnimation();
Allows bust sprites to move to specific x and y coordinates. This does not work for message busts as they're locked to the Message Window. Script Call:
$bust(id).moveTo(x, y, duration)
- Replace id with the bust ID you want to affect.
- 1 through 10 if you want to affect the screen busts.
- Replace x with the x coordinate on the screen to move to.
- Replace y with the y coordinate on the screen to move to.
- (Optional) Replace duration with how long it takes to move there.
- If no duration is used, then use the value in the plugin parameters
- Examples:
- $bust(1).moveTo(640, 720)
- $bust(5).moveTo(100, 360, 60)
Allows bust sprites to move relative to their current position. This does not work for message busts as they're locked to the Message Window. Script Call:
$bust(id).moveBy(+x, +y, duration)
$bust(id).moveBy(-x, -y, duration)
- Replace id with the bust ID you want to affect.
- 1 through 10 if you want to affect the screen busts.
- Replace x with how far left(-) or right(+) to move by.
- Replace y with how far up(-) or down(+) to move by.
- (Optional) Replace duration with how long it takes to move there.
- If no duration is used, then use the value in the plugin parameters
- Examples:
- $bust(1).moveBy(-100, +0)
- $bust(5).moveBy(+200, -50, 60)
Returns a bust sprite back to the home position. For those moments you're too confused, lazy, or both to figure out how to bring a bust sprite back to the original coordinates it was in. This does not work for message busts as they're locked to the Message Window. Script Call:
$bust(id).moveHome(duration)
- Replace id with the bust ID you want to affect.
- 1 through 10 if you want to affect the screen busts.
- (Optional) Replace duration with how long it takes to move there.
- If no duration is used, then use the value in the plugin parameters
- Examples:
- $bust(1).moveHome()
- $bust(4).moveHome(60)
Allows you to adjust the rate, acceleration, and easing when a bust moves. Script Call:
$bust(id).moveType('type')
- Replace id with the bust ID you want to affect.
- 1 through 10 if you want to affect the screen busts.
- Replace type with the movement type. Look below for a list.
- Examples:
- $bust(0).moveType('Linear')
- $bust(4).moveType('OutBounce')
Types:
Linear ......... No easing, no acceleration
InSine ......... Slight acceleration from zero to full speed
OutSine ........ Slight deceleration at the end
InOutSine ...... Slight accel. at beginning and slight decel. at end
InQuad ......... LV2 Accelerating from zero velocity
OutQuad ........ LV2 Decelerating to zero velocity
InOutQuad ...... LV2 Acceleration until halfway, then deceleration
InCubic ........ LV3 Accelerating from zero velocity
OutCubic ....... LV3 Decelerating to zero velocity
InOutCubic ..... LV3 Acceleration until halfway, then deceleration
InQuart ........ LV4 Accelerating from zero velocity
OutQuart ....... LV4 Decelerating to zero velocity
InOutQuart ..... LV4 Acceleration until halfway, then deceleration
InQuint ........ LV5 Accelerating from zero velocity
OutQuint ....... LV5 Decelerating to zero velocity
InOutQuint ..... LV5 Acceleration until halfway, then deceleration
InExpo ......... Accelerate exponentially until finish
OutExpo ........ Initial exponential acceleration slowing to stop
InOutExpo ...... Exponential acceleration and deceleration
InCirc ......... Increasing velocity until stop
OutCirc ........ Start fast, decreasing velocity until stop
InOutCirc ...... Fast increase in velocity, fast decrease in velocity
InBack ......... Slow movement backwards then fast snap to finish
OutBack ........ Fast snap to backwards point then slow to finish
InOutBack ...... Back In, then Back Out
InElastic ...... Bounces slowly then quickly to finish
OutElastic ..... Fast acceleration, bounces to zero
InOutElastic ... Slow start and end, two bounces sandwich a fast motion
InBounce ....... Bounce increasing in velocity until completion
OutBounce ...... Bounce to completion
InOutBounce .... Bounce in and bounce out
Fade in to 255 opacity or fade out 0 opacity. This can affect any bust and you can also declare the duration of the fading process. Script Call:
$bust(id).fadeIn(duration)
$bust(id).fadeOut(duration)
- Replace id with the bust ID you want to affect.
- 0 if you want to affect the message bust.
- 1 through 10 if you want to affect the screen busts.
- (Optional) Replace duration with how long it takes to fade in or out.
- If no duration is used, then use the value in the plugin parameters
- Examples:
- $bust(1).fadeIn()
- $bust(6).fadeOut(40)
If you don't want to fully change a bust's opacity to either 0 or 255, set it to whatever opacity level you want instead. Script Call:
$bust(id).opacityTo(opacity, duration)
- Replace id with the bust ID you want to affect.
- 0 if you want to affect the message bust.
- 1 through 10 if you want to affect the screen busts.
- Replace opacity with a number between 0 and 255 for how opaque it is.
- (Optional) Replace duration with how long it takes to fade in or out.
- If no duration is used, then use the value in the plugin parameters
- Examples:
- $bust(0).opacityTo(128)
- $bust(7).opacityTo(64)
This changes the opacity level of a bust relative to its current opacity instead of needing to put in an exact value. Script Call:
$bust(id).opacityBy(+opacity, duration)
$bust(id).opacityBy(-opacity, duration)
- Replace id with the bust ID you want to affect.
- 0 if you want to affect the message bust.
- 1 through 10 if you want to affect the screen busts.
- Replace opacity with how much you wish to adjust the opacity by.
- (Optional) Replace duration with how long it takes to change opacity.
- If no duration is used, then use the value in the plugin parameters
- Examples:
- $bust(0).opacityBy(+32)
- $bust(8).opacityBy(-64)
Sliding In and Sliding Out is a small move and fade in/out combo that is based around the bust's home position. This makes busts look like they're fading into the scene or fading out of them. Script Call:
$bust(id).slideIn(duration)
$bust(id).slideInFromLeft(duration)
$bust(id).slideInFromRight(duration)
$bust(id).slideOut(duration)
$bust(id).slideOutToLeft(duration)
$bust(id).slideOutToRight(duration)
- Replace id with the bust ID you want to affect.
- 0 if you want to affect the message bust.
- 1 through 10 if you want to affect the screen busts.
- Use the FromLeft, FromRight, ToLeft, ToRight versions to control the
direction the busts are going or leave it up to the plugin.
- (Optional) Replace duration with how long it takes to slide in/out.
- If no duration is used, then use the value in the plugin parameters
- Examples:
- $bust(0).slideIn()
- $bust(9).slideOut(20)
Lets you set the bust sprite to mirror, unmirror, or toggle the mirror setting it currently has. Script Call:
$bust(id).mirror()
$bust(id).unmirror()
$bust(id).mirrorToggle()
- Replace id with the bust ID you want to affect.
- 0 if you want to affect the message bust.
- 1 through 10 if you want to affect the screen busts.
- Examples:
- $bust(0).slideIn()
- $bust(9).slideOut(100, 20)
This lets you change the scale of the bust sprite to an exact amount. Now, I know that sprites with a negative value for scale flip over, but these text codes and script calls will disable that. If you want to mirror something, use the mirror text codes for it. Script Call:
$bust(id).scaleTo(scale, duration)
$bust(id).scaleToX(scale, duration)
$bust(id).scaleToY(scale, duration)
- Replace id with the bust ID you want to affect.
- 0 if you want to affect the message bust.
- 1 through 10 if you want to affect the screen busts.
- Replace scale with a number value on how to scale it.
- 0.5 is 50%. 1.0 is 100%. 1.5 is 150%.
- (Optional) Replace duration with how long it takes to scale.
- If no duration is used, then use the value in the plugin parameters
- Use the X and Y variations if you want to adjust those specifically
- Examples:
- $bust(0).scaleTo(1.0)
- $bust(2).scaleToX(0.5, 20)
- $bust(4).scaleToX(2.5, 60)
This lets you change the scale of the bust sprite relative to its current scale value. This will work with an absolute value of the current scale to remove any confusion about how mirrored scaling works, so just treat a bust that is mirrored the same way you'd treat a bust that's not mirrored. Script Call:
$bust(id).scaleBy(+scale, duration)
$bust(id).scaleByX(-scale, duration)
$bust(id).scaleByY(+scale, duration)
- Replace id with the bust ID you want to affect.
- 0 if you want to affect the message bust.
- 1 through 10 if you want to affect the screen busts.
- Replace scale with a number value on how to scale it.
- 0.5 is 50%. 1.0 is 100%. 1.5 is 150%.
- (Optional) Replace duration with how long it takes to scale.
- If no duration is used, then use the value in the plugin parameters
- Use the X and Y variations if you want to adjust those specifically
- Examples:
- $bust(0).scaleBy(-1.0)
- $bust(2).scaleToX(+0.5, 20)
- $bust(4).scaleToX(-2.5, 60)
Give busts a tone! Tones will tint the colors on a bust. The bust will then change its tint towards that tone over time. Script Call:
$bust(id).setTone(red, green, blue, gray, duration)
- Replace id with the bust ID you want to affect.
- 0 if you want to affect the message bust.
- 1 through 10 if you want to affect the screen busts.
- Replace red with a number between -255 and 255.
- Replace green with a number between -255 and 255.
- Replace blue with a number between -255 and 255.
- Replace gray with a number between 0 and 255.
- (Optional) Replace duration with how long it takes to change tone.
- If no duration is used, then use the value in the plugin parameters
- Examples:
- $bust(0).setTone(-68, -68, 0, 68)
- $bust(5).setTone(-68, -68, -68, 0, 60)
Dim and Light are preset tones that are primarily used for tinting busts. Usually visual novels will dim busts that aren't talking and light the busts that are. This is to speed up the process so that you don't have to type out a tone code every time. You can set the dim and light values in the plugin parameters. They'll also use the duration for tones if no duration is used to specify that specific dim or light tone change. Script Call:
$bust(id).dim(duration)
$bust(id).light(duration)
- Replace id with the bust ID you want to affect.
- 0 if you want to affect the message bust.
- 1 through 10 if you want to affect the screen busts.
- (Optional) Replace duration with how long it takes to change tone.
- If no duration is used, then use the value in the plugin parameters
- Examples:
- $bust(0).dim()
- $bust(5).light(60)
To have multiple busts do a bunch of things at once, you can use this piece of code in a script to accomplish it with whatever script call listed above. [0, 1, 2, 3, 4, 5, 6, 7, 8, 9, 10].forEach(function(i) {
$bust(i).slideIn(20);
$bust(i).moveType('OutBounce');
$bust(i).scaleTo(1.25, 20);
});
Replace the numbers in the array with the bust ID's that you want it to affect and whatever script calls in the middle after the $bust(i). Do not replace the i because that tells the code which bust to affect. Any number that's not listed in that array won't have the bust associated with it performing any of the listed actions in the middle. Weakness DisplayBattleManager.revealWeakness(x) Replace x with the number of weaknesses that are to be revealed for all enemies in the battle. BattleManager.revealWeaknessByVariable(x) Replace x with the variable ID. The x value determines how many weaknesses are revealed for all enemies in the battle. |

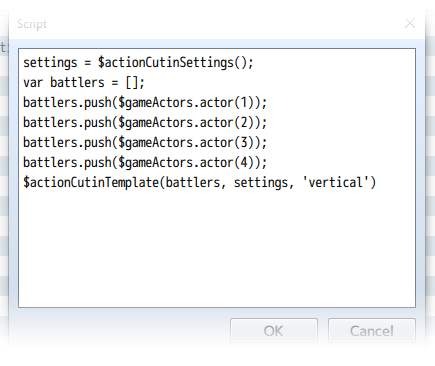
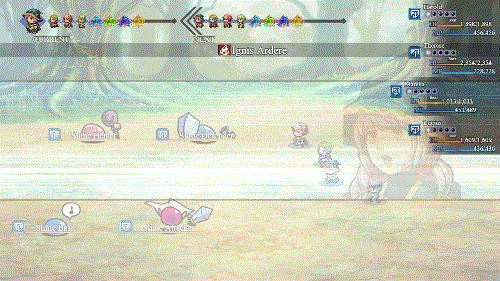
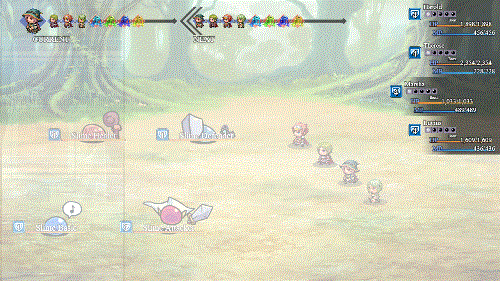
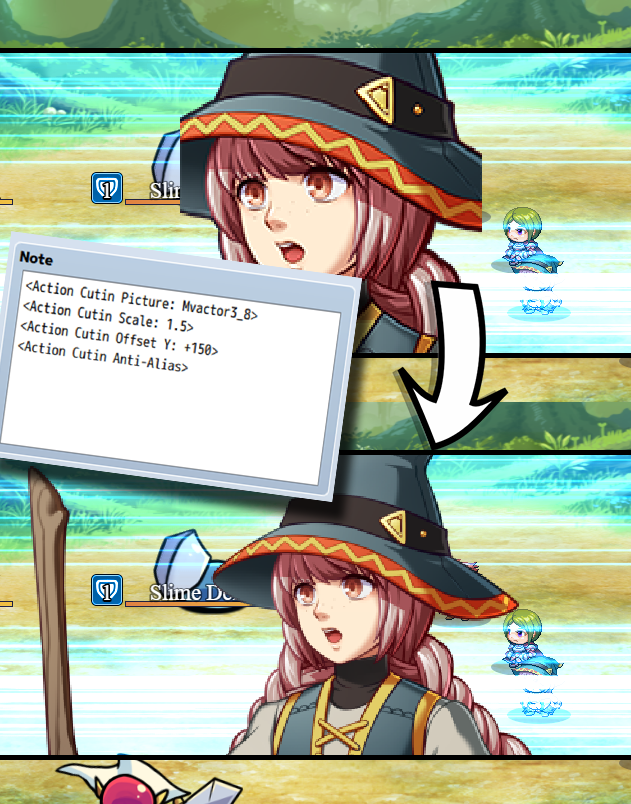
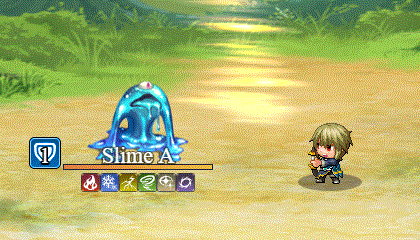
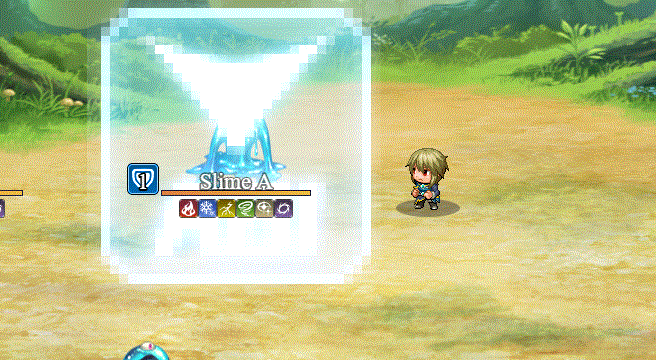

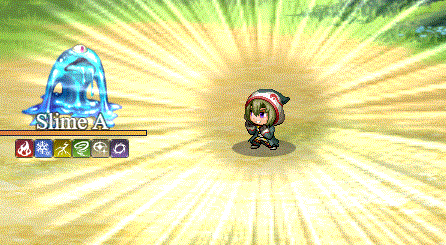
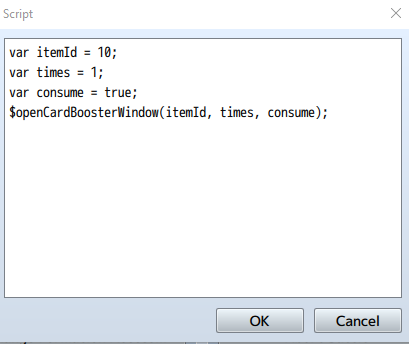


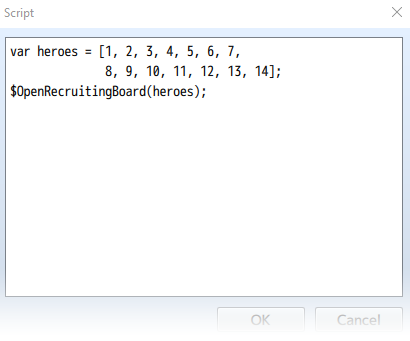


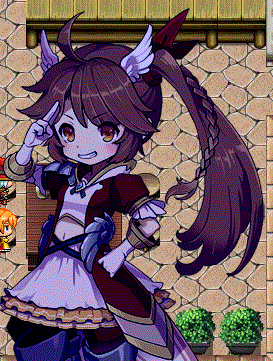

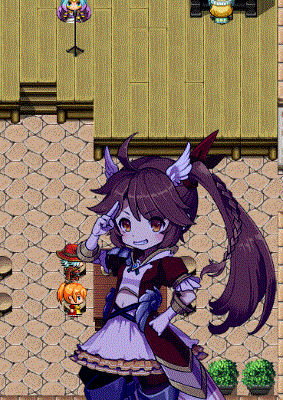

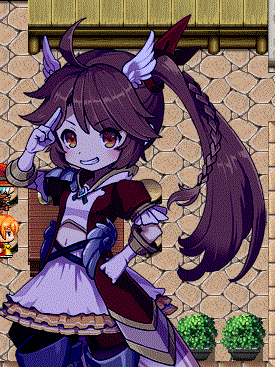
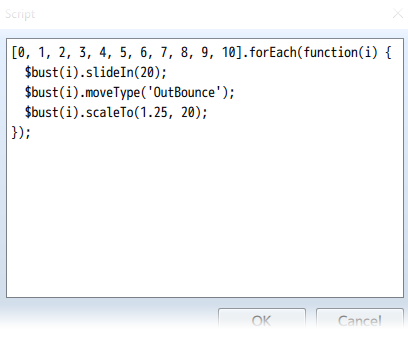
Pages in category "Script Calls (MV)"
The following 40 pages are in this category, out of 40 total.