Category:Lunatic Mode (MV)


|
VisuStella, Caz Wolf, Fallen Angel Olivia, Atelier Irina, and other affiliated content creators.
Contents
- 1 Introduction
- 2 Absorption Barrier
- 3 Auto Passive States
- 4 Base Parameter Control
- 5 Battle Engine Core
- 6 Buffs & States Core
- 7 Common Event Menu
- 8 Damage Core
- 9 Enemy Levels
- 10 Equip Core
- 11 Event Copier
- 12 Event Timer Control
- 13 Floor Damage
- 14 Instant Cast
- 15 Item Core
- 16 Item Synthesis
- 17 Level Up Growth Effects
- 18 Life Steal
- 19 Message Core
- 20 Overkill Bonus
- 21 Quest Journal System
- 22 Recruiting Board
- 23 Row Formation
- 24 Skill Core
- 25 Skill Learn System
- 26 Skill Mastery Levels
- 27 Steal & Snatch
- 28 Target Core
- 29 Weapon Unleash
|
IntroductionLunatic Mode is a key phrase coined by Yanfly and is often seen used across the RPG Maker community by many users to refer to advanced usage of plugins involving code of some sort. It usually pertains to the usage of notetags, but it can also be applied to other things, such as Plugin Parameters and comment tags, too. It is recommended that users don't dabble with Lunatic Mode features unless they understand that what they're using can cause their game to crash if the code is made incorrectly. OriginThe origin of Lunatic Mode came from Touhou Project, a Japanese bullet hell shoot 'em up game series. In the games, there are often four modes: Easy, Normal, Hard, and Lunatic. During the RPG Maker VX era, the Yanfly Engine ReDux series had their usage labeled in the four categories:
This difficulty scheme was never used again since the VX script libraries, but the term Lunatic Mode has stuck with the community since then. Absorption Barrier
For those with JavaScript proficiency, you can utilize these notetags to
allow your skills and items to give battlers custom Barrier Point totals.

Skill and Item Notetags:

  --- Target ---

  <Custom Target Barrier>
   value = target.level;
  </Custom Target Barrier>
  The 'value' variable determines the total amount of Barrier Points that
  will be added to the target's unexpiring Barrier Point total.

  <Custom Target Barrier x Turns>
   value = target.level;
  </Custom Target Barrier x Turns>
  The 'value' variable determines the total amount of Barrier Points that
  will be added to the target for x amount of turns.

  --- User ---

  <Custom User Barrier>
   value = user.level;
  </Custom User Barrier>
  The 'value' variable determines the total amount of Barrier Points that
  will be added to the user's unexpiring Barrier Point total.

  <Custom User Barrier x Turns>
   value = user.level;
  </Custom User Barrier x Turns>
  The 'value' variable determines the total amount of Barrier Points that
  will be added to the user for x amount of turns.
For those with JavaScript proficiency, you can utilize these notetags to
give your skills, items, actors, classes, enemies, weapons, armors, and
states custom Barrier Penetration effects.

Skill, Item, Actor, Class, Enemy, Weapon, Armor, State Notetags:

  --- Rate ---

  <Custom Barrier Penetration Rate>
   rate = target.hpRate();
  </Custom Barrier Penetration Rate>
  The 'rate' variable determines the percentile amount of damage the user
  will bypass for the target's Barrier Points. This is a multiplicative
  bonus and will be applied before any flat bonuses.

  --- Flat ---

  <Custom Barrier Penetration Flat>
   flat = target.level;
  </Custom Barrier Penetration Flat>
  The 'flat' variable determines the flat amount of damage the user will
  bypass for the target's Barrier Points. This is a flat bonus and will be
  applied after all multiplicative bonuses.
For those with JavaScript proficiency, you can utilize these notetags to
add a dynamic amount of Barrier Points during the start up of a battle.

Actor, Class, Enemy, Weapon, Armor, and State Notetags:

   --- Unexpiring ---

   <Custom Barrier Points>
    value += user.hp;
   </Custom Barrier Points>
   The 'value' variable determines how many Barrier Points the user will
   start a battle with. The Barrier Points added through this notetag are
   unexpiring Barrier Points.

   --- Timed ---

   <Custom Barrier Points x Turns>
    value += user.hp;
   </Custom Barrier Points x Turns>
   The 'value' variable determines how many Barrier Points the user will
   start a battle with but expires after x turns.
For those with JavaScript proficiency, you can utilize these notetags to
add a dynamic amount of Barrier Points during the user's regeneration phase.

Actor, Class, Enemy, Weapon, Armor, and State Notetags:

   --- Unexpiring ---

   <Custom Barrier Regen>
    value += user.hp / 4;
   </Custom Barrier Regen>
   The 'value' variable determines how many Barrier Points the user will
   gain during the user's regeneration phase. The Barrier Points added with
   this notetag are unexpiring Barrier Points.

   --- Timed ---

   <Custom Barrier Regen x Turns>
    value += user.hp / 4;
   </Custom Barrier Regen x Turns>
   The 'value' variable determines how many Barrier Points the user will
   gain during the user's regeneration phase. The Barrier Points added with
   this notetag will last x turns.
Auto Passive States
For those who understand a bit of JavaScript and would like for their
passive states to appear under specific conditions, you can use this notetag
to accomplish conditional factors.

State Notetags:
  <Custom Passive Condition>
  if (user.hp / user.mhp <= 0.25) {
    condition = true;
  } else {
    condition = false;
  }
  </Custom Passive Condition>
  This enables you to input conditions to be met in order for the passive
  state to appear. If the 'condition' variable returns true, the passive
  state will appear. If the 'condition' returns false, it won't appear. If
  condition is not defined, it will return true and the passive state will
  appear on the battler.
  * Note: All non-custom passive conditions must be met before this one can
  be fulfilled and allow the custom condition to appear.
  * Note: If you decide to use a condition that requires the actor to have a
  particular state, it cannot be a passive state to prevent infinite loops.
Lunatic Pack - Passive Condition CasesFor experienced users that know JavaScript and have RPG Maker MV 1.5.0+, you
can add new notetag effects that can be used by the plugin or alter the
effects of currently existing notetag effects from the plugin parameters
entry: Effect Code. It should look something like this:
---
// -------------
// Switch On/Off
// -------------
if (data.match(/SWITCH[ ](\d+)[ ]ON/i)) {
var switchId = parseInt(RegExp.$1);
condition = $gameSwitches.value(switchId);
} else if (data.match(/SWITCH[ ](\d+)[ ]OFF/i)) {
var switchId = parseInt(RegExp.$1);
condition = !$gameSwitches.value(switchId);
...
// -------------------------------
// Add new effects above this line
// -------------------------------
} else {
skip = true;
}
---
Here's what each of the variables used in this code bit refer to:
-------------------- ---------------------------------------------------
Variable: Refers to:
-------------------- ---------------------------------------------------
condition Current condition setting. If it returns true, then
the current condition case passes. Otherwise, no.
The passive state needs all its condition cases to
to become an active passive state.
a Returns the action user
user Returns the action user
subject Returns the action user
s[x] Return switch x (true/false)
v[x] Return variable x's current value
skip Default: false. If true, returns the previous rate
---
If you need to revert the Effect Code back to its original state, delete the
plugin from your plugin manager list and then add it again. The code will be
back to default.
Passive Aura Effects
For those with JavaScript experience and would like to make conditional aura
effects, you can use these notetags. Keep in mind, this conditional effect
is for the target delivered state and not the origin aura itself.

State Notetags:

  <Custom Aura Condition>
   if (user.hpRate() > 0.50) {
     condition = true;
   } else {
     condition = false;
   }
  </Custom Aura Condition>
  - The 'condition' variable will determine whether or not the target aura
  state will appear. If the 'condition' variable is 'true', then it will
  appear. If the 'condition' variable is 'false', then it will not appear.
  Remember, this notetag has to be placed in the target delivered state and
  not the origin aura itself.
Base Parameter ControlClass Base Parameters
If your formulas are short and simple, you can use this notetag to cover the
entire formula list for all of the base parameters:

Class Notetag:

  <Custom Class Parameters>
   maxhp = level * 30 + 300;
   maxmp = level * 20 + 150;
   atk = level * 15 + 15;
   def = level * 11 + 16;
   mat = level * 12 + 14;
   mdf = level * 10 + 13;
   agi = level * 14 + 15;
   luk = level * 13 + 12;
   exp = level * 100;
  </Custom Class Parameters>
  The 'maxhp', 'maxmp', 'atk', 'def', 'mat', 'mdf', 'agi', 'luk', and 'exp'.
  variables each refer to their own individual stats. The 'level' variable
  refers to the actor's current level. The formula can be made any way you
  like as long as it returns a legal number.
  * Note: The 'exp' stat here refers to the amount of exp needed to reach
  the next level.
For those who wish to put a bit more detail in calculating the formula for
each stat, you can use the following notetag setup:

Class Notetags:

  <Custom Param Formula>
   if (this.name() === 'Harold') {
     value = level * 30 + 300;
   } else {
     value = level * 25 + 250;
   }
  </Custom Param Formula>
  Replace 'Param' with 'maxhp', 'maxmp', 'atk', 'def', 'mat', 'mdf', 'agi',
  'luk', or 'exp'. The 'value' variable is the final result that's returned
  to count as the base class parameter. The 'level' variable refers to the
  actor's current level. The formula can be made any way you like as long as
  it returns a legal number.
  * Note: The 'exp' stat here refers to the amount of exp needed to reach
  the next level.
Battle Engine CoreBattle System - ATB
For those who have a bit of JavaScript experience and would like to have
more unique ways of performing ATB speed and charge changes, you can use the
following notetags:

Skill and Item Notetags:
  <Target ATB Eval>
  speed = x;
  charge = x;
  </Target ATB Eval>
  You can omit speed and/or charge. Whatever you set 'speed' to will change
  the ATB speed of the target. If the target is charging, 'charge' will
  cause the target's charge to change to that value. To make things more
  simple, 'max' will be the full gauge value.

  Here is an example:

  <Target ATB Eval>
  speed = target.hp / target.mhp * max;
  charge = target.hp / target.mhp * max;
  </Target ATB Eval>
  The above code will set the user's current ATB gauge to position equal to
  the target's HP ratio. If the target has 25% HP, the ATB gauge will go to
  25% full for the target.

  --- --- --- --- ---

  <After ATB Eval>
  speed = x;
  </After ATB Eval>
  This is the ATB set after the user has used the skill/item and the custom
  ATB amount you want the user to be at after. 'max' be the value of the
  full gauge value. Whatever you set 'speed', the user's ATB speed value
  will change to that much:

  Here is an example:

  <After ATB Eval>
  speed = user.mp / user.mmp * max;
  </After ATB Eval>
  The above code will set the user's ATB gauge after using the skill/item to
  equal the user's MP ratio. If the user has 25% MP, the ATB gauge will go
  to 25% full for the user.

  --- --- --- --- ---

  <ATB Interrupt Eval>
  interrupt = true;
  </ATB Interrupt Eval>
  This will allow you to set custom conditions for interrupting a target.
  Keep in mind that even though it is a custom condition, it still requires
  the target to be in the charging phase for the interrupt to work. By
  setting 'interrupt = true', the target will be interrupted.

  Here is an example:

  <ATB Interrupt Eval>
  if (user.hp > target.hp) {
     interrupt = true;
  }
  </ATB Interrupt Eval>
  The above code will state that if the user has more HP than the target,
  the target will be interrupted.
Battle System - CTB
For those who have a bit of JavaScript experience and would like to have
more unique ways of performing CTB speed and charge changes, you can use the
following notetags:

Skill and Item Notetags:
  <Target CTB Speed Eval>
  speed = x;
  charge = x;
  </Target CTB Speed Eval>
  You can omit speed and/or charge. Whatever you set 'speed' to will change
  the CTB speed of the target. If the target is charging, 'charge' will
  cause the target's charge to change to that value. To make things more
  simple, 'max' will be the full gauge value.

  Here is an example:

  <Target CTB Speed Eval>
  speed = target.hp / target.mhp * max;
  charge = target.hp / target.mhp * max;
  </Target CTB Speed Eval>
  The above code will set the user's current CTB gauge to position equal to
  the target's HP ratio. If the target has 25% HP, the CTB gauge will go to
  25% full for the target.

  --- --- --- --- ---

  <Target CTB Order Eval>
  order = x;
  </Target CTB Order Eval>
  Set the 'order' variable to how much you want to alter the target's
  current turn order by. If 'order' is positive, the order will need to wait
  that many more turns before its turn comes up. If 'order' is negative, it
  will will that amount of turns less before the order comes up.

  Here is an example:

  <Target CTB Order Eval>
  if (target.hp > 1000) {
    order = 3;
  } else {
    order = -1;
  }
  </Target CTB Order Eval>
  If the target when attacked has over 1000 HP left, the target will have to
  wait 3 more turns before its turn arrives. If the target has 1000 or less,
  the target actually waits 1 less turn.

  --- --- --- --- ---

  <After CTB Eval>
  speed = x;
  </After CTB Eval>
  This is the CTB set after the user has used the skill/item and the custom
  CTB amount you want the user to be at after. 'max' be the value of the
  full gauge value. Whatever you set 'speed', the user's CTB speed value
  will change to that much:

  Here is an example:

  <After CTB Eval>
  speed = user.mp / user.mmp * max;
  </After CTB Eval>
  The above code will set the user's CTB gauge after using the skill/item to
  equal the user's MP ratio. If the user has 25% MP, the CTB gauge will go
  to 25% full for the user.
Counter Control
For those with JavaScript proficiency, you can use the following Lunatic
Mode notetags to give a dynamic set of skills granted for counter usage.

Actor, Class, Enemy, Weapon, Armor, and State Notetags:

  <Custom Counter Skills>
   if (user.name() === 'Harold') {
     skills.push(50, 51, 52);
   } else if (user.name() === 'Therese') {
     skills.push(53, 54, 55);
   } else if (user.name() === 'Marsha') {
     skills.push(56, 57, 58);
   } else if (user.name() === 'Lucius') {
     skills.push(59, 60, 61);
   }
  </Custom Counter Skills>
  The 'skills' variable is an array that will contain all the counter skills
  that will be added to the list of potential skills the battler can counter
  actions with provided that their requirements are met.
For those with JavaScript proficiency, you can use the following Lunatic
Mode notetags to give a dynamic counter total bonus:

Actor, Class, Enemy, Weapon, Armor, and State Notetags:

  <Custom Counter Total>
   value = user.level;
  </Custom Counter Total>
  The 'value' variable is the total amount of counters is increased or
  decreased by. If the total counter value reaches 0 or less than 0 for the
  battler, the battler is unable to use counter skills.
For those with JavaScript proficiency, you can use the following Lunatic
Mode notetags to make the attacker's traits alter the target's CNT rate.

Actor, Class, Enemy, Weapon, Armor, and State Notetags:

  <Custom Target Counter Rate>
   rate -= user.hpRate();
  </Custom Target Counter Rate>
  The 'rate' variable is the final rate used to determine the counter rate
  the target has. It is already given the value calculated from the target's
  CNT value. This is calculated before the skill's custom counter rate.
For those with JavaScript proficiency, you can use the following Lunatic
Mode notetags to give skills a dynamic chance for the target to counter.

Skill and Item Notetags:

  <Custom Counter Rate>
   rate += target.hpRate();
  </Custom Counter Rate>
  The 'rate' variable is the final rate used to determine the counter rate
  the target has. It is already given the value calculated from the target's
  CNT value plus any additional counter rate modifiers from the skill. This
  is calculated after the attacker's custom target counter rate.
For those with JavaScript proficiency, you can use the following Luantic
Mode notetags to give counter skills a custom counter condition. While you
can do the same with an Eval condition, this notetag is for those who prefer
to take control over everything at once.

Skill Notetags:

  <Custom Counter Condition>
   if (attacker.name() === 'Harold') {
     condition = true;
   } else if (defender.name() === 'Therese') {
     condition = true;
   } else {
     condition = false;
   }
  </Custom Counter Condition>
  The 'condition' variable determines whether or not the counter skill will
  pass or fail. If the 'condition' variable returns 'true', the condition is
  met. If the 'condition' variable returns 'false', the condition fails to
  be met. Once the condition is met, the rest of the <Counter Condition>
  conditions will be checked.
Lunatic Pack - Action Beginning and End EffectsFor experienced users that know JavaScript and have RPG Maker MV 1.5.0+, you
can add new notetag effects that can be used by the plugin or alter the
effects of currently existing notetag effects from the plugin parameters
entry: Effect Code. It should look something like this:
---
// ---------
// Animation
// ---------
if (data.match(/ANIMATION[ ](\d+)/i)) {
var animationId = parseInt(RegExp.$1);
var mirror = data.match(/MIRROR/i);
if (data.match(/DELAY[ ](\d+)/i)) {
var delay = parseInt(RegExp.$1);
} else {
var delay = 0;
}
user.startAnimation(animationId, mirror, delay);
...
// -------------------------------
// Add new effects above this line
// -------------------------------
} else {
skip = true;
}
---
Here's what each of the variables used in this code bit refer to:
-------------------- ---------------------------------------------------
Variable: Refers to:
-------------------- ---------------------------------------------------
item The item being used by this action
skill The skill being used by this action
isItem Returns true if action is an item
isSkill Returns true if action is a skill
a Returns the action user
user Returns the action user
subject Returns the action user
b Returns the action's current target
target Returns the action's current target
s[x] Return switch x (true/false)
v[x] Return variable x's current value
user._result The current results for the user
target._result The current results for the target
userPreviousResult The results for the user before any changes
targetPreviousResult The results for the target before any changes
totalHpDamage The total amount of HP damage dealt this action
totalMpDamage The total amount of MP damage dealt this action
skip Default: false. If true, popups
---
If you need to revert the Effect Code back to its original state, delete the
plugin from your plugin manager list and then add it again. The code will be
back to default.
Weak Enemy PosesFor those with JavaScript experience, you can alter the pose used for an
enemy (static only, not animated) using these Lunatic Mode notetags:
Enemy Notetags:
<Custom Enemy Pose>
if (user.mpRate() >= 0.50) {
name = 'Scorpion';
hue = 180;
} else {
name = 'Spider';
}
</Custom Enemy Pose>
- The 'name' variable will refer to the filename used for the battler
image. The filename is case sensitive and must not include the file
extension. If the 'hue' variable is used, then that hue will be forced.
Otherwise, it will use the default hue of the enemy. The hue must be a
value between 0 and 360.
* NOTE: This applies only to static enemies and NOT animated enemies.
State Notetags:
<Custom Enemy Pose>
if (user.mpRate() >= 0.50) {
name = 'Scorpion';
hue = 180;
} else {
name = 'Spider';
}
</Custom Enemy Pose>
- When an enemy is afflicted with this state, the enemy would take on the
'name' image as long as that state is the highest priority state with a
forced enemy pose. The filename is case sensitive and must not include the
file extension. If the 'hue' variable is used, then that hue will be
forced. Otherwise, it will use the default hue of the enemy. The hue must
be a value between 0 and 360.
* NOTE: This applies only to static enemies and NOT animated enemies.
For the other variable to use:
defaultBattlerName
- This will be the default battler's name.
defaultBattlerHue
- This will be the default battler's hue.
Buffs & States Core
For those with an understanding of JavaScript, you can use these notetags to
give conditional turn modifiers when altering a target's buff/state turn
count. Follow the instructions below:

Skill and Item Notetags:

  <Custom stat Buff Turn>
   turn = 10;
   turn += user.agi;
  </Custom stat Buff Turn>
  Replace 'stat' with 'maxhp', 'maxmp', 'atk', 'def', 'mat', 'mdf', 'agi',
  or 'luk' without the quotes. Whatever the 'turn' variable returns is what
  the turn count will be set to for the stat buff.

  <Custom stat Debuff Turn>
   turn = 10;
   turn += user.agi;
  </Custom stat Debuff Turn>
  Replace 'stat' with 'maxhp', 'maxmp', 'atk', 'def', 'mat', 'mdf', 'agi',
  or 'luk' without the quotes. Whatever the 'turn' variable returns is what
  the turn count will be set to for the stat debuff.

  <Custom State X Turn>
   turn = 10;
   turn += user.agi;
  </Custom State X Turn>
  This alters the turn count for state x. Whatever the 'turn' variable
  returns is what the turn count will be set for state x.

  <Custom State name Turn>
   turn = 10;
   turn += user.agi;
  </Custom State name Turn>
  This alters the turn count for state 'name'. Whatever the 'turn' variable
  returns is what the turn count will be set for state 'name'. If you have
  multiple states in your database with the same name, priority will be
  given to the state with the highest ID.
For those with an understanding of JavaScript, you can use these notetags to
cause code to run at certain times.

Quick Reference:
  - Apply:        When a state is added.
  - Remove:       When a state is removed.
  - Leave:        When a state expires by reaching 0 turns.
  - Turn Start:   Whenever the battler's turn starts.
  - Action Start: Whenever the battler performs a new action.
  - Action End:   Whenever the battler finishes an action.
  - Regenerate:   Whenever the battler would regenerate HP/MP/TP.
  - Turn End:     Whenever the battler's turn ends.
  - Battle:       Whenever a battle is started.
  - Victory:      Whenever a battle is won. *Note1
  - Escape:       Whenever a battle is escaped. *Note1
  - Defeat:       Whenever a battle is lost. *Note1

*Note1: If the state is set to expire on battle end, the expiration will
occur before the custom effects would take place, meaning the effects will
not occur at all unless the expiration is set to off.

State Notetags:

--- Timing Effects ---

These effects specifically occur at certain intervals or timings.

  <Custom Apply Effect>
   code
   code
  </Custom Apply Effect>
  The code in between these notetags will run when the state is added onto
  a battler. The code will process after the state is actually applied.

  <Custom Remove Effect>
   code
   code
  </Custom Remove Effect>
  The code in between these notetags will run when the state is removed from
  a battler either manually or due to turn decay. The code will process
  after the state is actually removed but before <Custom Leave Effect>.

  <Custom Leave Effect>
   code
   code
  </Custom Leave Effect>
  The code in between these notetags will run when the state is removed from
  a battler due to turn decay. The code will process after the state is
  actually removed and after <Custom Remove Effect>.

  <Custom Turn Start Effect>
   code
   code
  </Custom Turn Start Effect>
  This requires YEP_BattleEngineCore. This effect will run at the start of
  each of the battler's turns. The code will process after all the other
  turn start effects have taken course.

  <Custom Action Start Effect>
   code
   code
  </Custom Action Start Effect>
  This effect will run at the start of each of the battler's actions. The
  code will process before the skill/item cost takes place.

  <Custom Action End Effect>
   code
   code
  </Custom Action End Effect>
  This effect will run at the end of each of the battler's actions. The
  code will process before the action end steps takes place.

  <Custom Regenerate Effect>
   code
   code
  </Custom Regenerate Effect>
  This effect will run whenever the battler would regenerate HP, MP, or TP.
  The code will process after all the other regenerate effects have ran.

  <Custom Turn End Effect>
   code
   code
  </Custom Turn End Effect>
  This effect will run at the end of each of the battler's turns. The code
  will process after all the other turn end effects have taken course.

  <Custom Battle Effect>
   code
   code
  </Custom Battle Effect>
  This effect will occur at the start of battle if the battler has the state
  already applied (usually through a passive state).

  <Custom Victory Effect>
   code
   code
  </Custom Victory Effect>
  This effect will occur at the end of battle if the party is victorious.
  This will only apply to the player's party. If this state can expire at
  the end of battle, this effect will not occur as state expiration will
  occur before this effect will happen.

  <Custom Escape Effect>
   code
   code
  </Custom Escape Effect>
  This effect will occur at the end of battle if the party has escaped.
  This will only apply to the player's party. If this state can expire at
  the end of battle, this effect will not occur as state expiration will
  occur before this effect will happen.

  <Custom Defeat Effect>
   code
   code
  </Custom Defeat Effect>
  This effect will occur at the end of battle if the party is defeated.
  This will only apply to the player's party. If this state can expire at
  the end of battle, this effect will not occur as state expiration will
  occur before this effect will happen.
For those with an understanding of JavaScript, you can use these notetags to
cause code to run during actions.

Quick Reference:
  Action Starts
  - Attacker: Initiate
  - Defender: Select
  Action Connects as a Success Hit, skip if Missed or Evaded
  - Attacker: Confirm
  - Defender: React
  Damage is Applied to the Defender
  - Defender: Respond
  - Attacker: Establish
  These occur regardless if the action is successfully hit.
  - Defender: Deselect
  - Attacker: Conclude

State Notetags:

--- On Action Effects ---

These effects specifically occur when the battler is a target of an action.

  <Custom Initiate Effect>
   code
   code
  </Custom Initiate Effect>
  This effect will run when the battler selects a target. This will occur
  before hit/miss/evade confirmation and damage execution. This effect will
  run before everything else has taken course.

  <Custom Select Effect>
   code
   code
  </Custom Select Effect>
  This effect will run when the battler is selected as a target. This will
  occur before hit/miss/evade confirmation and damage execution. This effect
  will run after <Custom Initiate Effect> before everything else has ran.

  <Custom Confirm Effect>
   code
   code
  </Custom Confirm Effect>
  This effect will run when the battler connects a hit and before damage
  execution occurs. This effect will run after <Custom Initiate Effect> and
  <Custom Select Effect> and before everything else.

  <Custom React Effect>
   value -= 100;
   value -= user.def;
  </Custom React Effect>
  This effect will run when the battler is selected as a target. This will
  occur only if the action connects and will occur before damage execution.
  This effect will run before damage calculation occurs and will return the
  'value' variable as a damage modifier. After <Custom Confirm Effect>, this
  effect will run.

  <Custom Respond Effect>
   code
   code
  </Custom Respond Effect>
  This effect will run when the battler is selected as a target. This will
  occur only if the action connects and will occur after damage execution.
  This effect will run after damage calculation occurs. The 'value' variable
  is equal to the damage dealt to the battler. This is the first effect to
  run after damage execution has taken place.

  <Custom Establish Effect>
   code
   code
  </Custom Establish Effect>
  This effect will run when the battler connects a hit and after damage
  execution occurs. This effect will run after <Custom Respond Effect> has
  occurred and before everything else.

  <Custom Deselect Effect>
   code
   code
  </Custom Deselect Effect>
  This effect will run when the battler is selected as a target. This will
  occur after hit/miss/evade confirmation and damage execution. This effect
  will run after everything else has taken course.

  <Custom Conclude Effect>
   code
   code
  </Custom Conclude Effect>
  This is the final effect to be run after the battler selects a target and
  will occur after hit/miss/evade confirmation and damage execution.
State Counters are newly added features to suplement states. They are used
purely in custom manners, which means they do not serve any function by
themselves. State Counters can be used to note a number of stacks, a stored
percentage, display a message, etc. All of it is purely updated based on
JavaScript functions.

---

There are a couple of notetags you can use for states:

  <Counter Font Size: x>
  This adjusts the font size of the counter.

  <Counter Alignment: left>
  <Counter Alignment: center>
  <Counter Alignment: right>
  This changes the alignment of the counter text.

  <Counter Buffer X: +x>
  <Counter Buffer X: -x>
  This adjusts the X buffer range for the counter text.

  <Counter Buffer Y: +x>
  <Counter Buffer Y: -x>
  This adjusts the Y buffer range for the counter text.

  <Counter Text Color: x>
  This changes the font color of the text to the text color x.

---

The following are JavaScript functions you may use to adjust counters:

  battler.clearStateCounters();
  - This will clear all the counter values for all states.

  battler.setStateCounter(stateId, value);
  - This will set the counter value for the particular state to 'value'.

  battler.addStateCounter(stateId, value);
  - This will add to the counter value for the state. The counter must be
  a number in order for this to work.

  battler.clampStateCounter(stateId, min, max);
  - This will set a minimum and maximum value for the counter value of the
  particular state. The counter must be a number in order for this to work.

  battler.removeStateCounter(stateId)
  - This will clear the counter value for the state.

  battler.getStateCounter(stateId)
  - This will return the current state counter value.
Extended Damage Over TimeFor those with JavaScript experience and would like to create more complex
formulas for custom damage/healing over time states, you can use these
following notetags below.
State Notetags:
---
<Custom DoT Formula>
if (a.isActor()) {
value = a.level * 100;
variance = 20;
element = 1;
} else {
value = a.hp / 50;
variance = 10;
element = 2;
}
</Custom DoT Formula>
- The damage to be dealt will be equal to the 'value'. This is the base
damage dealt primarily by the formula alone. The finalized damage to be
dealt will be affected by the 'variance' and 'element' values, which can
be changed within this formula, too. If 'variance' or 'element' are left
out of the formula, they will take on their default values. If you are
going to make a healing effect, use the notetag below this one.
---
<Custom Regen Formula>
if (a.isActor()) {
value = a.level * 8;
variance = 15;
element = 3;
} else {
value = a.hp / 2;
variance = 5;
element = 4;
}
</Custom Regen Formula>
- The healing to be dealt will be equal to the 'value'. This is the base
heal dealt primarily by the formula alone. The finalized healing to be
dealt will be affected by the 'variance' and 'element' values, which can
be changed within this formula, too. If 'variance' or 'element' are left
out of the formula, they will take on their default values. If you are
going to make a damaging effect, use the notetag above this one.
Lunatic Pack - State ProtectionFor experienced users that know JavaScript and have RPG Maker MV 1.5.0+, you
can add new notetag effects that can be used by the plugin or alter the
effects of currently existing notetag effects from the plugin parameters
entry: Effect Code. It should look something like this:
---
// ----------------
// Damage Reduction
// ----------------
if (data.match(/DAMAGE CUT[ ](\d+)([%%])/i)) {
rate = parseFloat(RegExp.$1) * 0.01;
blocked = originalValue * rate;
value -= blocked;
value = Math.max(value, 0);
} else if (data.match(/DAMAGE BLOCK[ ]([\+\-]\d+)/i)) {
blocked = parseInt(RegExp.$1);
value -= blocked;
value = Math.max(value, 0);
...
// -------------------------------
// Add new effects above this line
// -------------------------------
} else {
skip = true;
}
---
Here's what each of the variables used in this code bit refer to:
-------------------- ---------------------------------------------------
Variable: Refers to:
-------------------- ---------------------------------------------------
state The state this effect belongs to
stateId The state ID this effect belongs to
value The HP/MP damage being affected by this effect. Any
changes made to this value will be permanent unless
the effect is skipped.
originalValue The original HP/MP damage before any of the protect
state effects have been applied.
item The item being used by this action
skill The skill being used by this action
isItem Returns true if action is an item
isSkill Returns true if action is a skill
a Returns the action user
user Returns the action user
subject Returns the action user
b Returns the action's current target
target Returns the action's current target
s[x] Return switch x (true/false)
v[x] Return variable x's current value
user._result The current results for the user
target._result The current results for the target
userPreviousResult The results for the user before any changes
targetPreviousResult The results for the target before any changes
animation The animation to be played.
triggered Returns if any of this state's protection effects
have been triggered (true) or not (false)
skip Default: false. If true, skips popups & animations
---
If you need to revert the Effect Code back to its original state, delete the
plugin from your plugin manager list and then add it again. The code will be
back to default.
State Categories
For those with JavaScript experience and would like to remove a dynamic
number of states of a pertaining category, you can do so with the following
notetags!

Skill and Item Notetags:

  <Custom Remove State Category: text>
   value += user.level;
   value -= target.level;
  </Custom Remove State Category: text>
  The 'value' variable is the amount of states to be removed by the action.
  If there was a <Remove x State Category: text> in the skill/item notebox,
  then the 'value' variable will start off with that amount. If not, the
  'value' variable will start off at 1.
Common Event Menu
For those with JavaScript experience, you can use the following comment tags
for your common events to be enabled or disabled:

Common Event Comment Tags:

  <Menu Enable Eval>
   if ($gameSwitches.value(10)) {
     enabled = true;
   } else {
     enabled = false;
   }
  </Menu Enable Eval>
  - The 'enabled' variable determines if the common event can be selected or
  not. In the example above, Switch 10 needs to be ON in order for this
  common event to be selected.
For those with JavaScript experience, you can use the following comment tags
for your common events to be shown or hidden:

Common Event Comment Tags:

  <Menu Visible Eval>
   if ($gameSwitches.value(20)) {
     visible = true;
   } else {
     visible = false;
   }
  </Menu Visible Eval>
  - The 'visible' variable determines if the common event is shown or hidden
  in the common event menu list. In the example above, Switch 20 needs to be
  ON in order for this common event to be visible and shown.
Damage Core
For those who think the damage formula box is too small and would like to
use the notebox instead to declare the damage formula, you can use the
notetags below:

Skill and Item Notetags:
  <damage formula>
   value = 500;
   value += 2500;
  </damage formula>
  This will overwrite the damage formula found at the top and use the
  strings in the middle as the formula instead. Keep in mind that using
  comments here will cancel out anything following after. New variables can
  be used, too, to make damage calculations a bit easier.

  value   - Refers to the amount that will become the base damage value.
  user    - Refers to the actor/enemy using the skill/item.
  subject - Refers to the actor/enemy using the skill/item.
  target  - Refers to the target actor/enemy on the receiving end of
            the skill/item.
The damage formula isn't all there is to calculating the damage that appears
at the very end. In this plugin's parameters towards the bottom, you'll see
a large list of Damage Steps. Each one of these steps is a line of code that
the damage count will run through in order to calculate and finalize the
damage output.

The purpose of those parameters is to allow you ease of access on where you
want to insert code that is your own or custom code provided by another
plugin. Here's a quick reference on how the original damage flow looked like:

Game_Action.prototype.makeDamageValue = function(target, critical) {
    var item = this.item();
    var baseDamage = this.evalDamageFormula(target);
    var value = baseDamage * this.calcElementRate(target);
    if (this.isPhysical()) {
        value *= target.pdr;
    }
    if (this.isMagical()) {
        value *= target.mdr;
    }
    if (baseDamage < 0) {
        value *= target.rec;
    }
    if (critical) {
        value = this.applyCritical(value);
    }
    value = this.applyVariance(value, item.damage.variance);
    value = this.applyGuard(value, target);
    value = Math.round(value);
    return value;
};

In the vein of keeping everything organized, the following lines have been
incorporated into new functions:

Formula                               New Function
  value *= target.pdr                   value = this.applyPhysicalRate
  value *= target.mdr                   value = this.applyMagicalRate
  value *= target.rec                   value = this.applyHealRate
  value = this.applyCritical(value)     value = this.applyCriticalRate
Armor ScalingFor those with some JavaScript experience, you can make use of Lunatic Mode to calculate the way you want armor scaling done for particular skills and items right within the notebox! <Positive Armor Rate> value *= 100; value /= 100 + armor; </Positive Armor Rate> This enables you to set a custom positive armor calculation rate for the skill/item instead of using the default positive armor rate. <Negative Armor Rate> value *= 2 - (100 / (100 - armor)); value *= 1.5; </Negative Armor Rate> This enables you to set a custom negative armor calculation rate for the skill/item instead of using the default positive armor rate. <Base Armor> armor = target.def; armor -= user.atk / 4; </Base Armor> This enables you to set a custom way for the skill/item to calculate the base armor value used for armor scaling. Critical ControlFor those with a bit of JavaScript experience, you can create more in-depth formulas for critical hits for individual skills. Skill and Item Notetags: <Critical Rate Formula> rate = user.cri + 0.2; rate -= 1 - target.cev; </Critical Rate Formula> This adjusts the critical hit success rate for the skill/item. You can use multiplie lines to write out the formula, and 'rate' will be the success rate used to determine the skill's critical success rate. *Note: Using this tag sets the skill/item to enable Critical Hits. <Critical Multiplier Formula> value *= 3.0 + bonus; value *= $gameVariables.value(1) * 0.01; </Critical Multiplier Formula> This adjusts the critical multiplier formula for the skill/item. You can use multiple lines to write out the formula, and 'value' will be the amount of damage adjusted for the critical multiplier. *Note: Using this tag sets the skill/item to enable Critical Hits. <Flat Critical Formula> value += 1.5 * user.luk + bonus; value -= 0.75 * target.luk; </Flat Critical Formula> This adjusts the flat critical formula for the skill/item if you wish for there to be one. This is primarily used for a flat increase in critical damage and is usually applied after all other applied multipliers. *Note: Remember to use a negative number for heals. *Note: Using this tag sets the skill/item to enable Critical Hits. Lunatic Pack - Critical SwayFor experienced users that know JavaScript and have RPG Maker MV 1.5.0+, you
can add new notetag effects that can be used by the plugin or alter the
effects of currently existing notetag effects from the plugin parameters
entry: Effect Code. It should look something like this:
---
// ---------------
// User Param Rate
// ---------------
if (data.match(/(.*)[ ]PRIDE[ ](\d+)([%%])/i)) {
var param = String(RegExp.$1).toUpperCase();
var modifier = parseFloat(RegExp.$2) * 0.01;
if (param === 'HP') {
var paramRate = user.hpRate();
if (nonstack) {
stackCheck = this._stackHpPride;
this._stackHpPride = true;
}
} else if (param === 'MP') {
var paramRate = user.mpRate();
if (nonstack) {
stackCheck = this._stackMpPride;
this._stackMpPride = true;
}
} else if (param === 'TP') {
var paramRate = user.tpRate();
if (nonstack) {
stackCheck = this._stackTpPride;
this._stackTpPride = true;
}
} else {
skip = true;
}
rate += paramRate * modifier;
...
// -------------------------------
// Add new effects above this line
// -------------------------------
} else {
skip = true;
}
---
Here's what each of the variables used in this code bit refer to:
-------------------- ---------------------------------------------------
Variable: Refers to:
-------------------- ---------------------------------------------------
rate The current critical hit rate to be returned
item The item being used by this action
skill The skill being used by this action
isItem Returns true if action is an item
isSkill Returns true if action is a skill
a Returns the action user
user Returns the action user
subject Returns the action user
b Returns the action's current target
target Returns the action's current target
s[x] Return switch x (true/false)
v[x] Return variable x's current value
user._result The current results for the user
target._result The current results for the target
userPreviousResult The results for the user before any changes
targetPreviousResult The results for the target before any changes
nonstack Returns if effect's nonstacking or not (true/false)
stackCheck If true, it will autoskip the current effect
skip Default: false. If true, returns the previous rate
---
If you need to revert the Effect Code back to its original state, delete the
plugin from your plugin manager list and then add it again. The code will be
back to default.
Enemy Levels
For those with JavaScript experience, you can have enemies have conditional
starting levels. Place these Lunatic Mode notetags into the enemy notebox:

Enemy Notetags:

  <Custom Starting Level>
   level = $gameActors.actor(1).level + 5;
  </Custom Starting Level>
  The 'level' variable will become the enemy's starting level. This level is
  still affected by the enemy's minimum and maximum starting level barriers.
  After the starting levels are decided, it will still be affected by the
  random level fluctuation.
For those with JavaScript experience, you can have different formulas for
the ways parameters are calculated in regards to the enemy's level. Use the
notetags below:

Enemy Notetags:

  <Custom Parameter stat Formula>
   base * (1 + (level - 1) * rate) + (flat * (level - 1))
  </Custom Parameter stat Formula>
  Replace 'stat' with 'maxhp', 'maxmp', 'atk', 'def', 'mat', 'mdf', 'agi',
  'luk', 'exp', or 'gold'. Whatever is calculated for the formula on the
  last line will become the parameter value for the stat.
For those with JavaScript experience and would like to have more dynamic
ways of altering enemy levels instead of flat values, you can use these
notetags to do so:

Skill and Item Notetags:

  <Custom Change Enemy Level>
   level += user.atk;
   level -= target.agi;
  </Custom Change Enemy Level>
  The 'level' variable will be the enemy's current level. Any changes made
  to the 'level' variable will be what the enemy's level will become after
  this effect finishes taking place. If the skill has a reset level effect,
  it is applied first. If the skill has a flat level changing effect, that
  effect is applied next. After those two effects are applied, this custom
  enemy level change will take place.
Enemy Base Parameters
If your formulas are short and simple, you can use this notetag to cover the
entire formula list for all of the base parameters:

Enemy Notetag:

  <Custom Enemy Parameters>
   maxhp = level * 30 + 300;
   maxmp = level * 20 + 150;
   atk = level * 15 + 15;
   def = level * 11 + 16;
   mat = level * 12 + 14;
   mdf = level * 10 + 13;
   agi = level * 14 + 15;
   luk = level * 13 + 12;
   exp = level * 100;
   gold = level * 100;
  </Custom Enemy Parameters>
  The 'maxhp', 'maxmp', 'atk', 'def', 'mat', 'mdf', 'agi', 'luk', 'exp', or
  'gold' variables each refer to their own individual stats. The 'level'
  variable refers to the enemy's current level. The formula can be made any
  way you like as long as it returns a legal number.
  * Note: The 'exp' and 'gold' values here return the amount of experience
  points and gold the enemy gives when it dies.
For those who wish to put a bit more detail in calculating the formula for
each stat, you can use the following notetag setup:

Enemy Notetags:

  <Custom Base Param Formula>
   if (this.name() === 'Slime') {
     value = level * 30 + 300;
   } else {
     value = level * 25 + 250;
   }
  </Custom Base Param Formula>
  Replace 'Param' with 'maxhp', 'maxmp', 'atk', 'def', 'mat', 'mdf', 'agi',
  'luk', 'exp', or 'gold'. The 'value' variable is the final result that's
  returned to count as the base enemy parameter. The 'level' variable refers
  to the enemy's current level. The formula can be made any way you like as
  long as it returns a legal number.
  * Note: The 'exp' and 'gold' values here return the amount of experience
  points and gold the enemy gives when it dies.
Equip Core<Custom Parameters> Example: <Custom Parameters> code atk = $gameVariables.value(1); code mat = atk / 2; code all = $gameParty.members().length; code </Custom Parameters> </Code Parameters> Allows for parameters to have custom rates adjusted by code. The following parameters are defined: 'maxhp', 'maxmp', 'atk', 'def', 'mat', 'mdf', 'agi', 'luk', and 'all'. The 'all' parameter will affect all parameters. Changes made here do not alter the base parameters, but instead, are added onto the base parameters. Equip Requirements
For those with JavaScript proficiency, you can use these notetags to give
certain pieces of equipment a special requirement before it can be equipped.

Weapon and Armor Notetags:

  <Custom Equip Requirement Condition>
   if (user.name() === 'Harold') {
     condition = true;
   } else {
     condition = false;
   }
  </Custom Equip Requirement Condition>
  The 'condition' variable will determine whether or not the piece of
  equipment can be worn by the user. If 'condition' returns 'true', then the
  piece of equipment can be worn. If 'condition' returns 'false', then the
  piece of equipment can't be worn.
For those with JavaScript proficiency, you can use these notetags to alter
the text displayed in the Requirement Window.

Weapon and Armor Notetags:

  <Custom Equip Requirement Text>
   text = user.name() + ' has used this sword since young!\n';
   text += 'This is another line for the text!'
  </Custom Equip Requirement Text>
  For those who would like to write custom text for the Requirement Window,
  you can use this notetag. Text codes are allowed here. Use \n for line
  breaks. If you plan on using text codes, \i[4] would appear as \\i[4].
  Whatever value the 'text' variable has at the end will determine the text
  that will be displayed.
Event Copier
Lunatic Mode requires version 1.5.0+ of RPG Maker MV.

For those with JavaScript experience, you can throw in your own custom code
to run upon the loading of a copied event. This can be found in the plugin's
parameters 'PreCopy Code' and 'PostCopy Code'.

If you are using Template Names, you can add in 'PreCopy Code' and
'PostCopy Code' unique to that template.

For Lunatic Mode, there are some unique variables that you can alter.
They are the following:

- - - - - - - - - - - - - - - - - - - - - - - - - - - - - - - - - - - - - -
PreCopy Codes
- - - - - - - - - - - - - - - - - - - - - - - - - - - - - - - - - - - - - -

 Variables      Description

     mapId      ID of the map to be loaded.
   eventId      ID of the event to be loaded.
    target      The event before it's copied over.
    player      The player character.

Making changes to 'mapId' or 'eventId' will change the data that will be
loaded for the target. However, if 'mapId' is changed, you must make sure
that the map it's being changed to is already preloaded or else the event
will fail to be copied properly.

- - - - - - - - - - - - - - - - - - - - - - - - - - - - - - - - - - - - - -
PostCopy Codes
- - - - - - - - - - - - - - - - - - - - - - - - - - - - - - - - - - - - - -

 Variables      Description

    target      The loaded event after copied over.
    player      The player character.

While the 'mapId' and 'eventId' variables are available, they cannot be
changed and make an impact. You can, however, use them as a conditional
check to determine what to do with the target event or player.
Event Timer ControlFor experienced users that know JavaScript and have RPG Maker MV 1.5.0+, you
can add new plugin commands for this plugin or alter the code of currently
existing plugin commands from the plugin parameters entry: Effect Code.
It should look something like this:
---
// ------------
// Pause/Resume
// ------------
if (data.match(/PAUSE/i)) {
$gameTimer.pause();
} else if (data.match(/RESUME/i)) {
$gameTimer.resume();
...
// --------------------------------
// Add new commands above this data
// --------------------------------
} else {
// Do nothing
}
---
The 'data' variable refers to the rest of the Plugin Command after the
'EventTimer' keyword. For example:
EventTimer Increase 2 Hours, 30 Minutes, 15 Seconds
The 'data' would be 'Increase 2 Hours, 30 Minutes, 15 Seconds' and thus, the
string 'data' is used when checking lines in the 'Effect Code' parameter.
---
If you need to revert the Effect Code back to its original state, delete the
plugin from your plugin manager list and then add it again. The code will be
back to default.
Floor DamageFor those with JavaScript experience, you can make certain terrain tags deal custom amounts of damage to your actors. Tileset Notetag: <Custom Floor Damage x> value = actor.level; </Custom Floor Damage x> - 'x' is the terrain tag to mark the tileset with. By default, terrain tags are set to 0. They will go up as high as 7. 'y' will be the amount of damage dealt to each actor in the party. 'value' is the final damage value that will be added upon the <Floor Damage x: y> value. 'actor' will refer to the actor being damaged currently. Instant CastIn the event you wish to have an action be dynamic in whether or not it is an instant cast, you can use this notetag setup: Skill and Item Notetags: <Instant Eval> code code </Instant Eval> The code can be anything. However, what you want to define is the variable 'instant' to be true or false. 'instant = true' means the action will be instant cast while 'instant = false' means the action will not. If the variable 'instant' comes to no conclusion, it will resume like normal to determine instant properties via other modifiers. It is recommended to use an if/else statement with this notetag. *Note: This will take priority over <Cancel Instant> notetags. This is the only exception to the rule, but only because it can function as its own <Cancel Instant> if done in such a way. Example: <Instant Eval> if (user.atk >= 300) instant = true; </Instant Eval> In the above example, if the user's ATK value is equal to or greater than the value of 300, the action with this notetag will be considered to have instant cast properties. Item Core
For those with JavaScript experience, you can use the following Lunatic Mode
to run JavaScript code upon the creation of the item. This only applies to
newly made independent items.

Item, Weapon, Armor

  <On Creation Eval>
   item.price = baseItem.price;
   item.price += Math.floor(Random() * 100);
  </On Creation Eval>
  The 'item' variable refers to the independent item being made. 'baseItem'
  refers to the item's base item. Any alterations made to the 'item' will be
  applied to the independent item.
If you want to display unique and custom stuff into your info window on the
side, you can use the following notetags:

  <Info Text Top>
   text
   text
  </Info Text Top>
  Type in extra information you wish to type in for the item info window
  here, whether it is lore or other information. Text codes can be used.
  Information here is is displayed towards the top of the info window.

  <Info Text Bottom>
   text
   text
  </Info Text Bottom>
  Type in extra information you wish to type in for the item info window
  here, whether it is lore or other information. Text codes can be used.
  Information here is is displayed towards the bottom of the info window.

  <Info Eval>
   var variableId = 1;
   var value = 500;
   $gameVariables.setValue(variableId, value);
  </Info Eval>
  If you know JavaScript, you can use these notetags to run some code before
  displaying any new info. This way, if you plan on using text codes that
  display variable values, you can run a bit of code before displaying them
  to synch up what's shown in the item info window.
Attachable Augments
For those with JavaScript experience, you can use the following Lunatic Mode
notetags to make custom effects regarding the attaching and detaching of
certain augments.

--- Attach ---

<Augment Attach Eval: type>
 item.price += $gameParty.highestLevel();
 item.params[0] += $gameParty.highestLevel();
</Augment Attach Eval: type>
The 'type' refers to the slot type used for the augment. The 'item' variable
refers to the main item being augmented. The 'effectItem' variable refers to
the item being used as an augment component. This eval will only run when
the augment is being attached.

--- Detach ---

<Augment Detach Eval: type>
 item.price -= $gameParty.highestLevel();
 item.params[0] -= $gameParty.highestLevel();
</Augment Detach Eval: type>
The 'type' refers to the slot type used for the augment. The 'item' variable
refers to the main item being augmented. The 'effectItem' variable refers to
the item being used as an augment component. This eval will only run when
the augment is being attached.
Item Disassemble
For those with JavaScript experience, you can have custom effects occur when
an item is disassembled using the following notetag:

Item, Weapon, and Armor Notetags:

  <Custom Disassembled Effect>
   if (targetItem.name === 'Great Sword') {
     results.push($dataItems[1]);
   } else if (effectItem.name === 'Salvage Kit') {
     results.push($dataItems[2]);
   }
  </Custom Disassembled Effect>
  - The 'results' variable is an array that contains all of the items that
  have been collected. The variable 'targetItem' refers to the item being
  disassembled and 'effectItem' refers to the item disassembling the target
  item. This will occur before any custom disassembler effects.
  *NOTE: This requires that item to have items to gain when disassembling to
  begin with or else the item cannot be disassembled.
For those with JavaScript experience, you can have custom effects occur when
an item is used to disassemble using the following notetag:

Item, Weapon, and Armor Notetags:

  <Custom Disassembler Effect>
   if (targetItem.name === 'Great Sword') {
     results.push($dataItems[1]);
   } else if (effectItem.name === 'Salvage Kit') {
     results.push($dataItems[2]);
   }
  </Custom Disassembler Effect>
  - The 'results' variable is an array that contains all of the items that
  have been collected. The variable 'targetItem' refers to the item being
  disassembled and 'effectItem' refers to the item disassembling the target
  item. This will occur after any custom disassembled effects.
  *NOTE: This item is required to have a disassembler type.
Item Durability
For those with JavaScript proficiency, you can use this notetag to have your
weapons and/or armors produce special effects when they break.

Weapon and Armor Notetags:

  <Custom Break Effect>
   var newItem = $dataitems[1];
   $gameParty.gainItem(newItem, 1);
  </Custom Break Effect>
  This effect will only occur if the item breaks as a result of durability
  reaching 0 or lower from an action.
For those with JavaScript proficiency, you can use this notetag to have your
repair item perform a custom effect when it is used to repair a piece of
equipment.

Item, Weapon, and Armor Notetags:

  <Custom Repair Effect>
   item.price += 200;
  </Custom Repair Effect>
  The 'item' variable refers to the item being repaired. Any changes made to
  it will be saved for the independent item.
For those with JavaScript proficiency, you can use these notetags to have
your skill and item actions alter the target's equipment durability.

Skill and Item Notetags:

  ---

  <Custom User All Weapon Durability>
   value -= user.atk;
  </Custom User All Weapon Durability>

  <Custom User Random Weapon Durability>
   value -= user.atk;
  </Custom User Random Weapon Durability>

  <Custom User All Armor Durability>
   value -= user.atk;
  </Custom User All Armor Durability>

  <Custom User Random Armor Durability>
   value -= user.atk;
  </Custom User Random Armor Durability>
  The 'value' variable determines how to affect the user's weapon/armor. If
  'value' is negative, durability will drop. If 'value' is positive, then
  durability will increase. If the user's equipment reaches 0 or lower,
  the equipment will break.

  ---

  <Custom Target All Weapon Durability>
   value -= user.atk;
  </Custom Target All Weapon Durability>

  <Custom Target Random Weapon Durability>
   value -= user.atk;
  </Custom Target Random Weapon Durability>

  <Custom Target All Armor Durability>
   value -= user.atk;
  </Custom Target All Armor Durability>

  <Custom Target Random Armor Durability>
   value -= user.atk;
  </Custom Target Random Armor Durability>
  The 'value' variable determines how to affect the target's weapon/armor.
  If 'value' is negative, durability will drop. If 'value' is positive, then
  durability will increase. If the target's equipment reaches 0 or lower,
  the equipment will break.
Item RequirementsFor those with JavaScript experience, you can create your own custom requirements for whether or not items can be used using the following notetag setup: Item Notetags: <Custom Enable Requirement> condition = battler.level >= item.price; </Custom Enable Requirement> - The 'condition' variable will determine whether or not the item will be enabled/disabled. If the 'condition' variable returns true, then the item is enabled provided all other conditions (if any) are also met. Otherwise, the item is disabled and cannot be used. The 'battler' variable will refer to the battler using the item. The 'item' variable will refer to the item being checked. Item SynthesisFor those with a JavaScript experience, you can use these notetags to make a custom effect that will occur when a specific item is synthesized. For example, when a Potion is made, you can give the player an empty bottle as a side product of the synthesis. --- Item, Weapon, and Armor Notetags: <Custom Synthesis Effect> var bottle = $dataItems[123]; $gameParty.gainItem(bottle, 2); </Custom Synthesis Effect> For this notetag, the 'item' variable will refer to the item being synthesized. Changing it will do nothing but it will be used as a convenience variable to refer to it. --- Level Up Growth EffectsFor those with JavaScript experience, you can make custom effects occur upon
leveling up as well using these notetags:
Actor, Class, Skill, Weapon, Armor, State Notetags:
<Custom Level Up Effect>
code
code
</Custom Level Up Effect>
- Replace 'code' with the code you wish to run inside the notetags.
--- Example ---
<Custom Level Up Effect>
var heal = actor.mdf;
actor.gainHp(heal);
</Custom Level Up Effect>
- Upon leveling up, this will make the actor heal HP equal to the actor's
current MDF parameter.
--- Example ---
<Custom Level Up Effect>
if (actor.level >= 50) {
var keepExp = true;
actor.changeClass(5, keepExp);
}
</Custom Level Up Effect>
- If actor's level has exceeded level 50, then the actor will class change
into class ID 5.
--- Example ---
<Custom Level Up Effect>
if (actor.level >= 25) {
// Change sprite
var characterName = 'Actor1';
var characterIndex = 0;
actor.setCharacterImage(characterName, characterIndex);
// Change Face
var faceName = 'Actor1';
var faceIndex = 0;
actor.setFaceImage(faceName, faceIndex);
// Change SV Battler
var battlerName = 'Actor1_1';
actor.setBattlerImage(battlerName);
// Refresh Actor
actor.refresh();
}
</Custom Level Up Effect>
- If actor's level has exceeded level 25, then the actor's map sprite,
face graphic, and sideview battler will change into something else.
Life StealFor those with JavaScript proficiency, you can utilize these notetags to have your various database objects have dynamic Life Steal values. --- Skill and Item Notetags --- <Custom HP Life Steal Rate> rate = user.hpRate(); </Custom HP Life Steal Rate> <Custom MP Life Steal Rate> rate = user.hpRate(); </Custom MP Life Steal Rate> The 'rate' variable is the amount of HP/MP that the skill/item will life steal from the target based on the damage dealt to the target. This is a percentile value. --- --- --- <Custom HP Life Steal Flat> flat = user.mhp; </Custom HP Life Steal Flat> <Custom MP Life Steal Flat> flat = user.mhp; </Custom MP Life Steal Flat> The 'flat' variable is the amount of HP/MP that the skill/item will life steal from the target based on the damage dealt to the target. This is a flat value. --- Actor, Class, Enemy, Weapon, Armor, State Notetags --- <Custom HP Life Steal Physical Rate> rate = user.hpRate(); </Custom HP Life Steal Physical Rate> <Custom HP Life Steal Magical Rate> rate = user.hpRate(); </Custom HP Life Steal Magical Rate> <Custom HP Life Steal Certain Rate> rate = user.hpRate(); </Custom HP Life Steal Certain Rate> <Custom MP Life Steal Physical Rate> rate = user.hpRate(); </Custom MP Life Steal Physical Rate> <Custom MP Life Steal Magical Rate> rate = user.hpRate(); </Custom MP Life Steal Magical Rate> <Custom MP Life Steal Certain Rate> rate = user.hpRate(); </Custom MP Life Steal Certain Rate> The 'rate' variable is the bonus amount of multiplicative rate the related user will life steal HP/MP from its target relative to the damage dealt. This is a percentile value and stacks multiplicatively. --- --- --- <Custom HP Life Steal Physical Flat> flat = user.mhp; </Custom HP Life Steal Physical Flat> <Custom HP Life Steal Magical Flat> flat = user.mhp; </Custom HP Life Steal Magical Flat> <Custom HP Life Steal Certain Flat> flat = user.mhp; </Custom HP Life Steal Certain Flat> <Custom MP Life Steal Physical Flat> flat = user.mhp; </Custom MP Life Steal Physical Flat> <Custom MP Life Steal Magical Flat> flat = user.mhp; </Custom MP Life Steal Magical Flat> <Custom MP Life Steal Certain Flat> flat = user.mhp; </Custom MP Life Steal Certain Flat> The 'flat' variable is the bonus amount of flat bonus the related user will life steal HP/MP from its target relative to the damage dealt. This is a flat bonus value and stacks additively. Message CoreExtended Message Pack 2For those with JavaScript experience and would like to customize the way the text codes provided by this plugin behave, you can alter the code used for each of the text codes within the plugin parameters. Inside the plugin parameters exist the code used when each text code is being converted by the in-game message functions. Refer to the variables displayed in the comments at the top of each code to understand which of the variables are being used and how they're being used. By default: x - Refers to the x variable being inserted into the text code. This can be a number or string, depending on the text code. y - Refers to the y variable being inserted into the text code. This can be a number of string, depending on the text code. text - Refers to the text that will be displayed by the message system. This is what will appear as the final result for using the said text code. Overkill BonusThis section is for those who wish to dabble with JavaScript a bit more to make certain overkill aspects more customized. Enemy Notetags -------------------------------------------------------------------------- <Overkill Requirement Formula> requirement = x; <Overkill Requirement Formula> - Changes the enemy's overkill requirement to X. This is how much damage needs to be dealt minimum on the killing blow. You can use JS code here if you know how to code. The 'requirement' variable is the value that will be used to check if overkill is achieved. -------------------------------------------------------------------------- <Custom Overkill Effect> // Insert any code you want here </Custom Overkill Effect> - This code will run when the enemy is overkilled and collapses. The 'enemy' variable used here will refer to the enemy itself. The JS code you can use here can be anything you want, including turning on switches, setting variables, anything that comes to mind. -------------------------------------------------------------------------- Quest Journal SystemThe plugin parameter 'Lunatic Mode' is made for users who are familiar with
JavaScript. These parameters allow you to add additional lines of code to
their respective functions whenever the respective quest journal function
occurs in-game. The timing for them will occur after the function occurred
and only if it was successful in delivering a change.
---
Before Create Windows
After Create Windows
Close Quest Menu
---
Quest Add
Quest Remove
Quest Complete
Quest Fail
Quest Available
---
Change Description
---
Show Objective
Hide Objective
Complete Objective
Fail Objective
Normalize Objective
---
Show Reward
Hide Reward
Claim Reward
Deny Reward
Normalize Reward
---
Change Subtext
---
There are a few rules to note. The code for each of those plugin functions
will only run if it meets these rules:
1. The code will run for each quest or quest property changed. This means
that if you used a plugin command that alters a group of quests or
quest properties at once, the code will run multiple times individually
for each quest or quest property.
2. The code will only run if there has been successful changes to a quest
or quest property. For example, if a quest is already set to 'Failed',
running the plugin command to fail that quest again will not trigger
the Lunatic Mode code to run again.
3. When a quest is first added, any default properties added to the quest
will not trigger the Lunatic Mode to run. For example, if the quest
being added has objectives 1 and 2 already visible from the start, then
the Lunatic Mode code will not run for 1 and 2.
Make sure you understand these rules so that you know what governs whether
or not the custom code runs.
Recruiting Board
Those who understand JavaScript can customize the recruiting and retire process further using JavaScript code. The following are notetags that you may use to make your ideal recruiting and retiring process possible.
  <Custom Recruit Effect>
   JavaScript Code
   JavaScript Code
   JavaScript Code
  </Custom Recruit Effect>
  - Replace the JavaScript Code inside the notetags with JavaScript.
  This code will run once the actor is recruited.
  - 'actor' variable will refer to the actor being recruited.
<Custom Recruit Show> JavaScript Code JavaScript Code show = JavaScript Code </Custom Recruit Show> - Replace the JavaScript Code inside the notetags with JavaScript. This code will determine custom show requirements for the recruit list. - 'actor' variable will refer to the actor being recruited. - 'show' variable is a true/false that determines if the actor is listed. <Custom Recruit Enable> JavaScript Code JavaScript Code enable = JavaScript Code </Custom Recruit Enable> - Replace the JavaScript Code inside the notetags with JavaScript. This code will determine custom enable requirements for the recruit list. - 'actor' variable will refer to the actor being recruited. - 'enable' variable is a true/false that determines if recruiting is enabled.
  <Custom Retire Effect>
   JavaScript Code
   JavaScript Code
   JavaScript Code
  </Custom Retire Effect>
  - Replace the JavaScript Code inside the notetags with JavaScript.
  This code will run once the actor is retired.
  - 'actor' variable will refer to the actor being retired.
<Custom Retire Show> JavaScript Code JavaScript Code show = JavaScript Code </Custom Retire Show> - Replace the JavaScript Code inside the notetags with JavaScript. This code will determine custom show requirements for the retire list. - 'actor' variable will refer to the actor being retired. - 'show' variable is a true/false that determines if the actor is listed. <Custom Retire Enable> JavaScript Code JavaScript Code enable = JavaScript Code </Custom Retire Enable> - Replace the JavaScript Code inside the notetags with JavaScript. This code will determine custom enable requirements for the retire list. - 'actor' variable will refer to the actor being retired. - 'enable' variable is a true/false that determines if retiring is enabled. Row Formation
To the users who have a bit of JavaScript proficiency, you can use these
notetags to give your skills and items custom row modification properties.

Skill and Item Notetags

  <Custom Target Row>
   if (user.hpRate() > 0.50) {
     row += 1;
   } else {
     row = 1;
   }
  </Custom Target Row>
  The 'row' variable refers to the target's row. This will allow you to set
  or alter the target's row based on values. Remember that the lower the row
  number, the closer the target is to the opposing party.

  <Custom User Row>
   if (user.hpRate() > 0.50) {
     row += 1;
   } else {
     row = 1;
   }
  </Custom User Row>
  The 'row' variable refers to the user's row. This will allow you to set or
  alter the user's row based on values. Remember that the lower the row
  number, the closer the user is the the opposing party.
To the users who have a bit of JavaScript proficiency, you can use these
notetags to give your row states conditional activation properities, you can
use these notetags. These states have to be applied via the Row States in
the plugin parameters. However, they will not be applied to the battler
unless the conditions are met.

State Notetags:
  <Custom Row Condition>
  if (user.hp / user.mhp <= 0.25) {
    condition = true;
  } else {
    condition = false;
  }
  </Custom Row Condition>
  The 'condition' variable determines if the condition is met or not. If the
  condition is true, the condition is met and this state will be applied to
  the battler as a row state. If the 'condition' variable is false, then the
  row state will not be applied to the battler.
Skill Core
For users who want more control over skill costs and skill effects, there
exists notetags that allow you to apply code to the costs and/or effects of
a skill. For effects, this will also extend towards item control, as well.

  <Custom HP Cost>       Example: <Custom HP Cost>
   code                            cost += $gameVariables.value(1);
   code                           </Custom HP Cost>
  </Custom HP Cost>
  This allows the skill to have a custom HP cost based off of code. For the
  piece of code, 'cost' is a variable already predefined with the HP Cost
  and the HP percentage cost.

  <Custom MP Cost>       Example: <Custom MP Cost>
   code                            cost += $gameVariables.value(1);
   code                           </Custom MP Cost>
  </Custom MP Cost>
  This allows the skill to have a custom MP cost based off of code. For the
  piece of code, 'cost' is a variable already predefined with the MP Cost
  and the MP percentage cost.

  <Custom TP Cost>       Example: <Custom TP Cost>
   code                            cost += $gameVariables.value(1);
   code                           </Custom TP Cost>
  </Custom TP Cost>
  This allows the skill to have a custom TP cost based off of code. For the
  piece of code, 'cost' is a variable already predefined with the TP Cost
  and the TP percentage cost.
For those who would like to show certain skills and disable them under any
custom conditions using their JavaScript knowledge, use the following:

Skill Notetag:
  <Custom Show Eval>
  if (user.level > 50) {
    visible = true;
  } else {
    visible = false;
  }
  </Custom Show Eval>
  If the visible is set to true, the skill is shown (not hidden) and enabled
  if all other conditions are met. If visible is set to false, the skill is
  disabled and hidden from the list.
For those with a bit of JavaScript experience, you can use the following
notetags to restrict a skill and what kind of code to process when executing
the said skill.

Skill Notetags:

  <Custom Requirement>
   if ($gameParty.gold() > 1000) {
     value = true;
   } else {
     value = false;
   }
  </Custom Requirement>
  If value is set to true, the skill will be useable provided that all other
  requirements have been met. If the value is set to false, the skill won't
  be useable.

  <Custom Execution>
   $gameParty.loseGold(1000);
  </Custom Execution>
  This runs the code between the notetags upon using the skill.
For those with a bit of JavaScript experience, you can add new ways to
display the skill cost.

Skill Notetags:

  <Cost Display Eval>
   var variableId = 1;
   var value = 1000;
   $gameVariables.setValue(variableId, value);
  </Cost Display Eval>
  This notetag runs an eval before displaying the skill's cost. This is so
  you can set up variables and whatnot for your skill cost display text.

  <Custom Cost Display>
   \c[4]\v[1]\c[0] Gold
  </Custom Cost Display>
  This is the custom text displayed before the rest of the skill costs. You
  can use text codes with this notetag.
For this skill, multiple effects are applied and at different phases. The
various phases are as follows:

   Before Effect Phase (influenced by this plugin)
   if skill successfully lands:
   - Pre-Damage Effect Phase (influenced by this plugin)
   - Damage Phase
   - Post-Damage Effect Phase (influenced by this plugin)
   - Item Trait Effects Phase
   After Effect Phase (influenced by this plugin)

There's four phases which can be influenced by this plugin. Two of which do
not matter if the effect successfully lands or not, two of which do matter
if the skill does land.

Skill and Item Notetags:
  <Before Eval>
   code
   code
  </Before Eval>

  <Pre-Damage Eval>
   code
   code
  </Pre-Damage Eval>

  <Post-Damage Eval>
   code
   code
  </Post-Damage Eval>

  <After Eval>
   code
   code
  </After Eval>
  If you wish to use custom effects for your skill, you can insert the
  respective notetags into the skill (or item) noteboxes and it will run the
  code that appears in between the tags. However, using any form of comments
  in this tag will block out code that follows.

  Those using the <Pre-Damage Eval> and <Post-Damage Eval> are able to make
  use of the damage to be dealt and the damage that has been dealt through
  the 'value' variable. The <Pre-Damage Eval> notetag is capable of altering
  the 'value' variable and return it to have damage affected by its code.
Limited Skill Uses
For those with JavaScript proficiency, you can use the following notetags to
perform conditional changes to the target's Limited Uses.

Skill and Item Notetags:

  --- --- ---

  <Custom Global Limited Uses>
   value += user.level;
  </Custom Global Limited Uses>
  The 'value' variable is the number of uses the user will gain for all
  Limited Use skills.

  --- --- ---

  <Custom SType x Limited Uses>
   value += user.level;
  </Custom SType x Limited Uses>
  The 'value' variable is the number of uses the user will gain for all
  Limited Use skills of skill type x.

  --- --- ---

  <Custom Skill x Limited Uses>
   value += user.level;
  </Custom Skill x Limited Uses>

  or

  <Custom Skill name Limited Uses>
   value += user.level;
  </Custom Skill name Limited Uses>

  The 'value' variable is the number of uses the user will gain for all
  Limited Use skills of skill x. If you are using the named version of the
  notetag and you have multiple skills in your database with the same name,
  priority will be given to the skill with the highest ID.

  --- --- ---
For those with JavaScript proficiency, you can use the following notetags to
perform conditional changes to the target's Limited Use Maximums.

Actor, Class, Enemy, Weapon, Armor, State Notetags:

  --- --- ---

  <Custom Global Use Max>
   value += user.level;
  </Custom Global Use Max>
  The 'value' variable is the maximum uses the target will gain for all
  Limited Use skills.

  --- --- ---

  <Custom SType x Use Max>
   value += user.level;
  </Custom SType x Use Max>
  The 'value' variable is the maximum uses the target will gain for all
  Limited Use skills of skill type x.

  --- --- ---

  <Custom Skill x Use Max>
   value += user.level;
  </Custom Skill x Use Max>

  or

  <Custom Skill name Use Max>
   value += user.level;
  </Custom Skill name Use Max>

  The 'value' variable is the maximum uses the target will gain for all
  Limited Use skills of skill x. If you are using the named version of the
  notetag and you have multiple skills in your database with the same name,
  priority will be given to the skill with the highest ID.

  --- --- ---

* Note: Keep in mind that none of the adjustments here will bypass the
'Absolute Max' setting in the plugin parameters. That is the ceiling.
Lunatic Pack - Skill RewardsFor experienced users that know JavaScript and have RPG Maker MV 1.5.0+, you
can add new notetag effects that can be used by the plugin or alter the
effects of currently existing notetag effects from the plugin parameters
entry: Effect Code. It should look something like this:
---
// ----------
// Flat Gains
// ----------
if (data.match(/([\+\-]\d+)[ ]HP/i)) {
value = parseInt(RegExp.$1);
user.gainHp(value);
animation = animation || hpAnimation;
} else if (data.match(/([\+\-]\d+)[ ]MP/i)) {
value = parseInt(RegExp.$1);
user.gainMp(value);
animation = animation || mpAnimation;
...
// -------------------------------
// Add new effects above this line
// -------------------------------
} else {
skip = true;
}
---
Here's what each of the variables used in this code bit refer to:
-------------------- ---------------------------------------------------
Variable: Refers to:
-------------------- ---------------------------------------------------
item The item being used by this action
skill The skill being used by this action
isItem Returns true if action is an item
isSkill Returns true if action is a skill
a Returns the action user
user Returns the action user
subject Returns the action user
b Returns the action's current target
target Returns the action's current target
s[x] Return switch x (true/false)
v[x] Return variable x's current value
user._result The current results for the user
target._result The current results for the target
userPreviousResult The results for the user before any changes
targetPreviousResult The results for the target before any changes
animation The animation to be played. You can set it equal to
any of the following which corresponds to plugin
parameter settings:
- hpAnimation
- mpAnimation
- tpAnimation
- itemAnimation
- buffAnimation
- debuffAnimation
- addStateAnimation
- removeStateAnimation
- miscAnimation
skip Default: false. If true, skips popups & animations
---
If you need to revert the Effect Code back to its original state, delete the
plugin from your plugin manager list and then add it again. The code will be
back to default.
Party Limit GaugeFor those with JavaScript experience, you can implement conditional costs for the Party Limit costs of skills, how much is gained or lost for user and/or target(s). Skill Notetags: <Custom Party Limit Cost> cost = user.friendsUnit().members().length; </Custom Party Limit Cost> The 'cost' variable will reference the original cost of the skill, and can be modified to add more or less than original amount. The cost value will be the finalized amount for the skill but rounded upward if the cost is a decimal value. This is the increment cost. <Custom Ally Party Limit Gauge> value += user.level; </Custom Ally Party Limit Gauge> The 'value' variable determines how much of the gauge will be added to the user's Party Limit Gauge. This is not an increment value but the raw value added to the amount. <Custom Foe Party Limit Gauge> value -= target.level; </Custom Foe Party Limit Gauge> The 'value' variable determines how much of the gauge will be added to the target's Party Limit Gauge. This is not an increment value but the raw value added to the amount. Skill Cooldowns
For skills, you can set cooldowns to have a special code determine its value
when the skill is used.

Skill Notetag
  <Cooldown Eval>
  cooldown = x;
  cooldown += x;
  </Cooldown Eval>
  Insert these two tags into the skill's notebox to give it a unique way to
  determine the cooldown's value. The 'cooldown' variable determines the
  amount of turns for the cooldown.

  <Warmup Eval>
  warmup = x;
  warmup += x;
  </Warmup Eval>
  Insert these two tags into the skill's notebox to give it a unique way to
  determine the warmup's value. The 'warmup' variable determines the amount
  of turns for the warmup.
Skill Cost ItemsFor those with a bit of JavaScript knowledge, you can create dynamic item costs for your skills using the following notetags: Skill Notetags: <Custom Type x Cost> cost = user.level; </Custom Type x Cost> Replace 'type' with either 'item', 'weapon', or 'armor' to change the type and x as the ID of that item type. The 'cost' variable determines how much of the required item type is needed as the cost. <Custom Item Cost: name> cost = user.level; </Custom Item Cost: name> For those who prefer to use names instead, replace 'name' with the name of the item to be used as the cost. The 'cost' variable determines how much of the named item is needed as the cost. If you have multiple items in your database with the same name, priority will be given to the item with the highest ID in the order of items, weapons, and armors. Skill Learn System
For those who understand a bit of JavaScript and wish to go further with
customizing the process for the skill learning process, you can use the
following notetags:

Skill Notetags:

  <Learn Show Eval>
   value = true;
   value = false;
  </Learn Show Eval>
  For using a custom code to hide or show the skill, you can use these
  notetags. Returning value as true will cause the skill to appear
  regardless of all other requirements being unmet while returning value as
  false will cause the skill to appear regardless of all other requirements
  being met.

  <Learn Require Eval>
   value = true;
   value = false;
  </Learn Require Eval>
  For those who wish to use their own custom requirements using code. This
  must return value as true in order for the skill to appear to be
  learnable. Avoid using comments that may potentially block out further
  code.

  <Learn Cost Eval>
   code
   code
  </Learn Cost Eval>
  For those who know JavaScript, you can have custom actions be performed
  after learning the skill through the learn skill menu.

  <Learn Custom Text>
   text
   text
  </Learn Custom Text>
  This will be the custom text shown underneath all the main costs. You can
  use text codes for this.
For those who have basic JavaScript knowledge and would like to make the JP
costs for skills dynamic, you can use the following notetags:

Skill Notetags:

  <Custom Learn JP Cost>
   cost = user.level * 100;
  </Custom Learn JP Cost>
  The 'cost' variable is the value that will be returned as a result of this
  Lunatic Mode notetag. The value returned here from this code will be added
  on top of the <Learn Cost: x JP> value.
Skill Mastery Levels
There are no specific Skill Mastery Levels lunatic notetags, but this part
of the help file will serve as a means to answer potential questions that
people may have about how to add special effects based on a battler's
mastery level.

These examples require YEP_SkillCore.js as they use the Skill Core's lunatic
notetags to produce special effects.

YEP_SkillCore.js Skill Notetag Examples:

---

<After Eval>
if (user.skillMasteryLevel(item.id) >= 5) {
  target.addState(10);
  target.removeState(9);
}
<After Eval>

The above code will make a check to see if the user's current mastery level
of the skill is greater than or equal to 5. If it is, then state 10 in the
database will also be applied to the target. However, state 9 will then be
removed from the target.

---

<After Eval>
if (user.skillMasteryLevel(item.id) >= 2) {
  user.addBuff(3, 5);
  user.addDebuff(5, 8);
}
<After Eval>

The above code will make a check to see if the user's current mastery level
of the skill is greater than or equal to 2. If it is, then the user will
gain a DEF buff for 5 turns. However, the user will then suffer a debuff for
MDF for 8 turns.

For reference on what the parameter ID's are:

0 = MaxHP
1 = MaxMP
2 = ATK
3 = DEF
4 = MAT
5 = MDF
6 = AGI
7 = LUK

---

<After Eval>
if (user.skillMasteryLevel(item.id) >= 3) {
  $gameTemp.reserveCommonEvent(5)
}
<After Eval>

The above code will make a check to see if the user's current mastery level
of the skill is greater than or equal to 3. If it is, common event 5 will be
reserved and ran once applicable.

---

There are more possibilities with the way lunatic code can be used than just
these examples listed here. For some ideas, be sure to check out the Tips &
Tricks on Yanfly.moe.
Steal & SnatchFor those with JavaScript experience and would like to create their own
custom steal rates for individual skills and/or items, you can use this
notetag to accomplish that:
Skill and Item Notetags:
<Custom Steal Rate>
rate += user.hp / user.mhp;
rate += user.level * 0.01;
</Custom Steal Rate>
The 'rate' variable is already predefined with the default calculations.
You can either add onto it or overwrite it. The 'rate' variable is then
returned after this for rate calculation. This formula is applied for both
steal and snatching.
<Custom Steal Success Effect>
if (item) {
user.gainHp(item.price);
}
</Custom Steal Success Effect>
This allows for custom effects to occur after successfully stealing any
type of item. The 'item' variable refers to the stolen item.
Item, Weapon, and Armor Notetags:
<After Steal Effect>
target.atk -= 10;
user.addBuff(3, 5);
</After Steal Effect>
When this item, weapon, or piece of armor gets stolen, this piece of code
will run affecting the target enemy it was stolen from. 'item' will refer
to the item that was stolen. 'target' will refer to the target enemy the
actor stole from. 'user' will refer to the actor stealing the item.
Target Core
For users that are proficient with JavaScript, these notetags can be used to
provide custom help window text if you are also the Battle Engine Core.

Skill and Item Notetags:

  <Custom Target Text>
   text = $gameActors.actor(1).name();
   text += ' and ' + $gameActors.actor(2).name();
  </Custom Target Text>
  The 'text' variable is the text that will appear in the help window. Any
  changes made to it will be what is visibly displayed.
For users that are proficient with JavaScript, these notetags can be used to
make custom target selections. For the targeting aspect, this will refer to
the skill/item's current scope and the targets made here will be made
independent of the scope with the exception of the target, where if a target
is selected, it will become the 'target' value.

  <Custom Target Eval>
  for (var i = 0; i < foes.aliveMembers().length; ++i) {
    var member = foes.aliveMembers()[i];
    if (member.level % 3 === 0) targets.push(member);
  }
  </Custom Target Eval>
  The 'targets' variable is an array that determines which are the targets
  to be used during the selection process. Push the desired targets into
  the 'targets' array.
Selection ControlFor those with JavaScript experience, you can use the following notetags to
make custom selection conditions for skills and items.
Skill and Item Notetags:
<Custom Select Condition>
if (target.name() === 'Harold') {
condition = true;
} else {
condition = false;
}
</Custom Select Condition>
The 'condition' variable determines if the condition will pass or not. If
the variable returns 'true', the condition will pass. If the variable is
'false', the condition will fail and the target will not be a valid target
for the action. Even if the <Custom Select Condition> notetag passes, all
other selection conditions must pass, too.
Weapon Unleash
For those who have JavaScript proficiency and would like to make attack or
guard replacement work off conditional means, you can use the following
Lunatic Mode notetags:

Actor, Class, Enemy, Weapon, Armor, State notetags:

  --- Replace Attack ---

  <Custom Replace Attack>
  if (user.level > 50) {
    id = 50;
  } else {
    id = 0;
  }
  </Custom Replace Attack>
  This will run a custom conditional check to see if the Attack command gets
  replaced. The 'id' variable is the skill ID that it will change to. If the
  'id' variable is 0, the check has failed and will continue on with the
  list to the next target.

  --- Replace Guard ---

  <Custom Replace Guard>
  if (user.level > 50) {
    id = 50;
  } else {
    id = 0;
  }
  </Custom Replace Guard>
  This will run a custom conditional check to see if the Guard command gets
  replaced. The 'id' variable is the skill ID that it will change to. If the
  'id' variable is 0, the check has failed and will continue on with the
  list to the next target.
For those who have JavaScript proficiency and would like to add Weapon or Guard Unleashes with conditional success rates, you can use the following Lunatic Mode notetags: Actor, Class, Enemy, Weapon, Armor, State notetags: --- Weapon Unleash --- <Custom Weapon Unleash: x> rate = user.hp / user.mhp; </Custom Weapon Unleash: x> <Custom Weapon Unleash: name> rate = user.hp / user.mhp; </Custom Weapon Unleash: name> This causes the Attack skill to have a chance to randomly use skill x (or named). The 'rate' variable will determine the success rate of the unleash. This will apply only to the Attack Command. Insert multiple copies of this notetag to give more weapon unleashes. If a battler would have multiple weapon unleashes, the randomization check will occur in the following order: States - Highest to Lowest Priority Equipment - In order of equip list Enemy Aspect Class Aspect Actor Aspect If a weapon unleash check passes earlier in the list while there are still weapon unleashes later in the list, that weapon unleash will take priority and override all the following weapon unleashes. --- Guard Unleash --- <Custom Guard Unleash: x> rate = user.hp / user.mhp; </Custom Guard Unleash: x> <Custom Guard Unleash: name> rate = user.hp / user.mhp; </Custom Guard Unleash: name> This causes the Guard skill to have a chance to randomly use skill x (or named). The 'rate' variable will determine the success rate of the unleash. This will apply only to the Guard Command. Insert multiple copies of this notetag to give more guard unleashes. If a battler would have multiple guard unleashes, the randomization check will occur in the following order: States - Highest to Lowest Priority Equipment - In order of equip list Enemy Aspect Class Aspect Actor Aspect If a guard unleash check passes earlier in the list while there are still guard unleashes later in the list, that guard unleash will take priority and override all the following guard unleashes. |

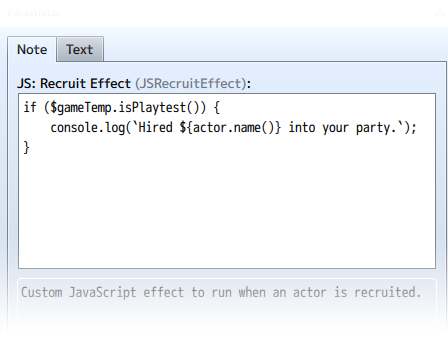
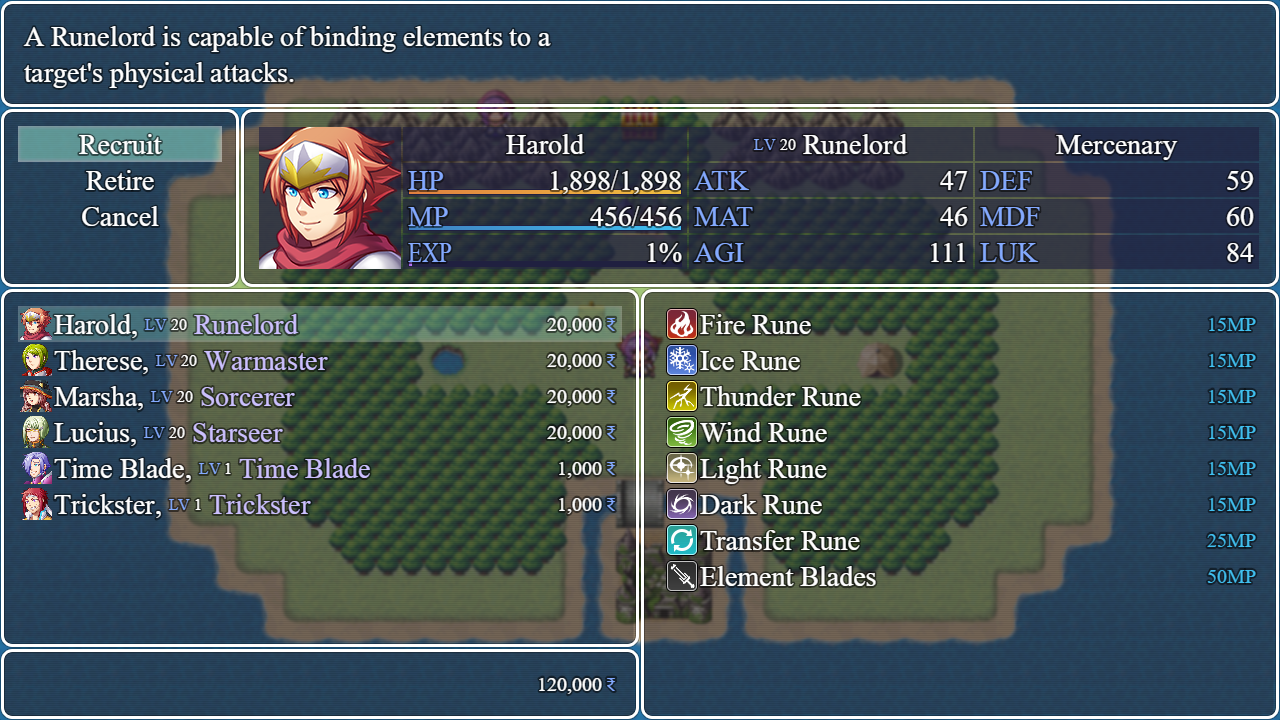
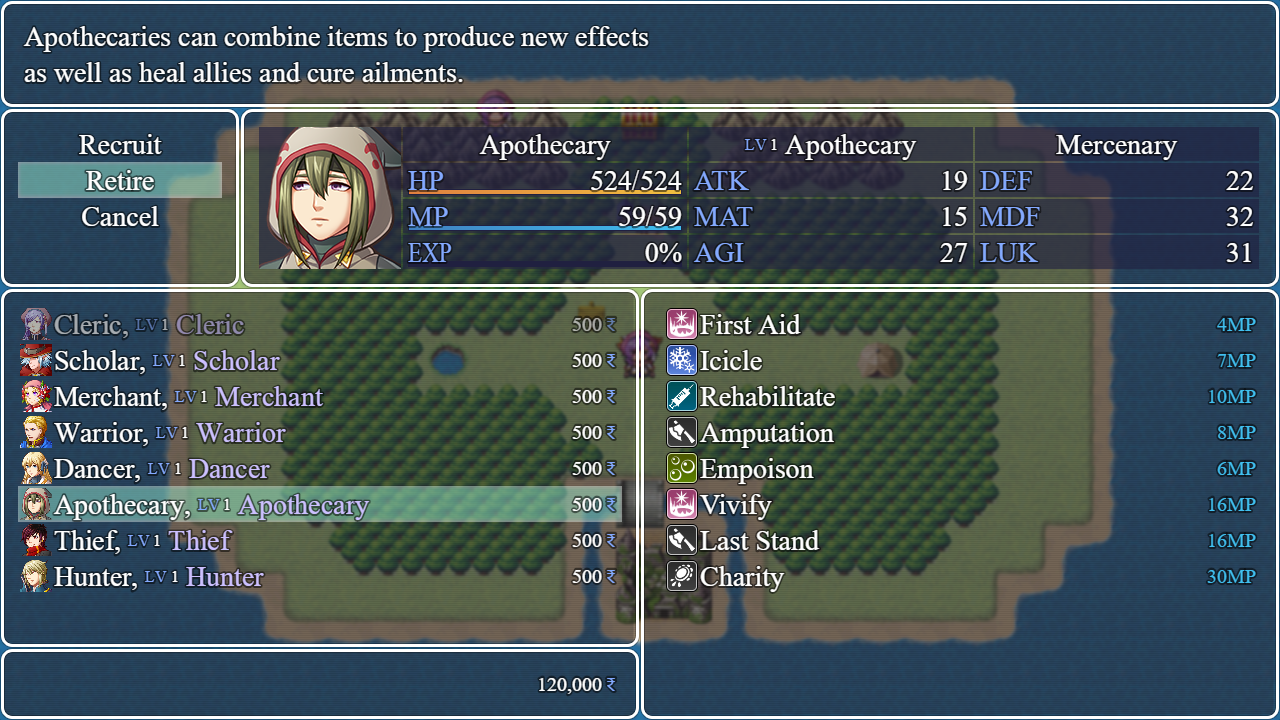
Pages in category "Lunatic Mode (MV)"
The following 51 pages are in this category, out of 51 total.