Category:Text Codes (MV)


|
VisuStella, Caz Wolf, Fallen Angel Olivia, Atelier Irina, and other affiliated content creators.
|
Text Codes are used in the Show Text event command. They are used to display things that text normally can't produce on its own, such as colors, get the name of a specific actor, change icons, and more. RPG Maker MV already comes with text codes of its own:
For all the text codes shown below, you will require their respective plugins to be able to use them. Message CoreBy using certain text codes in your messages, you can have the game replace
them with the following:
- - - - - - - - - - - - - - - - - - - - - - - - - - - - - - - - - - - - - -
Text Code Function
\V[n] Replaced by the value of the nth variable.
\N[n] Replaced by the name of the nth actor.
\P[n] Replaced by the name of the nth party member.
\G Replaced by the currency unit.
\C[n] Draw the subsequent text in the nth color.
\I[n] Draw the nth icon.
\{ Increases the text size by one step.
\} Decreases the text size by one step.
\\ Replaced with the backslash character.
\$ Opens the gold window.
\. Waits 1/4th seconds.
\| Waits 1 second.
\! Waits for button input.
\> Display remaining text on same line all at once.
\< Cancel the effect that displays text all at once.
\^ Do not wait for input after displaying text.
- - - - - - - - - - - - - - - - - - - - - - - - - - - - - - - - - - - - - -
Wait: Effect:
\w[x] - Waits x frames (60 frames = 1 second). Message window only.
- - - - - - - - - - - - - - - - - - - - - - - - - - - - - - - - - - - - - -
NameWindow: Effect:
\n<x> - Creates a name box with x string. Left side. *Note
\nc<x> - Creates a name box with x string. Centered. *Note
\nr<x> - Creates a name box with x string. Right side. *Note
*Note: Works for message window only.
- - - - - - - - - - - - - - - - - - - - - - - - - - - - - - - - - - - - - -
Line Break Effect:
<br> - If using word wrap mode, this will cause a line break.
- - - - - - - - - - - - - - - - - - - - - - - - - - - - - - - - - - - - - -
Position: Effect:
\px[x] - Sets x position of text to x.
\py[x] - Sets y position of text to y.
- - - - - - - - - - - - - - - - - - - - - - - - - - - - - - - - - - - - - -
Outline: Effect:
\oc[x] - Sets outline colour to x.
\ow[x] - Sets outline width to x.
- - - - - - - - - - - - - - - - - - - - - - - - - - - - - - - - - - - - - -
Font: Effect:
\fr - Resets all font changes.
\fs[x] - Changes font size to x.
\fn<x> - Changes font name to x.
\fb - Toggles font boldness.
\fi - Toggles font italic.
- - - - - - - - - - - - - - - - - - - - - - - - - - - - - - - - - - - - - -
Actor: Effect:
\af[x] - Shows face of actor x. *Note
\ac[x] - Writes out actor's class name.
\an[x] - Writes out actor's nickname.
*Note: Works for message window only.
- - - - - - - - - - - - - - - - - - - - - - - - - - - - - - - - - - - - - -
Party: Effect:
\pf[x] - Shows face of party member x. *Note
\pc[x] - Writes out party member x's class name.
\pn[x] - Writes out party member x's nickname.
*Note: Works for message window only.
- - - - - - - - - - - - - - - - - - - - - - - - - - - - - - - - - - - - - -
Names: Effect:
\nc[x] - Writes out class x's name.
\ni[x] - Writes out item x's name.
\nw[x] - Writes out weapon x's name.
\na[x] - Writes out armour x's name.
\ns[x] - Writes out skill x's name.
\nt[x] - Writes out state x's name.
- - - - - - - - - - - - - - - - - - - - - - - - - - - - - - - - - - - - - -
Icon Names: Effect:
\ii[x] - Writes out item x's name including icon.
\iw[x] - Writes out weapon x's name including icon.
\ia[x] - Writes out armour x's name including icon.
\is[x] - Writes out skill x's name including icon.
\it[x] - Writes out state x's name including icon.
- - - - - - - - - - - - - - - - - - - - - - - - - - - - - - - - - - - - - -
And those are the text codes added with this script. Keep in mind that some
of these text codes only work for the Message Window. Otherwise, they'll
work for help descriptions, actor biographies, and others.
Extended Message Pack 1By using certain text codes in your messages, you can have the game replace
them with the following:
- - - - - - - - - - - - - - - - - - - - - - - - - - - - - - - - - - - - - -
LetterSound Effect:
\lson - Turns Letter Sounds on.
\lsoff - Turns Letter Sounds off.
\lsn<filename> - Changes Letter Sound to play filename. This is case
sensitive. Do not include the file extension.
\lsv[x] - Sets the volume of the Letter Sound to x.
\lspi[x] - Sets the pitch of the Letter Sound to x.
\lspiv[x] - Sets the pitch variance of the Letter Sound to x.
\lspa[x] - Sets the pan of the Letter Sound to x.
\lspav[x] - Sets the pan variance of the Letter Sound to x.
\lsi[x] - Sets the interval the Letter Sounds play to x.
*Note: Works for message window only.
- - - - - - - - - - - - - - - - - - - - - - - - - - - - - - - - - - - - - -
Enemy Name Effect:
\en[x] - Gets the name of the enemy in Database position x.
\et[x] - Gets the name of the enemy in Troop position x.
- - - - - - - - - - - - - - - - - - - - - - - - - - - - - - - - - - - - - -
NameWindow: Effect:
\n<x> - Creates a name box with x string. Left side.
\nc<x> - Creates a name box with x string. Centered.
\nr<x> - Creates a name box with x string. Right side.
\nd<x> - Creates a dimmed name box with x string. Left side.
\ndc<x> - Creates a dimmed name box with x string. Centered.
\ndr<x> - Creates a dimmed name box with x string. Right side.
\nt<x> - Creates a transparent name box with x string. Left side.
\ntc<x> - Creates a transparent name box with x string. Centered.
\ntr<x> - Creates a transparent name box with x string. Right side.
*Note: Works for message window only.
- - - - - - - - - - - - - - - - - - - - - - - - - - - - - - - - - - - - - -
MessagePosition Effect:
\msgposx[x] - Sets the X position of the Message Window to x.
\msgposx[auto] - Sets the X position of the Message Window to default.
\msgposy[x] - Sets the Y position of the Message Window to x.
\msgposy[auto] - Sets the Y position of the Message Window to default.
\msgevent[x] - Map Field Only! Positions the X and Y position of the
Message Window relative to the event x's position. If you
use 0, the window will be placed relative to the player's
position on the map.
\msgactor[x] - Requires Battle Engine Core. Battle Only! Puts the
message over actor x's head if actor is in the party.
Otherwise, the message will appear in normal location.
\msgparty[x] - Requires Battle Engine Core. Battle Only! Puts the
message over party member x's head if member is present.
Otherwise, the message will appear in normal location.
\msgenemy[x] - Requires Battle Engine Core. Battle Only! Puts the
message over enemy member x's head if member is present.
Otherwise, the message will appear in normal location.
\msgwidth[x] - Sets the width of the Message Window to x.
\msgwidth[auto] - Sets the width of the Message Window to fit the text.
Do not use the auto function with Word Wrap.
\msgrows[x] - Sets the rows of the Message Window to x.
\msgrows[auto] - Sets the rows of the Message Window to text.
Do not use the auto function with Word Wrap.
\auto - Sets the width and rows of the Message window to fit the
current message window. Do not use this with Word Wrap.
\autoevent[x] - Map Field Only! Sets the width and rows of the Message
window to fit the current message window and positions it
relative to event x. If you use 0, the window will be
placed relative to the player's position on the map. Do
not use this with Word Wrap.
\autoactor[x] - Requires Battle Engine Core. Battle Only! Sets the width
and rows of the message window to fit the current message
window and puts the message over actor x's head if actor
is in the party. Otherwise, the message will appear in
normal location. Do not use this with Word Wrap.
\autoparty[x] - Requires Battle Engine Core. Battle Only! Sets the width
and rows of the message window to fit the current message
window and puts the message over party member x's head if
member is present. Otherwise, the message will appear in
normal location. Do not use this with Word Wrap.
\autoenemy[x] - Requires Battle Engine Core. Battle Only! Sets the width
and rows of the message window to fit the current message
window and puts the message over enemy member x's head if
member is present. Otherwise, the message will appear in
normal location. Do not use this with Word Wrap.
\msgreset - Resets all of the positioning settings to default.
* Note: This setting change will remain for just the current message. Going
to the next message will reset this setting back to whatever the default
setting is in the plugin parameters for the Message Core. If you change the
amount of rows past 4, it will not acquire the messages following. You will
need to use the 'MessageRows x' plugin command to accomplish that. These
notetags work for the message window only.
Do not use the [auto] width and row functions with Word Wrap. Word wrap
will cause them to behave erratically.
- - - - - - - - - - - - - - - - - - - - - - - - - - - - - - - - - - - - - -
FaceIndex Effect:
\faceindex[x] - Changes the face index of the currently used face
graphic to index x at the start of the message.
*Note: Works for message window only.
- - - - - - - - - - - - - - - - - - - - - - - - - - - - - - - - - - - - - -
DigitGroup Effect:
\dg[x] - Groups the number value x with commas. 12345 becomes 12,345.
- - - - - - - - - - - - - - - - - - - - - - - - - - - - - - - - - - - - - -
HexColor Effect:
\hc[rrggbb] - Changes the text color to a hex color code using red, green,
blue format. For example, pure red is \hc[ff0000].
- - - - - - - - - - - - - - - - - - - - - - - - - - - - - - - - - - - - - -
PlayTime Effect:
\playtime - Displays the current playtime of the player.
- - - - - - - - - - - - - - - - - - - - - - - - - - - - - - - - - - - - - -
MapName Effect:
\map[x] - Displays the map name of Map ID x. If x is 0, it will
display the name of the map the player is currently on.
- - - - - - - - - - - - - - - - - - - - - - - - - - - - - - - - - - - - - -
Extended Message Pack 2By using certain text codes in your messages, you can have the game replace
them with the following:
- - - - - - - - - - - - - - - - - - - - - - - - - - - - - - - - - - - - - -
Quantity Effect:
\qi[x] - Returns the quantity of item x the party currently has.
\qw[x] - Returns the quantity of weapon x the party currently has.
\qa[x] - Returns the quantity of armor x the party currently has.
- - - - - - - - - - - - - - - - - - - - - - - - - - - - - - - - - - - - - -
Compare Effect: Changes text color based on x and y. Defaults:
\compare<x:y> - x >= y = Green x < y = Red
\compare1<x:y> - x >= y = Red x < y = White
\compare2<x:y> - x >= y = Yellow x < y = White
\compare3<x:y> - x >= y = Green x < y = White
\compare4<x:y> - x >= y = Blue x < y = Purple
\compare5<x:y> - x >= y = White x < y = Grey
\compare6<x:y> - x >= y = White x < y = Red
\compare7<x:y> - x >= y = White x < y = Purple
\compare8<x:y> - x >= y = White x < y = Dark Blue
\compare9<x:y> - x >= y = White x < y = Brown
- - - - - - - - - - - - - - - - - - - - - - - - - - - - - - - - - - - - - -
Case Effect: Returns a different string based on conditions.
\caseSwitch{s?x:y} - If switch s is on, returns text x.
If switch s is off, returns text y.
\caseEval{e?x:y} - If eval code e is true, returns text x.
If eval code e is false, returns text y.
- - - - - - - - - - - - - - - - - - - - - - - - - - - - - - - - - - - - - -
ActorParam Effect:
\amhp[x] - Returns the MaxHP value of actor x.
\ahp[x] - Returns the current HP value of actor x.
\ahp%[x] - Returns the HP rate of actor x.
\ammp[x] - Returns the MaxMP value of actor x.
\amp[x] - Returns the current MP value of actor x.
\amp%[x] - Returns the MP rate of actor x.
\amtp[x] - Returns the MaxTP value of actor x.
\atp[x] - Returns the current TP value of actor x.
\atp%[x] - Returns the TP rate of actor x.
\aatk[x] - Returns actor x's ATK value. Attack
\adef[x] - Returns actor x's DEF value. Defense
\amat[x] - Returns actor x's MAT value. Magic Attack
\amdf[x] - Returns actor x's MDF value. Magic Defense
\aagi[x] - Returns actor x's AGI value. Agility
\aluk[x] - Returns actor x's LUK value. Luck
- - - - - - - - - - - - - - - - - - - - - - - - - - - - - - - - - - - - - -
ActorXParam Effect:
\ahit[x] - Returns actor x's HIT rate. Hit Rate
\aeva[x] - Returns actor x's EVA rate. Evasion Rate
\acri[x] - Returns actor x's CRI rate. Critical Rate
\acev[x] - Returns actor x's CEV rate. Critical Evasion Rate
\amev[x] - Returns actor x's MEV rate. Magic Evasion Rate
\amrf[x] - Returns actor x's MRF rate. Magic Reflection Rate
\acnt[x] - Returns actor x's CNT rate. Counter Attack Rate
\ahrg[x] - Returns actor x's HRG rate. HP Regeneration Rate
\amrg[x] - Returns actor x's MRG rate. MP Regeneration Rate
\atrg[x] - Returns actor x's TRG rate. TP Regeneration Rate
- - - - - - - - - - - - - - - - - - - - - - - - - - - - - - - - - - - - - -
ActorSParam Effect:
\atgr[x] - Returns actor x's TGR rate. Target Rate
\agrd[x] - Returns actor x's GRD rate. Guard Rate
\arec[x] - Returns actor x's REC rate. Recovery Rate
\apha[x] - Returns actor x's PHA rate. Pharmacology Rate
\amcr[x] - Returns actor x's MCR rate. MP Cost Rate
\atcr[x] - Returns actor x's TCR rate. TP Charge Rate
\apdr[x] - Returns actor x's PDR rate. Physical Damage Rate
\amdr[x] - Returns actor x's MDR rate. Magical Damage Rate
\afdr[x] - Returns actor x's FDR rate. Floor Damaage Rate
\aexr[x] - Returns actor x's EXR rate. Experience Rate
- - - - - - - - - - - - - - - - - - - - - - - - - - - - - - - - - - - - - -
EnemyParam Effect:
\emhp[x] - Returns the MaxHP value of enemy x.
\ehp[x] - Returns the current HP value of enemy x.
\ehp%[x] - Returns the HP rate of enemy x.
\emmp[x] - Returns the MaxMP value of enemy x.
\emp[x] - Returns the current MP value of enemy x.
\emp%[x] - Returns the MP rate of enemy x.
\emtp[x] - Returns the MaxTP value of enemy x.
\etp[x] - Returns the current TP value of enemy x.
\etp%[x] - Returns the TP rate of enemy x.
\eatk[x] - Returns enemy x's ATK value. Attack
\edef[x] - Returns enemy x's DEF value. Defense
\emat[x] - Returns enemy x's MAT value. Magic Attack
\emdf[x] - Returns enemy x's MDF value. Magic Defense
\eagi[x] - Returns enemy x's AGI value. Agility
\eluk[x] - Returns enemy x's LUK value. Luck
\eexp[x] - Returns enemy x's EXP value. Experience
\egold[x] - Returns enemy x's GOLD value. Gold
- - - - - - - - - - - - - - - - - - - - - - - - - - - - - - - - - - - - - -
EnemyXParam Effect:
\ehit[x] - Returns enemy x's HIT rate. Hit Rate
\eeva[x] - Returns enemy x's EVA rate. Evasion Rate
\ecri[x] - Returns enemy x's CRI rate. Critical Rate
\ecev[x] - Returns enemy x's CEV rate. Critical Evasion Rate
\emev[x] - Returns enemy x's MEV rate. Magic Evasion Rate
\emrf[x] - Returns enemy x's MRF rate. Magic Reflection Rate
\ecnt[x] - Returns enemy x's CNT rate. Counter Attack Rate
\ehrg[x] - Returns enemy x's HRG rate. HP Regeneration Rate
\emrg[x] - Returns enemy x's MRG rate. MP Regeneration Rate
\etrg[x] - Returns enemy x's TRG rate. TP Regeneration Rate
- - - - - - - - - - - - - - - - - - - - - - - - - - - - - - - - - - - - - -
EnemySParam Effect:
\etgr[x] - Returns enemy x's TGR rate. Target Rate
\egrd[x] - Returns enemy x's GRD rate. Guard Rate
\erec[x] - Returns enemy x's REC rate. Recovery Rate
\epha[x] - Returns enemy x's PHA rate. Pharmacology Rate
\emcr[x] - Returns enemy x's MCR rate. MP Cost Rate
\etcr[x] - Returns enemy x's TCR rate. TP Charge Rate
\epdr[x] - Returns enemy x's PDR rate. Physical Damage Rate
\emdr[x] - Returns enemy x's MDR rate. Magical Damage Rate
\efdr[x] - Returns enemy x's FDR rate. Floor Damaage Rate
\eexr[x] - Returns enemy x's EXR rate. Experience Rate
- - - - - - - - - - - - - - - - - - - - - - - - - - - - - - - - - - - - - -
Message Eval Text\evalText<<code>> - Replace 'code' with JavaScript code. It will run the code inside, then return whatever is the last line of the code that's ran. Here are some examples of what you could do this with: - - - - - - - - - - - - - - - - - - - - - - - - - - - - - - - - - - - - - - Examples: --- \evalText<<$gameActors.actor(1).atk + $gameActors.actor(2).atk>> - Displays the sum of actor 1's ATK and actor 2's ATK. --- \evalText<<Math.min(1000, $gameParty.gold())>> - Displays either '1000' or the party's gold count, depending on which one is currently smaller. --- \evalText<<['His','Her','Its'][\v[123]]>> - Depending on the value of Variable 123, this will display 'His' if the Variable 123 value is equal to 0, 'Her' if the value is equal to 1, or 'Its' if the value is equal to 2. --- \evalText<<['Abel','Brandon','Chris'][$gameVariables.value(456)]>> - Depending on the value of Variable 456, this will display 'Abel' if the Variable 456 value is equal to 0, 'Brandon' if the value is equal to 1, or 'Chris' if the value is equal to 2. Battle Engine CoreIn-Battle StatusBy using certain text codes in your messages, you can have the game replace them with the following: - - - - - - - - - - - - - - - - - - - - - - - - - - - - - - - - - - - - - - State Help Function \th[x] - Replaced by the text used in state x's help description. - - - - - - - - - - - - - - - - - - - - - - - - - - - - - - - - - - - - - - Boost Point System
You can put these in a skill or item's help description and it will change the text depending on how much BP the current actor is using. \bpDamage[x] This will apply BP damage multipliers to number x based on the actor's currently used BP amount. \bpTurn[x] This will apply BP turn multipliers to number x based on the actor's currently used BP amount. \bpRepeat[x] This will apply BP repeat multipliers to number x based on the actor's currently used BP amount. \bpAnalyze[x] This will apply BP analyze multipliers to number x based on the actor's currently used BP amount. \bpEffect[x] This will apply BP effect multipliers to number x based on the actor's currently used BP amount. \bp[text] The text inside the brackets won't appear unless at least 1 BP is used. \bp0[text] The text inside the brackets will only appear if no BP is being used. \bp>x[text] The text inside the brackets will only appear if more than x BP is being used. \bp>=x[text] The text inside the brackets will only appear if more than or exactly x BP is being used. \bp=x[text] The text inside the brackets will only appear if exactly x BP is being used. \bp<=x[text] The text inside the brackets will only appear if less than or exactly x BP is being used. \bp<x[text] The text inside the brackets will only appear if less than x BP is being used. Real Time System
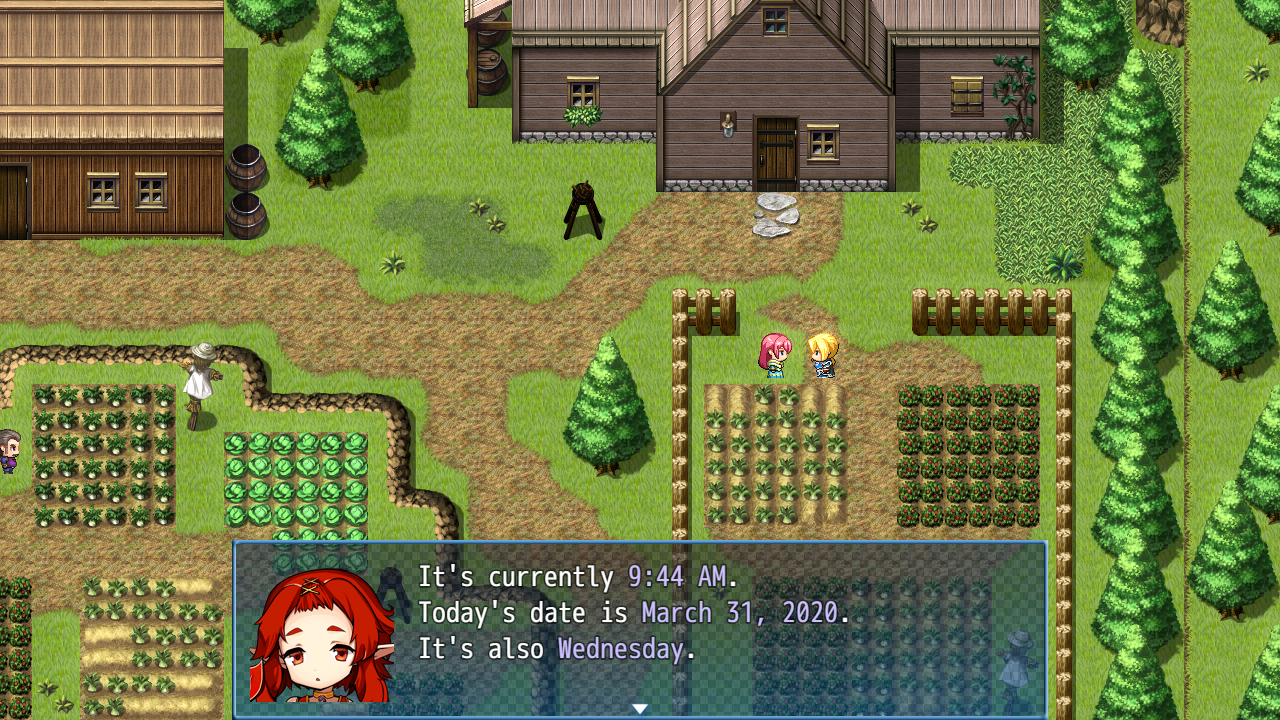
These text codes can be used inside messages: \Year - Returns the current year. \YearA - Returns the current year's last two digits. \Month - Returns the current month's name. \MonthID - Returns the current month's numeric value. \Date - Returns the current date number. \WeekDay - Returns the current week day's name. \Hour \Hour24 - Returns the current hour (24 hour). \Hour12 - Returns the current hour (12 hour). \Minute - Returns the current minute. This number will be padded if under 10. \Second - Returns the current second. This number will be padded if under 10. \Meridiem - Returns 'AM' or 'PM' depending on the current time. Visual Novel Busts
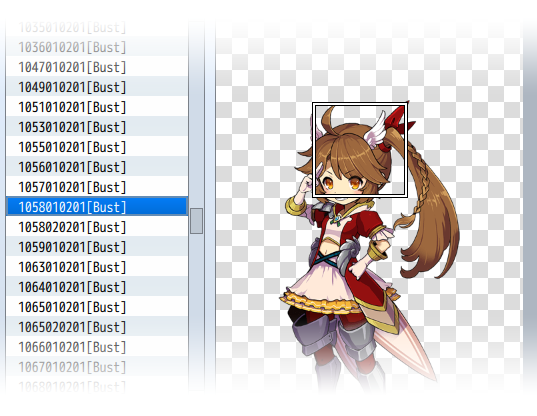
Does exactly what it means, display a bust. There are 11 busts that can be controlled. 0 is the Message Window's bust graphic. 1 through 10 are the busts that are shown on the screen behind the Message Window.
Insert [BUST] into the filenames of face graphics and they will be setup automatically to change as the bust graphic. Harold.png will become Harold[BUST].png. This makes it unnecessary for you to use \bust[0] every time you want to set a bust to the message window itself. This only works for images in the img/faces/ folder.
Text Code:
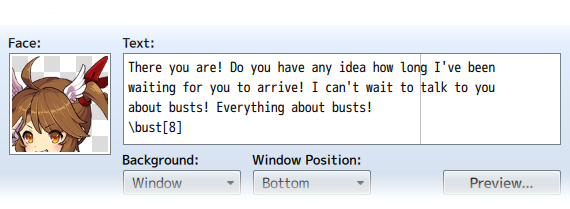
\bust[id]
- Requirement: Select a face graphic.
- Replace id with the bust ID you want to implant the face graphic on.
- 0 if you want to use the message bust.
- 1 through 10 if you want to use the screen busts.
- Examples:
- \bust[0]
- \bust[1]
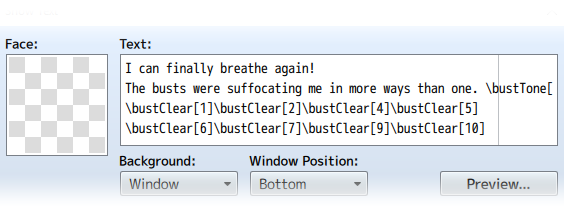
Clearing a bust removes it from view and resets it to the default settings so that the next time it's used, it will be a fresh slate. This is done automatically for message busts after the Message Window closes. A plugin parameter setting can be turned on to make all busts clear after an event finishes running. Text Codes:
\bustClear[id, duration]
- Replace id with the bust ID you want to affect.
- 0 if you want to affect the message bust.
- 1 through 10 if you want to affect the screen busts.
- (Optional) Replace duration with how long it takes to clear.
- If no duration is used, then use the value in the plugin parameters
- Examples:
- \bustClear[0]
- \bustClear[2, 20]
If you have set up a bust to use expressions, you can use this text code to change the expression of the bust. Please refer to the "Expression List" part of the help section up above to learn how to set up busts to make an expression sheet. Text Codes:
\bustExp[id, expression]
\bustExpression[id, expression]
- Replace id with the bust ID you want to affect.
- 0 if you want to affect the message bust.
- 1 through 10 if you want to affect the screen busts.
- Replace expression with either a number index or the string that is
associated with that expression to display the wanted expression.
- Examples:
- \bustExp[0, 1]
- \bustExpression[2, Angry]
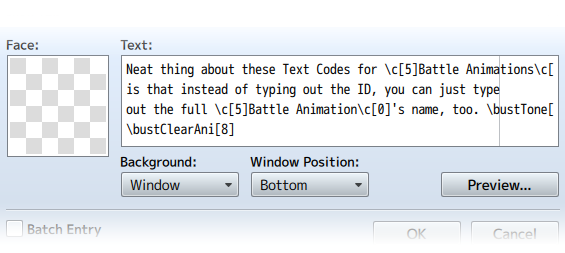
You can play battle animations on the busts to depict actions, emotions, whatever you want them to do. These will play the battle animation only once before closing out. Text Codes:
\bustAni[id, ani, mirror, delay]
\bustAnimation[id, ani, mirror, delay]
- Replace id with the bust ID you want to affect.
- 0 if you want to affect the message bust.
- 1 through 10 if you want to affect the screen busts.
- Replace ani with the ID of the battle animation
- Alternatively, you can type out the battle animation's name, too.
- (Optional) Replace mirror with true/face to mirror the animation.
- (Optional) Replace delay with the frames to wait before playing.
- Examples:
- \bustAni[0, 5]
- \bustAnimation[2, Healing One 2, true, 20]
Play battle animations repeatedly instead of one time. Otherwise, this is the same as playing regular battle animations. Repeating animations will stop automatically for message busts when the window closes. For screen busts, they will vanish once the event terminates. Text Codes:
\bustRepAni[id, ani, mirror, delay]
\bustRepeatAnimation[id, ani, mirror, delay]
- Replace id with the bust ID you want to affect.
- 0 if you want to affect the message bust.
- 1 through 10 if you want to affect the screen busts.
- Replace ani with the ID of the battle animation
- Alternatively, you can type out the battle animation's name, too.
- (Optional) Replace mirror with true/face to mirror the animation.
- (Optional) Replace delay with the frames to wait before playing.
- Examples:
- \bustRepAni[0, 5]
- \bustRepeatingAnimation[2, Healing One 2, true, 20]
Put an end to a repeating battle animation because otherwise that is going to go on forever until the currently running event fully terminates. Text Codes:
\bustClearAni[id]
\bustClearAnimation[id]
- Replace id with the bust ID you want to affect.
- 0 if you want to affect the message bust.
- 1 through 10 if you want to affect the screen busts.
- Examples:
- \bustClearAni[0]
- \bustClearAnimation[3]
Allows bust sprites to move to specific x and y coordinates. This does not work for message busts as they're locked to the Message Window. Text Code:
\bustMoveTo[id, x, y, duration]
- Replace id with the bust ID you want to affect.
- 1 through 10 if you want to affect the screen busts.
- Replace x with the x coordinate on the screen to move to.
- Replace y with the y coordinate on the screen to move to.
- (Optional) Replace duration with how long it takes to move there.
- If no duration is used, then use the value in the plugin parameters
- Examples:
- \bustMoveTo[1, 640, 720]
- \bustMoveTo[5, 100, 360, 60]
Allows bust sprites to move relative to their current position. This does not work for message busts as they're locked to the Message Window. Text Codes:
\bustMoveBy[id, +x, +y, duration]
\bustMoveBy[id, -x, -y, duration]
- Replace id with the bust ID you want to affect.
- 1 through 10 if you want to affect the screen busts.
- Replace x with how far left(-) or right(+) to move by.
- Replace y with how far up(-) or down(+) to move by.
- (Optional) Replace duration with how long it takes to move there.
- If no duration is used, then use the value in the plugin parameters
- Examples:
- \bustMoveBy[1, -100, +0]
- \bustMoveBy[5, +200, -50, 60]
Returns a bust sprite back to the home position. For those moments you're too confused, lazy, or both to figure out how to bring a bust sprite back to the original coordinates it was in. This does not work for message busts as they're locked to the Message Window. Text Code:
\bustMoveHome[id, duration]
- Replace id with the bust ID you want to affect.
- 1 through 10 if you want to affect the screen busts.
- (Optional) Replace duration with how long it takes to move there.
- If no duration is used, then use the value in the plugin parameters
- Examples:
- \bustMoveHome[1]
- \bustMoveHome[4, 60]
Allows you to adjust the rate, acceleration, and easing when a bust moves. Text Code:
\bustMoveType[id, type]
- Replace id with the bust ID you want to affect.
- 0 if you want to affect the message bust.
- 1 through 10 if you want to affect the screen busts.
- Replace type with the movement type. Look below for a list.
- Examples:
- \bustMoveType[0, Linear]
- \bustMoveType[3, OutBounce]
Types:
Linear ......... No easing, no acceleration
InSine ......... Slight acceleration from zero to full speed
OutSine ........ Slight deceleration at the end
InOutSine ...... Slight accel. at beginning and slight decel. at end
InQuad ......... LV2 Accelerating from zero velocity
OutQuad ........ LV2 Decelerating to zero velocity
InOutQuad ...... LV2 Acceleration until halfway, then deceleration
InCubic ........ LV3 Accelerating from zero velocity
OutCubic ....... LV3 Decelerating to zero velocity
InOutCubic ..... LV3 Acceleration until halfway, then deceleration
InQuart ........ LV4 Accelerating from zero velocity
OutQuart ....... LV4 Decelerating to zero velocity
InOutQuart ..... LV4 Acceleration until halfway, then deceleration
InQuint ........ LV5 Accelerating from zero velocity
OutQuint ....... LV5 Decelerating to zero velocity
InOutQuint ..... LV5 Acceleration until halfway, then deceleration
InExpo ......... Accelerate exponentially until finish
OutExpo ........ Initial exponential acceleration slowing to stop
InOutExpo ...... Exponential acceleration and deceleration
InCirc ......... Increasing velocity until stop
OutCirc ........ Start fast, decreasing velocity until stop
InOutCirc ...... Fast increase in velocity, fast decrease in velocity
InBack ......... Slow movement backwards then fast snap to finish
OutBack ........ Fast snap to backwards point then slow to finish
InOutBack ...... Back In, then Back Out
InElastic ...... Bounces slowly then quickly to finish
OutElastic ..... Fast acceleration, bounces to zero
InOutElastic ... Slow start and end, two bounces sandwich a fast motion
InBounce ....... Bounce increasing in velocity until completion
OutBounce ...... Bounce to completion
InOutBounce .... Bounce in and bounce out
Fade in to 255 opacity or fade out 0 opacity. This can affect any bust and you can also declare the duration of the fading process. Text Code:
\bustFadeIn[id, duration]
\bustFadeOut[id, duration]
- Replace id with the bust ID you want to affect.
- 0 if you want to affect the message bust.
- 1 through 10 if you want to affect the screen busts.
- (Optional) Replace duration with how long it takes to fade in or out.
- If no duration is used, then use the value in the plugin parameters
- Examples:
- \bustFadeIn[1]
- \bustFadeOut[6, 40]
If you don't want to fully change a bust's opacity to either 0 or 255, set it to whatever opacity level you want instead. Text Code:
\bustOpacityTo[id, opacity, duration]
- Replace id with the bust ID you want to affect.
- 0 if you want to affect the message bust.
- 1 through 10 if you want to affect the screen busts.
- Replace opacity with a number between 0 and 255 for how opaque it is.
- (Optional) Replace duration with how long it takes to fade in or out.
- If no duration is used, then use the value in the plugin parameters
- Examples:
- \bustOpacityTo[0, 128]
- \bustOpacityTo[7, 64]
This changes the opacity level of a bust relative to its current opacity instead of needing to put in an exact value. Text Code:
\bustOpacityBy[id, +opacity, duration]
\bustOpacityBy[id, -opacity, duration]
- Replace id with the bust ID you want to affect.
- 0 if you want to affect the message bust.
- 1 through 10 if you want to affect the screen busts.
- Replace opacity with how much you wish to adjust the opacity by.
- (Optional) Replace duration with how long it takes to change opacity.
- If no duration is used, then use the value in the plugin parameters
- Examples:
- \bustOpacityBy[0, +32]
- \bustOpacityBy[8, -64]
Sliding In and Sliding Out is a small move and fade in/out combo that is based around the bust's home position. This makes busts look like they're fading into the scene or fading out of them. Text Code:
\bustSlideIn[id, duration]
\bustSlideInFromLeft[id, duration]
\bustSlideInFromRight[id, duration]
\bustSlideOut[id, duration]
\bustSlideOutToLeft[id, duration]
\bustSlideOutToRight[id, duration]
- Replace id with the bust ID you want to affect.
- 0 if you want to affect the message bust.
- 1 through 10 if you want to affect the screen busts.
- Use the FromLeft, FromRight, ToLeft, ToRight versions to control the
direction the busts are going or leave it up to the plugin.
- (Optional) Replace duration with how long it takes to slide in/out.
- If no duration is used, then use the value in the plugin parameters
- Examples:
- \bustSlideIn[0]
- \bustSlideOut[9, 20]
Lets you set the bust sprite to mirror, unmirror, or toggle the mirror setting it currently has. Text Code:
\bustMirror[id]
\bustUnmirror[id]
\bustMirrorToggle[id]
- Replace id with the bust ID you want to affect.
- 0 if you want to affect the message bust.
- 1 through 10 if you want to affect the screen busts.
- Examples:
- \bustMirror[0]
- \bustUnmirror[1]
- \bustMirrorToggle[1]
This lets you change the scale of the bust sprite to an exact amount. Now, I know that sprites with a negative value for scale flip over, but these text codes and script calls will disable that. If you want to mirror something, use the mirror text codes for it. Text Code:
\bustScaleTo[id, scale, duration]
\bustScaleToX[id, scale, duration]
\bustScaleToY[id, scale, duration]
- Replace id with the bust ID you want to affect.
- 0 if you want to affect the message bust.
- 1 through 10 if you want to affect the screen busts.
- Replace scale with a number value on how to scale it.
- 0.5 is 50%. 1.0 is 100%. 1.5 is 150%.
- (Optional) Replace duration with how long it takes to scale.
- If no duration is used, then use the value in the plugin parameters
- Use the X and Y variations if you want to adjust those specifically
- Examples:
- \bustScaleTo[0, 1.0]
- \bustScaleToX[2, 0.5, 20]
- \bustScaleToY[4, 2.5, 60]
This lets you change the scale of the bust sprite relative to its current scale value. This will work with an absolute value of the current scale to remove any confusion about how mirrored scaling works, so just treat a bust that is mirrored the same way you'd treat a bust that's not mirrored. Text Code:
\bustScaleBy[id, +scale, duration]
\bustScaleByX[id, -scale, duration]
\bustScaleByY[id, +scale, duration]
- Replace id with the bust ID you want to affect.
- 0 if you want to affect the message bust.
- 1 through 10 if you want to affect the screen busts.
- Replace scale with a number value on how to scale it.
- 0.5 is 50%. 1.0 is 100%. 1.5 is 150%.
- (Optional) Replace duration with how long it takes to scale.
- If no duration is used, then use the value in the plugin parameters
- Use the X and Y variations if you want to adjust those specifically
- Examples:
- \bustScaleBy[0, -1.0]
- \bustScaleByX[2, +0.5, 20]
- \bustScaleByY[4, -2.5, 60]
Give busts a tone! Tones will tint the colors on a bust. The bust will then change its tint towards that tone over time. Text Code:
\bustTone[id, red, green, blue, gray, duration]
- Replace id with the bust ID you want to affect.
- 0 if you want to affect the message bust.
- 1 through 10 if you want to affect the screen busts.
- Replace red with a number between -255 and 255.
- Replace green with a number between -255 and 255.
- Replace blue with a number between -255 and 255.
- Replace gray with a number between 0 and 255.
- (Optional) Replace duration with how long it takes to change tone.
- If no duration is used, then use the value in the plugin parameters
- Examples:
- \bustTone[0, -68, -68, 0, 68]
- \bustTone[5, -68, -68, -68, 0, 60]
Dim and Light are preset tones that are primarily used for tinting busts. Usually visual novels will dim busts that aren't talking and light the busts that are. This is to speed up the process so that you don't have to type out a tone code every time. You can set the dim and light values in the plugin parameters. They'll also use the duration for tones if no duration is used to specify that specific dim or light tone change. Text Code:
\bustDim[id, duration]
\bustLight[id, duration]
- Replace id with the bust ID you want to affect.
- 0 if you want to affect the message bust.
- 1 through 10 if you want to affect the screen busts.
- (Optional) Replace duration with how long it takes to change tone.
- If no duration is used, then use the value in the plugin parameters
- Examples:
- \bustDim[0]
- \bustLight[5, 60]
|


Pages in category "Text Codes (MV)"
The following 8 pages are in this category, out of 8 total.