Difference between revisions of "Template:VisuMZ Items and Equips Core Notetags"
(→JavaScript Notetags: Item Accessibility) |
(→JavaScript Notetags: Item Accessibility) |
||
| Line 117: | Line 117: | ||
- Used for: Item Notetags | - Used for: Item Notetags | ||
- Determines the enabled status of the item based on JavaScript code. | - Determines the enabled status of the item based on JavaScript code. | ||
| + | - If the actor this is disabled for is the only party member, it will not be | ||
| + | visible in the item list. | ||
- Replace 'code' to determine the type enabled status of the item. | - Replace 'code' to determine the type enabled status of the item. | ||
- The 'enabled' variable returns a boolean (true/false) to determine if the | - The 'enabled' variable returns a boolean (true/false) to determine if the | ||
Revision as of 13:21, 18 December 2020
The following are notetags that have been added through this plugin. These notetags will not work with your game if this plugin is OFF or not present.
Contents
General
These notetags affect the Items, Weapons, and Armors on a general scale.
---
<Max: x>

- Used for: Item, Weapon, Armor Notetags
- Determines the maximum quantity that can be held for this item.
- Replace 'x' with a number value to determine the maximum amount.
---
<Color: x>
<Color: #rrggbb>

- Used for: Item, Weapon, Armor, Skill Notetags
- Determines the color of the object inside the in-game menus.
- Replace 'x' with a number value depicting a window text color.
- Replace 'rrggbb' with a hex color code for a more custom color.
---
<Category: x>

- Used for: Item, Weapon, Armor Notetags
- Arranges items into certain/multiple categories to work with the Category
  Plugin Parameter setting: "Category:x".
- Replace 'x' with a category name to mark this item as.
---
<Categories>
 x
 x
</Categories>

- Used for: Item, Weapon, Armor Notetags
- Arranges items into certain/multiple categories to work with the Category
  Plugin Parameter setting: "Category:x".
- Replace each 'x' with a category name to mark this item as.
---
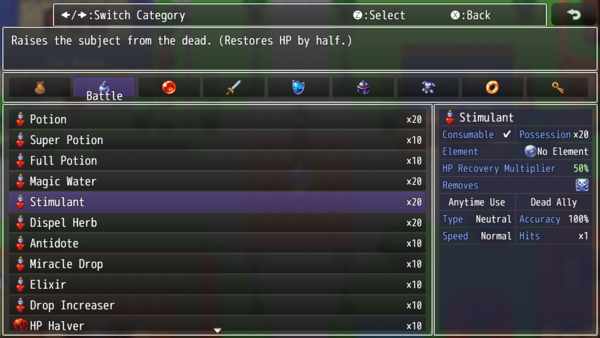
Item Accessibility Notetags
The following notetags allow you to choose when items can/cannot be used based on switches.
---
<Enable Switch: x>

<Enable All Switches: x,x,x>
<Enable Any Switches: x,x,x>

- Used for: Item Notetags
- Determines the enabled status of the item based on switches.
- Replace 'x' with the switch ID to determine the item's enabled status.
- If 'All' notetag variant is used, item will be disabled until all
  switches are ON. Then, it would be enabled.
- If 'Any' notetag variant is used, item will be enabled if any of the
  switches are ON. Otherwise, it would be disabled.
---
<Disable Switch: x>

<Disable All Switches: x,x,x>
<Disable Any Switches: x,x,x>

- Used for: Item Notetags
- Determines the enabled status of the item based on switches.
- Replace 'x' with the switch ID to determine the item's enabled status.
- If 'All' notetag variant is used, item will be enabled until all switches
  are ON. Then, it would be disabled.
- If 'Any' notetag variant is used, item will be disabled if any of the
  switches are ON. Otherwise, it would be enabled.
---
JavaScript Notetags: Item Accessibility
The following are notetags made for users with JavaScript knowledge to determine if an item can be accessible by code.
---
<JS Item Enable>
 code
 code
 enabled = code;
</JS Item Enable>

- Used for: Item Notetags
- Determines the enabled status of the item based on JavaScript code.
- If the actor this is disabled for is the only party member, it will not be
  visible in the item list.
- Replace 'code' to determine the type enabled status of the item.
- The 'enabled' variable returns a boolean (true/false) to determine if the
  item will be enabled or not.
- The 'user' variable refers to the user with the item.
- The 'item' variable refers to the item being checked.
- All other item conditions must be met in order for this to code to count.
---
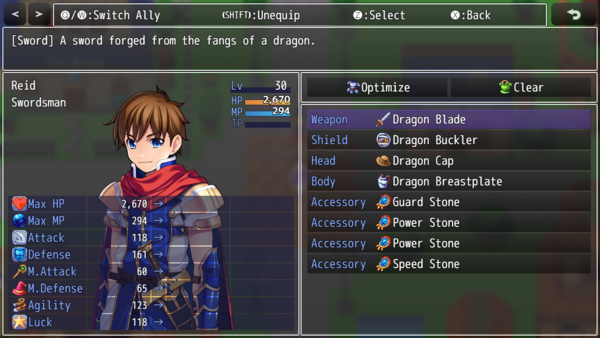
Equipment Notetags
The following notetags provide equipment-related effects from deciding what equip slots can be given to classes to the base parameter changes asigned to weapons and armors.
---
<Equip Slots>
 slotName
 slotName
 slotName
</Equip Slots>

- Used for: Class Notetags
- Changes the equipment slot loadout for any actor who is that class.
- Replace 'slotName' with an Equipment Type name from Database > Types.
  This is case-sensitive.
- Insert or remove as many "slotName" equipment types as needed.
---
<param: +x>
<param: -x>

- Used for: Weapon, Armor Notetags
- Changes the base parameter value for the equip item.
- Replace 'param' with any of the following: 'MaxHP', 'MaxMP', 'ATK', 'DEF',
  'MAT', 'MDF', 'AGI', or 'LUK' to change that specific parameter's value.
- Replace 'x' with a number value to set the parameter value to.
- This allows you to bypass the Database Editor's number limitations.
---
JavaScript Notetags: Equipment
The following are notetags made for users with JavaScript knowledge to adjust the parameter through code.
---
<JS Parameters>
 MaxHP = code;
 MaxMP = code;
 ATK = code;
 DEF = code;
 MAT = code;
 MDF = code;
 AGI = code;
 LUK = code;
</JS Parameters>

- Used for: Weapon, Armor Notetags
- Uses JavaScript to determine the values for the basic parameters based on
  the code used to calculate its value.
- The variables 'MaxHP', 'MaxMP', 'ATK', 'DEF', 'MAT', 'MDF', 'AGI', and
  'LUK' are used to determine the finalized value of the parameter. This
  variable is case sensitive.
- If a parameter is not present, its value will be treated as +0.
---
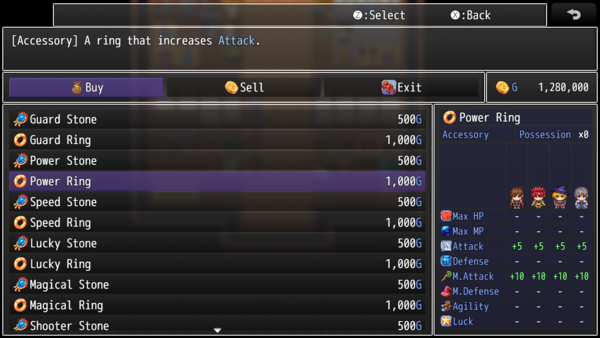
Status Window Notetags
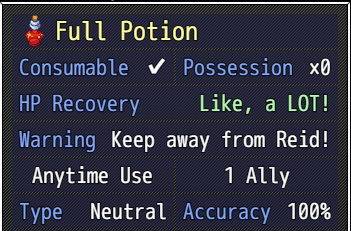
The following notetags will affect the Shop Status Window info. If for any reason the data that is displayed is not to your liking or insufficient, you can change it up using the following notetags.
---
<Status Info>
 key: data
 key: data
 key: data
</Status Info>

- Used for: Skill, Item, Weapon, Armor Notetags
- If you do not like the generated data that's displayed, you can change it
  using this notetag to display what you want.
- Replace 'key' with one of the following:
  - Consumable
  - Quantity
  - Occasion
  - Scope
  - Speed
  - Success Rate
  - Repeat
  - Hit Type
  - Element
  - Damage Multiplier
  - HP Recovery
  - MP Recovery
  - TP Recovery
  - HP Damage
  - MP Damage
  - TP Damage
  - User TP Gain
  - Added Effects
  - Removed Effects
- Replace 'data' with the text data you want to visually appear. You may use
  text codes for this.
- This only affects info entries that are already visible and won't make
  other categories suddenly appear.
- Insert or remove as many "key: data" lines as needed.
---
<Custom Status Info>
 key: data
 key: data
 key: data
</Custom Status Info>

- Used for: Skill, Item Notetags
- If you want custom categories and data to be displayed for your items that
  aren't provided by the Shop Status Window Info to begin with, you can use
  this notetag to add in your own entries.
- Replace 'key' with text of the exact label you want. You may use text
  codes for this.
- Replace 'data' with text of the exact text data you want. You may use text
  codes for this.
- Insert or remove as many "key: data" lines as needed.
---
Shop Menu Notetags
These notetags adjust how prices and such are managed inside the Shop Menu as well as whether or not some items are visible depending on switch states.
---
<Price: x>

- Used for: Item, Weapon, Armor Notetags
- Adjusts the buying price for this item.
- Replace 'x' with a number depicting the desired value for the buy price.
- This allows you to bypass the RPG Maker MZ editor's limitation of 999,999.
---
<Can Sell>
<Cannot Sell>

- Used for: Item, Weapon, Armor Notetags
- Makes the item either always sellable or cannot be sold.
- This bypasses the game's internal hard-coding to prevent items with a
  price of 0 from being able to be sold.
- This bypasses the game's internal hard-coding to always allow items with
  a price value of being able to be sold.
---
<Sell Price: x>

- Used for: Item, Weapon, Armor Notetags
- Changes the sell price to be something different than the default amount.
- Replace 'x' with a number depicting the desired value for the sell price.
---
<Show Shop Switch: x>

<Show Shop All Switches: x,x,x>
<Show Shop Any Switches: x,x,x>

- Used for: Item, Weapon, Armor Notetags
- Determines the visibility of the shop item based on switches.
- Replace 'x' with the switch ID to determine the shop item's visibility.
- If 'All' notetag variant is used, item will be hidden until all switches
  are ON. Then, it would be shown.
- If 'Any' notetag variant is used, item will be shown if any of the
  switches are ON. Otherwise, it would be hidden.
---
<Hide Shop Switch: x>

<Hide Shop All Switches: x,x,x>
<Hide Shop Any Switches: x,x,x>

- Used for: Item, Weapon, Armor Notetags
- Determines the visibility of the shop item based on switches.
- Replace 'x' with the switch ID to determine the shop item's visibility.
- If 'All' notetag variant is used, item will be shown until all switches
  are ON. Then, it would be hidden.
- If 'Any' notetag variant is used, item will be hidden if any of the
  switches are ON. Otherwise, it would be shown.
---
<Cannot Sell Switch: x>

<Cannot Sell All Switches: x,x,x>
<Cannot Sell Any Switches: x,x,x>

- Used for: Item, Weapon, Armor Notetags
- Determines the sellability of the shop item based on switches.
- Replace 'x' with the switch ID to determine the shop item's sellability.
- If 'All' notetag variant is used, item cannot be sold until all switches
  are ON. Otherwise, it can be sold.
- If 'Any' notetag variant is used, item cannot be sold if any of the
  switches are ON. Otherwise, it can be sold.
---
JavaScript Notetags: Shop Menu
The following are notetags made for users with JavaScript knowledge. These notetags are primarily aimed at Buy and Sell prices.
---
<JS Buy Price>
 code
 code
 price = code;
</JS Buy Price>

- Used for: Item, Weapon, Armor Notetags
- Replace 'code' to determine the buying 'price' of the item.
- Insert the final buy price into the 'price' variable.
- The 'item' variable refers to the item being bought.
---
<JS Sell Price>
 code
 code
 price = code;
</JS Sell Price>

- Used for: Item, Weapon, Armor Notetags
- Replace 'code' to determine the selling 'price' of the item.
- Insert the final sell price into the 'price' variable.
- The 'item' variable refers to the item being sold.
---
