Starting Tips

|
VisuStella, Caz Wolf, Fallen Angel Olivia, Atelier Irina, and other affiliated content creators.
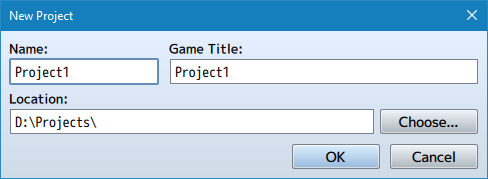
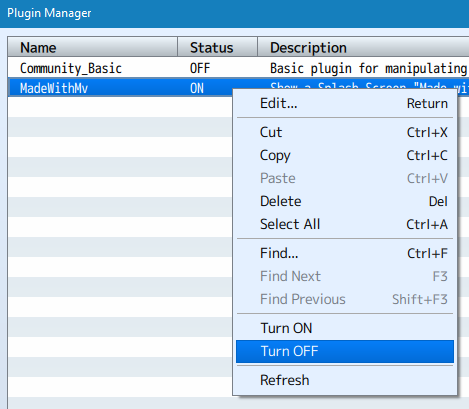
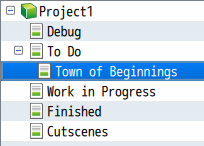
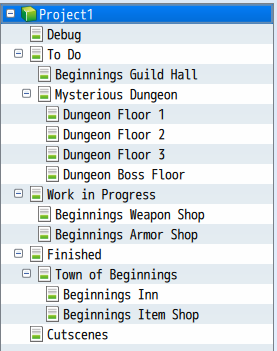
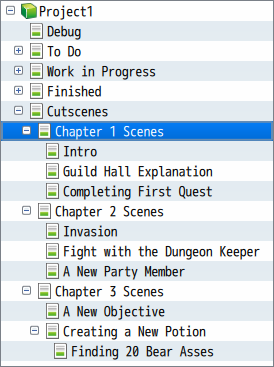
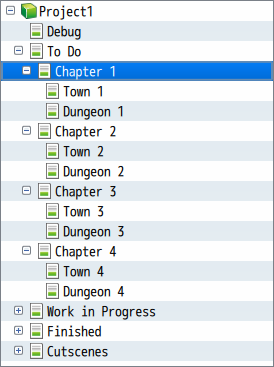
IntroductionWhen creating a new project in RPG Maker MV, it can be hard to figure out where to begin. There's so many things that need to be done, so many things that need preparation, so many ideas you have, and it can be a mess to make. These are some tips I have for you all to help start your projects to make it more bearable to handle, especially if you're a solo dev. Keep in mind that these are tips, not absolute rules that you have to follow. TipsDon't Stress Over Titles YetThis is a common trap that a lot of devs tend to have when creating a new project. They tend to try to figure out the best possible title for their game before even continuing into the game dev process. You can change the title of the project at any time so this is nothing that is permanent. You see similar problems with amateur writers, who must begin with a title for their essay, paper, book, etc. before they can write out the content of their work. This is a hindrance and will impede on progress. Instead, give your project a "codename", which could be just about anything. Many AAA game studios do this with their major projects before deciding on a name for their final product. Even non-game companies do this. Microsoft, for example, codenamed Windows 7 as "Vienna" and Windows 10 as "Threshold" before deciding to just go with simpler number naming schemes. You can worry about creating a good title once you have a feel for what your game is going to be about. Turn Off/Remove Initial PluginsOpen up the Plugin Manager and either turn these off or remove them from your game completely. The Community_Basic plugin conflicts with a lot of the Yanfly Engine Plugins library and a lot of its functions are already recreated in the Core Engine plugin. The MadeWithMv plugin creates an unskippable splash screen that occurs each time you boot up the game, even for play-testing. It's a huge time waster. Use Your Maps as DirectoriesThe Five MapsWhen starting out, I recommend creating these maps for organization purposes.
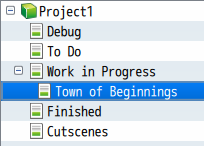
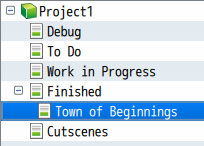
You can name them whatever you want. I've seen some people name them as "Do, Doing, Done" and it still serves the same function. And what function is that? Read below: To Do, Work in Progress, FinishedThese maps will serve as directories for other maps in your game. Not only that, they give you an idea of what needs to be done, what is currently being worked on, and what is already finished. Let's take a look below. In the above image, the map listed under "To Do" means that the map still needs to be worked on. There's little to no work being done on it. In a project with multiple devs, this folder can be used to help devs figure out which maps need work on so the workflow can be distributed more thoroughly. Once you've decided to work on a specific map from the "To Do" list, drag it over to "Work in Progress". This way, you have an idea of what's currently being worked on and it will be harder to forget about that map in case you get sidetracked. This is also helpful in group projects with multiple devs, as it will give other devs an idea on which maps are currently being worked on and which maps still have to be done. Once a map is done or in the finishing stages, drag it from "Work in Progress" to "Finished". This will help remind you that these maps are finished and don't require much else work on them. You may still go back to them and change things around, of course. The rules aren't absolute as these folders are just here for organization purposes. In a group project, this tells other devs which maps are already done so they can start play testing them or focus on something else. By having a more visible understanding on where your map progress is, it's easier to determine what still needs to be done. Often at times, when devs finish a small "part" of their game, they end up with Choice Paralysis and could not figure out what to work on next. This "map directory" will help mitigate that by letting you know at all times what still needs to be done and worked on. Debug RoomSo what is the Debug map for? It's for a debug room. What's that, you might ask? A debug room is typically a map that only the game dev(s) can access. It's usually not the prettiest map, and it usually contains a bunch of events to help the dev in different ways. Such functions include the following:
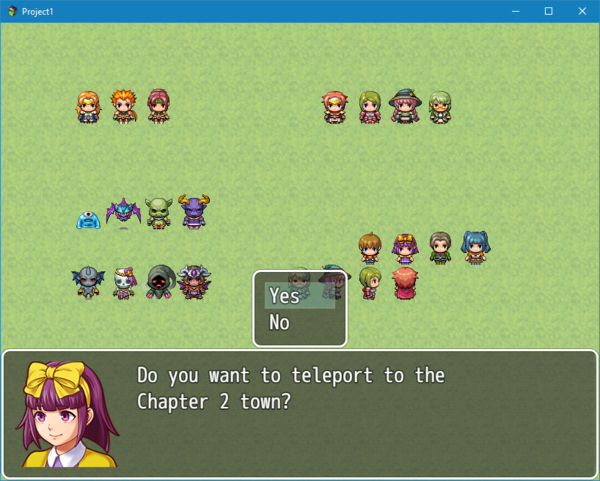
So why is the debug room separate from the To Do, Work in Progress, and Finished maps? Well, there's a couple of reasons for that. The first is that this map normally is inaccessible from the main game itself and usually only a place you can access through test play (usually through setting the player's starting location at that specific point). The second reason is so that the map is quickly accessible, allowing the game dev(s) to quickly add the necessary events that need testing. CutscenesSo, why is the Cutscenes folder separate from all the rest and not on the playable maps themselves? A couple of reasons:
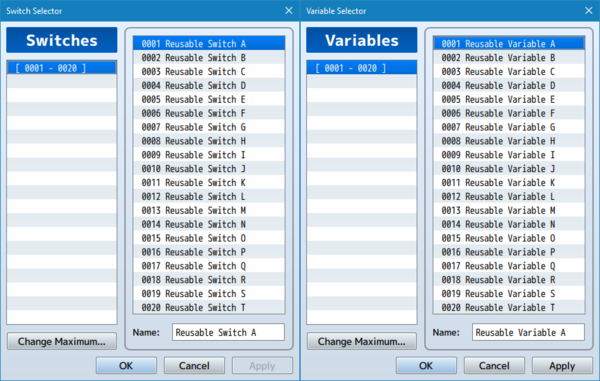
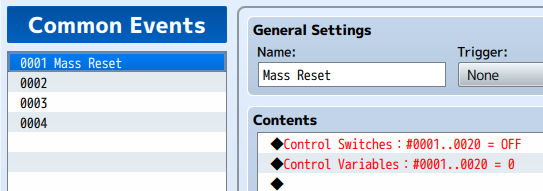
There's a drawback to using a separate map as a cutscene. That drawback is that if you make any changes to the original playable map the cutscene is based off of, you would have to implement the same changes onto the separate cutscene map itself. However, this drawback is a minuscule con compared to the various pros that having cutscenes as separate maps give you. Recycle Switches and VariablesInstead of making switches and variables for every single thing, make them reusable. I personally reserve 20 of each to be reusable switches and variables although I don't even use more than half of that amount at times. I also recommend setting them as your first batch of switches and variables, making them the very first page of switches and variables that you see. So, what are the benefits of recycling switches and variables?
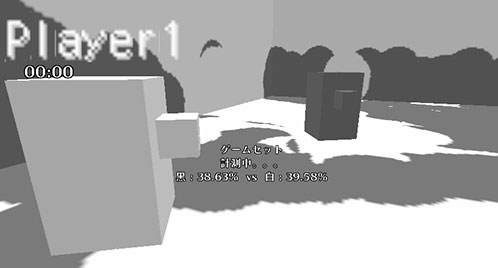
Prototype Your GameThe screenshot you're seeing above is a prototype of the Nintendo game: Splatoon. They used simple blocks and other geometric shapes before inserting in their own graphics. Why? So that they can get down a core gameplay loop first before deciding on the aesthetics. There's something important that we can take out of this: Not every aspect of your game has to be made as its finalized product from the get go. In fact, it's probably worse for you in the long run if you do that. As time progresses while you develop your game, your vision of the game becomes more and more clear, and any of the assets you've made at the beginning of your project's development cycle might not fit that vision anymore. For that reason, it's better to come up with a prototype of your game first. What does a prototype accomplish? Get a glimpse of what the gameplay loop is likeGetting a glimpse of what the core gameplay loop is like will help you solidify your vision of the game. Before you make your spectacular dungeons, amazing towns, etc., come up with the game's progression flow first. That way, you won't have to scrap some maps, items, characters, skills, enemies, etc. that you've planned in advance but decided to not use since it doesn't fit your game. Identify what makes the gameplay funBy keeping the project simple while you prototype, it's easier to identify what would make the gameplay fun without all the extra noise in the background. The noise, in this sense, would be the graphics, music, distinct items, etc. that would otherwise distract you from developing a core gameplay loop. By figuring out what the gameplay loop is, what part of it is fun, there's two things you can do from that point:
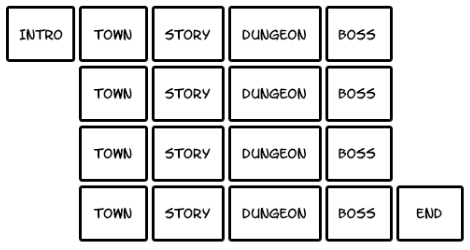
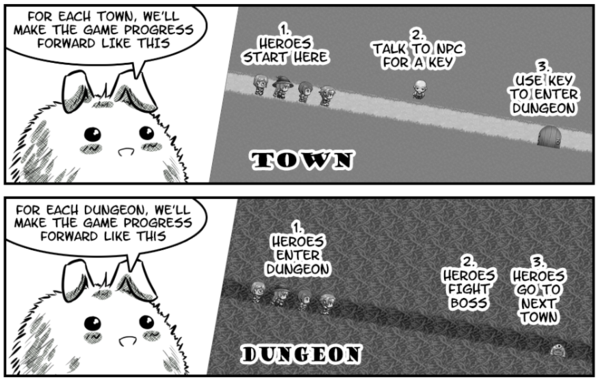
Common JRPG Core StructureThe core gameplay structure of a JRPG is the following:
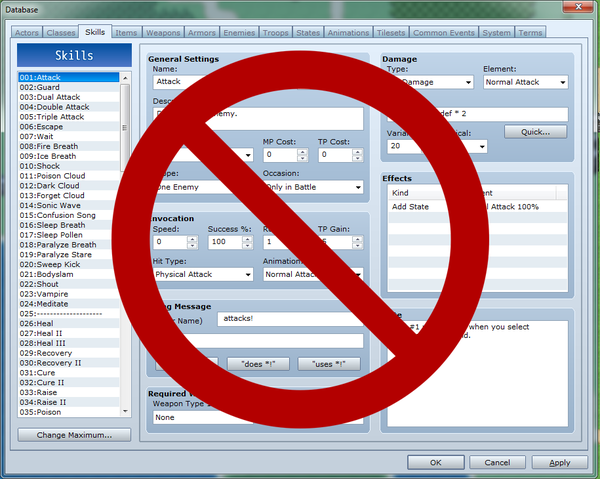
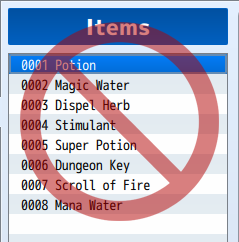
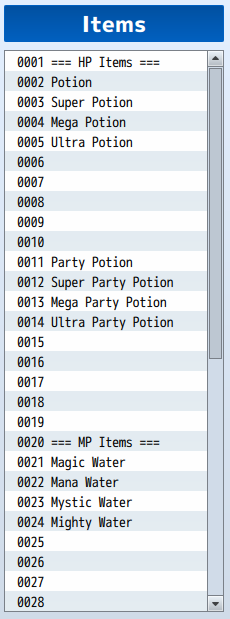
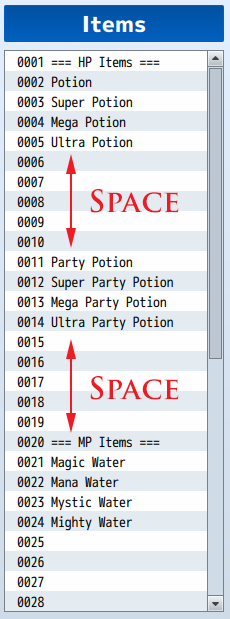
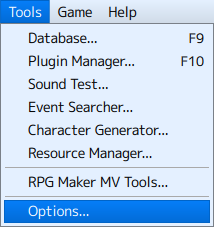
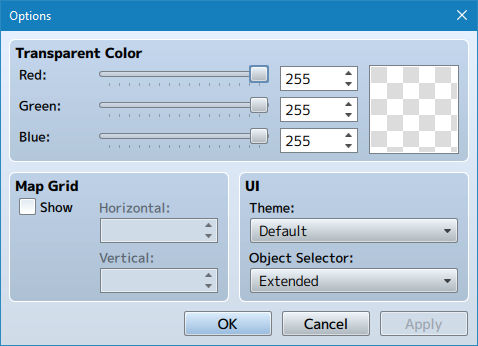
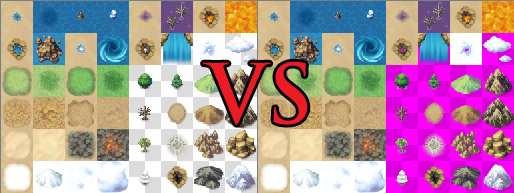
It's pretty generic, but that's the staple core gameplay structure of a JRPG. You can mix things up, too. Change things around. Perhaps instead of finding a new town, the players would immediately find a new dungeon and would have to progress through that to get to a new town instead. No matter what you do to change things around, the structure is something that tends to repeat itself in some form similar to what you see above. If there aren't multiple towns, there is probably a hub town, where the game focuses on one small town that unlocks new parts of it as players progress through the game. If there aren't multiple dungeons, it's probably one major dungeon with different floors or sections that unlock as players progress through the game. The differences are negligible compared to the core structure. You do not have to make your game in that structure, but it's beneficial for newer game devs to follow it to get a feel for how progression works when developing a RPG. Try setting up the maps ahead of time and go through them quickly. It's easier this way to get a sense of what the gameplay structure is like for your game without having to go through each of the intricate details. If something feels off about the gameplay structure at this point, it's going to feel off about the gameplay structure at a later point in time, too, so it's best to iron things out at this stage rather than trying to force it later. During the prototyping stage, avoid making things like side quests, mini-games, and other types of optional content. Those things add noise to the gameplay structure's finetuning process and can easily distract you from what main purpose of the prototype: to figure out what makes your game work. Database TipsWhat you see above is a prime example of what NOT to do with a database. These are the sample databases that come with the previous iterations of RPG Maker and they're far from the model example of what you should follow when creating your own database. So, what should you do then? Sort Your Items Ahead of TimeSort your items ahead of time. Whatever order you put your items in is the order they will appear in-game. If they're badly organized in the database, they're going to be badly organized in-game. This is bad for both you and the players. It's going to be harder for you to find the items you want/need to put into the game and harder for the players to find/use what they're looking for. Instead, sort them by category in either ascending or descending order by strength. Having them done in such a way makes it easier for both you and the players to find what you want. This will save you time on the development side of things and save the player from potential headaches playing your game. Ordering them by strength will also give both devs and players a quicker understanding on where everything is tiered at a glance. Don't be afraid to use up item slots to function as category markers. Taking up a couple of database slots doesn't hurt the game as this isn't the old days of highly limited memory storage. Most database entry types in RPG Maker MV can hold upwards of 2,000 entries while others can hold 1,000. That's more than enough for most games and even big AAA titles tend to not even hit that limit. Leave Space in the DatabaseLeave space between database categories. Why? So that you can add new entries in there at a later point. Even if you don't plan on doing it, you can never tell what your plans are in the future. By giving yourself this extra leeway, you don't have to risk your database categories becoming disorganized and thrown out of sync by leaving extra room in there for each category. Make RPG Maker ComfortableIn the more recent versions of RPG Maker MV, there's Options that you can change under the editor's Tools submenu. It should take you to a screen like this: Transparent ColorFor Transparent Color, I recommend setting it to a color you typically don't use, but stands out greatly so that you can tell when there's a transparent tile or not. A setting like 255, 0, 255 will give you a "neon pink" color that makes it readily visible to identify as transparency. Map GridThe Map Grid, if enabled, will alter the editor to visibly cut up the map into "screen sizes" depicted by the number of tiles you've set horizontally and vertically. I highly recommend that you enable this to get a good idea of what the player can see on the map at a glance. For screen sizes, use the following table to get an idea on what the screen sizes would look like:
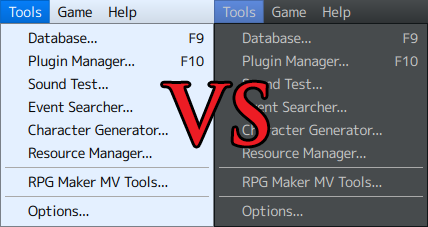
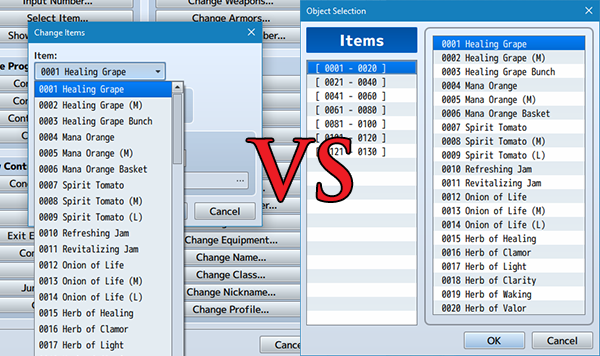
UIThe UI allows you to set the theme of the RPG Maker MV editor to the default vanilla theme, a dark theme, a high contrast white theme, or a high contrast black theme. Use whichever one you feel the most comfortable with. Object SelectorAs for the Object Selector, you can choose between a dropdown menu, extended menu, or a smart menu. For this one, I recommend the "extended menu" no matter what. Why? Because it's simply more organized and most importantly, doesn't lag the editor. The "Smart" option will have the object selector as a dropdown menu if the list is small, but if it exceeds a certain size, it will become the extended menu. The reason why I'm against the dropdown option is because the RPG Maker MV editor loads the database objects every single time the object list is populated, even if there hasn't been any changes to the database since the last time the list was made. This means, if you have a list of 1000+ items, it's going to cause the editor to lag a bit before opening up. The extended menu will only grab the segments that you demand instead. Plus, it's more organized. End of Article |
