Build Your Community Through Your Game

|
VisuStella, Caz Wolf, Fallen Angel Olivia, Atelier Irina, and other affiliated content creators.
IntroductionThe gaming market is much more different than it was before in the past. The life cycle of a game can come and go with little regards to its contents. A game packed full of content might only be in the spotlight for a fraction of the time while another game with minimal content might stay there for longer. A lot of this boils down to the community it has. A strong community is the main driving force behind the success and attention indie games get today. A game without a community will face massive challenges to gain the attention it rightfully deserves. The larger the community, the better the chances of success for that game, too. This article was transcribed over from RPG Maker Web by Arisu.
What You NeedThe VisuStella MZ Core Engine can help with this. Download it with the VisuStella MZ Sample Project. It offers you the tools to implant links straight into the communities you developed and/or are a part of.
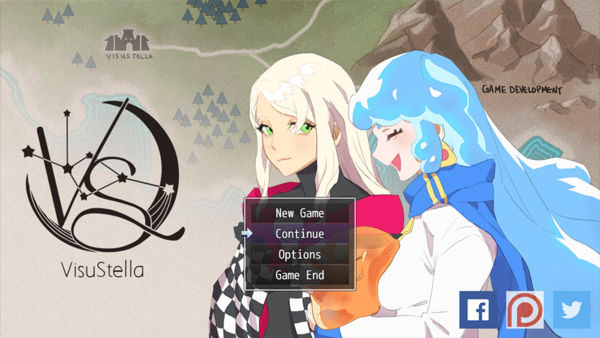
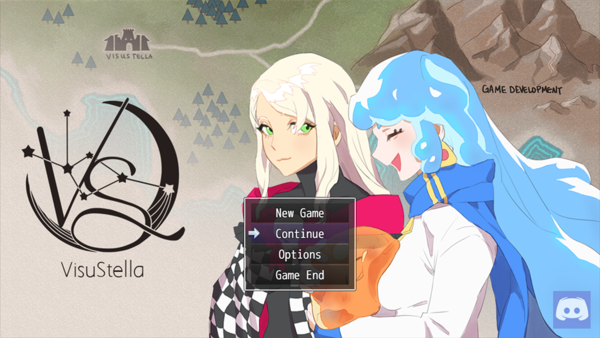
How This Builds CommunityHow does this build community? By giving access to those communities straight from the title screen. Notice those icons in the lower right part of the screen? Yep, those icons are button links to Facebook, Patreon, and Twitter. You can remove icons or add more if you so like.
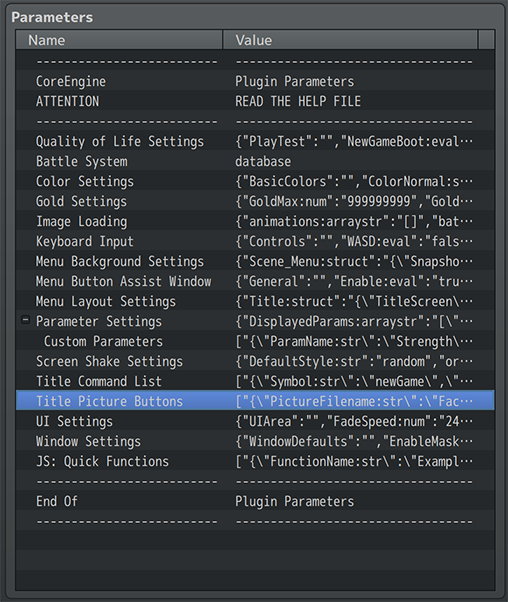
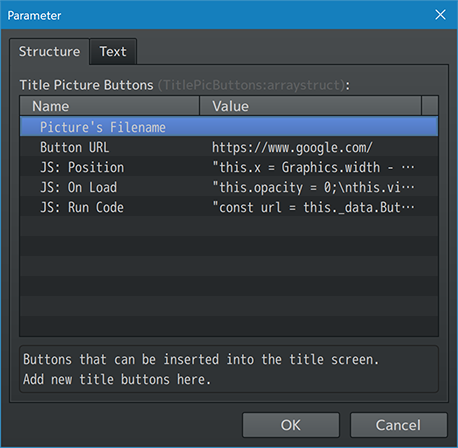
SetupSo, how do we get in on this and create the links that you want? Well, first up, let’s open up the Plugin Manager, visit the VisuStella MZ Core Engine plugin, and open up those Plugin Parameters. You should see a section in the long list of settings called Title Picture Buttons. Click that and that’s where we’ll begin our work. When you add in a new entry, you should get a window that looks something like this: Here, you can adjust whatever settings you need, but the three main things we want to look at are the Picture’s Filename, Button URL, and JS: Position. With those options, you can respectively choose the image you want to use, where to send the player, and where to put it on the screen.
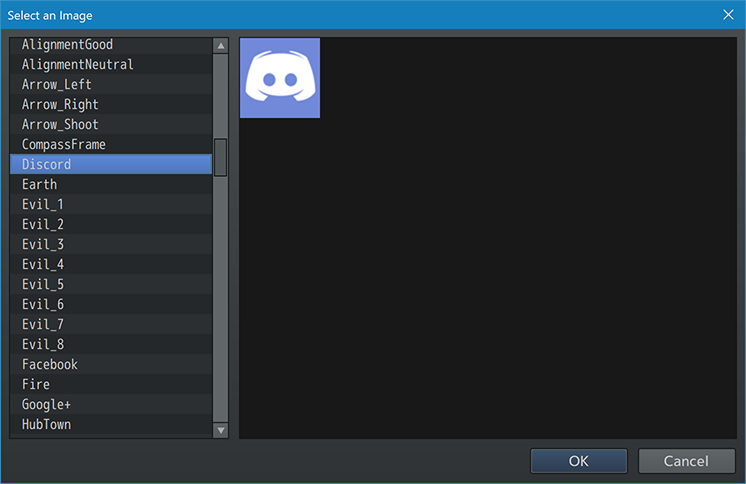
FilenameFirst, let’s work with the Picture’s Filename: When selecting the Picture’s Filename setting, you’ll encounter a window for you to select an image from your game project’s img/pictures/ folder. This image will appear on the main title screen for your game. Here, we’ll pick the Discord image since we want to link to a Discord server with it. Pick something nice and easy to recognize.
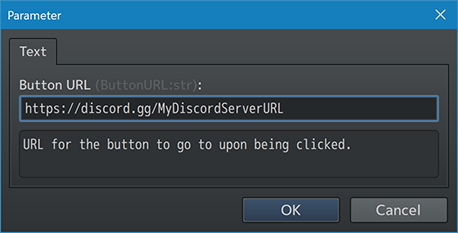
Button URLNext, let’s go to the Button URL setting. Under the Button URL setting, you determine where on the internet you want to send the player if you send them through this link. Here, we’re providing a link to a Discord server. This is a great way to grow the community you want in the places you want them to grow in, too.
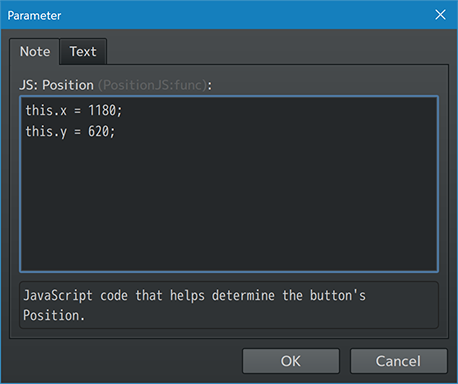
JS: PositionAnd finally, for the JS: Position setting, you can adjust where on the screen you want the image to appear. This setting does use JavaScript code, but don’t worry, it’s not scary. You can input the direct X and Y coordinates you want the picture to appear at like shown above. Copy this code as an example if you need it, too: this.x = 1180; this.y = 620; Once that’s in, the upper left corner of the image will appear at those X and Y coordinates. The numbers that work out may vary based on your game’s screen resolution and image size so play around with the numbers that best suit your game. And with that all done, save the settings, save the game, and let’s launch the game and take a look at our new button!
PlaytestYaynation! Any player who’s familiar with Discord would instantly know what that button entails or at least have an idea of what that icon means. Having such a button on the title screen of a game means that all of the game’s players have a bridge towards the game’s Discord community.
RecommendationsNaturally, you can add more buttons on the screen to the mix. Here are a few of the ones that we have provided in the VisuStella MZ Sample Project to help you get started with. These are also the ones we recommend using: Discord: Discord chat rooms are one the most common platforms used for live chatting now. They’re easily one of the best ways to grow a community. Create your own Discord server and give people a place to talk about your game live.
Reddit: Reddit functions as a mini forum-like community. You can create your own easily, too! There’s no need to host your own forum on your own website when Reddit can do it for you!
Facebook, Twitter, Tumblr, and YouTube are all powerful platforms in their own right for developing communities. These are great ways of delivering news to anyone who follows you or your game on those platforms.
Patreon: Hey, every game project benefits from funding. Patreon is a crowdfunding platform that also lets you develop a community. If your players are looking to provide a little bit of extra support to your game, now they know how to get there!
ConclusionWe hope that this tutorial has been helpful and gives you a nice jump start to the creation of your game community! Good luck everybody and Happy RPG Making!
End of Article |
