Yanfly's Life Hacks for RPG Maker Devs

|
VisuStella, Caz Wolf, Fallen Angel Olivia, Atelier Irina, and other affiliated content creators.
IntroductionI've seen about 500+ different RPG Maker MV projects and 200+ different RPG Maker MZ projects by different users. I've learned quite a few "Life Hacks" from them when it comes to game dev and how it can improve one's game dev experience. In this article, I'll be sharing some of my own "Life Hacks" with you and some that were made by those devs. Let's get started.
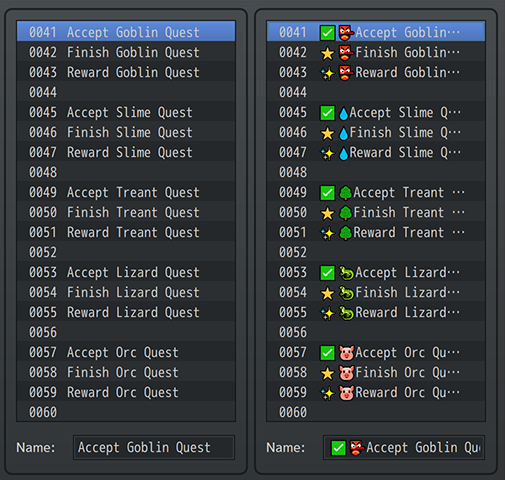
1. Emojis in Switch and Variable NamesDid you know you can put emojis into RPG Maker MV/MZ's switch and variable names? Well, now you do. If you are wondering why anyone would like to put emojis into a Switch or Variable name, it's because it makes things easier to read and quickly identify which switch is being used. When you have entire lists filled with text, like in the left side of the screenshot above, things tend to blur together. It makes it easier to make mistakes and incorrectly identify which switch should be used. But when you use emojis, it has the same effect as using icons for your item names. Instead of all the item entries being a single color and only of letter shapes, you have more variety to quickly identify which is which. The same application can be used for your own switches and variables. Except instead of being for the player, this is for you instead!
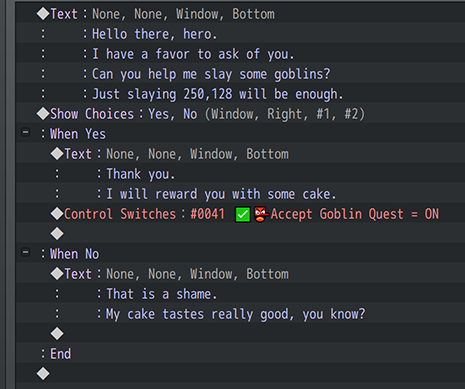
Another perk is that the emojis also appear in the event list. This improves the legibility of what goes on in an event. A quick look at the icons allow you to quickly decipher what switch type is being used and understand that specific event command entry is a switch or variable, too.
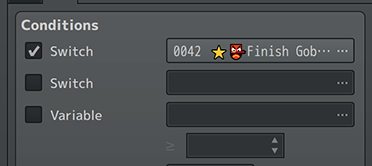
One of the more annoying things with RPG Maker's editor is that sometimes, you're unable to see the full name of a switch or variable. But when some emojis are involved, just a few symbols of them can alert you of the type of switch being used. Of course, this is provided that you understand the emoji system you put into play.
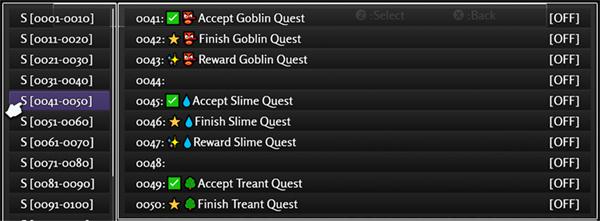
There is also the benefit of the debug menu showing the emojis, too. By quickly scrolling through the list of switches and variables, it's easy to miss the ones you're looking for. But with some emojis, identifying them because easier.
That said, do use this life hack with moderation. When you give every single switch and variable an emoji, especially commonly used ones, the effectiveness of it wears down.
This doesn't work with all operating systems. It works with modern Windows OS's (like Windows 8 and up) and Mac OS X 10.10+.
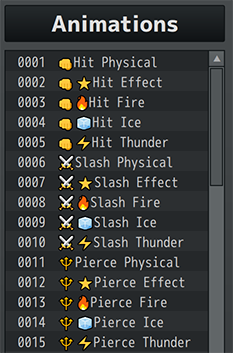
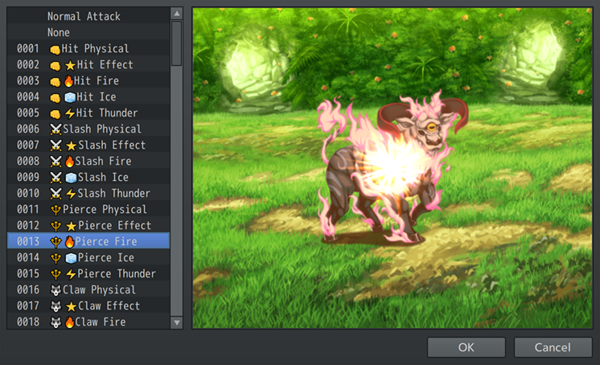
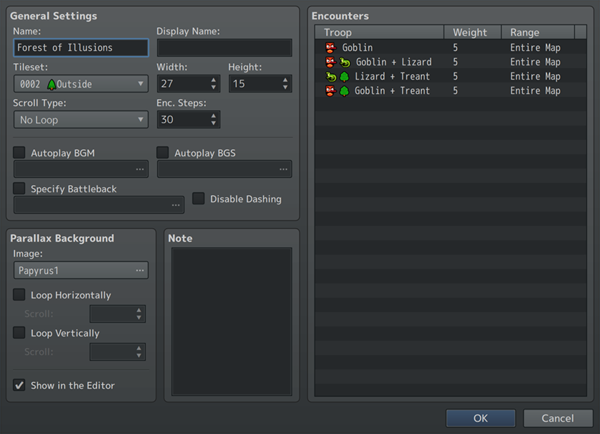
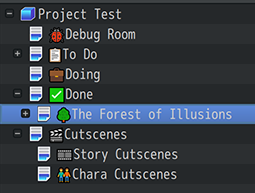
2. Emojis in the DatabaseLike with Switches and Variables, you can use emojis in various database objects. My personal favorites to use them on are animations, tilesets, and troops. The reason you'd use them would be for the same exact reason you would use them in Switch and Variable names, too: to make things easier to identify.
For example, when selecting which animation to use for a skill or item, it suddenly becomes a lot easier to identify which one from the menu. This also makes it less prone to error when selecting an incorrect animation type.
These can be used for map properties and even map names to quickly let you organize things. Considering that map names, tileset names, and troop names aren't shown in game (map names have a different text to display them in-game with), these are all safe targets to use emojis with.
I try not to use them with database objects that appear in game, like items, weapons, armors, and skills. That's because not all operating systems support emojis. Another reason to not use them with database objects is because there are some notetags that search linked database objects by name and adding an emoji to those database objects will make things a lot more difficult.
3. Character Sprites as LabelsI see it all too often: Making an autorun event with an invisible sprite, then make more invisible sprite interactions all over the map. When you eventually want to modify a specific event that has an invisible sprite, you have to click through each one in order to find it. It's a big time waster. This can be remedied with character sprite labels. Simply make your own labels and put down text on the sprite itself. This will require you to make your own custom sprite sheet with these labels, but by doing so, you increase the efficiency and productivity of creating huge event systems that are sprawling throughout your game.
Now, you might be worried if these will show up in your game, and they probably will if you just leave it at that. But here's a trick you can do to make it work: The first page is merely used to house a sprite label. The second page is where the autorun event actually takes effect and without the sprite label graphic. Only the first page needs to have the sprite label graphic to give you the benefits of it.
Now, you might argue that this makes it inconvenient to modify the event's contents since you have to turn the page to the second page. And you are right! Thankfully, there's an answer to that if you're using the Events & Movement Core if you are using RPG Maker MZ. If you are using RPG Maker MV, you can use the Call Event plugin instead. First, transplant the event commands over from the second page to the first page. Then, run a Plugin Command for a "Call Event: Remote Read" on the second page to reference the event list on the first page. That does the same exact thing.
This technique helps keeps things organized and makes it easier to find the events you're looking for. For a quick list of the labels I'm using, here they are:
End of Article |
