Events and Movement Core VisuStella MZ

|
VisuStella, Caz Wolf, Fallen Angel Olivia, Atelier Irina, and other affiliated content creators.
Contents
- 1 Download
- 2 System
- 3 Extension Plugins
- 4 VisuStella MZ
- 5 Introduction
- 6 Requirements
- 7 Features
- 8 Notetags
- 9 Plugin Commands
- 9.1 Auto Movement Plugin Commands
- 9.2 Call Event Plugin Commands
- 9.3 Dash Plugin Commands
- 9.4 Event Icon Plugin Commands
- 9.5 Event Label Plugin Commands
- 9.6 Event Location Plugin Commands
- 9.7 Event Popup Plugin Commands
- 9.8 Event Timer Plugin Commands
- 9.9 Follower Control Plugin Commands
- 9.10 Global Switch Plugin Commands
- 9.11 Global Variable Plugin Commands
- 9.12 Morph Event Plugin Commands
- 9.13 Player Icon Plugin Commands
- 9.14 Self Data Plugin Commands
- 9.15 Self Switch Plugin Commands
- 9.16 Self Variable Plugin Commands
- 9.17 Spawn Event Plugin Commands
- 10 Move Route Custom Commands
- 11 Plugin Parameters
- 12 Terms of Use
- 13 Credits
- 14 Changelog
- 15 See Also
- 16 End of File
Download | ||
SystemThis is a plugin created for RPG Maker MZ. | ||
|
Click here for help on how to install plugins and an explanation on the Tier Hierarchy System. |
Click here to learn how to update plugins. |
Click here for how to troubleshoot plugins if you get an error. |
Extension PluginsThe following plugins are Extension Plugins that require this plugin as its Parent Plugin. Place the following plugins below this plugin located in the Plugin Manager if you plan on using them.
VisuStella MZThis plugin is a part of the VisuStella MZ Plugin Library. Click here if you want to help support VisuStella on Patreon. IntroductionThe Events & Movement Core plugin adds a lot of new functionality in terms of event flexibility and movement options to RPG Maker MZ. These range from adding in old capabilities from previous iterations of RPG Maker to more mainstream techniques found in other game engines. Movement options are also expanded to support 8-directional movement as well as sprite sheets provided that the VisuStella 8 format is used. Features include all (but not limited to) the following:
RequirementsThis plugin is made for RPG Maker MZ. This will not work in other iterations of RPG Maker.
This plugin is a Tier 1 plugin. Place it under other plugins of lower tier value on your Plugin Manager list (ie: 0, 1, 2, 3, 4, 5). This is to ensure that your plugins will have the best compatibility with the rest of the VisuStella MZ Plugin library.
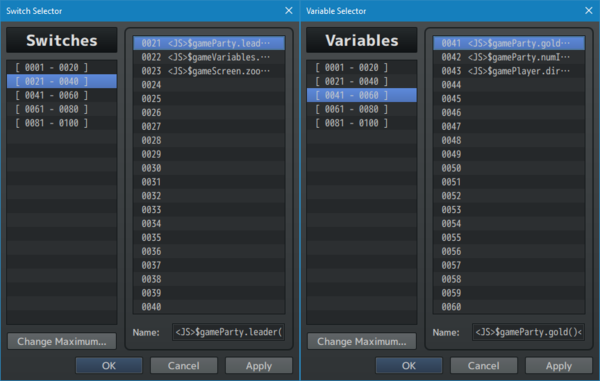
FeaturesAdvanced Switches and VariablesSwitches and variables can now run JavaScript code and return values instantly. While at first glance, this may seem no different from using the Control Variables event command's Script option, this can be used to instantly set up Switch and/or Variable conditions for Parallel Common Events, Event Page Conditions, Enemy Skill Conditions, and Troop Page Conditions instantly without needing to make an event command to do so. --- <JS> code </JS> - Used for: Switch and Variable names - Replace 'code' with JavaScript code on what value to return. --- NOTE: Tagged Switches/Variables are mutually exclusive from one another. You cannot tag them with <JS>, <Self>, or <Global> simultaneously. ---
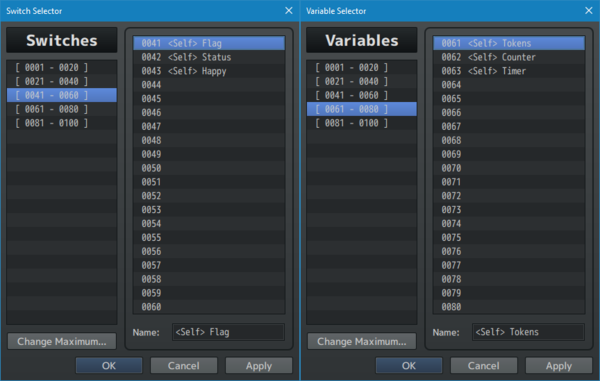
Self Switches and VariablesRPG Maker MZ by default has 4 Self Switches: A, B, C, D. For some types of games, this isn't enough. This plugin gives you the ability convert regular Switches into Self Switches so you could have more. Self Variables also do not exist in RPG Maker MZ by default. Just like with Switches, you can turn regular Variables into Self Variables. --- <Self> - Used for: Switch and Variable names - Converts the Switch/Variable into a Self Switch/Variable. --- After, just use them like you would for normal Switches and Variables in an event's page conditions. If the <Self> tag is present inside the Switch or Variable's name, then it will use data unique to only that event. NOTE: Tagged Switches/Variables are mutually exclusive from one another. You cannot tag them with <JS>, <Self>, or <Global> simultaneously. --- If you need to use a script call to get a Self Switch or Self Variable's value, you can use the following script calls. Get Self Switch Values:
getSelfSwitchValue(mapID, eventID, switchID)
- Replace 'mapID' with the map ID the target event is located on.
- Replace 'eventID' with the ID of the target event.
- Replace 'switchID' with the ID number if it is a Self Switch made with
<Self> or a capital letter surrounded by quotes if it's A, B, C, or D.
- This will return the true/false value of the Self Switch.
- Example: getSelfSwitchValue(12, 34, 56)
- Example: getSelfSwitchValue(12, 34, 'B')
  Get Self Variable Values:

  getSelfVariableValue(mapID, eventID, variableID)
  - Replace 'mapID' with the map ID the target event is located on.
  - Replace 'eventID' with the ID of the target event.
  - Replace 'variableID' with the ID number of the Self Variable.
  - This will return whatever stored value is found in the Self Variable.
  - Example: getSelfVariableValue(12, 34, 56)
Set Self Switch Values:
setSelfSwitchValue(mapID, eventID, switchID, value)
- Replace 'mapID' with the map ID the target event is located on.
- Replace 'eventID' with the ID of the target event.
- Replace 'switchID' with the ID number if it is a Self Switch made with
<Self> or a capital letter surrounded by quotes if it's A, B, C, or D.
- Replace 'value' with either 'true' or 'false' for ON/OFF respectively.
Do not use quotes.
- This will change the Self Switch's value to true/false.
- Example: setSelfSwitchValue(12, 34, 56, false)
- Example: setSelfSwitchValue(12, 34, 'B', true)
  Set Self Variable Values:

  setSelfVariableValue(mapID, eventID, variableID, value)
  - Replace 'mapID' with the map ID the target event is located on.
  - Replace 'eventID' with the ID of the target event.
  - Replace 'variableID' with the ID number of the Self Variable.
  - Replace 'value' with the value you want to set the Self Variable to.
  - Example: setSelfVariableValue(12, 34, 56, 88888)
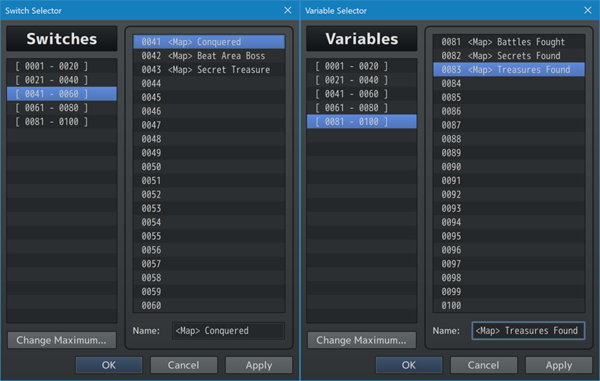
--- Map Switches and VariablesSimilar to Self Switches and Self Variables, Map Switches and Map Variables are switches and variables that retain data based on the map the player is currently located in. In other words, they're self switches and variables but for maps instead! These features do not exist in RPG Maker MZ by default. Just like with the Self Switches and Self Variables, you can turn regular Switches or Variables into Map Switches and Map Variables using the following name tag: --- <Map> - Used for: Switch and Variable names - Converts the Switch/Variable into a Map Switch/Variable. --- After, just use them like you would for normal Switches and Variables in an event's page conditions. If the <Map> tag is present inside the Switch or Variable's name, then it will use data unique to only that map. NOTE: Tagged Switches/Variables are mutually exclusive from one another. You cannot tag them with <JS>, <Self>, <Map>, or <Global> simultaneously. --- If you need to use a script call to get a Map Switch or Map Variable's value, you can use the following script calls: ---
Get Map Switch Values:
getMapSwitchValue(mapID, switchID)
- Replace 'mapID' with the map ID the switch is located on.
- Replace 'switchID' with the ID number of the switch to get data.
- Example: getMapSwitchValue(4, 20)
---
Get Variable Switch Values:
getMapVariableValue(mapID, variableID)
- Replace 'mapID' with the map ID the switch is located on.
- Replace 'variableID' with the ID number of the variable to get data.
- Example: getMapVariableValue(6, 9)
---
Set Map Switch Values:
setMapSwitchValue(mapID, switchID, value)
- Replace 'mapID' with the map ID the switch is located on.
- Replace 'switchID' with the ID number of the switch to get data.
- Replace 'value' with either 'true' or 'false' for ON/OFF respectively.
Do not use quotes.
- Example: setMapSwitchValue(4, 20, true)
- Example: setMapSwitchValue(6, 9, false)
---
Set Map Variable Values:
setMapVariableValue(mapID, variableID, value)
- Replace 'mapID' with the map ID the switch is located on.
- Replace 'variableID' with the ID number of the variable to get data.
- Replace 'value' with the value you want to set the Map Variable to.
- Example: setMapVariableValue(6, 9, 420)
---
--- Reference Switches and Reference VariablesReference Switches and Reference Variables are added in version 1.62 of this plugin. These switches and variables allow you to reference them through strings when using script calls. By simply naming your switch or variable ((Reference Name)), you can use that 'reference name' in a string to call them for script calls. This is just so you don't need to remember the ID's of every other Switch/Variable. When referencing the strings in the script calls, case does not matter, which means you can use all capitals or all lower case and they'll still reference the same switch or variable. --- For example: ---
Switch 10 Name: ((Priscilla Joined))
Script Call: $gameSwitches.value('Priscilla Joined')
$gameSwitches.setValue('Priscilla Joined', true)
---
Variable 20 Name: Total ((Goblins Slain))
Script Call: $gameVariables.value('Goblins Slain')
$gameVariables.setValue('Goblins Slain', 50)
---
Remember to put quotes around the name for the script call! This only applies for the $gameSwitches and $gameVariables functions of value(id) and setValue(id, value). They do not apply to the other $gameSwitches and $gameVariables functions. ---
Character Sprite Filename TagsFor the files located inside of your project's /img/characters/ folder, if the filenames themselves have specific "tags" in them, special properties will be applied to them. These tags can be combined together with a few exceptions. Some of these are new to VisuStella MZ, while others are default to MZ. --- !filename.png
- Tag: !
- Causes this character's sprite to align with the tile grid instead of
being lifted a few pixels higher.
- This is primarily used for things like doors, chests, and floor plates.
- Default to RPG Maker MZ.
--- $filename.png
- Tag: $
- Causes this character's sprite to use the "big character" format.
- Primarily used for sprites like the big monsters and such which only
have 3x4 cells as opposed to 12x8 cells that regular sprite sheets have.
- Cannot be combined with the [VS8] tag.
- Default to RPG Maker MZ.
--- filename[Invisible].png
- Tag: [Invisible] or [Inv]
- This character's sprite will become invisible on the map screen in-game
while almost everything else about it is visible.
- This is used for those who wish to use sprite labels for things such as
autorun and parallel events.
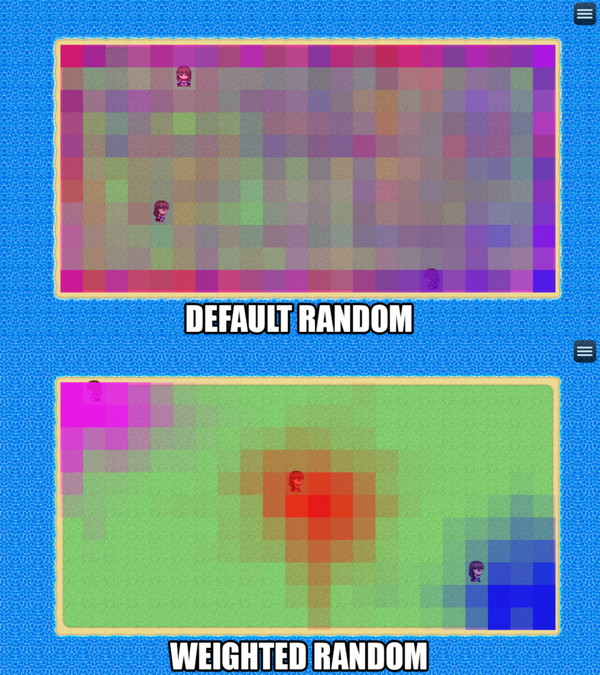
--- filename[VS8].png - Tag: [VS8] - Converts this sprite into a VisuStella-Style 8-Direction Sprite Sheet. - Refer to the section below. - Cannot be combined with the $ tag. --- VisuStella-Style 8-Directional Sprite SheetsThis plugin provides support for the VisuStella-Style 8-Directional Sprite Sheets, also know as VS8. VS8 sprite sheets offer support for walking frames, dashing frames, carrying frames, and emotes. --- To designate a sprite sheet as VS8, simply add [VS8] to the filename. Something like Actor1.png would become Actor1_[VS8].png. --- VS8 sprites are formatted as such. Each block below is a set of 3 frames. Walk Down Walk DL Dash Down Dash DL Walk Left Walk DR Dash Left Dash DR Walk Right Walk UL Dash Right Dash UL Walk Up Walk UR Dash Up Dash UR Carry Down Carry DL Ladder Emotes 3 Carry Left Carry DR Rope Emotes 4 Carry Right Carry UL Emotes 1 Emotes 5 Carry Up Carry UR Emotes 2 Emotes 6 Note: While jumping, the "carry" frame is used as most of the time, this is a sprite pose with arms up in the air where the "carried" icon is. --- Here are how each of the emote sets are grouped from left to right. Emotes 1: Item, Hmph, Victory Emotes 2: Hurt, Kneel, Collapse Emotes 3: !, ?, Music Note Emotes 4: Heart, Anger, Sweat Emotes 5: Cobweb, ..., Light Bulb Emotes 6: Sleep0, Sleep1, Sleep2 --- Weighted Random MovementWhen creating events to place on the map, you can determine what type of autonomous movement the event will have. When selecting "Random", the event will move randomly across the map. However, with the way "Random" movement works with the RPG Maker MZ default code, the event is more likely to hit a wall and then hug the said wall as it maps laps around the map's outer borders making it feel very unnatural for any player who's been on the map long enough. This is where "Weighted Random Movement" comes in. It changes up the random movement behavior to function where the farther the event is, the more likely the event is to step back towards its "home" position (aka where it spawned upon loading the map). This is so that a housewife NPC doesn't suddenly wander off into the middle of an army's training grounds on the same town map. The event will stay closer to its home value depending on how high the weight's value is. There are a number of ways to adjust the weighted value. --- Plugin Parameters > Movement > Event Movement > Random Move Weight This Plugin Parameter setting allows you to set the default weight for all events with "Random" autonomous movement. It is set at a default value of 0.10 to give the event an understandable degree of freedom. Lower numbers give events more freedom to move. Larger numbers will make the events stick closer to home. Change this value to 0 to disable it. --- You can customize this individually per event by using Notetags and/or Comment Tags for the events. <Random Move Weight: x> - Used for: Event Notetags and Event Page Comment Tags - If this tag is used on an event with random-type autonomous movement, then the event will stick closer to their home location (where they are located upon spawning on the map). How close they stick to their home location will depend on the weighted 'x' value. - Replace 'x' with a number between 0 and 1. Numbers closer to 0 give the event more freedom when moving randomly while numbers closer to 1 cause the event to stick closer to their home position. <True Random Move> - Used for: Event Notetags and Event Page Comment Tags - If this tag is used on an event with random-type autonomous movement, then that event will ignore the effects of weighted randomized movement. ---
Notetags
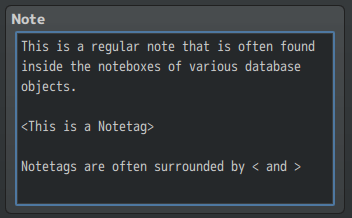
RPG Maker MZ's editor is unable to allow for custom traits/properties that a game dev may wish to associate with a database object, event, map, etc. Notetags are used to work around such limitations by allowing the game dev to tag certain traits/properties using specific Notetags declared by the related plugin. Here is a list of Notetag(s) that you may use.
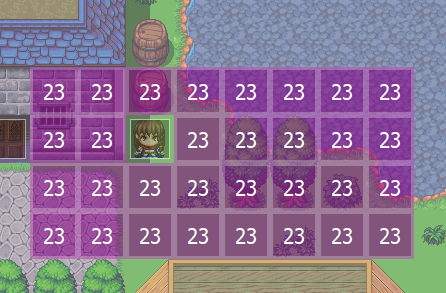
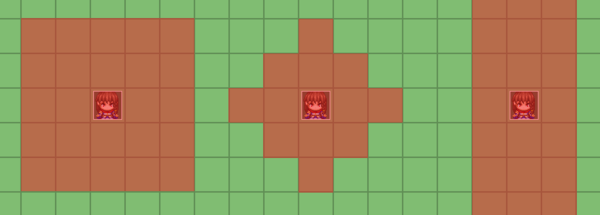
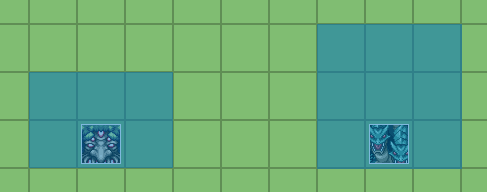
Some of these are comment tags. Comment tags are used for events to mark and affect individual event pages rather than the whole event. Map NotetagsThe following notetags are used for maps only. While some of these options are also available in the Plugin Parameters, some of these notetags extend usage to specific maps marked by these notetags as well. --- <Diagonal Movement: On> <Diagonal Movement: Off> - Used for: Map Notetags - Turns on/off diagonal movement for those maps. - If notetag isn't present, use Plugin Parameter setting. --- <type Allow Region: x> <type Allow Region: x, x, x> <type Forbid Region: x> <type Forbid Region: x, x, x> <type Dock Region: x> <type Dock Region: x, x, x> - Used for: Map Notetags - Replace 'type' with 'All', 'Walk', 'Player', 'Event', 'Vehicle', 'Boat', 'Ship', or 'Airship'. - 'Allow' notetag variants allow that type to pass through them no matter what other passability settings are in place. - 'Forbid' notetag variants forbid that type from passing through at all. - 'Dock' notetag variants allow vehicles to dock there. Boats and ships must face the region direction while airships must land directly on top. --- <Map Load Common Event: x> <Map Load Common Events: x, x, x> - Used for: Map Notetags - When this map is loaded, run the specified Common Events once available. - Does NOT trigger if you transfer to a different part of the same map. - Replace 'x' with a number representing the ID of the Common Event you wish to reserve and run once ready. --- <Save Event Locations> - Used for: Maps Notetags - Saves the locations of all events on the map so that when you return to that map at a later point, the events will be in the position they were last in. --- <Hide Player> <Show Player> - Used for: Map Notetags - Forcefully hides or shows the player sprite. This is so you don't need to manually turn the setting on/off each time you enter a specific map. - These settings will take priority over the event commands. - If the player sprite is hidden, so are the player's followers. - If the player sprite is visible, the player's followers will still depend on their settings. - These notetags are mutually exclusive from each other. --- <Hide Followers> <Show Followers> - Used for: Map Notetags - Forcefully hides or shows the player's followers. This is so you don't need to manually turn them on/off each time you enter a specific map. - These settings will take priority over the event commands. - These notetags are mutually exclusive from each other. --- Page Comment TagsThe following comment tags are to be put inside of the pages of events, troops, and common events for them to work! --- <Page Conditions> conditions conditions conditions </Page Conditions> - Used for: Map Event Page, Troop Page, and Common Event Page Comment Tags - This allows you to create custom page conditions that utilize the Conditional Branch event command to see if the additional page conditions are met. --- <Conditions Met> - Used for: Map Event Page, Troop Page, and Common Event Page Comment Tags - If used between the <Page Conditions> and </Page Conditions> comment tag, upon reaching this part of event command list, the custom page conditions will be considered met. --- Example: ◆Comment:<Page Conditions> ◆If:Reid has equipped Potion Sword ◆Comment:If Reid has equipped the Potion Sword : :<Condition Met> ◆ :End ◆Comment:</Page Conditions> If Reid has the "Potion Sword" weapon equipped, then the additional custom page conditions are met and the event page will be present/active. If this is a troop condition, the troop page event will activate. If this is a common event, there will be a parallel common event active. --- Event and Event Page NotetagsThe following notetags have comment tag variants (with a few exceptions). If a notetag is used for an event, it will affect the event constantly. If a comment tag is used, it will only affect the page the comment tag is on and only that page. --- <Activation Region: x> <Activation Regions: x,x,x> - Used for: Event Notetags and Event Page Comment Tags - Allows this event to be remotely activated as long as the player is standing within a tile marked by a designated region. - Replace 'x' with the regions you wish to remotely activate this event in. - Action Button: Player must press OK while being in the region. - Player/Event Touch: Player must step onto the region. - Autorun/Parallel: Player be in the region. - If this is placed in a notetag, the effect will be present across all event pages used. - If this is placed inside a page's comment, the effect will only occur if that event page is currently active. - NOTE: This cannot be used with any other activation tags. --- <Activation Square: x> <Activation Circle: x> <Activation Delta: x> <Activation Row: x> <Activation Column: x> - Used for: Event Notetags and Event Page Comment Tags - Allows this event to be remotely activated as long as the player is within range of its activation type. - Replace 'x' with a number stating the range in tiles. - Square: A square-shaped range with the event at the center. - Circle: A circle-shaped range with the event at the center. - Delta: A diamond-shaped range with the event at the center. - Row: Spans horizontally across the map. 'x' expands up and down. - Column: Spans vertically across the map. 'x' expands left and right. - If this is placed in a notetag, the effect will be present across all event pages used. - If this is placed inside a page's comment, the effect will only occur if that event page is currently active. - NOTE: This cannot be used with any other activation tags. --- <Always Update Movement> - Used for: Event Notetags and Event Page Comment Tags - Events normally have to be within screen range for them to update their self movement. If this tag is present, the event is always updating. - If this is placed in a notetag, the effect will be present across all event pages used. - If this is placed inside a page's comment, the effect will only occur if that event page is currently active. --- <Click Trigger> - Used for: Event Notetags and Event Page Comment Tags - Allows this event to activate upon being clicked on with the mouse. - If this is placed in a notetag, the effect will be present across all event pages used. - If this is placed inside a page's comment, the effect will only occur if that event page is currently active. --- <Copy Event: Map x, Event y> <Copy Event: x, y> <Copy Event: template> - Used for: Event Notetags ONLY - Makes this event copy all of the event settings from a different event that can be found on a different map (as long as that map is registered inside of Plugin Parameters => Event Template Settings => Preloaded Maps). - Replace 'x' with a number representing the copied event's Map ID. - If '0' is used for the Map ID, reference the current map. - Replace 'y' with a number representing the copied event's Event ID. - For the 'template' variant, replace 'template' with the name of the template made in Plugin Parameters => Event Template Settings => Event Template List. - If this is placed in a notetag, the effect will be present across all event pages used. --- <Custom Z: x>
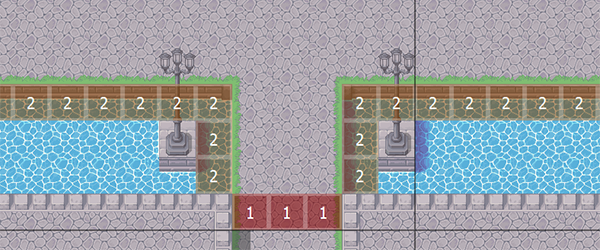
- Used for: Event Notetags and Event Page Comment Tags
- Replace 'x' with a number value to determine the event sprite's Z value
relative to the tilemap.
- For reference from rmmz_core.js:
- 0 : Lower tiles
- 1 : Lower characters
- 3 : Normal characters
- 4 : Upper tiles
- 5 : Upper characters
- 6 : Airship shadow
- 7 : Balloon
- 8 : Animation
- 9 : Destination
- You can use numbers below 0 and above 9.
- Values under 0 go below the tilemap.
- Values above 9 go above everything else on the tilemap.
- These values do NOT go below or above other screen objects that are
NOT attached to the tilemap layer such as parallaxes or weather or
windows because that's simply not how z-axis work with sprite layers.
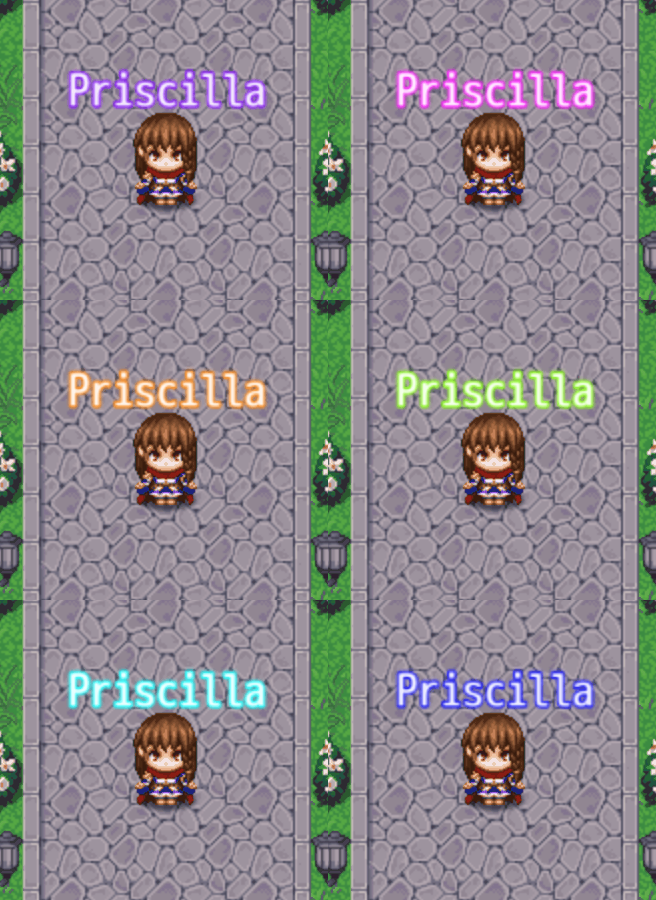
--- <Encounter Half Square: x> <Encounter Half Circle: x> <Encounter Half Delta: x> <Encounter Half Row: x> <Encounter Half Column: x> - Used for: Event Notetags and Event Page Comment Tags - If the player is within the 'x' area effect of this event, the random encounter rate will be halved. - Replace 'x' with a number stating the range in tiles. - Square: A square-shaped range with the event at the center. - Circle: A circle-shaped range with the event at the center. - Delta: A diamond-shaped range with the event at the center. - Row: Spans horizontally across the map. 'x' expands up and down. - Column: Spans vertically across the map. 'x' expands left and right. - If this is placed in a notetag, the effect will be present across all event pages used. - If this is placed inside a page's comment, the effect will only occur if that event page is currently active. Script Call Check: $isTileEncounterHalf(x, y) - This can be used to check if a certain map tile (x, y) has an encounter rate halving effect on it. - Returns a boolean (true or false) when used. --- <Encounter None Square: x> <Encounter None Circle: x> <Encounter None Delta: x> <Encounter None Row: x> <Encounter None Column: x> - Used for: Event Notetags and Event Page Comment Tags - If the player is within the 'x' area effect of this event, the random encounter rate will be suppressed completely. - Replace 'x' with a number stating the range in tiles. - Square: A square-shaped range with the event at the center. - Circle: A circle-shaped range with the event at the center. - Delta: A diamond-shaped range with the event at the center. - Row: Spans horizontally across the map. 'x' expands up and down. - Column: Spans vertically across the map. 'x' expands left and right. - If this is placed in a notetag, the effect will be present across all event pages used. - If this is placed inside a page's comment, the effect will only occur if that event page is currently active. Script Call Check: $isTileEncounterNone(x, y) - This can be used to check if a certain map tile (x, y) has an encounter rate suppression effect on it. - Returns a boolean (true or false) when used. --- <Erase if Encounter Half> <Erase if Encounter None> - Used for: Event Notetags ONLY - Automatically erase this event if the player's party has an encounter half or encounter none effect, or if the event has spawned in an encounter half or encounter none area. - This check only occurs in two situations: when the map is first loaded after being teleported into or when the player leaves a menu and returns back to the map. - Events that have been erased due to this effect will NOT return even if the encounter half/none effect is removed while the player is still on the map. The event will return if the player exits the map and comes back. --- <Exit Reset Self Data> - Used for: Event Notetags ONLY - When the player leaves the current map, all Self Switches and Self Variables related to this event will be reset. --- <Hitbox Left: x> <Hitbox Right: x> <Hitbox Up: x> <Hitbox Down: x> - Used for: Event Notetags and Event Page Comment Tags - Replace 'x' with a number to extend the hitbox of the event by that many tiles towards the listed direction. - Use multiples of this notetag to extend them to different directions. - If this is placed in a notetag, the effect will be present across all event pages used. - If this is placed inside a page's comment, the effect will only occur if that event page is currently active. --- <Icon: x> - Used for: Event Notetags and Event Page Comment Tags - Replace 'x' with the Icon ID you wish to put above this event. - This will not override any Icons designated to the ID through a Plugin Command. - If this is placed in a notetag, the effect will be present across all event pages used. - If this is placed inside a page's comment, the effect will only occur if that event page is currently active. --- <Icon Buffer X: +x> <Icon Buffer X: -x> <Icon Buffer Y: +x> <Icon Buffer Y: -x> <Icon Buffer: +x, +y> <Icon Buffer: -x, -y> - Used for: Event Notetags and Event Page Comment Tags - Allows you to adjust the positions of the icon on the envent by buffers. - Replace 'x' and 'y' with the values to adjust the position buffers by. - If this is placed in a notetag, the effect will be present across all event pages used. - If this is placed inside a page's comment, the effect will only occur if that event page is currently active. --- <Label: text> - Used for: Event Notetags and Event Page Comment Tags - Puts a label over the event's head displaying 'text'. - Text codes can be used. - If text codes are used, avoid text codes that use < and > wrappers. - If this is placed in a notetag, the effect will be present across all event pages used. - If this is placed inside a page's comment, the effect will only occur if that event page is currently active. --- <Label> text text </Label> - Used for: Event Notetags and Event Page Comment Tags - Puts a label over the event's head displaying 'text'. - This can display multiple lines. - Text codes can be used. - You can use text codes with < and > wrappers. - If this is placed in a notetag, the effect will be present across all event pages used. - If this is placed inside a page's comment, the effect will only occur if that event page is currently active. --- <Label Range: x> - Used for: Event Notetags and Event Page Comment Tags - Sets a range requirement for the player to be in order for the event's label to appear. - Replace 'x' with a number value depicting the range in tiles. - If this is placed in a notetag, the effect will be present across all event pages used. - If this is placed inside a page's comment, the effect will only occur if that event page is currently active. --- <Label Range Type: Square> <Label Range Type: Circle> <Label Range Type: Diamond> - Used for: Event Notetags and Event Page Comment Tags - Sets a range type for the label to appear visible for. - Square: A square-shaped range with the event at the center. - Circle: A circle-shaped range with the event at the center. - Diamond: A diamond-shaped range with the event at the center. - If this is placed in a notetag, the effect will be present across all event pages used. - If this is placed inside a page's comment, the effect will only occur if that event page is currently active. - If this tag is not used, refer to the default plugin parameter settings. --- <Label Offset X: +x> <Label Offset X: -x> <Label Offset Y: +x> <Label Offset Y: -x> <Label Offset: +x, +y> <Label Offset: -x, -y> - Used for: Event Notetags and Event Page Comment Tags - Allows you to adjust the positions of the label on the envent by offsets. - Replace 'x' and 'y' with the values to adjust the position offsets by. - If this is placed in a notetag, the effect will be present across all event pages used. - If this is placed inside a page's comment, the effect will only occur if that event page is currently active. --- <Label Hue Shift: +x>
<Label Hue Shift: -x>
- Used for: Event Notetags and Event Page Comment Tags
- Changes the hue of the event label by +x or -x every frame.
- Keep in mind that since this is changing hue, this will appear to have
no effect if you are using black and white labels.
- Use labels with text codes that add color to them like '\C[4]text'
- This only works with the sprite version of event labels and does not work
with the legacy version.
--- <Location X: +x> <Location X: -x> <Location Y: +x> <Location Y: -x> <Location: +x, +y> <Location: +x, -y> <Location: -x, +y> <Location: -x, -y> - Used for: Event Notetags and Event Page Comment Tags - Adjusts the initial location of this event by +x and +y (or -x and -y). - This allows you to stack events on top of each other or even move them to various places of the map. - Replace 'x' with a number that represents the horizontal tiles to adjust the initial starting location by. - Replace 'y' with a number that represents the vertical tiles to adjust the initial starting location by. --- <Mirror Sprite> - Used for: Event Notetags and Event Page Comment Tags - The event sprite's visual appearance is mirrored. --- <Move Only Region: x> <Move Only Regions: x,x,x> - Used for: Event Notetags and Event Page Comment Tags - Sets the move range of this event to only the region(s) marked by the notetag(s) or comment tag(s). - This will bypass terrain passability. - This will not bypass event collision. - If this is placed in a notetag, the effect will be present across all event pages used. - If this is placed inside a page's comment, the effect will only occur if that event page is currently active. --- <Move Synch Target: Player> <Move Synch Target: Event x> - Used for: Event Notetags and Event Page Comment Tags - Synchronizes the movement of this event with a target (either the player or another event). This event will only move whenever the synchronized target moves. - For 'Event x' variant, replace 'x' with the ID of the event to synch to. - If this is placed in a notetag, the effect will be present across all event pages used. - If this is placed inside a page's comment, the effect will only occur if that event page is currently active. --- <Move Synch Type: Random> <Move Synch Type: Approach> <Move Synch Type: Away> <Move Synch Type: Custom> <Move Synch Type: Mimic> <Move Synch Type: Reverse Mimic> <Move Synch Type: Mirror Horizontal> <Move Synch Type: Mirror Vertical> - Used for: Event Notetags and Event Page Comment Tags - Choose the type of movement the event will have if it is synchronized to a target. - Random: Move to a random position. - Approach: Approaches target. - Away: Flees from target. - Custom: Follows a custom move route. - Mimic: Imitates the target's movement style. - Reverse Mimic: Does the opposite of the target's movement. - Mirror Horizontal: Moves as if a mirror is placed horizontally. - Mirror Vertical: Moves as if a mirror is placed vertically. - If this is placed in a notetag, the effect will be present across all event pages used. - If this is placed inside a page's comment, the effect will only occur if that event page is currently active. --- <Move Synch Delay: x> - Used for: Event Notetags and Event Page Comment Tags - If this tag is present, the event will wait a bit after each move before moving again. - Replace 'x' with the number of movement instances in between. - If this is placed in a notetag, the effect will be present across all event pages used. - If this is placed inside a page's comment, the effect will only occur if that event page is currently active. --- <Move Synch Distance Opacity: x> - Used for: Event Notetags and Event Page Comment Tags - Changes the opacity of the event based on the distance between it and its move synched target. Closer means more opaque. Further away means more transparent. - Replace 'x' with a number representing the opacity change per pixel distance away. 'x' can use decimal values like 1.05 and 1.5. --- <Picture Filename: filename>
- Used for: Event Notetags and Event Page Comment Tags
- Applies a picture graphic from the /img/pictures/ folder of your project.
- This graphic will be on top of the character sprite but below the event
icon sprite.
- The picture priority will be the same as the event's priority.
- If it is "below characters", the player can walk on top of it.
- If it is "above characters", the player will behind it.
- If it is "same as characters", the priority will be based on the
current relative Y position. This also means, if the picture is big
enough, it can clip into the top of tree tiles and such.
- Replace 'filename' with a filename from the game project's /img/pictures/
folder. This is case sensitive. Do NOT include the file extension.
- If this is placed in a notetag, the effect will be present across
all event pages used.
- If this is placed inside a page's comment, the effect will only occur
if that event page is currently active.
--- <Picture Type: Enemy> <Picture Type: SV Enemy> - Used for: Event Notetags and Event Page Comment Tags - Used with <Picture Filename: filename> notetag. - Will use /img/enemies/ or /img/sv_enemies/ instead of /img/pictures/ to grab a picture graphic from. - Other picture graphic sprite related notetags will apply as normal. --- <Picture Max Size: x> <Picture Scale: y%> - Used for: Event Notetags and Event Page Comment Tags - Used with <Picture Filename: filename> notetag. - If the "Max Size" or "Scale" supplementary notetags are used, the picture graphic will be scaled proportionally to fit either the exact pixel size for "Max Size" or the "Scale" ratio. - Both the "Max Size" and "Scale" notetags require the "Filename" notetag. - Replace 'x' with a number value representing the exact pixel size for the "Max Size" notetag. - Replace 'y' with a number value representing the scale on which to shrink or enlarge the picture. 100% is normal size. 50% is half size. 200% is double size. - If this is placed in a notetag, the effect will be present across all event pages used. - If this is placed inside a page's comment, the effect will only occur if that event page is currently active. --- <Picture Offset X: +x> <Picture Offset X: -x> <Picture Offset Y: +x> <Picture Offset Y: -x> <Picture Offset: +x, +y> <Picture Offset: -x, -y> - Used for: Event Notetags and Event Page Comment Tags - Used with <Picture Filename: filename> notetag. - Offsets the X and Y position of the event picture relative to the event sprite's own position. - Replace 'x' and 'y' with numbers indicating the offset in pixels. - If this is placed in a notetag, the effect will be present across all event pages used. - If this is placed inside a page's comment, the effect will only occur if that event page is currently active. --- <Picture Wait Frames: x> - Used for: Event Notetags and Event Page Comment Tags - Used with <Picture Filename: filename> notetag. - Requires VisuMZ_4_AnimatedPictures! - "Wait Frames" is used with VisuMZ's Animated Pictures plugin. This determines the delay inbetween frame changes. - Replace 'x' with a number representing the amount of frames to wait inbetween frame changes. - If this is placed in a notetag, the effect will be present across all event pages used. - If this is placed inside a page's comment, the effect will only occur if that event page is currently active. --- <Playtest> - Used for: Event Notetags. - This does NOT work when it's in the Event Page Comment Tags. - If this notetag is found in the event's notebox (NOT comments), then the event will only appear during a playtest session. It will not appear in a deployed game where the playtest flag is not on. --- <Random Move Weight: x> - Used for: Event Notetags and Event Page Comment Tags - If this tag is used on an event with random-type autonomous movement, then the event will stick closer to their home location (where they are located upon spawning on the map). How close they stick to their home location will depend on the weighted 'x' value. - Replace 'x' with a number between 0 and 1. Numbers closer to 0 give the event more freedom when moving randomly while numbers closer to 1 cause the event to stick closer to their home position. --- <True Random Move> - Used for: Event Notetags and Event Page Comment Tags - If this tag is used on an event with random-type autonomous movement, then that event will ignore the effects of weighted randomized movement. --- <Save Event Location> - Used for: Event Notetags ONLY - Saves the locations of the event on the map so that when you return to that map at a later point, the event will be in the position it was last in. --- <Hide Shadow> - Used for: Event Notetags and Event Page Comment Tags - Hides the shadow for the event. - If this is placed in a notetag, the effect will be present across all event pages used. - If this is placed inside a page's comment, the effect will only occur if that event page is currently active. --- <Scale: x%> <Scale X: x%> <Scale Y: y%> - Used for: Event Notetags and Event Page Comment Tags - Changes the scale of the sprite to the designated size. - For <Scale: x%> variant: replace 'x' with a number representing the scaling overall percentage to be used. - For <Scale X: x%> variant, replace 'x' with a number representing the x factor for the horizontal scaling percentage to be used. - For <Scale Y: y%> variant, replace 'y' with a number representing the y factor for the vertical scaling percentage to be used. - If this is placed in a notetag, the effect will be present across all event pages used. - If this is placed inside a page's comment, the effect will only occur if that event page is currently active. --- <Shadow Filename: filename> - Used for: Event Notetags and Event Page Comment Tags - Replaces the shadow graphic used with 'filename' found in the img/system/ project folder. - If this is placed in a notetag, the effect will be present across all event pages used. - If this is placed inside a page's comment, the effect will only occur if that event page is currently active. --- <Sprite Offset X: +x> <Sprite Offset X: -x> <Sprite Offset Y: +x> <Sprite Offset Y: -x> <Sprite Offset: +x, +y> <Sprite Offset: -x, -y> - Used for: Event Notetags and Event Page Comment Tags - Changes how much the event's sprite is visibly offset by. - Replace 'x' and 'y' with numbers indicating the offset in pixels. - If this is placed in a notetag, the effect will be present across all event pages used. - If this is placed inside a page's comment, the effect will only occur if that event page is currently active. --- <Step Pattern: Left to Right>
<Step Pattern: Right to Left>
<Step Pattern: Spin Clockwise>
<Step Pattern: Spin CW>
<Step Pattern: Spin CounterClockwise>
<Step Pattern: Spin CCW>
<Step Pattern: Spin AntiClockwise>
<Step Pattern: Spin ACW>
- Used for: Event Notetags and Event Page Comment Tags
- Changes the way the event animates if a tag is present.
- Left to Right: Makes the event sprite's step behavior go from frame 0 to
1 to 2, then back to 0 instead of looping backward.
- Right to Left: Makes the event sprite's step behavior go from frame 2 to
1 to 0, then back to 2 instead of looping forward.
- Spin Clockwise: Makes the event sprite's step behavior spin CW.
- Spin CounterClockwise: Makes the event sprite's step behavior spin CCW.
- If this is placed in a notetag, the effect will be present across
all event pages used.
- If this is placed inside a page's comment, the effect will only occur
if that event page is currently active.
--- <Tile Expand Up: x> <Tile Expand Down: x> <Tile Expand Left: x> <Tile Expand Right: x> - Used for: Event Notetags and Event Page Comment Tags - Used for events with tile graphics. Expands the graphic up, down, left, or right from the spritesheet. - This does NOT expand the hitbox. - The graphic will be anchored to the tile it's expanded from. This means even if you expanded downward, the actual event's position will still be the current event's X/Y coordinates. It's just grown more vertically and is still centered horizontally. - This is primarily used to save on having to use too many events for tiles that expanded past 1x1 tile sizes. --- Plugin CommandsPlugin Commands are event commands that are used to call upon functions added by a plugin that aren't inherently a part of RPG Maker MZ. Here is a list of Plugin Command(s) that you may use: ---
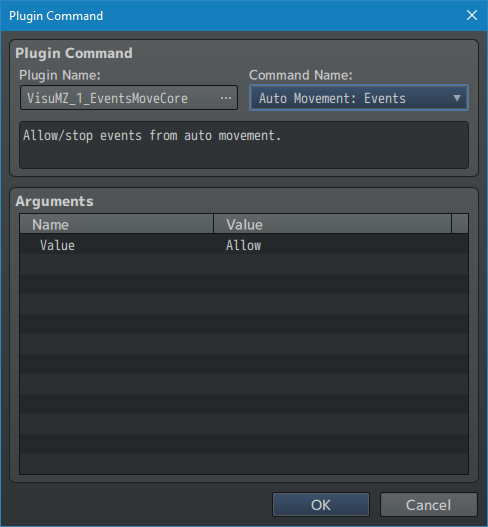
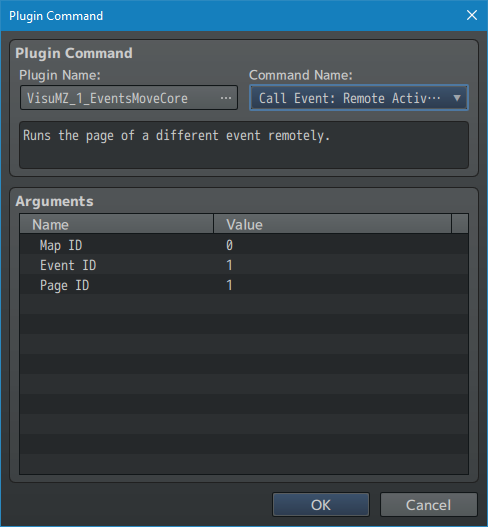
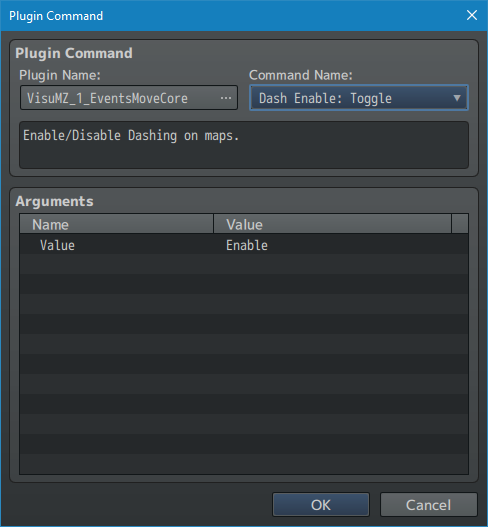
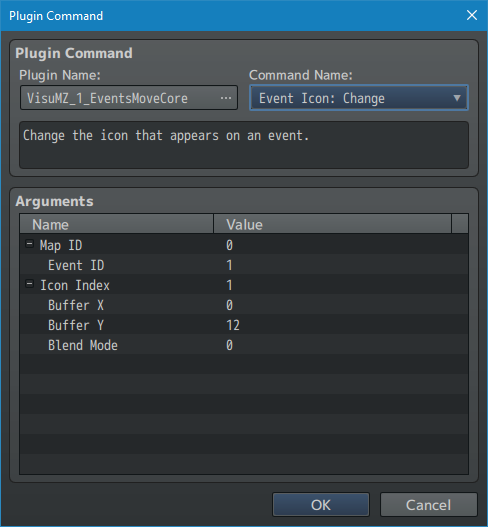
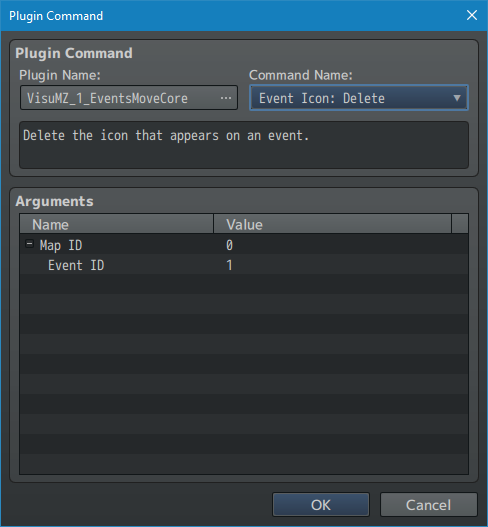
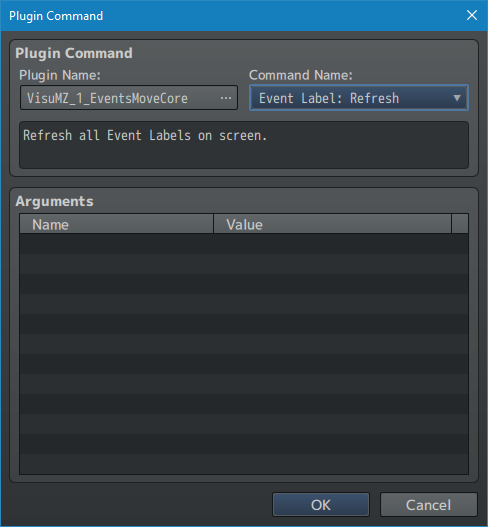
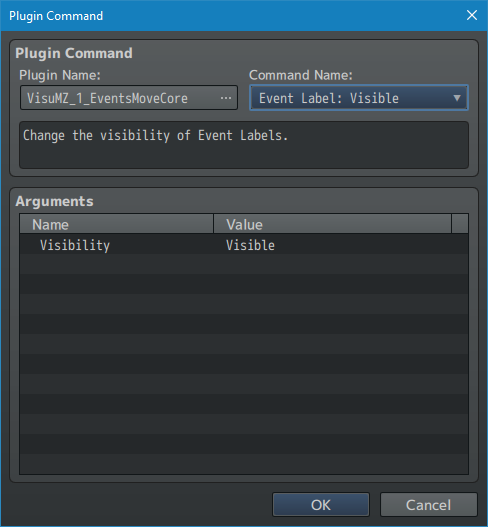
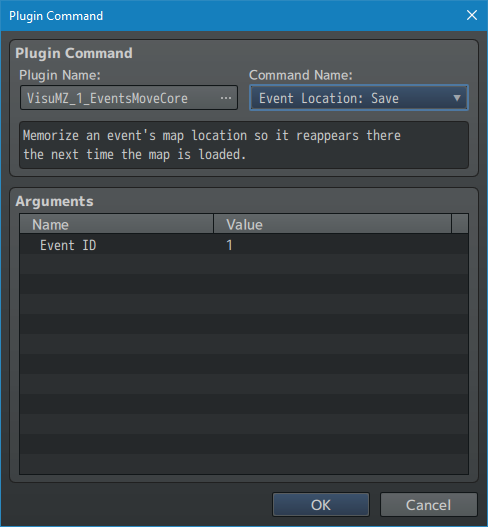
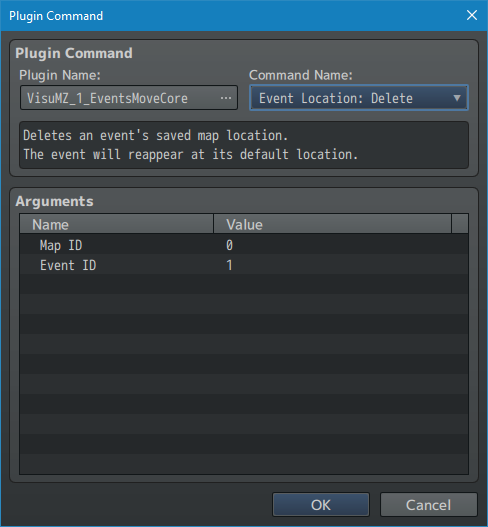
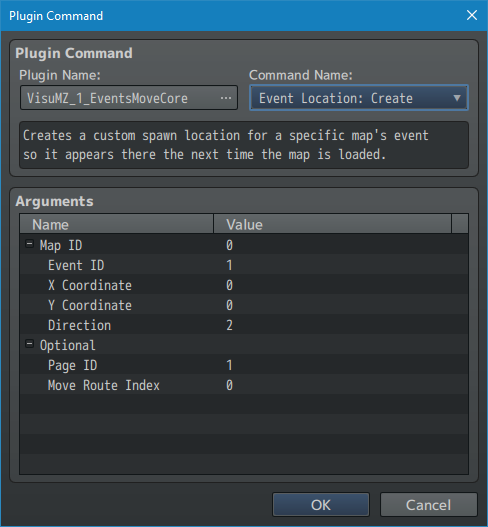
--- Auto Movement Plugin Commands--- Auto Movement: Events - Allow/stop events from auto movement. Value: - Allow events to move automatically? --- Call Event Plugin Commands--- Call Event: Remote Read - Runs the page of a different event remotely. - This will run the page of the target event on the CURRENT event. - This means that any "This Event" commands will be applied to the event using this Plugin Command and NOT the target event that page data is being retrieved from. - Think of it as the current event using the target called event as a Common Event ala how RPG Maker 2003 works (for those familiar with it). Map ID: - Target event's map. Use 0 for current map. - You may use JavaScript code. Event ID: - The ID of the event to remotely run. - Use 0 for current event. - You may use JavaScript code. Page ID: - The page of the remote event to run. - You may use JavaScript code. --- Dash Plugin Commands--- Dash Enable: Toggle - Enable/Disable Dashing on maps. Value: - What do you wish to change dashing to? --- Event Icon Plugin Commands--- Event Icon: Change (Temporary) - Change the icon that appears on an event. - This change is temporary and resets upon new events. Map ID: - The map the target map. Use 0 for current map. - You may use JavaScript code. Event ID: - The ID of the target event. - Use 0 for current event. - You may use JavaScript code. Icon Index: - Icon index used for the icon. - You may use JavaScript code. Buffer X: - How much to shift the X position by? - You may use JavaScript code. Buffer Y: - How much to shift the Y position by? - You may use JavaScript code. Blend Mode: - What kind of blend mode do you wish to apply to the icon sprite? --- Event Icon: Change (Forced) - Change the icon that appears on an event. - This change is forced and needs to be restored. Map ID: - The map the target map. Use 0 for current map. - You may use JavaScript code. Event ID: - The ID of the target event. - Use 0 for current event. - You may use JavaScript code. Icon Index: - Icon index used for the icon. - You may use JavaScript code. Buffer X: - How much to shift the X position by? - You may use JavaScript code. Buffer Y: - How much to shift the Y position by? - You may use JavaScript code. Blend Mode: - What kind of blend mode do you wish to apply to the icon sprite? --- Event Icon: Delete - Delete the icon that appears on an event. - This will remain deleted and invisible for events. Map ID: - The map the target map. Use 0 for current map. - You may use JavaScript code. Event ID: - The ID of the target event. - Use 0 for current event. - You may use JavaScript code. --- Event Icon: Restore - Restores a deleted or forced icon that appears on an event. Map ID: - The map the target map. Use 0 for current map. - You may use JavaScript code. Event ID: - The ID of the target event. - Use 0 for current event. - You may use JavaScript code. --- Event Label Plugin Commands--- Event Label: Refresh - Refresh all Event Labels on screen. - This is used to refresh page conditions for map changes that don't force a refresh. --- Event Label: Visible - Change the visibility of Event Labels. Visibility: - What do you wish to change visibility to? --- Event Location Plugin Commands--- Event Location: Save - Memorize an event's map location so it reappears there the next time the map is loaded. Event ID: - The ID of the target event. - You may use JavaScript code. --- Event Location: Delete - Deletes an event's saved map location. - The event will reappear at its default location. Map ID: - The map the target map. Use 0 for current map. - You may use JavaScript code. Event ID: - The ID of the target event. - Use 0 for current event. - You may use JavaScript code. --- Event Location: Create
- Creates a custom spawn location for a specific map's event so it appears
there the next time the map is loaded.
Map ID:
- The map the target map. Use 0 for current map.
- You may use JavaScript code.
Event ID:
- The ID of the target event.
- Use 0 for current event.
- You may use JavaScript code.
X Coordinate:
- The X coordinate of the event.
- You may use JavaScript code.
Y Coordinate:
- The Y coordinate of the event.
- You may use JavaScript code.
Direction:
- The direction the event will be facing.
Optional:
Page ID:
- The page of the event to set the move route to.
- You may use JavaScript code.
Move Route Index:
- The point in the move route for this event to be at if the page ID
matches the rest of the page conditions.
--- Event Popup Plugin Commands
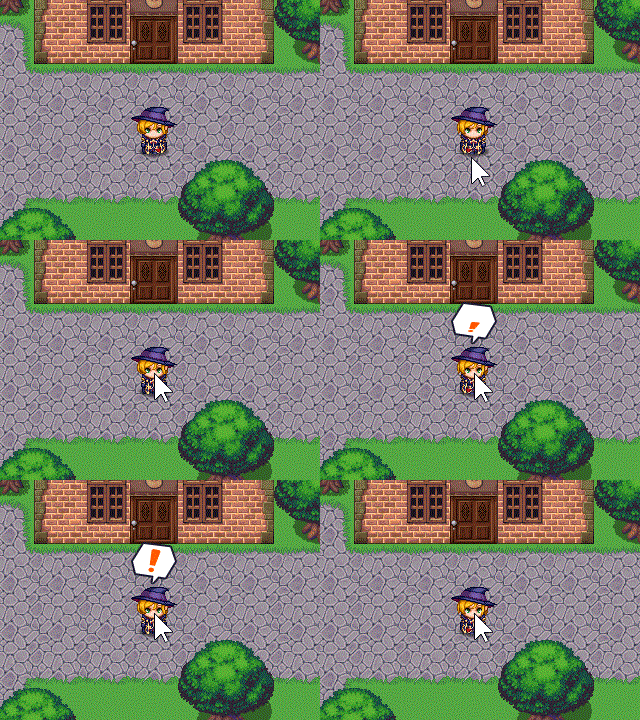
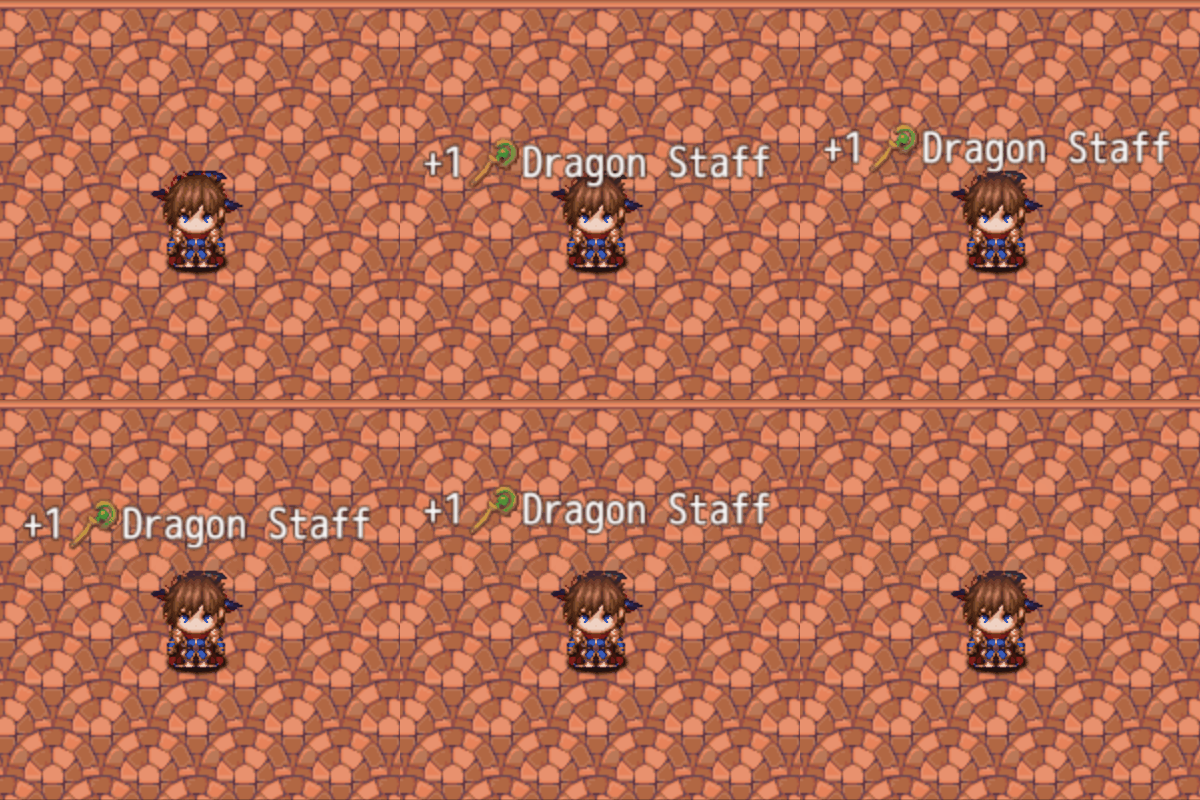
2023 December 15 Since the version 1.55 update of Events and Movement Core, you can use the new Plugin Command called "Event Popup", which creates text above specific targets like the player character or an event, and move it. This feature is made by none other than yours truly, Arisu! There's many applications in which this can be used, but only if you change the way it's used. Let's take a look at them! This article will show you how to use popups to display Quick Messages, indicate Obtained Items, giving gifts to NPC's, and throwing items across the map.
--- Event Popup: Player - Makes a centered event popup on the player sprite. - Requires VisuMZ_1_MessageCore! - Cannot be used in battle! Message Text: - Insert the text to be displayed. - Text codes can be used. Message Duration: - What is the frame duration of the event popup? - 60 frames = 1 second. You may use code. Popup Settings: - These settings let you adjust how the popup animates. - See "Popup Settings" section below. --- Event Popup: Follower - Makes a centered event popup on target follower sprite. - Requires VisuMZ_1_MessageCore! - Cannot be used in battle! Follower Index: - Which follower index to play popup? - Index starts at 0. - You may use JavaScript code. Message Text: - Insert the text to be displayed. - Text codes can be used. Message Duration: - What is the frame duration of the event popup? - 60 frames = 1 second. - You may use code. Popup Settings: - These settings let you adjust how the popup animates. - See "Popup Settings" section below. --- Event Popup: Event - Makes a centered event popup on target event sprite. - Requires VisuMZ_1_MessageCore! - Cannot be used in battle! Event ID: - The ID of the event to play popup on. - Use 0 for current event. - You may use JavaScript code. Message Text: - Insert the text to be displayed. - Text codes can be used. Message Duration: - What is the frame duration of the event popup? - 60 frames = 1 second. You may use code. Popup Settings: - These settings let you adjust how the popup animates. - See "Popup Settings" section below. --- Event Popup: Target Tile - Makes a centered event popup on target tile. - Requires VisuMZ_1_MessageCore! - Cannot be used in battle! Map Tile X: Map Tile Y: - The x/y coordinate of the map tile. - You may use JavaScript code. Message Text: - Insert the text to be displayed. - Text codes can be used. Message Duration: - What is the frame duration of the event popup? - 60 frames = 1 second. You may use code. Popup Settings: - These settings let you adjust how the popup animates. - See "Popup Settings" section below. --- Popup Settings
Fade Settings:
Fade In Duration:
- How many frames does it take to fade in?
- 60 frames = 1 second.
Fade Out Duration:
- How many frames does it take to fade out?
- 60 frames = 1 second.
Offset Settings:
Starting Offset X:
- Offsets the starting x position.
- Negative: left. Positive: right.
- You may use code.
Starting Offset Y:
- Offsets the starting y position.
- Negative: up. Positive: down.
- You may use code.
Ending Offset X:
- Offsets the ending x position.
- Negative: left. Positive: right.
- You may use code.
Ending Offset Y:
- Offsets the ending y position.
- Negative: up. Positive: down.
- You may use code.
Scaling Settings:
Starting Scale X:
- What is the starting scale x?
- 0.0 = 0%, 0.5 = 50%, 1.0 = 100%
- You may use code.
Starting Scale Y:
- What is the starting scale y?
- 0.0 = 0%, 0.5 = 50%, 1.0 = 100%
- You may use code.
Ending Scale X:
- What is the ending scale x?
- 0.0 = 0%, 0.5 = 50%, 1.0 = 100%
- You may use code.
Ending Scale Y:
- What is the ending scale y?
- 0.0 = 0%, 0.5 = 50%, 1.0 = 100%
- You may use code.
Angle Settings:
Starting Offset Angle:
- What is the starting angle offset?
- Use numbers between 0 and 360.
- You may use code.
Ending Offset Angle:
- What is the ending angle offset?
- Use numbers between 0 and 360.
- You may use code.
Misc Settings:
Arc Peak:
- This is the height of the popup's trajectory arc in pixels.
- Positive: up. Negative: down.
- You may use code.
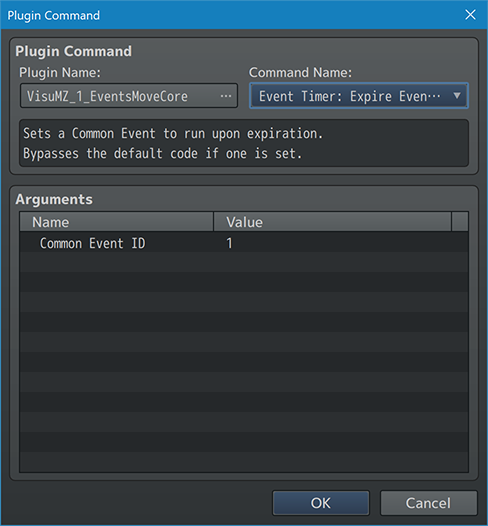
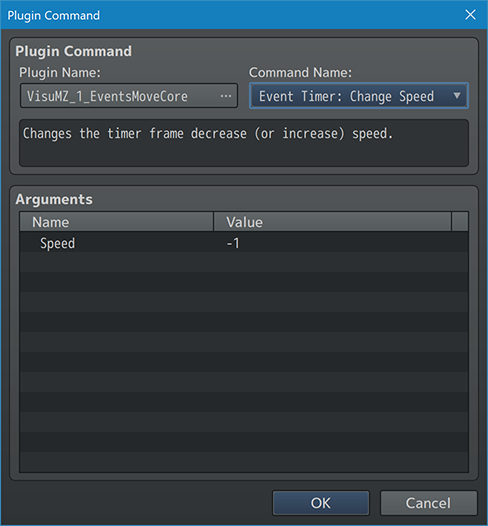
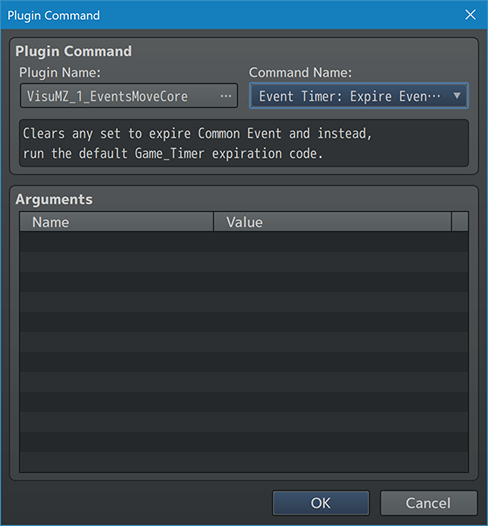
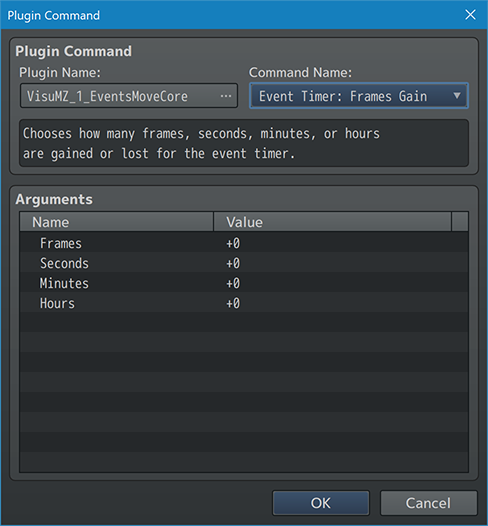
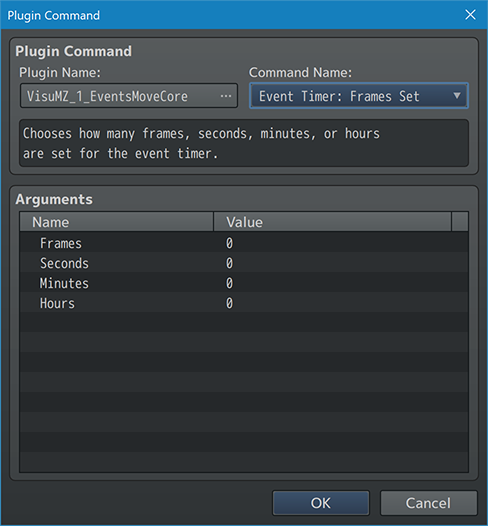
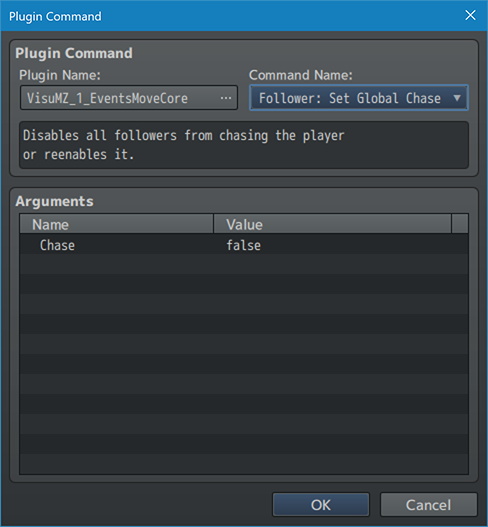
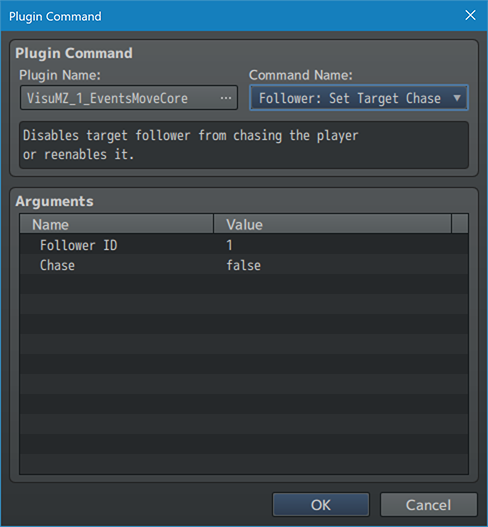
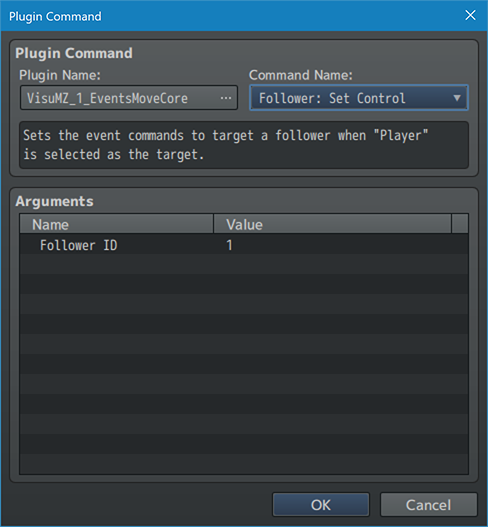
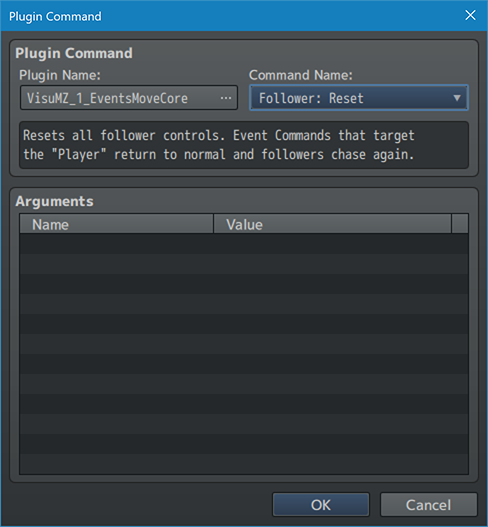
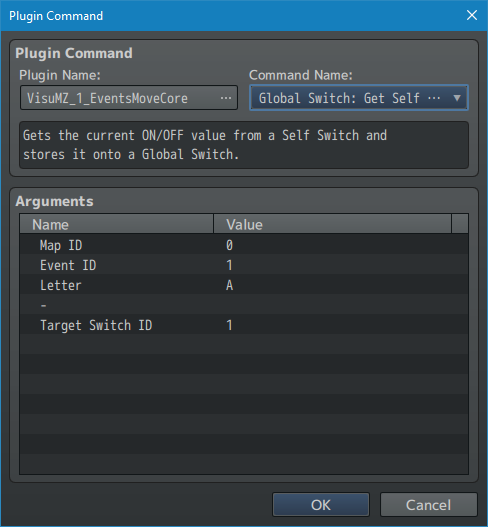
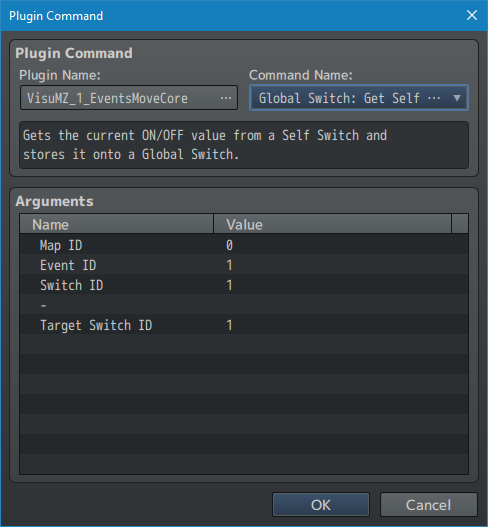
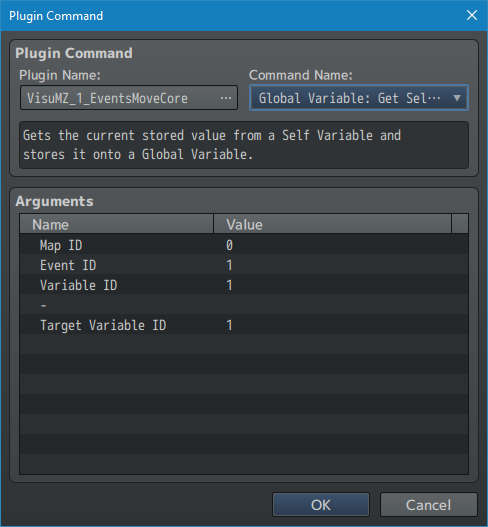
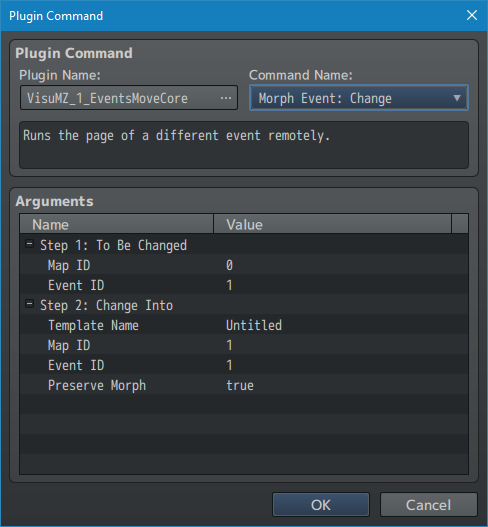
--- Event Timer Plugin Commands--- Event Timer: Change Speed - Changes the timer frame decrease (or increase) speed. Speed: - How many 1/60ths of a second does each frame increase or decrease by? - Negative decreases. - Positive increases. - JavaScript allowed. --- Event Timer: Expire Event Assign - Sets a Common Event to run upon expiration. - Bypasses the default code if one is set. Common Event ID: - Select the Common Event to run upon the timer's expiration. --- Event Timer: Expire Event Clear - Clears any set to expire Common Event and instead, run the default Game_Timer expiration code. --- Event Timer: Frames Gain - Chooses how many frames, seconds, minutes, or hours are gained or lost for the event timer. Frames: - How many 1/60ths of a second are gained/lost? - Positive for gain. - Negative for lost. - JavaScript allowed. Seconds: - How many seconds are gained/lost? - Positive for gain. - Negative for lost. - JavaScript allowed. Minutes: - How many minutes are gained/lost? - Positive for gain. - Negative for lost. - JavaScript allowed. Hours: - How many hours are gained/lost? - Positive for gain. - Negative for lost. - JavaScript allowed. --- Event Timer: Frames Set - Chooses how many frames, seconds, minutes, or hours are set for the event timer. Frames: - Set frame count to this value. - Each frame is 1/60th of a second. - JavaScript allowed. Seconds: - Set seconds to this value. - JavaScript allowed. Minutes: - Set minutes to this value. - Each minute is 60 seconds. - JavaScript allowed. Hours: - Set hours to this value. - Each hour is 60 minutes. - JavaScript allowed. --- Event Timer: Pause - Pauses the current event timer, but does not stop it. --- Event Timer: Resume - Resumes the current event timer from the paused state. --- Follower Control Plugin Commands--- Follower: Set Global Chase - Disables all followers from chasing the player or reenables it. Chase: - Sets all followers to chase the player or not. --- Follower: Set Target Chase - Disables target follower from chasing the player or reenables it. Follower ID: - Select which follower ID to disable/reenable chasing for. Chase: - Sets target follower to chase its target or not. --- Follower: Set Control - Sets the event commands to target a follower when "Player" is selected as the target. Follower ID: - Select which follower ID to control. - 0 is the player. --- Follower: Reset - Resets all follower controls. Event Commands that target the "Player" return to normal and followers chase again. --- Global Switch Plugin Commands--- Global Switch: Get Self Switch A B C D - Gets the current ON/OFF value from a Self Switch and stores it onto a Global Switch. Map ID: - The map the source map. Use 0 for current map. - You may use JavaScript code. Event ID: - The ID of the source event. - Use 0 for current event. - You may use JavaScript code. Letter: - Letter of the target event's Self Switch to obtain data from. - Target Switch ID: - The ID of the target switch. --- Global Switch: Get Self Switch ID - Gets the current ON/OFF value from a Self Switch and stores it onto a Global Switch. Map ID: - The map the source map. Use 0 for current map. - You may use JavaScript code. Event ID: - The ID of the source event. - Use 0 for current event. - You may use JavaScript code. Switch ID: - The ID of the source switch. - Target Switch ID: - The ID of the target switch. --- Global Variable Plugin Commands--- Global Variable: Get Self Variable ID - Gets the current stored value from a Self Variable and stores it onto a Global Variable. Map ID: - The map the source map. Use 0 for current map. - You may use JavaScript code. Event ID: - The ID of the source event. - Use 0 for current event. - You may use JavaScript code. Variable ID: - The ID of the source variable. - Target Variable ID: - The ID of the target variable. --- Morph Event Plugin Commands--- Morph Event: Change
- Runs the page of a different event remotely.
Step 1:
Map ID:
- Target event's map. Use 0 for current map.
- You may use JavaScript code.
Event ID:
- The ID of the target event.
- Use 0 for current event.
- You may use JavaScript code.
Step 2:
Template Name:
- Name of the target event template to morph into.
- Ignored if this is called "Untitled".
Map ID:
- Target event's map. Use 0 for current map.
- You may use JavaScript code.
Event ID:
- The ID of the target event.
- Use 0 for current event.
- You may use JavaScript code.
Preserve Morph:
- Is the morph effect preserved?
- Or does it expire upon leaving the map?
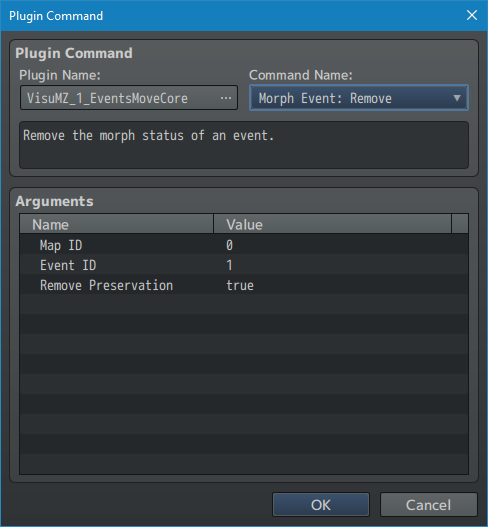
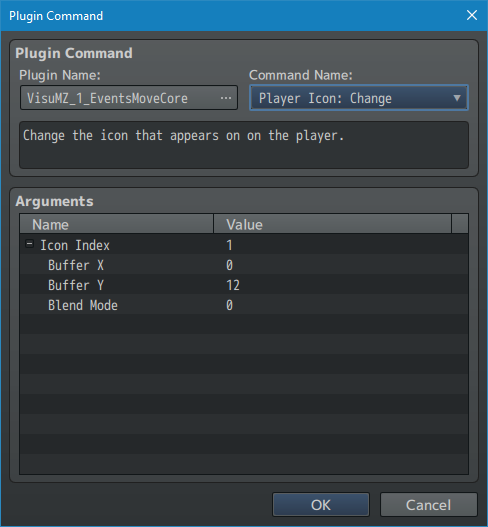
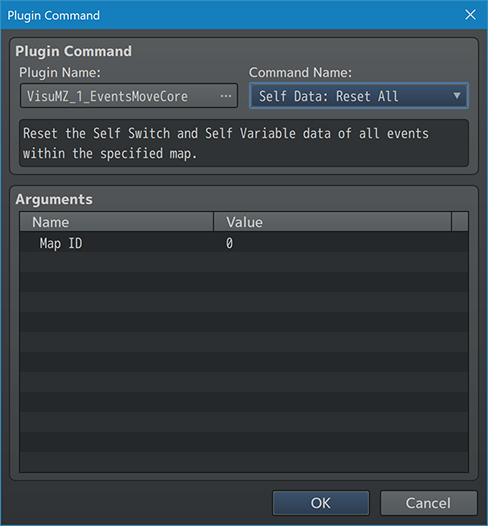
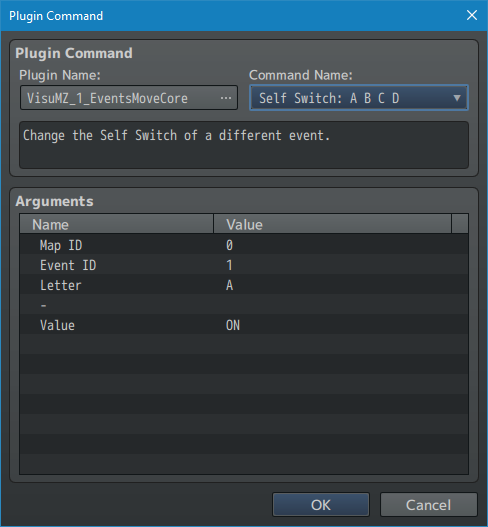
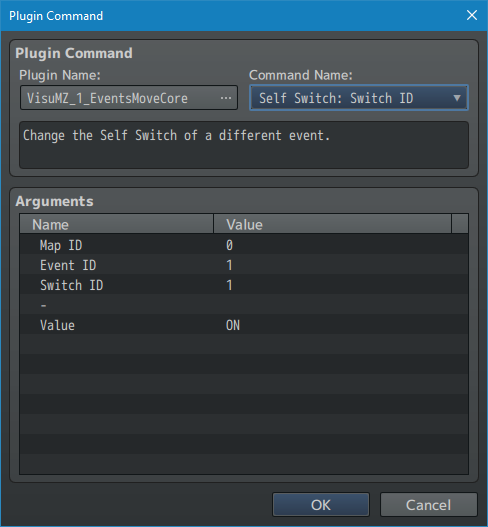
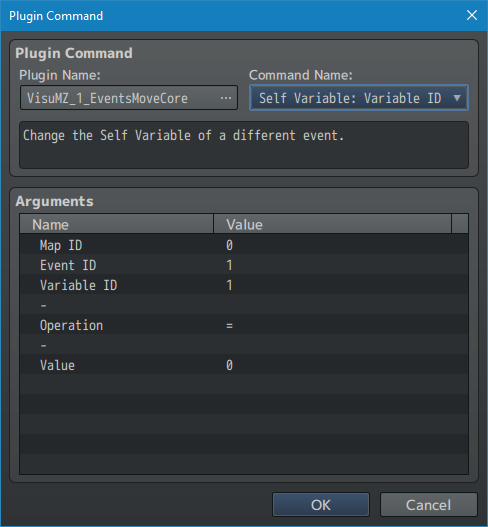
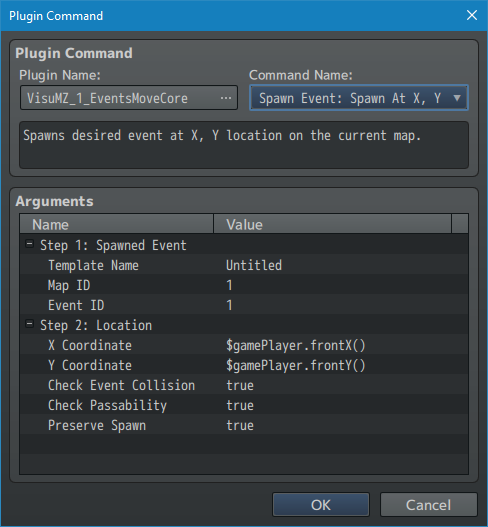
--- Morph Event: Remove - Remove the morph status of an event. Map ID: - Target event's map. Use 0 for current map. - You may use JavaScript code. Event ID: - The ID of the event to remotely run. - Use 0 for current event. - You may use JavaScript code. Remove Preservation: - Also remove the preservation effect? --- Player Icon Plugin Commands--- Player Icon: Change - Change the icon that appears on on the player. Icon Index: - Icon index used for the icon. - You may use JavaScript code. Buffer X: - How much to shift the X position by? - You may use JavaScript code. Buffer Y: - How much to shift the Y position by? - You may use JavaScript code. Blend Mode: - What kind of blend mode do you wish to apply to the icon sprite? --- Player Icon: Delete - Delete the icon that appears on the player. --- Self Data Plugin Commands--- Self Data: Reset All - Reset the Self Switch and Self Variable data of all events within the specified map. Map ID: - The map the target map. Use 0 for current map. - You may use JavaScript code. --- Self Switch Plugin Commands--- Self Switch: A B C D - Change the Self Switch of a different event. Map ID: - The map the target map. Use 0 for current map. - You may use JavaScript code. Event ID: - The ID of the target event. - Use 0 for current event. - You may use JavaScript code. Letter: - Letter of the target event's Self Switch to change. Value: - What value do you want to set the Self Switch to? --- Self Switch: Switch ID - Change the Self Switch of a different event. Map ID: - The map the target map. Use 0 for current map. - You may use JavaScript code. Event ID: - The ID of the target event. - Use 0 for current event. - You may use JavaScript code. Switch ID: - The ID of the target switch. Value: - What value do you want to set the Self Switch to? --- Self Variable Plugin Commands--- Self Variable: Variable ID - Change the Self Variable of a different event. Map ID: - The map the target map. Use 0 for current map. - You may use JavaScript code. Event ID: - The ID of the target event. - Use 0 for current event. - You may use JavaScript code. Variable ID: - The ID of the target variable. Value: - What value do you want to set the Self Switch to? --- Spawn Event Plugin Commands--- Spawn Event: Spawn At X, Y
- Spawns desired event at X, Y location on the current map.
Step 1:
Template Name:
- Name of the target event template to spawn as.
- Ignored if this is called "Untitled".
Map ID:
- Target event's map to be used as reference.
- You may use JavaScript code.
Event ID:
- The ID of the target event to be used as reference.
- You may use JavaScript code.
Step 2:
X Coordinate:
- Target Location to spawn at.
- You may use JavaScript code.
Y Coordinate:
- Target Location to spawn at.
- You may use JavaScript code.
Check Event Collision:
- Check collision with any other events and player?
Check Passability:
- Check passability of the target location.
Preserve Spawn:
- Is the spawned event preserved?
- Or does it expire upon leaving the map?
Step 3:
Success Switch ID:
- Target switch ID to record spawning success.
- Ignore if ID is 0. OFF means failed. ON means success.
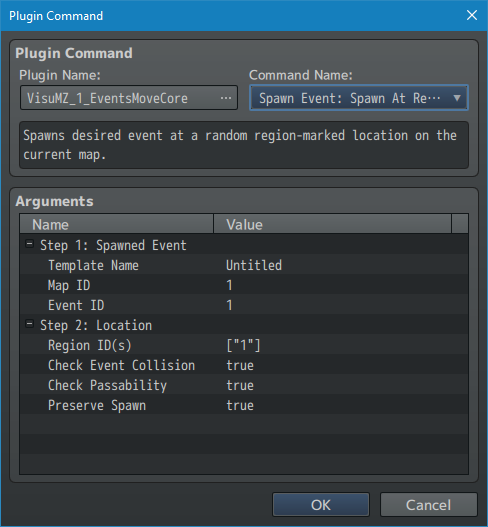
--- Spawn Event: Spawn At Region
- Spawns desired event at a random region-marked location on the
current map.
Step 1:
Template Name:
- Name of the target event template to spawn as.
- Ignored if this is called "Untitled".
Map ID:
- Target event's map to be used as reference.
- You may use JavaScript code.
Event ID:
- The ID of the target event to be used as reference.
- You may use JavaScript code.
Step 2:
Region ID(s):
- Pick region(s) to spawn this event at.
Check Event Collision:
- Check collision with any other events and player?
Check Passability:
- Check passability of the target location.
Preserve Spawn:
- Is the spawned event preserved?
- Or does it expire upon leaving the map?
Step 3:
Success Switch ID:
- Target switch ID to record spawning success.
- Ignore if ID is 0. OFF means failed. ON means success.
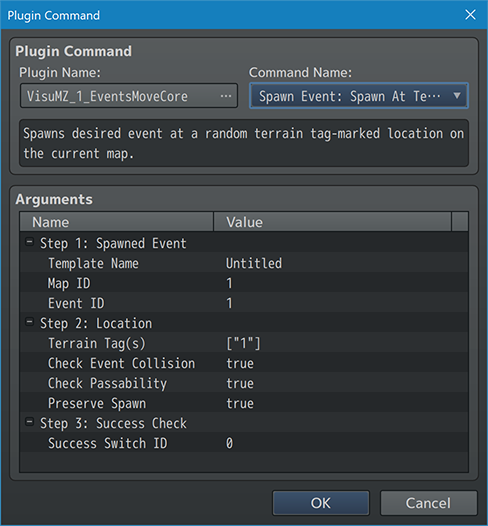
--- Spawn Event: Spawn At Terrain Tag
- Spawns desired event at a random terrain tag-marked location on the
current map.
Step 1:
Template Name:
- Name of the target event template to spawn as.
- Ignored if this is called "Untitled".
Map ID:
- Target event's map to be used as reference.
- You may use JavaScript code.
Event ID:
- The ID of the target event to be used as reference.
- You may use JavaScript code.
Step 2:
Terrain Tag(s):
- Pick terrain tag(s) to spawn this event at.
- Insert numbers between 0 and 7.
Check Event Collision:
- Check collision with any other events and player?
Check Passability:
- Check passability of the target location.
Preserve Spawn:
- Is the spawned event preserved?
- Or does it expire upon leaving the map?
Step 3:
Success Switch ID:
- Target switch ID to record spawning success.
- Ignore if ID is 0. OFF means failed. ON means success.
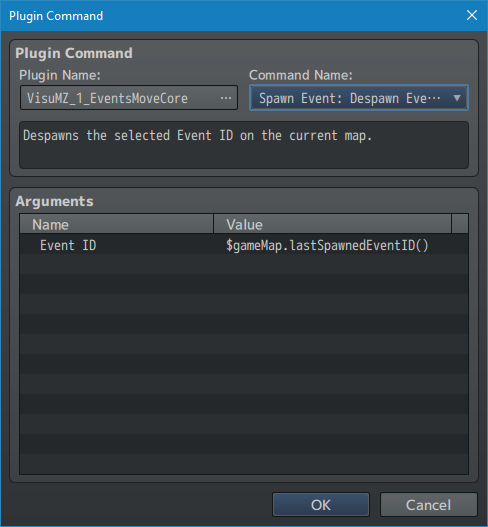
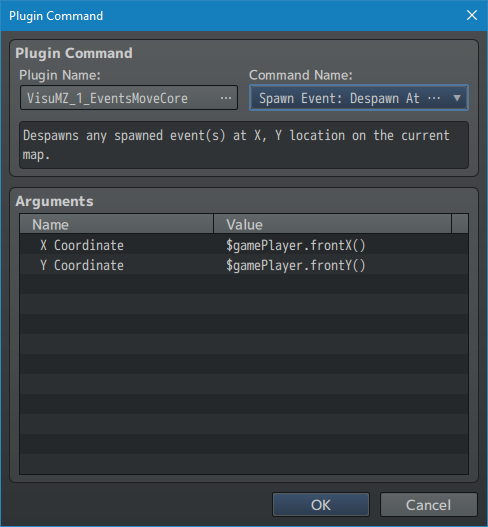
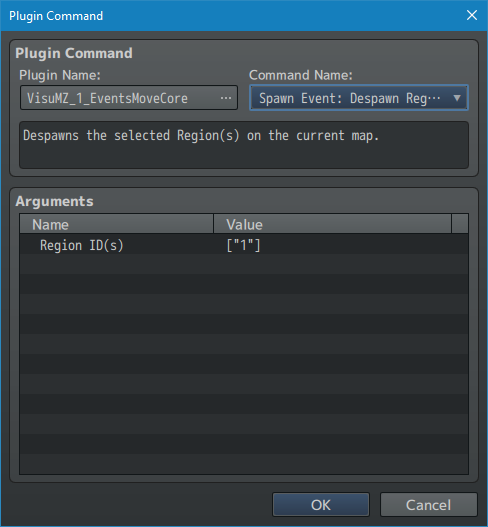
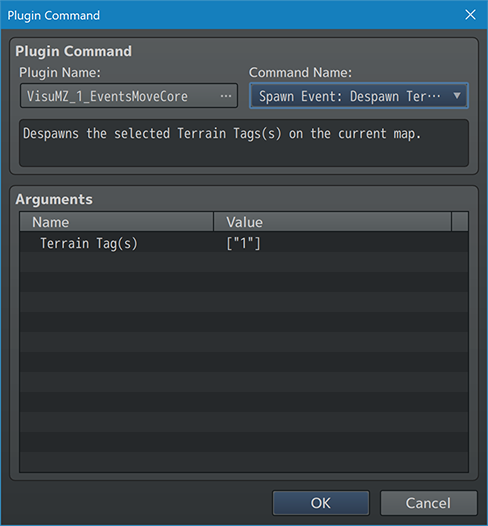
--- Spawn Event: Despawn Event ID - Despawns the selected Event ID on the current map. Event ID - The ID of the target event. - You may use JavaScript code. --- Spawn Event: Despawn At X, Y - Despawns any spawned event(s) at X, Y location on the current map. X Coordinate: - Target Location to despawn at. - You may use JavaScript code. Y Coordinate: - Target Location to despawn at. - You may use JavaScript code. --- Spawn Event: Despawn Region(s) - Despawns the selected Region(s). Region ID(s) - Pick region(s) and despawn everything inside it. --- Spawn Event: Despawn Terrain Tag(s) - Despawns the selected Terrain Tags(s) on the current map. Terrain Tag(s): - Pick terrain tag(s) and despawn everything inside it. - Insert numbers between 0 and 7. --- Spawn Event: Despawn Everything - Despawns all spawned events on the current map. --- Move Route Custom CommandsSome custom commands have been added to the "Set Movement Route" event command. These can be accessed by pressing the "Script..." command and typing in the following, which don't need to be in code form. Keep in mind that since these are custom additions and RPG Maker MZ does not allow plugins to modify the editor, the "Preview" button will not factor in the effects of these commands. If you wish to use a value from a variable, insert $gameVariables.value(x) or \V[x] in place of the x in any of the below. If you wish to use a value from a self variable, insert \SelfVar[x] in place of the x in any of the below. This will only draw from the current event. If you wish to draw data from outside event self variables, we recommend you use the \V[x] variant after using the Plugin Commands to draw data from them for the best accuracy. --- Animation: x - Replace 'x' with the ID of the animation to play on moving unit. --- Balloon: name - Replace 'name' with any of the following to play a balloon on that the target moving unit. - '!', '?', 'Music Note', 'Heart', 'Anger', 'Sweat', 'Cobweb', 'Silence', 'Light Bulb', 'Sleep', 'User-Defined 1', 'User-Defined 2', 'User-Defined 3', 'User-Defined 4', 'User-Defined 5' - Do NOT insert quotes. - Examples: - Balloon: ! - Balloon: Sleep - Balloon: Heart --- Fade In: x Fade Out: x - Fades in/out the sprite's opacity. - Fade In will continuously raise the opacity level until it reaches 255. - Fade Out will continuously lower the opacity level until it reaches 0. - Replace 'x' with the speed to fade in/out the sprite. --- Force Carry: On Force Carry: Off - For usage with the VS8 sprite sheet. - Use ON to turn force carrying on. - Use OFF to turn force carrying off. - Sprites using the VS8 sprite sheet will also show the VS8 Carry frames. --- Force Dash: On Force Dash: Off - Use ON to turn force dashing on. - Use OFF to turn force dashing off. - Forces dashing will prompt the player or event to be in the dashing state. - Sprites using the VS8 sprite sheet will also show the VS8 Dashing frames. --- Hug: Left Hug: Right - Causes the moving unit to hug the left/right side of the wall. --- Index: x - Replace 'x' with a number depicting the character index to change the moving unit's sprite to. --- Index: +x Index: -x - Replace 'x' with the value to change the character index of the moving unit's sprite by. --- Jump Forward: x - Replace 'x' with the number of tiles for the unit to jump forward by. --- Jump To: x, y - Replace 'x' and 'y' with the coordinates for the unit to jump to. --- Jump to Event: x - Replace 'x' with the ID of the event for the unit to jump to. --- Jump to Player - Causes the moving unit to jump to the player. --- Jump To Home - Causes the event to jump to its home position. - This only works on events, not player characters or followers. --- Move Lower Left Until Stop Move Down Until Stop Move Lower Right Until Stop Move Left Until Stop Move Right Until Stop Move Upper Left Until Stop Move Up Until Stop Move Upper Right Until Stop - Causes the moving unit to move that direction until it hits a stop. - Events will stop moving before they make contact with the player. --- Crash Move Lower Left Until Stop Crash Move Down Until Stop Crash Move Lower Right Until Stop Crash Move Left Until Stop Crash Move Right Until Stop Crash Move Upper Left Until Stop Crash Move Up Until Stop Crash Move Upper Right Until Stop - Causes the moving unit to move that direction until it hits a stop. - Events can crash into the player and trigger an event. --- Move To: x, y - Replace 'x' and 'y' with the map coordinates to move the unit to through pathfinding. - This uses RPG Maker MZ's pathfinding algorithm. It is not perfect so do not expect the most optimal results. - Events will go around the player. --- Crash Move To: x, y - Replace 'x' and 'y' with the map coordinates to move the unit to through pathfinding. - This uses RPG Maker MZ's pathfinding algorithm. It is not perfect so do not expect the most optimal results. - Events can crash into the player and trigger an event. --- Move to Event: x - Replace 'x' with the ID of the event to move the unit to. - This uses RPG Maker MZ's pathfinding algorithm. It is not perfect so do not expect the most optimal results. - Events will go around the player. --- Crash Move to Event: x - Replace 'x' with the ID of the event to move the unit to. - This uses RPG Maker MZ's pathfinding algorithm. It is not perfect so do not expect the most optimal results. - Events can crash into the player and trigger an event. --- Move to Player - Moves the unit to the player. - This uses RPG Maker MZ's pathfinding algorithm. It is not perfect so do not expect the most optimal results. - Events can crash into the player and trigger an event. --- Move to Home - Moves the unit towards their home position on the map. - This only works on events, not player characters or followers. - This uses RPG Maker MZ's pathfinding algorithm. It is not perfect so do not expect the most optimal results. --- Crash Move to Home - Moves the unit towards their home position on the map. - This only works on events, not player characters or followers. - This uses RPG Maker MZ's pathfinding algorithm. It is not perfect so do not expect the most optimal results. - Events can crash into the player and trigger an event. --- Move Lower Left: x Move Down: x Move Lower Right: x Move Left: x Move Right: x Move Upper Left: x Move Up: x Move Upper Right: x - Replace 'x' with the number of times to move the unit by in the designated direction on the map. - Events can crash into the player and trigger an event. --- Opacity: x% - Replace 'x' with the percentage to change the unit's sprite opacity to. --- Opacity: +x Opacity: -x - Replace 'x' with the increment to change the unit's sprite opacity by. --- Pattern Lock: x - Replace 'x' with the step pattern to lock the unit's sprite to. --- Pattern Unlock - Removes pattern lock effect. --- Pose: name - If using a VS8 sprite, this will cause the unit to strike a pose. - Replace 'name' with any the following: - 'Item', 'Hmph', 'Victory', 'Hurt', 'Kneel', 'Collapse', '!', '?', 'Music Note', 'Heart', 'Anger', 'Sweat', 'Cobweb', 'Silence', 'Light Bulb', 'Sleep' - Do NOT insert quotes. - Examples: - Balloon: Item - Balloon: Victory - Balloon: ? --- Step Toward: x, y - Replace 'x' and 'y' for the desired coordinates for the unit to take one step towards. - This uses RPG Maker MZ's pathfinding algorithm. It is not perfect so do not expect the most optimal results. --- Step Toward Event: x - Replace 'x' with the ID of the event for the unit to take one step to. - This uses RPG Maker MZ's pathfinding algorithm. It is not perfect so do not expect the most optimal results. --- Step Toward Player - Causes event to take one step towards the player. - This uses RPG Maker MZ's pathfinding algorithm. It is not perfect so do not expect the most optimal results. --- Step Toward Home - Causes the event to take one step towards its home position. - This only works on events, not player characters or followers. - This uses RPG Maker MZ's pathfinding algorithm. It is not perfect so do not expect the most optimal results. --- Step Away From: x, y - Replace 'x' and 'y' for the desired coordinates for the unit to take one step away from. - This uses RPG Maker MZ's pathfinding algorithm. It is not perfect so do not expect the most optimal results. --- Step Away From Event: x - Replace 'x' with the ID of the event for the unit to take one step from. - This uses RPG Maker MZ's pathfinding algorithm. It is not perfect so do not expect the most optimal results. --- Step Away From Player - Causes event to take one step away from the player. - This uses RPG Maker MZ's pathfinding algorithm. It is not perfect so do not expect the most optimal results. --- Turn To: x, y - Replace 'x' and 'y' for the coordinates to make the unit face towards. - This supports 8 directional turning. --- Turn to Event: x - Replace 'x' with the ID of the event to turn the unit towards. - This supports 8 directional turning. --- Turn to Player - Causes the unit to turn towards the player. - This supports 8 directional turning. --- Turn to Home - Causes the event to turn towards its home position. - This refers to the original position's X/Y on the map. - The event will turn and face the tile that is its original X/Y location. - This only works on events, not player characters or followers. --- Step Away From Home - Causes the event to take one step away from its home position. - This only works on events, not player characters or followers. - This uses RPG Maker MZ's pathfinding algorithm. It is not perfect so do not expect the most optimal results. --- Turn Away From: x, y - Replace 'x' and 'y' for the coordinates to make the unit face away from. - This supports 8 directional turning. --- Turn Away From Event: x - Replace 'x' with the ID of the event to turn the unit away from. - This supports 8 directional turning. --- Turn Away From Player - Causes the unit to turn away from the player. - This supports 8 directional turning. --- Turn Away From Home - Causes the event to turn away from its home position. - This only works on events, not player characters or followers. --- Turn Lower Left Turn Lower Right Turn Upper Left Turn Upper Right - Causes the unit to turn to one of the diagonal directions. --- Self Switch x: On Self Switch x: Off Self Switch x: Toggle - Replace 'x' with 'A', 'B', 'C', 'D', or a <Self> Switch ID to adjust the unit's self switch. --- Self Variable x: y - Replace 'x' with a <Self> Variable ID to adjust the unit's self variable. - Replace 'y' with a number value to set the self variable to. --- Teleport To: x, y - Replace 'x' and 'y' with the coordinates to instantly move the unit to. --- Teleport to Event: x - Replace 'x' with the ID of the event to instantly move the unit to. --- Teleport to Player - Instantly moves the unit to the player's location. --- Teleport to Home - Instantly teleports an event to its home position on the map. - This only works on events, not player characters or followers. --- If none of the commands are detected above, then a script call will be ran. --- Plugin ParametersEvent Label SettingsEvent Labels are small windows created to display text over an event's head. They're set up using the <Label> notetags and/or comment tags. Event Labels are a great way to instantly relay information about the event's role to the player. --- Event Labels
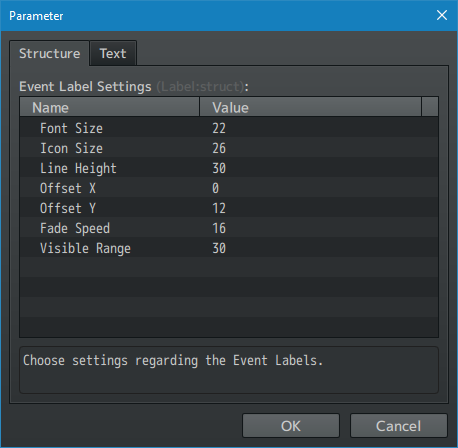
Sprite Based?:
- Use sprite-based labels instead of legacy-window version.
- Legacy-window version will not be supported in future.
- Sprite-based labels are more memory efficient and work better
compatibility-wise.
Mobile-Enabled?:
- Enable event labels for mobile devices?
Font Size:
- The font size used for the Event Labels.
Icon Size:
- The size of the icons used in the Event Labels.
Line Height:
- The line height used for the Event Labels.
Offset X:
- Globally offset all labels horizontally by this amount.
Offset Y:
- Globally offset all labels vertically by this amount.
Fade Speed:
- Fade speed for labels.
Visible Range:
- Range the player has to be within the event to make its label visible.
Range Type:
- What do you want the default label visible range type?
- Square
- Diamond
- Circle
--- Event Icon SettingsIcons can be displayed over an event's head through the <Icon> notetags and/or comment tags. These can be used for a variety of things such as making them look like they're carrying an item or to indicate they have a specific role. --- Event Icon
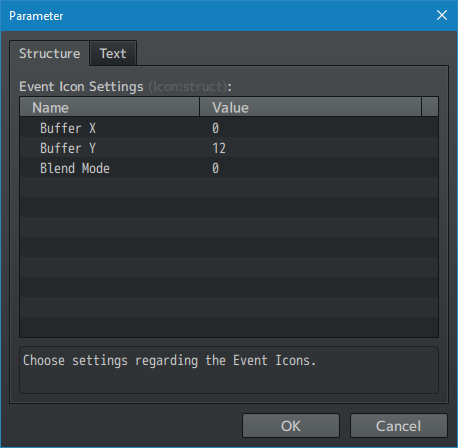
Buffer X:
- Default X position buffer for event icons.
Buffer Y:
- Default Y position buffer for event icons.
Blend Mode:
- Default blend mode for even icons.
- 0 - Normal
- 1 - Additive
- 2 - Multiply
- 3 - Screen
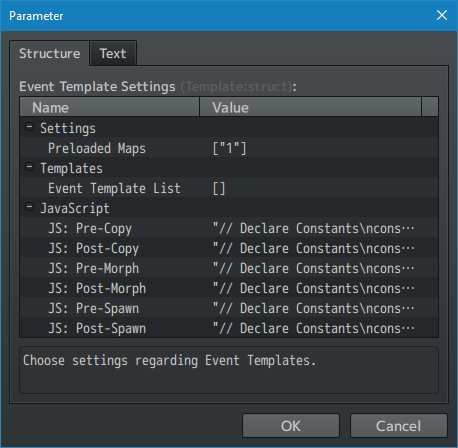
--- Event Template SettingsEvent Templates allow you to store specific maps and/or event data to bring out on need while having a premade set base. They're similar to prefabs but aren't things that can be altered individually as one setting for an event template will serve as a blueprint for all of them that use them. Event Templates are used for the <Copy Event> notetags, the Morph Event and Spawn Event Plugin Commands. --- Settings
Preloaded Maps:
- A list of all the ID's of the maps that will be preloaded to serve as
template maps for this plugin.
--- Templates
- A list of all the Event Templates used by this project. Used for notetags
and Plugin Commands.
Name:
- Name of the template. It'll be used as anchor points for notetags and
Plugin Commands.
Map ID:
- ID of the map the template event is stored on.
- This will automatically add this ID to preloaded list.
Event ID:
- ID of the event the template event is based on.
JavaScript:
JS: Pre-Copy:
JS: Post-Copy:
JS: Pre-Morph:
JS: Post-Morph:
JS: Pre-Spawn:
JS: Post-Spawn:
- Code that's ran during certain circumstances.
- The code will occur at the same time as the ones listed in the main
Event Template Settings Plugin Parameters. However, the ones listed
in these individual entries will only occur for these specific
templates and only if the templates are used.
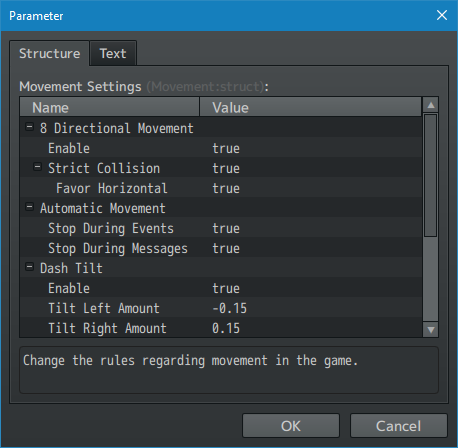
--- JavaScript JS: Pre-Copy: JS: Post-Copy: JS: Pre-Morph: JS: Post-Morph: JS: Pre-Spawn: JS: Post-Spawn: - Code that's ran during certain circumstances. - These are global and are ran for all copies, morphs, and/or spawns. --- Movement SettingsThese plugin parameters allow you to control how movement works in your game, toggling it from 4-directional to 8-directional, setting up rules to stop self-movement from events while an event or message is present, and other aesthetics such as tilting the sprite while dashing, setting shadows beneath the sprites, and allow for turning in place. ⚠️⚠️⚠️Shadows do NOT appear for sprites using a "!" as their leading filename marker. These sprites are environmental and are considered "object" characters by the RPG Maker MZ core scripts. They do not utilize character shadows due. --- 8 Directional Movement
Enable:
- Allow 8-directional movement by default? Players can move diagonally.
Strict Collision:
- Enforce strict collission rules where the player must be able to pass
both cardinal directions?
Favor Horizontal:
- Favor horizontal if cannot pass diagonally but can pass both
horizontally and vertically?
Slower Diagonals?
- Enforce a slower movement speed when moving diagonally?
Speed Multiplier
- What's the multiplier to adjust movement speed when moving diagonally?
--- Automatic Movement Stop During Events: - Stop automatic event movement while events are running. Stop During Messages: - Stop automatic event movement while a message is running. --- Bitmap Smoothing: - Do you want to smooth or pixelate the map sprites? - Pixelating them is better for zooming and tilting. --- Dash
Dash Modifier:
- Alters the dash speed modifier.
Dash on Ladder?
- Allow dashing while on a ladder or rope?
Enable Dash Tilt?:
- Tilt any sprites that are currently dashing?
Tilt Left Amount:
- Amount in radians when moving left (upper left, left, lower left).
Tilt Right Amount:
- Amount in radians when moving right (upper right, right, lower right).
Tilt Vertical Amount:
- Amount in radians when moving vertical (up, down).
--- Event Movement Random Move Weight: - Use numbers between 0 and 1. - Numbers closer to 1 stay closer to their home position. - 0 to disable it. Shift Y: - How many pixels should non-tile characters be shifted by? - Negative: up. Positive: down. --- Path Finding Mobile-Enabled?: - Enable diagonal pathfinding for mobile devices? --- Shadows
Show:
- Show shadows on all events and player-related sprites.
Default Filename:
- Default filename used for shadows found in img/system/ folder.
Shadow Z Layer:
- What is the sprite Z layer used for the shadow sprites?
- In-game layers are as follows:
- 0 : Lower tiles
- 1 : Lower characters
- 3 : Normal characters
- 4 : Upper tiles
- 5 : Upper characters
- 6 : Airship shadow
- 7 : Balloon
- 8 : Animation
- 9 : Destination
--- Turn in Place Enable: - When not dashing, player will turn in place before moving. - This only applies with keyboard inputs. Delay in Frames: - The number of frames to wait before moving. --- Vehicle Speeds Boat Speed: - Allows you to adjust the base speed of the boat vehicle. Ship Speed: - Allows you to adjust the base speed of the ship vehicle. Airship Speed: - Allows you to adjust the base speed of the airship vehicle. --- VisuStella 8-Dir SettingsThese are settings for sprite sheets using the VS8 format. For more information on the VS8 format, look in the help section above. --- Balloon Icon Settings Auto-Balloon Poses: - Automatically pose VS8 sprites when using balloon icons. Balloon Offset X: - Offset balloon icons on VS8 sprites by x pixels. Balloon Offset Y: - Offset balloon icons on VS8 sprites by y pixels. --- Icons Auto Buffer: - Automatically buffer the X and Y coordinates of VS8 sprites? Use Carry Pose: - Use the carry pose when moving with an icon overhead. --- Region RulingsThese settings allow you to decide the passability of the player, events, and various vehicles through the usage of Regions. --- Allow Regions All Allow: Walk Allow: Player Allow: Event Allow: Vehicle Allow: Boat Allow: Ship Allow: Airship Allow: - Insert Region ID's where the affected unit type can enter. - Region ID's range from 0 to 255. --- Forbid Regions All Forbid: Walk Forbid: Player Forbid: Event Forbid: Vehicle Forbid: Boat Forbid: Ship Forbid: Airship Forbid: - Insert Region ID's where the affected unit type cannot enter. - Region ID's range from 0 to 255. --- Dock Regions Vehicle Dock: Boat Dock: Ship Dock: Airship Dock: - Insert Region ID's where the affected vehicle can dock - Region ID's range from 0 to 255. Only Region Dockable: - Vehicles are only able to dock at designated regions. --- Common Event on OK ButtonThese Plugin Parameters allow you to setup Common Events that activate using Regions when pressing the OK button while standing on top of them or in front of them. These let you create near universally interactable objects using Regions, such as rivers to start up fishing events or locations to places items on. --- Regions Regions 1 - 255: - Which Common Event does this region activate? - Use 0 to not activate any Common Events. --- Target Tile
Target Tile:
- Which tile should be checked for Common Event on OK Button?
- Tile in front of player.
- Tile player is standing on top of.
--- Common Event on TouchThese Plugin Parameters allow you to setup Common Events that trigger when stepping onto Region-marked tiles. These let you create custom effects that will occur such as customized damage floors, traps, and/or events. Areas marked with these regions will not allow random encounters to occur. This is how RPG Maker works. Assuming you are not using plugins at all, by putting on touch events all over the map, tiles with those on touch events will not let random encounters trigger. --- Regions Regions 1 - 255: - Which Common Event does this region activate? - Use 0 to not activate any Common Events. --- Terrain Tag SettingsTerrain Tags are used in Database => Tilesets to mark certain tiles and give them unique properties through terrain tags. --- Terrain Tag ID's Rope: - Which terrain tag number to use for ropes? ---
Terms of Use1. These plugins may be used in free or commercial games provided that they have been acquired through legitimate means at VisuStella.com and/or any other official approved VisuStella sources. Exceptions and special circumstances that may prohibit usage will be listed on VisuStella.com. 2. All of the listed coders found in the Credits section of this plugin must be given credit in your games or credited as a collective under the name: "VisuStella". 3. You may edit the source code to suit your needs, so long as you do not claim the source code belongs to you. VisuStella also does not take responsibility for the plugin if any changes have been made to the plugin's code, nor does VisuStella take responsibility for user-provided custom code used for custom control effects including advanced JavaScript notetags and/or plugin parameters that allow custom JavaScript code. 5. VisuStella is not responsible for problems found in your game due to unintended usage, incompatibility problems with plugins outside of the VisuStella MZ library, plugin versions that aren't up to date, nor responsible for the proper working of compatibility patches made by any third parties. VisuStella is not responsible for errors caused by any user-provided custom code used for custom control effects including advanced JavaScript notetags and/or plugin parameters that allow JavaScript code. 8. Any extensions and/or addendums made to this plugin's Terms of Use can be found on VisuStella.com and must be followed. Terms of Use: Japanese『VisuStella MZ』利用規約 1. これらのプラグインは、VisuStella.comおよび/または公式に承認されたVisuStellaのソースから合法的な手段で入手したものである限り、フリーゲームや商用ゲームに使用することができます。例外的に使用が禁止される場合については、VisuStella.comの記載をご確認ください。 2. 本プラグインの「クレジット」部分に記載されているすべてのコーダーの名前は、ゲーム内にクレジット表記を行うか、もしくは「VisuStella」という名前の下にまとめて表記する必要があります。 3. ソースコードを自分のものだと主張しない限りは、必要に応じて編集することが可能です。ただしプラグインのコードに変更が加えられた場合、VisuStellaはそのプラグインに対して一切の責任を負いません。高度なJavaScriptのノートタグやJavaScriptコードを許可するプラグインのパラメータを含む、カスタムコントロールエフェクトに使用される、ユーザー提供のカスタムコードについても、VisuStellaは一切の責任を負いません。 5. VisuStellaは、意図しない使用方法による問題、VisuStella MZライブラリ以外のプラグインとの非互換性の問題、プラグインのバージョンが最新でないことによる問題、第三者による互換性パッチが適切に動作していないことなどが原因でゲーム内で発生した問題については、一切の責任を負いません。VisuStellaは、高度なJavaScriptのノートタグやJavaScriptコードを許可するプラグインのパラメータを含む、カスタムコントロールエフェクトに使用される、ユーザー提供のカスタムコードに起因するエラーについても、一切の責任を負いません。 8. このプラグインの利用規約の追加項目や補足については、VisuStella.comに掲載されていますので、それを参照し従ってください。 CreditsIf you are using this plugin, credit the following people in your game: Team VisuStella ChangelogVersion 1.62: January 19, 2026
Version 1.61: December 15, 2025
Version 1.60: August 29, 2024
Version 1.59: June 13, 2024
Version 1.58: May 16, 2024
Version 1.57: March 14, 2024
Version 1.56: February 15, 2024
Version 1.55: December 14, 2023
Version 1.54: October 12, 2023
Version 1.53: August 17, 2023
Version 1.52: July 13, 2023
Version 1.51: June 15, 2023
Version 1.50: April 13, 2023
Version 1.49: March 16, 2023
Version 1.48: January 20, 2023
Version 1.47: November 10, 2022
Version 1.46: September 29, 2022
Version 1.45: August 18, 2022
Version 1.44: July 21, 2022
Version 1.43: July 14, 2022
Version 1.42: June 23, 2022
Version 1.41: June 1, 2022
Version 1.39: May 5, 2022
Version 1.38: April 28, 2022
Version 1.37: March 24, 2022
Version 1.36: March 17, 2022
Version 1.35: March 3, 2022
Version 1.34: February 17, 2022
Version 1.33: February 3, 2022
Version 1.32: January 20, 2022
Version 1.31: January 6, 2022
Version 1.30: November 25, 2021
Version 1.29: October 7, 2021
Version 1.28: September 30, 2021
Version 1.27: September 17, 2021
Version 1.26: September 3, 2021
Version 1.25: July 30, 2021
Version 1.24: June 4, 2021
Version 1.23: May 21, 2021
Version 1.22: May 7, 2021
Version 1.21: March 12, 2021
Version 1.20: February 26, 2021
Version 1.19: February 12, 2021
Version 1.18: February 5, 2021
Version 1.17: January 29, 2021
Version 1.16: January 22, 2021
Version 1.15: January 1, 2021
Version 1.14: December 18, 2020
Version 1.13: December 4, 2020
Version 1.12: November 29, 2020
Version 1.11: November 15, 2020
Version 1.10: November 1, 2020
Version 1.09: October 25, 2020
Version 1.08: October 11, 2020
Version 1.07: October 4, 2020
Version 1.06: September 27, 2020
Version 1.05: September 20, 2020
Version 1.04: September 13: 2020
Version 1.03: September 6, 2020
Version 1.02: ugust 30, 2020
Version 1.01: August 23, 2020
Version 1.00: August 20, 2020
See Also
End of File |
- RPG Maker MZ Plugins
- RPG Maker MZ Parent Plugins
- RPG Maker MZ Tier 1 Plugins
- Notetags (MZ)
- Plugin Commands (MZ)
- RPG Maker MZ Core Plugins
- RPG Maker MZ Gameplay Plugins
- RPG Maker MZ Movement Plugins
- RPG Maker MZ Eventing Plugins
- RPG Maker MZ Utility Plugins
- RPG Maker MZ Mechanical Plugins
- RPG Maker MZ Visual Plugins
- RPG Maker MZ Quality of Life Plugins

