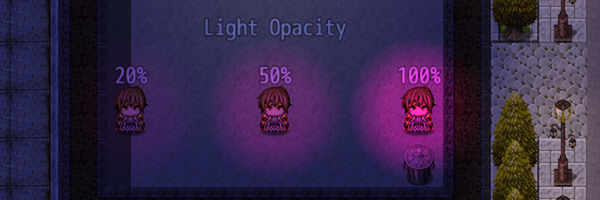
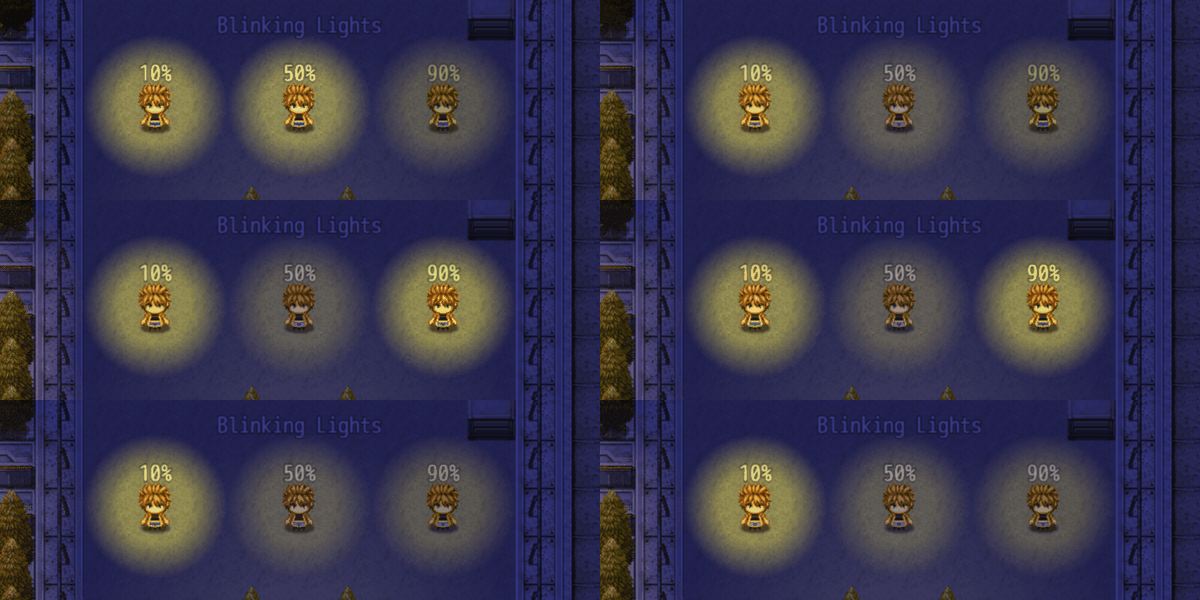
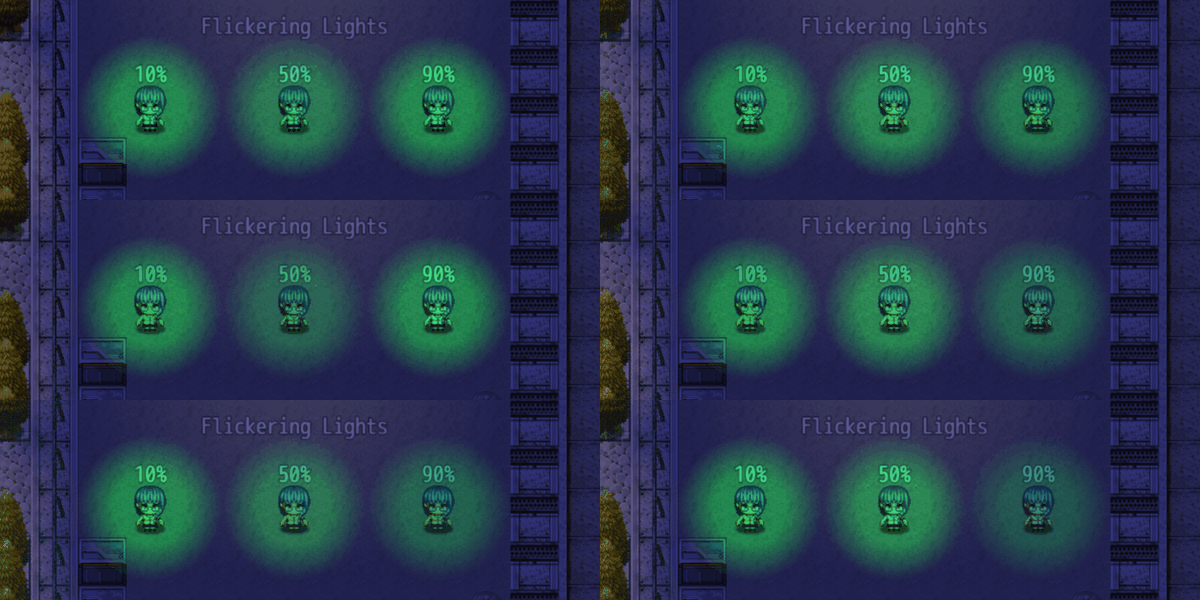
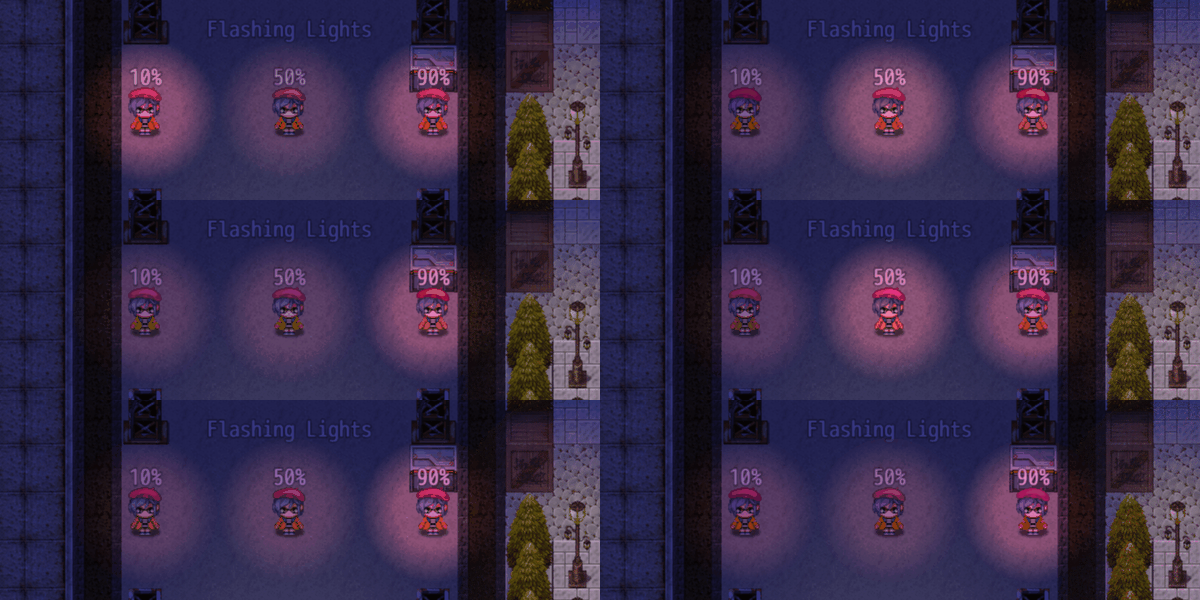
Lighting Effects VisuStella MZ



|
VisuStella, Caz Wolf, Fallen Angel Olivia, Atelier Irina, and other affiliated content creators.
Contents
- 1 Download
- 2 System
- 3 Required Plugins
- 4 VisuStella MZ
- 5 Introduction
- 6 Requirements
- 7 Instructions - Quick Start
- 7.1 Step 1: Create a map with a darkness overlay.
- 7.2 Step 2: Create an event with a radial light.
- 7.3 Step 3: Play Test! Checking out the Radial Light!
- 7.4 Step 4: Create an event with a conical light.
- 7.5 Step 5: Play Test! Checking out the Conical Light!
- 7.6 Step 6: Applying Behaviors
- 7.7 Step 7: Play Test! Checking out Light Behaviors!
- 8 Keeping FPS Stable
- 9 VisuStella MZ Compatibility
- 10 Notetags
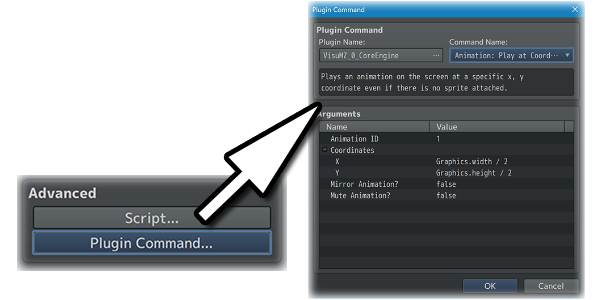
- 11 Plugin Commands
- 12 Plugin Parameters
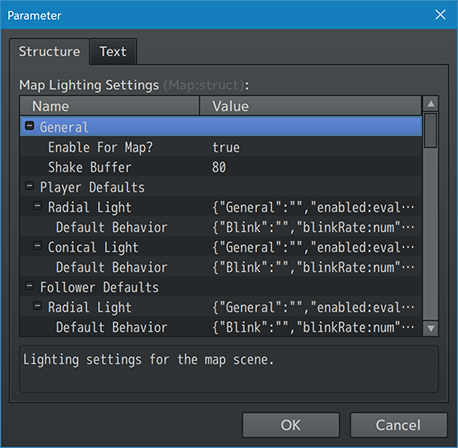
- 12.1 Map Lighting Settings
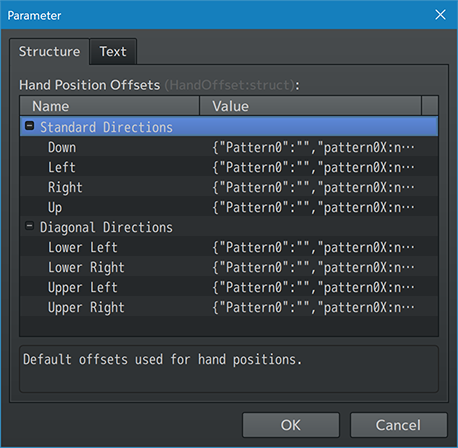
- 12.2 Hand Position, VS8 Dash, VS8 Jump Offsets
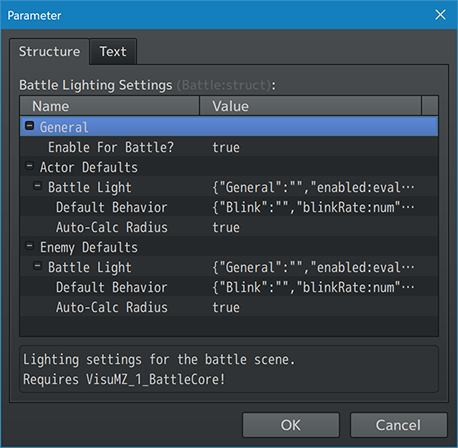
- 12.3 Battle Lighting Settings
- 12.4 Anti-Light Settings
- 12.5 Auto-Light Regions Settings
- 12.6 Preset Color Settings
- 12.7 Options Menu Settings
- 12.8 Radial Light Settings
- 12.9 Conical Light Settings
- 12.10 Light Behavior Settings
- 13 Terms of Use
- 14 Credits
- 15 Changelog
- 16 See Also
- 17 End of File
Download | ||
SystemThis is a plugin created for RPG Maker MZ. | ||
|
Click here for help on how to install plugins and an explanation on the Tier Hierarchy System. |
Click here to learn how to update plugins. |
Click here for how to troubleshoot plugins if you get an error. |
Required PluginsThe following plugins are required in order to use this plugin. Place the following plugins above this plugin located in the Plugin Manager.
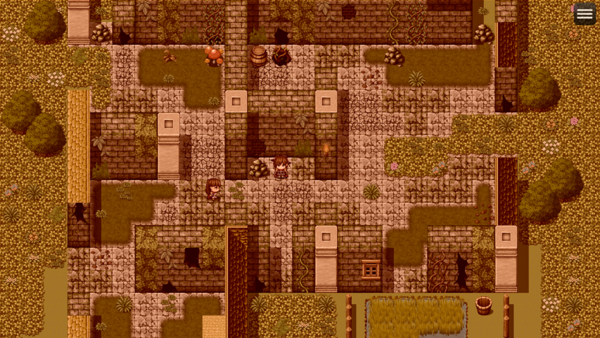
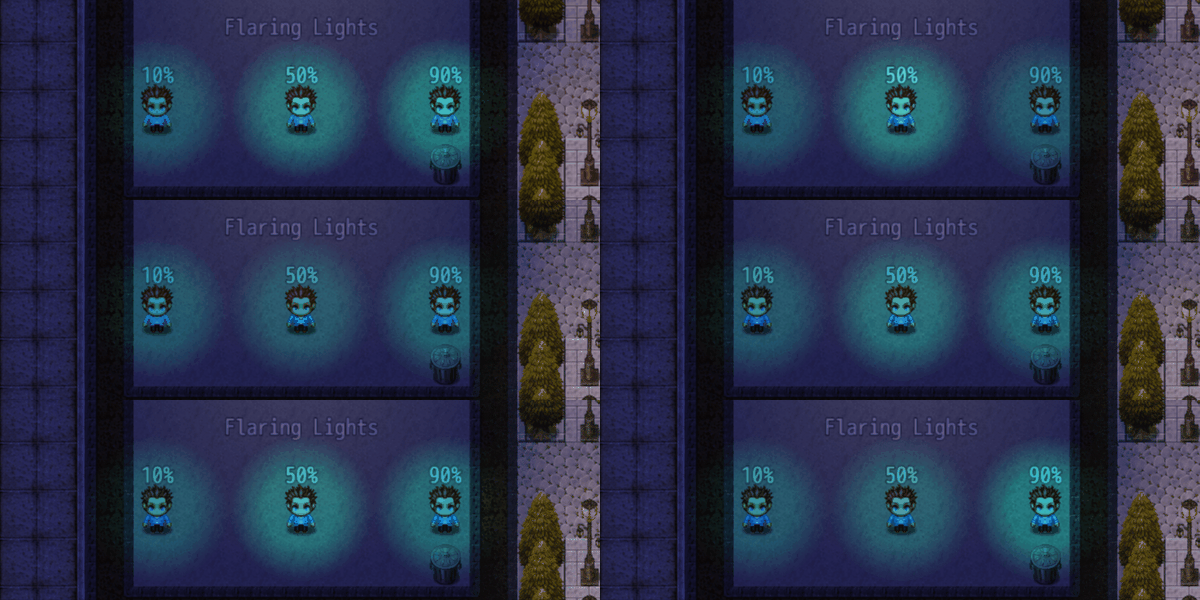
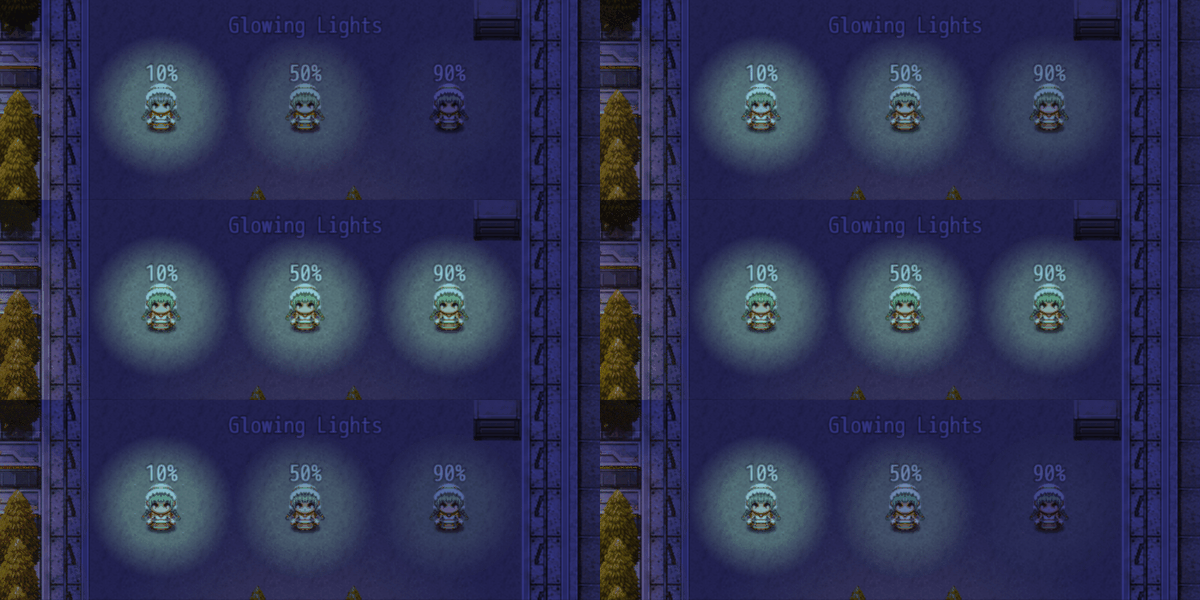
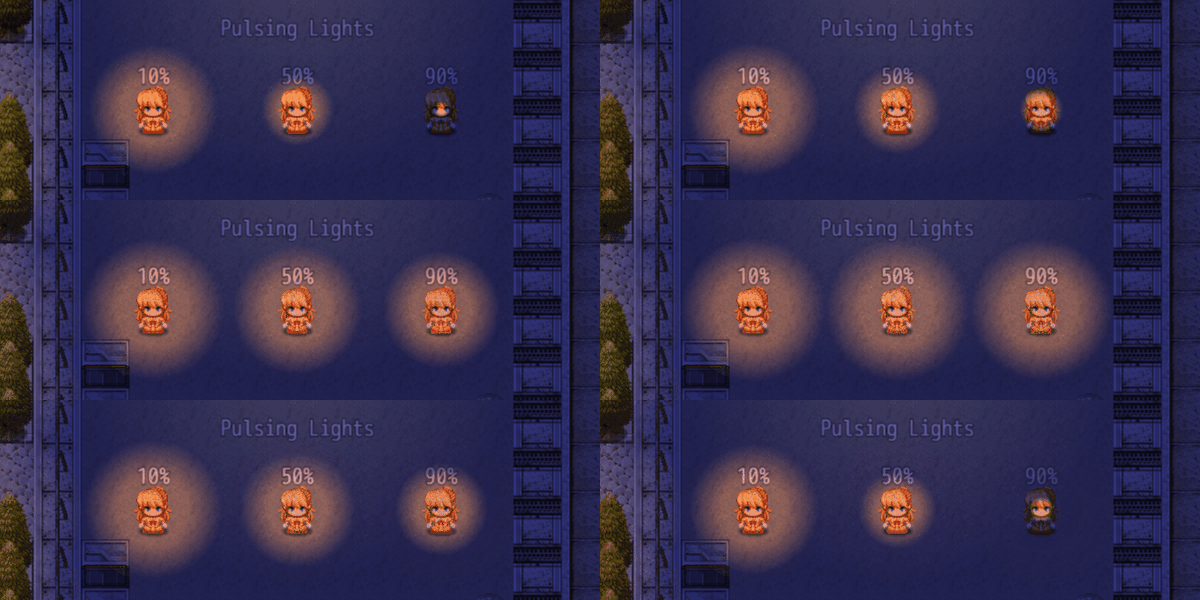
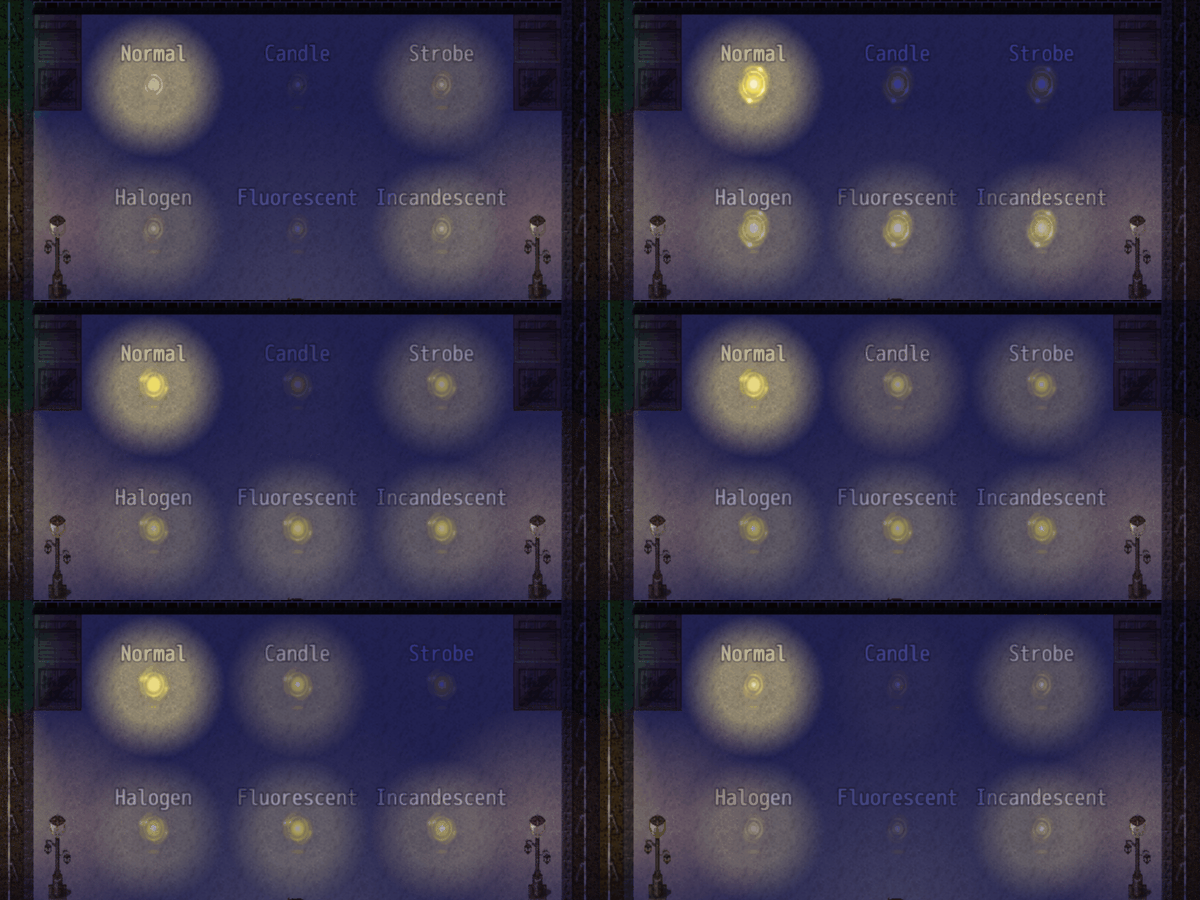
VisuStella MZThis plugin is a part of the VisuStella MZ Plugin Library. Click here if you want to help support VisuStella on Patreon. IntroductionRPG Maker MZ lacks the ability to provide lighting by default. During scenes where it is night, the usage of tones is not adequate either since there is no way to illuminate the darkness. This plugin remedies that problem by providing lighting effects that pierce the darkness. From radial lights to conical lights and applying various lighting behaviors, this plugin covers the general lighting needs that RPG Maker MZ does not. Features include all (but not limited to) the following:
RequirementsThis plugin is made for RPG Maker MZ. This will not work in other iterations of RPG Maker. Required Plugin ListThis plugin requires the above listed plugins to be installed inside your game's Plugin Manager list in order to work. You cannot start your game with this plugin enabled without the listed plugins.
This plugin is a Tier 2 plugin. Place it under other plugins of lower tier value on your Plugin Manager list (ie: 0, 1, 2, 3, 4, 5). This is to ensure that your plugins will have the best compatibility with the rest of the VisuStella MZ Plugin library.
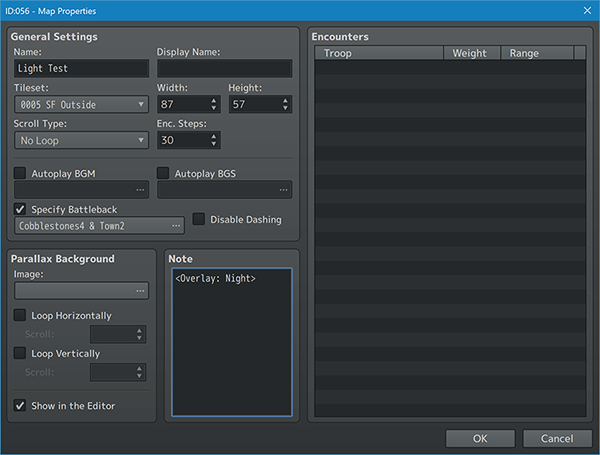
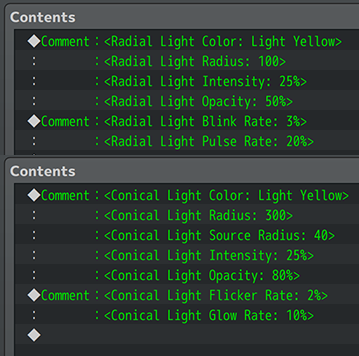
Instructions - Quick StartHere are some instructions to get yourself started quickly on using the Lighting Effects plugin. --- Step 1: Create a map with a darkness overlay.1. Create a new map (or use an old one if you know what you're doing). 2. Right click the map's name in the editor and go to the Map's Properties. 3. Add the <Overlay: Night> notetag into the map's notebox. 4. For more information on the types of settings you can pick, look in the help file.
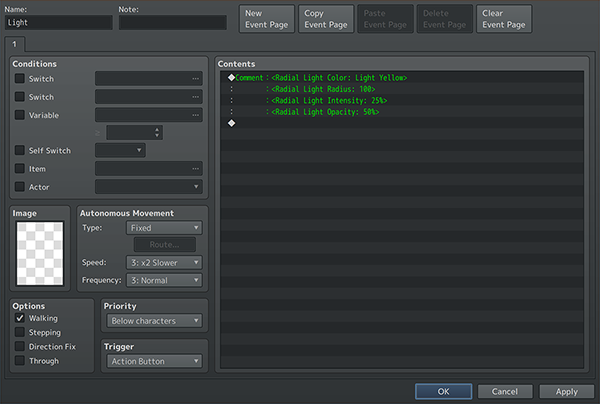
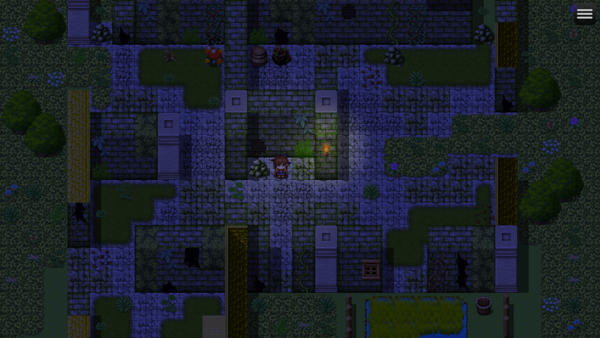
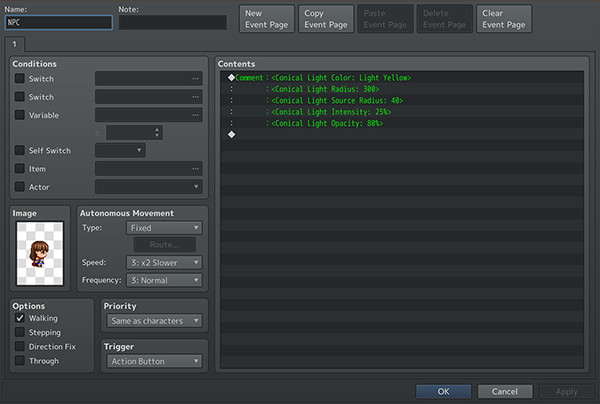
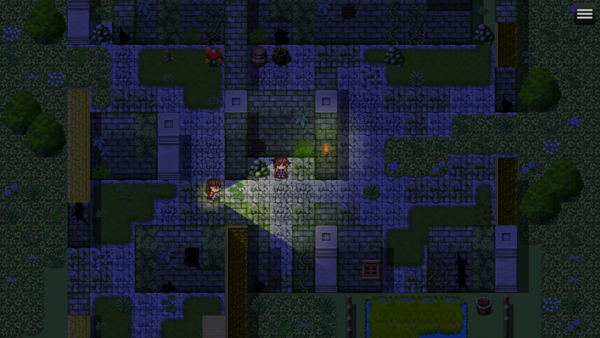
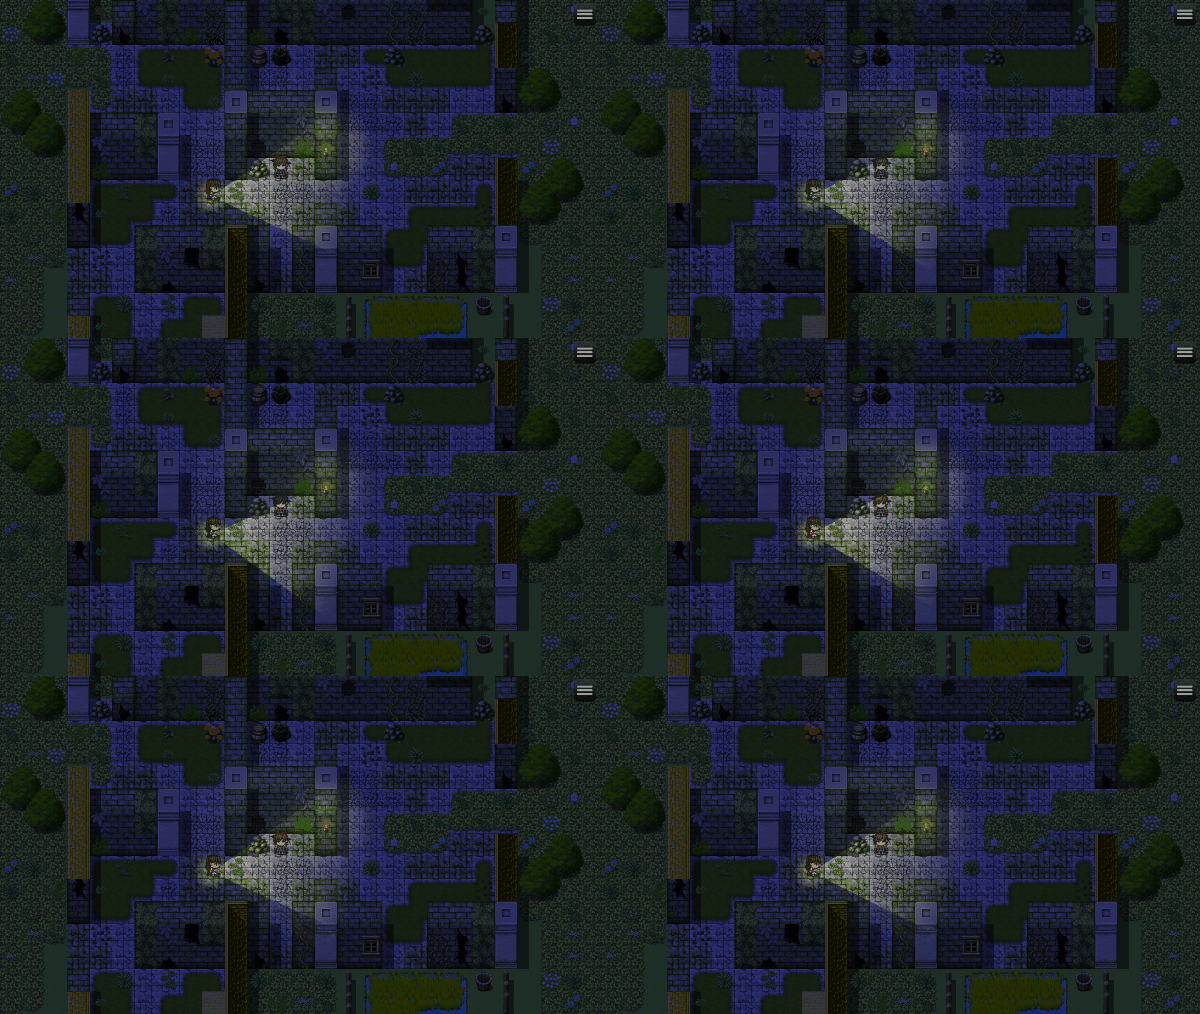
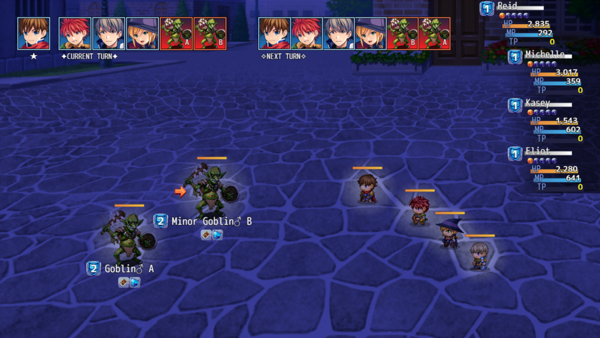
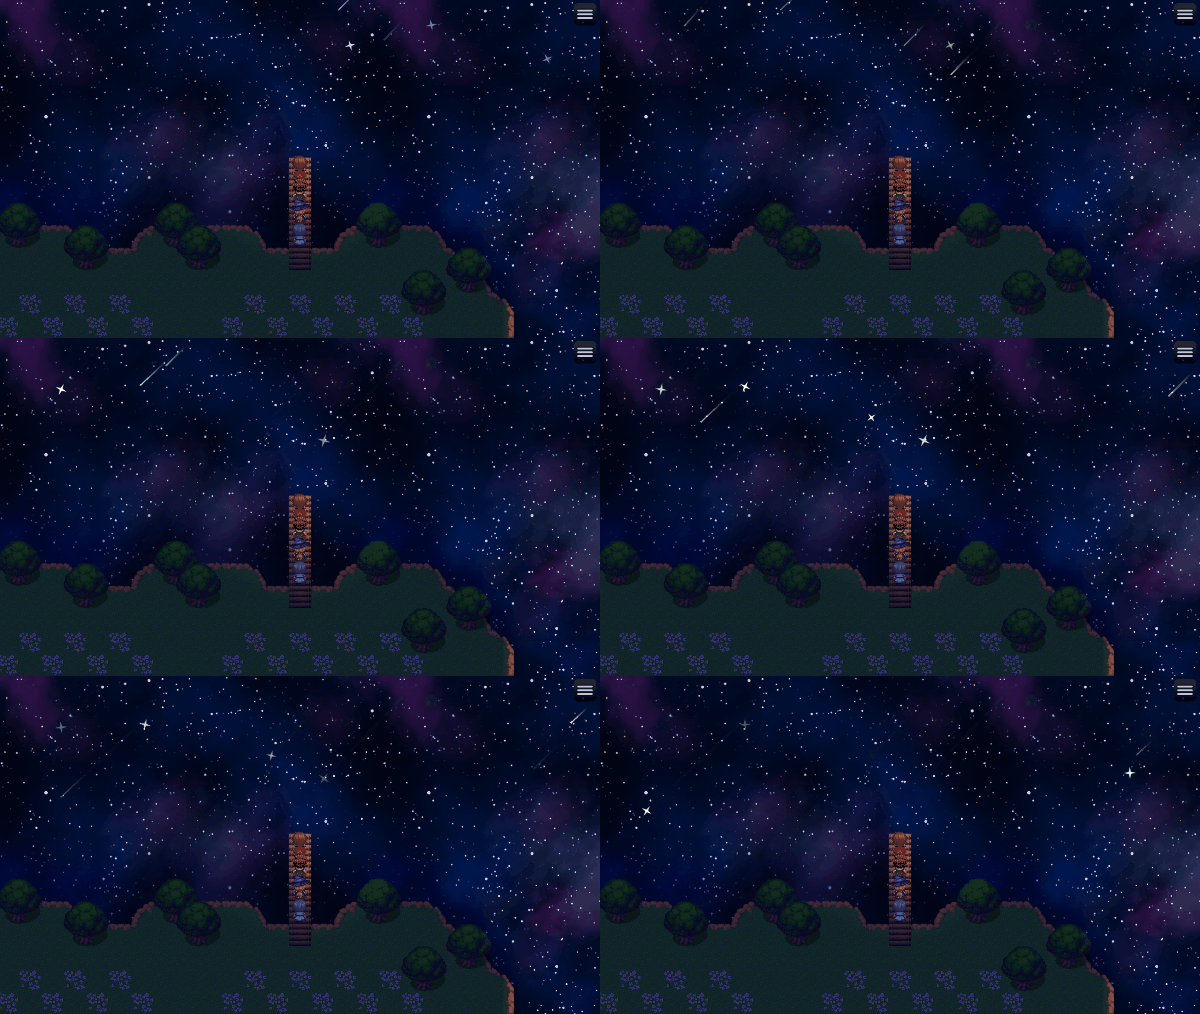
will shift to "Night". If you don't want this to happen and want to shift it dynamically, use the Plugin Command "OVERLAY: Change to Preset Color" or "OVERLAY: Change to Custom Color" to change them instead. --- Step 2: Create an event with a radial light.1. Create a new event on the map. 2. Add a "Comment" event to the event (you can use the notebox, too, but it's tiny, and the comment box is more visible). 3. Inside the comment (or notebox), add in the following tags: <Radial Light Color: Light Yellow> <Radial Light Radius: 100> <Radial Light Intensity: 25%> <Radial Light Opacity: 50%> 4. You can leave any of them out, but these four are selected as the main notetags to use to adjust how radial lights behave. 5. For more information on the types of settings you can apply to radial lights, look in the help file. 6. Let's see how this looks in-game! 7. Save the game project. 8. Let's test it out! --- Step 3: Play Test! Checking out the Radial Light!1. You should notice that the screen is darker than normal with the "Night" color as the darkness overlay. 2. Find the event you've made. It should be emitting a light. 3. The player, by default, assuming that no other Plugin Parameters have been changed, should also be emitting a faint light and has a conical light on, too. 4. Everything working? Awesome, let's create an event with a conical light this time. --- Step 4: Create an event with a conical light.1. Create another new event on the map. 2. Add a "Comment" event to the event (once again, you can use the notebox, too if you want but we prefer the larger comment box). 3. Inside the comment (or notebox), add in the following tags: <Conical Light Color: Light Yellow> <Conical Light Radius: 300> <Conical Light Source Radius: 40> <Conical Light Intensity: 25%> <Conical Light Opacity: 80%> 4. You can leave any of the above out, but these are the usual suspects when applying a conical light to an event. 5. The "Source Radius" notetag refers to the light source point from which the conical light extends out of. 6. For more information on the types of settings you can apply to radial lights, look in the help file. 7. Let's see how this looks in-game! 8. Save the game project. 9. Let's test it out! --- Step 5: Play Test! Checking out the Conical Light!1. Look for the new event you've made. It should be holding a conical light, similar to your player. 2. Conical lights will face whatever direction its user is facing. 3. By default, the source point should be coming from the user's hand. 4. This can be changed via notetags, Plugin Parameters, or Plugin Commands. 5. Look in the help file for more information. 6. The lights look kinda boring the way they are though. Let's give them some typical light behaviors. --- Step 6: Applying Behaviors1. Open your first event with the radial light and add these tags: <Radial Light Blink Rate: 3%> <Radial Light Pulse Rate: 20%> 2. This will cause the radial light tied to this event to change slightly while waiting. This imitates how certain light bulbs work although there are other patterns you can use. 3. Look in the help file for more behavior notetags you can use. 4. Let's modify the conical light event and add these tags: <Conical Light Flicker Rate: 2%> <Conical Light Glow Rate: 10%> 5. This will cause the conical light tied to this event to also change ever so slightly while waiting. Like with the other, this also imitates how flash bulbs work although there are other pattners you can use. 6. Check the help file out for more behavior types to use with these lights. 7. Let's see how this looks in-game! 8. Save the game project. 9. Let's test it out! --- Step 7: Play Test! Checking out Light Behaviors!1. Find the two events you've altered. 2. You'll notice that the lights don't stay static the way they are. One will pulse back and forth while the other will have its opacity oscillate down and back up. 3. Lighting behaviors make the atmosphere less boring even if nothing is happening on screen. 4. These behaviors extend to blinking, flickering, flashing, flares, glows, pulses, and even custom patterns. 5. For more information, check out the help file. --- And with that, you should have a better grasp on a few of the things the Lighting Effects plugin is capable of. --- Keeping FPS StableAs this is a plugin that adds special effects to your game, you do have to be mindful about how you use the various Lighting Effects features or else your game will face FPS drops. --- Here are a few things to keep in mind: 1. Lighting Effects work best on small to medium sized maps. Anything below 72x72 tiles in size is ideal. This also puts less stress on RPG Maker MZ even if you aren't using Lighting Effects for that map as there are less tiles to process in regards to the tilemap shader. 2. Don't go overboard with Lighting Effect events. The more events there are for lighting effects, the more the player's GPU will act up. Keep the event count low and there will be less FPS drops. Anything below 80 events is ideal. However, performances may vary on different computers. This is also a good practice to keep in mind for maps that aren't using Lighting Effects either. 3. Keep spawned lights to a minimum. Generally speaking, anything under 128 spawned lights on a map at a time is a good metric to keep in mind. However, performances may vary on different computers. --- We are NOT responsible for irresponsible usage of this plugin that pushes graphical processing to their absolute limitations. --- VisuStella MZ CompatibilityWhile this plugin is compatible with the majority of the VisuStella MZ plugin library, it is not compatible with specific plugins or specific features. This section will highlight the main plugins/features that will not be compatible with this plugin or put focus on how the make certain features compatible. --- Battle Core VisuStella MZWithout the VisuStella MZ Battle Core installed in the same project, there will be no darkness overlay in battle and as such, no lighting effects. The Battle Core provides the needed architecture for lighting effects to go through properly. --- Weather Effects VisuStella MZWeather patterns placed on the lower layer will be affected by the darkness overlay that the VisuStella MZ Lighting Effects plugin utilizes. This means that even the supposively "brighter" weather patterns will be dimmed out (such as the Flame Wall or Aurora to name a few). To deal with this, use the Lighting Effects plugin's "Auto-Light Regions" and mark the parallax visible tiles with those said regions. Weather patterns placed on the upper layer will not be affected by the darkness overlay in order to allow the weather have better contrast in addition to following RPG Maker MZ's decision to not have weather affected by tints either. If you want to tint the upper layer weather, you can add the tint manually through the weather pattern's custom Image Settings and apply a hue. --- Notetags
RPG Maker MZ's editor is unable to allow for custom traits/properties that a game dev may wish to associate with a database object, event, map, etc. Notetags are used to work around such limitations by allowing the game dev to tag certain traits/properties using specific Notetags declared by the related plugin. Here is a list of Notetag(s) that you may use.
--- Auto-Tint-Related Notetags--- <Auto-Tint: Normal> <Auto-Tint: Dark> <Auto-Tint: Sepia> <Auto-Tint: Sunset> <Auto-Tint: Night> - Used for: Map Notetags - Automatically tints the screen upon map entry with a preset tone. - Screen tint preset values are based on RPG Maker MZ's default presets. - Keep in minds that lights do not pierce through tones. --- <Auto-Tint: r, g, b, k> - Used for: Map Notetags - Automatically tints the screen upon map entry with a custom tone. - Replace 'r' with a number representing the red tone value (-255 to 255). - Replace 'g' with a number representing the green tone value (-255 to 255). - Replace 'b' with a number representing the blue tone value (-255 to 255). - Replace 'k' with a number representing the grey tone value (0 to 255). - Values that exceed -255 or 255 will be automatically timmed down. - Grey values that are negative will have their absolute value taken of. - Keep in minds that lights do not pierce through tones. --- Darkness Overlay-Related Notetags--- <Overlay: name>
- Used for: Map Notetags
- Applies a darkness overlay to the map that lights can penetrate through.
- Replace 'name' with any of the following preset names:
- Normal, Dawn, Day, Dusk, Night
- White, Black, Red, Orange, Yellow, Green, Cyan, Blue, Purple, Magenta,
Pink, Brown
- Light Red, Light Orange, Light Yellow, Light Green, Light Cyan,
Light Blue, Light Purple, Light Magenta, Light Pink, Light Brown
- Dark Red, Dark Orange, Dark Yellow, Dark Green, Dark Cyan,
Dark Blue, Dark Purple, Dark Magenta, Dark Pink, Dark Brown
- Some of the above presets automatically adjust opacity levels to certain
values. Otherwise, they will be at 255.
--- <Overlay Color: #rrggbb> - Used for: Map Notetags - Applies a darkness overlay using a custom color. - Replace 'rr' with a hexadecimal value for red. - Replace 'gg' with a hexadecimal value for green. - Replace 'bb' with a hexadecimal value for blue. - Leave the '#' in place. - If you are unsure of what hexadecimal value your color is, please use an online site like: https://htmlcolorcodes.com/ - These settings do not adjust opacity levels. --- <Overlay Opacity: x> - Used for: Map Notetags - Adjusts the darkness overlay's opacity level. - Replace 'x' with a number value from 0 to 255, where 0 is transparent and 255 is opaque. --- <Overlay Opacity: x%> - Used for: Map Notetags - Adjusts the darkness overlay's opacity level by rate. - Replace 'x' with a number value from 0 to 100, where 0% is transparent and 100% is opaque. --- <No Overlay> - Used for: Map Notetags - For the maps where you don't want there to be any overlay, but you don't want this to affect the other maps using them. --- Anti-Light-Related Notetags--- <Hard Anti-Light Region: x>
<Hard Anti-Light Regions: x, x, x>
- Used for: Map Notetags
- Tiles marked by these regions won't have any light shown on them.
- This will use hard edges.
- This will override the settings found in the Plugin Parameters.
- If this notetag is not used, use the settings in the Plugin Parameters
instead for the map.
- This does NOT work with looping maps.
- This does NOT block light from going to the other side. If the light
radius is large enough, it will pierce through to the other side. It just
won't be visible on the region marked tiles.
- Replace 'x' with a number representing the region ID to function as an
anti-light tile marker.
- You cannot use region 0. Use a number from 1 to 255 instead.
--- <Hard Anti-Light Terrain Tag: x>
<Hard Anti-Light Terrain Tags: x, x, x>
- Used for: Map Notetags
- Tiles marked by these terrain tags won't have any light shown on them.
- This will use hard edges.
- This will override the settings found in the Plugin Parameters.
- If this notetag is not used, use the settings in the Plugin Parameters
instead for the map.
- This does NOT work with looping maps.
- This does NOT block light from going to the other side. If the light
radius is large enough, it will pierce through to the other side. It just
won't be visible on the terrain tag marked tiles.
- Replace 'x' with a number representing the terrain tag to function as an
anti-light tile marker.
- You cannot use terrain tag 0. Use a number from 1 to 7 instead.
--- <Soft Anti-Light Region: x>
<Soft Anti-Light Regions: x, x, x>
- Used for: Map Notetags
- Tiles marked by these regions won't have any light shown on them.
- This will use soft edges.
- This will override the settings found in the Plugin Parameters.
- If this notetag is not used, use the settings in the Plugin Parameters
instead for the map.
- This does NOT work with looping maps.
- This does NOT block light from going to the other side. If the light
radius is large enough, it will pierce through to the other side. It just
won't be visible on the region marked tiles.
- Replace 'x' with a number representing the region ID to function as an
anti-light tile marker.
- You cannot use region 0. Use a number from 1 to 255 instead.
--- <Soft Anti-Light Terrain Tag: x>
<Soft Anti-Light Terrain Tags: x, x, x>
- Used for: Map Notetags
- Tiles marked by these terrain tags won't have any light shown on them.
- This will use soft edges.
- This will override the settings found in the Plugin Parameters.
- If this notetag is not used, use the settings in the Plugin Parameters
instead for the map.
- This does NOT work with looping maps.
- This does NOT block light from going to the other side. If the light
radius is large enough, it will pierce through to the other side. It just
won't be visible on the terrain tag marked tiles.
- Replace 'x' with a number representing the terrain tag to function as an
anti-light tile marker.
- You cannot use terrain tag 0. Use a number from 1 to 7 instead.
--- Radial Light General-Related NotetagsUsing this notetag will override the default settings found in the Plugin Parameters provided that they are adjusting already present settings. --- <Radial Light>
- Used for: Actor, Enemy, Event Notetags, and Event Page Comment Tags
- Quick and simple setup to add radial lights to this event.
- Using this notetag will enable radial lights for this event.
- This will use the default settings found in the Plugin Parameters for
Event Radial Lights.
- When used for actors and/or enemies, the effects will occur in battle.
- Actor effects are NOT applied to the map.
- When on the map, the radial light settings used will be dependent on
the player and follower radial light settings instead of the individual
actor radial light settings.
--- <No Radial Light>
- Used for: Actor, Enemy, Event Notetags, and Event Page Comment Tags
- Disables radial lights for this event.
- Primarily used if the default settings for Event Radial Lights would have
the radial light enabled.
- When used for actors and/or enemies, the effects will occur in battle.
- Actor effects are NOT applied to the map.
- When on the map, the radial light settings used will be dependent on
the player and follower radial light settings instead of the individual
actor radial light settings.
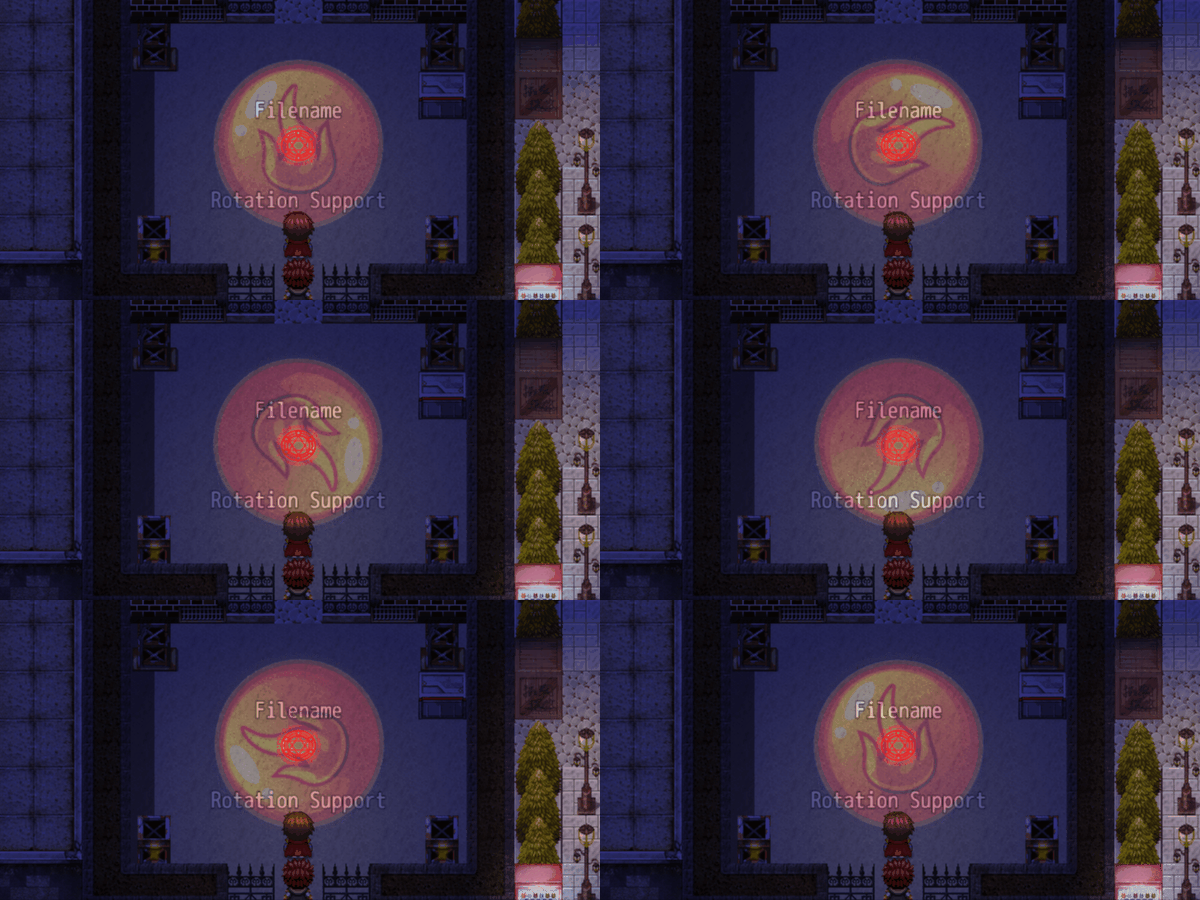
--- <Radial Light Filename: filename>
- Used for: Actor, Enemy, Event Notetags, and Event Page Comment Tags
- Uses an image instead of generated radial lights.
- Using this notetag will lock out the usage of generated radial light
notetags found below.
- Replace 'filename' with a picture found within your game project's
img/pictures/ folder. Filenames are case sensitive. Leave out the filename
extension from the notetag.
- Image will be centered on the target where the center of the image is the
anchor point and will be rotated.
- Using this notetag will enable radial lights for this event.
- When used for actors and/or enemies, the effects will occur in battle.
- Actor effects are NOT applied to the map.
- When on the map, the radial light settings used will be dependent on
the player and follower radial light settings instead of the individual
actor radial light settings.
--- <Radial Light Color: name>
- Used for: Actor, Enemy, Event Notetags, and Event Page Comment Tags
- Creates a generated radial light using a preset color.
- This notetag cannot be used with <Radial Light Filename: filename>.
- Replace 'name' with any of the following:
- Normal, Dawn, Day, Dusk, Night
- White, Black, Red, Orange, Yellow, Green, Cyan, Blue, Purple, Magenta,
Pink, Brown
- Light Red, Light Orange, Light Yellow, Light Green, Light Cyan,
Light Blue, Light Purple, Light Magenta, Light Pink, Light Brown
- Dark Red, Dark Orange, Dark Yellow, Dark Green, Dark Cyan,
Dark Blue, Dark Purple, Dark Magenta, Dark Pink, Dark Brown
- Using this notetag will enable radial lights for this event.
- When used for actors and/or enemies, the effects will occur in battle.
- Actor effects are NOT applied to the map.
- When on the map, the radial light settings used will be dependent on
the player and follower radial light settings instead of the individual
actor radial light settings.
--- <Radial Light Color: #rrggbb>
- Used for: Actor, Enemy, Event Notetags, and Event Page Comment Tags
- Creates a generated radial light using a custom color.
- This notetag cannot be used with <Radial Light Filename: filename>.
- Replace 'rr' with a hexadecimal value for red.
- Replace 'gg' with a hexadecimal value for green.
- Replace 'bb' with a hexadecimal value for blue.
- Leave the '#' in place.
- If you are unsure of what hexadecimal value your color is, please use an
online site like: https://htmlcolorcodes.com/
- Using this notetag will enable radial lights for this event.
- When used for actors and/or enemies, the effects will occur in battle.
- Actor effects are NOT applied to the map.
- When on the map, the radial light settings used will be dependent on
the player and follower radial light settings instead of the individual
actor radial light settings.
--- <Radial Light Radius: r>
<Radial Light Diameter: d>
- Used for: Actor, Enemy, Event Notetags, and Event Page Comment Tags
- Determines the radius/diameter of the generated radial light.
- This notetag cannot be used with <Radial Light Filename: filename>.
- Replace 'r' with a number representing the pixel radius of the generated
radial light.
- Replace 'd' with a number representing the pixel diameter of the generated
radial light.
- Use one or the other.
- Using this notetag will enable radial lights for this event.
- When used for actors and/or enemies, the effects will occur in battle.
- Actor effects are NOT applied to the map.
- When on the map, the radial light settings used will be dependent on
the player and follower radial light settings instead of the individual
actor radial light settings.
- If this notetag is used, this will disable the "Auto-Calc Radius" Plugin
Parameter for this specific actor/enemy.
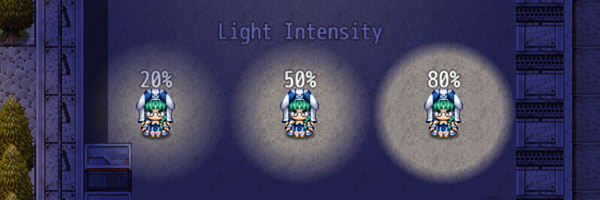
--- <Radial Light Intensity: x%>
- Used for: Actor, Enemy, Event Notetags, and Event Page Comment Tags
- Determines the light intensity of the generated radial light.
- This notetag cannot be used with <Radial Light Filename: filename>.
- Intensity determines how much of the light's luminosity extends outwards
at full strength between fading away.
- Replace 'x' with a number between 0 and 100 representing the intensity
percentage for the generated radial light.
- Using this notetag will enable radial lights for this event.
- When used for actors and/or enemies, the effects will occur in battle.
- Actor effects are NOT applied to the map.
- When on the map, the radial light settings used will be dependent on
the player and follower radial light settings instead of the individual
actor radial light settings.
--- <Radial Light Angle: x>
- Used for: Actor, Enemy, Event Notetags, and Event Page Comment Tags
- Determines the initial angle of the generated radial light.
- Can be used with both image and generated radial lights.
- Best used with the <Radial Light Filename: filename> notetag in order to
see any changes.
- Replace 'x' with a number between 0 and 360 representing the angle.
- Using this notetag will enable radial lights for this event.
- When used for actors and/or enemies, the effects will occur in battle.
- Actor effects are NOT applied to the map.
- When on the map, the radial light settings used will be dependent on
the player and follower radial light settings instead of the individual
actor radial light settings.
--- <Radial Light Rotate Speed: +x>
<Radial Light Rotate Speed: -x>
- Used for: Actor, Enemy, Event Notetags, and Event Page Comment Tags
- Determines the speed at which the radial light rotates.
- Can be used with both image and generated radial lights.
- Best used with the <Radial Light Filename: filename> notetag in order to
see any changes.
- Replace 'x' with a number representing how slow (smaller numbers) or fast
(larger numbers) the light rotates.
- Use negative numbers for a reverser rotation going counter-clockwise.
- Using this notetag will enable radial lights for this event.
- When used for actors and/or enemies, the effects will occur in battle.
- Actor effects are NOT applied to the map.
- When on the map, the radial light settings used will be dependent on
the player and follower radial light settings instead of the individual
actor radial light settings.
--- <Radial Light Blend Mode: Normal>
<Radial Light Blend Mode: Additive>
<Radial Light Blend Mode: Multiply>
<Radial Light Blend Mode: Screen>
- Used for: Actor, Enemy, Event Notetags, and Event Page Comment Tags
- Changes the blend mode of the radial light.
- Can be used with both image and generated radial lights.
- We recommend that you use 'screen'.
- Using this notetag will enable radial lights for this event.
- When used for actors and/or enemies, the effects will occur in battle.
- Actor effects are NOT applied to the map.
- When on the map, the radial light settings used will be dependent on
the player and follower radial light settings instead of the individual
actor radial light settings.
--- <Radial Light Opacity: x>
<Radial Light Opacity: x%>
- Used for: Actor, Enemy, Event Notetags, and Event Page Comment Tags
- Changes the opacity level of the radial light.
- Can be used with both image and generated radial lights.
- The opacity of a light determines how bright (larger numbers) or dim
(smaller numbers) it is.
- Replace 'x' with a number between 0 and 255 to determine how dim (smaller
numbers) or bright (larger numbers) the light is.
- Replace 'x%' with a percentage between 0% and 100% to determine how
dim (smaller numbers) or bright (larger numbers) the light is.
- Using this notetag will enable radial lights for this event.
- When used for actors and/or enemies, the effects will occur in battle.
- Actor effects are NOT applied to the map.
- When on the map, the radial light settings used will be dependent on
the player and follower radial light settings instead of the individual
actor radial light settings.
--- <Radial Light Offset: +x, +y>
<Radial Light Offset: -x, -y>
- Used for: Actor, Enemy, Event Notetags, and Event Page Comment Tags
- Offsets the position of the radial light, which is normally centered on
the sprite it is coming from.
- Can be used with both image and generated radial lights.
- Replace 'x' and 'y' with numeric values the exact number of pixels to
offset the radial light's x and y coordinates by.
- Using this notetag will enable radial lights for this event.
- When used for actors and/or enemies, the effects will occur in battle.
- Actor effects are NOT applied to the map.
- When on the map, the radial light settings used will be dependent on
the player and follower radial light settings instead of the individual
actor radial light settings.
--- Radial Light Behavior-Related NotetagsUsing this notetag will override the default settings found in the Plugin Parameters provided that they are adjusting already present settings. --- <Radial Light Blink Rate: x%>
- Used for: Actor, Enemy, Event Notetags, and Event Page Comment Tags
- Adjusts the frequency at which the radial light will blink.
- Replace 'x' with a percentage representing the frequency.
- Lower numbers mean less frequent.
- Higher numbers mean more frequent.
- When used for actors and/or enemies, the effects will occur in battle.
- Actor effects are NOT applied to the map.
- When on the map, the radial light settings used will be dependent on
the player and follower radial light settings instead of the individual
actor radial light settings.
--- <Radial Light Blink Modifier: +x%>
<Radial Light Blink Modifier: -x%>
- Used for: Actor, Enemy, Event Notetags, and Event Page Comment Tags
- Adjusts a static multiplicative opacity modifier at which lights will
become brighter (+) or dimmer (-) when flashing.
- Replace 'x' with a percentage representing the static multiplier increase.
- Positive numbers mean brighter.
- Negative numbers mean dimmer.
- When used for actors and/or enemies, the effects will occur in battle.
- Actor effects are NOT applied to the map.
- When on the map, the radial light settings used will be dependent on
the player and follower radial light settings instead of the individual
actor radial light settings.
--- <Radial Light Flicker Rate: x%>
- Used for: Actor, Enemy, Event Notetags, and Event Page Comment Tags
- Adjusts the frequency at which the radial light will flicker.
- Replace 'x' with a percentage representing the frequency.
- Lower numbers mean less frequent.
- Higher numbers mean more frequent.
- When used for actors and/or enemies, the effects will occur in battle.
- Actor effects are NOT applied to the map.
- When on the map, the radial light settings used will be dependent on
the player and follower radial light settings instead of the individual
actor radial light settings.
--- <Radial Light Flicker Modifier: +x%>
<Radial Light Flicker Modifier: -x%>
- Used for: Actor, Enemy, Event Notetags, and Event Page Comment Tags
- Adjusts a randomized multiplicative opacity modifier at which lights will
become brighter (+) or dimmer (-) when flashing.
- Replace 'x' with a percentage representing the randomized multiplier
increase.
- Randomized multiplier will range anywhere from 0 to the number itself.
- Positive numbers mean brighter.
- Negative numbers mean dimmer.
- When used for actors and/or enemies, the effects will occur in battle.
- Actor effects are NOT applied to the map.
- When on the map, the radial light settings used will be dependent on
the player and follower radial light settings instead of the individual
actor radial light settings.
--- <Radial Light Flash Rate: x%>
- Used for: Actor, Enemy, Event Notetags, and Event Page Comment Tags
- Adjusts the frequency at which the radial light will flash.
- Replace 'x' with a percentage representing the frequency.
- Lower numbers mean less frequent.
- Higher numbers mean more frequent.
- When used for actors and/or enemies, the effects will occur in battle.
- Actor effects are NOT applied to the map.
- When on the map, the radial light settings used will be dependent on
the player and follower radial light settings instead of the individual
actor radial light settings.
- Must be used with a lower opacity setting.
- Use with <Radial Light Opacity: x%> notetag.
- If <Radial Light Opacity: x%> is not used, default to 50%.
--- <Radial Light Flash Modifier: +x%>
<Radial Light Flash Modifier: -x%>
- Used for: Actor, Enemy, Event Notetags, and Event Page Comment Tags
- Adjusts a static additive opacity modifier at which lights will become
brighter (+) or dimmer (-) when flashing.
- Replace 'x' with a percentage representing the static additional change.
- Positive numbers mean brighter.
- Negative numbers mean dimmer.
- When used for actors and/or enemies, the effects will occur in battle.
- Actor effects are NOT applied to the map.
- When on the map, the radial light settings used will be dependent on
the player and follower radial light settings instead of the individual
actor radial light settings.
--- <Radial Light Flare Rate: x%>
- Used for: Actor, Enemy, Event Notetags, and Event Page Comment Tags
- Adjusts the frequency at which the radial light will flare.
- Replace 'x' with a percentage representing the frequency.
- Lower numbers mean less frequent.
- Higher numbers mean more frequent.
- When used for actors and/or enemies, the effects will occur in battle.
- Actor effects are NOT applied to the map.
- When on the map, the radial light settings used will be dependent on
the player and follower radial light settings instead of the individual
actor radial light settings.
- Must be used with a lower opacity setting.
- Use with <Radial Light Opacity: x%> notetag.
- If <Radial Light Opacity: x%> is not used, default to 50%.
--- <Radial Light Flare Modifier: +x%>
<Radial Light Flare Modifier: -x%>
- Used for: Actor, Enemy, Event Notetags, and Event Page Comment Tags
- Adjusts a randomized additive opacity modifier at which lights will become
brighter (+) or dimmer (-) when flaring up.
- Replace 'x' with a percentage representing the randomized multiplier
increase.
- Randomized multiplier will range anywhere from 0 to the number itself.
- Positive numbers mean brighter.
- Negative numbers mean dimmer.
- When used for actors and/or enemies, the effects will occur in battle.
- Actor effects are NOT applied to the map.
- When on the map, the radial light settings used will be dependent on
the player and follower radial light settings instead of the individual
actor radial light settings.
--- <Radial Light Glow Rate: x%>
- Used for: Actor, Enemy, Event Notetags, and Event Page Comment Tags
- Adjusts how much the radial light will oscillate its brightness back and
forth in a glow-like fashion.
- Replace 'x' with a percentage representing the change in brightness.
- Lower numbers mean less fluctuation.
- Higher numbers mean more fluctuation.
- When used for actors and/or enemies, the effects will occur in battle.
- Actor effects are NOT applied to the map.
- When on the map, the radial light settings used will be dependent on
the player and follower radial light settings instead of the individual
actor radial light settings.
--- <Radial Light Glow Speed: x%>
- Used for: Actor, Enemy, Event Notetags, and Event Page Comment Tags
- Adjusts the speed at which the glow oscillates back and forth.
- Replace 'x' with a percentage representing the speed.
- Lower numbers mean slower.
- Higher numbers mean faster.
- When used for actors and/or enemies, the effects will occur in battle.
- Actor effects are NOT applied to the map.
- When on the map, the radial light settings used will be dependent on
the player and follower radial light settings instead of the individual
actor radial light settings.
--- <Radial Light Glow Random>
<Radial Light Glow No Random>
- Used for: Actor, Enemy, Event Notetags, and Event Page Comment Tags
- Adds a random seed (or not) to the glow oscillation. This can be used to
put multiple lights glowing at different starting points.
- This is used to offset the default RNG settings found in the default
Plugin Parameters.
- When used for actors and/or enemies, the effects will occur in battle.
- Actor effects are NOT applied to the map.
- When on the map, the radial light settings used will be dependent on
the player and follower radial light settings instead of the individual
actor radial light settings.
--- <Radial Light Pulse Rate: x%>
- Used for: Actor, Enemy, Event Notetags, and Event Page Comment Tags
- Adjusts how much the radial light will oscillate its radius back and
forth in a pulse-like fashion.
- Replace 'x' with a percentage representing the change in size.
- Lower numbers mean less shrinking.
- Higher numbers mean more shrinking.
- When used for actors and/or enemies, the effects will occur in battle.
- Actor effects are NOT applied to the map.
- When on the map, the radial light settings used will be dependent on
the player and follower radial light settings instead of the individual
actor radial light settings.
--- <Radial Light Pulse Speed: x%>
- Used for: Actor, Enemy, Event Notetags, and Event Page Comment Tags
- Adjusts the speed at which the pulse oscillates back and forth.
- Replace 'x' with a percentage representing the speed.
- Lower numbers mean slower.
- Higher numbers mean faster.
- When used for actors and/or enemies, the effects will occur in battle.
- Actor effects are NOT applied to the map.
- When on the map, the radial light settings used will be dependent on
the player and follower radial light settings instead of the individual
actor radial light settings.
--- <Radial Light Pulse Random>
<Radial Light Pulse No Random>
- Used for: Actor, Enemy, Event Notetags, and Event Page Comment Tags
- Adds a random seed (or not) to the pulse oscillation. This can be used to
put multiple lights pulsing at different starting points.
- This is used to offset the default RNG settings found in the default
Plugin Parameters.
- When used for actors and/or enemies, the effects will occur in battle.
- Actor effects are NOT applied to the map.
- When on the map, the radial light settings used will be dependent on
the player and follower radial light settings instead of the individual
actor radial light settings.
--- <Radial Light Pattern Type: name>
- Used for: Actor, Enemy, Event Notetags, and Event Page Comment Tags
- Uses a premade pattern by this plugin. The pattern will change the
brightness of the light in a sequenced pattern.
- Replace 'name' with any of the following text:
- none, normal
- fluorescent, halogen, incandescent
- candle, torch, campfire
- fast strobe, slow strobe
- strong pulse, medium pulse, slow pulse
- underwater
- When used for actors and/or enemies, the effects will occur in battle.
- Actor effects are NOT applied to the map.
- When on the map, the radial light settings used will be dependent on
the player and follower radial light settings instead of the individual
actor radial light settings.
--- <Radial Light Custom Pattern: x>
- Used for: Actor, Enemy, Event Notetags, and Event Page Comment Tags
- Uses a custom pattern determined by you, the game dev, on how the light's
brightness will change over time.
- Replace 'x' with letters of the alphabet from 'a' to 'z'.
- 'a' is completely transparent.
- 'm' is midway in brightness.
- 'z' is the brightest the light can be.
- When used for actors and/or enemies, the effects will occur in battle.
- Actor effects are NOT applied to the map.
- When on the map, the radial light settings used will be dependent on
the player and follower radial light settings instead of the individual
actor radial light settings.
- Examples:
- <Radial Light Custom Pattern: mmmmmaaaaammmmmaaaaaabcdefgabcdefg>
- <Radial Light Custom Pattern: nmonqnmomnmomomno>
- <Radial Light Custom Pattern: abcdefghijklmnopqrrqponmlkjihgfedcba>
--- <Radial Light Pattern Delay: x>
- Used for: Actor, Enemy, Event Notetags, and Event Page Comment Tags
- Determines how many frames to wait before going to the next part of the
preset pattern and/or custom pattern.
- Replace 'x' with a number representing the frames the radial light needs
to wait before moving forward in the pattern.
- Lower numbers mean faster (minimum: 1).
- Higher numbers mean slower.
- When used for actors and/or enemies, the effects will occur in battle.
- Actor effects are NOT applied to the map.
- When on the map, the radial light settings used will be dependent on
the player and follower radial light settings instead of the individual
actor radial light settings.
--- Conical Light General-Related NotetagsUsing this notetag will override the default settings found in the Plugin Parameters provided that they are adjusting already present settings. --- <Conical Light> - Used for: Event Notetags and Event Page Comment Tags - Quick and simple setup to add conical lights to this event. - Using this notetag will enable conical lights for this event. - This will use the default settings found in the Plugin Parameters for Event Conical Lights. --- <No Conical Light> - Used for: Event Notetags and Event Page Comment Tags - Disables conical lights for this event. - Primarily used if the default settings for Event Conical Lights would have the conical light enabled. --- <Conical Light Filename: filename>
- Used for: Event Notetags and Event Page Comment Tags
- Uses an image instead of generated conical lights.
- Using this notetag will lock out the usage of generated conical light
notetags found below.
- By default, you should have your conical light image face the right at
"0 degrees".
- Replace 'filename' with a picture found within your game project's
img/pictures/ folder. Filenames are case sensitive. Leave out the filename
extension from the notetag.
- Using this notetag will enable conical lights for this event.
--- <Conical Light File Angle Offset: +x> <Conical Light File Angle Offset: -x> - Used for: Event Notetags and Event Page Comment Tags - Determines how much to offset the angle of the conical light image by. - Replace 'x' with a number from 0 to 360 representing the angle offset. - Negatives are allowed in order to quickly go the other way. - Using this notetag will enable conical lights for this event. --- <Conical Light File Anchor: x, y> - Used for: Event Notetags and Event Page Comment Tags - Determine the anchor points for the conical light image. - Replace 'x' and 'y' with numbers between 0 and 1. - For x: 0.0 is left-aligned, 0.5 is center-aligned, 1.0 is right-aligned. - For y: 0.0 is top-aligned, 0.5 is middle-aligned, 1.0 is bottom-aligned. - Using this notetag will enable conical lights for this event. --- <Conical Light Color: name>
- Used for: Event Notetags and Event Page Comment Tags
- Creates a generated conical light using a preset color.
- This notetag cannot be used with <Conical Light Filename: filename>.
- Replace 'name' with any of the following:
- Normal, Dawn, Day, Dusk, Night
- White, Black, Red, Orange, Yellow, Green, Cyan, Blue, Purple, Magenta,
Pink, Brown
- Light Red, Light Orange, Light Yellow, Light Green, Light Cyan,
Light Blue, Light Purple, Light Magenta, Light Pink, Light Brown
- Dark Red, Dark Orange, Dark Yellow, Dark Green, Dark Cyan,
Dark Blue, Dark Purple, Dark Magenta, Dark Pink, Dark Brown
- Using this notetag will enable conical lights for this event.
--- <Conical Light Color: #rrggbb> - Used for: Event Notetags and Event Page Comment Tags - Creates a generated conical light using a custom color. - This notetag cannot be used with <Conical Light Filename: filename>. - Replace 'rr' with a hexadecimal value for red. - Replace 'gg' with a hexadecimal value for green. - Replace 'bb' with a hexadecimal value for blue. - Leave the '#' in place. - If you are unsure of what hexadecimal value your color is, please use an online site like: https://htmlcolorcodes.com/ - Using this notetag will enable conical lights for this event. --- <Conical Light Radius: r> <Conical Light Diameter: d> - Used for: Event Notetags and Event Page Comment Tags - Determines the radius/diameter of the generated conical light. - This notetag cannot be used with <Conical Light Filename: filename>. - Replace 'r' with a number representing the pixel radius of the generated conical light. - Replace 'd' with a number representing the pixel diameter of the generated conical light. - Use one or the other. - Using this notetag will enable conical lights for this event. --- <Conical Light Source Radius: r> <Conical Light Source Diameter: d> - Used for: Event Notetags and Event Page Comment Tags - Determines the radius/diameter of the generated conical light's light source, creating a little circle from where the cone starts. - This notetag cannot be used with <Conical Light Filename: filename>. - Replace 'r' with a number representing the pixel radius of the generated conical light. - Replace 'd' with a number representing the pixel diameter of the generated conical light. - Use one or the other. - Using this notetag will enable conical lights for this event. --- <Conical Light Intensity: x%>
- Used for: Event Notetags and Event Page Comment Tags
- Determines the light intensity of the generated conical light.
- This notetag cannot be used with <Conical Light Filename: filename>.
- Intensity determines how much of the light's luminosity extends outwards
at full strength between fading away.
- Replace 'x' with a number between 0 and 100 representing the intensity
percentage for the generated conical light.
- Using this notetag will enable conical lights for this event.
--- <Conical Light Blend Mode: Normal> <Conical Light Blend Mode: Additive> <Conical Light Blend Mode: Multiply> <Conical Light Blend Mode: Screen> - Used for: Event Notetags and Event Page Comment Tags - Changes the blend mode of the conical light. - Can be used with both image and generated conical lights. - We recommend that you use 'screen'. - Using this notetag will enable conical lights for this event. --- <Conical Light Opacity: x>
<Conical Light Opacity: x%>
- Used for: Event Notetags and Event Page Comment Tags
- Changes the opacity level of the conical light.
- Can be used with both image and generated conical lights.
- The opacity of a light determines how bright (larger numbers) or dim
(smaller numbers) it is.
- Replace 'x' with a number between 0 and 255 to determine how dim (smaller
numbers) or bright (larger numbers) the light is.
- Replace 'x%' with a percentage between 0% and 100% to determine how
dim (smaller numbers) or bright (larger numbers) the light is.
- Using this notetag will enable conical lights for this event.
--- <Conical Light Angle: x> - Used for: Event Notetags and Event Page Comment Tags - Determines the arc angle of the generated conical light. - The larger the angle, the wider the arc. - Replace 'x' with a number between 0 and 360 representing the angle. - Using this notetag will enable conical lights for this event. --- <Conical Light Angle Sway: x> - Used for: Event Notetags and Event Page Comment Tags - Determines how many degrees the light will sway back and forth. - The larger the angle, the wider the sway. - Replace 'x' with a number between 0 and 360 representing the degrees the light will sway. - Use 0 for no sway. - Using this notetag will enable conical lights for this event. --- <Conical Light Sway Speed: x%> - Used for: Event Notetags and Event Page Comment Tags - Determines how fast the light will sway back and forth. - Replace 'x' with a percentage from 1% to 100%. - Lower numbers mean slower. - Higher numbers mean faster. - Using this notetag will enable conical lights for this event. --- <Conical Light Sway Random> <Conical Light Sway No Random> - Used for: Event Notetags and Event Page Comment Tags - Adds a random seed (or not) to the sway oscillation. This can be used to put multiple lights swaying at different starting points. - This is used to offset the default RNG settings found in the default Plugin Parameters. - Using this notetag will enable conical lights for this event. --- <Conical Light Force Direction: x>
- Used for: Event Notetags and Event Page Comment Tags
- Forces the conical light to face a certain direction.
- This is primarily used for tile events or direction fixed events that
would otherwise lock a conical light to face a certain direction.
- Replace 'x' with any of the following:
- none
- down, left, right, up
- lower left, lower right, upper left, upper right
- Use 'none' to remove any forced directions.
- Using this notetag will enable conical lights for this event.
--- <Conical Light Follow Cursor> <Conical Light Not Follow Cursor> - Used for: Event Notetags and Event Page Comment Tags - Causes the conical light to face towards the direction of the mouse cursor if it's within the game client window. - This is used to offset the default settings found in the default Plugin Parameters. - Using this notetag will enable conical lights for this event. --- <Conical Light Hand Offset> <Conical Light Center Offset> - Used for: Event Notetags and Event Page Comment Tags - Causes the conical light to follow either the hand-focused offsets or base the offset at the center of the character. - This is used to offset the default settings found in the default Plugin Parameters. - Using this notetag will enable conical lights for this event. --- <Conical Light Offset: +x, +y>
<Conical Light Offset: -x, -y>
- Used for: Event Notetags and Event Page Comment Tags
- Offsets the position of the conical light, which is normally centered on
the sprite it is coming from.
- Can be used with both image and generated conical lights.
- Used with the <Conical Light Center Offset> tag if the Plugin
Parameters dictate using hand offsets.
- As of the v1.10 update of this plugin, the presence of this tag will
also automatically include the <Conical Light Center Offset> tag.
- This is NOT used with the <Conical Light Hand Offset> notetag.
- Replace 'x' and 'y' with numeric values the exact number of pixels to
offset the conical light's x and y coordinates by.
- Using this notetag will enable conical lights for this event.
--- <Conical Light d Pattern p: +x, +y>
<Conical Light d Pattern p: -x, -y>
<Conical Light d Pattern p: +x, -y>
<Conical Light d Pattern p: -x, +y>
- Used for: Actor Notetags, Event Notetags, and Event Page Comment Tags
- When using hand-based offsets for the conical light, this will cause the
light source to come from the target's hand instead of their chest/face.
- Used with the <Conical Light Hand Offset> notetag if the Plugin
Parameters dictate using non-hand offsets.
- As of the v1.10 update of this plugin, the presence of this tag will
also automatically include the <Conical Light Hand Offset> tag.
- This is NOT used with the <Conical Light Hand Offset> notetag.
- For actors, the light source origin will vary depending on who is in the
lead, in case certain actors may be left or right handed, or if happen to
be a robot that has the light shining from their eyes.
- Replace 'd' with text representing the direction the offset is for. Use
any of the directions below:
- down, left, right, up
- lower left, lower right, upper left, upper right
- Replace 'p' with a number representing the pattern index. Patterns are
the individual frames used in the sprite when walking.
- By default, RPG Maker MZ sprites have the following patterns:
- Left frame is pattern 0.
- Center frame is pattern 1.
- Right frame is pattern 2.
- Replace 'x' and 'y' with numeric values the exact number of pixels to
offset the conical light's x and y coordinates by.
- Examples:
- <Conical Light Down Pattern 0: +12, +14>
- <Conical Light Left Pattern 1: +4, +16>
- <Conical Light Right Pattern 2: -6, +16>
--- Conical Light Behavior-Related NotetagsUsing this notetag will override the default settings found in the Plugin Parameters provided that they are adjusting already present settings. --- <Conical Light Blink Rate: x%> - Used for: Event Notetags and Event Page Comment Tags - Adjusts the frequency at which the conical light will blink. - Replace 'x' with a percentage representing the frequency. - Lower numbers mean less frequent. - Higher numbers mean more frequent. --- <Conical Light Blink Modifier: +x%> <Conical Light Blink Modifier: -x%> - Used for: Event Notetags and Event Page Comment Tags - Adjusts a static multiplicative opacity modifier at which lights will become brighter (+) or dimmer (-) when flashing. - Replace 'x' with a percentage representing the static multiplier increase. - Positive numbers mean brighter. - Negative numbers mean dimmer. --- <Conical Light Flicker Rate: x%> - Used for: Event Notetags and Event Page Comment Tags - Adjusts the frequency at which the conical light will flicker. - Replace 'x' with a percentage representing the frequency. - Lower numbers mean less frequent. - Higher numbers mean more frequent. --- <Conical Light Flicker Modifier: +x%> <Conical Light Flicker Modifier: -x%> - Used for: Event Notetags and Event Page Comment Tags - Adjusts a randomized multiplicative opacity modifier at which lights will become brighter (+) or dimmer (-) when flashing. - Replace 'x' with a percentage representing the randomized multiplier increase. - Randomized multiplier will range anywhere from 0 to the number itself. - Positive numbers mean brighter. - Negative numbers mean dimmer. --- <Conical Light Flash Rate: x%> - Used for: Event Notetags and Event Page Comment Tags - Adjusts the frequency at which the conical light will flash. - Replace 'x' with a percentage representing the frequency. - Lower numbers mean less frequent. - Higher numbers mean more frequent. - Must be used with a lower opacity setting. - Use with <Conical Light Opacity: x%> notetag. - If <Conical Light Opacity: x%> is not used, default to 50%. --- <Conical Light Flash Modifier: +x%> <Conical Light Flash Modifier: -x%> - Used for: Event Notetags and Event Page Comment Tags - Adjusts a static additive opacity modifier at which lights will become brighter (+) or dimmer (-) when flashing. - Replace 'x' with a percentage representing the static additional change. - Positive numbers mean brighter. - Negative numbers mean dimmer. --- <Conical Light Flare Rate: x%> - Used for: Event Notetags and Event Page Comment Tags - Adjusts the frequency at which the conical light will flare. - Replace 'x' with a percentage representing the frequency. - Lower numbers mean less frequent. - Higher numbers mean more frequent. - Must be used with a lower opacity setting. - Use with <Conical Light Opacity: x%> notetag. - If <Conical Light Opacity: x%> is not used, default to 50%. --- <Conical Light Flare Modifier: +x%> <Conical Light Flare Modifier: -x%> - Used for: Event Notetags and Event Page Comment Tags - Adjusts a randomized additive opacity modifier at which lights will become brighter (+) or dimmer (-) when flaring up. - Replace 'x' with a percentage representing the randomized multiplier increase. - Randomized multiplier will range anywhere from 0 to the number itself. - Positive numbers mean brighter. - Negative numbers mean dimmer. --- <Conical Light Glow Rate: x%> - Used for: Event Notetags and Event Page Comment Tags - Adjusts how much the conical light will oscillate its brightness back and forth in a glow-like fashion. - Replace 'x' with a percentage representing the change in brightness. - Lower numbers mean less fluctuation. - Higher numbers mean more fluctuation. --- <Conical Light Glow Speed: x%> - Used for: Event Notetags and Event Page Comment Tags - Adjusts the speed at which the glow oscillates back and forth. - Replace 'x' with a percentage representing the speed. - Lower numbers mean slower. - Higher numbers mean faster. --- <Conical Light Glow Random> <Conical Light Glow No Random> - Used for: Event Notetags and Event Page Comment Tags - Adds a random seed (or not) to the glow oscillation. This can be used to put multiple lights glowing at different starting points. - This is used to offset the default RNG settings found in the default Plugin Parameters. --- <Conical Light Pulse Rate: x%> - Used for: Event Notetags and Event Page Comment Tags - Adjusts how much the conical light will oscillate its radius back and forth in a pulse-like fashion. - Replace 'x' with a percentage representing the change in size. - Lower numbers mean less shrinking. - Higher numbers mean more shrinking. --- <Conical Light Pulse Speed: x%> - Used for: Event Notetags and Event Page Comment Tags - Adjusts the speed at which the pulse oscillates back and forth. - Replace 'x' with a percentage representing the speed. - Lower numbers mean slower. - Higher numbers mean faster. --- <Conical Light Pulse Random> <Conical Light Pulse No Random> - Used for: Event Notetags and Event Page Comment Tags - Adds a random seed (or not) to the pulse oscillation. This can be used to put multiple lights pulsing at different starting points. - This is used to offset the default RNG settings found in the default Plugin Parameters. --- <Conical Light Pattern Type: name> - Used for: Event Notetags and Event Page Comment Tags - Uses a premade pattern by this plugin. The pattern will change the brightness of the light in a sequenced pattern. - Replace 'name' with any of the following text: - none, normal - fluorescent, halogen, incandescent - candle, torch, campfire - fast strobe, slow strobe - strong pulse, medium pulse, slow pulse - underwater --- <Conical Light Custom Pattern: x> - Used for: Event Notetags and Event Page Comment Tags - Uses a custom pattern determined by you, the game dev, on how the light's brightness will change over time. - Replace 'x' with letters of the alphabet from 'a' to 'z'. - 'a' is completely transparent. - 'm' is midway in brightness. - 'z' is the brightest the light can be. - Examples: - <Conical Light Custom Pattern: mmmmmaaaaammmmmaaaaaabcdefgabcdefg> - <Conical Light Custom Pattern: nmonqnmomnmomomno> - <Conical Light Custom Pattern: abcdefghijklmnopqrrqponmlkjihgfedcba> --- <Conical Light Pattern Delay: x> - Used for: Event Notetags and Event Page Comment Tags - Determines how many frames to wait before going to the next part of the preset pattern and/or custom pattern. - Replace 'x' with a number representing the frames the conical light needs to wait before moving forward in the pattern. - Lower numbers mean faster (minimum: 1). - Higher numbers mean slower. --- Plugin CommandsPlugin Commands are event commands that are used to call upon functions added by a plugin that aren't inherently a part of RPG Maker MZ. Here is a list of Plugin Command(s) that you may use: ---
--- Overlay Plugin Commands--- OVERLAY: Change to Preset Color - Change current darkness overlay to a preset color and opacity level. Color: - Pick a preset color. - This will also come with predetermined opacity values. Duration: - What is the duration of the color change? --- OVERLAY: Change to Custom Color - Change current darkness overlay to a custom color. Color: - Custom color. - This uses #rrggbb format. - Check your color here: https://htmlcolorcodes.com/ Opacity: - Opacity level of the color. - Value between 0-255. - Transparent: 0. Opaque: 255. Duration: - What is the duration of the color change? --- Battle Light Plugin Commands--- BATTLE LIGHT: Change Actor(s) Settings - Change the battle-radial light settings for target(s). Actor ID(s): - Target actor(s) you want to change light settings for. - You may use JavaScript code. Settings: - Change the radial light settings for the target(s). Behavior: - Change the behaviors for this radial light. Auto-Calc Radius: - Automatically calculates the radius size based on sprite's width/height. --- BATTLE LIGHT: Change Enemy(s) Settings - Change the battle-radial light settings for target(s). Enemy Index(es): - Select enemy troop index(es) to change light settings for. - You may use JavaScript code. Settings: - Change the radial light settings for the target(s). Behavior: - Change the behaviors for this radial light. Auto-Calc Radius: - Automatically calculates the radius size based on sprite's width/height. --- Radial Light Plugin Commands--- RADIAL LIGHT: Change Player Settings - Change the radial light settings for the player. Settings: - Change the radial light settings for the player. - See "Radial Light Settings" section below. Behavior: - Change the behaviors for this radial light. - See "Behavior" section below. --- RADIAL LIGHT: Change Follower Settings - Change the radial light settings for followers. Settings: - Change the radial light settings for all followers. - See "Radial Light Settings" section below. Behavior: - Change the behaviors for this radial light. - See "Behavior" section below. --- RADIAL LIGHT: Change Event(s) Settings - Change the radial light settings for target event(s). Event ID(s): - Target event(s) to have their light settings changed. - Use 0 for "this event". - You may use JavaScript code. Settings: - Change the radial light settings for target event(s). - See "Radial Light Settings" section below. Behavior: - Change the behaviors for this radial light. - See "Behavior" section below. --- RADIAL LIGHT: Change Boat Settings
- Change the radial light settings for the boat vehicle.
Boarded:
Radial Light:
- Changed radial light settings for this vehicle.
Changed Behavior:
- What are the changed behavioral settings for these radial lights?
Unboarded:
Radial Light:
- Changed radial light settings for this vehicle.
Changed Behavior:
- What are the changed behavioral settings for these radial lights?
--- RADIAL LIGHT: Change Ship Settings
- Change the radial light settings for the ship vehicle.
Boarded:
Radial Light:
- Changed radial light settings for this vehicle.
Changed Behavior:
- What are the changed behavioral settings for these radial lights?
Unboarded:
Radial Light:
- Changed radial light settings for this vehicle.
Changed Behavior:
- What are the changed behavioral settings for these radial lights?
--- RADIAL LIGHT: Change Airship Settings
- Change the radial light settings for the airship vehicle.
Boarded:
Radial Light:
- Changed radial light settings for this vehicle.
Changed Behavior:
- What are the changed behavioral settings for these radial lights?
Unboarded:
Radial Light:
- Changed radial light settings for this vehicle.
Changed Behavior:
- What are the changed behavioral settings for these radial lights?
--- Conical Light Plugin Commands--- CONICAL LIGHT: Change Player Settings - Change the conical light settings for the player. Settings: - Change the conical light settings for the player. - See "Conical Light Settings" section below. Behavior: - Change the behaviors for this conical light. - See "Behavior" section below. --- CONICAL LIGHT: Change Follower Settings - Change the conical light settings for followers. Settings: - Change the conical light settings for all followers. - See "Conical Light Settings" section below. Behavior: - Change the behaviors for this conical light. - See "Behavior" section below. --- CONICAL LIGHT: Change Event(s) Settings - Change the conical light settings for target event(s). Event ID(s): - Target event(s) to have their light settings changed. - Use 0 for "this event". - You may use JavaScript code. Settings: - Change the conical light settings for target event(s). - See "Conical Light Settings" section below. Behavior: - Change the behaviors for this conical light. - See "Behavior" section below. --- CONICAL LIGHT: Change Boat Settings
- Change the conical light settings for the boat vehicle.
Boarded:
Conical Light:
- Changed conical light settings for this vehicle.
Changed Behavior:
- What are the changed behavioral settings for these conical lights?
Unboarded:
Conical Light:
- Changed conical light settings for this vehicle.
Changed Behavior:
- What are the changed behavioral settings for these conical lights?
--- CONICAL LIGHT: Change Ship Settings
- Change the conical light settings for the ship vehicle.
Boarded:
Conical Light:
- Changed conical light settings for this vehicle.
Changed Behavior:
- What are the changed behavioral settings for these conical lights?
Unboarded:
Conical Light:
- Changed conical light settings for this vehicle.
Changed Behavior:
- What are the changed behavioral settings for these conical lights?
--- CONICAL LIGHT: Change Airship Settings
- Change the conical light settings for the airship vehicle.
Boarded:
Conical Light:
- Changed conical light settings for this vehicle.
Changed Behavior:
- What are the changed behavioral settings for these conical lights?
Unboarded:
Conical Light:
- Changed conical light settings for this vehicle.
Changed Behavior:
- What are the changed behavioral settings for these radial lights?
--- Conical Offset Plugin Commands--- CONICAL OFFSET: Change Actor(s) Settings
- Change the conical light hand offset for target actor(s).
Actor ID(s):
- Target actor(s) you want to change offset settings for.
- You may use JavaScript code.
Enable:
- Change the offset settings for the target(s).
Hand Position Offsets:
- Change target(s)'s offsets used for hand positions.
VS8 Dash Offsets:
- Change target(s)'s offsets used for hand positions for VS8 sprites
while dashing.
VS8 Jump Offsets:
- Change target(s)'s offsets used for hand positions for VS8 sprites
while jumping.
--- CONICAL OFFSET: Change Event(s) Settings
- Change the conical light hand offset for target event(s).
Event ID(s):
- Target event(s) you want to change offset settings for.
- Use 0 for "this event".
- You may use JavaScript code.
Enable:
- Change the offset settings for the target(s).
Hand Position Offsets:
- Change target(s)'s offsets used for hand positions.
VS8 Dash Offsets:
- Change target(s)'s offsets used for hand positions for VS8 sprites
while dashing.
VS8 Jump Offsets:
- Change target(s)'s offsets used for hand positions for VS8 sprites
while jumping.
--- CONICAL LIGHT: Change Ship Settings
- Change the conical light hand offset for the Ship vehicle.
Boarded:
Changed Offsets:
- Changed offsets used for the "hand" positions of this vehicle.
Unboarded:
Changed Offsets:
- Changed offsets used for the "hand" positions of this vehicle.
--- CONICAL LIGHT: Change Airship Settings
- Change the conical light hand offset for the airship vehicle.
Boarded:
Changed Offsets:
- Changed offsets used for the "hand" positions of this vehicle.
Unboarded:
Changed Offsets:
- Changed offsets used for the "hand" positions of this vehicle.
--- CONICAL LIGHT: Change Boat Settings
- Change the conical light hand offset for the boat vehicle.
Boarded:
Changed Offsets:
- Changed offsets used for the "hand" positions of this vehicle.
Unboarded:
Changed Offsets:
- Changed offsets used for the "hand" positions of this vehicle.
--- Spawn Light Plugin Commands--- SPAWN LIGHT: Create Light(s) at Map X/Y
- Map only!
- Create new light spawn(s) locked to the map.
- Use tile coordinates for X and Y.
Light Settings:
Settings:
- Change the radial light settings for the light spawn(s).
Bheavior:
- Change the behaviors for the light spawn(s).
Coordinates X/Y:
Origin X:
Origin Y:
- What is the origin X/Y position?
- You may use JavaScript code.
Spawn Settings:
JS: Trajectory:
- Code used to determine the trajectory of these lights.
- These will revolve around the origin X/Y position.
Initial Time:
- What is the initial time value for this light spawn(s)?
- You may use JavaScript code.
Total Spawns:
- How many light spawns should there be?
- Minimum value: 1.
- You may use JavaScript code.
Time Increment:
- What is the time increment between spawns?
Expiration Timer:
- After how many frames will light spawn(s) expire?
- Use 0 for no expiration.
- You may use JavaScript code.
--- SPAWN LIGHT: Create Light(s) at Screen X/Y
- Map only!
- Create new light spawn(s) locked to the screen.
- The light spawn(s) is unaffected by map scrolling.
Light Settings:
Settings:
- Change the radial light settings for the light spawn(s).
Bheavior:
- Change the behaviors for the light spawn(s).
Coordinates X/Y:
Origin X:
Origin Y:
- What is the origin X/Y position?
- You may use JavaScript code.
Spawn Settings:
JS: Trajectory:
- Code used to determine the trajectory of these lights.
- These will revolve around the origin X/Y position.
Initial Time:
- What is the initial time value for this light spawn(s)?
- You may use JavaScript code.
Total Spawns:
- How many light spawns should there be?
- Minimum value: 1.
- You may use JavaScript code.
Time Increment:
- What is the time increment between spawns?
Expiration Timer:
- After how many frames will light spawn(s) expire?
- Use 0 for no expiration.
- You may use JavaScript code.
--- SPAWN LIGHT: Create Light(s) on Player
- Map only!
- Create new light spawn(s) following the player.
- The light spawn(s) is unaffected by map scrolling.
Light Settings:
Settings:
- Change the radial light settings for the light spawn(s).
Bheavior:
- Change the behaviors for the light spawn(s).
Spawn Settings:
JS: Trajectory:
- Code used to determine the trajectory of these lights.
- These will revolve around the origin X/Y position.
Initial Time:
- What is the initial time value for this light spawn(s)?
- You may use JavaScript code.
Total Spawns:
- How many light spawns should there be?
- Minimum value: 1.
- You may use JavaScript code.
Time Increment:
- What is the time increment between spawns?
Expiration Timer:
- After how many frames will light spawn(s) expire?
- Use 0 for no expiration.
- You may use JavaScript code.
--- SPAWN LIGHT: Create Light(s) on Follower
- Map only!
- Create new light spawn(s) following the player.
- The light spawn(s) is unaffected by map scrolling.
Light Settings:
Settings:
- Change the radial light settings for the light spawn(s).
Bheavior:
- Change the behaviors for the light spawn(s).
Target:
Follower Index:
- Which follower index should the light(s) follow?
- Index starts at 0.
- You may use JavaScript code.
Spawn Settings:
JS: Trajectory:
- Code used to determine the trajectory of these lights.
- These will revolve around the origin X/Y position.
Initial Time:
- What is the initial time value for this light spawn(s)?
- You may use JavaScript code.
Total Spawns:
- How many light spawns should there be?
- Minimum value: 1.
- You may use JavaScript code.
Time Increment:
- What is the time increment between spawns?
Expiration Timer:
- After how many frames will light spawn(s) expire?
- Use 0 for no expiration.
- You may use JavaScript code.
--- SPAWN LIGHT: Create Light(s) on Event
- Map only!
- Create new light spawn(s) following the player.
- The light spawn(s) is unaffected by map scrolling.
Light Settings:
Settings:
- Change the radial light settings for the light spawn(s).
Bheavior:
- Change the behaviors for the light spawn(s).
Target:
Event ID:
- Which map event should the light(s) follow?
- Use 0 for "this event".
- You may use JavaScript code.
Spawn Settings:
JS: Trajectory:
- Code used to determine the trajectory of these lights.
- These will revolve around the origin X/Y position.
Initial Time:
- What is the initial time value for this light spawn(s)?
- You may use JavaScript code.
Total Spawns:
- How many light spawns should there be?
- Minimum value: 1.
- You may use JavaScript code.
Time Increment:
- What is the time increment between spawns?
Expiration Timer:
- After how many frames will light spawn(s) expire?
- Use 0 for no expiration.
- You may use JavaScript code.
--- Light-Related Sub Settings--- Radial Light Settings
General:
Enabled?:
- Is this radial light enabled?
Properties:
Filename:
- Filename used for the light effect image.
- If used, ignore Color, Radius, and Intensity.
- Image will be centered on the target where the center of the image is
the anchor point and will be rotated.
Color:
- Color of the radial light in #rrggbb format.
- For generated lights only.
- Ignore if using image.
Radius:
- What is the radius of this radial light?
- For generated lights only.
- Ignore if using image.
Intensity:
- Radial light intensity. Use value between 0 & 1.
- For generated lights only.
- Ignore if using image.
Optional:
Angle:
- What is the angle of this radial light?
- Only noticeable with using images.
Rotate Speed:
- The rotation speed of this light?
- Lower: slower. Higher: faster. Negative: reverse.
Blend Mode:
- What kind of blend mode do you wish to apply to the radial light?
Opacity:
- What is the opacity (0 to 255)?
- Lower: dimmer. Higher: Brighter.
Offsets:
Offset X:
- Offset the X position of this light.
- Negative: left. Positive: right.
Offset Y:
- Offset the Y position of this light.
- Negative: up. Positive: down.
--- Conical Light Settings
General:
Enabled?:
- Is this conical light enabled?
Properties:
Filename:
- Filename used for the light effect image.
- If used, ignore Radius, Color, and Intensity.
Angle Offset:
- Offset the image angle by this many degrees.
- Only applies to images.
File Anchor X:
File Anchor Y:
- Anchor X/Y used for images.
- For X - Left: 0.0; Center: 0.5; Right: 1.0
- For Y - Top: 0.0; Middle: 0.5; Bottom: 1.0
Color:
- What is the radius of this conical light?
- For generated lights only.
- Ignore if using image.
Radius:
- What is the radius of this conical light?
- For generated lights only.
- Ignore if using image.
Source Radius:
- What is the radius of this light source?
- For generated lights only.
- Ignore if using image.
Intensity:
- Conical light intensity. Use value between 0 & 1.
- For generated lights only.
- Ignore if using image.
Optional:
Blend Mode:
- What kind of blend mode do you wish to apply to the conical light?
Opacity:
- What is the opacity (0 to 255)?
- Lower: dimmer. Higher: Brighter.
Angle:
Arc Angle:
- What is the angle of this conical light's arc?
Angle Sway:
- How many degrees should this light sway?
- Use 0 for no sway.
Sway Speed:
- How fast should this light sway?
- Lower: Slower; Higher: Faster
Randomize Sway?:
- Change the sway to offset at different starting points?
Direction:
Forced Direction?:
- Force the conical light to face a certain direction?
Follow Cursor?
- Follow the mouse cursor?
Offsets:
Use Hand Offset?:
- Put the light source on the target's "hand" position?
- Disables the two settings below if on.
Offset X (Non-Hand):
- Offset the X position of this light.
- Negative: left. Positive: right.
Offset Y (Non-Hand):
- Offset the Y position of this light.
- Negative: up. Positive: down.
--- Behavior
Blink:
Blink Rate:
- What is the rate of occurance for this effect?
- Use a decimal number between 0 and 1.
Blink Modifier:
- Static multiplicative opacity modifier. Before additive.
- Use a decimal number between -1 and 1. Negatives allowed.
Flicker:
Flicker Rate:
- What is the rate of occurance for this effect?
- Use a decimal number between 0 and 1.
Flicker Modifier:
- Random multiplicative opacity modifier. Before additive.
- Use a decimal number between -1 and 1. Negatives allowed.
Flash:
Flash Rate:
- What is the rate of occurance for this effect?
- Use a decimal number between 0 and 1.
Flash Modifier:
- Static additive opacity modifier. Before multiplicative.
- Use a decimal number between -1 and 1. Negatives allowed.
Flare:
Flare Rate:
- What is the rate of occurance for this effect?
- Use a decimal number between 0 and 1.
Flare Modifier:
- Random additive opacity modifier. Before multiplicative.
- Use a decimal number between -1 and 1. Negatives allowed.
Glow:
Glow Rate:
- What is the glow change for this light?
- Use a decimal number between 0 and 1.
Glow Speed:
- What is the speed at which glow oscillates at?
- Use a decimal number between 0 and 1.
Randomize Glow?:
- Offset the glow to oscillate at different starting points?
Pulse:
Pulse Rate:
- What is the pulse change for this light?
- Use a decimal number between 0 and 1.
Pulse Speed:
- What is the speed at which pulse oscillates at?
- Use a decimal number between 0 and 1.
Randomize Pulse?:
- Offset the pulse to oscillate at different starting points?
Pattern:
Pattern Name:
- Select the pattern name for this light.
- Ignore if using any Custom Pattern.
Custom Pattern:
- Create a custom pattern with letters from a to z.
- Where 'a' is transparent and 'z' is opaque.
Frame Delay:
- What is the frame delay between pattern updates?
--- Plugin ParametersMap Lighting SettingsLighting settings for the map scene. These settings allow you to adjust the default settings used for the majority of lighting types and behaviors across the player character, followers, events, and the various vehicles. --- General Enable For Map?: - Enable Lighting Effects for map? Shake Buffer: - Screen shakes reveal more of the screen than normal. - How many pixels of buffer should you provide? --- Player Defaults Radial Light: - Default radial light settings for this target. Default Behavior: - What are the default behavioral settings for this light? Conical Light: - Default radial light settings for this target. Default Behavior: - What are the default behavioral settings for this light? --- Follower Defaults Radial Light: - Default radial light settings for this target. Default Behavior: - What are the default behavioral settings for this light? Conical Light: - Default radial light settings for this target. Default Behavior: - What are the default behavioral settings for this light? --- Event Defaults Radial Light: - Default radial light settings for this target. Default Behavior: - What are the default behavioral settings for this light? Conical Light: - Default radial light settings for this target. Default Behavior: - What are the default behavioral settings for this light? --- Vehicles Boat: Ship: Airship: Boarded: Radial Light:
- Default radial light settings for this target.
   Default Behavior:
   - What are the default behavioral settings for this light?
 Conical Light:
 - Default radial light settings for this target.
   Default Behavior:
   - What are the default behavioral settings for this light?
"Hand" Offsets:
- Default offsets used for the "hand" positions of this vehicle.
Unboarded: Radial Light:
- Default radial light settings for this target.
   Default Behavior:
   - What are the default behavioral settings for this light?
 Conical Light:
 - Default radial light settings for this target.
   Default Behavior:
   - What are the default behavioral settings for this light?
       "Hand" Offsets:
       - Default offsets used for the "hand" positions of this vehicle.
--- Hand Position, VS8 Dash, VS8 Jump OffsetsDefault offsets used for hand positions. These are for conical lights and help determine where the light source should come from to avoid making the conical light look weird by having lights come from the user's face or chest as seen with other lighting plugins. There are also separate settings for those using VS8 sprites for dashing and jumping positions. Be sure to adjust them accordingly. --- Standard Directions Down: Up: Left: Right: - Offsets to determine conical light source position when facing this direction. --- Diagonal Directions Lower Left: Lower Right: Upper Left: Upper Right: - Offsets to determine conical light source position when facing this direction. --- Pattern Offsets: Pattern 0-10: Offset X: - What is the offset X for this pattern? - Negative: left. Positive: right. Offset Y: - What is the offset Y for this pattern? - Negative: up. Positive: down. ---
Battle Lighting SettingsLighting settings for the battle scene. The VisuStella MZ Battle Core is required in order for lighting effects to work in-battle. --- General Enable For Battle?: - Enable Lighting Effects for battles? - Requires VisuStella MZ Battle Core! --- Actor Defaults Battle Light: - Default battle-radial light settings for actors. Default Behavior: - What are the default behavioral settings for actor radial lights? Auto-Calc Radius:
- Automatically calculates the radius size based on sprite's
width/height.
- Ignore if use <Radial Light Radius: x>.
--- Enemy Defaults Battle Light: - Default battle-radial light settings for enemies. Default Behavior: - What are the default behavioral settings for enemy radial lights? Auto-Calc Radius:
- Automatically calculates the radius size based on sprite's
width/height.
- Ignore if use <Radial Light Radius: x>.
---
Anti-Light SettingsAnti-Light regions and terrain tags can be used to mark certain tiles from being affected by light at all. These tiles can be used as ceiling tiles or areas outside of the map boundaries where light doesn't normally reach. Keep in mind that this does NOT block light from passing through it. If a light source is big enough to engulf the tiles past the anti-light marked tiles, those tiles will still be lit up by any light sources. Therefore, you need to mark those tiles on the map to be anti-light as well in addition to planning out your maps for potential light piercing through the tiles. There are two kinds of anti-light types. Hard edges and soft edges. Hard Edges are extremely rough and box like. Soft Edges will smooth out towards regularly lit tiles. --- Hard Edges Regions: - Which regions by default apply anti-light? - 0 is ignored. Use a number from 1 to 255. Terrain Tags: - Which terrain tags by default apply anti-light? - 0 is ignored. Use a number from 1 to 7. --- Soft Edges Regions: - Which regions by default apply anti-light? - 0 is ignored. Use a number from 1 to 255. Terrain Tags: - Which terrain tags by default apply anti-light? - 0 is ignored. Use a number from 1 to 7. ---
Auto-Light Regions SettingsTiles marked with these regions will automatically have white light spawned on top of them. However, depending on the group the region belongs to, the light spawned will have varying degrees of opacity. This means some places can be less lit while others can be darker. This can be used to light up certain parts of the map automatically while requiring others to be lit with standard lighting. This is also helpful for those who wish to keep their parallax fully lit (since it will be affected by the darkness overlay) without having to put in a lot of light sources. --- Auto-Light Regions Opacity - 100%: to Opacity - 5%: - Mark the regions with this opacity level. - Light color will be white. Use Region ID's (1 to 255). --- Preset Color SettingsIf you happen to not like the preset colors used by this plugin, you can redefine them using different hexidecimal values for you own touch. If you are unsure of what the hexidecimal values are, please use an online site like: https://htmlcolorcodes.com/ --- Daytime Colors Greyscale Colors Red Colors Orange Colors Yellow Colors Green Colors Cyan Colors Blue Colors Purple Colors Magenta Colors Pink Colors Brown Colors Misc Colors Preset Color Name: - Preset's hex color in #rrggbb format. - Check your color here: https://htmlcolorcodes.com/ --- Options Menu SettingsLighting settings for the options scene. These are for the players who aren't fond of blinking or oscillating lights in case they bother them. --- Options Adjust Window Height: - Automatically adjust the options window height? - Ignore if using the VisuStella MZ Options Core. --- Blinking Lights Add Option?: - Add the 'Blinking Lights' option to the Options menu? Option Name: - Command name of the option. --- Pulsing Lights Add Option?: - Add the 'Pulsing Lights' option to the Options menu? Option Name: - Command name of the option. --- Radial Light SettingsThese are sub-settings found in the other settings lists. These settings adjust the default/primary properties of radial lights for the specific user type. --- General: Enabled?: - Is this radial light enabled? --- Properties: Filename: - Filename used for the light effect image. - If used, ignore Color, Radius, and Intensity. - Image will be centered on the target where the center of the image is the anchor point and will be rotated. Color: - Color of the radial light in #rrggbb format. - For generated lights only. - Ignore if using image. Radius: - What is the radius of this radial light? - For generated lights only. - Ignore if using image. Intensity: - Radial light intensity. Use value between 0 & 1. - For generated lights only. - Ignore if using image. --- Optional: Angle: - What is the angle of this radial light? - Only noticeable with using images. Rotate Speed: - The rotation speed of this light? - Lower: slower. Higher: faster. Negative: reverse. Blend Mode: - What kind of blend mode do you wish to apply to the radial light? Opacity: - What is the opacity (0 to 255)? - Lower: dimmer. Higher: Brighter. --- Offsets: Offset X: - Offset the X position of this light. - Negative: left. Positive: right. Offset Y: - Offset the Y position of this light. - Negative: up. Positive: down. --- Conical Light SettingsThese are sub-settings found in the other settings lists. These settings adjust the default/primary properties of conical lights for the specific user type. --- General: Enabled?: - Is this conical light enabled? --- Properties: Filename: - Filename used for the light effect image. - If used, ignore Radius, Color, and Intensity. Angle Offset: - Offset the image angle by this many degrees. - Only applies to images. File Anchor X: File Anchor Y: - Anchor X/Y used for images. - For X - Left: 0.0; Center: 0.5; Right: 1.0 - For Y - Top: 0.0; Middle: 0.5; Bottom: 1.0 Color: - What is the radius of this conical light? - For generated lights only. - Ignore if using image. Radius: - What is the radius of this conical light? - For generated lights only. - Ignore if using image. Source Radius: - What is the radius of this light source? - For generated lights only. - Ignore if using image. Intensity: - Conical light intensity. Use value between 0 & 1. - For generated lights only. - Ignore if using image. --- Optional: Blend Mode: - What kind of blend mode do you wish to apply to the radial light? Opacity: - What is the opacity (0 to 255)? - Lower: dimmer. Higher: Brighter. --- Angle: Arc Angle: - What is the angle of this conical light's arc? Angle Sway: - How many degrees should this light sway? - Use 0 for no sway. Sway Speed: - How fast should this light sway? - Lower: Slower; Higher: Faster Randomize Sway?: - Change the sway to offset at different starting points? --- Direction: Forced Direction?: - Force the conical light to face a certain direction? Follow Cursor? - Follow the mouse cursor? --- Offsets: Offset X: - Offset the X position of this light. - Negative: left. Positive: right. Offset Y: - Offset the Y position of this light. - Negative: up. Positive: down. --- Light Behavior SettingsThese are sub-settings found in the other settings lists. These settings adjust the default/primary patterns of how lights behave for the specific user type. --- Blink: Blink Rate: - What is the rate of occurance for this effect? - Use a decimal number between 0 and 1. Blink Modifier: - Static multiplicative opacity modifier. Before additive. - Use a decimal number between -1 and 1. Negatives allowed. --- Flicker: Flicker Rate: - What is the rate of occurance for this effect? - Use a decimal number between 0 and 1. Flicker Modifier: - Random multiplicative opacity modifier. Before additive. - Use a decimal number between -1 and 1. Negatives allowed. --- Flash: Flash Rate: - What is the rate of occurance for this effect? - Use a decimal number between 0 and 1. Flash Modifier: - Static additive opacity modifier. Before multiplicative. - Use a decimal number between -1 and 1. Negatives allowed. --- Flare: Flare Rate: - What is the rate of occurance for this effect? - Use a decimal number between 0 and 1. Flare Modifier: - Random additive opacity modifier. Before multiplicative. - Use a decimal number between -1 and 1. Negatives allowed. --- Glow: Glow Rate: - What is the glow change for this light? - Use a decimal number between 0 and 1. Glow Speed: - What is the speed at which glow oscillates at? - Use a decimal number between 0 and 1. Randomize Glow?: - Offset the glow to oscillate at different starting points? --- Pulse: Pulse Rate: - What is the pulse change for this light? - Use a decimal number between 0 and 1. Pulse Speed: - What is the speed at which pulse oscillates at? - Use a decimal number between 0 and 1. Randomize Pulse?: - Offset the pulse to oscillate at different starting points? --- Pattern: Pattern Name: - Select the pattern name for this light. - Ignore if using any Custom Pattern. Custom Pattern: - Create a custom pattern with letters from a to z. - Where 'a' is transparent and 'z' is opaque. Frame Delay: - What is the frame delay between pattern updates? ---
Terms of Use1. These plugins may be used in free or commercial games provided that they have been acquired through legitimate means at VisuStella.com and/or any other official approved VisuStella sources. Exceptions and special circumstances that may prohibit usage will be listed on VisuStella.com. 2. All of the listed coders found in the Credits section of this plugin must be given credit in your games or credited as a collective under the name: "VisuStella". 3. You may edit the source code to suit your needs, so long as you do not claim the source code belongs to you. VisuStella also does not take responsibility for the plugin if any changes have been made to the plugin's code, nor does VisuStella take responsibility for user-provided custom code used for custom control effects including advanced JavaScript notetags and/or plugin parameters that allow custom JavaScript code. 5. VisuStella is not responsible for problems found in your game due to unintended usage, incompatibility problems with plugins outside of the VisuStella MZ library, plugin versions that aren't up to date, nor responsible for the proper working of compatibility patches made by any third parties. VisuStella is not responsible for errors caused by any user-provided custom code used for custom control effects including advanced JavaScript notetags and/or plugin parameters that allow JavaScript code. 8. Any extensions and/or addendums made to this plugin's Terms of Use can be found on VisuStella.com and must be followed. Terms of Use: Japanese『VisuStella MZ』利用規約 1. これらのプラグインは、VisuStella.comおよび/または公式に承認されたVisuStellaのソースから合法的な手段で入手したものである限り、フリーゲームや商用ゲームに使用することができます。例外的に使用が禁止される場合については、VisuStella.comの記載をご確認ください。 2. 本プラグインの「クレジット」部分に記載されているすべてのコーダーの名前は、ゲーム内にクレジット表記を行うか、もしくは「VisuStella」という名前の下にまとめて表記する必要があります。 3. ソースコードを自分のものだと主張しない限りは、必要に応じて編集することが可能です。ただしプラグインのコードに変更が加えられた場合、VisuStellaはそのプラグインに対して一切の責任を負いません。高度なJavaScriptのノートタグやJavaScriptコードを許可するプラグインのパラメータを含む、カスタムコントロールエフェクトに使用される、ユーザー提供のカスタムコードについても、VisuStellaは一切の責任を負いません。 5. VisuStellaは、意図しない使用方法による問題、VisuStella MZライブラリ以外のプラグインとの非互換性の問題、プラグインのバージョンが最新でないことによる問題、第三者による互換性パッチが適切に動作していないことなどが原因でゲーム内で発生した問題については、一切の責任を負いません。VisuStellaは、高度なJavaScriptのノートタグやJavaScriptコードを許可するプラグインのパラメータを含む、カスタムコントロールエフェクトに使用される、ユーザー提供のカスタムコードに起因するエラーについても、一切の責任を負いません。 8. このプラグインの利用規約の追加項目や補足については、VisuStella.comに掲載されていますので、それを参照し従ってください。 CreditsIf you are using this plugin, credit the following people in your game: Team VisuStella ChangelogVersion 1.10: January 16, 2025
Version 1.09: November 14, 2024
Version 1.08: June 13, 2024
Version 1.07: February 15, 2024
Version 1.06: November 16, 2023
Version 1.05: September 14, 2023
Version 1.04: February 16, 2023
Version 1.03: May 5, 2022
Version 1.02: March 31, 2022
Version 1.01: March 24, 2022
Version 1.00 Official Release Date: April 8, 2022
See Also
End of File |

