Visual Fogs VisuStella MZ


|
VisuStella, Caz Wolf, Fallen Angel Olivia, Atelier Irina, and other affiliated content creators.
Download | ||
SystemThis is a plugin created for RPG Maker MZ. | ||
|
|
|
|
|
Click here for help on how to install plugins and an explanation on the Tier Hierarchy System. |
Click here to learn how to update plugins. |
Click here for how to troubleshoot plugins if you get an error. |


|
VisuStella MZThis plugin is a part of the VisuStella MZ Plugin Library.
Click here if you want to help support VisuStella on Patreon. Introduction
Fogs are a handy feature long removed from RPG Maker since RPG Maker XP. This plugin reintroduces them back into RPG Maker MZ. Fogs function similar to parallaxes, except rather than being under the tile map, fogs appear above the tile map and the characters. This plugin gives you an unlimited amount of fogs to apply to each map alongside many controls to make the fogs appear more vivid. A restricted fog area system is also added to this plugin to make fogs appear only within certain regions and/or terrain tags. This way, you can utilize parallaxes as masked layers for obscured sections of the map. Sometimes, fogs may be too intrusive to the player's visibility. A vignette feature has been added to make fogs appear only on the borders or certain sides of the screen. This way, fogs can still add to the atmosphere without obscuring too much of the visible screen. Features include all (but not limited to) the following:
RequirementsThis plugin is made for RPG Maker MZ. This will not work in other iterations of RPG Maker.
This plugin is a Tier 4 plugin. Place it under other plugins of lower tier value on your Plugin Manager list (ie: 0, 1, 2, 3, 4, 5). This is to ensure that your plugins will have the best compatibility with the rest of the VisuStella MZ Plugin library.
Major ChangesThis plugin adds some new hard-coded features to RPG Maker MZ's functions. The following is a list of them. --- Fogs
Fogs are not an inherent feature for the map editor. They need to be added through map notetags or Plugin Commands. Each of the fogs added through this plugin's notetags and/or commands are assigned an ID. Referring back to the ID later will allow you to update and/or remove that fog when needed. When fogs are created, they appear above the tile map and characters, but below the weather. This means they are created between the two layers when the map's sprites are generated. Fogs will behave very similar to parallaxes in how they move about the screen. This means that if a fog is set to looping, it will loop in accordance to the screen's display coordinates. This is to maintain consistency with how the RPG Maker MZ engine behaves. --- Regions and Terrain Tags
If you don't want a fog to appear for the whole entire foreground and want to confine them to certain areas of the map, you can assign regions or terrain tags for them to appear in. NOTE: This effect does not work on looping maps. Only the parts of the map marked by the designated regions and/or terrain tags will reveal the fog. Those parts will be little squares each, equal to the size of a tile. They have soft borders due to blurring options. The foggy tiles will be slightly larger than normal due to spill values. You may notice that some tiles don't blur well when they are towards the right and bottom sides of the screen when the blur values are higher than normal. This is a known issue with Pixi JS's filters and there's not much the VisuStella team can do about it. Instead, what we recommend is that you use a fog vignette on an upper layer to mask the bleeding issue. Each fog layer can have their own custom regions and/or terrain tags to appear in. These can be adjusted through the notetag settings or through the Plugin Commands provided by this plugin. Fog layers can be limited to multiple regions and/or terrain tags at the same time. WARNING: This will cause longer load times on larger maps and affect their performance. We highly recommend that you don't use this feature on maps larger than 120 tiles wide or tall. However, this value can vary from device to device. --- Vignettes
If you don't want fogs to obscure the whole screen, use a vignette to make them appear only at the sides of the screen. You can use custom vignette masks or rendered ones provided by this plugin. If you decide to make a custom vignette mask, create them similar to regular image masks. This means that white areas of the masking image will be the parts of the screen where the fog appears while the black areas of the image will hide the fog. You can use gradients to make the vignette mask appear more smooth. Vignettes cannot be used with region and terrain tags. This is because the region and terrain tag tiles move alongside the screen while vignettes are always locked onto the borders of the screen. However, if you wish to use both, just apply two different fog layers instead. --- Not For BattleFor clarification, the VisuStella MZ Visual Fogs plugin is NOT made for battle. There's a separate plugin for that called Visual Battle Environment. The reason why fogs aren't made for battle is because the way fogs are handled in map vary from how they would be handled in battle. Using the Visual Fogs Plugin Commands will only alter the fog appearances when the player finishes battle. --- Notetags
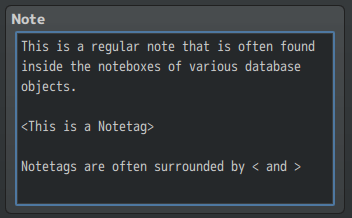
RPG Maker MZ's editor is unable to allow for custom traits/properties that a game dev may wish to associate with a database object, event, map, etc. Notetags are used to work around such limitations by allowing the game dev to tag certain traits/properties using specific Notetags declared by the related plugin. Here is a list of Notetag(s) that you may use.
--- Fog-Related Notetags
--- <Fog id Settings>
Name: filename
optional property
optional property
optional property
</Fog id Settings>
- Used for: Map Notetags
- Creates a regular fog layer for this map by default.
- Replace 'id' with a number value to assign to the fog.
- Plugin Commands will refer to this ID for changes and removal.
- The 'Name' setting is required. Without it, no fog will be made.
- Replace 'filename' with the filename of the image you want to use as
a fog found in the game project's img/parallaxes/ folder.
- Do not include the file extension.
- Insert as many of the optional properties as you want. You can find a list
of them in the section below.
--- Optional Properties
Replace the 'optional property' segment of the notetags above with any of the text below to acquire their effects. You can add/remove as many of the optional properties as you need. --- Horz Scroll: x Vert Scroll: y - This enables horizontal or vertical scrolling for the fog. - Replace 'x' or 'y' with a Number value to determine how fast they will scroll across the screen. - Use a negative value to make them scroll the other way. - These effects are mutually exclusive from the "Map Locked" property. --- Map Locked - This will cause the fog to only scroll when the map scrolls. - This has the same effect as naming a fog with "!" in front of its filename. - If the filename used for this fog has "!" in front of it, the Map Locked effect will be automatically turned on. - These effect is mutually exclusive from the "Horz Scroll" and "Vert Scroll" properties. --- Opacity: x Opacity: x% - Changes the opacity level of the fog. - Replace 'x' with a number from 0 to 255 representing the opacity level. - Replace 'x%' with a percentage from 0% to 100% representing the opacity. --- Blend Mode: Normal Blend Mode: Additive Blend Mode: Multiply Blend Mode: Screen - Sets the blend mode for the icon on the fog. - Use only one of the above. --- Hue: x Hue Shift: x - Changes the hue of the fog to 'x' so that you don't need to create multiple copies of the files with different colors. - Replace 'x' with a number value between 0 and 360. - If the "Hue Shift" property is also used, then adjust the hue of the fog each frame by 'x' amount. - 'x' can be positive or negative. --- Color Tone: red, green, blue, gray - Changes the color tone or tint of the fog. - Replace 'red', 'green', 'blue' with a value between -255 and 255. - Replace 'gray' with a value between 0 and 255. --- Region: id Regions: id, id, id - Forces the fog to only become visible on tiles marked regions with a matching ID (alongside valid terrain tags). - If this isn't used, then the fog will be as large as the screen. - Replace 'id' with a region ID between 1 and 255. - Region 0 is ignored and will not work. - Insert multiple ID's to mark more tiles the fog can appear on. - This feature cannot be used with Vignettes. - WARNING: This WILL cause longer load times on larger maps. --- Terrain Tag: id Terrain Tags: id, id, id - Forces the fog to only become visible on tiles marked terrain tags with a matching ID (alongside valid regions). - If this isn't used, then the fog will be as large as the screen. - Replace 'id' with a terrain tag ID between 1 and 7. - Terrain tag 0 is ignored and will not work. - Insert multiple ID's to mark more tiles the fog can appear on. - This feature cannot be used with Vignettes. - WARNING: This WILL cause longer load times on larger maps. --- Tile Blur: x - Determines how soft the borders are around the revealed fog tiles. - Use larger numbers to blur them more. - Use a value of zero to remove any blur. --- Tile Spill: x - Determines how much larger to make the revealed fog tiles. - Use larger numbers to spill more and make the tiles larger. - Use a value of zero to not spill at all and use the exact tile sizes. --- Vignette: type - Makes the fog appear along the edge of the screen rather than the entire visible game screen. - Replace 'type' with any of the following: - Border - Horizontal - Vertical - Upper - Lower - Left - Right ---
Custom Vignette: filename

- Allows you to use a custom parallax image as a vignette.
- Replace 'filename' with the filename of the image you want to use as
  a vignette found in the game project's img/parallaxes/ folder.
  - Do not include the file extension.
- Custom vignettes are used as masks.
  - White areas on the image determine the visible parts of the fog.
  - Black areas on the image determine the invisible parts of the fog.
--- Plugin Commands
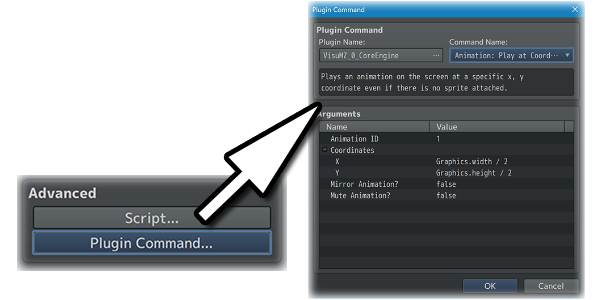
Plugin Commands are event commands that are used to call upon functions added by a plugin that aren't inherently a part of RPG Maker MZ. Here is a list of Plugin Command(s) that you may use: ---
--- Fog Plugin Commands---
Fog: Add/Change Settings
- Add/Change settings for target fog.
- Does not alter the map editor's fog.

  Required:

    ID:
    - What is the ID of this fog to be added/changed?

    Filename:
    - What is the filename of the fog?

  Optional Settings:

    Scrolling:

      Map Lock?:
      - Lock the fog to the map's scrolling?
      - Automatically enable if the filename starts with "!"

      Loop Horizontally?:
      - Loop the fog horizontally?
      - Does not work with Map Lock enabled.

        Scroll:
        - What is the horizontal scroll speed?
        - Use a negative value to invert the direction.

      Loop Vertically?:
      - Loop the fog vertically?
      - Does not work with Map Lock enabled.

        Scroll:
        - What is the vertical scroll speed?
        - Use a negative value to invert the direction.

    Appearance:

      Opacity:
      - What is the opacity level for this fog?
      - You may use JavaScript code.

      Blend Mode:
      - What kind of blend mode do you wish to apply to the fog?
      - You may use JavaScript code.
        - Normal
        - Additive
        - Multiply
        - Screen

      Hue:
      - Do you wish to adjust this fog's hue?
      - You may use JavaScript code.

      Hue Shift:
      - How much do you want the hue to shift each frame?
      - You may use JavaScript code.

      Color Tone:
      - What tone do you want for the fog?
      - Format: [Red, Green, Blue, Gray]

    Location:

      Regions:
      - Which regions will show this fog?
      - Does not work with 0. Leave empty to ignore.

      Terrain Tags:
      - Which terrain tags will show this fog?
      - Does not work with 0. Leave empty to ignore.

      Tile Blur:
      - What's the blur level you wish to use for tiles?
      - You may use JavaScript code.

      Tile Spill:
      - What's the spill amount you wish to use for tiles?
      - You may use JavaScript code.

    Vignette:

      Type:
      - What vignette do you want to use for this fog?
      - This will override location settings.

      Custom:
      - Do you wish to use a custom vignette instead?
      - Automatically changes the type to "Custom".
---
Fog: Fade Opacity
- Fades the target fog(s) opacity to a different value.

  ID(s):
  - Target which fog(s)?
  - Cannot target the map editor's fog.

  Target Opacity:
  - What opacity level to this value (0-255).
  - You may use JavaScript code to determine the value.

  Duration:
  - How many frames should this change take?
  - You may use JavaScript code to determine the value.
---
Fog: Remove
- Removes target fog(s).

  ID(s):
  - Remove which fog(s)?
  - Cannot remove the map editor's fog.
--- Plugin ParametersDefault Settings
The below are the default settings when it comes to creating fogs through map notetags. --- Defaults Fog Opacity: - What is the default fog opacity level for map notetags? Blend Mode: - What is the default fog blend mode for map notetags? - Normal - Additive - Multiply - Screen Tile Blur: - What is the default fog tile blur intensity for map notetags? Tile Spill: - What is the default fog tile spill amount for map notetags? ---
Terms of Use1. These plugins may be used in free or commercial games provided that they have been acquired through legitimate means at VisuStella.com and/or any other official approved VisuStella sources. Exceptions and special circumstances that may prohibit usage will be listed on VisuStella.com. 2. All of the listed coders found in the Credits section of this plugin must be given credit in your games or credited as a collective under the name: "VisuStella". 3. You may edit the source code to suit your needs, so long as you do not claim the source code belongs to you. VisuStella also does not take responsibility for the plugin if any changes have been made to the plugin's code, nor does VisuStella take responsibility for user-provided custom code used for custom control effects including advanced JavaScript notetags and/or plugin parameters that allow custom JavaScript code. 5. VisuStella is not responsible for problems found in your game due to unintended usage, incompatibility problems with plugins outside of the VisuStella MZ library, plugin versions that aren't up to date, nor responsible for the proper working of compatibility patches made by any third parties. VisuStella is not responsible for errors caused by any user-provided custom code used for custom control effects including advanced JavaScript notetags and/or plugin parameters that allow JavaScript code. 8. Any extensions and/or addendums made to this plugin's Terms of Use can be found on VisuStella.com and must be followed. Terms of Use: Japanese『VisuStella MZ』利用規約 1. これらのプラグインは、VisuStella.comおよび/または公式に承認されたVisuStellaのソースから合法的な手段で入手したものである限り、フリーゲームや商用ゲームに使用することができます。例外的に使用が禁止される場合については、VisuStella.comの記載をご確認ください。 2. 本プラグインの「クレジット」部分に記載されているすべてのコーダーの名前は、ゲーム内にクレジット表記を行うか、もしくは「VisuStella」という名前の下にまとめて表記する必要があります。 3. ソースコードを自分のものだと主張しない限りは、必要に応じて編集することが可能です。ただしプラグインのコードに変更が加えられた場合、VisuStellaはそのプラグインに対して一切の責任を負いません。高度なJavaScriptのノートタグやJavaScriptコードを許可するプラグインのパラメータを含む、カスタムコントロールエフェクトに使用される、ユーザー提供のカスタムコードについても、VisuStellaは一切の責任を負いません。 5. VisuStellaは、意図しない使用方法による問題、VisuStella MZライブラリ以外のプラグインとの非互換性の問題、プラグインのバージョンが最新でないことによる問題、第三者による互換性パッチが適切に動作していないことなどが原因でゲーム内で発生した問題については、一切の責任を負いません。VisuStellaは、高度なJavaScriptのノートタグやJavaScriptコードを許可するプラグインのパラメータを含む、カスタムコントロールエフェクトに使用される、ユーザー提供のカスタムコードに起因するエラーについても、一切の責任を負いません。 8. このプラグインの利用規約の追加項目や補足については、VisuStella.comに掲載されていますので、それを参照し従ってください。 CreditsIf you are using this plugin, credit the following people in your game: Team VisuStella ChangelogVersion 1.08: June 15, 2023
Version 1.07: August 4, 2022
Version 1.06: July 7, 2022
Version 1.05: December 9, 2021
Version 1.04: June 25, 2021
Version 1.03: May 28, 2021
Version 1.02: May 21, 2021
Version 1.01: May 7, 2021
Version 1.00 Official Release Date: March 5, 2021
See Also
End of File |