Difference between revisions of "Event Popup Tips and Tricks"
| Line 93: | Line 93: | ||
These have to be copied and pasted as one line. | These have to be copied and pasted as one line. | ||
| − | This setup allows your player character to give gifts from any of the four main direction to the target event when interacting with them. | + | This setup allows your player character to give gifts from any of the four main direction to the target event when interacting with them. The heart balloon reaction is optional. |
Revision as of 13:42, 15 December 2023
|
VisuStella, Caz Wolf, Fallen Angel Olivia, Atelier Irina, and other affiliated content creators.
IntroductionSince the version 1.55 update of Events and Movement Core, you can use the new Plugin Command called "Event Popup", which creates text above specific targets like the player character or an event, and move it. This feature is made by none other than yours truly, Arisu! There's many applications in which this can be used, but only if you change the way it's used. Let's take a look at them! Oh, and just as a reminder, you do need to have Message Core installed in the same project for this Plugin Command to work.
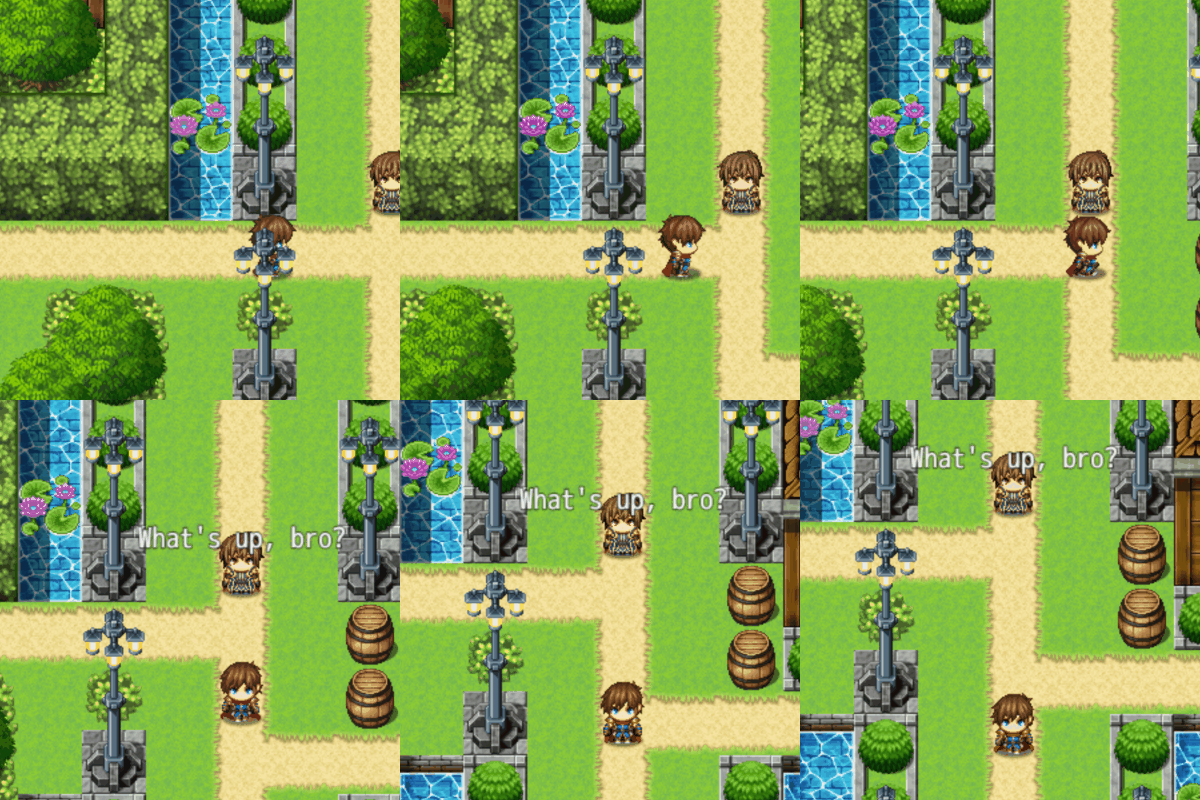
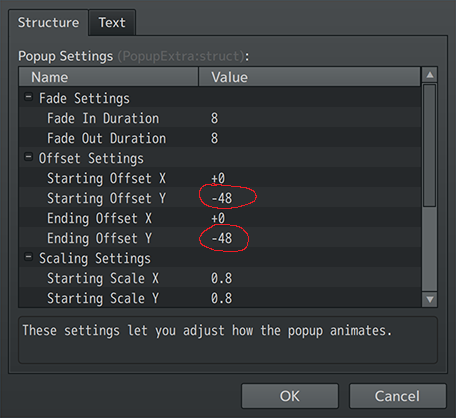
Use CasesQuick MessagesSimilar to how Gab Windows and Proximity Messages are used, this feature can be used to depict quick conversations happening as the player draws near without needing to stop the player. Not much needs to be changed in order for this to work. Just change between using the Plugin Command Event Popup: Event's Event ID parameter to shift between events if needed or by using the Event Popup: Player Plugin Command if you want the text to come from the player. Normally, the text would fly upward, but if you go into the Plugin Command's Popup Settings and change the Ending Offset Y to match the Starting Offset Y value, the text will still in place like such: Make sure the Ending Offset X to match the Starting Offset X values are the same, too! This change to the default Popup Settings will prevent the text from floating upwards and appear above the target character's head briefly.
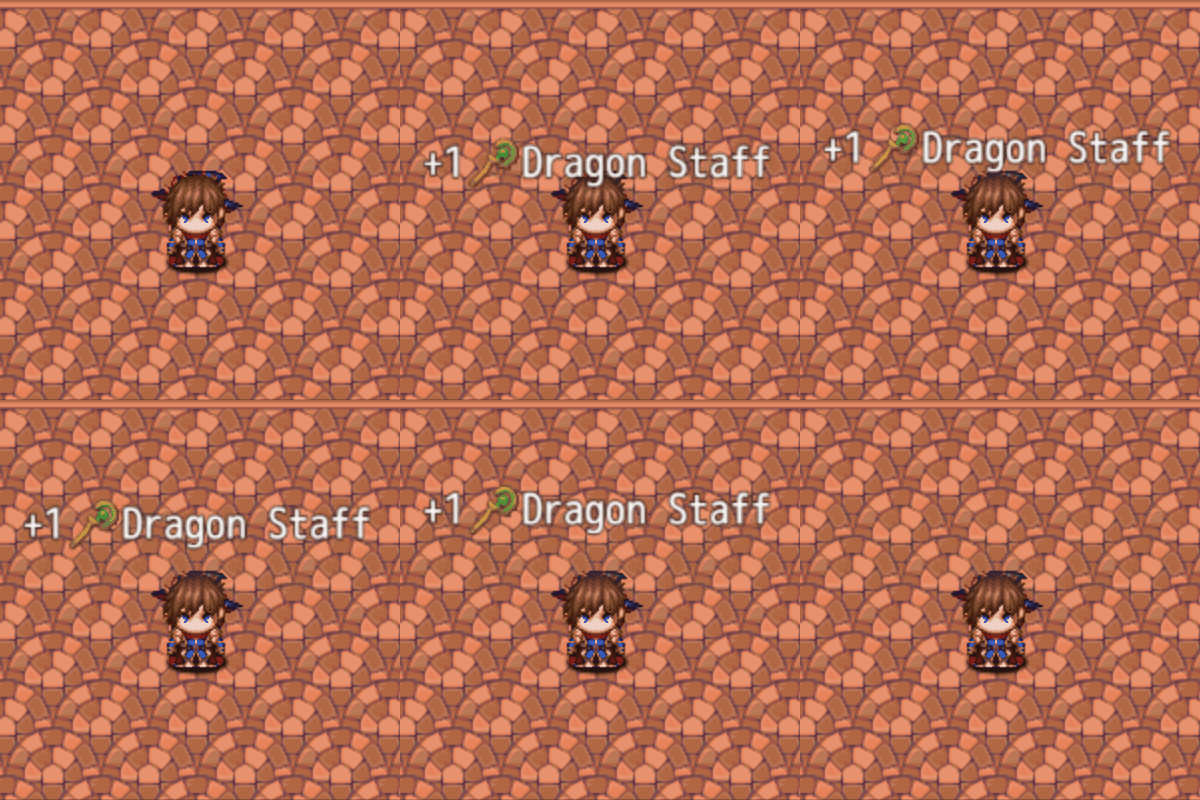
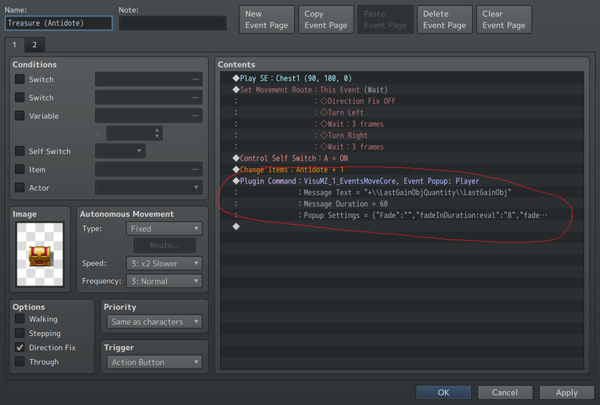
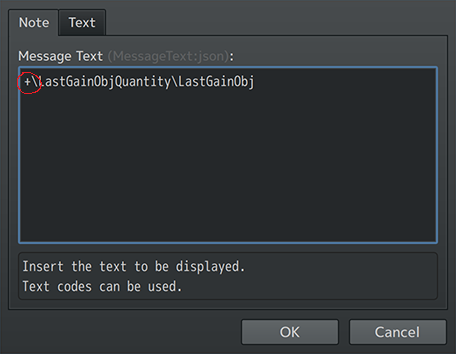
Obtain ItemsGiven this is probably how this feature will be used the most, we decided to make it the default values for the Event Popup: Player Plugin Command. This uses the Message Core text code of \LastGainObjQuantity and \LastGainObj to work. For the sake of this tutorial, I'll explain the process: First, go to an event that would give the player an item. This can be a treasure chest, exploring a cupboard, etc. For the purpose of this example, we'll use the Treasure Chest quick event. However, we have removed the Show Message event command in favor of the Plugin Command Event Popup: Player. Within that inserted Plugin Command, we change the Message Text parameter to display the following: +\LastGainObjQuantity\LastGainObj The text codes from the Message Core will display how many of the item the player just received and which item the player has just received. If this is the player losing items instead, remove the "+" from the Message Text. This shows that you can use text codes in Event Popups, and from there, we can explore the possibilities even more.
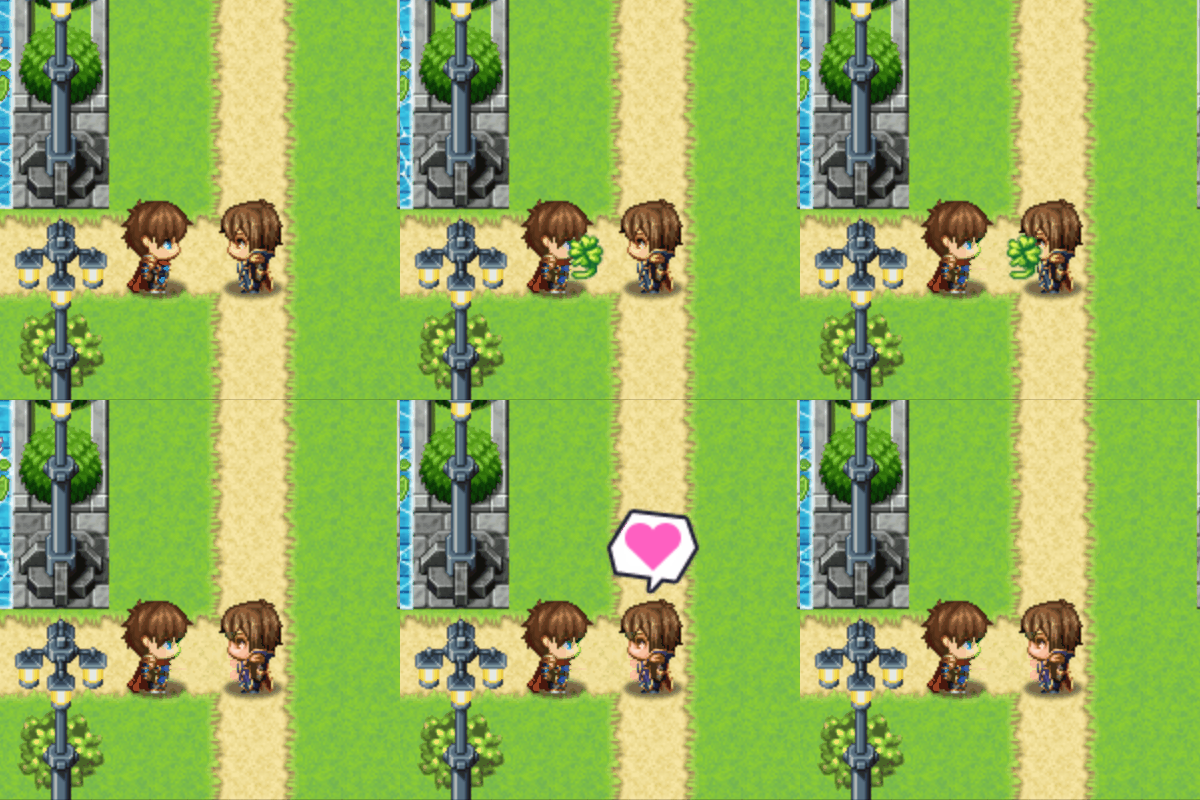
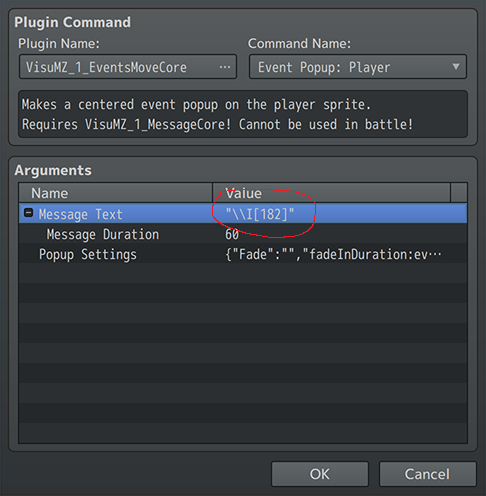
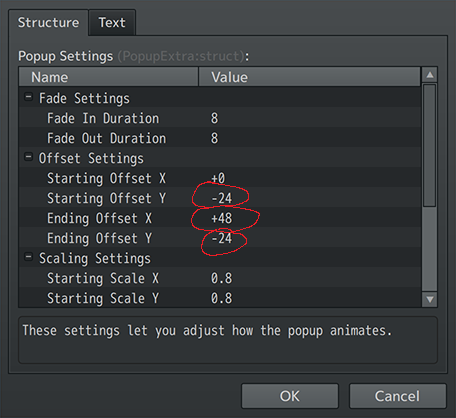
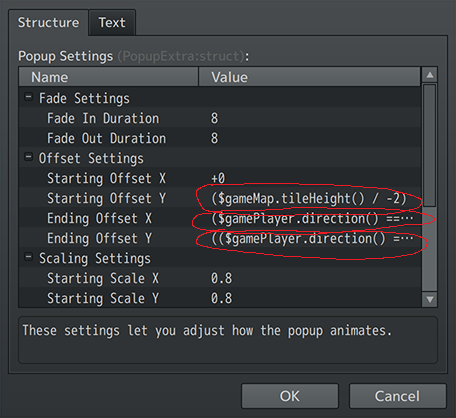
Giving GiftsAllowing text codes to be used enables possibilities like giving gifts between two characters on the screen. For this example, we do this from the Plugin Command Event Popup: Player. By changing the Message Text to an icon text code, we emulate the giving of such an item to the target character. That much should be easy to figure out. But how do we make it travel from one character to another? The answer to that lies in the Popup Settings and more specifically, the offsets: We lowered the Y offsets because we want the item to appear closer to the middle of the characters' bodies. -24 is good enough here. Like with the example of a Quick Message, keep the starting and ending offset Y the same. By changing the ending offset X to +48, we have the popup travel right one tile. However, there is a problem with this arrangement. These settings will only work if you active the target event from the left so that the popup will travel right. We need the player to be flexible in how this is handled. So, from here, we use JavaScript in the offsets! These values need to be changed as such: Starting Offset X +0 Starting Offset Y ($gameMap.tileHeight() / -2) Ending Offset X ($gamePlayer.direction() === 4) ? -$gameMap.tileWidth() : (($gamePlayer.direction() === 6) ? $gameMap.tileWidth() : 0) Ending Offset Y (($gamePlayer.direction() === 8) ? -$gameMap.tileHeight() : (($gamePlayer.direction() === 2) ? $gameMap.tileHeight() : 0)) - ($gameMap.tileHeight() / 2) These have to be copied and pasted as one line. This setup allows your player character to give gifts from any of the four main direction to the target event when interacting with them. The heart balloon reaction is optional.
Throwing ItemsConclusionEnd of File |
