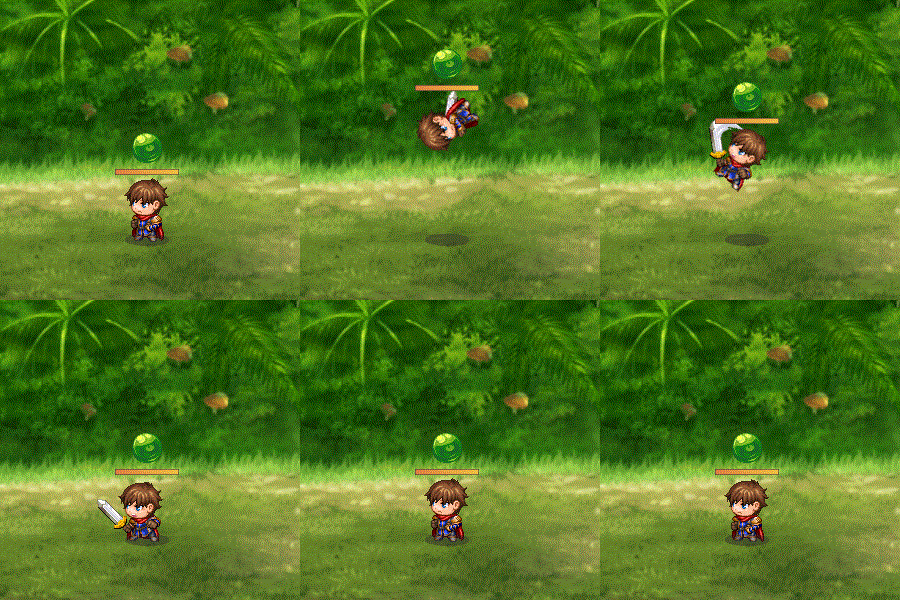
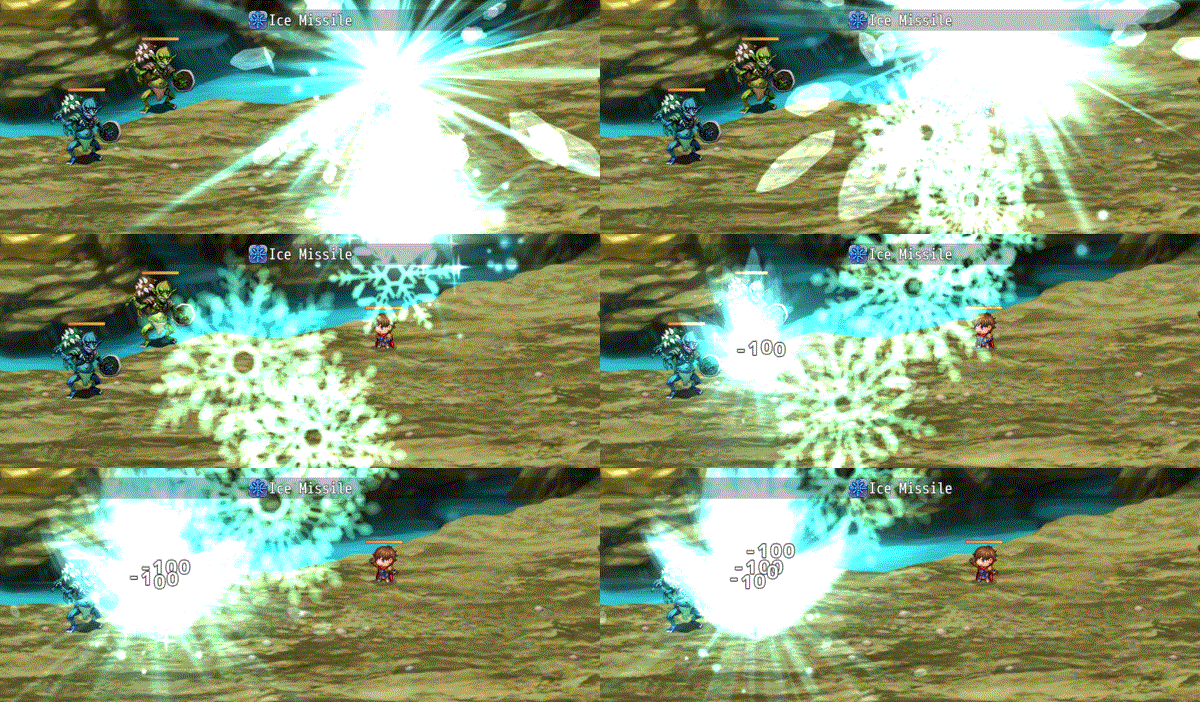
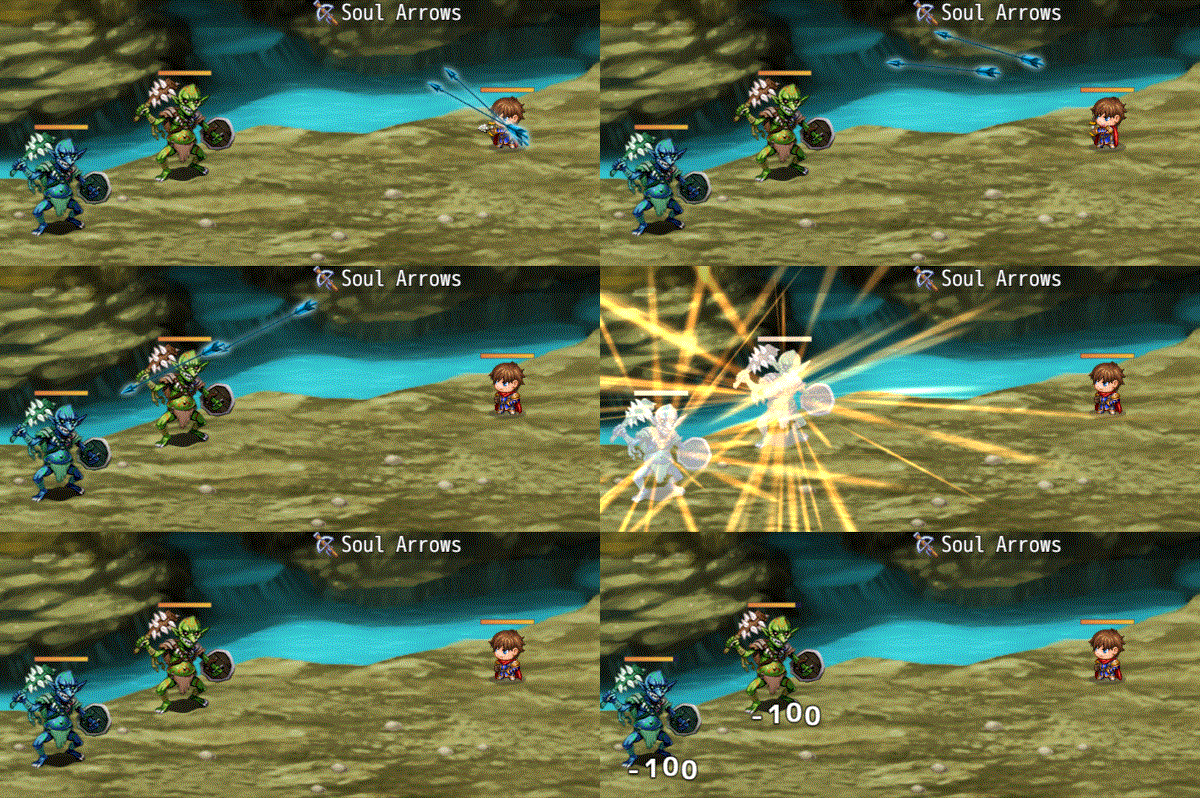
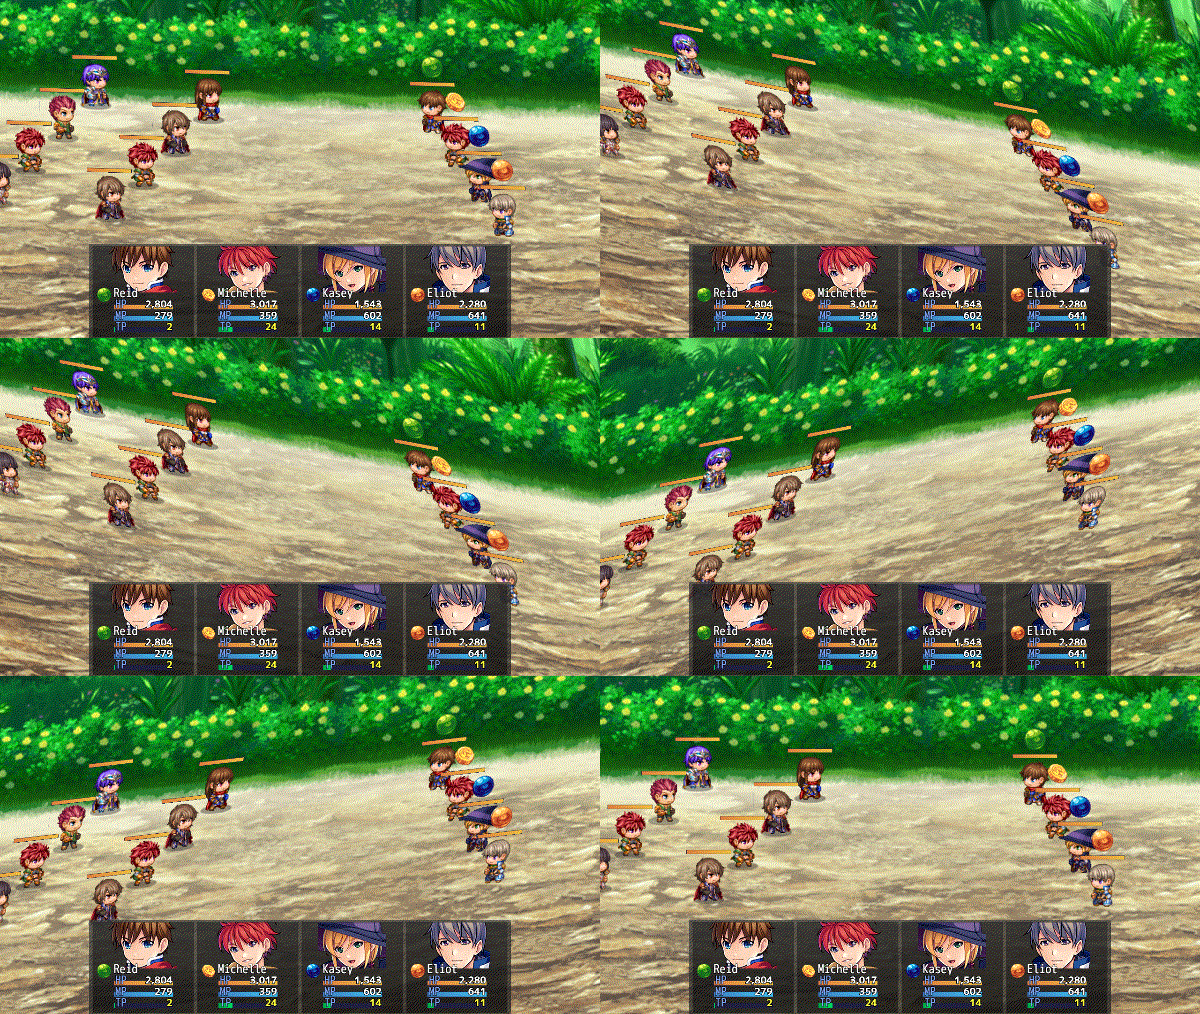
Battle Core VisuStella MZ



|
VisuStella, Caz Wolf, Fallen Angel Olivia, Atelier Irina, and other affiliated content creators.
Contents
- 1 Download
- 2 System
- 3 Extension Plugins
- 4 VisuStella MZ
- 5 Introduction
- 6 Requirements
- 7 Major Changes
- 7.1 Action Sequences
- 7.2 Action Speed
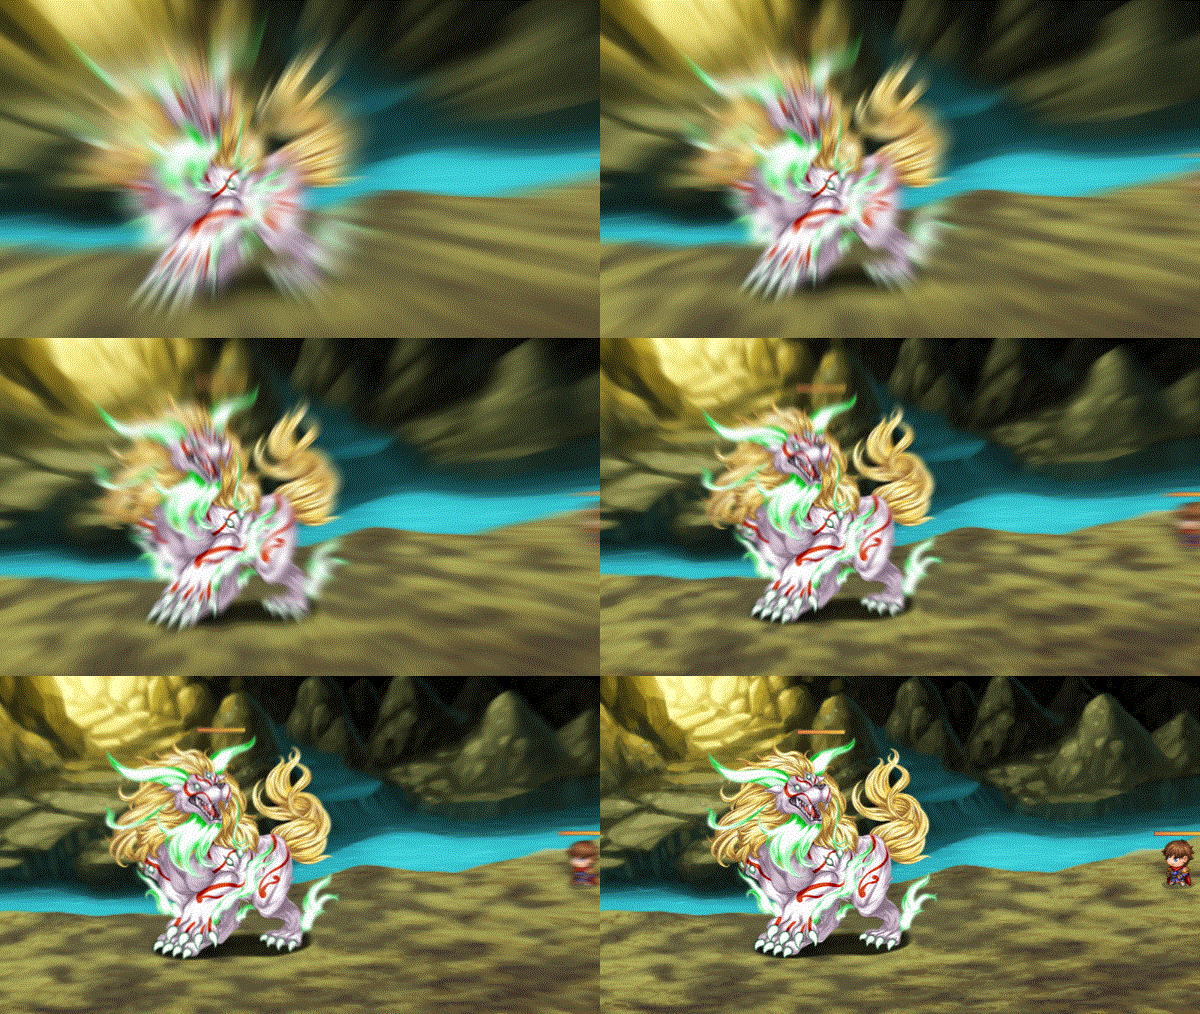
- 7.3 Animated Sideview Battler Support For Enemies
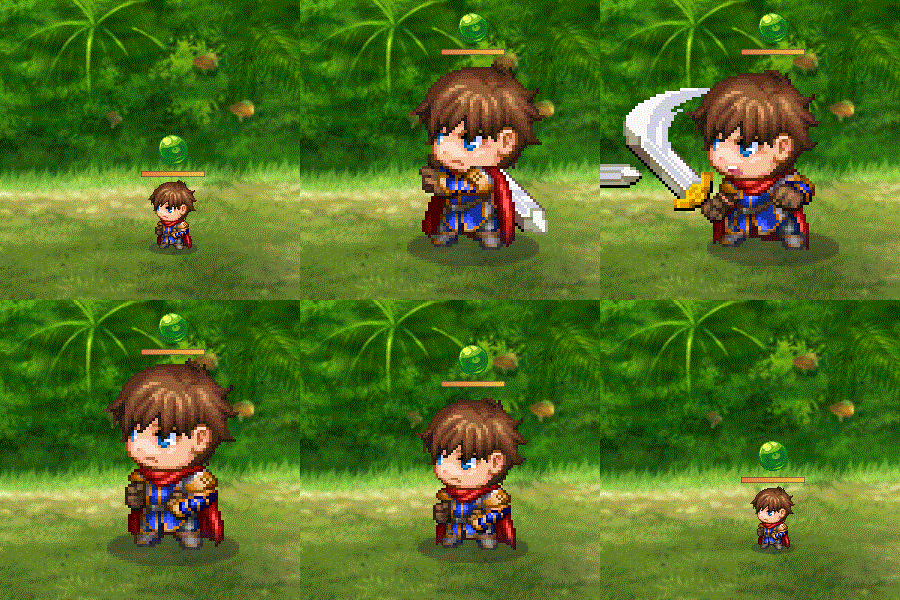
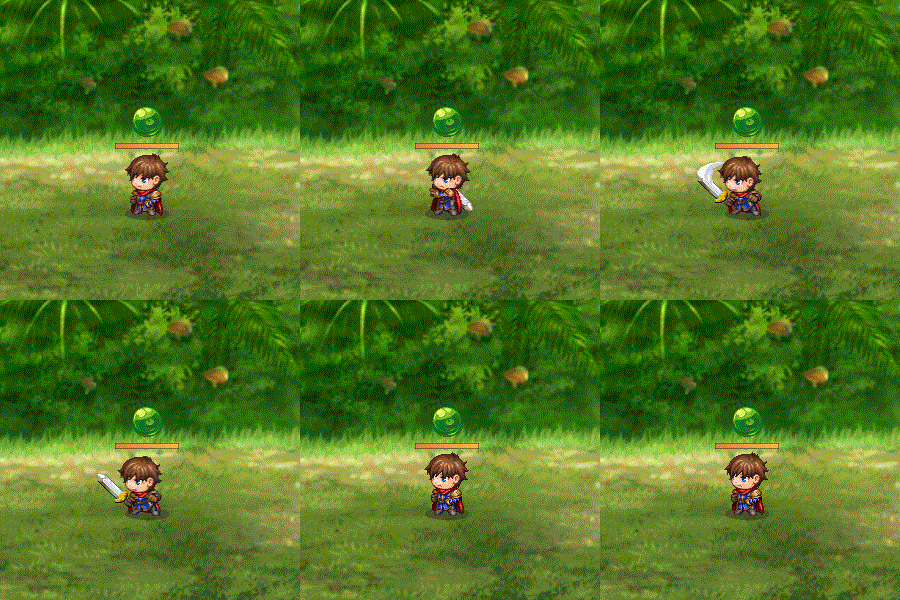
- 7.4 Battle Sprite Updates
- 7.5 Change Battleback in Battle
- 7.6 Critical Hit - LUK Influence
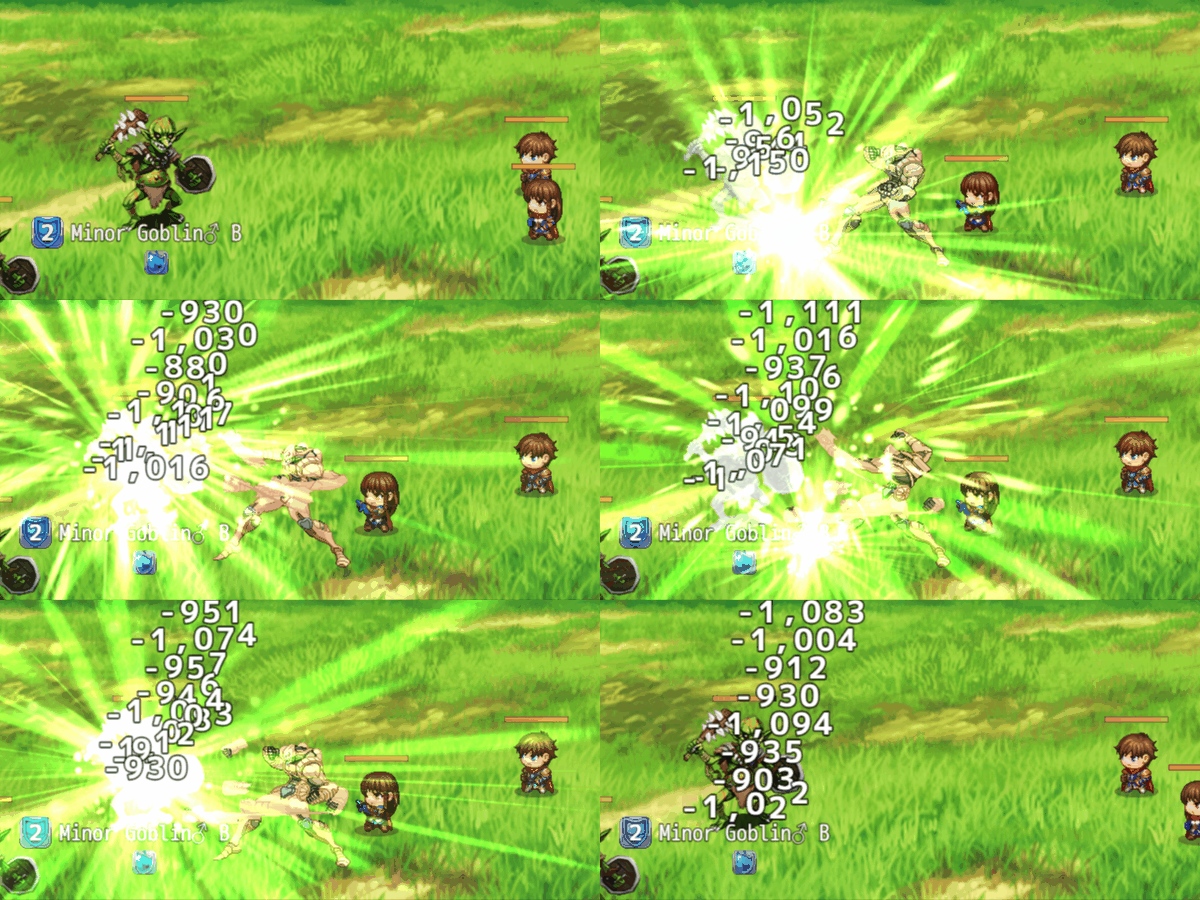
- 7.7 Damage Popups
- 7.8 Dual Wield
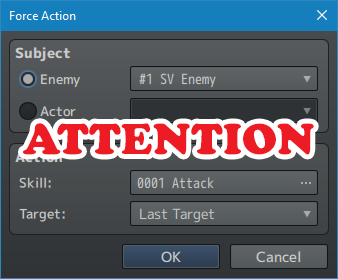
- 7.9 Force Action
- 7.10 Random Scope
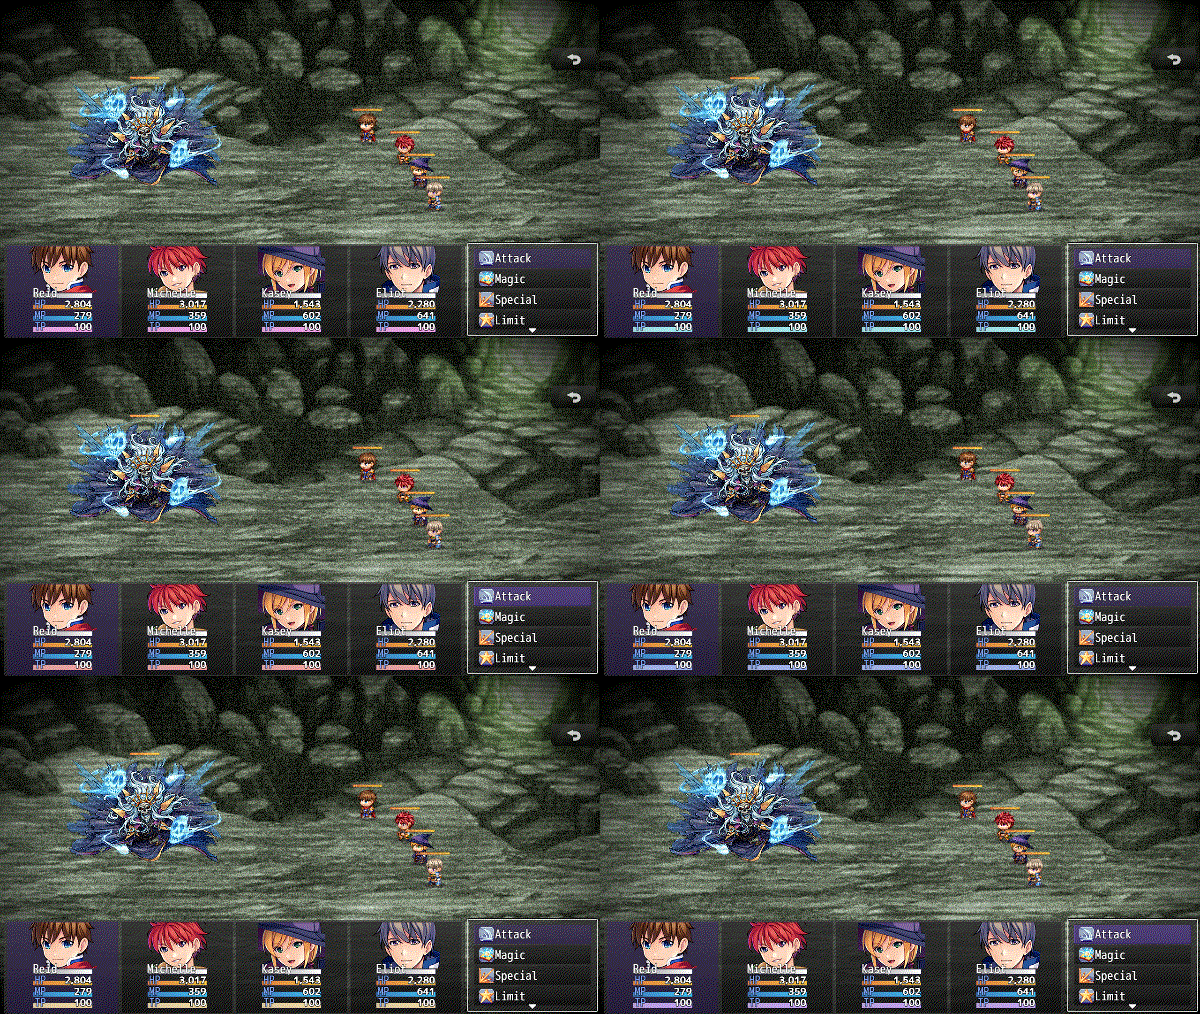
- 7.11 Spriteset_Battle Update
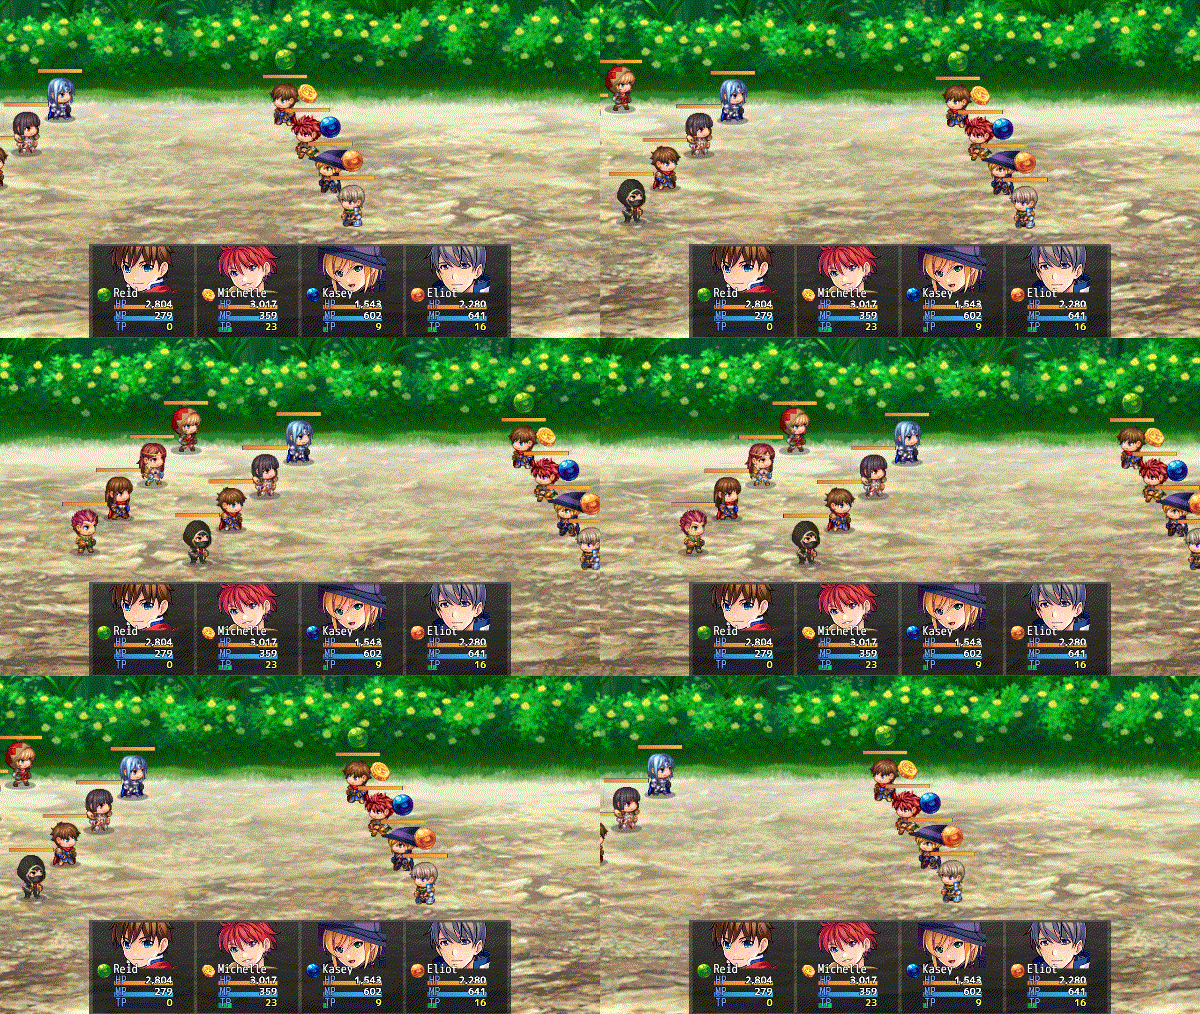
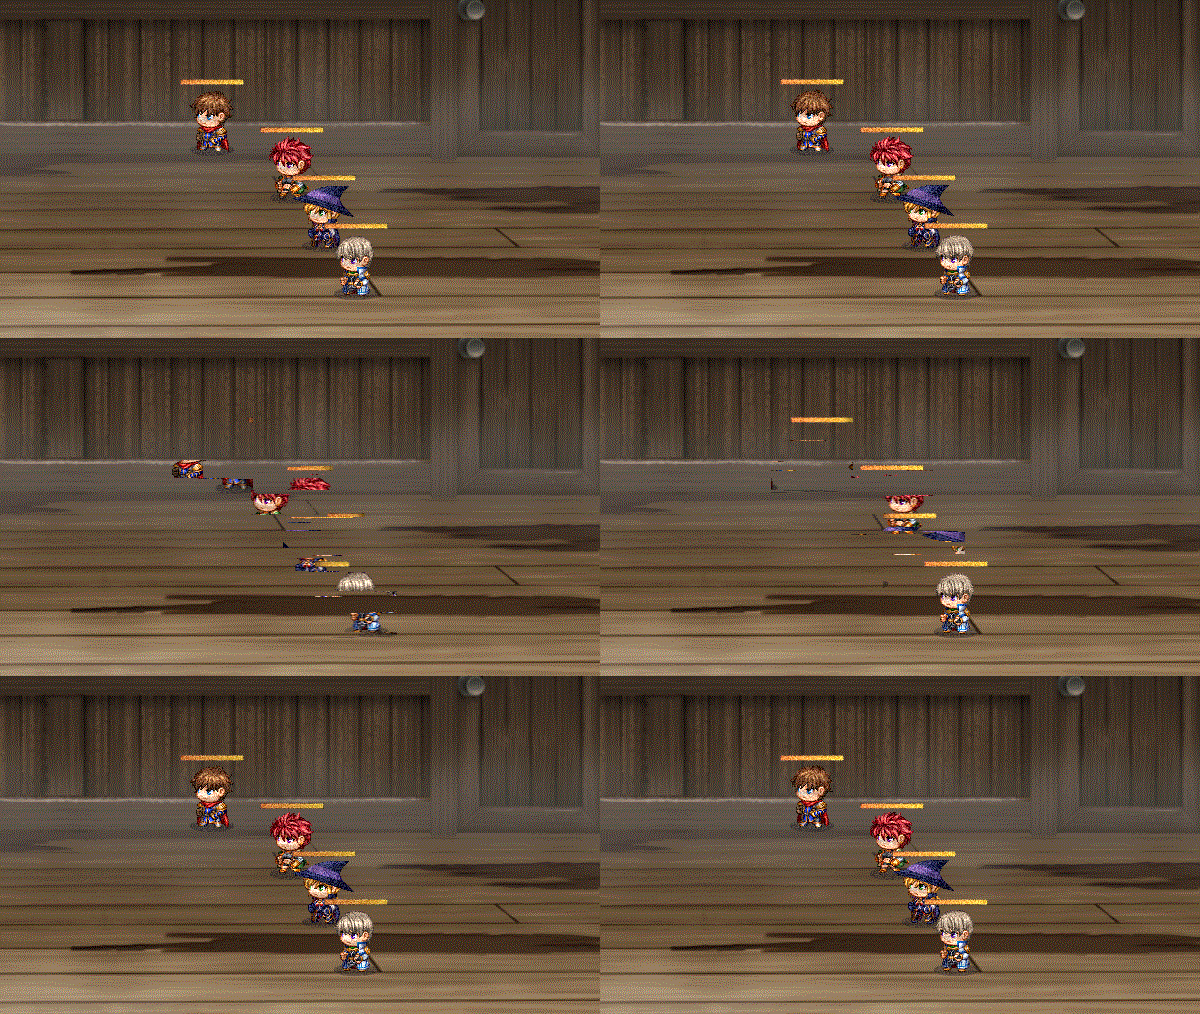
- 7.12 TPB/ATB Active Battle Actor Shifting
- 7.13 Weather Displayed in Battle
- 8 Base Troops
- 9 Damage Styles
- 10 VisuStella MZ Compatibility
- 11 Notetags
- 11.1 HP Gauge-Related Notetags
- 11.2 Animation-Related Notetags
- 11.3 Battleback-Related Notetags
- 11.4 Battle Command-Related Notetags
- 11.5 JavaScript Notetag: Battle Command-Related
- 11.6 Targeting-Related Notetags
- 11.7 JavaScript Notetag: Targeting-Related
- 11.8 Damage-Related Notetags
- 11.9 Critical-Related Notetags
- 11.10 JavaScript Notetags: Critical-Related
- 11.11 Life Steal-Related Notetags
- 11.12 Action Sequence-Related Notetags
- 11.13 Animated Sideview Battler-Related Notetags
- 11.14 Enemy-Related Notetags
- 11.15 JavaScript Notetags: Mechanics-Related
- 11.16 Battle Layout-Related Notetags
- 11.17 Troop Size Tags
- 11.18 Troop Comment Tags
- 12 Plugin Commands
- 12.1 Action Sequence - Action Sets
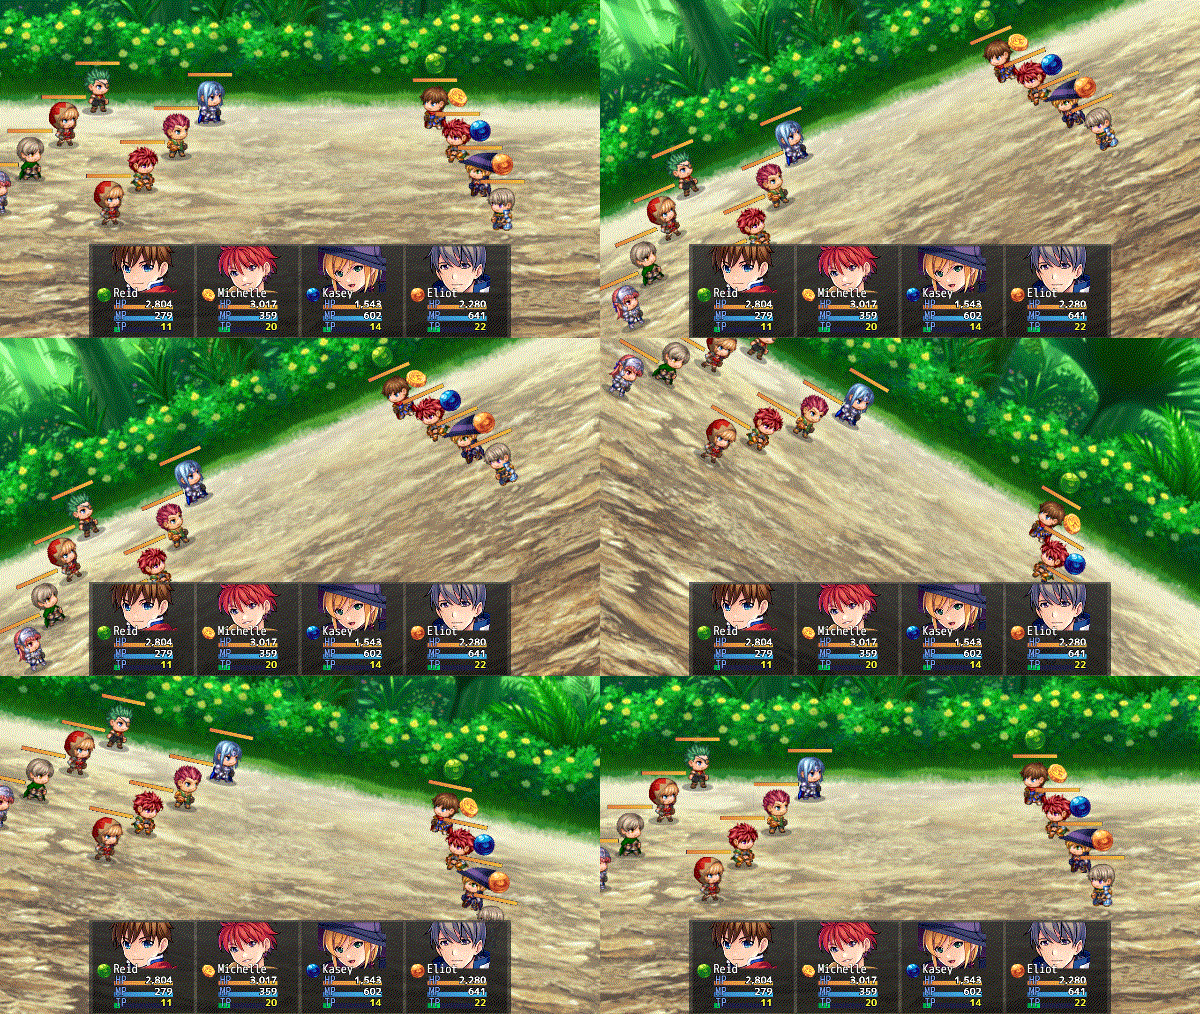
- 12.2 Action Sequences - Angle (Camera)
- 12.3 Action Sequences - Animations
- 12.4 Action Sequences - Battle Log
- 12.5 Action Sequences - Camera
- 12.6 Action Sequences - Dragonbones
- 12.7 Action Sequences - Elements
- 12.8 Action Sequences - Grid
- 12.9 Action Sequences - Horror Effects
- 12.10 Action Sequences - Impact
- 12.11 Action Sequences - Inject
- 12.12 Action Sequences - Mechanics
- 12.13 Action Sequences - Motion
- 12.14 Action Sequences - Movement
- 12.15 Action Sequences - Projectiles
- 12.16 Action Sequences - Skew (Camera)
- 12.17 Action Sequences - Target
- 12.18 Action Sequences - Voice
- 12.19 Action Sequences - Weapon
- 12.20 Action Sequences - Zoom (Camera)
- 13 Plugin Parameters
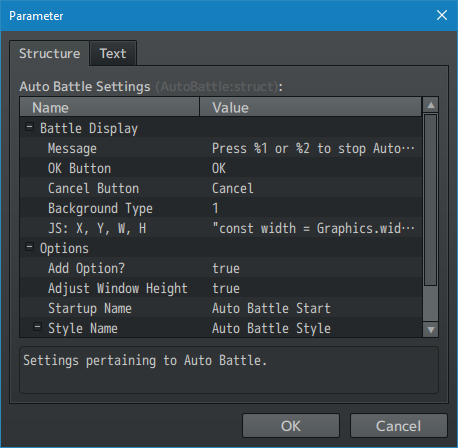
- 13.1 Auto Battle Settings
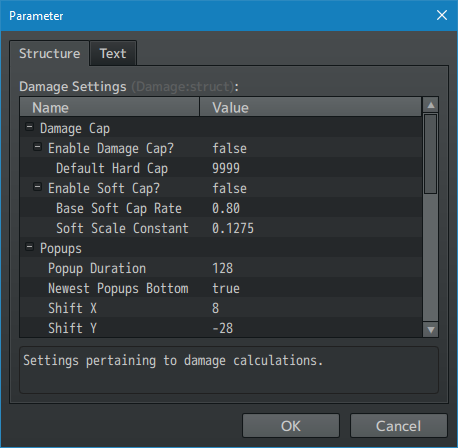
- 13.2 Damage Settings
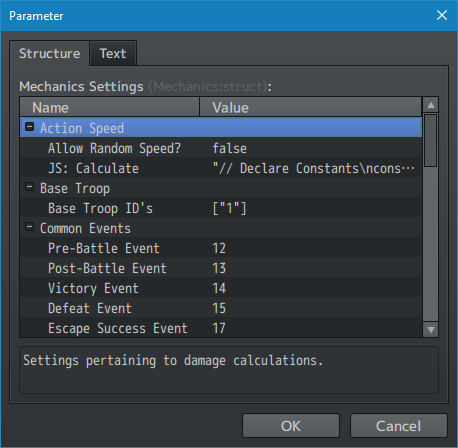
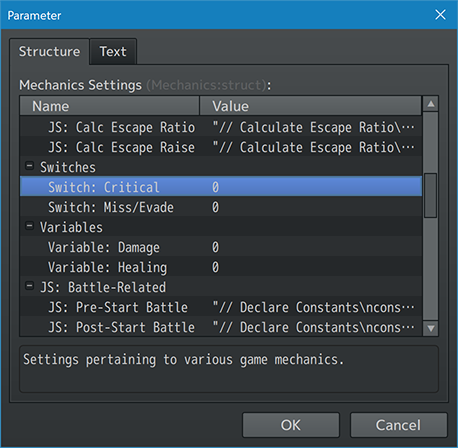
- 13.3 Mechanics Settings
- 13.4 Battle Layout Settings
- 13.5 Battle Log Settings
- 13.6 Battleback Scaling Settings
- 13.7 Party Command Window
- 13.8 Actor Command Window
- 13.9 Multi-Target Windows Settings
- 13.10 Actor Battler Settings
- 13.11 Enemy Battler Settings
- 13.12 HP Gauge Settings
- 13.13 Action Sequence Settings
- 14 Terms of Use
- 15 Credits
- 16 Changelog
- 17 End of File
Download | ||
SystemThis is a plugin created for RPG Maker MZ. | ||
|
Click here for help on how to install plugins and an explanation on the Tier Hierarchy System. |
Click here to learn how to update plugins. |
Click here for how to troubleshoot plugins if you get an error. |
|
|
|
|
Extension PluginsThe following plugins are Extension Plugins that require this plugin as its Parent Plugin. Place the following plugins below this plugin located in the Plugin Manager if you plan on using them.
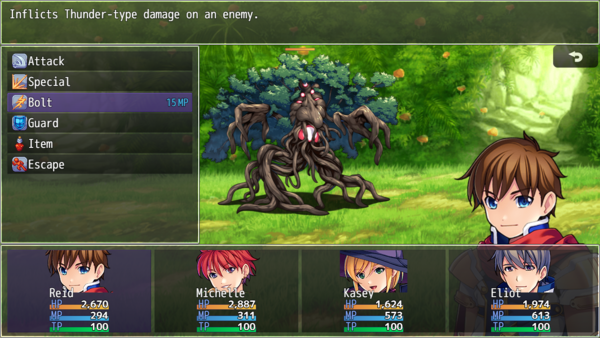
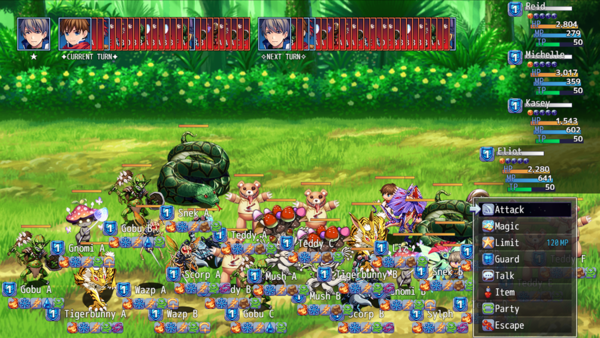
VisuStella MZThis plugin is a part of the VisuStella MZ Plugin Library. Click here if you want to help support VisuStella on Patreon. IntroductionThe Battle Core plugin revamps the battle engine provided by RPG Maker MZ to become more flexible, streamlined, and support a variety of features. The updated battle engine allows for custom Action Sequences, battle layout styles, and a lot of control over the battle mechanics, too. Features include all (but not limited to) the following:
RequirementsThis plugin is made for RPG Maker MZ. This will not work in other iterations of RPG Maker.
This plugin is a Tier 1 plugin. Place it under other plugins of lower tier value on your Plugin Manager list (ie: 0, 1, 2, 3, 4, 5). This is to ensure that your plugins will have the best compatibility with the rest of the VisuStella MZ Plugin library.
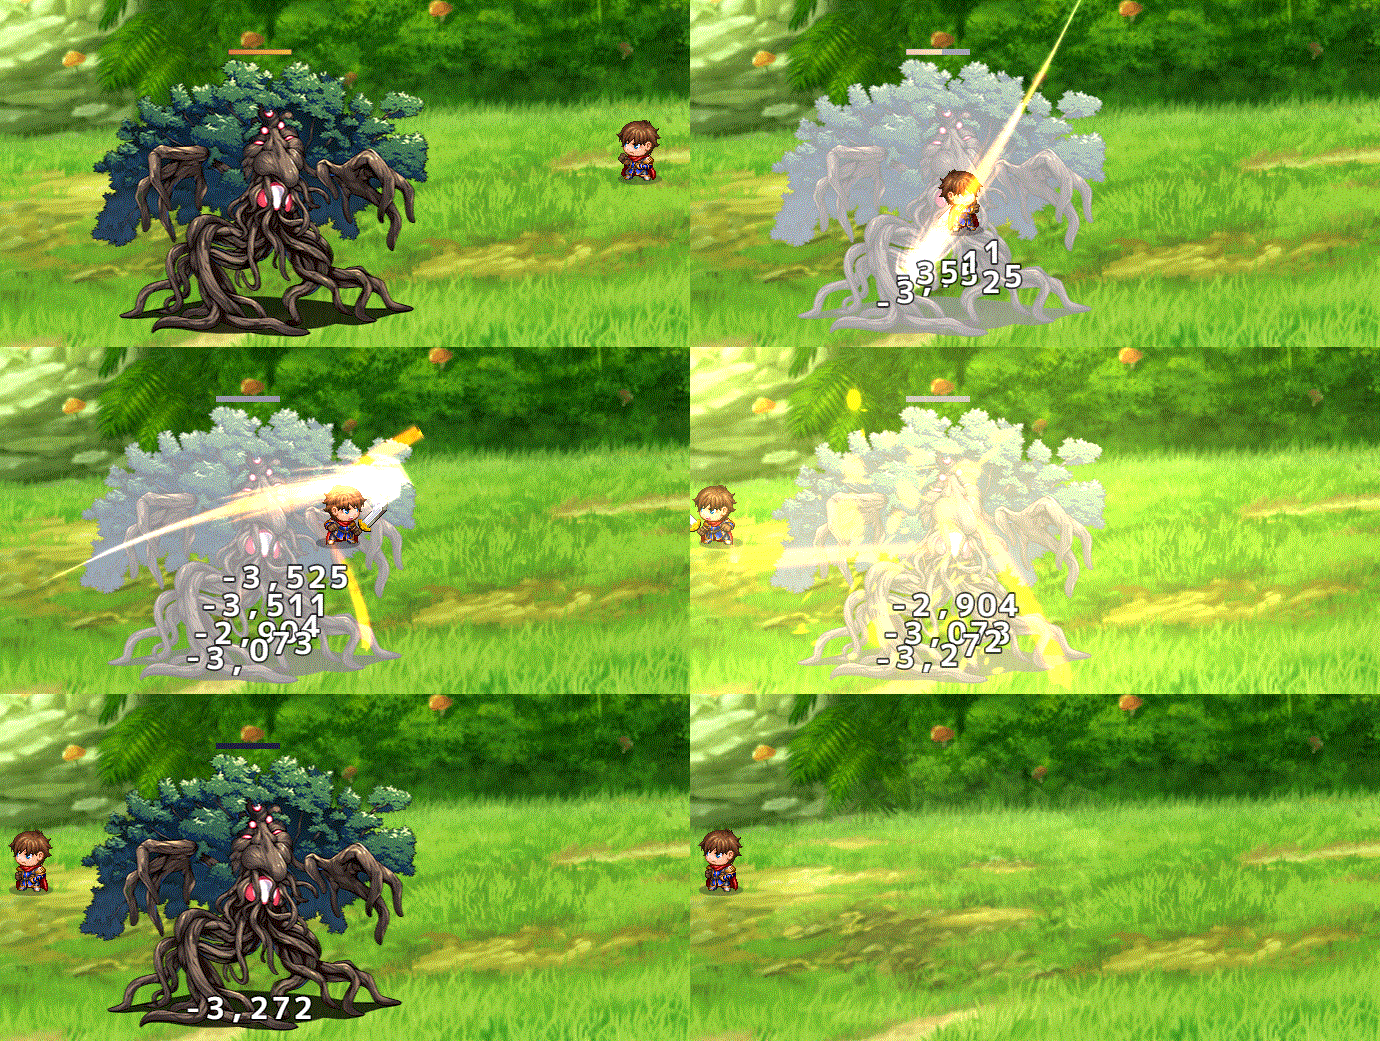
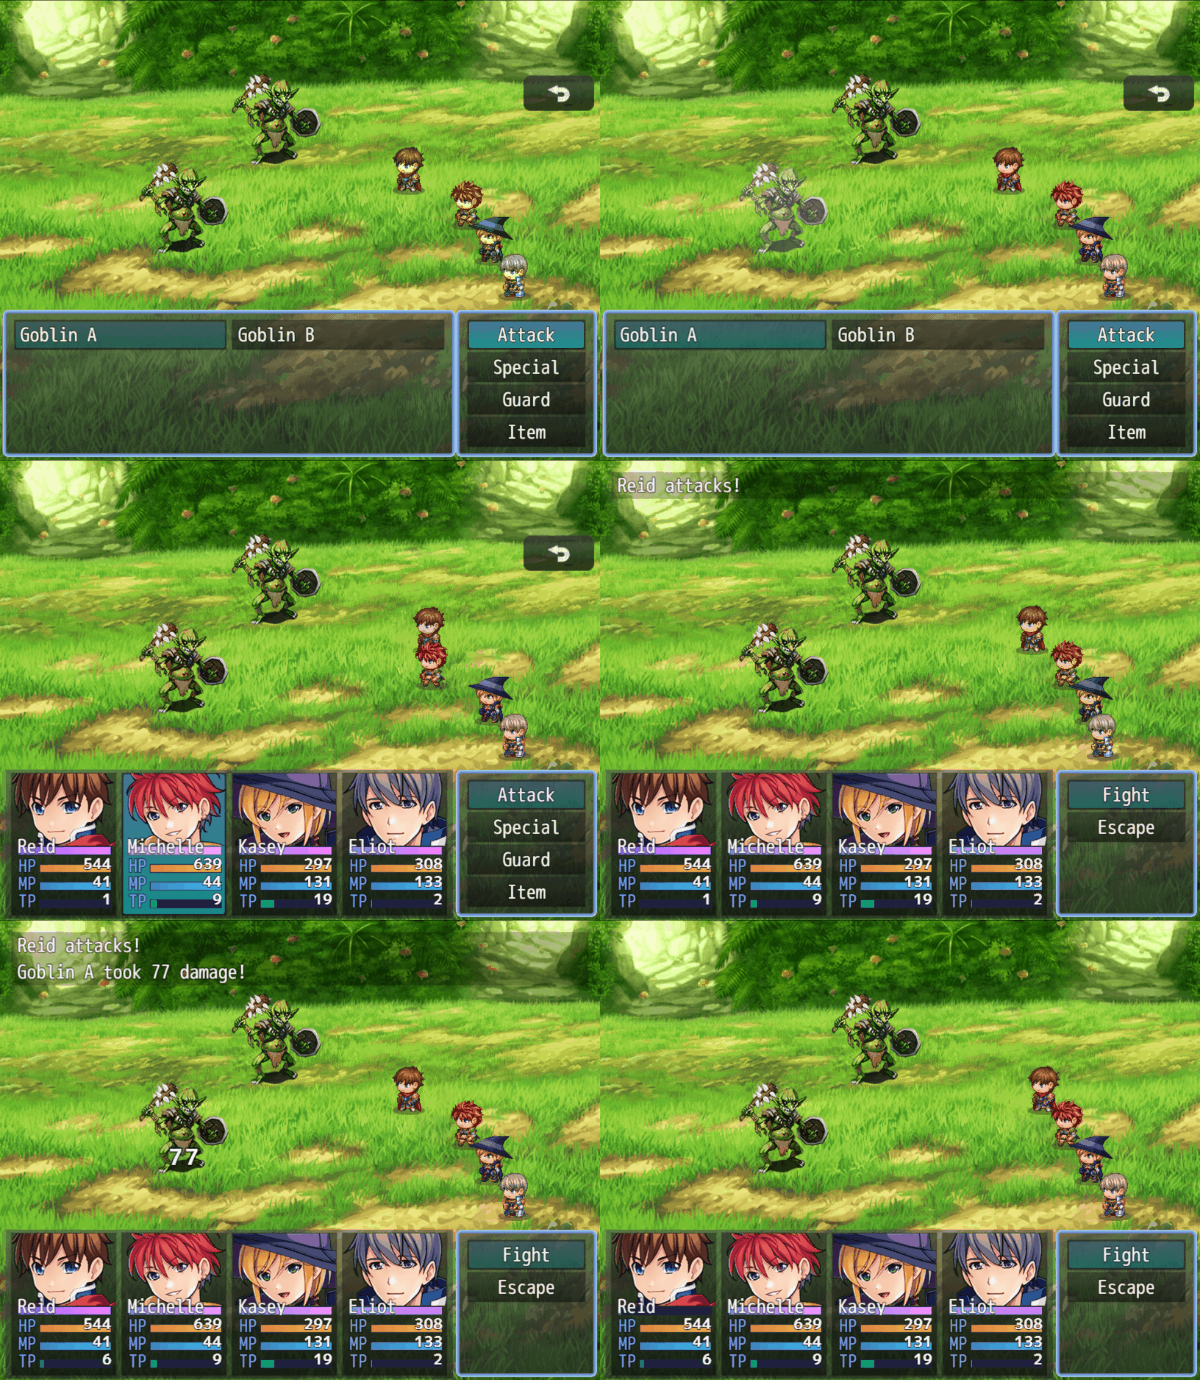
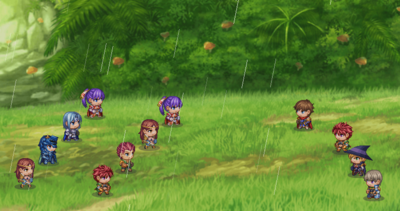
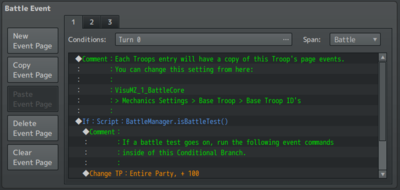
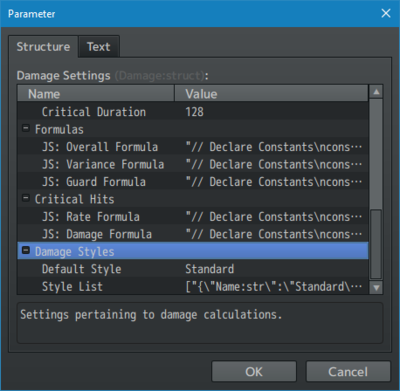
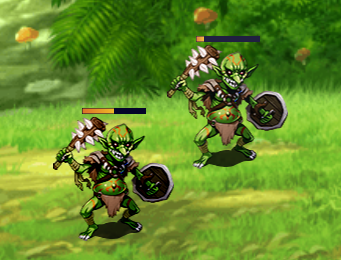
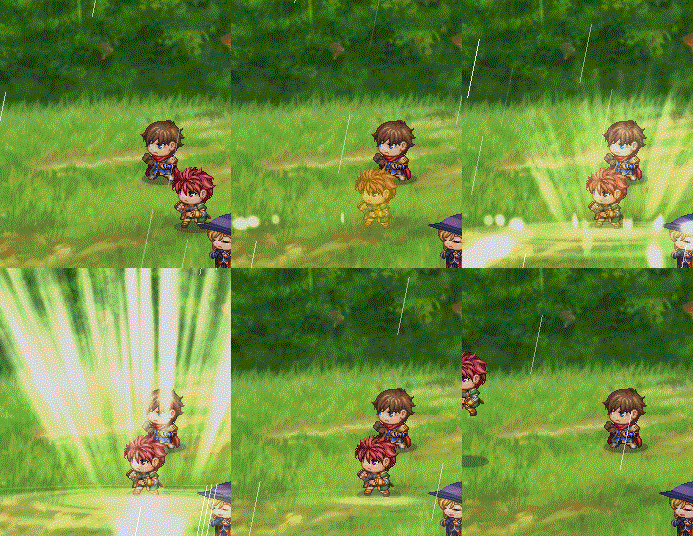
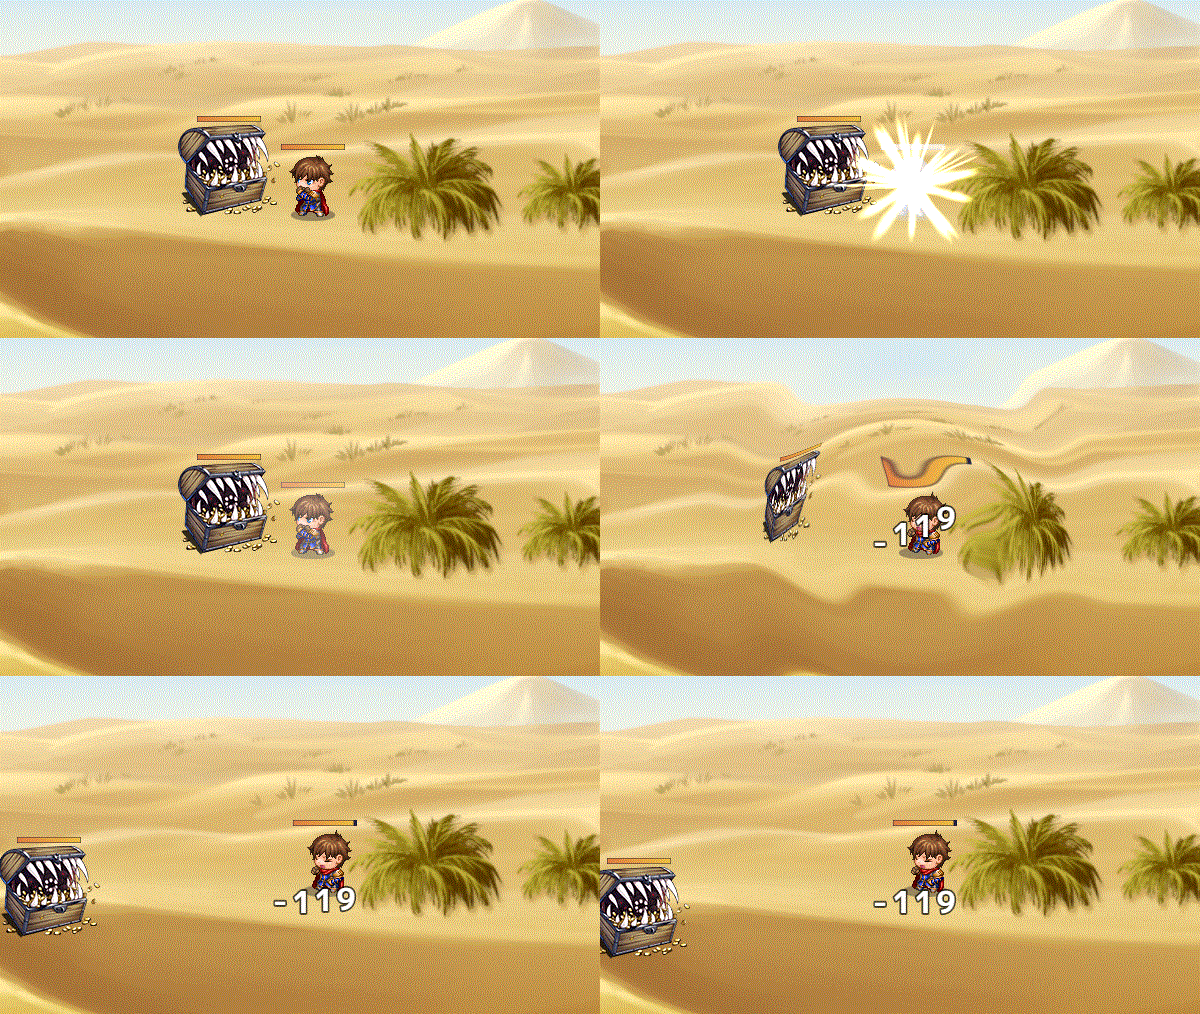
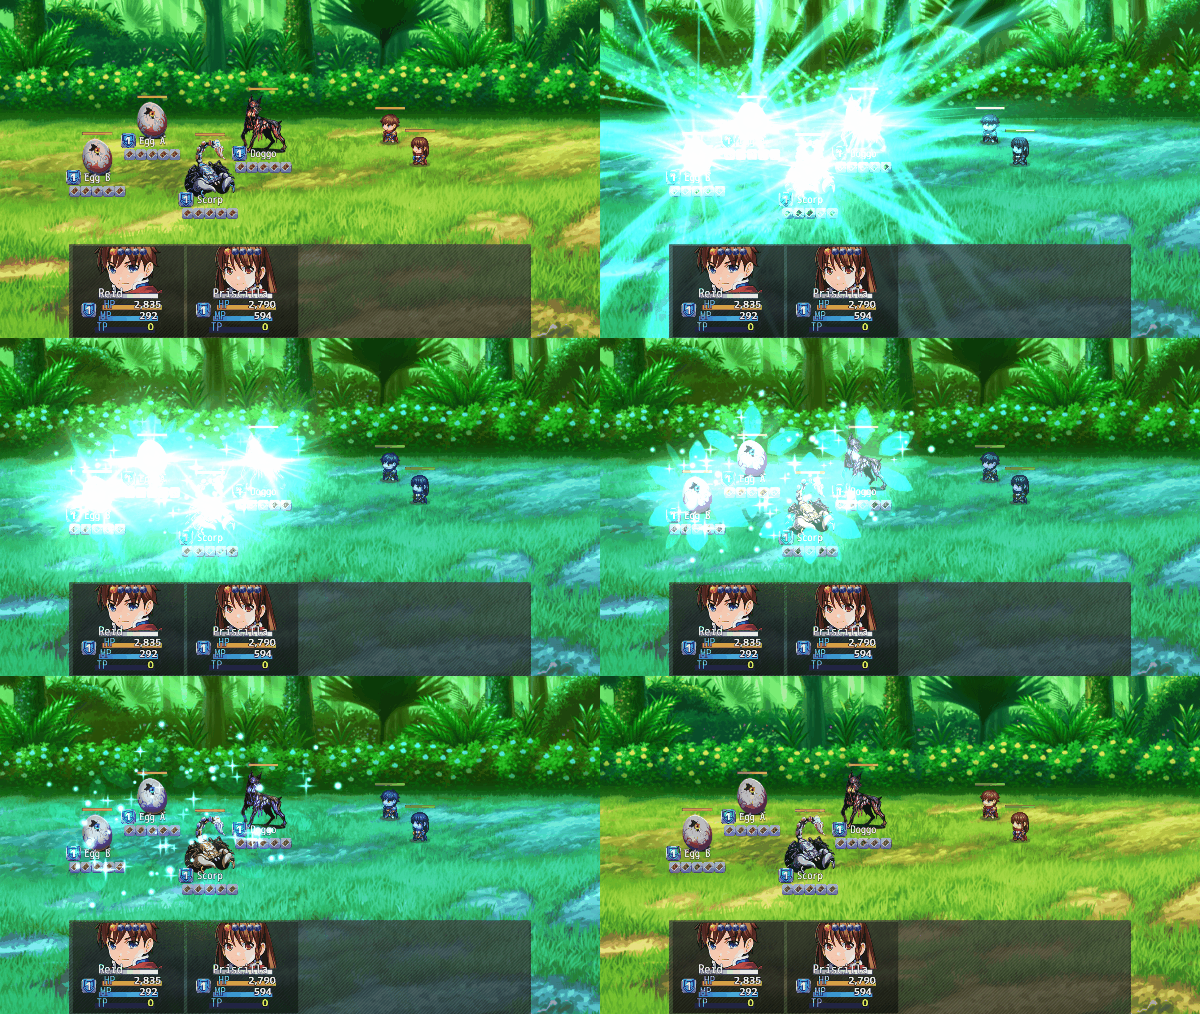
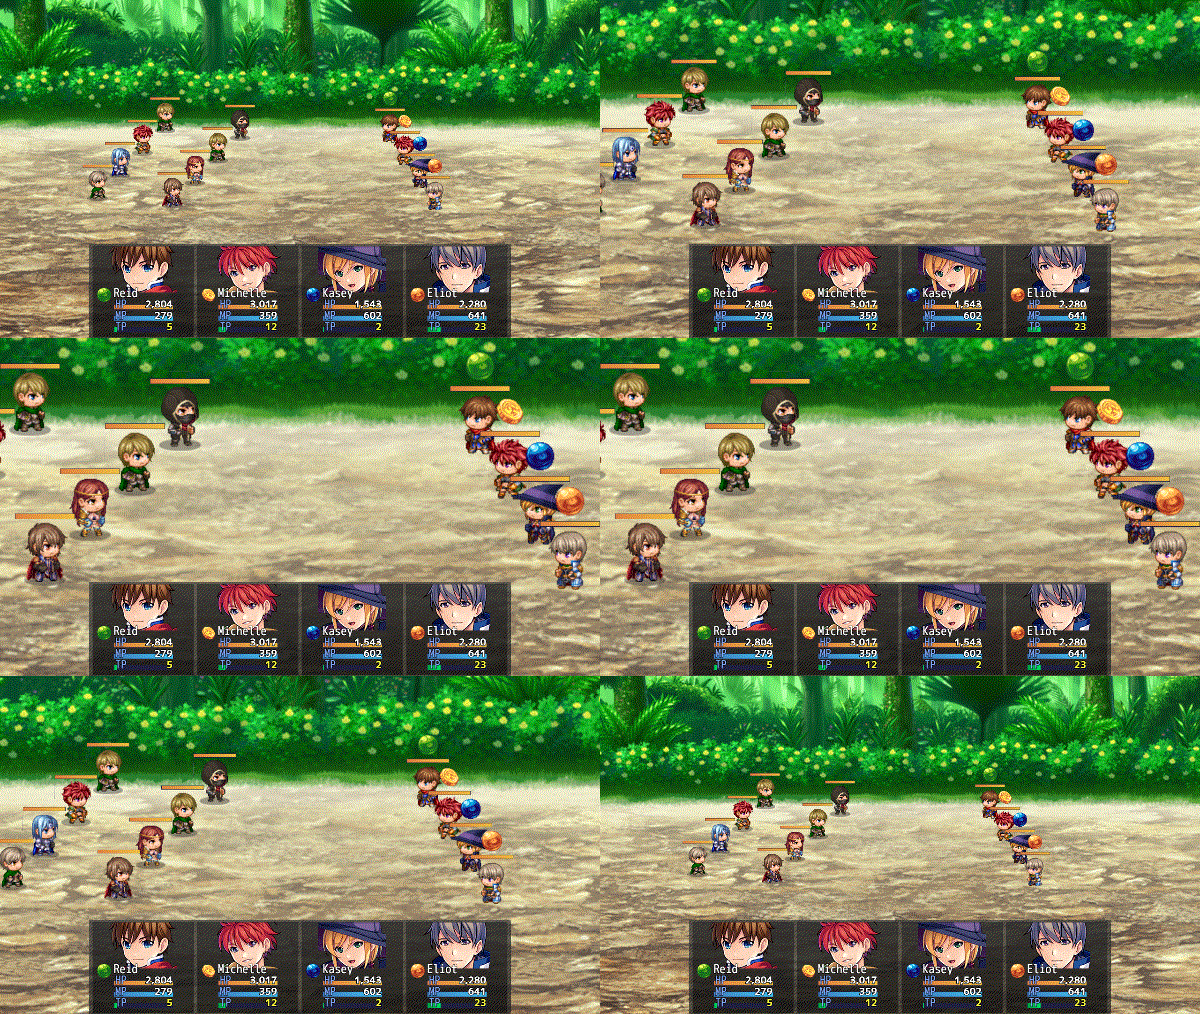
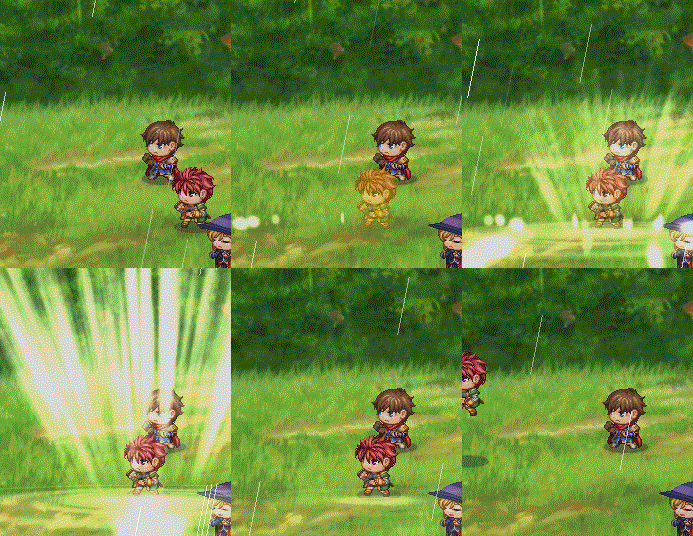
Major ChangesThis plugin will overwrite some core parts of the RPG Maker MZ base code in order to ensure the Battle Core plugin will work at full capacity. The following are explanations of what has been changed. --- Action SequencesAction sequences are now done either entirely by the Battle Log Window or through common events if the <Custom Action Sequence> notetag is used. In RPG Maker MZ by default, Action Sequences would be a mixture of using the Battle Log Window, the Battle Manager, and the Battle Scene, making it hard to fully grab control of the situation. --- Action SpeedAction speeds determine the turn order in the default battle system. The AGI of a battle unit is also taken into consideration. However, the random variance applied to the action speed system makes the turn order extremely chaotic and hard for the player to determine. Thus, the random variance aspect of it has been turned off. This can be reenabled by default through Plugin Parameters => Mechanics Settings => Allow Random Speed? --- Animated Sideview Battler Support For EnemiesEnemies can now use Sideview Actor sprites for themselves! They will behave like actors and can even carry their own set of weapons for physical attacks. These must be set up using notetags. More information can be found in the notetag section. As the sprites are normally used for actors, some changes have been made to Sprite_Actor to be able to support both actors and enemies. These changes should have minimal impact on other plugins. --- Battle Sprite UpdatesA lot of functions in Sprite_Battler, Sprite_Actor, and Sprite_Enemy have been overwritten to make the new Action Sequence system added by this plugin possible. These changes make it possible for the sprites to move anywhere on the screen, jump, float, change visibility, and more. --- Change Battleback in BattleBy default, the Change Battleback event command does not work in battle. Any settings made to it will only reflect in the following battle. Now, if the battleback event command is used during battle, it will reflect upon any new changes immediately. --- Critical Hit - LUK InfluenceThe LUK Buffs now affect the critical hit rate based off how the formula is now calculated. Each stack of a LUK Buff will double the critical hit rate and compound upon that. That means a x1 LUK Buff stack will raise it by x2, a x2 LUK Buff stack will raise the critical hit rate by x4, a x3 LUK Buff Stack will raise the critical hit rate stack by x8, and so on. LUK also plays a role in how much damage is dealt with critical hits. The default critical hit multiplier has been reduced from x3 to x2. However, a percentage of LUK will added on (based off the user's CRI rate) onto the finalized critical damage. If the user's CRI rate is 4%, then 4% of the user LUK value will also be added onto the damage. This change can be altered through Plugin Parameters => Damage Settings => Critical Hits => JS: Rate Formula and JS: Damage Formula. --- Damage PopupsDamage popups are now formatted with + and - to determine healing and damage. MP Damage will also include "MP" at the back. This is to make it clearer what each colored variant of the damage popup means as well as help color blind players read the on-screen data properly. Damage popups have also been rewritten to show all changed aspects instead of just one. Previously with RPG Maker MZ, if an action would deal both HP and MP damage, only one of them would show. Now, everything is separated and both HP and MP changes will at a time. --- Dual WieldPreviously, RPG Maker MZ had "Dual Wielding" attack using both weapon animations at once, with the combined ATK of each weapon. It's confusing to look at and does not portray the nature of "Dual Wielding". Dual Wielding, or in the case of users adding in third and fourth weapons, Multi Wielding is now changed. Each weapon is displayed individually, each producing its own attack animation, showing each weapon type, and applying only that weapon's ATK, Traits, and related effects. It is no longer a combined effect to display everything at once like RPG Maker MZ default. If an actor has multiple weapon slots but some of them are unequipped, then the action will treat the attack as a single attack. There will be no barehanded attack to add on top of it. This is to match RPG Maker MZ's decision to omit a second animation if the same scenario is applied. Force ActionPreviously, Forced Actions would interrupt the middle of an event to perform an action. However, with the addition of more flexible Action Sequences, the pre-existing Force Action system would not be able to exist and would require being remade. Forced Actions now are instead, added to a separate queue from the action battler list. Whenever an action and/or common event is completed, then if there's a Forced Action battler queued, then the Forced Action battler will have its turn. This is the cleanest method available and avoids the most conflicts possible. This means if you planned to make cinematic sequences with Forced Actions, you will need to account for the queued Force Actions. However, in the case of battle cinematics, we would highly recommend that you use the newly added Action Sequence Plugin Commands instead as those give you more control than any Force Action ever could. --- Random ScopeThe skill and item targeting scopes for Random Enemy, 2 Random Enemies, 3 Random Enemies, 4 Random Enemies will now ignore TGR and utilize true randomness. --- Spriteset_Battle UpdateThe spriteset now has extra containers to separate battlers (actors and enemies), animations, and damage. This is to make actors and enemy battler sprites more efficient to sort (if enabled), so that animations won't interfere with and cover damage sprites, and to make sure damage sprites are unaffected by screen tints in order to ensure the player will always have a clear read on the information relaying sprites. --- TPB/ATB Active Battle Actor ShiftingThe above image is a demonstration of what the bug looks like in an empty project. Pressing cancel on the Actor Command Window no longer switches between actors with a full TPB/ATB gauge before reaching the Party Command Window. This is to accomplish a couple of things: 1) reduce the number of button presses to reach the Party Command Window and 2) to prevent motion resets and disrupting action sequences. If this feature is vital to your battle system, we recommend that you do not use this plugin or any of the Battle Core-required plugins. --- Weather Displayed in BattlePreviously, weather has not been displayed in battle. This means that any weather effects placed on the map do not transfer over to battle and causes a huge disconnect for players. The Battle Core plugin will add weather effects to match the map's weather conditions. Any changes made to weather through event commands midway through battle will also be reflected. --- Base TroopsBase Troops can be found, declared, and modified in the Plugin Parameters => Mechanics Settings => Base Troop ID's. All of the listed Troop ID's here will have their page events replicated and placed under all other troops found in the database. --- This means that if you have an event that runs on Turn 1 of a Base Troop, then for every troop out there, that same event will also run on Turn 1, as well. This is useful for those who wish to customize their battle system further and to reduce the amount of work needed to copy/paste said event pages into every database troop object manually. --- Damage StylesDamage Styles are a new feature added through the Battle Core plugin. When using certain Battle Styles, you can completely ignore typing in the whole damage formula inside the damage formula input box, and instead, insert either a power amount or a multiplier depending on the Damage Style. The plugin will then automatically calculate damage using that value factoring in ATK, DEF, MAT, MDF values. --- Here is a list of the Damage Styles that come with this plugin by default. You can add in your own and even edit them to your liking. Or just remove them if you want. - - - - - - - - - - - - - - - - - - - - - - - - - - - - - - - - - - - - - - Style Use Formula As PH/MA Disparity Stat Scale Damage Scale - - - - - - - - - - - - - - - - - - - - - - - - - - - - - - - - - - - - - - Standard Formula No Varies Varies ArmorScaling Formula No Varies Varies CT Multiplier Yes Low Normal D4 Multiplier No High Normal DQ Multiplier No Low Low FF7 Power Yes Low High FF8 Power Yes Medium Normal FF9 Power Yes Low Normal FF10 Power Yes Medium High MK Multiplier No Medium Low MOBA Multiplier No Medium Normal PKMN Power No Low Normal Use the above chart to figure out which Damage Style best fits your game, if you plan on using them. The 'Standard' style is the same as the 'Manual' formula input, except that it allows for the support of <Armor Penetration> and <Armor Reduction> notetags. The 'Armor Scaling' style allows you to type in the base damage calculation without the need to type in any defending modifiers. NOTE: While these are based off the damage formulas found in other games, not all of them are exact replicas. Many of them are adapted for use in RPG Maker MZ since not all RPG's use the same set of parameters and not all external multipliers function the same way as RPG Maker MZ. --- Style:
Use Formula As:
PH/MA Disparity:
Stat Scale:
Damage Scale:
--- To determine what kind of parameters are used for the Damage Styles, they will depend on two things: the action's 'Hit Type' (ie Physical Attack, Magical Attack, and Certain Hit) and the action's 'Damage Type' (ie. Damage, Recovery, or Drain). Certain Hit tends to use whichever value is higher: ATK or MAT, and then ignores the target's defense values. Use Certain Hits for 'True Damage'. Use the chart below to figure out everything else: - - - - - - - - - - - - - - - - - - - - - - - - - - - - - - - - - - - - - - Hit Type Damage Type Attacker Parameter Defender Parameter - - - - - - - - - - - - - - - - - - - - - - - - - - - - - - - - - - - - - - Physical Damage ATK DEF Magical Damage MAT MDF Certain Hit Damage Larger (ATK, MAT) -Ignores- Physical Recover DEF -Ignores- Magical Recover MDF -Ignores- Certain Hit Recover Larger (ATK, MAT) -Ignores- Physical Drain ATK DEF Magical Drain MAT MDF Certain Hit Drain Larger (ATK, MAT) -Ignores- These can be modified within the Plugin Parameters in the individual Damage Styles themselves. --- Skills and Items can use different Damage Styles from the setting you've selected in the Plugin Parameters. They can be altered to have different Damage Styles through the usage of a notetag: <Damage Style: name> This will use whichever style is found in the Plugin Parameters. If "Manual" is used, then no style will be used and all calculations will be made strictly based off the formula found inside the formula box. --- VisuStella MZ CompatibilityWhile this plugin is compatible with the majority of the VisuStella MZ plugin library, it is not compatible with specific plugins or specific features. This section will highlight the main plugins/features that will not be compatible with this plugin or put focus on how the make certain features compatible. --- When using Action Sequences, Boost effects for damage, turn extensions, analyze, etc. will not occur for anything other than the Action Sequence: "MECH: Action Effect" in order to maintain controlled effects. However, if you do want to apply bonuses for Boosts, utilize "MECH: Boost Store Data" to store inside a variable how many times Boosts were used. This can be used however which way you want it to as long as it is manageable through events and Common Events. --- Notetags
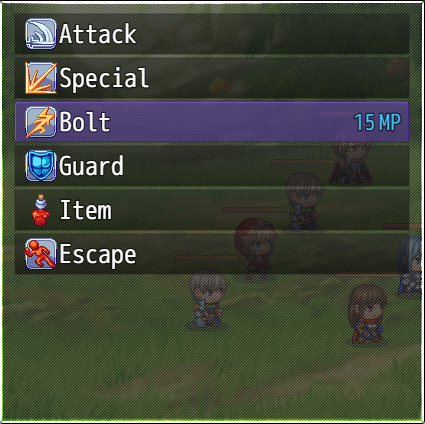
RPG Maker MZ's editor is unable to allow for custom traits/properties that a game dev may wish to associate with a database object, event, map, etc. Notetags are used to work around such limitations by allowing the game dev to tag certain traits/properties using specific Notetags declared by the related plugin. Here is a list of Notetag(s) that you may use.
The following are notetags that have been added through this plugin. These notetags will not work with your game if this plugin is OFF or not present. HP Gauge-Related NotetagsThe following notetags allow you to set whether or not HP Gauges can be displayed by enemies regardless of Plugin Parameter settings. --- <Show HP Gauge> - Used for: Enemy Notetags - Will always show the HP Gauge for the enemy regardless of the defeat requirement setting. - This does not bypass the player's Options preferences. - This does not bypass disabling enemy HP Gauges as a whole. --- <Hide HP Gauge> - Used for: Enemy Notetags - Will always hide the HP Gauge for the enemy regardless of the defeat requirement setting. - This does not bypass the player's Options preferences. --- <Battle UI Offset: +x, +y> <Battle UI Offset: -x, -y> <Battle UI Offset X: +x> <Battle UI Offset X: -x> <Battle UI Offset Y: +y> <Battle UI Offset Y: -y> - Used for: Actor and Enemy Notetags - Adjusts the offset of HP Gauges and State Icons above the heads of actors and enemies. - Replace 'x' with a number value that offsets the x coordinate. - Negative x values offset left. Positive x values offset right. - Replace 'y' with a number value that offsets the y coordinate. - Negative y values offset up. Positive x values offset down. --- Animation-Related NotetagsThe following notetags allow you to set animations to play at certain instances and/or conditions. --- <Slip Animation: x> - Requires VisuMZ_0_CoreEngine! - Used for: Actor, Class, Weapon, Armor, Enemy, State Notetags - During the phase at which the user regenerates HP, MP, or TP, this animation will play as long as the user is alive and visible. - Replace 'x' with a number value representing the Animation ID to play. --- <Cast Animation: x> - Used for: Skill Notetags - Plays a battle animation at the start of the skill. - Replace 'x' with a number value representing the Animation ID to play. --- <Attack Animation: x> - Used for: Enemy Notetags - Gives an enemy an attack animation to play for its basic attack. - Replace 'x' with a number value representing the Animation ID to play. --- Battleback-Related NotetagsYou can apply these notetags to have some control over the battlebacks that appear in different regions of the map for random or touch encounters. --- <Region x Battleback1: filename> <Region x Battleback2: filename> - Used for: Map Notetags - If the player starts a battle while standing on 'x' region, then the 'filename' battleback will be used. - Replace 'x' with a number representing the region ID you wish to use. - Replace 'filename' with the filename of the graphic to use. Do not insert any extensions. This means the file 'Castle1.png' will be only inserted as 'Castle1' without the '.png' at the end. - *NOTE: This will override any specified battleback settings. --- Battle Command-Related NotetagsYou can use notetags to change how the battle commands of playable characters appear in battle as well as whether or not they can be used. --- <Seal Attack> <Seal Guard> <Seal Item> - Used for: Actor, Class, Weapon, Armor, Enemy, State Notetags - Prevents specific battle commands from being able to be used. --- <Battle Commands> Attack Skills SType: x SType: name All Skills Skill: x Skill: name Guard Item Party Escape Auto Battle Combat Log Talk Weapon Swap </Battle Commands> - Used for: Class Notetags - Changes which commands appear in the Actor Command Window in battle. If this notetag is not used, then the default commands determined in Plugin Parameters => Actor Command Window => Command List will be used. - Add/remove/modify entries as needed. - Attack - Adds the basic attack command. - Skills - Displays all the skill types available to the actor. - SType: x - Stype: name - Adds in a specific skill type. - Replace 'x' with the ID of the skill type. - Replace 'name' with the name of the skill type (without text codes). - All Skills - Adds all usable battle skills as individual actions. - Skill: x - Skill: name - Adds in a specific skill as a usable action. - Replace 'x' with the ID of the skill. - Replace 'name' with the name of the skill. - Guard - Adds the basic guard command. - Item - Adds the basic item command. - Party - Requires VisuMZ_2_PartySystem. - Allows this actor to switch out with a different party member. - Escape - Adds the escape command. - Auto Battle - Adds the auto battle command. - Combat Log - Requires VisuMZ_4_CombatLog. - Opens up the combat log. - Talk - Requires VisuMZ_3_BattleCmdTalk! - Shows talk command if applicable. - Weapon Swap - Requires VisuMZ_2_WeaponSwapSystem. - Swaps the current weapon. Example: <Battle Commands> Attack Skill: Heal Skills Guard Item Escape </Battle Commands> --- <Command Text: x> - Used for: Skill Notetags - When a skill is used in a <Battle Commands> notetag set, you can change the skill name text that appears to something else. - Replace 'x' with the skill's name you want to shown in the Actor Battle Command window. - Recommended Usage: Shorten skill names that are otherwise too big to fit inside of the Actor Battle Command window. --- <Command Icon: x> - Used for: Skill Notetags - When a skill is used in a <Battle Commands> notetag set, you can change the skill icon that appears to something else. - Replace 'x' with the ID of icon you want shown in the Actor Battle Command window to represent the skill. --- <Command Require Learn> - Used for: Skill Notetags - Determines if a battle command is visible or not by whether the actor has learned the skill. - Learning the skill is a requirement. Acquiring the skill through traits does not count as learning the skill. --- <Command Require Access> - Used for: Skill Notetags - Determines if a battle command is visible or not by whether the actor has access to the skill. - Having access to the skill can come through either learning the skill or temporarily acquiring it through trait objects. --- <Command Show Switch: x> <Command Show All Switches: x,x,x> <Command Show Any Switches: x,x,x> - Used for: Skill Notetags - Determines if a battle command is visible or not through switches. - Replace 'x' with the switch ID to determine the skill's visibility. - If 'All' notetag variant is used, item will be hidden until all switches are ON. Then, it would be shown. - If 'Any' notetag variant is used, item will be shown if any of the switches are ON. Otherwise, it would be hidden. - This can be applied to Attack and Guard commands, too. --- <Command Hide Switch: x> <Command Hide All Switches: x,x,x> <Command Hide Any Switches: x,x,x> - Used for: Skill Notetags - Determines if a battle command is visible or not through switches. - Replace 'x' with the switch ID to determine the skill's visibility. - If 'All' notetag variant is used, item will be shown until all switches are ON. Then, it would be hidden. - If 'Any' notetag variant is used, item will be hidden if any of the switches are ON. Otherwise, it would be shown. - This can be applied to Attack and Guard commands, too. --- <Battle Portrait: filename> - Used for: Actor - This is used with the "Portrait" Battle Layout. - Sets the battle portrait image for the actor to 'filename'. - Replace 'filename' with a picture found within your game project's img/pictures/ folder. Filenames are case sensitive. Leave out the filename extension from the notetag. - This will override any menu images used for battle only. --- <Battle Portrait Offset: +x, +y> <Battle Portrait Offset: -x, -y> <Battle Portrait Offset X: +x> <Battle Portrait Offset X: -x> <Battle Portrait Offset Y: +y> <Battle Portrait Offset Y: -y> - Used for: Actor - This is used with the "Portrait" and "Border" Battle Layouts. - Offsets the X and Y coordinates for the battle portrait. - Replace 'x' with a number value that offsets the x coordinate. - Negative x values offset left. Positive x values offset right. - Replace 'y' with a number value that offsets the y coordinate. - Negative y values offset up. Positive x values offset down. --- JavaScript Notetag: Battle Command-RelatedThe following are notetags made for users with JavaScript knowledge to determine if skill-based battle commands are visible or hidden. --- <JS Command Visible> code code visible = code; </JS Command Visible> - Used for: Skill Notetags - The 'visible' variable is the final returned variable to determine the skill's visibility in the Battle Command Window. - Replace 'code' with JavaScript code to determine the skill's visibility in the Battle Command Window. - The 'user' variable represents the user who will perform the skill. - The 'skill' variable represents the skill to be used. --- Targeting-Related NotetagsThe following notetags are related to the targeting aspect of skills and items and may adjust the scope of how certain skills/items work. --- <Always Hit> <Always Hit Rate: x%> - Used for: Skill, Item Notetags - Causes the action to always hit or to always have a hit rate of exactly the marked x%. - Replace 'x' with a number value representing the hit success percentage. --- <Repeat Hits: x> - Used for: Skill, Item Notetags - Changes the number of hits the action will produce. - Replace 'x' with a number value representing the number of hits to incur. --- <Target: x Random Any> - Used for: Skill, Item Notetags - Makes the skill pick 'x' random targets when used. - Targets can be both actors and enemies. - This will overwrite the existing database scope and ignore the database's existing scope in favor of this. - Replace 'x' with a number value representing the number of random targets. --- <Target: x Random Enemies> - Used for: Skill, Item Notetags - Makes the skill pick 'x' random targets when used. - Targets are only enemies. - This will overwrite the existing database scope and ignore the database's existing scope in favor of this. - Replace 'x' with a number value representing the number of random targets. --- <Target: x Random Allies> - Used for: Skill, Item Notetags - Makes the skill pick 'x' random targets when used. - Targets are only actors. - This will overwrite the existing database scope and ignore the database's existing scope in favor of this. - Replace 'x' with a number value representing the number of random targets. --- <Target: All Allies But User> - Used for: Skill, Item Notetags - This will overwrite the existing database scope and ignore the database's existing scope in favor of this. - Targets all allies with the exception of the user. --- <Target: Ally or Enemy> - Used for: Skill, Item Notetags - Allows the player to target allies or enemies with the skill/item. - Keep in mind this does NOT allow you to select dead party members. - This will overwrite the existing database scope and ignore the database's existing scope in favor of this. - Target selection emphasis will go to allies first. - Ignored when used by enemies and will be treated as an ally scope. - Auto-battle actors will also treat this action as an ally scope. - For certain battle layouts in frontview, this will open the Actor Select window in order for Touch Input to be able to select actors. --- <Target: Enemy or Ally> - Used for: Skill, Item Notetags - Allows the player to target enemies or allies with the skill/item. - Keep in mind this does NOT allow you to select dead party members. - This will overwrite the existing database scope and ignore the database's existing scope in favor of this. - Target selection emphasis will go to enemies first. - Ignored when used by enemies and will be treated as an enemy scope. - Auto-battle actors will also treat this action as an enemy scope. - For certain battle layouts in frontview, this will open the Actor Select window in order for Touch Input to be able to select actors. --- <Single or Multiple Select>
- Used for: Skill, Item Notetags
- Requires an original scope that can select individual targets.
- This will allow the skill/item to be able to select either single targets
or multiple targets at once.
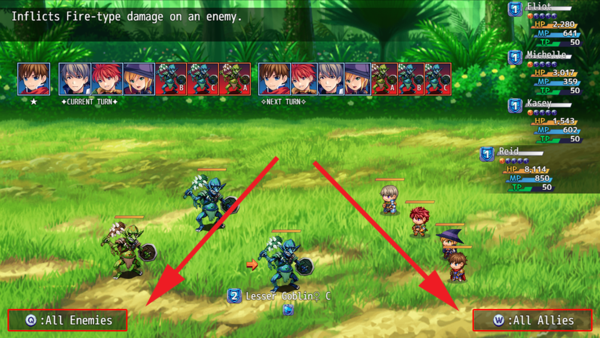
- In order to select "all enemies", the player must press the "Page Up"
keyboard button or the visual on screen "All Enemies" button.
- In order to select "all allies", the player must press the "Page Down"
keyboard button or the visual on screen "All Allies" button.
- Those wondering why this isn't regulated to a command left or right of
the enemies and actors is because mouse controls and touch controls
would not be able to select all enemies or all allies that way.
- This can NOT be used with single dead ally scopes.
- If there is an enemy with Taunt or Provoke, the option to select
"All Enemies" does not become possible.
- The enemy AI and Auto-Battle actor AI will NOT make use of the ability to
toggle between single and multiple target scopes. They will only use the
single target versions of these skills.
--- <Disperse Damage>
- Used for: Skill, Item Notetags
- This will cause any damage dealt by this skill to be split equally amongst
all targets of the skill including repeats.
- For basic attacks, any damage reduction added attack trait totals will
by reverted.
- This does NOT have to be used with <Single or Multiple Select> notetag and
can be used by itself for an "All" scope, making the skill/item deal less
damage if there's more enemies and more damage if there's less enemies.
--- <Cannot Target User> - Used for: Skill, Item Notetags - This will cause the action to be unable to select the user as the target. - This is not a targeting scope. Instead, it is used in addition to any other targeting scopes out there. - When used with "All" scopes, the user is removed from the target pool. - This is also applied outside of battle. - If the user somehow enters the target pool, the user is then replaced by a random ally found in the party. --- JavaScript Notetag: Targeting-Related--- <JS Targets> code code targets = [code]; </JS Targets> - Used for: Skill, Item Notetags - The 'targets' variable is an array that is returned to be used as a container for all the valid action targets. - The 'targets' variable will include the original set of targets determined by the skill/item's original scale. - Replace 'code' with JavaScript code to determine valid targets. --- Damage-Related Notetags--- <Damage Style: name> - Used for: Skill, Item Notetags - Replace 'name' with a Damage Style name to change the way calculations are made using the damage formula input box. - Names can be found in Plugin Parameters => Damage Settings => Style List --- <Armor Reduction: x> <Armor Reduction: x%> - Used for: Actor, Class, Skill, Item, Weapon, Armor, Enemy, State Notetags - If used on skills and/or items, sets the current skill/item's armor reduction properties to 'x' and/or 'x%'. - If used on trait objects, adds 'x' and/or 'x%' armor reduction properties when calculating one's own armor. - Use the 'x' notetag variant to determine a flat reduction value. - Use the 'x%' notetag variant to determine a percentile reduction value. --- <Armor Penetration: x> <Armor Penetration: x%> - Used for: Actor, Class, Skill, Item, Weapon, Armor, Enemy, State Notetags - If used on skills and/or items, sets the current skill/item's armor penetration properties to 'x' and/or 'x%'. - If used on trait objects, adds 'x' and/or 'x%' armor penetration properties when calculating a target's armor. - Use the 'x' notetag variant to determine a flat penetration value. - Use the 'x%' notetag variant to determine a percentile penetration value. --- <Magic Reduction: x> <Magic Reduction: x%> - Used for: Actor, Class, Skill, Item, Weapon, Armor, Enemy, State Notetags - If used on skills and/or items, sets the current skill/item's armor reduction properties to 'x' and/or 'x%'. - If used on trait objects, adds 'x' and/or 'x%' armor reduction properties when calculating one's own armor. - This applies to magical attacks. - Use the 'x' notetag variant to determine a flat reduction value. - Use the 'x%' notetag variant to determine a percentile reduction value. --- <Magic Penetration: x> <Magic Penetration: x%> - Used for: Actor, Class, Skill, Item, Weapon, Armor, Enemy, State Notetags - If used on skills and/or items, sets the current skill/item's armor penetration properties to 'x' and/or 'x%'. - If used on trait objects, adds 'x' and/or 'x%' armor penetration properties when calculating a target's armor. - This applies to magical attacks. - Use the 'x' notetag variant to determine a flat penetration value. - Use the 'x%' notetag variant to determine a percentile penetration value. --- <Bypass Damage Cap> - Used for: Actor, Class, Skill, Item, Weapon, Armor, Enemy, State Notetags - If used on skills and/or items, this will cause the action to never have its damage capped. - If used on trait objects, this will cause the affected unit to never have its damage capped. --- <Damage Cap: x> - Used for: Actor, Class, Skill, Item, Weapon, Armor, Enemy, State Notetags - If used on skills and/or items, this will declare the hard damage cap to be the 'x' value. - If used on trait objects, this will raise the affect unit's hard damage cap to 'x' value. If another trait object has a higher value, use that value instead. --- <Bypass Soft Damage Cap> - Used for: Actor, Class, Skill, Item, Weapon, Armor, Enemy, State Notetags - If used on skills and/or items, this will cause the action to never have its damage scaled downward to the soft cap. - If used on trait objects, this will cause the affected unit to never have its damage scaled downward to the soft cap. --- <Soft Damage Cap: +x%> <Soft Damage Cap: -x%> - Used for: Actor, Class, Skill, Item, Weapon, Armor, Enemy, State Notetags - If used on skills and/or items, this will increase/decrease the action's soft cap by x% where 'x' is a percentage value representing the increment changed by the hard cap value. - If used on trait objects, this will raise the affect unit's soft damage limit by x% where 'x' is a percentage value representing the increment changed by the hard cap value. --- <Unblockable> - Used for: Skill, Item Notetags - Using "Guard" against this skill will not reduce any damage. --- Critical-Related NotetagsThe following notetags affect skill and item critical hit rates and the critical damage multiplier. --- <Always Critical> - Used for: Skill, Item Notetags - This skill/item will always land a critical hit regardless of the user's CRI parameter value. --- <Set Critical Rate: x%> - Used for: Skill, Item Notetags - This skill/item will always have a x% change to land a critical hit regardless of user's CRI parameter value. - Replace 'x' with a percerntage value representing the success rate. --- <Modify Critical Rate: x%> <Modify Critical Rate: +x%> <Modify Critical Rate: -x%> - Used for: Skill, Item Notetags - Modifies the user's CRI parameter calculation for this skill/item. - The 'x%' notetag variant will multiply the user's CRI parameter value for this skill/item. - The '+x%' and '-x%' notetag variants will incremenetally increase/decrease the user's CRI parameter value for this skill/item. --- <Modify Critical Multiplier: x%> <Modify Critical Multiplier: +x%> <Modify Critical Multiplier: -x%> - Used for: Skill, Item Notetags - These notetags determine the damage multiplier when a critical hit lands. - The 'x%' notetag variant multiply the multiplier to that exact percentage. - The '+x%' and '-x%' notetag variants will change the multiplier with an incremenetal rate for this skill/item. --- <Modify Critical Bonus Damage: x%> <Modify Critical Bonus Damage: +x%> <Modify Critical Bonus Damage: -x%> - Used for: Skill, Item Notetags - These notetags determine the bonus damage added when a critical hit lands. - The 'x%' notetag variant multiply the damage to that exact percentage. - The '+x%' and '-x%' notetag variants will change the bonus damage with an incremenetal rate for this skill/item. --- JavaScript Notetags: Critical-RelatedThe following are notetags made for users with JavaScript knowledge to determine how critical hit-related aspects are calculated. --- <JS Critical Rate> code code rate = code; </JS Critical Rate> - Used for: Skill, Item Notetags - The 'rate' variable is the final returned amount to determine the critical hit success rate. - Replace 'code' with JavaScript code to determine the final 'rate' to be returned as the critical hit success rate. - The 'user' variable represents the one using the skill/item. - The 'target' variable represents the one receiving the skill/item hit. --- <JS Critical Damage> code code multiplier = code; bonusDamage = code; </JS Critical Damage> - Used for: Skill, Item Notetags - The 'multiplier' variable is returned later and used as the damage multiplier used to amplify the critical damage amount. - The 'bonusDamage' variable is returned later and used as extra added damage for the critical damage amount. - Replace 'code' with JavaScript code to determine how the 'multiplier' and 'bonusDamage' variables are calculated. - The 'user' variable represents the one using the skill/item. - The 'target' variable represents the one receiving the skill/item hit. --- Life Steal-Related Notetags--- <HP Life Steal: x%> <MP Life Steal: x%> - Used for: Skill, Item Notetags - Causes this skill/item to have Life Steal properties, allowing the user to take x% of the HP/MP Damage as recovered HP/MP. - HP Life Steal can only take HP from dealt HP damage. - MP Life Steal can only take MP from dealt MP damage. - Replace 'x' with a number representing the percentage of the dealt damage used as HP/MP recovery. - This cannot be used with skills/items with HP Drain/MP Drain. Life Steal is a different mechanic from HP Drain/MP Drain. --- <HP Life Steal Certain Hit: +x%>
<HP Life Steal Physical Hit: +x%>
<HP Life Steal Magical Hit: +x%>
<HP Life Steal Certain Hit: -x%>
<HP Life Steal Physical Hit: -x%>
<HP Life Steal Magical Hit: -x%>
<MP Life Steal Certain Hit: +x%>
<MP Life Steal Physical Hit: +x%>
<MP Life Steal Magical Hit: +x%>
<MP Life Steal Certain Hit: -x%>
<MP Life Steal Physical Hit: -x%>
<MP Life Steal Magical Hit: -x%>
- Used for: Used for: Actor, Class, Armor, Enemy, State Notetags
- The related battler's various trait properties can have passive life steal
properties that will trigger upon using skills/items with matching hit
types regardless of whether or not the skill/item innately has Life Steal.
- Notetag variants with "Certain Hit" will only trigger from "Certain Hit"
skill and item types. Same with "Physical" and "Magical" variants.
- HP Life Steal can only take HP from dealt HP damage.
- MP Life Steal can only take HP from dealt MP damage.
- Replace 'x' with a number representing the additive stacking percentage
boost of the dealt damage used as HP/MP recovery. The effects will stack
additively with other trait objects.
- This cannot be used with skills/items with HP Drain/MP Drain. Life Steal
is a different mechanic from HP Drain/MP Drain.
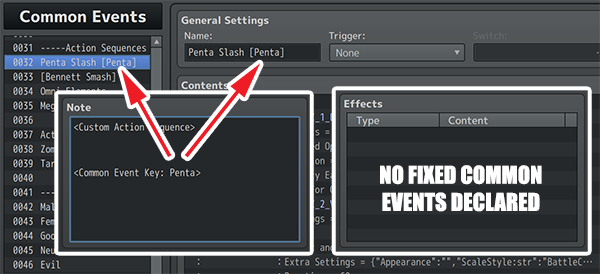
--- <Cancel Life Steal> <Cancel HP Life Steal> <Cancel MP Life Steal> - Used for: Skill, Item Notetags - Prevents this skill from allowing Life Steal effects to occur including the passive life steal calculators from the skill/item user. - This does not affect HP Drain/MP Drain. Life Steal is a different mechanic from HP Drain/MP Drain. --- <Guard Life Steal> <Guard HP Life Steal> <Guard MP Life Steal> - Used for: Used for: Actor, Class, Armor, Enemy, State Notetags - If the related battler becomes the target of Life Steal, this will prevent the Life Steal effects from taking effect. - This does not affect HP Drain/MP Drain. Life Steal is a different mechanic from HP Drain/MP Drain. --- <Disarm Life Steal> <Disarm HP Life Steal> <Disarm MP Life Steal> - Used for: Used for: Actor, Class, Armor, Enemy, State Notetags - Makes the related battler unable to HP/MP Life Steal regardless of the skill/item and its related properties like equipment. - This does not prevent skills/items with innate Life Steal from being used. Only the Life Steal part of the skill/item will have no effect. - This does not affect HP Drain/MP Drain. Life Steal is a different mechanic from HP Drain/MP Drain. --- <Negative Life Steal> <Negative HP Life Steal> <Negative MP Life Steal> - Used for: Used for: Actor, Class, Armor, Enemy, State Notetags - If the related battler becomes the target of Life Steal, this will invert the healing properties of Life Steal, causing the Life Steal user to instead take HP/MP damage. - This does NOT heal the target related battler. - This does not prevent skills/items with innate Life Steal from being used. Only the Life Steal part of the skill/item will have no effect. - This does not affect HP Drain/MP Drain. Life Steal is a different mechanic from HP Drain/MP Drain. --- Action Sequence-Related NotetagsAction Sequences allow you full control over how a skill and/or item plays through its course. These notetags give you control over various aspects of those Action Sequences. More information is found in the Action Sequences help section. --- <Custom Action Sequence> - Used for: Skill, Item Notetags - Removes all automated Action Sequence parts from the skill. - Everything Action Sequence-related will be done by Common Events. - Insert Common Event(s) into the skill/item's effects list to make use of the Custom Action Sequences. - This will prevent common events from loading in the Item Scene and Skill Scene when used outside of battle. --- <Auto Action Sequence> - Used for: Skill, Item Notetags - If the Action Sequence Plugin Parameter "Auto Notetag" is enabled, this plugin will prevent custom action sequences from happening for the skill or item, and instead, use an Automatic Action Sequence instead. - Ignore this if you have "Auto Notetag" disabled or set to false. By default, this setting is set to false. Please be aware of the changes you've made to your game before using it. --- <Bypass Auto Action Sequence> - Used for: Skill, Item Notetags - This notetag is used for the game devs that have the Action Sequence Plugin Parameter "Auto Notetag" on for applying <Custom Action Sequence> to everything. - This will allow items and skills to be able to launch their common events from the menu scene regardless of the inherent restriction to prevent action sequence based skills/items with common events from launching. - Ignore this if you have "Auto Notetag" disabled or set to false. By default, this setting is set to false. Please be aware of the changes you've made to your game before using it. --- <Common Event: name> - Used for: Skill, Item Notetags - Battle only: calls forth a Common Event of a matching name. - Replace 'name' with the name of a Common Event to call from when this skill/item is used in battle. - Remove any \I[x] in the name. - Insert multiple notetags to call multiple Common Events in succession. - This will occur after any Common Event Trait Effects for the skill/item's database entry. - This is primarily used for users who are reorganizing around their Common Events and would still like to have their skills/items perform the correct Action Sequences in case the ID's are different. --- <Display Icon: x> <Display Text: string> - Used for: Skill, Item Notetags - When displaying the skill/item name in the Action Sequence, determine the icon and/or text displayed. - Replace 'x' with a number value representing the icon ID to be displayed. - Replace 'string' with a text value representing the displayed name. --- <Common Event Key: name>
<Common Event Keys: name, name, name>
<Common Event Keys>
key
key
key
</Common Event Keys>
- Used for: Skill, Item Notetags
- Will generate Common Events for the skill/item with a corresponding key.
- Replace 'name' with the name of the Common Event's key that you want to
reference. That key will be converted into a Common Event effect for the
skill/item and be treated as an action sequence.
- The notetag variants that use multiple keys will have the keys added in
the order they are listed.
- If keys do not reference any Common Events, no Common Events will be
added for that key.
- To mark a Common Event with a key, insert inside a Common Event's name the
[ and ] brackets around the text that will be used as the Common Event's
key text.
- For example, if Common Event's name is "Penta Slash [PENTA]", then the
key used is "PENTA" without the quotes.
- This key could then be referenced by <Common Event Key: PENTA> notetag.
- Do not use commas (,) inside the key text as it will be automatically
removed for the sake of consistency.
- This feature is made for make the process of sharing Action Sequences to
become easier without needing to line up Common Event ID's.
--- Animated Sideview Battler-Related NotetagsEnemies can use Animated Sideview Actor graphics thanks to this plugin. These notetags give you control over that aspect. Some of these also affect actors in addition to enemies. --- <Sideview Battler: filename> <Sideview Battlers> filename: weight filename: weight filename: weight </Sideview Battlers> - Used for: Enemy Notetags - Replaces the enemy's battler graphic with an animated Sideview Actor graphic found in the img/sv_actors/ folder. - Replace 'filename' with the filename of the graphic to use. Do not insert any extensions. This means the file 'Actor1_1.png' will be only inserted as 'Actor1_1' without the '.png' at the end. - If the multiple notetag vaiant is used, then a random filename is selected from the list upon the enemy's creation. - Replace 'weight' with a number value representing how often the 'filename' would come up. The higher the weight, the more often. You may omit this and the colon(:) and just type in the 'filename' instead. - Add/remove lines as you see fit. Example: <Sideview Battlers> Actor1_1: 25 Actor1_3: 10 Actor1_5 Actor1_7 </Sideview Battlers> --- <Sideview Anchor: x, y> - Used for: Actor, Enemy Notetags - Sets the sprite anchor positions for the sideview sprite. - Replace 'x' and 'y' with numbers depicting where the anchors should be for the sideview sprite. - By default, the x and y anchors are 0.5 and 1.0. --- <Sideview Home Offset: +x, +y> <Sideview Home Offset: -x, -y> - Used for: Actor, Class, Weapon, Armor, State Notetags - Offsets the sideview actor sprite's home position by +/-x, +/-y. - Replace 'x' and 'y' with numbers depicting how much to offset each of the coordinates by. For '0' values, use +0 or -0. - This notetag will not work if you remove it from the JavaScript code in Plugin Parameters > Actor > JS: Home Position --- <Sideview Weapon Offset: +x, +y> <Sideview Weapon Offset: -x, -y> - Used for: Actor, Class, Weapon, Armor, Enemy State Notetags - Offsets the sideview weapon sprite's position by +/-x, +/-y. - Replace 'x' and 'y' with numbers depicting how much to offset each of the coordinates by. For '0' values, use +0 or -0. --- <Sideview Show Shadow> <Sideview Hide Shadow> - Used for: Actor, Enemy Notetags - Sets it so the sideview battler's shadow will be visible or hidden. --- <Sideview Shadow Scale: x%> <Sideview Shadow Scale: x.y> - Used for: Actor, Enemy Notetags - Adjusts the scaling size of the sideview battler's shadow. - This affects both the X and Y scale. --- <Sideview Shadow Scale X: x%> <Sideview Shadow Scale X: x.y> <Sideview Shadow Scale Y: x%> <Sideview Shadow Scale Y: x.y> - Used for: Actor, Enemy Notetags - Adjusts the scaling size of the sideview battler's shadow. - These affect their respective X and Y scales separately. --- <Sideview Collapse> <Sideview No Collapse> - Used for: Enemy Notetags - Either shows the collapse graphic or does not show the collapse graphic. - Collapse graphic means the enemy will 'fade away' once it's defeated. - No collapse graphic means the enemy's corpse will remain on the screen. --- <Sideview Idle Motion: name>
<Sideview Idle Motions>
name: weight
name: weight
name: weight
</Sideview Idle Motions>
- Used for: Enemy Notetags
- Changes the default idle motion for the enemy.
- Replace 'name' with any of the following motion names:
- 'walk', 'wait', 'chant', 'guard', 'damage', 'evade', 'thrust', 'swing',
'missile', 'skill', 'spell', 'item', 'escape', 'victory', 'dying',
'abnormal', 'sleep', 'dead'
- If the multiple notetag vaiant is used, then a random motion name is
selected from the list upon the enemy's creation.
- Replace 'weight' with a number value representing how often the 'name'
would come up. The higher the weight, the more often. You may omit this
and the colon(:) and just type in the 'name' instead.
- Add/remove lines as you see fit.
Example:
<Sideview Idle Motions>
walk: 25
wait: 50
guard
victory
abnormal
</Sideview Idle Motions>
--- <Sideview Size: width, height> - Used for: Enemy Notetags - When using a sideview battler, its width and height will default to the setting made in Plugin Parameters => Enemy Settings => Size: Width/Height. - This notetag lets you change that value to something else. - Replace 'width' and 'height' with numbers representing how many pixels wide/tall the sprite will be treated as. - This does NOT change the image size. This only changes the HITBOX size. --- <Sideview Weapon: weapontype> <Sideview Weapons> weapontype: weight weapontype: weight weapontype: weight </Sideview Weapons> - Used for: Enemy Notetags - Give your sideview enemies weapons to use. - Replace 'weapontype' with the name of the weapon type found under the Database => Types => Weapon Types list (without text codes). - If the multiple notetag vaiant is used, then a random weapon type is selected from the list upon the enemy's creation. - Replace 'weight' with a number value representing how often the weapontype would come up. The higher the weight, the more often. You may omit this and the colon(:) and just type in the 'weapontype' instead. - Add/remove lines as you see fit. Example: <Sideview Weapons> Dagger: 25 Sword: 25 Axe </Sideview Weapons> --- <traitname Sideview Battler: filename> <traitname Sideview Battlers> filename: weight filename: weight filename: weight </traitname Sideview Battlers> - Used for: Enemy Notetags - Requires VisuMZ_1_ElementStatusCore - Allows certain Trait Sets to cause battlers to have a unique appearance. - Replace 'filename' with the filename of the graphic to use. Do not insert any extensions. This means the file 'Actor1_1.png' will be only inserted as 'Actor1_1' without the '.png' at the end. - If the multiple notetag vaiant is used, then a random filename is selected from the list upon the enemy's creation. - Replace 'weight' with a number value representing how often the 'filename' would come up. The higher the weight, the more often. You may omit this and the colon(:) and just type in the 'filename' instead. - Add/remove lines as you see fit. Examples: <Male Sideview Battlers> Actor1_1: 25 Actor1_3: 10 Actor1_5 Actor1_7 </Male Sideview Battlers> <Female Sideview Battlers> Actor1_2: 25 Actor1_4: 10 Actor1_6 Actor1_8 </Female Sideview Battlers> --- <traitname Sideview Idle Motion: name>
<traitname Sideview Idle Motions>
name: weight
name: weight
name: weight
</traitname Sideview Idle Motions>
- Used for: Enemy Notetags
- Requires VisuMZ_1_ElementStatusCore
- Allows certain Trait Sets to cause battlers to have unique idle motions.
- Replace 'name' with any of the following motion names:
- 'walk', 'wait', 'chant', 'guard', 'damage', 'evade', 'thrust', 'swing',
'missile', 'skill', 'spell', 'item', 'escape', 'victory', 'dying',
'abnormal', 'sleep', 'dead'
- If the multiple notetag vaiant is used, then a random motion name is
selected from the list upon the enemy's creation.
- Replace 'weight' with a number value representing how often the 'name'
would come up. The higher the weight, the more often. You may omit this
and the colon(:) and just type in the 'name' instead.
- Add/remove lines as you see fit.
Examples:
<Jolly Sideview Idle Motions>
wait: 25
victory: 10
walk
</Jolly Sideview Idle Motions>
<Serious Sideview Idle Motions>
walk: 25
guard: 10
wait
</Jolly Sideview Idle Motions>
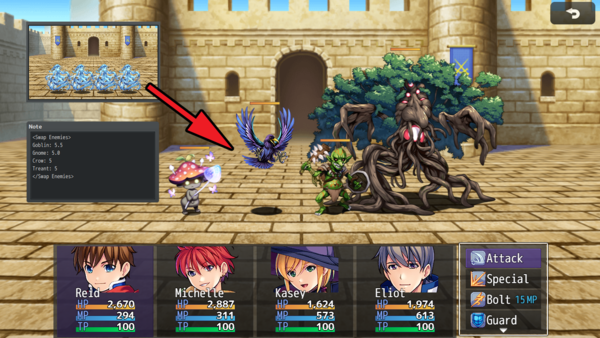
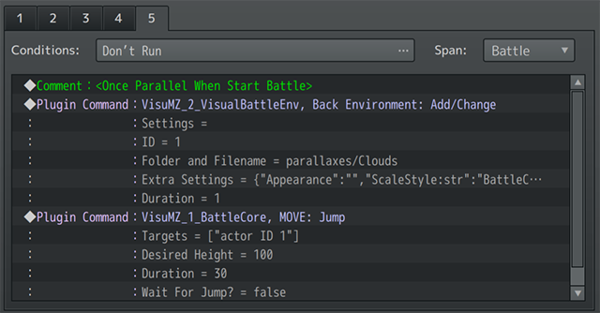
--- <traitname Sideview Weapon: weapontype> <traitname Sideview Weapons> weapontype: weight weapontype: weight weapontype: weight </traitname Sideview Weapons> - Used for: Enemy Notetags - Requires VisuMZ_1_ElementStatusCore - Allows certain Trait Sets to cause battlers to have unique weapons. - Replace 'weapontype' with the name of the weapon type found under the Database => Types => Weapon Types list (without text codes). - If the multiple notetag vaiant is used, then a random weapon type is selected from the list upon the enemy's creation. - Replace 'weight' with a number value representing how often the weapontype would come up. The higher the weight, the more often. You may omit this and the colon(:) and just type in the 'weapontype' instead. - Add/remove lines as you see fit. Examples: <Male Sideview Weapons> Dagger: 25 Sword: 25 Axe </Male Sideview Weapons> <Female Sideview Weapons> Dagger: 25 Spear: 25 Cane </Female Sideview Weapons> --- Enemy-Related Notetags--- <Battler Sprite Cannot Move> - Used for: Enemy Notetags - Prevents the enemy from being able to move, jump, and/or float due to Action Sequences. Useful for rooted enemies. --- <Swap Enemies> name: weight name: weight name: weight </Swap Enemies> - Used for: Enemy Notetags - Causes this enemy database object to function as a randomizer for any of the listed enemies inside the notetag. When the enemy is loaded into the battle scene, the enemy is immediately replaced with one of the enemies listed. The randomization is based off the 'weight' given to each of the enemy 'names'. - Replace 'name' with the database enemy of the enemy you wish to replace the enemy with. - Replace 'weight' with a number value representing how often the 'name' would come up. The higher the weight, the more often. You may omit this and the colon(:) and just type in the 'name' instead. - Add/remove lines as you see fit. Example: <Swap Enemies> Bat: 50 Slime: 25 Orc Minotaur </Swap Enemies> --- JavaScript Notetags: Mechanics-RelatedThese JavaScript notetags allow you to run code at specific instances during battle provided that the unit has that code associated with them in a trait object (actor, class, weapon, armor, enemy, or state). How you use these is entirely up to you and will depend on your ability to understand the code used and driven for each case. --- <JS Pre-Start Battle> code code code </JS Pre-Start Battle> <JS Post-Start Battle> code code code </JS Post-Start Battle> - Used for: Actor, Class, Weapon, Armor, Enemy, State Notetags - Runs JavaScript code at the start of battle aimed at the function: BattleManager.startBattle() - 'Pre' runs before the function runs. - 'Post' runs after the function runs. - Replace 'code' with JavaScript code to run desired effects. - The 'user' variable represents the one affected by the trait object. --- <JS Pre-Start Turn> code code code </JS Pre-Start Turn> <JS Post-Start Turn> code code code </JS Post-Start Turn> - Used for: Actor, Class, Weapon, Armor, Enemy, State Notetags - Runs JavaScript code at the start of a turn aimed at the function: BattleManager.startTurn() - 'Pre' runs before the function runs. - 'Post' runs after the function runs. - Replace 'code' with JavaScript code to run desired effects. - The 'user' variable represents the one affected by the trait object. --- <JS Pre-Start Action> code code code </JS Pre-Start Action> <JS Post-Start Action> code code code </JS Post-Start Action> - Used for: Actor, Class, Skill, Item, Weapon, Armor, Enemy, State Notetags - Runs JavaScript code at the start of an action aimed at the function: BattleManager.startAction() - 'Pre' runs before the function runs. - 'Post' runs after the function runs. - If used on skills and/or items, this will only apply to the skill/item being used and does not affect other skills and items. - If used on trait objects, this will apply to any skills/items used as long as the unit affected by the trait object has access to the trait object. - Replace 'code' with JavaScript code to run desired effects. - The 'user' variable represents the one affected by the trait object. --- <JS Pre-Apply> code code code </JS Pre-Apply> - Used for: Skill, Item Notetags - Runs JavaScript code at the start of an action hit aimed at the function: Game_Action.prototype.apply() - 'Pre' runs before the function runs. - If used on skills and/or items, this will only apply to the skill/item being used and does not affect other skills and items. - Replace 'code' with JavaScript code to run desired effects. - The 'user' variable represents the one using the skill/item. - The 'target' variable represents the one receiving the skill/item hit. --- <JS Pre-Apply as User> code code code </JS Pre-Apply as User> <JS Pre-Apply as Target> code code code </JS Pre-Apply as Target> - Used for: Actor, Class, Weapon, Armor, Enemy, State Notetags - Runs JavaScript code at the start of an action hit aimed at the function: Game_Action.prototype.apply() - 'Pre' runs before the function runs. - If used on trait objects, this will apply to any skills/items used as long as the unit affected by the trait object has access to the trait object. - If the 'as User' notetag variant is used, this code will be run as a response to the action from the action user end. - If the 'as Target' notetag variant is used, this code will be run as a response to the action from the action target end. - Replace 'code' with JavaScript code to run desired effects. - The 'user' variable represents the one using the skill/item. - The 'target' variable represents the one receiving the skill/item hit. --- <JS Pre-Damage> code code code </JS Pre-Damage> - Used for: Skill, Item Notetags - Runs JavaScript code before damage is dealt aimed at the function: Game_Action.prototype.executeDamage() - 'Pre' runs before the function runs. - If used on skills and/or items, this will only apply to the skill/item being used and does not affect other skills and items. - Replace 'code' with JavaScript code to run desired effects. - The 'user' variable represents the one using the skill/item. - The 'target' variable represents the one receiving the skill/item hit. --- <JS Pre-Damage as User> code code code </JS Pre-Damage as User> <JS Pre-Damage as Target> code code code </JS Pre-Damage as Target> - Used for: Actor, Class, Weapon, Armor, Enemy, State Notetags - Runs JavaScript code before damage is dealt aimed at the function: Game_Action.prototype.executeDamage() - 'Pre' runs before the function runs. - If used on trait objects, this will apply to any skills/items used as long as the unit affected by the trait object has access to the trait object. - If the 'as User' notetag variant is used, this code will be run as a response to the action from the action user end. - If the 'as Target' notetag variant is used, this code will be run as a response to the action from the action target end. - Replace 'code' with JavaScript code to run desired effects. - The 'user' variable represents the one using the skill/item. - The 'target' variable represents the one receiving the skill/item hit. --- <JS Post-Damage> code code code </JS Post-Damage> - Used for: Skill, Item Notetags - Runs JavaScript code after damage is dealt aimed at the function: Game_Action.prototype.executeDamage() - 'Post' runs after the function runs. - If used on skills and/or items, this will only apply to the skill/item being used and does not affect other skills and items. - Replace 'code' with JavaScript code to run desired effects. - The 'user' variable represents the one using the skill/item. - The 'target' variable represents the one receiving the skill/item hit. --- <JS Post-Damage as User> code code code </JS Post-Damage as User> <JS Post-Damage as Target> code code code </JS Post-Damage as Target> - Used for: Actor, Class, Weapon, Armor, Enemy, State Notetags - Runs JavaScript code after damage is dealt aimed at the function: Game_Action.prototype.executeDamage() - 'Post' runs after the function runs. - If used on trait objects, this will apply to any skills/items used as long as the unit affected by the trait object has access to the trait object. - If the 'as User' notetag variant is used, this code will be run as a response to the action from the action user end. - If the 'as Target' notetag variant is used, this code will be run as a response to the action from the action target end. - Replace 'code' with JavaScript code to run desired effects. - The 'user' variable represents the one using the skill/item. - The 'target' variable represents the one receiving the skill/item hit. --- <JS Post-Apply> code code code </JS Post-Apply> - Used for: Skill, Item Notetags - Runs JavaScript code at the end of an action hit aimed at the function: Game_Action.prototype.apply() - 'Post' runs after the function runs. - If used on skills and/or items, this will only apply to the skill/item being used and does not affect other skills and items. - Replace 'code' with JavaScript code to run desired effects. - The 'user' variable represents the one using the skill/item. - The 'target' variable represents the one receiving the skill/item hit. --- <JS Post-Apply as User> code code code </JS Post-Apply as User> <JS Post-Apply as Target> code code code </JS Post-Apply as Target> - Used for: Actor, Class, Weapon, Armor, Enemy, State Notetags - Runs JavaScript code at the end of an action hit aimed at the function: Game_Action.prototype.apply() - 'Post' runs after the function runs. - If used on trait objects, this will apply to any skills/items used as long as the unit affected by the trait object has access to the trait object. - If the 'as User' notetag variant is used, this code will be run as a response to the action from the action user end. - If the 'as Target' notetag variant is used, this code will be run as a response to the action from the action target end. - Replace 'code' with JavaScript code to run desired effects. --- <JS Pre-End Action> code code code </JS Pre-End Action> <JS Post-End Action> code code code </JS Post-End Action> - Used for: Actor, Class, Weapon, Armor, Enemy, State Notetags - Runs JavaScript code at the end of an action aimed at the function: BattleManager.endAction() - 'Pre' runs before the function runs. - 'Post' runs after the function runs. - If used on trait objects, this will apply to any skills/items used as long as the unit affected by the trait object has access to the trait object. - Replace 'code' with JavaScript code to run desired effects. - The 'user' variable represents the one affected by the trait object. --- <JS Pre-End Turn> code code code </JS Pre-End Turn> <JS Post-End Turn> code code code </JS Post-End Turn> - Used for: Actor, Class, Weapon, Armor, Enemy, State Notetags - Runs JavaScript code at the end of a turn aimed at the function: Game_Battler.prototype.onTurnEnd() - 'Pre' runs before the function runs. - 'Post' runs after the function runs. - Replace 'code' with JavaScript code to run desired effects. - The 'user' variable represents the one affected by the trait object. --- <JS Pre-Regenerate> code code code </JS Pre-Regenerate> <JS Post-Regenerate> code code code </JS Post-Regenerate> - Used for: Actor, Class, Weapon, Armor, Enemy, State Notetags - Runs JavaScript code when a unit regenerates HP/MP aimed at the function: Game_Battler.prototype.regenerateAll() - 'Pre' runs before the function runs. - 'Post' runs after the function runs. - Replace 'code' with JavaScript code to run desired effects. - The 'user' variable represents the one affected by the trait object. --- <JS Battle Victory> code code code </JS Battle Victory> - Used for: Actor, Class, Weapon, Armor, Enemy, State Notetags - Runs JavaScript code when a battle is won aimed at the function: BattleManager.processVictory() - Replace 'code' with JavaScript code to run desired effects. - The 'user' variable represents the one affected by the trait object. --- <JS Escape Success> code code code </JS Escape Success> - Used for: Actor, Class, Weapon, Armor, Enemy, State Notetags - Runs JavaScript code when escaping succeeds aimed at the function: BattleManager.onEscapeSuccess() - Replace 'code' with JavaScript code to run desired effects. - The 'user' variable represents the one affected by the trait object. --- <JS Escape Failure> code code code </JS Escape Failure> - Used for: Actor, Class, Weapon, Armor, Enemy, State Notetags - Runs JavaScript code when escaping fails aimed at the function: BattleManager.onEscapeFailure() - Replace 'code' with JavaScript code to run desired effects. - The 'user' variable represents the one affected by the trait object. --- <JS Battle Defeat> code code code </JS Battle Defeat> - Used for: Actor, Class, Weapon, Armor, Enemy, State Notetags - Runs JavaScript code when a battle is lost aimed at the function: BattleManager.processDefeat() - Replace 'code' with JavaScript code to run desired effects. - The 'user' variable represents the one affected by the trait object. --- <JS Pre-End Battle> code code code </JS Pre-End Battle> <JS Post-End Battle> code code code </JS Post-End Battle> - Used for: Actor, Class, Weapon, Armor, Enemy, State Notetags - Runs JavaScript code when the battle is over aimed at the function: BattleManager.endBattle() - 'Pre' runs before the function runs. - 'Post' runs after the function runs. - Replace 'code' with JavaScript code to run desired effects. - The 'user' variable represents the one affected by the trait object. --- Battle Layout-Related NotetagsThese tags will change the battle layout for a troop regardless of how the plugin parameters are set up normally. Insert these tags in either the noteboxes of maps or the names of troops for them to take effect. If both are present for a specific battle, then priority goes to the setting found in the troop name. --- <Layout: type> <Battle Layout: type> - Used for: Map Notetags, Troop Name Tags, and Troop Comment Tags - Changes the battle layout style used for this specific map or battle. - Replace 'type' with 'default', 'list', 'xp', 'portrait', or 'border'. - Those with VisuMZ_3_FrontviewBattleUI can use 'frontview'. - Those with VisuMZ_3_SideviewBattleUI can use 'sideview'. - If using Troop Comment Tags, then as long as the tag appears in a comment found on any of the Troop's pages (even if they don't run), the tag will be considered in effect. --- Troop Size Tags--- <Extend: x> <Extend: x, x, x> - Used for: Troop Name Tags and Troop Comment Tags - Adds enemies from another troop to the current troop. - Enemies from another troop will retain their database positions. - Replace 'x' with the ID of the database troop entry you wish to add enemy members from. - Insert multiple x's to add from more troops. - Extended troop members will be added in the order they're listed. - Be cautious of how many enemies you add as too many will lag the battle system. We are not responsible for frame drops due to this. --- Troop Comment TagsPlace these tags inside of a comment found in a troop page's event list. --- <Once Parallel When Start Battle> - Used for: Troop Page Comment Tags - Causes the troop page to immediately load the moment the battle scene begins to fade in (not after it fades in). This is faster than a turn 0 condition troop page. Troop page conditions are ignored. - This can be used for things like the Action Sequence Camera plugin, the Visual Battle Environment plugin, and/or initial battle poses and such in order to provide a near seamless battle transition experience. - This does NOT trigger when coming out of the options menu or party menu. - This WILL trigger when going from battle to battle nonstop via plugins like VisuStella MZ's Chain Battles. - When actors are moving towards their home positions, it will take around 30 frames by default. Use this information however you like. --- Plugin CommandsPlugin Commands are event commands that are used to call upon functions added by a plugin that aren't inherently a part of RPG Maker MZ. Here is a list of Plugin Command(s) that you may use: ---
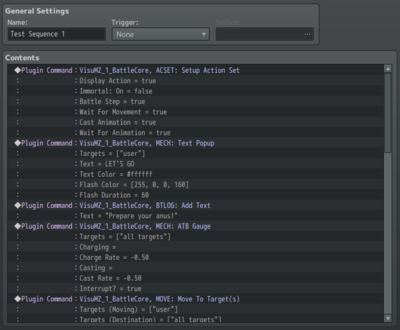
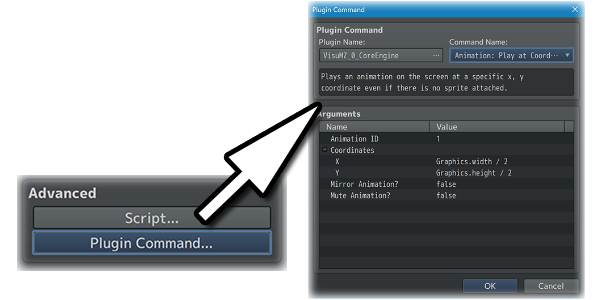
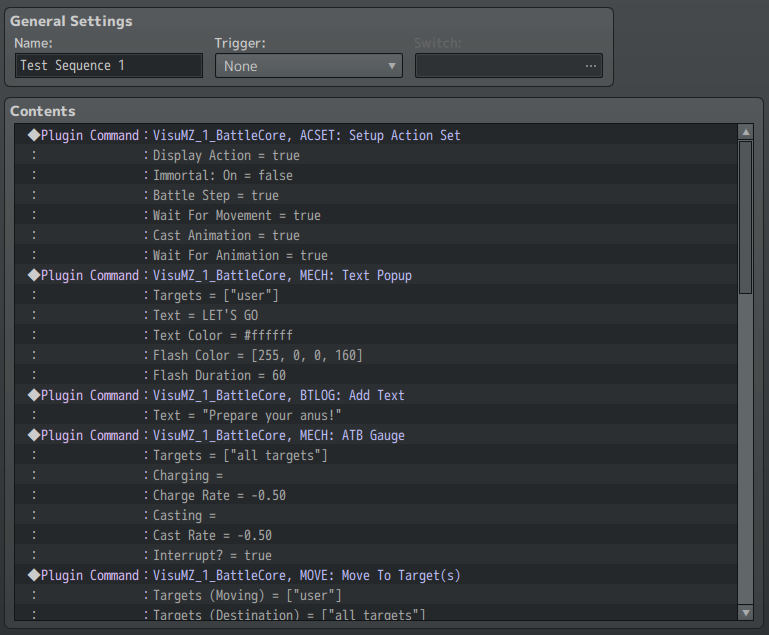
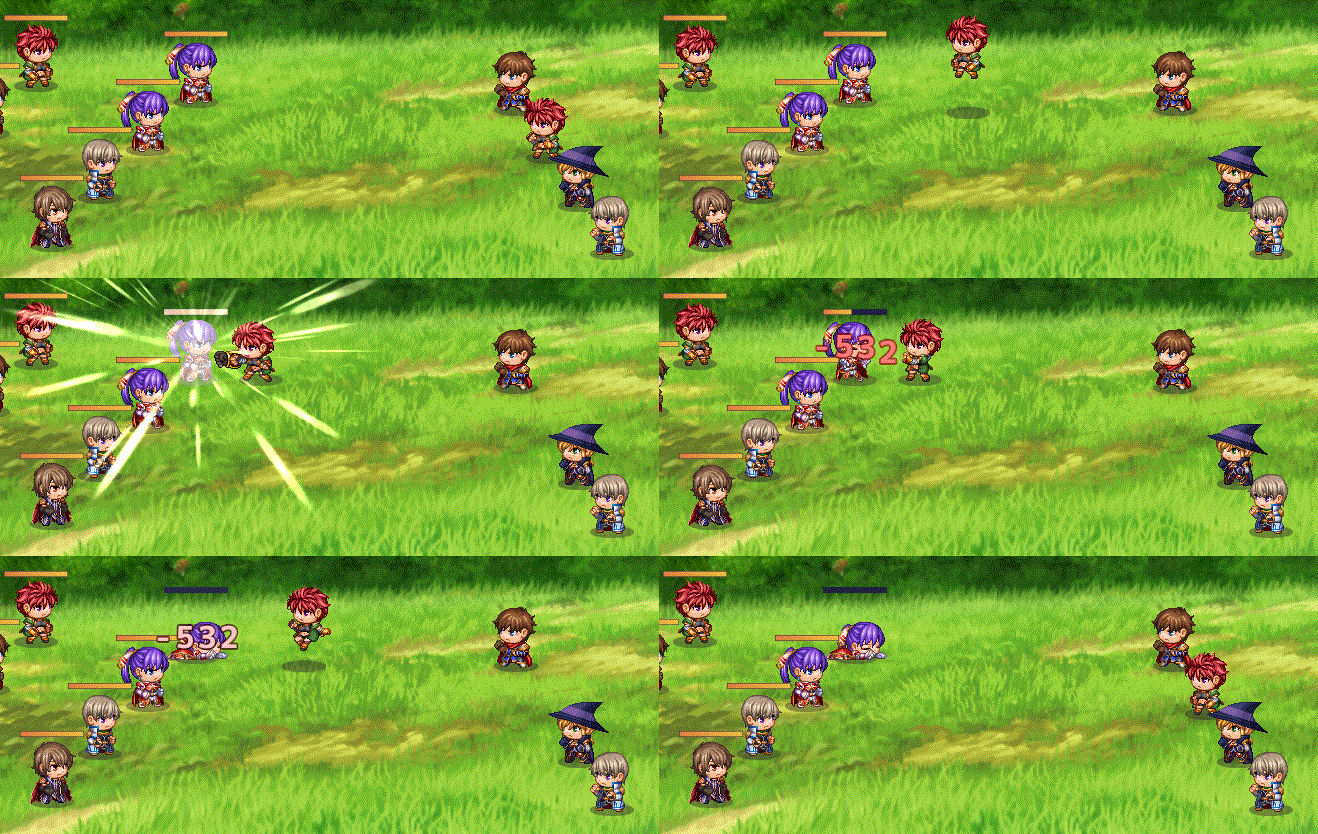
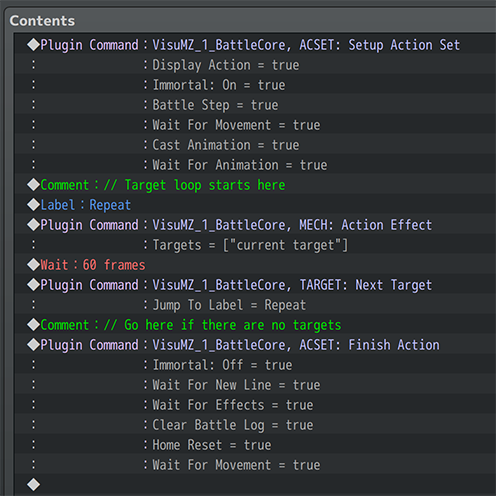
Skills and items, when used in battle, have a pre-determined series of actions to display to the player as a means of representing what's going on with the action. For some game devs, this may not be enough and they would like to get more involved with the actions themselves. Action Sequences, added through this plugin, enable this. To give a skill or item a Custom Action Sequence, a couple of steps must be followed: --- 1. Insert the <Custom Action Sequence> notetag into the skill or item's notebox (or else this would not work as intended). 2. Give that skill/item a Common Event through the Effects box. The selected Common Event will contain all the Action Sequence data. 3. Create the Common Event with Action Sequence Plugin Commands and/or event commands to make the skill/item do what you want it to do. --- The Plugin Commands added through the Battle Core plugin focus entirely on Action Sequences. However, despite the fact that they're made for skills and items, some of these Action Sequence Plugin Commands can still be used for regular Troop events and Common Events. --- Action Sequence - Action SetsAction Sequence Action Sets are groups of commonly used Action Sequence Commands put together for more efficient usage. --- ACSET: Setup Action Set - The generic start to most actions. Display Action: Immortal: On: Battle Step: Wait For Movement: Cast Animation: Wait For Animation: - Use this part of the action sequence? --- ACSET: All Targets Action Set - Affects all targets simultaneously performing the following. Dual/Multi Wield? - Add times struck based on weapon quantity equipped? Perform Action: Wait Count: Action Animation: Wait For Animation: Action Effect: Immortal: Off: - Use this part of the action sequence? - Insert values for the Wait Count(s). --- ACSET: Each Target Action Set - Goes through each target one by one to perform the following. Dual/Multi Wield? - Add times struck based on weapon quantity equipped? Perform Action: Wait Count: Action Animation: Wait Count: Action Effect: Immortal: Off: - Use this part of the action sequence? - Insert values for the Wait Count(s). --- ACSET: Finish Action - The generic ending to most actions. Immortal: Off: Wait For New Line: Wait For Effects: Clear Battle Log: Home Reset: Wait For Movement: - Use this part of the action sequence? --- Action Sequences - Angle (Camera)These action sequences allow you to have control over the camera angle. Requires VisuMZ_3_ActSeqCamera! --- ANGLE: Change Angle - Changes the camera angle. - Requires VisuMZ_3_ActSeqCamera! Angle: - Change the camera angle to this many degrees. Duration: - Duration in frames to change camera angle. Angle Easing: - Select which easing type you wish to apply. - Requires VisuMZ_0_CoreEngine. Wait For Angle?: - Wait for angle changes to complete before performing next command? --- ANGLE: Reset Angle - Reset any angle settings. - Requires VisuMZ_3_ActSeqCamera! Duration: - Duration in frames to reset camera angle. Angle Easing: - Select which easing type you wish to apply. - Requires VisuMZ_0_CoreEngine. Wait For Angle?: - Wait for angle changes to complete before performing next command? --- ANGLE: Wait For Angle - Waits for angle changes to complete before performing next command. - Requires VisuMZ_3_ActSeqCamera! --- Action Sequences - AnimationsThese Action Sequences are related to the 'Animations' that can be found in the Animations tab of the Database. --- ANIM: Action Animation - Plays the animation associated with the action. Targets: - Select unit(s) to play the animation on. Mirror Animation: - Mirror the animation? Wait For Animation?: - Wait for animation to complete before performing next command? --- ANIM: Attack Animation - Plays the animation associated with the user's weapon. Targets: - Select unit(s) to play the animation on. Mirror Animation: - Mirror the animation? Wait For Animation?: - Wait for animation to complete before performing next command? --- ANIM: Attack Animation 2+ - Plays the animation associated with the user's other weapons. - Plays nothing if there is no other weapon equipped. Targets: - Select unit(s) to play the animation on. Slot: - Which weapon slot to get this data from? - Main-hand weapon is weapon slot 1. Mirror Animation: - Mirror the animation? Wait For Animation?: - Wait for animation to complete before performing next command? --- ANIM: Balloon Animation - Plays a balloon animation on target(s). Targets: - Select unit(s) to play the animation on. Balloon Type: - What kind of balloon should be played on target(s)? Wait for Completion: - Wait for balloon animation completion before continuing? --- ANIM: Balloon Icon (Single) - Plays a balloon animation using an icon on target(s). - Requires VisuMZ_4_IconBalloons! Targets: - Select unit(s) to play the animation on. Icon Index: - Insert the ID of the icon to show. - Tip: Right click > Insert Icon Index Wait for Completion: - Wait for balloon animation completion before continuing? --- ANIM: Balloon Icon (Range) - Plays a balloon animation an icon range on target(s). - Requires VisuMZ_4_IconBalloons! Targets: - Select unit(s) to play the animation on. Starting Icon Index: - Insert the ID of the icon to show. - Tip: Right click > Insert Icon Index Ending Icon Index: - Insert the ID of the icon to show. - Tip: Right click > Insert Icon Index Wait for Completion: - Wait for balloon animation completion before continuing? --- ANIM: Balloon Icon (Specific) - Plays a balloon animation with specific icons on target(s). - Requires VisuMZ_4_IconBalloons! Targets: - Select unit(s) to play the animation on. Icons: - Insert the ID(s) of the icon to show. - Tip: Right click > Insert Icon Index Wait for Completion: - Wait for balloon animation completion before continuing? --- ANIM: Cast Animation - Plays the cast animation associated with the action. Targets: - Select unit(s) to play the animation on. Mirror Animation: - Mirror the animation? Wait For Animation?: - Wait for animation to complete before performing next command? --- ANIM: Change Battle Portrait - Changes the battle portrait of the actor (if it's an actor). - Can be used outside of battle/action sequences. Targets: - Select unit(s) to play the animation on. - Valid units can only be actors. Filename: - Select the file to change the actor's portrait to. --- ANIM: Guard Animation - Plays the animation associated with the user's guard action (if any). Targets: - Select unit(s) to play the animation on. Mirror Animation: - Mirror the animation? Wait For Animation?: - Wait for animation to complete before performing next command? --- ANIM: Item Animation - Plays the animation associated with a specific item. Item ID: - Which item ID will the animation come from? Targets: - Select unit(s) to play the animation on. Mirror Animation: - Mirror the animation? Wait For Animation?: - Wait for animation to complete before performing next command? --- ANIM: Play at Coordinate
- Plays an animation on the screen at a specific x, y coordinate.
- Requires VisuMZ_0_CoreEngine!
Animation ID:
- Plays this animation.
Coordinates:
X:
Y:
- X/Y coordinate used for the animation.
You may use JavaScript code.
Mirror Animation?:
- Mirror the animation?
Mute Animation?:
- Mute the animation?
Wait for Completion?:
- Wait the animation to finish before continuing?
--- ANIM: Show Animation - Plays the a specific animation on unit(s). Targets: - Select unit(s) to play the animation on. Animation ID: - Select which animation to play on unit(s). Mirror Animation: - Mirror the animation? Wait For Animation?: - Wait for animation to complete before performing next command? --- ANIM: Show Animation JS - Plays the a specific animation on unit(s). - Uses JavaScript to determine animation ID. Targets: - Select unit(s) to play the animation on. JS: Animation ID: - Select which animation to play on unit(s). - Uses JavaScript to determine animation ID. Mirror Animation: - Mirror the animation? Wait For Animation?: - Wait for animation to complete before performing next command? --- ANIM: Skill Animation - Plays the animation associated with a specific skill. Skill ID: - Which skill ID will the animation come from? Targets: - Select unit(s) to play the animation on. Mirror Animation: - Mirror the animation? Wait For Animation?: - Wait for animation to complete before performing next command? --- ANIM: Wait For Animation - Causes the interpreter to wait for any animation(s) to finish. --- Action Sequences - Battle LogThese Action Sequences are related to the Battle Log Window, the window found at the top of the battle screen. --- BTLOG: Add Text
- Adds a new line of text into the Battle Log.
Text:
- Add this text into the Battle Log.
- Text codes allowed.
Copy to Combat Log?:
- Copies text to the Combat Log.
- Requires VisuMZ_4_CombatLog
Combat Log Icon:
- What icon would you like to bind to this entry?
- Requires VisuMZ_4_CombatLog
--- BTLOG: Clear Battle Log - Clears all the text in the Battle Log. --- BTLOG: Display Action - plays the current action in the Battle Log. --- BTLOG: Pop Base Line - Removes the Battle Log's last added base line and all text up to its former location. --- BTLOG: Push Base Line - Adds a new base line to where the Battle Log currently is at. --- BTLOG: Refresh Battle Log - Refreshes the Battle Log. --- BTLOG: UI Show/Hide - Shows or hides the Battle UI (including the Battle Log). Show/Hide?: - Shows/hides the Battle UI. --- BTLOG: Wait For Battle Log - Causes the interpreter to wait for the Battle Log to finish. --- BTLOG: Wait For New Line - Causes the interpreter to wait for a new line in the Battle Log. --- Action Sequences - CameraThese Action Sequences are battle camera-related. Requires VisuMZ_3_ActSeqCamera! --- CAMERA: Clamp ON/OFF - Turns battle camera clamping on/off. - Requires VisuMZ_3_ActSeqCamera! Setting: - Turns camera clamping on/off. --- CAMERA: Focus Point - Focus the battle camera on a certain point in the screen. - Requires VisuMZ_3_ActSeqCamera! X Coordinate: - Insert the point to focus the camera on. - You may use JavaScript code. Y Coordinate: - Insert the point to focus the camera on. - You may use JavaScript code. Duration: - Duration in frames for camera focus change. Camera Easing: - Select which easing type you wish to apply. - Requires VisuMZ_0_CoreEngine. Wait For Camera? - Wait for camera changes to complete before performing next command? --- CAMERA: Focus Target(s) - Focus the battle camera on certain battler target(s). - Requires VisuMZ_3_ActSeqCamera! Targets: - Select unit(s) to focus the battle camera on. Duration: - Duration in frames for camera focus change. Camera Easing: - Select which easing type you wish to apply. - Requires VisuMZ_0_CoreEngine. Wait For Camera? - Wait for camera changes to complete before performing next command? --- CAMERA: Offset - Offset the battle camera from the focus target. - Requires VisuMZ_3_ActSeqCamera! Offset X: - How much to offset the camera X by. - Negative: left. Positive: right. Offset Y: - How much to offset the camera Y by. - Negative: up. Positive: down. Duration: - Duration in frames for offset change. Camera Easing: - Select which easing type you wish to apply. - Requires VisuMZ_0_CoreEngine. Wait For Camera? - Wait for camera changes to complete before performing next command? --- CAMERA: Reset - Reset the battle camera settings. - Requires VisuMZ_3_ActSeqCamera! Reset Focus?: - Reset the focus point? Reset Offset?: - Reset the camera offset? Duration: - Duration in frames for reset change. Camera Easing: - Select which easing type you wish to apply. - Requires VisuMZ_0_CoreEngine. Wait For Camera? - Wait for camera changes to complete before performing next command? --- CAMERA: Wait For Camera - Waits for camera changes to complete before performing next command. - Requires VisuMZ_3_ActSeqCamera! --- Action Sequences - DragonbonesThese Action Sequences are Dragonbones-related. Requires VisuMZ_2_DragonbonesUnion! --- DB: Dragonbones Animation - Causes the unit(s) to play a Dragonbones motion animation. - Requires VisuMZ_2_DragonbonesUnion! Targets: - Select which unit(s) to perform a motion animation. Motion Animation: - What is the name of the Dragonbones motion animation you wish to play? --- DB: Dragonbones Time Scale - Causes the unit(s) to change their Dragonbones time scale. - Requires VisuMZ_2_DragonbonesUnion! Targets: - Select which unit(s) to perform a motion animation. Time Scale: - Change the value of the Dragonbones time scale to this. --- Action Sequences - ElementsThese Action Sequences can change up the element(s) used for the action's damage calculation midway through an action. They also require the VisuMZ_1_ElementStatusCore plugin to be present in order for them to work. --- ELE: Add Elements - Adds element(s) to be used when calculating damage. - Requires VisuMZ_1_ElementStatusCore! Elements: - Select which element ID to add onto the action. - Insert multiple element ID's to add multiple at once. --- ELE: Clear Element Changes - Clears all element changes made through Action Sequences. - Requires VisuMZ_1_ElementStatusCore! --- ELE: Force Elements - Forces only specific element(s) when calculating damage. - Requires VisuMZ_1_ElementStatusCore! Elements: - Select which element ID to force in the action. - Insert multiple element ID's to force multiple at once. --- ELE: Null Element - Forces no element to be used when calculating damage. - Requires VisuMZ_1_ElementStatusCore! --- Action Sequences - GridThese Action Sequences are Battle Grid System-related. Requires VisuMZ_2_BattleGridSystem! --- GRID: Action Animation at Node
- Plays action animation at target node.
- Requires VisuMZ_2_BattleGridSystem!
Action-Selected Node?:
- Use Action-Selected Node Coordinates if possible?
- Requires "Empty" or "Any" for <Target: x Grid Node>
- If the no action is in effect or the action doesn't use that target
structure, use the node coordinates below:
Unit:
- Which unit's Node do you want to play an animation on?
Rank:
- Input the number representing the Rank of the Node you want to play an
animation on.
Flank:
- Input the number representing the Flank of the Node you want to play
an animation on.
Offset X:
- Offsets the animation x position.
- Negative: left. Positive: right.
Offset Y:
- Offsets the animation y position.
- Negative: up. Positive: down.
--- GRID: Add Passive State(s) to Node
- Adds Passive State(s) at target node.
- Requires VisuMZ_2_BattleGridSystem!
State ID(s):
- Select which State ID(s) to add as a Passive State.
Action-Selected Node?:
- Use Action-Selected Node Coordinates if possible?
- Requires "Empty" or "Any" for <Target: x Grid Node>
- If the no action is in effect or the action doesn't use that target
structure, use the node coordinates below:
Unit:
- Which unit do you want to add the Passive State Node effect for?
Rank:
- Input the number representing the Rank of the Node you want to add a
Passive State(s) to.
Flank:
- Input the number representing the Flank of the Node you want to add a
Passive State(s) to.
--- GRID: Add Trigger to Node
- Adds Trigger to target node.
- Target node cannot have battler.
- Each node can only contain ONE trigger!
- Otherwise, newly placed triggers will overwrite the old ones.
- Requires VisuMZ_2_BattleGridSystem!
Skill ID:
- Select which Skill ID(s) to add as the trigger.
Action-Selected Node?:
- Use Action-Selected Node Coordinates if possible?
- Requires "Empty" or "Any" for <Target: x Grid Node>
- If the no action is in effect or the action doesn't use that target
structure, use the node coordinates below:
Unit:
- Which unit do you want to add the Trigger Node effect for?
Rank:
- Input the number representing the Rank of the Node you want to add a
Trigger to.
Flank:
- Input the number representing the Flank of the Node you want to add a
Trigger to.
--- GRID: Animation ID at Node
- Plays specific animation ID at target node.
Animation ID:
- Play this animation at target node.
Mirror?:
- Mirror this animation?
Mute?:
- Mute this animation?
Action-Selected Node?:
- Use Action-Selected Node Coordinates if possible?
- Requires "Empty" or "Any" for <Target: x Grid Node>
- If the no action is in effect or the action doesn't use that target
structure, use the node coordinates below:
Unit:
- Which unit's Node do you want to play an animation on?
Rank:
- Input the number representing the Rank of the Node you want to play an
animation on.
Flank:
- Input the number representing the Flank of the Node you want to play
an animation on.
Offset X:
- Offsets the animation x position.
- Negative: left. Positive: right.
Offset Y:
- Offsets the animation y position.
- Negative: up. Positive: down.
--- GRID: Animation JS at Node
- Uses JS to calculate which animation to play at target node.
JS: Animation ID:
- Calculate which animation to play on unit(s).
- Uses JavaScript to determine animation ID.
Mirror?:
- Mirror this animation?
Mute?:
- Mute this animation?
Action-Selected Node?:
- Use Action-Selected Node Coordinates if possible?
- Requires "Empty" or "Any" for <Target: x Grid Node>
- If the no action is in effect or the action doesn't use that target
structure, use the node coordinates below:
Unit:
- Which unit's Node do you want to play an animation on?
Rank:
- Input the number representing the Rank of the Node you want to play an
animation on.
Flank:
- Input the number representing the Flank of the Node you want to play
an animation on.
Offset X:
- Offsets the animation x position.
- Negative: left. Positive: right.
Offset Y:
- Offsets the animation y position.
- Negative: up. Positive: down.
--- GRID: Animation Type at Node
- Plays certain animation type at target node.
- Requires VisuMZ_2_BattleGridSystem!
Type:
- What is the animation type you would like to play?
- Attack
- Guard
- Item
- Skill
Slot (Attack Type):
- Which weapon slot to get this data from?
- Main-hand weapon is weapon slot 1.
Item ID (Item Type):
- Which item ID will the animation come from?
Skill ID (Skill Type):
- Which skill ID will the animation come from?
Action-Selected Node?:
- Use Action-Selected Node Coordinates if possible?
- Requires "Empty" or "Any" for <Target: x Grid Node>
- If the no action is in effect or the action doesn't use that target
structure, use the node coordinates below:
Unit:
- Which unit's Node do you want to play an animation on?
Rank:
- Input the number representing the Rank of the Node you want to play an
animation on.
Flank:
- Input the number representing the Flank of the Node you want to play
an animation on.
Offset X:
- Offsets the animation x position.
- Negative: left. Positive: right.
Offset Y:
- Offsets the animation y position.
- Negative: up. Positive: down.
--- GRID: Move Target(s) In Direction
- Moves target(s) in a specific direction to other Nodes.
- Requires VisuMZ_2_BattleGridSystem!
- This will bypass the "once per action" condition used for both the
<rule Move User Node direction: x> & <rule Move Target Node direction: x>
notetags as this is not a notetag effect.
Targets:
- Select unit(s) to move.
Movement Type:
- Select the Movement type rulings.
- See VisuMZ_2_BattleGridSystem help file for details.
Direction:
- Select the movement direction.
Distance:
- The number of nodes to be moved.
- You may use JavaScript code.
Duration:
- Input the number representing the frames used to move.
Silent Change?:
- Silent: Discreet changes shown. More apparent later.
- Visual: Instant changes shown.
--- GRID: Pull To Target Node
- Pulls battlers towards target node.
- Requires VisuMZ_2_BattleGridSystem!
Action-Selected Node?:
- Use Action-Selected Node Coordinates if possible?
- Requires "Empty" or "Any" for <Target: x Grid Node>
Unit:
- Which unit do you want to pull on?
Rank:
- Input the number representing the Rank of the Node you want to
pull to.
Flank:
- Input the number representing the Flank of the Node you want to
pull to.
Strength:
- Input the strength level of the pull.
Duration:
- Input the number representing the frames used to move.
--- GRID: Push From Target Node
- Pushes battlers away from target node.
- Requires VisuMZ_2_BattleGridSystem!
Action-Selected Node?:
- Use Action-Selected Node Coordinates if possible?
- Requires "Empty" or "Any" for <Target: x Grid Node>
Unit:
- Which unit do you want to push from?
Rank:
- Input the number representing the Rank of the Node you want to
push from.
Flank:
- Input the number representing the Flank of the Node you want to
push from.
Strength:
- Input the strength level of the push.
Duration:
- Input the number representing the frames used to move.
--- GRID: Remove All Passive States from Node
- Removes all Passive State effects at target node.
- Requires VisuMZ_2_BattleGridSystem!
Action-Selected Node?:
- Use Action-Selected Node Coordinates if possible?
- Requires "Empty" or "Any" for <Target: x Grid Node>
- If the no action is in effect or the action doesn't use that target
structure, use the node coordinates below:
Unit:
- Which unit do you want to clear the Node for?
Rank:
- Input the number representing the Rank of the Node you want to clear
Passive States from.
Flank:
- Input the number representing the Flank of the Node you want to clear
Passive States from.
--- GRID: Remove Passive State(s) from Node
- Remove Passive State(s) at target node.
- Requires VisuMZ_2_BattleGridSystem!
State ID(s):
- Select which State ID(s) to remove as a Passive State.
Action-Selected Node?:
- Use Action-Selected Node Coordinates if possible?
- Requires "Empty" or "Any" for <Target: x Grid Node>
- If the no action is in effect or the action doesn't use that target
structure, use the node coordinates below:
Unit:
- Which unit do you want to remove the Passive State Node effect for?
Rank:
- Input the number representing the Rank of the Node you want to remove
a Passive State(s) from.
Flank:
- Input the number representing the Flank of the Node you want to remove
a Passive State(s) from.
--- GRID: Remove Trigger from Node
- Removes Trigger at target node.
- Requires VisuMZ_2_BattleGridSystem!
Action-Selected Node?:
- Use Action-Selected Node Coordinates if possible?
- Requires "Empty" or "Any" for <Target: x Grid Node>
- If the no action is in effect or the action doesn't use that target
structure, use the node coordinates below:
Unit:
- Which unit do you want to clear Triggers for?
Rank:
- Input the number representing the Rank of the Node you want to clear
Triggers from.
Flank:
- Input the number representing the Flank of the Node you want to clear
Triggers from.
---
Action Sequences - Horror EffectsThese Action Sequences are Horror Effects-related. Requires VisuMZ_2_HorrorEffects! --- HORROR: Clear All Filters - Clear all Horror Effects filters on the target battler(s). Targets: - Select unit(s) to remove Horror Effects for. --- HORROR: Glitch Create - Creates the glitch effect on the target battler(s). Targets: - Select unit(s) to create the Horror Effect for. Glitch Slices: - Glitch slices to be used with the target. Glitch Offset: - Default offset value. Glitch Animated?: - Animate the glitch effect? Glitch Frequency: - If animated, how frequent to make the glitch effect? - Lower = often Higher = rarer Glitch Strength: - If animated, how strong is the glitch effect? - Lower = weaker Higher = stronger --- HORROR: Glitch Remove - Removes the glitch effect on the target battler(s). Targets: - Select unit(s) to remove the Horror Effect for. --- HORROR: Noise Create - Creates the noise effect on the target battler(s). Targets: - Select unit(s) to create the Horror Effect for. Noise Rate: - Noise rate to be used with the target. Noise Animated: - Animate the noise for the target? --- HORROR: Noise Remove - Removes the noise effect on the target battler(s). Targets: - Select unit(s) to remove the Horror Effect for. --- HORROR: TV Create - Creates the TV effect on the target battler(s). Targets: - Select unit(s) to create the Horror Effect for. TV Line Thickness: - Default TV line thickness - Lower = thinner Higher = thicker TV Corner Size: - Default TV line corner size - Lower = smaller Higher = bigger TV Animated: - Animate the TV? TV Speed: - Speed used to animate the TV if animated - Lower = slower Higher = faster --- HORROR: TV Remove - Removes the TV effect on the target battler(s). Targets: - Select unit(s) to remove the Horror Effect for. ---
--- Action Sequences - ImpactThese Action Sequences are related to creating impact. Requires VisuMZ_3_ActSeqImpact! --- IMPACT: Bizarro Inversion - Swaps blue/red colors on the battlefield. - Requires VisuMZ_3_ActSeqImpact! Bizarro?: - Enable Bizarro Inversion effect? --- IMPACT: Color Break - Breaks the colors on the screen before reassembling. - Requires VisuMZ_3_ActSeqImpact! Intensity: - What is the intensity of the color break effect? Duration: - What is the duration of the color break effect? Easing Type: - Select which easing type you wish to apply. --- IMPACT: Desaturation - Desaturates all colors on the battlefield. - Requires VisuMZ_3_ActSeqImpact! - Created by Manu Gaming! Desaturate?: - Enable Desaturation effect? --- IMPACT: Motion Blur Screen - Creates a motion blur on the whole screen. - Requires VisuMZ_3_ActSeqImpact! Angle: - Determine what angle to make the motion blur at. Intensity Rate: - This determines intensity rate of the motion blur. - Use a number between 0 and 1. Duration: - How many frames should the motion blur last? - What do you want to be its duration? Easing Type: - Select which easing type you wish to apply. --- IMPACT: Motion Blur Target(s) - Creates a motion blur on selected target(s). - Requires VisuMZ_3_ActSeqImpact! Targets: - Select unit(s) to create motion blur effects for. Angle: - Determine what angle to make the motion blur at. Intensity Rate: - This determines intensity rate of the motion blur. - Use a number between 0 and 1. Duration: - How many frames should the motion blur last? - What do you want to be its duration? Easing Type: - Select which easing type you wish to apply. --- IMPACT: Motion Trail Create - Creates a motion trail effect for the target(s). - Requires VisuMZ_3_ActSeqImpact! Targets: - Select unit(s) to create motion trail effects for. Delay: - How many frames to delay by when creating a motion trail? - The higher the delay, the less motion trails there are. Duration: - How many frames should the motion trail last? - What do you want to be its duration? Hue: - What do you want to be the hue for the motion trail? Starting Opacity: - What starting opacity value do you want for the motion trail? - Opacity values decrease over time. Tone: - What tone do you want for the motion trail? - Format: [Red, Green, Blue, Gray] --- IMPACT: Motion Trail Remove - Removes the motion trail effect from the target(s). - Requires VisuMZ_3_ActSeqImpact! Targets: - Select unit(s) to clear motion trail effects for. --- IMPACT: Negative Inversion - Inverts all the colors on the battlefield. - Requires VisuMZ_3_ActSeqImpact! - Created by Manu Gaming! Negative?: - Enable Negative Inversion effect? --- IMPACT: Oversaturation - Oversaturates colors on the battlefield. - Requires VisuMZ_3_ActSeqImpact! Oversaturate?: - Enable Oversaturation effect? --- IMPACT: Shockwave at Point - Creates a shockwave at the designated coordinates. - Requires VisuMZ_3_ActSeqImpact! Point: X: Point: Y: - What x/y coordinate do you want to create a shockwave at? - You can use JavaScript code. Amplitude: - What is the aplitude of the shockwave effect? Wavelength: - What is the wavelength of the shockwave effect? Duration: - What is the duration of the shockwave? --- IMPACT: Shockwave from Each Target(s)
- Creates a shockwave at each of the target(s) location(s).
- Requires VisuMZ_3_ActSeqImpact!
Targets:
- Select unit(s) to start a shockwave from.
Target Location:
- Select which part target group to start a shockwave from.
Offset X:
Offset Y:
- How much to offset the shockwave X/Y point by.
Amplitude:
- What is the aplitude of the shockwave effect?
Wavelength:
- What is the wavelength of the shockwave effect?
Duration:
- What is the duration of the shockwave?
--- IMPACT: Shockwave from Target(s) Center
- Creates a shockwave from the center of the target(s).
- Requires VisuMZ_3_ActSeqImpact!
Targets:
- Select unit(s) to start a shockwave from.
Target Location:
- Select which part target group to start a shockwave from.
Offset X:
Offset Y:
- How much to offset the shockwave X/Y point by.
Amplitude:
- What is the aplitude of the shockwave effect?
Wavelength:
- What is the wavelength of the shockwave effect?
Duration:
- What is the duration of the shockwave?
--- IMPACT: Time Scale - Adjust time to go faster or slower! - Requires VisuMZ_3_ActSeqImpact! - Created by Manu Gaming! Scale: - Adjusts how fast/slow time goes. - 1.00 is normal. Lower is slower. Higher is faster. --- IMPACT: Time Stop - Stops time for a set amount of milliseconds. - Requires VisuMZ_3_ActSeqImpact! - Created by Manu Gaming! Milliseconds: - How many milliseconds should time stop for? - 1000 milliseconds = 1 second. --- IMPACT: Zoom Blur at Point - Creates a zoom blur at the designated coordinates. - Requires VisuMZ_3_ActSeqImpact! Point: X: Point: Y: - What x/y coordinate do you want to focus the zoom at? - You can use JavaScript code. Zoom Strength: - What is the strength of the zoom effect? - Use a number between 0 and 1. Visible Radius: - How much of a radius should be visible from the center? Duration: - What is the duration of the zoom blur? Easing Type: - Select which easing type you wish to apply. --- IMPACT: Zoom Blur at Target(s) Center
- Creates a zoom blur at the center of targets.
- Requires VisuMZ_3_ActSeqImpact!
Targets:
- Select unit(s) to start a zoom blur from.
Target Location:
- Select which part target group to start a zoom blur from.
Offset X:
Offset Y:
- How much to offset the zoom blur X/Y point by.
Zoom Strength:
- What is the strength of the zoom effect?
- Use a number between 0 and 1.
Visible Radius:
- How much of a radius should be visible from the center?
Duration:
- What is the duration of the zoom blur?
Easing Type:
- Select which easing type you wish to apply.
--- Action Sequences - InjectThese Action Sequences are related to injecting sprite animations. Requires VisuMZ_3_ActSeqImpact! --- INJECT: Animation Begin
- Injects and plays a whole spritesheet animation.
- The spritesheet animation will play over the battler until it is finished.
- The battler's original sprite will be invisible until finished.
- Requires VisuMZ_3_ActSeqImpact!
Targets:
- Select unit(s) to inject the animation on.
Filename:
- Select the animation spritesheet file.
- Located in the /img/sv_actors/ folder.
Horizontal Cells:
- How many horizontal cells (or columns) are there?
Vertical Cells:
- How many vertical cells (or rows) are there?
Frame Delay:
- How many frames are played inbetween cells?
Smooth Bitmap?:
- Smooth the spritesheet graphic?
Offset:
Offset X:
- Offsets the X position of the injected animation.
- Negative: left. Positive: right.
Offset Y:
- Offsets the Y position of the injected animation.
- Negative: up. Positive: down.
--- INJECT: Animation End - Stops and ends any injected animations on target(s). - Any inject animation will be prematurely terminated. - Requires VisuMZ_3_ActSeqImpact! Targets: - Select unit(s) to stop injected animation(s). --- INJECT: Animation Pause/Resume - Pauses/resumes any injected animations on target(s). - Requires VisuMZ_3_ActSeqImpact! Targets: - Select unit(s) to pause/resume injected animation(s). Pause?: - Pause the injected animation? --- INJECT: Wait For Injected Animation - Waits for injected animations to complete before performing next command. - Requires VisuMZ_3_ActSeqImpact! --- Action Sequences - MechanicsThese Action Sequences are related to various mechanics related to the battle system. --- MECH: Action Effect - Causes the unit(s) to take damage/healing from action and incurs any changes made such as buffs and states. Targets: - Select unit(s) to receive the current action's effects. --- MECH: Active Chain Input Disable - Disables input for Active Chain Skills at this time. - Requires VisuMZ_3_ActiveChainSkills! --- MECH: Add Buff/Debuff - Adds buff(s)/debuff(s) to unit(s). - Determine which parameters are affected and their durations. Targets: - Select unit(s) to receive the buff(s) and/or debuff(s). Buff Parameters: - Select which parameter(s) to buff. - Insert a parameter multiple times to raise its stacks. Debuff Parameters: - Select which parameter(s) to debuff. - Insert a parameter multiple times to raise its stacks. Turns: - Number of turns to set the parameter(s) buffs to. - You may use JavaScript code. --- MECH: Add State - Adds state(s) to unit(s). Targets: - Select unit(s) to receive the buff(s). States: - Select which state ID(s) to add to unit(s). - Insert multiple state ID's to add multiple at once. --- MECH: Analyze Weakness - Reveal elemental weakness(es) from target(s). - Requires VisuMZ_3_WeaknessDisplay! Targets: - Select unit(s) to reveal elemental weaknesses for. Reveal: - How many elemental weaknesses do you wish to reveal? - You may use JavaScript code. --- MECH: Armor Penetration
- Adds an extra layer of defensive penetration/reduction.
- You may use JavaScript code for any of these.
Armor/Magic Penetration:
Rate:
- Penetrates an extra multiplier of armor by this value.
Flat:
- Penetrates a flat amount of armor by this value.
Armor/Magic Reduction:
Rate:
- Reduces an extra multiplier of armor by this value.
Flat:
- Reduces a flat amount of armor by this value.
--- MECH: ATB Gauge
- Alters the ATB/TPB Gauges.
- Requires VisuMZ_2_BattleSystemATB!
Targets:
- Select unit(s) to alter the ATB/TPB Gauges for.
Charging:
Charge Rate:
- Changes made to the ATB Gauge if it is currently charging.
Casting:
Cast Rate:
- Changes made to the ATB Gauge if it is currently casting.
Interrupt?:
- Interrupt the ATB Gauge if it is currently casting?
--- MECH: Boost Points Change - Changes Boost Points for target(s). - Requires VisuMZ_3_BoostAction! Targets: - Select unit(s) to alter the Boost Points for. Alter Boost Points By: - Alters the unit(s) Boost Points. - Positive for gaining points. Negative for losing points. --- MECH: Boost Store Data - Stores the number of Boosts used this action inside a variable. - Requires VisuMZ_3_BoostAction! Variable ID: - Which variable do you want to store the data inside? --- MECH: Break Shield Change - Changes Break Shields for target(s) if not Break Stunned. - Requires VisuMZ_4_BreakShields! Targets: - Select unit(s) to alter the Break Shields for. Alter Break Shields By: - Alters the unit(s) Break Shields. - Positive for gaining shields. Negative for losing shields. --- MECH: Break Shield Reset - Resets Break Shields for target(s) if not Break Stunned. - Requires VisuMZ_4_BreakShields! Targets: - Select unit(s) to reset the Break Shields for. --- MECH: BTB Brave Points - Alters the target(s) Brave Points to an exact value. - Requires VisuMZ_2_BattleSystemBTB! Targets: - Select unit(s) to alter the ATB/TPB Gauges for. Alter Brave Points By: - Alters the target(s) Brave Points. - Positive for gaining BP. - Negative for losing BP. --- MECH: Collapse - Causes the unit(s) to perform its collapse animation if the unit(s) has died. Targets: - Select unit(s) to process a death collapse. Force Death: - Force death even if the unit has not reached 0 HP? - This will remove immortality. Wait For Effect?: - Wait for the collapse effect to complete before performing next command? --- MECH: CTB Order - Alters the CTB Turn Order. - Requires VisuMZ_2_BattleSystemCTB! Targets: - Select unit(s) to alter the CTB Turn Order for. Change Order By: - Changes turn order for target(s) by this amount. - Positive increases wait. Negative decreases wait. --- MECH: CTB Speed - Alters the CTB Speed. - Requires VisuMZ_2_BattleSystemCTB! Targets: - Select unit(s) to alter the CTB Speed for. Charge Rate: - Changes made to the CTB Speed if it is currently charging. Cast Rate: - Changes made to the CTB Speed if it is currently casting. --- MECH: Custom Damage Formula - Changes the current action's damage formula to custom. - This will assume the MANUAL damage style. Formula: - Changes the current action's damage formula to custom. - Use 'default' to revert the damage formula. --- MECH: Damage Popup - Causes the unit(s) to display the current state of damage received or healed. Targets: - Select unit(s) to prompt a damage popup. --- MECH: Emulate Attack Effect - Emulate an "Action Effect" but using a the user's attack skill instead of the current action. - Essentially lets you perform the mechanics of another action without having to use another action or needing to pay that action's costs. User(s): - Select unit(s) to perform the action's effects. Targets: - Select unit(s) to receive the current action's effects. --- MECH: Emulate Guard Effect - Emulate an "Action Effect" but using a the user's guard skill instead of the current action. - Essentially lets you perform the mechanics of another action without having to use another action or needing to pay that action's costs. User(s): - Select unit(s) to perform the action's effects. Targets: - Select unit(s) to receive the current action's effects. --- MECH: Emulate Item Effect - Emulate an "Action Effect" but using a specific item instead of the current action. - Essentially lets you perform the mechanics of another action without having to use another action or needing to pay that action's costs. Item ID: - Which item ID will be emulated? User(s): - Select unit(s) to perform the action's effects. Targets: - Select unit(s) to receive the current action's effects. --- MECH: Emulate Skill Cost - Pick a skill for target(s) to emulate paying the cost of. - Lets you cause characters to perform paying the costs of a specific skill without needing to actually use them. - This will include Skill Cooldowns and Limited Skill Uses. Skill ID: - Which skill ID will have its cost paid for? - Use 0 for current action's skill. User(s): - Select unit(s) to perform the action's effects. --- MECH: Emulate Skill Effect - Emulate an "Action Effect" but using a specific skill instead of the current action. - Essentially lets you perform the mechanics of another action without having to use another action or needing to pay that action's costs. Skill ID: - Which skill ID will be emulated? User(s): - Select unit(s) to perform the action's effects. Targets: - Select unit(s) to receive the current action's effects. --- MECH: Enemy Escape - Causes the enemy unit(s) to escape. Targets: - Select unit(s) to escape. --- MECH: Dead Label Jump
- If the active battler is dead, jump to a specific label in the
common event.
Jump To Label:
- If the active battler is dead, jump to this specific label in the
common event.
--- MECH: ETB Energy Count - Alters the subject team's available Energy Count. - Requires VisuMZ_2_BattleSystemETB! Energy Count: - Alters the subject team's available Energy Count. - Positive for gaining energy. Negative for losing energy. --- MECH: FTB Action Count - Alters the subject team's available Action Count. - Requires VisuMZ_2_BattleSystemFTB! Action Count: - Alters the subject team's available Action Count. - Positive for gaining actions. Negative for losing actions. --- MECH: HP, MP, TP
- Alters the HP, MP, and TP values for unit(s).
- Positive values for healing. Negative values for damage.
Targets:
- Select unit(s) to receive the current action's effects.
HP, MP, TP:
Rate:
- Changes made to the parameter based on rate.
- Positive values for healing. Negative values for damage.
Flat:
- Flat changes made to the parameter.
- Positive values for healing. Negative values for damage.
Damage Popup?:
- Display a damage popup after?
--- MECH: Immortal
- Changes the immortal flag of targets. If immortal flag is removed and a
unit would die, collapse that unit.
Targets:
- Alter the immortal flag of these groups. If immortal flag is removed and
a unit would die, collapse that unit.
Immortal:
- Turn immortal flag for unit(s) on/off?
--- MECH: Multipliers
- Changes the multipliers for the current action.
- You may use JavaScript code for any of these.
Critical Hit%:
Rate:
- Affects chance to land a critical hit by this multiplier.
Flat:
- Affects chance to land a critical hit by this flat bonus.
Critical Damage
Rate:
- Affects critical damage by this multiplier.
Flat:
- Affects critical damage by this flat bonus.
Damage/Healing
Rate:
- Sets the damage/healing multiplier for current action.
Flat:
- Sets the damage/healing bonus for current action.
Hit Rate
Rate:
- Affects chance to connect attack by this multiplier.
Flat:
- Affects chance to connect attack by this flat bonus.
--- MECH: Once Parallel - Plays a Common Event parallel to the battle event once without repeating itself when done. Common Event ID: - The ID of the parallel Common Event to play. - Does NOT repeat itself when finished. - When exiting battle scene, all Once Parallels are cleared. - Once Parallels are not retained upon reentering the scene. - Once Parallels are not stored in memory and cannot be saved. --- MECH: OTB Order - Alters the OTB Turn Order. Best used with single targets. - Requires VisuMZ_2_BattleSystemOTB! Targets: - Select unit(s) to alter the OTB Turn Order for. Current Turn By: - Changes turn order for target(s) by this amount. - Positive increases wait. Negative decreases wait. Next Turn By: - Changes turn order for target(s) by this amount. - Positive increases wait. Negative decreases wait. Follow Turn By: - Changes turn order for target(s) by this amount. - Positive increases wait. Negative decreases wait. --- MECH: PTB Alter Cost - Alters the action's cost settings. - Requires VisuMZ_2_BattleSystemPTB! Override?: - Overrides any 'permanent' settings for Changeability? Alter Changeability: - Allow the cost type and value to be changeable? Alter Cost Type: - Change the cost type to this scenario. - Use 'Unchanged' for no changes. Alter Cost Value: - What is the default action cost for this scenario? --- MECH: PTB Conversion - Converts full actions into half actions. - Requires VisuMZ_2_BattleSystemPTB! Conversion Count: - Converts full actions into half actions. - If not enough, consume half actions. --- MECH: PTB Full/Half Action(s) - Alters the subject team's available Full/Half Actions. - Requires VisuMZ_2_BattleSystemPTB! Full Actions: - Alters the subject team's available Full Actions. - Positive for gaining. Negative for losing. Half Actions: - Alters the subject team's available Half Actions. - Positive for gaining. Negative for losing. --- MECH: Remove Buff/Debuff - Removes buff(s)/debuff(s) from unit(s). - Determine which parameters are removed. Targets: - Select unit(s) to have the buff(s) and/or debuff(s) removed. Buff Parameters: - Select which buffed parameter(s) to remove. Debuff Parameters: - Select which debuffed parameter(s) to remove. --- MECH: Remove State - Remove state(s) from unit(s). Targets: - Select unit(s) to have states removed from. States: - Select which state ID(s) to remove from unit(s). - Insert multiple state ID's to remove multiple at once. --- MECH: State Turns Change By - Changes target(s) state turns by an amount. - Requires VisuMZ_1_SkillsStatesCore! Targets: - Select unit(s) to affect state turns for. State ID: - What is the ID of the state you wish to change turns for? - Only works on states that can have turns. Change Turns By: - How many turns should the state be changed to? - You may use JavaScript code. Auto-Add State?: - Automatically adds state if actor(s) does not have it applied? --- MECH: State Turns Change To - Changes target(s) state turns to a specific value. - Requires VisuMZ_1_SkillsStatesCore! Targets: - Select unit(s) to affect state turns for. State ID: - What is the ID of the state you wish to change turns for? - Only works on states that can have turns. Change Turns To: - How many turns should the state be changed to? - You may use JavaScript code. Auto-Add State?: - Automatically adds state if target(s) does not have it applied? --- MECH: STB Exploit Effect
- Utilize the STB Exploitation mechanics!
- Requires VisuMZ_2_BattleSystemSTB!
Target(s) Exploited?:
- Exploit the below targets?
Targets:
- Select unit(s) to become exploited.
Force Exploitation:
- Force the exploited status?
User Exploiter?:
- Allow the user to become the exploiter?
Force Exploitation:
- Force the exploiter status?
--- MECH: STB Extra Action - Adds an extra action for the currently active battler. - Requires VisuMZ_2_BattleSystemSTB! Extra Actions: - How many extra actions should the active battler gain? - You may use JavaScript code. --- MECH: STB Remove Excess Actions - Removes excess actions from the active battler. - Requires VisuMZ_2_BattleSystemSTB! Remove Actions: - How many actions to remove from the active battler? - You may use JavaScript code. --- MECH: Swap Weapon - Causes the unit(s) to swap their weapon for another. - Requires VisuMZ_2_WeaponSwapSystem! Targets: - Select unit(s) to swap weapons for. Weapon Type ID: - Which weapon type to swap to? - This is NOT the weapon's ID. - It's the weapon TYPE. --- MECH: Text Popup
- Causes the unit(s) to display a text popup.
Targets:
- Select unit(s) to prompt a text popup.
Text:
- What text do you wish to display?
Text Color:
- Use #rrggbb for custom colors or regular numbers for text colors from
the Window Skin.
Flash Color:
- Adjust the popup's flash color.
- Format: [red, green, blue, alpha]
Flash Duration:
- What is the frame duration of the flash effect?
--- MECH: Variable Popup
- Causes the unit(s) to display a popup using the data stored inside
a variable.
Targets:
- Select unit(s) to prompt a text popup.
Variable:
- Get data from which variable to display as a popup?
Digit Grouping:
- Use digit grouping to separate numbers?
- Requires VisuMZ_0_CoreEngine!
Text Color:
- Use #rrggbb for custom colors or regular numbers for text colors from
the Window Skin.
Flash Color:
- Adjust the popup's flash color.
- Format: [red, green, blue, alpha]
Flash Duration:
- What is the frame duration of the flash effect?
--- MECH: Wait For Effect - Waits for the effects to complete before performing next command. --- Action Sequences - MotionThese Action Sequences allow you the ability to control the motions of sideview sprites. --- MOTION: Clear Freeze Frame - Clears any freeze frames from the unit(s). Targets: - Select which unit(s) to clear freeze frames for. --- MOTION: Freeze Motion Frame
- Forces a freeze frame instantly at the selected motion.
- Automatically clears with a new motion.
Targets:
- Select which unit(s) to freeze motions for.
Motion Type:
- Freeze this motion for the unit(s).
Frame Index:
- Which frame do you want to freeze the motion on?
- Frame index values start at 0.
Show Weapon?:
- If using 'attack', 'thrust', 'swing', or 'missile', display the
weapon sprite?
--- MOTION: Motion Type
- Causes the unit(s) to play the selected motion.
Targets:
- Select which unit(s) to perform a motion.
Motion Type:
- Play this motion for the unit(s).
Show Weapon?:
- If using 'attack', 'thrust', 'swing', or 'missile', display the
weapon sprite?
--- MOTION: Perform Action - Causes the unit(s) to play the proper motion based on the current action. Targets: - Select which unit(s) to perform a motion. --- MOTION: Refresh Motion - Cancels any set motions unit(s) has to do and use their most natural motion at the moment. Targets: - Select which unit(s) to refresh their motion state. --- MOTION: Wait By Motion Frame
- Creates a wait equal to the number of motion frames passing.
- Time is based on Plugin Parameters => Actors => Motion Speed.
Motion Frames to Wait?:
- Each "frame" is equal to the value found in
Plugin Parameters => Actors => Motion Speed
--- Action Sequences - MovementThese Action Sequences allow you the ability to control the sprites of actors and enemies in battle. --- MOVE: Battle Step - Causes the unit(s) to move forward past their home position to prepare for action. Targets: - Select which unit(s) to move. Wait For Movement?: - Wait for movement to complete before performing next command? --- MOVE: Change Home By Distance
- Change unit(s)'s home position by a distance from their current home
position(s).
- Sideview-only!
Targets:
- Select which unit(s) to change home position(s) for.
Distance Adjustment:
- Makes adjustments to distance values to determine which direction to
change by.
- Normal - No adjustments made
- Horizontal - Actors adjust left, Enemies adjust right
- Vertical - Actors adjust Up, Enemies adjust down
- Both - Applies both Horizontal and Vertical
Distance: X:
- Horizontal distance to move.
- You may use JavaScript code.
Distance: Y:
- Vertical distance to move.
- You may use JavaScript code.
Duration:
- Duration in frames for total change amount.
Face Destination?:
- Turn and face the destination?
Movement Easing:
- Select which easing type you wish to apply.
- Requires VisuMZ_0_CoreEngine.
Movement Motion:
- Play this motion for the unit(s).
Wait For Movement?:
- Wait for movement to complete before performing next command?
--- MOVE: Change Home To JS Coordinates
- Change home position(s) to specified JS Coordinates.
- Sideview-only! Uses JavaScript!
Targets:
- Select which unit(s) to change home position(s) for.
JS: Coordinates:
- Code used to determine the coordinates for the target(s)'s new home
position.
Offset Adjustment:
- Makes adjustments to offset values to determine which direction to
adjust the destination by.
Offset: X:
- Horizontal offset to move.
- You may use JavaScript code.
Offset: Y:
- Vertical offset to move.
- You may use JavaScript code.
Duration:
- Duration in frames for total change amount.
Face Destination?:
- Turn and face the destination?
Movement Easing:
- Select which easing type you wish to apply.
- Requires VisuMZ_0_CoreEngine.
Movement Motion:
- Play this motion for the unit(s).
Wait For Movement?:
- Wait for movement to complete before performing next command?
--- MOVE: Change Home To Point
- Change home position(s) to a target point on the screen.
- Sideview-only! Points based off Graphics.boxWidth/Height.
Targets:
- Select which unit(s) to change home position(s) for.
Destination Point:
- Select which point to face.
- Center
- Point X, Y
- Replace 'x' and 'y' with coordinates
Offset Adjustment:
- Makes adjustments to offset values to determine which direction to
adjust the destination by.
Offset: X:
- Horizontal offset to move.
- You may use JavaScript code.
Offset: Y:
- Vertical offset to move.
- You may use JavaScript code.
Duration:
- Duration in frames for total change amount.
Face Destination?:
- Turn and face the destination?
Movement Easing:
- Select which easing type you wish to apply.
- Requires VisuMZ_0_CoreEngine.
Movement Motion:
- Play this motion for the unit(s).
Wait For Movement?:
- Wait for movement to complete before performing next command?
--- MOVE: Change Home To Target(s)
- Moves unit(s) to another unit(s) on the battle field.
- Sideview-only!
Targets (Moving):
- Select which unit(s) to change home position(s) for.
Targets (Destination):
- Select which unit(s) to change home position to.
Target Location:
- Select which part target group to change home position to.
- front head
- front center
- front base
- middle head
- middle center
- middle base
- back head
- back center
- back base
Melee Distance:
- The melee distance away from the target location in addition to the
battler's width.
Offset Adjustment:
- Makes adjustments to offset values to determine which direction to
adjust the destination by.
Offset: X:
- Horizontal offset to move.
- You may use JavaScript code.
Offset: Y:
- Vertical offset to move.
- You may use JavaScript code.
Duration:
- Duration in frames for total change amount.
Face Destination?:
- Turn and face the destination?
Movement Easing:
- Select which easing type you wish to apply.
- Requires VisuMZ_0_CoreEngine.
Movement Motion:
- Play this motion for the unit(s).
Wait For Movement?:
- Wait for movement to complete before performing next command?
--- MOVE: Face Direction - Causes the unit(s) to face forward or backward. - Sideview-only! Targets: - Select which unit(s) to change direction. Direction: - Select which direction to face. --- MOVE: Face JS Coordinates
- Causes the unit(s) to face specified JS Coordinates.
- Sideview-only! Uses JavaScript!
Targets:
- Select which unit(s) to change direction.
JS: Coordinates:
- Code used to determine the coordinates for the target(s) to face
towards.
Face Away From?:
- Face away from the point instead?
--- MOVE: Face Point
- Causes the unit(s) to face a point on the screen.
- Sideview-only!
Targets:
- Select which unit(s) to change direction.
Point:
- Select which point to face.
- Home
- Center
- Point X, Y
- Replace 'x' and 'y' with coordinates
Face Away From?:
- Face away from the point instead?
--- MOVE: Face Target(s) - Causes the unit(s) to face other targets on the screen. - Sideview-only! Targets (facing): - Select which unit(s) to change direction. Targets (destination): - Select which unit(s) for the turning unit(s) to face. Face Away From?: - Face away from the unit(s) instead? --- MOVE: Float - Causes the unit(s) to float above the ground. - Sideview-only! Targets: - Select which unit(s) to make float. Desired Height: - Vertical distance to float upward. - You may use JavaScript code. Duration: - Duration in frames for total float amount. Float Easing: - Select which easing type you wish to apply. - Requires VisuMZ_0_CoreEngine. Wait For Float?: - Wait for floating to complete before performing next command? --- MOVE: Home Reset - Causes the unit(s) to move back to their home position(s) and face back to their original direction(s). Targets: - Select which unit(s) to move. Wait For Movement?: - Wait for movement to complete before performing next command? --- MOVE: Jump - Causes the unit(s) to jump into the air. - Sideview-only! Targets: - Select which unit(s) to make jump. Desired Height: - Max jump height to go above the ground - You may use JavaScript code. Duration: - Duration in frames for total jump amount. Wait For Jump?: - Wait for jumping to complete before performing next command? --- MOVE: Move Distance
- Moves unit(s) by a distance from their current position(s).
- Sideview-only!
Targets:
- Select which unit(s) to move.
Distance Adjustment:
- Makes adjustments to distance values to determine which direction to
move unit(s).
- Normal - No adjustments made
- Horizontal - Actors adjust left, Enemies adjust right
- Vertical - Actors adjust Up, Enemies adjust down
- Both - Applies both Horizontal and Vertical
Distance: X:
- Horizontal distance to move.
- You may use JavaScript code.
Distance: Y:
- Vertical distance to move.
- You may use JavaScript code.
Duration:
- Duration in frames for total movement amount.
Face Destination?:
- Turn and face the destination?
Movement Easing:
- Select which easing type you wish to apply.
- Requires VisuMZ_0_CoreEngine.
Movement Motion:
- Play this motion for the unit(s).
Wait For Movement?:
- Wait for movement to complete before performing next command?
--- MOVE: Move To JS Coordinates
- Moves unit(s) to specified JS Coordinates.
- Sideview-only! Uses JavaScript!
Targets:
- Select which unit(s) to move.
JS: Coordinates:
- Code used to determine the coordinates for the target(s) to move to.
Offset Adjustment:
- Makes adjustments to offset values to determine which direction to
adjust the destination by.
Offset: X:
- Horizontal offset to move.
- You may use JavaScript code.
Offset: Y:
- Vertical offset to move.
- You may use JavaScript code.
Duration:
- Duration in frames for total movement amount.
Face Destination?:
- Turn and face the destination?
Movement Easing:
- Select which easing type you wish to apply.
- Requires VisuMZ_0_CoreEngine.
Movement Motion:
- Play this motion for the unit(s).
Wait For Movement?:
- Wait for movement to complete before performing next command?
--- MOVE: Move To Point
- Moves unit(s) to a designated point on the screen.
- Sideview-only! Points based off Graphics.boxWidth/Height.
Targets:
- Select which unit(s) to move.
Destination Point:
- Select which point to face.
- Home
- Center
- Point X, Y
- Replace 'x' and 'y' with coordinates
Offset Adjustment:
- Makes adjustments to offset values to determine which direction to
adjust the destination by.
Offset: X:
- Horizontal offset to move.
- You may use JavaScript code.
Offset: Y:
- Vertical offset to move.
- You may use JavaScript code.
Duration:
- Duration in frames for total movement amount.
Face Destination?:
- Turn and face the destination?
Movement Easing:
- Select which easing type you wish to apply.
- Requires VisuMZ_0_CoreEngine.
Movement Motion:
- Play this motion for the unit(s).
Wait For Movement?:
- Wait for movement to complete before performing next command?
--- MOVE: Move To Target(s)
- Moves unit(s) to another unit(s) on the battle field.
- Sideview-only!
Targets (Moving):
- Select which unit(s) to move.
Targets (Destination):
- Select which unit(s) to move to.
Target Location:
- Select which part target group to move to.
- front head
- front center
- front base
- middle head
- middle center
- middle base
- back head
- back center
- back base
Melee Distance:
- The melee distance away from the target location in addition to the
battler's width.
Offset Adjustment:
- Makes adjustments to offset values to determine which direction to
adjust the destination by.
Offset: X:
- Horizontal offset to move.
- You may use JavaScript code.
Offset: Y:
- Vertical offset to move.
- You may use JavaScript code.
Duration:
- Duration in frames for total movement amount.
Face Destination?:
- Turn and face the destination?
Movement Easing:
- Select which easing type you wish to apply.
- Requires VisuMZ_0_CoreEngine.
Movement Motion:
- Play this motion for the unit(s).
Wait For Movement?:
- Wait for movement to complete before performing next command?
--- MOVE: Opacity - Causes the unit(s) to change opacity. - Sideview-only! Targets: - Select which unit(s) to change opacity. Desired Opacity: - Change to this opacity value. - You may use JavaScript code. Duration: - Duration in frames for opacity change. Opacity Easing: - Select which easing type you wish to apply. - Requires VisuMZ_0_CoreEngine. Wait For Opacity?: - Wait for opacity changes to complete before performing next command? --- MOVE: Scale/Grow/Shrink - Causes the unit(s) to scale, grow, or shrink?. - Sideview-only! Targets: - Select which unit(s) to change the scale of. Scale X: Scale Y: - What target scale value do you want? - 1.0 is normal size. Duration: - Duration in frames to scale for. Scale Easing: - Select which easing type you wish to apply. - Requires VisuMZ_0_CoreEngine. Wait For Scale?: - Wait for scaling to complete before performing next command? --- MOVE: Skew/Distort - Causes the unit(s) to skew. - Sideview-only! Targets: - Select which unit(s) to skew. Skew X: Skew Y: - What variance to skew? - Use small values for the best results. Duration: - Duration in frames to skew for. Skew Easing: - Select which easing type you wish to apply. - Requires VisuMZ_0_CoreEngine. Wait For Skew?: - Wait for skew to complete before performing next command? --- MOVE: Spin/Rotate - Causes the unit(s) to spin. - Sideview-only! Targets: - Select which unit(s) to spin. Angle: - How many degrees to spin? Duration: - Duration in frames to spin for. Spin Easing: - Select which easing type you wish to apply. - Requires VisuMZ_0_CoreEngine. Revert Angle on Finish: - Upon finishing the spin, revert the angle back to 0. Wait For Spin?: - Wait for spin to complete before performing next command? --- MOVE: Wait For Float - Waits for floating to complete before performing next command. --- MOVE: Wait For Jump - Waits for jumping to complete before performing next command. --- MOVE: Wait For Movement - Waits for movement to complete before performing next command. --- MOVE: Wait For Opacity - Waits for opacity changes to complete before performing next command. --- MOVE: Wait For Scale - Waits for scaling to complete before performing next command. --- MOVE: Wait For Skew - Waits for skewing to complete before performing next command. --- MOVE: Wait For Spin - Waits for spinning to complete before performing next command. ---
Action Sequences - ProjectilesCreate projectiles on the screen and fire them off at a target. Requires VisuMZ_3_ActSeqProjectiles! --- PROJECTILE: Animation
- Create an animation projectile and fire it at a target.
- Requires VisuMZ_3_ActSeqProjectiles!
Coordinates:
Start Location:
- Settings to determine where the projectile(s) start from.
Type:
- Select where the projectile should start from.
- Target - Start from battler target(s)
- Point - Start from a point on the screen
Target(s):
- Select which unit(s) to start the projectile from.
Centralize:
- Create one projectile at the center of the targets?
- Or create a projectile for each target?
Target Location:
- Select which part of the target to send the projectile from.
- front head
- front center
- front base
- middle head
- middle center
- middle base
- back head
- back center
- back base
Point X:
Point Y:
- Insert the X/Y coordinate to start the projectile at.
- You may use JavaScript code.
Offset X:
Offset Y:
- Insert how many pixels to offset the X/Y coordinate by.
- You may use JavaScript code.
Goal Location:
- Settings to determine where the projectile(s) start from.
Type:
- Select where the projectile should go to.
- Target - Goal is battler target(s)
- Point - Goal is a point on the screen
Target(s):
- Select which unit(s) for projectile to go to.
Centralize:
- Create one projectile at the center of the targets?
- Or create a projectile for each target?
Target Location:
- Select which part of the target to send the projectile to.
- front head
- front center
- front base
- middle head
- middle center
- middle base
- back head
- back center
- back base
Point X:
Point Y:
- Insert the X/Y coordinate to send the projectile to.
- You may use JavaScript code.
Offset X:
Offset Y:
- Insert how many pixels to offset the X/Y coordinate by.
- You may use JavaScript code.
Settings:
Animation ID:
- Determine which animation to use as a projectile.
Duration:
- Duration for the projectile(s) to travel.
Wait For Projectile?:
- Wait for projectile(s) to reach their destination before going onto
the next command?
Wait For Animation?:
- Wait for animation to finish before going to the next command?
Extra Settings:
- Add extra settings to the projectile?
Auto Angle?:
- Automatically angle the projectile to tilt the direction
it's moving?
Angle Offset:
- Alter the projectile's tilt by this many degrees.
Arc Peak:
- This is the height of the project's trajectory arc in pixels.
Easing:
- Select which easing type to apply to the projectile's trajectory.
Spin Speed:
- Determine how much angle the projectile spins per frame.
- Does not work well with "Auto Angle".
Effect Emulation:
Action Effect?:
- Emulate current Action Effect when projectile reaches target?
- Only works with start and goal targets.
Item Effect ID?:
- Emulate an Item Effect when projectile reaches target?
- Use 0 to not use.
- Only works with start and goal targets.
Skill Effect ID?:
- Emulate a Skill Effect when projectile reaches target?
- Use 0 to not use.
- Only works with start and goal targets.
Common Event ID:
- Plays a Once Parallel Common Event upon reaching target.
- Use 0 to not use.
- Works regardless of start/goal targets.
--- PROJECTILE: Icon
- Create an icon projectile and fire it at a target.
- Requires VisuMZ_3_ActSeqProjectiles!
Coordinates:
Start Location:
- Settings to determine where the projectile(s) start from.
Type:
- Select where the projectile should start from.
- Target - Start from battler target(s)
- Point - Start from a point on the screen
Target(s):
- Select which unit(s) to start the projectile from.
Centralize:
- Create one projectile at the center of the targets?
- Or create a projectile for each target?
Target Location:
- Select which part of the target to send the projectile from.
- front head
- front center
- front base
- middle head
- middle center
- middle base
- back head
- back center
- back base
Point X:
Point Y:
- Insert the X/Y coordinate to start the projectile at.
- You may use JavaScript code.
Offset X:
Offset Y:
- Insert how many pixels to offset the X/Y coordinate by.
- You may use JavaScript code.
Goal Location:
- Settings to determine where the projectile(s) start from.
Type:
- Select where the projectile should go to.
- Target - Goal is battler target(s)
- Point - Goal is a point on the screen
Target(s):
- Select which unit(s) for projectile to go to.
Centralize:
- Create one projectile at the center of the targets?
- Or create a projectile for each target?
Target Location:
- Select which part of the target to send the projectile to.
- front head
- front center
- front base
- middle head
- middle center
- middle base
- back head
- back center
- back base
Point X:
Point Y:
- Insert the X/Y coordinate to send the projectile to.
- You may use JavaScript code.
Offset X:
Offset Y:
- Insert how many pixels to offset the X/Y coordinate by.
- You may use JavaScript code.
Settings:
Icon:
- Determine which icon to use as a projectile.
- You may use JavaScript code.
Duration:
- Duration for the projectile(s) to travel.
Wait For Projectile?:
- Wait for projectile(s) to reach their destination before going onto
the next command?
Extra Settings:
- Add extra settings to the projectile?
Auto Angle?:
- Automatically angle the projectile to tilt the direction
it's moving?
Angle Offset:
- Alter the projectile's tilt by this many degrees.
Arc Peak:
- This is the height of the project's trajectory arc in pixels.
Blend Mode:
- What kind of blend mode do you wish to apply to the projectile?
- Normal
- Additive
- Multiply
- Screen
Easing:
- Select which easing type to apply to the projectile's trajectory.
Hue:
- Adjust the hue of the projectile.
- Insert a number between 0 and 360.
Scale:
- Adjust the size scaling of the projectile.
- Use decimals for exact control.
Spin Speed:
- Determine how much angle the projectile spins per frame.
- Does not work well with "Auto Angle".
Effect Emulation:
Action Effect?:
- Emulate current Action Effect when projectile reaches target?
- Only works with start and goal targets.
Item Effect ID?:
- Emulate an Item Effect when projectile reaches target?
- Use 0 to not use.
- Only works with start and goal targets.
Skill Effect ID?:
- Emulate a Skill Effect when projectile reaches target?
- Use 0 to not use.
- Only works with start and goal targets.
Common Event ID:
- Plays a Once Parallel Common Event upon reaching target.
- Use 0 to not use.
- Works regardless of start/goal targets.
--- PROJECTILE: Picture
- Create a picture projectile and fire it at a target.
- Requires VisuMZ_3_ActSeqProjectiles!
Coordinates:
Start Location:
- Settings to determine where the projectile(s) start from.
Type:
- Select where the projectile should start from.
- Target - Start from battler target(s)
- Point - Start from a point on the screen
Target(s):
- Select which unit(s) to start the projectile from.
Centralize:
- Create one projectile at the center of the targets?
- Or create a projectile for each target?
Target Location:
- Select which part of the target to send the projectile from.
- front head
- front center
- front base
- middle head
- middle center
- middle base
- back head
- back center
- back base
Point X:
Point Y:
- Insert the X/Y coordinate to start the projectile at.
- You may use JavaScript code.
Offset X:
Offset Y:
- Insert how many pixels to offset the X/Y coordinate by.
- You may use JavaScript code.
Goal Location:
- Settings to determine where the projectile(s) start from.
Type:
- Select where the projectile should go to.
- Target - Goal is battler target(s)
- Point - Goal is a point on the screen
Target(s):
- Select which unit(s) for projectile to go to.
Centralize:
- Create one projectile at the center of the targets?
- Or create a projectile for each target?
Target Location:
- Select which part of the target to send the projectile to.
- front head
- front center
- front base
- middle head
- middle center
- middle base
- back head
- back center
- back base
Point X:
Point Y:
- Insert the X/Y coordinate to send the projectile to.
- You may use JavaScript code.
Offset X:
Offset Y:
- Insert how many pixels to offset the X/Y coordinate by.
- You may use JavaScript code.
Settings:
Picture Filename:
- Determine which picture to use as a projectile.
Duration:
- Duration for the projectile(s) to travel.
Wait For Projectile?:
- Wait for projectile(s) to reach their destination before going onto
the next command?
Extra Settings:
- Add extra settings to the projectile?
Auto Angle?:
- Automatically angle the projectile to tilt the direction
it's moving?
Angle Offset:
- Alter the projectile's tilt by this many degrees.
Arc Peak:
- This is the height of the project's trajectory arc in pixels.
Blend Mode:
- What kind of blend mode do you wish to apply to the projectile?
- Normal
- Additive
- Multiply
- Screen
Easing:
- Select which easing type to apply to the projectile's trajectory.
Hue:
- Adjust the hue of the projectile.
- Insert a number between 0 and 360.
Scale:
- Adjust the size scaling of the projectile.
- Use decimals for exact control.
Spin Speed:
- Determine how much angle the projectile spins per frame.
- Does not work well with "Auto Angle".
Effect Emulation:
Action Effect?:
- Emulate current Action Effect when projectile reaches target?
- Only works with start and goal targets.
Item Effect ID?:
- Emulate an Item Effect when projectile reaches target?
- Use 0 to not use.
- Only works with start and goal targets.
Skill Effect ID?:
- Emulate a Skill Effect when projectile reaches target?
- Use 0 to not use.
- Only works with start and goal targets.
Common Event ID:
- Plays a Once Parallel Common Event upon reaching target.
- Use 0 to not use.
- Works regardless of start/goal targets.
--- Action Sequences - Skew (Camera)These action sequences allow you to have control over the camera skew. Requires VisuMZ_3_ActSeqCamera! --- SKEW: Change Skew - Changes the camera skew. - Requires VisuMZ_3_ActSeqCamera! Skew X: - Change the camera skew X to this value. Skew Y: - Change the camera skew Y to this value. Duration: - Duration in frames to change camera skew. Skew Easing: - Select which easing type you wish to apply. - Requires VisuMZ_0_CoreEngine. Wait For Skew?: - Wait for skew changes to complete before performing next command? --- SKEW: Reset Skew - Reset any skew settings. - Requires VisuMZ_3_ActSeqCamera! Duration: - Duration in frames to reset camera skew. Skew Easing: - Select which easing type you wish to apply. - Requires VisuMZ_0_CoreEngine. Wait For Skew?: - Wait for skew changes to complete before performing next command? --- SKEW: Wait For Skew - Waits for skew changes to complete before performing next command. - Requires VisuMZ_3_ActSeqCamera! --- Action Sequences - TargetIf using a manual target by target Action Sequence, these commands will give you full control over its usage. Refer to the image above for reference on how this works. --- TARGET: Current Index
- Sets the current index to this value.
- Then decide to jump to a label (optional).
Set Index To:
- Sets current targeting index to this value.
- 0 is the starting index of a target group.
Jump To Label:
- If a target is found after the index change, jump to this label in the
Common Event.
--- TARGET: Next Target
- Moves index forward by 1 to select a new current target.
- Then decide to jump to a label (optional).
Jump To Label:
- If a target is found after the index change, jump to this label in the
Common Event.
--- TARGET: Previous Target
- Moves index backward by 1 to select a new current target.
- Then decide to jump to a label (optional).
Jump To Label:
- If a target is found after the index change, jump to this label in the
Common Event.
--- TARGET: Random Target
- Sets index randomly to determine new currernt target.
- Then decide to jump to a label (optional).
Force Random?:
- Index cannot be its previous index amount after random.
Jump To Label:
- If a target is found after the index change, jump to this label in the
Common Event.
--- Action Sequences - Voice--- VOICE: Common Line - Plays a common voice line from target battler(s). - Requires VisuMZ_3_BattleVoices! Speaker Target(s): - Select unit(s) to play voice lines from. Voice Line: - What voice line do you wish to play? --- VOICE: Play Special Line
- Plays a special voice line from target battler(s).
- Requires VisuMZ_3_BattleVoices!
Speaker Target(s):
- Select unit(s) to play voice lines from.
Voice Line Type:
- What voice line type do you wish to play?
- Action Name
- Chant Line
- Item Name
- Skill Name
- Spell Name
- Unique Lines
Name / Letter:
- What voice letter/name do you want to play?
--- Action Sequences - WeaponAllows for finer control over Dual/Multi Wielding actors. Only works for Actors. --- WEAPON: Clear Weapon Slot - Clears the active weapon slot (making others valid again). - Only works for Actors. Targets: - Select unit(s) to clear the active weapon slot for. --- WEAPON: Next Weapon Slot - Goes to next active weapon slot (making others invalid). - If next slot is weaponless, don't label jump. Targets: - Select unit(s) to change the next active weapon slot for. --- WEAPON: Set Weapon Slot - Sets the active weapon slot (making others invalid). - Only works for Actors. Targets: - Select unit(s) to change the active weapon slot for. Weapon Slot ID: - Select weapon slot to make active (making others invalid). - Use 0 to clear and normalize. You may use JavaScript code. --- Action Sequences - Zoom (Camera)These Action Sequences are zoom-related. Requires VisuMZ_3_ActSeqCamera! --- ZOOM: Change Scale - Changes the zoom scale. - Requires VisuMZ_3_ActSeqCamera! Scale: - The zoom scale to change to. Duration: - Duration in frames to reset battle zoom. Zoom Easing: - Select which easing type you wish to apply. - Requires VisuMZ_0_CoreEngine. Wait For Zoom? - Wait for zoom changes to complete before performing next command? --- ZOOM: Reset Zoom - Reset any zoom settings. - Requires VisuMZ_3_ActSeqCamera! Duration: - Duration in frames to reset battle zoom. Zoom Easing: - Select which easing type you wish to apply. - Requires VisuMZ_0_CoreEngine. Wait For Zoom? - Wait for zoom changes to complete before performing next command? --- ZOOM: Wait For Zoom - Waits for zoom changes to complete before performing next command. Requires VisuMZ_3_ActSeqCamera! --- Plugin ParametersAuto Battle SettingsThese Plugin Parameter settings allow you to change the aspects added by this plugin that support Auto Battle and the Auto Battle commands. Auto Battle commands can be added to the Party Command Window and/or Actor Command Window. The one used by the Party Command Window will cause the whole party to enter an Auto Battle state until stopped by a button input. The command used by the Actor Command Window, however, will cause the actor to select an action based off the Auto Battle A.I. once for the current turn instead. --- Battle Display Message: - Message that's displayed when Auto Battle is on. Text codes allowed. %1 - OK button, %2 - Cancel button OK Button: - Text used to represent the OK button. - If VisuMZ_0_CoreEngine is present, ignore this. Cancel Button: - Text used to represent the Cancel button. - If VisuMZ_0_CoreEngine is present, ignore this. Background Type: - Select background type for Auto Battle window. - 0 - Window - 1 - Dim - 2 - Transparent JS: X, Y, W, H: - Code used to determine the dimensions for this window. --- Options Add Option?: - Add the Auto Battle options to the Options menu? Adjust Window Height: - Automatically adjust the options window height? Startup Name: - Command name of the option. Style Name: - Command name of the option. OFF: - Text displayed when Auto Battle Style is OFF. ON: - Text displayed when Auto Battle Style is ON. --- Damage SettingsThese Plugin Parameters add a variety of things to how damage is handled in battle. These range from hard damage caps to soft damage caps to how damage popups appear, how the formulas for various aspects are handled and more. Damage Styles are also a feature added through this plugin. More information can be found in the help section above labeled 'Damage Styles'. --- Damage Cap Enable Damage Cap?: - Put a maximum hard damage cap on how far damage can go? - This can be broken through the usage of notetags. Default Hard Cap: - The default hard damage cap used before applying damage. Enable Soft Cap?: - Soft caps ease in the damage values leading up to the hard damage cap. - Requires hard Damage Cap enabled. Base Soft Cap Rate: - The default soft damage cap used before applying damage. Soft Scale Constant: - The default soft damage cap used before applying damage. --- Popups Popup Duration: - Adjusts how many frames a popup stays visible. Newest Popups Bottom: - Puts the newest popups at the bottom. End Battle Show?: - Show or hide popups upon victory or escape? - Used to hide battle-state removal popups. Offset X: Offset Y: - Sets how much to offset the sprites by horizontally/vertically. Shift X: Shift Y: - Sets how much to shift the sprites by horizontally/vertically. Critical Flash Color: - Adjust the popup's flash color. - Format: [red, green, blue, alpha] Critical Duration: - Adjusts how many frames a the flash lasts. --- Formulas JS: Overall Formula: - The overall formula used when calculating damage. JS: Variance Formula: - The formula used when damage variance. JS: Guard Formula: - The formula used when damage is guarded. --- Critical Hits JS: Rate Formula: - The formula used to calculate Critical Hit Rates. JS: Damage Formula: - The formula used to calculate Critical Hit Damage modification. --- Damage Styles Default Style: - Which Damage Style do you want to set as default? - Use 'Manual' to not use any styles at all. - The 'Manual' style will not support <Armor Penetration> notetags. - The 'Manual' style will not support <Armor Reduction> notetags. Style List: - A list of the damage styles available. - These are used to calculate base damage. Name: - Name of this Damage Style. -Used for notetags and such. JS: Formula: - The base formula for this Damage Style. Items & Equips Core: HP Damage:
MP Damage:
HP Recovery:
MP Recovery:
HP Drain:
MP Drain:
- Vocabulary used for this data entry.
JS: Damage Display:
- Code used the data displayed for this category.
--- Mechanics SettingsSome of the base settings for the various mechanics found in the battle system can be altered here in these Plugin Parameters. Most of these will involve JavaScript code and require you to have to good understanding of how the RPG Maker MZ code works before tampering with it. --- Action Speed Allow Random Speed?: - Allow speed to be randomized base off the user's AGI? JS: Calculate: - Code used to calculate action speed. --- Base Troop Base Troop ID's: - Select the Troop ID(s) to duplicate page events from for all other troops. - More information can be found in the dedicated Help section above. --- Common Events (on Map) Pre-Battle Event: Post-Battle Event: Victory Event: Defeat Event: Escape Success Event: Escape Fail Event: - Queued Common Event to run upon meeting the condition. - Use to 0 to not run any Common Event at all. - "Post-Battle Event" will always run regardless. - If any events are running before the battle, they will continue running to the end first before the queued Common Events will run. - These common events only run on the map scene. They're not meant to run in the battle scene. - If the "Defeat Event" has a common event attached to it, then random encounters will be changed to allow defeat without being sent to the Game Over scene. Instead, the game will send the player to the map scene where the Defeat Event will run. --- Escape JS: Calc Escape Ratio: - Code used to calculate the escape success ratio. JS: Calc Escape Raise: - Code used to calculate how much the escape success ratio raises upon each failure. --- Switches Switch: Critical: - Turns switch ON if the action performs a critical hit. - Switch reverts to OFF whenever an action starts. - If multiple targets/hits are struck, as long as one hit lands a critical hit, then the switch will remain ON for the rest of the action. Switch: Miss/Evade: - Turns switch ON if the action misses/is evaded. - Switch reverts to OFF whenever an action starts. - If multiple targets/hits are struck, as long as one hit fails to land, then the switch will remain ON for the rest of the action. --- Variables Variable: Damage: - Variable records target damage during action. - Variable reverts to 0 whenever an action starts. - If multiple targets/hits are struck, the variable will record the total amount of damage done for the remainder of the action (unless manually reseting to 0 during an Action Sequence). Variable: Healing: - Variable records target healing during action. - Variable reverts to 0 whenever an action starts. - If multiple targets/hits are struck, the variable will record the total amount of healing done for the remainder of the action (unless manually reseting to 0 during an Action Sequence). --- JS: Battle-Related JS: Pre-Start Battle: - Target function: BattleManager.startBattle() - JavaScript code occurs before function is run. JS: Post-Start Battle: - Target function: BattleManager.startBattle() - JavaScript code occurs after function is run. JS: Battle Victory: - Target function: BattleManager.processVictory() - JavaScript code occurs before function is run. JS: Escape Success: - Target function: BattleManager.onEscapeSuccess() - JavaScript code occurs before function is run. JS: Escape Failure: - Target function: BattleManager.onEscapeFailure() - JavaScript code occurs before function is run. JS: Battle Defeat: - Target function: BattleManager.processDefeat() - JavaScript code occurs before function is run. JS: Pre-End Battle: - Target function: BattleManager.endBattle() - JavaScript code occurs before function is run. JS: Post-End Battle: - Target function: BattleManager.endBattle() - JavaScript code occurs after function is run. --- JS: Turn-Related JS: Pre-Start Turn: - Target function: BattleManager.startTurn() - JavaScript code occurs before function is run. JS: Post-Start Turn: - Target function: BattleManager.startTurn() - JavaScript code occurs after function is run. JS: Pre-End Turn: - Target function: Game_Battler.prototype.onTurnEnd() - JavaScript code occurs before function is run. JS: Post-End Turn: - Target function: Game_Battler.prototype.onTurnEnd() - JavaScript code occurs after function is run. JS: Pre-Regenerate: - Target function: Game_Battler.prototype.regenerateAll() - JavaScript code occurs before function is run. JS: Post-Regenerate: - Target function: Game_Battler.prototype.regenerateAll() - JavaScript code occurs after function is run. --- JS: Action-Related JS: Pre-Start Action: - Target function: BattleManager.startAction() - JavaScript code occurs before function is run. JS: Post-Start Action: - Target function: BattleManager.startAction() - JavaScript code occurs after function is run. JS: Pre-Apply: - Target function: Game_Action.prototype.apply() - JavaScript code occurs before function is run. JS: Pre-Damage: - Target function: Game_Action.prototype.executeDamage() - JavaScript code occurs before function is run. JS: Post-Damage: - Target function: Game_Action.prototype.executeDamage() - JavaScript code occurs after function is run. JS: Post-Apply: - Target function: Game_Action.prototype.apply() - JavaScript code occurs after function is run. JS: Pre-End Action: - Target function: BattleManager.endAction() - JavaScript code occurs before function is run. JS: Post-End Action: - DescriTarget function: BattleManager.endAction() - JavaScript code occurs after function is run. --- Battle Layout SettingsThe Battle Layout Settings Plugin Parameter gives you control over the look, style, and appearance of certain UI elements. These range from the way the Battle Status Window presents its information to the way certain windows like the Party Command Window and Actor Command Window appear. --- Battle Layout Style - The style used for the battle layout. Default: - Shows actor faces in Battle Status. List: - Lists actors in Battle Status. XP: - Shows actor battlers in a stretched Battle Status. Portrait: - Shows portraits in a stretched Battle Status. Border: - Displays windows around the screen border. --- List Style Show Faces: - Shows faces in List Style? Command Window Width: - Determine the window width for the Party and Actor Command Windows. - Affects Default and List Battle Layout styles. --- XP Style Command Lines: - Number of action lines in the Actor Command Window for the XP Style. Sprite Height: - Default sprite height used when if the sprite's height has not been determined yet. Sprite Base Location: - Determine where the sprite is located on the Battle Status Window. - Above Name - Sprite is located above the name. - Bottom - Sprite is located at the bottom of the window. - Centered - Sprite is centered in the window. - Top - Sprite is located at the top of the window. --- Portrait Style Show Portraits?: - Requires VisuMZ_1_MainMenuCore. - Shows the actor's portrait instead of a face. Portrait Scaling: - If portraits are used, scale them by this much. --- Border Style Columns: - The total number of columns for Skill & Item Windows in the battle scene Show Portraits?: - Requires VisuMZ_1_MainMenuCore. - Shows the actor's portrait at the edge of the screen. Portrait Scaling: - If portraits are used, scale them by this much. --- Skill & Item Windows Middle Layout: - Shows the Skill & Item Windows in mid-screen? Columns: - The total number of columns for Skill & Item Windows in the battle scene --- Status Window Elements Battler Name: Gauge 1 (HP): Gauge 2 (MP): Gauge 3 (TP): State Icon: TPB/ATB Gauge: Offset: X/Y: - Offset this Battle Status Window element's X/Y. - For X: Negative goes left. Positive goes right. - For Y: Negative goes up. Positive goes down. Window Skin: Filename: - Filename used for the Battle Status Window skin. - Leave this empty to use the default window skin. Hide Window Skin?: - Hide the window skin for the Battle Status Window? Selectable Background: Hide Selectable BG?: - Show/Hide the selectable background box for the Battle Status Window? Attachments: Back Attachment: Filename:
- Filename used for an image to attach to the back of the Battle
Status Window. Leave empty for none.
Offset: X/Y:
- Offset this Battle Status Window element's X/Y.
- For X: Negative goes left. Positive goes right.
- For Y: Negative goes up. Positive goes down.
Front Attachment: Filename:
- Filename used for an image to attach to the front of the Battle
Status Window. Leave empty for none.
--- UI Elements Anti-Tint UI? - Prevent UI Elements from being tinted? - This prevents UI Elements such as HP Gauges, Enemy Names, Battle Cursor, and Weakness Display from being affected by screen tint. --- Battle Log SettingsThese Plugin Parameters give you control over how the Battle Log Window, the window shown at the top of the screen in the battle layout, appears, its various properties, and which text will be displayed. The majority of the text has been disabled by default with this plugin to make the flow of battle progress faster. --- General Back Color: - Use #rrggbb for a hex color. Max Lines: - Maximum number of lines to be displayed. Message Wait: - Number of frames for a usual message wait. Text Align: - Text alignment for the Window_BattleLog. JS: X, Y, W, H: - Code used to determine the dimensions for the battle log. --- Start Turn Show Start Turn?: - Display turn changes at the start of the turn? Start Turn Message: - Message displayed at turn start. - %1 - Turn Count Start Turn Wait: - Number of frames to wait after a turn started. --- Display Action Show Centered Action?: - Display a centered text of the action name? Show Skill Message 1?: - Display the 1st skill message? Show Skill Message 2?: - Display the 2nd skill message? Show Item Message?: - Display the item use message? --- Action Changes Show Counter?: - Display counter text? Show Reflect?: - Display magic reflection text? Show Substitute?: - Display substitute text? --- Action Results Show No Effect?: - Display no effect text? Show Critical?: - Display critical text? Show Miss/Evasion?: - Display miss/evasion text? Show HP Damage?: - Display HP Damage text? Show MP Damage?: - Display MP Damage text? Show TP Damage?: - Display TP Damage text? --- Display States Show Added States?: - Display added states text? Show Removed States?: - Display removed states text? Show Current States?: - Display the currently affected state text? Show Added Buffs?: - Display added buffs text? Show Added Debuffs?: - Display added debuffs text? Show Removed Buffs?: - Display removed de/buffs text? --- Battleback Scaling SettingsBy default, the battlebacks in RPG Maker MZ scale as if the screen size is a static 816x624 resolution, which isn't always the case. These settings here allow you to dictate how you want the battlebacks to scale for the whole game. These settings CANNOT be changed midgame or per battle. --- Settings Default Style: - The default scaling style used for battlebacks. - MZ (MZ's default style) - 1:1 (No Scaling) - Scale To Fit (Scale to screen size) - Scale Down (Scale Downward if Larger than Screen) - Scale Up (Scale Upward if Smaller than Screen) JS: 1:1: JS: Scale To Fit: JS: Scale Down: JS: Scale Up: JS: 1:1: JS: 1:1: - This code gives you control over the scaling for this style. --- Party Command WindowThese Plugin Parameters allow you control over how the Party Command Window operates in the battle scene. You can turn disable it from appearing or make it so that it doesn't --- Command Window Style: - How do you wish to draw commands in the Party Command Window? - Text Only: Display only the text. - Icon Only: Display only the icon. - Icon + Text: Display the icon first, then the text. - Auto: Determine which is better to use based on the size of the cell. Text Align: - Text alignment for the Party Command Window. Fight Icon: - The icon used for the Fight command. Add Auto Battle?: - Add the "Auto Battle" command to the Command Window? Auto Battle Icon: - The icon used for the Auto Battle command. Auto Battle Text: - The text used for the Auto Battle command. Add Options?: - Add the "Options" command to the Command Window? Options Icon: - The icon used for the Options command. Active TPB Message:
- Message that will be displayed when selecting options during the
middle of an action.
Escape Icon: - The icon used for the Escape command. --- Access Skip Party Command: - DTB: Skip Party Command selection on turn start. - TPB: Skip Party Command selection at battle start. Disable Party Command: - Disable the Party Command Window entirely? --- Help Window Fight: - Text displayed when selecting a skill type. - %1 - Skill Type Name Auto Battle: - Text displayed when selecting the Auto Battle command. Options: - Text displayed when selecting the Options command. Escape: - Text displayed when selecting the escape command. --- Actor Command WindowThese Plugin Parameters allow you to change various aspects regarding the Actor Command Window and how it operates in the battle scene. This ranges from how it appears to the default battle commands given to all players without a custom <Battle Commands> notetag. --- Command Window Style: - How do you wish to draw commands in the Actor Command Window? - Text Only: Display only the text. - Icon Only: Display only the icon. - Icon + Text: Display the icon first, then the text. - Auto: Determine which is better to use based on the size of the cell. Text Align: - Text alignment for the Actor Command Window. Item Icon: - The icon used for the Item command. Normal SType Icon: - Icon used for normal skill types that aren't assigned any icons. - Ignore if VisuMZ_1_SkillsStatesCore is installed. Magic SType Icon: - Icon used for magic skill types that aren't assigned any icons. - Ignore if VisuMZ_1_SkillsStatesCore is installed. --- Battle Commands Command List: - List of battle commands that appear by default if the <Battle Commands> notetag isn't present. - Attack
- Adds the basic attack command.
- Skills
- Displays all the skill types available to the actor.
- SType: x
- Stype: name
- Adds in a specific skill type.
- Replace 'x' with the ID of the skill type.
- Replace 'name' with the name of the skill type (without text codes).
- All Skills
- Adds all usable battle skills as individual actions.
- Skill: x
- Skill: name
- Adds in a specific skill as a usable action.
- Replace 'x' with the ID of the skill.
- Replace 'name' with the name of the skill.
- Guard
- Adds the basic guard command.
- Item
- Adds the basic item command.
- Escape
- Adds the escape command.
- Auto Battle
- Adds the auto battle command.
- Party
- Requires VisuMZ_2_PartySystem!
- Switches out the current actor for another.
- Combat Log
- Requires VisuMZ_4_CombatLog!
- Shows combat log.
- Talk
- Requires VisuMZ_3_BattleCmdTalk!
- Shows talk command if applicable.
- Weapon Swap
- Requires VisuMZ_2_WeaponSwapSystem!
- Swaps current weapon for next one.
Show Command Costs: - If a battle command has a resource cost, show it? --- Help Window Skill Types: - Text displayed when selecting a skill type. - %1 - Skill Type Name Items: - Text displayed when selecting the item command. Escape: - Text displayed when selecting the escape command. Auto Battle: - Text displayed when selecting the Auto Battle command. --- Multi-Target Windows SettingsAction Sequence Plugin Parameters adjust how the Multi-Target Windows appear in battle. These windows are visible when selecting an enemy or actor while using a skill/item that has the <Single or Multiple Select> notetag. Those wondering why this isn't regulated to a command left or right of the enemies and actors is because mouse controls and touch controls would not be able to select all enemies or all allies that way. --- Properties Window Width: - What is the width used for the Multi-Target Window? Background Type: - Select background type for these windows. Show Button: - Shows the keyboard/controller button to press? - Requires VisuMZ_0_CoreEngine! --- Vocab All Actors: - What is the text used for the "All Actors" button? All Enemies: - What is the text used for the "All Enemies" button? --- Offsets > Actor Offsets Offsets > Enemy Offsets Offset X: - Offsets the button's x position. - Negative: left. Positive: right. Offset Y: - Offsets the button's y position. - Negative: up. Positive: down. --- Actor Battler SettingsThese Plugin Parameter settings adjust how the sideview battlers behave for the actor sprites. Some of these settings are shared with enemies if they use sideview battler graphics. --- Flinch Flinch Distance X: - The normal X distance when flinching. Flinch Distance Y: - The normal Y distance when flinching. Flinch Duration: - The number of frames for a flinch to complete. Shake Flinch: - Perform a shake flinch when taking damage? Max Duration: - Maximum duration a shake flinch can have. - This is reduced relative to the amount of damage taken. Max Power: - The power rating of a shake flinch at full damage. - This is reduced relative to the amount of damage taken. --- Sideview Battlers Anchor: X: - Default X anchor for Sideview Battlers. - Use values between 0 and 1 to be safe. Anchor: Y: - Default Y anchor for Sideview Battlers. - Use values between 0 and 1 to be safe. Chant Style: - What determines the chant motion? - Hit type or skill type? Offset X: - Offsets X position where actor is positioned. - Negative values go left. Positive values go right. Offset Y: - Offsets Y position where actor is positioned. - Negative values go up. Positive values go down. Motion Speed: - The number of frames in between each motion. Priority: Active: - Place the active actor on top of actor and enemy sprites. Priority: Actors: - Prioritize actors over enemies when placing sprites on top of each other Smooth Image: - Smooth out the battler images or pixelate them? Shadow Visible: - Show or hide the shadow for Sideview Battlers. JS: Home Position: - Code used to calculate the home position of actors. --- Enemy Battler SettingsThese Plugin Parameter settings adjust how enemies appear visually in the battle scene. Some of these settings will override the settings used for actors if used as sideview battlers. Other settings include changing up the default attack animation for enemies, how the enemy select window functions, and more. --- Visual Attack Animation: - Default attack animation used for enemies. - Use <Attack Animation: x> for custom animations. Emerge Text: - Show or hide the 'Enemy emerges!' text at the start of battle. Offset X: - Offsets X position where enemy is positioned. - Negative values go left. Positive values go right. Offset Y: - Offsets Y position where enemy is positioned. - Negative values go up. Positive values go down. Smooth Image: - Smooth out the battler images or pixelate them? --- Select Window Any: Last Selected: - Prioritize last selected enemy over front view or sideview settings? FV: Right Priority: - If using frontview, auto select the enemy furthest right. SV: Right Priority: - If using sideview, auto select the enemy furthest right. --- Name: Legacy Option: - Use the legacy version (window) or new version (sprite). - WARNING: Legacy version is no longer supported for bugs. - Not all settings available here in the Plugin Parameters will be available to the legacy version (ie Always Visible and Attach States). Font Size: - Font size used for enemy names. Name Position: Offset X: Offset Y: - Offset the enemy name's position by this much. - For X: Negative goes left. Positive goes right. - For Y: Negative goes up. Positive goes down. Name: Attach States: - Attach the enemy's state icon to the enemy name? Attach: Offset X: Attach: Offset Y: - How much to offset the attached icon's X/Y position by? - For X: Negative goes left. Positive goes right. - For Y: Negative goes up. Positive goes down. Name Visibility: Always Hidden: - Determines if the enemy name will always be visible. - Highest priority. Always Visible: - Determines if the enemy name will always be visible. - Medium priority. By Selection?: - Determines the conditions for enemy name visibility. - Lowest priority. --- Sideview Battlers Allow Collapse: - Causes defeated enemies with SV Battler graphics to "fade away" when defeated? Anchor: X: - Default X anchor for Sideview Battlers. Anchor: Y: - Default Y anchor for Sideview Battlers. Motion: Idle: - Sets default idle animation used by Sideview Battlers. Shadow Visible: - Show or hide the shadow for Sideview Battlers. Size: Width: - Default width for enemies that use Sideview Battlers. Size: Height: - Default height for enemies that use Sideview Battlers. Weapon Type: - Sets default weapon type used by Sideview Battlers. - Use 0 for Bare Hands. --- HP Gauge SettingsSettings that adjust the visual HP Gauge displayed in battle. --- Show Gauges For Actors: - Show HP Gauges over the actor sprites' heads? - Requires SV Actors to be visible. Enemies: - Show HP Gauges over the enemy sprites' heads? - Can be bypassed with <Hide HP Gauge> notetag. Requires Defeat?: - Requires defeating the enemy once to show HP Gauge? - Can be bypassed with <Show HP Gauge> notetag. Battle Test Bypass?:
- Bypass the defeat requirement in battle test?
--- Settings Animation Duration: - How many frames should gauges animate themselves? - Default: 20 frames. Anchor X: Anchor Y: - Where do you want the HP Gauge sprite's anchor X/Y to be? - Use values between 0 and 1 to be safe. Scale: - How large/small do you want the HP Gauge to be scaled? Offset X: Offset Y: - How many pixels to offset the HP Gauge's X/Y by? --- Options Add Option?: - Add the 'Show HP Gauge' option to the Options menu? Adjust Window Height: - Automatically adjust the options window height? Option Name: - Command name of the option. --- Action Sequence SettingsAction Sequence Plugin Parameters allow you to decide if you want automatic Action Sequences to be used for physical attacks, the default casting animations used, how counters and reflects appear visually, and what the default stepping distances are. --- Automatic Sequences Melee Single Target: - Allow this auto sequence for physical, single target actions? Melee Multi Target: - Allow this auto sequence for physical, multi-target actions? --- Quality of Life Auto Notetag: - Automatically apply the <Custom Action Sequence> notetag effect to any item or skill that has a Common Event? - Any item or skill without a Common Event attached to it will use the Automatic Action Sequences instead. - The <Auto Action Sequence> notetag will disable this effect for that particular skill or item. --- Cast Animations Certain Hit: - Cast animation for Certain Hit skills. Physical: - Cast animation for Physical skills. Magical: - Cast animation for Magical skills. --- Counter/Reflect Counter Back: - Play back the attack animation used? Reflect Animation: - Animation played when an action is reflected. Reflect Back: - Play back the attack animation used? --- Stepping Melee Distance: - Minimum distance in pixels for Movement Action Sequences. Step Distance X: - The normal X distance when stepping forward. Step Distance Y: - The normal Y distance when stepping forward. Step Duration: - The number of frames for a stepping action to complete. ---
Terms of Use1. These plugins may be used in free or commercial games provided that they have been acquired through legitimate means at VisuStella.com and/or any other official approved VisuStella sources. Exceptions and special circumstances that may prohibit usage will be listed on VisuStella.com. 2. All of the listed coders found in the Credits section of this plugin must be given credit in your games or credited as a collective under the name: "VisuStella". 3. You may edit the source code to suit your needs, so long as you do not claim the source code belongs to you. VisuStella also does not take responsibility for the plugin if any changes have been made to the plugin's code, nor does VisuStella take responsibility for user-provided custom code used for custom control effects including advanced JavaScript notetags and/or plugin parameters that allow custom JavaScript code. 5. VisuStella is not responsible for problems found in your game due to unintended usage, incompatibility problems with plugins outside of the VisuStella MZ library, plugin versions that aren't up to date, nor responsible for the proper working of compatibility patches made by any third parties. VisuStella is not responsible for errors caused by any user-provided custom code used for custom control effects including advanced JavaScript notetags and/or plugin parameters that allow JavaScript code. 8. Any extensions and/or addendums made to this plugin's Terms of Use can be found on VisuStella.com and must be followed. Terms of Use: Japanese『VisuStella MZ』利用規約 1. これらのプラグインは、VisuStella.comおよび/または公式に承認されたVisuStellaのソースから合法的な手段で入手したものである限り、フリーゲームや商用ゲームに使用することができます。例外的に使用が禁止される場合については、VisuStella.comの記載をご確認ください。 2. 本プラグインの「クレジット」部分に記載されているすべてのコーダーの名前は、ゲーム内にクレジット表記を行うか、もしくは「VisuStella」という名前の下にまとめて表記する必要があります。 3. ソースコードを自分のものだと主張しない限りは、必要に応じて編集することが可能です。ただしプラグインのコードに変更が加えられた場合、VisuStellaはそのプラグインに対して一切の責任を負いません。高度なJavaScriptのノートタグやJavaScriptコードを許可するプラグインのパラメータを含む、カスタムコントロールエフェクトに使用される、ユーザー提供のカスタムコードについても、VisuStellaは一切の責任を負いません。 5. VisuStellaは、意図しない使用方法による問題、VisuStella MZライブラリ以外のプラグインとの非互換性の問題、プラグインのバージョンが最新でないことによる問題、第三者による互換性パッチが適切に動作していないことなどが原因でゲーム内で発生した問題については、一切の責任を負いません。VisuStellaは、高度なJavaScriptのノートタグやJavaScriptコードを許可するプラグインのパラメータを含む、カスタムコントロールエフェクトに使用される、ユーザー提供のカスタムコードに起因するエラーについても、一切の責任を負いません。 8. このプラグインの利用規約の追加項目や補足については、VisuStella.comに掲載されていますので、それを参照し従ってください。 CreditsIf you are using this plugin, credit the following people in your game: Team VisuStella ChangelogVersion 1.75: March 16, 2023
Version 1.74: February 16, 2023
Version 1.73: January 20, 2023
Version 1.72: December 15, 2022
Version 1.71: November 10, 2022
Version 1.70b: October 20, 2022
Version 1.69b: September 8, 2022
Version 1.68: August 4, 2022
Version 1.67: July 28, 2022
Version 1.66: July 14, 2022
Version 1.65: July 7, 2022
Version 1.64: June 16, 2022
Version 1.63: May 26, 2022
Version 1.62: April 22, 2022
Version 1.61: April 14, 2022
Version 1.60: April 7, 2022
Version 1.59: March 31, 2022
Version 1.58: March 24, 2022
Version 1.57: February 17, 2022
Version 1.56: February 10, 2022
Version 1.55: January 27 2022
Version 1.54: January 13, 2022
Version 1.53: December 30, 2021
Version 1.52: December 16, 2021
Version 1.51: December 9, 2021
Version 1.50: November 4, 2021
Version 1.49: October 28, 2021
Version 1.48: October 21, 2021
Version 1.47: October 14, 2021
Version 1.46: September 23, 2021
Version 1.45: September 17, 2021
Version 1.44: August 20, 2021
Version 1.43: July 23, 2021
Version 1.42: July 16, 2021
Version 1.41: July 2, 2021
Version 1.40: June 25, 2021
Version 1.39: June 18, 2021
Version 1.38: June 11, 2021
Version 1.37: May 21, 2021
Version 1.36: May 14, 2021
Version 1.35: May 7, 2021
Version 1.34: April 23, 2021
Version 1.33: April 9, 2021
Version 1.32: April 2, 2021
Version 1.31: March 26, 2021
Version 1.30: March 19, 2021
Version 1.29: March 12, 2021
Version 1.28: March 5, 2021
Version 1.27: February 26, 2021
Version 1.26: February 19, 2021
Version 1.25: February 5, 2021
Version 1.24: January 29, 2021
Version 1.23: January 22, 2021
Version 1.22: January 15, 2021
Version 1.21: January 8, 2021
Version 1.20: January 1, 2021
Version 1.19: December 25, 2020
Version 1.18: December 18, 2020
Version 1.17: December 11, 2020
Version 1.16: December 4, 2020
Version 1.15: November 29, 2020
Version 1.14: November 22, 2020
Version 1.13: November 15, 2020
Version 1.12: November 8, 2020
Version 1.11: November 1, 2020
Version 1.10: October 25, 2020
Version 1.09: October 18, 2020
Version 1.08: October 11, 2020
Version 1.07: October 4, 2020
Version 1.06: September 27, 2020
Version 1.05: September 20, 2020
Version 1.04: September 13, 2020
Version 1.03: September 6, 2020
Version 1.02: August 30, 2020
Version 1.01: August 23, 2020
Version 1.00: August 20, 2020
|
End of File
- RPG Maker MZ Plugins
- RPG Maker MZ Parent Plugins
- RPG Maker MZ Tier 1 Plugins
- Notetags (MZ)
- Plugin Commands (MZ)
- RPG Maker MZ Core Plugins
- RPG Maker MZ Battle Plugins
- RPG Maker MZ Gameplay Plugins
- RPG Maker MZ Utility Plugins
- RPG Maker MZ Mechanical Plugins
- RPG Maker MZ Visual Plugins
- RPG Maker MZ Menu Plugins
- RPG Maker MZ Quality of Life Plugins
