Difference between revisions of "Category:Plugin Commands (MV)"
(→Message Core) |
(→Message Core) |
||
| Line 223: | Line 223: | ||
EnableDamageCap Enables default cap for both damage and healing. | EnableDamageCap Enables default cap for both damage and healing. | ||
DisableDamageCap Disables default cap for both damage and healing. | DisableDamageCap Disables default cap for both damage and healing. | ||
| + | </nowiki> | ||
| + | |||
| + | == [[Force Advantage (YEP)|Force Advantage]] == | ||
| + | |||
| + | <nowiki> | ||
| + | Use the following plugin commands to force a battle advantage on the next | ||
| + | upcoming battle: | ||
| + | |||
| + | Plugin Command: | ||
| + | |||
| + | ForceAdvantage Pre-Emptive | ||
| + | ForceAdvantage Preemptive | ||
| + | ForceAdvantage First Strike | ||
| + | ForceAdvantage Player | ||
| + | - Forces a pre-emptive strike giving the player the advantage. | ||
| + | |||
| + | ForceAdvantage Surprise | ||
| + | ForceAdvantage Back Attack | ||
| + | ForceAdvantage Enemy | ||
| + | - Forces a surprise attack giving the enemy party the advantage. | ||
| + | |||
| + | ForceAdvantage None | ||
| + | ForceAdvantage Normal | ||
| + | ForceAdvantage Neutral | ||
| + | - Forces a neutral advantage where neither party has the advantage. | ||
| + | |||
| + | ForceAdvantage Clear | ||
| + | - Clears any forced advantage settings imposed by the above commands. | ||
</nowiki> | </nowiki> | ||
Revision as of 18:24, 26 June 2019


|
VisuStella, Caz Wolf, Fallen Angel Olivia, Atelier Irina, and other affiliated content creators.
Advanced Switches & Variables
These plugin commands can be used to immediately refresh a map or troop
troop event to ensure that switch/variable data gets noticed and triggered
or updated upon your call.

Plugin Command:

  RefreshMap
  - This will refresh all of the map's events. This will update any page
  conditions with Advanced Switches or Variables that may have changed
  values prior to using this plugin command. This can only be used outside
  of battle!

  RefreshTroop
  - This will refresh the current event interpreter in battle. This will
  update any page condition within the current troop that utilizes Advanced
  Switches or Variables that may have changed values prior to using this
  plugin command.
  * NOTE: If you are using the Battle Engine Core, using this won't be
  necessary for the majority of the time.
Anti-Audio Delay
FlushAudioCache BGM
FlushAudioCache BGS
FlushAudioCache ME
FlushAudioCache SE
FlushAudioCache ALL
These will clear the audio caches for the written type of audio. If you pick all, then all four types will be flushed out of memory. This will give your game a clear slate for the the audio cache, which means the game may lag a little bit upon reloading the new BGM files.
In my opinion, these plugin commands should never need to be used since the plugin will automatically clear them once the cache goes over the limit, but I'm just giving you control over the audio cache for your game just in case you want to do something with it.
Action Sequence Fast Forward/Skip
If your item/skill's battle action sequence runs a common event that requires you to temporarily stop Fast Forward and Skip Forward, you can use these plugin commands to control them:
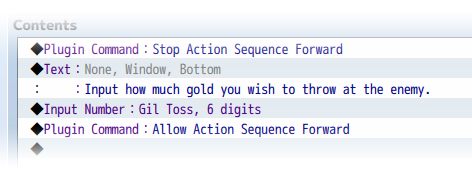
STOP ACTION SEQUENCE FORWARD
- This will stop Fast Forward and Skip Forward at this point onward.

ALLOW ACTION SEQUENCE FORWARD
- This will reenable Fast Forward and Skip Forward from this point onward.
Battle Engine Core
While the player is not in battle, you can change the battle system using a
Plugin Command. With only this plugin, there is only one battle system
included: the default battle system.

Plugin Command:
  setBattleSys DTB      Sets battle system to Default Turn Battle.

Other future plugins may include other battle systems that may utilize the
Battle Engine Core.
Battle System - ATB
To change your battle system to Active Turn Battle if it isn't the default
battle system, you can use the following Plugin Command:

Plugin Command:
  setBattleSys ATB      Sets battle system to Active Turn Battle.
  setBattleSys DTB      Sets battle system to Default Turn Battle.

Using the above Plugin Commands, you can toggle between the Default Battle
System and Active Turn Battle!
Battle System - CTB
To change your battle system to Charge Turn Battle if it isn't the default
battle system, you can use the following Plugin Command:

Plugin Command:
  setBattleSys CTB      Sets battle system to Charge Turn Battle.
  setBattleSys DTB      Sets battle system to Default Turn Battle.

Using the above Plugin Commands, you can toggle between the Default Battle
System and Charge Turn Battle!
Battle System - STB
To change your battle system to Standard Turn Battle if it isn't the default
battle system, you can use the following Plugin Command:

Plugin Command:
  setBattleSys STB      Sets battle system to Standard Turn Battle.
  setBattleSys DTB      Sets battle system to Default Turn Battle.

Using the above Plugin Commands, you can toggle between the Default Battle
System and Standard Turn Battle!
In-Battle Status
For those who would like to change whether the 'Status' option is shown or
hidden midway through the game, you can use the following plugin commands:

Plugin Commands:

  ShowInBattleStatus
  - This will cause the 'Status' command to show.

  HideInBattleStatus
  - This will cause the 'Status' command to not show.
Turn Order Display
Use the following plugin commands to control the Turn Order Display.

Plugin Command:

  EnableTurnOrderDisplay
  - Turns on the Turn Order Display to be shown in battle if the battle is
  a turn-based battle system can support the Turn Order Display.

  DisableTurnOrderDisplay
  - Turns off the Turn Order Display to be hidden in battle.
Class Change Core
Included in this plugin are multiple Plugin Commands to help assist you with
class changing for your game.

Plugin Command
  OpenClass
  - This opens the class changing scene.

  ShowClass
  HideClass
  - This shows/hides the Class option from the main menu.

  EnableClass
  DisableClass
  - This makes the Class option enabled/disabled.

  UnlockClass 5 6
  - This allows Actor 5 to unlock Class 6.

  RemoveClass 5 7
  - This causes Actor 5 to no longer access Class 7.

  UnlockClassAll 8
  - This unlocks Class 8 for the global pool.

  RemoveClassAll 9
  - This removes Class 9 from the global pool.

  EnablePrimaryClassChange 5
  DisablePrimaryClassChange 5
  - This enables/disables primary class changing for actor 5.
Subclass
You can use these following plugin commands to change subclassing throughout
the game!

Plugin Command:

  ShowSubclass
  HideSubclass
  - Shows/Hides the Subclass command in the Class Change Menu.

  EnableSubclass
  DisableSubclass
  - Enables/Disables the Subclass command in the Class Change Menu.

  ChangeSubclass x y
  - Changes actor x's subclass to y. Replace y with 0 to remove a subclass.

  EnableSubclassChange 5
  DisableSubclassChange 5
  - This enables/disables subclass changing for actor 5.
Core Engine
Plugin Command:
  GainGold 1234567890       # Party gains 1234567890 gold.
  LoseGold 9876543210       # Party loses 9876543210 gold.
Damage Core
The following are plugins you can use to set the damage cap rulings for your
game. Keep in mind that individual aspects such as equipment traits, skill
properties, etc. will take priority over these default caps.

Plugin Command:
  SetDamageCap 9999     Sets the default damage cap to 9999.
  SetHealingCap 9999    Sets the default healing cap to 9999.
  EnableDamageCap       Enables default cap for both damage and healing.
  DisableDamageCap      Disables default cap for both damage and healing.
Force Advantage
Use the following plugin commands to force a battle advantage on the next
upcoming battle:

Plugin Command:

  ForceAdvantage Pre-Emptive
  ForceAdvantage Preemptive
  ForceAdvantage First Strike
  ForceAdvantage Player
  - Forces a pre-emptive strike giving the player the advantage.

  ForceAdvantage Surprise
  ForceAdvantage Back Attack
  ForceAdvantage Enemy
  - Forces a surprise attack giving the enemy party the advantage.

  ForceAdvantage None
  ForceAdvantage Normal
  ForceAdvantage Neutral
  - Forces a neutral advantage where neither party has the advantage.

  ForceAdvantage Clear
  - Clears any forced advantage settings imposed by the above commands.
Message Core
The following are some plugin commands you can use through the Event Editor
to change various aspects about the Message system.

Plugin Comand
  MessageRows 6
  - Changes the Message Rows displayed to 6. If you are using continuous
  Show Text events, this will continue displaying the following lines's
  texts until it hits the row limit. Anything after that is cut off until
  the next message starts to avoid accidental overlap.

  MessageWidth 400
  - Changes the Message Window Width to 400 pixels. This will cut off any
  words that are shown too far to the right so adjust accordingly!

  EnableWordWrap
  - Enables wordwrapping. If a word extends past the window size, it will
  automatically move onto the next line. Keep in mind, you will need to use
  \br to perform line breaks.

  DisableWordWrap
  - This disables wordwrapping. Line breaks will be automatic at points
  where a new line is started in the editor.

  EnableFastForward
  - Enables Fast Forward key from working with messages.

  DisableFastForward
  - Disables Fast Forward key from working with messages.
Extended Message Pack 1
You can use the following plugin commands to adjust a few of the settings
regarding the Message Window.

Plugin Commands

  --- Letter Sounds ---

  EnableLetterSound
  DisableLetterSound
  - These commands will enable or disable the letter sounds respectively.

  LetterSoundName Cursor2
  - This will replace the current letter sound with the written filename.
  The filename is case sensitive. Do not use the file extension.

  LetterSoundVolume 100
  - This will change the letter sound volume to 100.

  LetterSoundPitch 125
  - This will change the letter sound pitch to 125.

  LetterSoundPitchVariance 10
  - This will cause the letter sound's pitch to fluctuate between -10 & 10.

  LetterSoundPan 0
  - This will change the letter sound's pan to 0.

  LetterSoundPanVariance 10
  - This will cause the letter sound's pan to fluctuate between -10 and 10.

  LetterSoundInterval 2
  - This will change the interval at which the letter sounds are played to
  2 letters. Change it to 0 to play on every letter written out.

  LetterSoundReset
  - This will reset the letter sounds to their default settings.

  --- Choice Settings ---

  ChoiceRowMax 4
  - This will set the maximum amount of visible choices to 4.

  HideChoice 5
  - This will cause choice 5 to be hidden.

  ShowChoice 6
  - This will cause choice 6 to be shown and no longer hidden.

  ClearHiddenChoices
  - All choices become visible and are no longer hidden.

  DisableChoice 1
  - This will cause choice 1 to be disabled.

  EnableChoice 2
  - This will cause choice 2 to be enabled.

  ClearDisabledChoices
  - All choices become enabled and are no longer disabled.

  ClearChoiceSettings
  - All choices are shown and enabled.

  --- Message Window Positions ---

  MessageRows 6
  - Changes the Message Rows displayed to 6. If you are using continuous
  Show Text events, this will continue displaying the following lines's
  texts until it hits the row limit. Anything after that is cut off until
  the next message starts to avoid accidental overlap.

  MessageWidth 400
  - Changes the Message Window Width to 400 pixels. This will cut off any
  words that are shown too far to the right so adjust accordingly!

  MessagePositionX 300
  - Sets the Message Window's X Position to 300. This position will be
  relative to its horizontal anchor point.

  MessagePositionY 400
  - Sets the Message Window's Y Position to 400. This position will be
  relative to its vertical anchor point.

  MessagePositionXAuto
  - Sets the Message Window's X Position to be automatically fitted and not
  set relative to its horizontal anchor point.

  MessagePositionYAuto
  - Sets the Message Window's Y Position to be automatically fitted and not
  set relative to its vertical anchor point.

  MessageAnchorX left
  - Sets the Message Window's x anchor to 'left', 'center', or 'right' if
  you are using specified coordinates.

  MessageAnchorY bottom
  - Sets the Message Window's y anchor to 'top', 'center', or 'bottom' if
  you are using specified coordinates.

  MessagePositionReset
  - Resets both the Message Window's X and Y Positions to its automatic
  positions and not adjusted to its anchor points. The Message Width and the
  Message Rows.
Message Backlog
The following plugin commands can be used to alter various settings
regarding the Message Backlog.

Plugin Command:

  EnableMessageBacklog
  DisableMessageBacklog
  - This enables/disables the message backlog from being playeraccessed.

  EnableMessageLogging
  DisableMessageLogging
  - If enabled, new messages will be recorded to the backlog.
  If disabled, they won't be recorded.

  OpenMessageBacklog
  - This will forcefully open the message backlog if done on the map scene.
  (Highly recommended to be used with Button Common Events)
Save Core
Autosave
Autosave is manually done by the game developer using plugin commands. There
are also other plugin commands that can control autosaving, too.

  Plugin Commands:

     Autosave
     - This will make the game automatically save in the last saved file
     slot used by the player. If the player has started a new game and did
     not save into a slot yet, nothing will happen. If autosave is disabled
     by the player through the Options menu or disabled by the system with
     a plugin command, nothing will happen either.

     EnableAutosave
     DisableAutosave
     - This will forcibly enable or disable autosaving done by the game.
     This will not bypass the player's option to disable Autosave if trying
     to enable it. The player's decision to disable Autosaving will take
     priority over the game dev's. If you wish to take this option away from
     the player, please change it in the plugin parameters.
New Game+
To set the current save to have New Game+ settings, you'll need to use these
plugin commands to alter the settings:

Plugin Commands:

  EnableNewGamePlus
  - This will cause any save after this has been enabled to have a New Game+
  option instead of the "Load" command on the loading screen.

  DisableNewGamePlus
  - This will disable the New Game+ option for saves made after this plugin
  command has run. The "Load" option will appear instead of "New Game+".
Self Switches & Variables
Those who would like to remotely control Self Switches and Self Variables
can use the following plugin commands:

Plugin Commands:

  SelfSwitch Map x, Event y, Switch z to true
  SelfSwitch Map x, Event y, Switch z to false
  SelfSwitch Map x, Event y, Switch z to code
  - This will change the Self Switch used for map 'x', event 'y', and
  switch 'z' to the value of 'code' value. You can replace 'code' with a
  'true' or 'false' value or a piece of code like '$gameSwitches.value(4)'.

  SelfVariable Map x, Event y, Variable z to 12345
  SelfVariable Map x, Event y, Variable z to value + 100
  SelfVariable Map x, Event y, Variable z to code
  - This will change the Self Variable used for map 'x', event 'y', and
  switch 'z' to the value of 'code' value. You can replace 'code' with a
  number like '12345', a calculation using 'value' (the current value of the
  Self Variable), or a piece of code like '$gameVariables.value(4)'.
Pages in category "Plugin Commands (MV)"
The following 82 pages are in this category, out of 82 total.