Difference between revisions of "Category:Notetags (MV)"
(→Battle Engine Core) |
(→Battle Engine Core) |
||
| Line 791: | Line 791: | ||
armor, or state the property of starting a turn with X CTB Speed or X% of | armor, or state the property of starting a turn with X CTB Speed or X% of | ||
the CTB turn completion target. | the CTB turn completion target. | ||
| + | </nowiki> | ||
| + | |||
| + | === [[Battle System - STB (YEP)|Battle System - STB]] === | ||
| + | <hr> | ||
| + | |||
| + | <nowiki> | ||
| + | The following are notetags that pertain to and affect the STB system. | ||
| + | |||
| + | Skill and Item Notetags: | ||
| + | |||
| + | <STB Help> | ||
| + | text | ||
| + | text | ||
| + | </STB Help> | ||
| + | For those planning on using multiple battle systems, sometimes you may | ||
| + | have your skills perform differently while using STB. If so, using this | ||
| + | notetag will allow skills and items to display different help text while | ||
| + | STB is enabled. | ||
</nowiki> | </nowiki> | ||
Revision as of 17:15, 26 June 2019


|
VisuStella, Caz Wolf, Fallen Angel Olivia, Atelier Irina, and other affiliated content creators.
Action Cutin
- Actor, Actor, and Enemy Notetags
If you are using these notetags for actors and classes, priority will be given to the actor notetags before given to the class notetags.
<Action Cutin Picture: filename>
Changes this actor/enemy's cutin to use that of a picture.
- Replace 'filename' with the filename of a graphic in img/pictures/
- The filename is case sensitive!

<Action Cutin Face: filename, index>
Changes this actor/enemy's cutin to use that of a face graphic.
- Replace 'filename' with the filename of a graphic in img/faces/
- The filename is case sensitive!
- Replace 'index' with a number indicating the cell of the graphic.
- Index starts from 0 and counts upwards.

<Action Cutin SV: filename, index>
Changes this actor/enemy's cutin to use that of a SV Actor graphic.
- Replace 'filename' with the filename of a graphic in img/sv_actors/
- The filename is case sensitive!
- Replace 'index' with a number indicating the cell of the graphic.
- Index starts from 0 and counts upwards.

<Action Cutin Battler: filename>
<Action Cutin Battler: filename, hue>
Changes this actor/enemy's cutin to use that of a battler graphic.
- Replace 'filename' with the filename of a graphic in either img/enemies/ or img/sv_enemies/ depending on if your game is front view or sideview.
- Replace 'hue' with a numeric value between (0 to 360) representing hue.

<Action Cutin Scale: n>
Changes the actor/enemy's cutin graphic's scale.
- Replace 'n' with a numeric value to represent scale.
- 1.0 is 100%. 0.5 is 50%. 2.25 is 225%.

<Action Cutin Offset X: +n>
<Action Cutin Offset X: -n>
<Action Cutin Offset Y: +n>
<Action Cutin Offset Y: -n>
Changes the actor/enemy's cutin graphic's offset position for X and Y.
- Replace 'n' with a numeric value in pixels to alter the x/y offset.

<Action Cutin Anti-Alias>
<Action Cutin No Anti-Alias>
Changes the anti-alias settings for the cutin graphic.
- Skill and Item Notetags
<Action Cutin>
<No Action Cutin>
Changes whether or not this skill/item will have an action cutin or not. This will bypass the settings in the Plugin Parameters.
<Action Cutin Image: filename>
Changes the speedline graphic behind the face cutin to a different image.
- Replace 'filename' with the filename of a graphic in img/pictures/
- The filename is case sensitive!

<Action Cutin Hue: n>
Changes the hue of the speedline graphic behind the face cutin.
- Replace 'n' with a numeric value between (0 to 360) representing hue.
<Action Cutin Blend Mode: Normal>
<Action Cutin Blend Mode: Additive>
<Action Cutin Blend Mode: Multiply>
<Action Cutin Blend Mode: Screen>
Changes the blend mode of the speedline graphic behind the face cutin.

<Action Cutin Border Thickness: n>
Changes the thickness of the borders for the action cutin.
- Replace 'n' with a numeric value in pixels to represent border thickness.

<Action Cutin Border Color: color>
Changes the color of the borders for the action cutin.
- Replace 'color' with the name of a color or a hex code representing color.

<Action Cutin Screen X: n>
<Action Cutin Screen Y: n>
Changes the speedline graphic's screen X and Y positions.
- Replace 'n' with a numeric value representing their coordinates.
- The X position will be the far left of the speedlines graphic.
- The Y position will be the middle of the speedlines graphic.

<Action Cutin Shift Distance X: n>
<Action Cutin Shift Distance Y: n>
Changes how far the face shifts from side to side.
- Replace 'n' with a numeric value representing the distance in pixels.
<Action Cutin Shift Frames: n>
Changes the duration of the shift.
- Replace 'n' with a numeric value representing the duration in frames.

<Action Cutin Flash>
<Action Cutin No Flash>
Changes whether or not the screen flash is enabled or disabled.

<Action Cutin Flash Color: red, green, blue, intensity>
Changes the color of the screen flash.
- Replace 'red' with a numeric value (0 to 255).
- Replace 'green' with a numeric value (0 to 255).
- Replace 'blue' with a numeric value (0 to 255).
- Replace 'intensity' with a numeric value (0 to 255).

<Action Cutin Flash Duration: n>
Changes the duration of the screen flash.
- Replace 'n' with a numeric value representing the duration in frames.

<Action Cutin Shake>
<Action Cutin No Shake>
Changes whether or not the screen shake is enabled or disabled.

<Action Cutin Shake Power: n>
Changes the power of the screen shake.
- Replace 'n' with a numeric value representing the shake power.

<Action Cutin Shake Speed: n>
Changes the speed of the screen speed.
- Replace 'n' with a numeric value representing the shake speed.

<Action Cutin Shake Duration: n>
Changes the duration of the screen shake.
- Replace 'n' with a numeric value representing the duration in frames.

<Action Cutin Sound>
<Action Cutin No Sound>
Changes whether or not a sound is played when this action cutin occurs.

<Action Cutin Sound Filename: filename>
Changes the sound played for the sound effect.
- Replace 'filename' with the filename of a sound in audio/se/
- The filename is case sensitive!

<Action Cutin Sound Volume: n>
Changes the volume of the sound effect played.
- Replace 'n' with a numeric value representing the volume.

<Action Cutin Sound Pitch: n>
Changes the pitch of the sound effect played.
- Replace 'n' with a numeric value representing the pitch.

<Action Cutin Sound Pan: n>
Changes the pan of the sound effect played.
- Replace 'n' with a numeric value representing the pan.
- Negative for left.
- Positive for right.

<Action Cutin Duration: n>
Changes the duration of the action cutin.
- Replace 'n' with a numeric value representing the duration in frames.

<Action Cutin Opacity Speed: n>
Changes the rate at which the action cutin fades in and out.
- Replace 'n' with a numeric value representing the change.
- Lower numbers are slower.
- Higher numbers are faster.

<Action Cutin Forced Scale: n>
Forces the face graphic of the battler to be scaled a certain value.
- Replace 'n' with a numeric value to represent scale.
- 1.0 is 100%. 0.5 is 50%. 2.25 is 225%.

<Action Cutin Forced Anti-Alias>
<Action Cutin Forced No Anti-Alias>
Forces the face graphic of the battler to use anti-alias or not.

<Action Cutin Forced Offset X: +n>
<Action Cutin Forced Offset X: -n>
<Action Cutin Forced Offset Y: +n>
<Action Cutin Forced Offset Y: -n>
Forces the actor/enemy's cutin graphic's offset position for X and Y.
- Replace 'n' with a numeric value in pixels to alter the x/y offset.
Action Sequence Fast Forward/Skip
<Cannot Fast Forward>
<Cannot Skip Forward>
- Prevents this specific item/skill from being able to Fast Forward or Skip Forward. Possible reasons on why you want to use such a notetag on such an item/skill could be that this is an item that involves button inputs, or displays data on screen (like a Scan) that you don't want the player to miss out on.

<Fast Forward Speed: x>
- Replace x with a number above 1. This is how fast the Fast Forward function will occur for this particular item/skill. To be used with longer action sequences. *See Note*

<Skip Forward Speed: x>
- Replace x with a number above 1. This is how much Skip Forward will speed through the action sequence at. To be used with longer action sequences. *See Note*
Note: Making the speed too high will have possible unforeseen consequences that the plugin cannot foresee nor fix. This is because the fast forward and skip functions function off a macroscale that speeds up the game's update frequency. This does not take into consideration the game's delta time since that's impossible to do without causing other problems. It is your own due diligence as a game developer to find the right speeds for each item/skill that won't break the system.
Base Parameter Control
You can use the following notetags to alter the various aspects that modify
the base parameter values:

Actor, Class, Enemy, Weapon, Armor, and State Notetags:

  <stat Plus: +x>
  <stat Plus: -x>
  Replace 'stat' with 'maxhp', 'maxmp', 'atk', 'def', 'mat', 'mdf', 'agi',
  or 'luk'. This is the value added to the base parameter before the rate
  and flat values contribute to the total parameter value assuming the
  plugin's default formula is utilized.

  <stat Rate: x%>
  <stat Rate: x.y>
  Replace 'stat' with 'maxhp', 'maxmp', 'atk', 'def', 'mat', 'mdf', 'agi',
  or 'luk'. This is the value multiplied to the sum of the base and plus of
  the parameter before affected by the buffRate and flat value assuming the
  plugin's default formula is utilized.

  <stat Flat: +x>
  <stat Flat: -x>
  Replace 'stat' with 'maxhp', 'maxmp', 'atk', 'def', 'mat', 'mdf', 'agi',
  or 'luk'. This is the value added at the end after the sum of the base and
  plus parameters have been added and multiplied by the rate values assuming
  the plugin's default formula is utilized.

  <stat Max: x>
  <stat Min: x>
  Replace 'stat' with 'maxhp', 'maxmp', 'atk', 'def', 'mat', 'mdf', 'agi',
  or 'luk'. This sets the maximum or minimum cap of the the stat parameter
  to x. If a battler is affected by multiple of these notetags, then the
  value used will be the largest value of the notetag used.
Battle Engine Core
When changing "Terms" and the "Messages" that appear in battle, inserting
the following tag anywhere in the message will cause the message to center
itself in the battle log.

  <CENTER>
  This tag must be all caps in order for the battle log window to recognize
  it as an instruction to center the displayed battle text message.

There are a couple of notetags you can use to change the way certain skills
and items will show up incase you don't want a name like 'Harold's Attack'
to appear in the name.

Skill and Item Notetags:

  <Display Text: x>
  This will change the text displayed to x.

  <Display Icon: x>
  This will change the icon displayed to x.

The battle turn order is also fixed, too. This way, any battlers that Have
their AGI value changed over the course of battle will reflect those changes
during the current turn rather than the following turn. The action speed
calculation can also be adjusted and finetuned to have the random factor of
its speed calculation formula removed, too, making AGI actually worthwhile
as a tactical parameter.

Skill and Item Notetag:
  <speed: +x>
  <speed: -x>
  This lets you break past the editor's limit of -2000 and 2000 allowing you
  to set the speed of your actions with more control.

Casting Animations help provide visual hints for players either by letting
them know which battler is going to perform an action or what type of skill
that action will be. This plugin enables skills to have casting animations
that can be modified universally or customized for each individual skill.

Skill Notetag:
  <Cast Animation: x>
  Sets the skill's cast animation to animation ID x. Setting x to zero will
  cause the skill to not have any animaton at all.

In RPG Maker MV's default battle system, both the sideview and the frontview
settings do not display counterattacks, reflected magic attacks, nor any
case of substituting for battle members. The Battle Engine Core provides
games that are using the sideview settings small amounts of animations to
relay information to the player in a more visual sense.

Magic Reflection will also display a reflection animation to indicate the
battler has reflection properties. This animation can be changed in the
parameters, but certain actors, classes, enemies, weapons, armors, and
states can display a unique kind of animation for reflection if desired.

Actor, Class, Enemy, Weapon, Armor, and State Notetag:
  <Reflect Animation ID: x>
  Changes the user's reflect animation to x. This will take priority in the
  following order: Actor, Class, Enemy, Weapon, Armor, State, Default.

Sometimes, you don't want your enemies to be able to move. Or you don't want
certain actors to be able to move. They're just stationary for whatever
reason. To accomplish that, you can use this notetag to forbid the battler
from moving.

Actor, Class, Enemy, Weapon, Armor, and State Notetag:
  <Sprite Cannot Move>
  Prevents the battler's sprite from moving. This will take priority in the
  following order: Actor, Class, Enemy, Weapon, Armor, and State. If an
  enemy is unable to move when it performs an action, it will flash white as
  if it normally does in front view.

Sideview battlers are generally centered horizontally, and grounded at their
feet. However, not all sideview battler spritesheets work this way. In the
event you have a sideview battler that doesn't conform to those standards,
you can 'anchor' them a different way.

Actor, Class, Weapon, Armor, State Notetags:
  <Anchor X: y.z>
  <Anchor Y: y.z>
  This sets the anchor location for the actor's sideview battler at y.z.
  By default, the X anchor is 0.5 while the Y anchor is 1.0. If you want
  the X anchor to be a bit more to the left, make it less than 0.5. Make it
  more than 0.5 to make the X anchor more towards the right. To raise the
  Y anchor, set the number value to less than 1.0. Keep adjusting until you
  find that perfect anchor setting.

If an anchor has multiple traits that yield different anchors, it will be
used in a priority list akin to this order:

  States
  Weapons
  Armors
  Class
  Actor
  Default

The higher it is on the priority list, the higher its priority.

To give your enemies unique attack animations, you can use this notetag:

Enemy Notetag:
  <Attack Animation: x>
  Replace x with the ID of the battle animation you wish to set as the
  enemy's default attack animation.

By default, RPG Maker MV's battle system has automatic state removal under
three different conditions: none, action end, turn end.

None and Turn End are working as intended. However, Action End, however, had
the states removed at the start of the battler's action rather than the end.
This is changed and updated to occur only at the end of a battler's action.

Two more automatic conditions are now added: Action Start and Turn Start.
These can be added and implemented using the following notetags:

State Notetags:
  <Action Start: x>
  <Action Start: x to y>
  This will cause this state to update its turns remaining at the start of
  an action. x is the number of turns it will last. If you use x to y, upon
  applying the state, the state will be removed a random number of turns
  from x to y.

  <Turn Start: x>
  <Turn Start: x to y>
  This will cause the state to update its turns remaining at the start of a
  battle turn. x is the number of turns it will last. If you use x to y,
  upon applying the state, the state will be removed a random number of
  turns from x to y.

States with Action End have a unique trait to them where if the caster of
the state is the current active battler (subject) and if the state is then
applied on the user itself, they will gain a 'free turn'. The 'free turn' is
to mitigate the user from losing 1 duration of the turn since with an Action
End timing, they would lose the benefit of being under the state for that
turn's timing.
Animated Sideview Enemies
Insert these notetags into the enemy noteboxes below to change their
sidewview battler aspects.

Enemy Notetags:

  --- General ---

  <Breathing>
  <No Breathing>
  Enables or disables a 'breathing' effect for the enemy sprite.

  <Breathing Speed: x>
  How many frames does it take to make a full breathing cycle? The lower the
  x value, the faster the enemy breathes. The higher the x value, the slower
  the enemy breathes.

  <Breathing Rate X: x.y>
  <Breathing Rate Y: x.y>
  Sets the horizontal and vertical breathing rate to x.y. 1.0 is a 100%
  variance change while 0.0 is a 0% variance.

  <Enable HP Link Breathing>
  <Disable HP Link Breathing>
  Will enable/disable HP Link Breathing. The lower the HP on the enemy, the
  slower the enemy will breathe.

  <Floating>
  Sets the enemy to be animated as if it was floating.

  <Floating Speed: x>
  How many frames does it take to do a full floating cycle? The lower the x
  value, the faster the enemy floats. The higher the x value, the slower the
  enemy floats.

  <Floating Rate: x.y>
  Sets the floating rate for the enemy to x.y. 1.0 is a 100% variance change
  while 0.0 is a 0% variance change.

  <Floating Height: x>
  Sets the minimum float height for the enemy to x.

  <Floating Death>
  <No Floating Death>
  Decide whether or not this particular enemy will float while dead or
  instead, drop to the ground instantly and will bypass the 'Floating Death'
  plugin parameter for the particular enemy.

  <Scale Sprite: x%>
  This allows you to scale the sprite larger or smaller by x% of the
  original sprite size. If you wish to only scale either the width or the
  height, use the notetags below:

  <Scale Sprite Width: x%>
  <Scale Sprite Height: x%>
  This will scale the sprite's width or height by x% amount specifically
  rather than the whole sprite itself by the same ratio.

  --- Sideview ---

  <Sideview Battler: filename>
  This is the filename used for the sideview battler found within your
  project's img/sv_actors/ folder. Doing this will enable the following
  notetags to be applied to the battler. This is case-sensitive and used
  without the image's file extension.

  *Example: SF_Actor3_8.png would be <Sideview Battler: SF_Actor3_8>

  *Note: If more than one of these tags is used, the sideview battler
  selected will be picked from a random pool. Their settings, however, will
  match all of the other sideview settings set in the notetags for the sake
  of simplicity.

  --- Sideview Specific ---

  <Sideview Anchor X: y.z>
  <Sideview Anchor Y: y.z>
  This sets the anchor location for the enemy's sideview battler at y.z.
  This is used for the event you have an odd-proportioned sideview battler.

  <Sideview Width: x>
  <Sideview Height: x>
  Sets the width/height of the sideview battler. This is for the event
  you're using a battler image that may have different proportions than
  normal sideview battlers.

  <Sideview Collapse>
  Sets it so that the enemy when it dies will collapse and vanish.

  <Sideview No Collapse>
  Sets it so that the enemy when it dies will leave behind a corpse and
  will not vanish.

  <Sideview Frame Speed: x>
  Sets the frame speed of this sideview battler to x. The lower the x value,
  the faster the sideview battler animates. The higher it is, the slower the
  battler animates.

  --- State Overlays ---

  <Sideview Show State Overlay>
  <Sideview Hide State Overlay>
  This will either show or hide the state overlay for the sideview enemy and
  ignore the default setting within the plugin parameters.

  --- Motions ---

  <Sideview Attack Motion: swing>
  <Sideview Attack Motion: thrust>
  <Sideview Attack Motion: missile>
  Sets the basic attack motion for your sideview enemy if the sideview
  enemy is not using any weapons. You can use any of the following motions:
  walk     wait     chant     guard     damage     evade
  thrust   swing    missile   skill     spell      item
  escape   victory  dying     abnormal  sleep      dead

  <Sideview Weapon: x>
  This sets the sprite's weapon image to x. If you haven't modified your
  system images of the weapons, they would be as follows:

  0 - Nothing
  1 - Dagger   7 - Long Bow  13 - Mace       19 - Slingshot  25 - Book
  2 - Sword    8 - Crossbow  14 - Rod        20 - Shotgun    26 - Custom
  3 - Flail    9 - Gun       15 - Club       21 - Rifle      27 - Custom
  4 - Axe     10 - Claw      16 - Chain      22 - Chainsaw   28 - Custom
  5 - Whip    11 - Glove     17 - Sword#2    23 - Railgun    29 - Custom
  6 - Staff   12 - Spear     18 - Iron Pipe  24 - Stun Rod   30 - Custom

  * Note: Inserting multiple of these notetags will put them inside a random
  pool of weapons to use. Keep in mind if you use this notetag, it will use
  all the default settings found in the plugin's parameters. If you wish to
  use more unique settings, use the notetag below:

  <Sideview Weapon: x, y, z>
  This sets the sprite's weapon image to x, motion to y, and attack
  animation to z. An example of how this notetag would be used would be
  as such:

     <Sideview Weapon: 2, swing, 6>

  This will give the battler a sword with the swing motion and playing
  battle animation 6 when attacking.

  <Sideview Idle Motion: x>
  Sets the idling motion for your sideview enemy. You can use any of the
  following motions:
  walk     wait     chant     guard     damage     evade
  thrust   swing    missile   skill     spell      item
  escape   victory  dying     abnormal  sleep      dead
  * Note: Inserting multiple of these notetags will put them inside a random
  pool of motions to use.

  <Sideview Damage Motion: x>
  Sets the damaged motion for your sideview enemy. You can use any of the
  following motions:
  walk     wait     chant     guard     damage     evade
  thrust   swing    missile   skill     spell      item
  escape   victory  dying     abnormal  sleep      dead

  <Sideview Evade Motion: x>
  Sets the evasion motion for your sideview enemy. You can use any of the
  following motions:
  walk     wait     chant     guard     damage     evade
  thrust   swing    missile   skill     spell      item
  escape   victory  dying     abnormal  sleep      dead

  <Sideview Escape Motion: x>
  Sets the escaping motion for your sideview enemy. You can use any of the
  following motions:
  walk     wait     chant     guard     damage     evade
  thrust   swing    missile   skill     spell      item
  escape   victory  dying     abnormal  sleep      dead

  <Sideview Guard Motion: x>
  Sets the guard motion for your sideview enemy. You can use any of the
  following motions:
  walk     wait     chant     guard     damage     evade
  thrust   swing    missile   skill     spell      item
  escape   victory  dying     abnormal  sleep      dead

  <Sideview Abnormal Motion: x>
  Sets the abnormal motion for your sideview enemy. You can use any of the
  following motions:
  walk     wait     chant     guard     damage     evade
  thrust   swing    missile   skill     spell      item
  escape   victory  dying     abnormal  sleep      dead

  <Sideview Sleep Motion: x>
  Sets the sleep motion for your sideview enemy. You can use any of the
  following motions:
  walk     wait     chant     guard     damage     evade
  thrust   swing    missile   skill     spell      item
  escape   victory  dying     abnormal  sleep      dead

  <Sideview Dying Motion: x>
  Sets the dying (crisis) motion for your sideview enemy. You can use any
  of the following motions:
  walk     wait     chant     guard     damage     evade
  thrust   swing    missile   skill     spell      item
  escape   victory  dying     abnormal  sleep      dead

  <Sideview Dead Motion: x>
  Sets the dead motion for your sideview enemy. You can use any of the
  following motions:
  walk     wait     chant     guard     damage     evade
  thrust   swing    missile   skill     spell      item
  escape   victory  dying     abnormal  sleep      dead

  --- Shadows ---

  <Sideview Show Shadow>
  Sets it so the enemy will show its shadow for its sideview sprite. The
  default setting of this is tied to Battle Engine Core's 'Show Shadows'.

  <Sideview Hide Shadow>
  Sets it so the enemy will hide its shadow for its sideview sprite. The
  default setting of this is tied to Battle Engine Core's 'Show Shadows'.

  <Sideview Shadow Width: x%>
  Sets the shadow width to x% larger/smaller than the default shadow size
  found within the img/system folder.

  <Sideview Shadow Height: x%>
  Sets the shadow height to x% larger/smaller than the default shadow size
  found within the img/system folder.

State Notetags:

  <Hide Sideview Weapon>
  This will cause the animated sideview enemy battler to hide its sideview
  weapon effect. The attack motion will revert back to the barehanded attack
  motion set for the enemy and the attack animation will be the enemy's
  default attack animation.
Battle System - ATB
The following are notetags that pertain to and affect the ATB system.

Skill and Item Notetags:
  <ATB Help>
  text
  text
  </ATB Help>
  For those planning on using multiple battle systems, sometimes you may
  have your skills perform differently while using ATB. If so, using this
  notetag will allow skills and items to display different help text while
  ATB is enabled.

  <ATB Speed: x>
  <ATB Charge: x>
  <ATB Gauge: x>
  Usable only during ATB. This sets the target's current speed or charge to
  x. If 'speed' or 'charge' is used, it will only affect those gauges while
  in the respective phase. If 'gauge' is used, it will affect either.

  <ATB Speed: x%>
  <ATB Charge: x%>
  <ATB Gauge: x%>
  Usable only during ATB. This sets the target's current speed or charge to
  x% of the whole gauge. If 'speed' or 'charge' is used, it will only affect
  those gauges while in the respective phase. If 'gauge' is used, it will
  affect either.

  <ATB Speed: +x>   or   <ATB Speed: -x>
  <ATB Charge: +x>  or   <ATB Charge: -x>
  <ATB Gauge: +x>   or   <ATB Gauge: -x>
  Usable only during ATB. This increases or decreases the target's current
  speed or charge by x. If 'speed' or 'charge' is used, it will only affect
  those gauges while in the respective phase. If 'gauge' is used, it will
  affect either.

  <ATB Speed: +x%>   or   <ATB Speed: -x%>
  <ATB Charge: +x%>  or   <ATB Charge: -x%>
  <ATB Gauge: +x%>   or   <ATB Gauge: -x%>
  Usable only during ATB. This increases or decreases the target's current
  speed or charge by x% of the whole gauge. If 'speed' or 'charge' is used,
  it will only affect those gauges while in the respective phase. If 'gauge'
  is used, it will affect either.

  <After ATB: x>
  <After ATB: x%>
  This will set the skill/item user's ATB speed value to x or x%. If 'x' is
  used, this will be the exact ATB value. If x% is used, this will be the
  percentage of the ATB gauge that it will be at.

  <ATB Interrupt>
  <ATB Interrupt: x%>
  This will give the skill the ability to interrupt and cancel out the
  target's current action while it is in the charging phase. If the 'x%'
  notetag version is used, it will have a x% chance of success.

  <Cannot ATB Interrupt>
  This causes the skill to be unable to be interrupted and prevent the
  battler's ATB to reset.

Actor, Class, Enemy, Weapon, Armor, and State Notetags:
  <ATB Start: +x>
  <ATB Start: +x%>
  Usable only during ATB. This will give the actor, class, enemy, weapon,
  armor, or state the property of starting battle with X ATB Speed or X% of
  the ATB gauge filled up.

  <ATB Turn: +x>
  <ATB Turn: +x%>
  Usable only during ATB. This will give the actor, class, enemy, weapon,
  armor, or state the property of starting a turn with X ATB Speed or X% of
  the ATB gauge filled up.
Visual ATB Gauge
The following are some notetags you can use to adjust the appearance of
the enemy's ATB Gauge.

Enemy Notetags:
  <Show ATB Gauge>
  <Hide ATB Gauge>
  This will cause the ATB Gauge to be shown or hidden ignoring the default
  settings found in the parameters.

  <ATB Gauge Width: x>
  This allows you to set the enemy's ATB Gauge width to x instead of having
  it match the enemy's battler graphic width.
Battle System - CTB
The following are notetags that pertain to and affect the CTB system.

Actor and Enemy Notetags:
  <CTB Icon: x>
  This sets the icon used for the actor/enemy to be x.

  <CTB Border Color: x>
  This sets the border color used for the actor/enemy to text color x.

  <CTB Background Color: x>
  This sets the background color used for the actor/enemy to text color x.

Actor only Notetags:
  <Class x CTB Icon: y>
  This sets it so that if the actor is a specific class, the actor will get
  a specific icon used for the CTB Turn Order. If the actor is class x, it
  will receive icon y.

  <Hero CTB Icon: x>
  <Warrior CTB Icon: x>
  <Mage CTB Icon: x>
  <Priest CTB Icon: x>
  If you prefer to use names instead of class ID's, you can use the above
  notetag format. If the actor is the named class, it will receive icon x.
  If you have multiple classes with the same name, priority will be given to
  the class with the highest ID.

Skill and Item Notetags:
  <CTB Help>
  text
  text
  </CTB Help>
  For those planning on using multiple battle systems, sometimes you may
  have your skills perform differently while using CTB. If so, using this
  notetag will allow skills and items to display different help text while
  CTB is enabled.

  <CTB Speed: x>
  Usable only during CTB. This sets the target's current speed to x.

  <CTB Speed: x%>
  Usable only during CTB. This sets the target's current speed to x% of
  the CTB turn completion target.

  <CTB Speed: +x>
  <CTB Speed: -x>
  Usable only during CTB. This increases or decreases the target's current
  speed by x.

  <CTB Speed: +x%>
  <CTB Speed: -x%>
  Usable only during CTB. This increases or decreases the target's current
  speed or charge by x% of the CTB turn completion target.

  <CTB Order: +x>
  <CTB Order: -x>
  Moves target's position in the turn order by +x or -x. +x will make the
  target having to wait more before getting their turn while -x will make
  the target having to wait less. The effect is minimal and will only last
  for the current turn cycle.
  * Note: If you use this for multiple targets, each target will shift turns
  individually at a time.

  <After CTB: x>
  <After CTB: x%>
  This will set the skill/item user's CTB speed value to x or x%. If 'x' is
  used, this will be the exact CTB value. If x% is used, this will be the
  percentage of the CTB turn completion target that it will be at.

Actor, Class, Enemy, Weapon, Armor, and State Notetags:
  <CTB Start: +x>
  <CTB Start: +x%>
  Usable only during CTB. This will give the actor, class, enemy, weapon,
  armor, or state the property of starting battle with X CTB Speed or X% of
  the CTB turn completion target.

  <CTB Turn: +x>
  <CTB Turn: +x%>
  Usable only during CTB. This will give the actor, class, enemy, weapon,
  armor, or state the property of starting a turn with X CTB Speed or X% of
  the CTB turn completion target.
Battle System - STB
The following are notetags that pertain to and affect the STB system.

Skill and Item Notetags:

  <STB Help>
   text
   text
  </STB Help>
  For those planning on using multiple battle systems, sometimes you may
  have your skills perform differently while using STB. If so, using this
  notetag will allow skills and items to display different help text while
  STB is enabled.
Collectible Card Game
Card Game Core
- Card Notetags
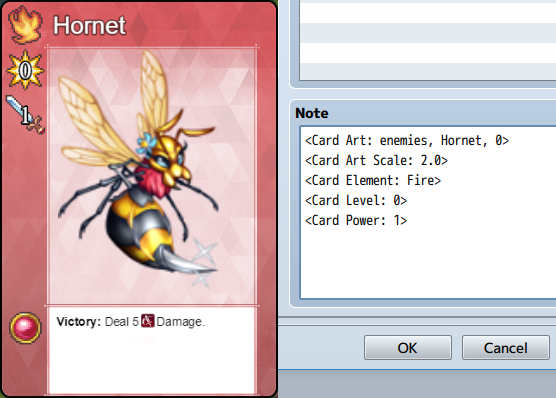
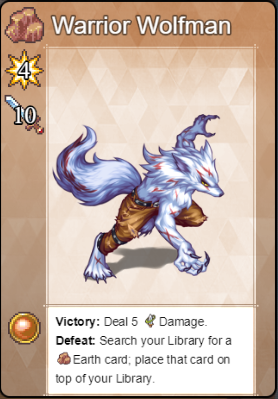
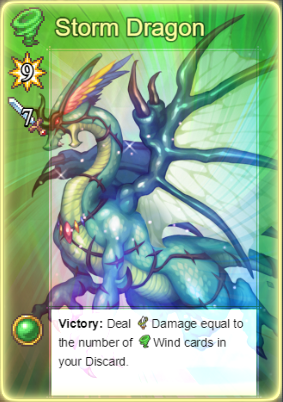
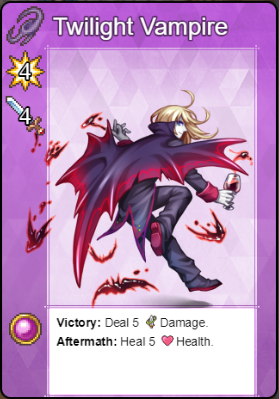
<Card Art: foldername, filename>
<Card Art: foldername, filename, hue>
- Replace 'foldername' with the img/folder's name (case sensitive)
- Replace 'filename' with the graphic's filename (case sensitive)
- (Optional) Replace 'hue' with a number between 0 and 360 for the hue. If
you don't use this option, it will default to 0.
- Example: <Card Art: sv_enemies, Dragon, 100>
<Card Dragonbones: armature>
- If you are running KELYEP_DragonBones, you can use DB armatures for the
card art instead. Replace 'armature' with the name of the armature you wish
load onto this card. The armature is automatically loaded upon game start.
This is case sensitive.

<Card Dragonbones Animation: animationName>
- Replace 'animationName' with the name of the animation used by the DB
armature. The animation name is case sensitive.
<Card Art Offset: +x, +y>
<Card Art Offset: -x, -y>
- Replace 'x' and 'y' with numeric values to determine the horizontal and
vertical offset for the art graphic from the center.
<Card Art Scale: x>
- Replace 'x' with a number to determine the scaling value of the art.
1.0 is 100%. 0.5 is 50%. 2.5 is 250%.
<Card Art Cells: ColxRow>
- Use this notetag only if you plan on using a sprite sheet.
- Replace 'Col' with the number of cell columns the sprite sheet has.
- Replace 'Row' with the number of cell rows the sprite sheet has.
- Otherwise, if this notetag is unused, the art will be treated as a
normal full-sized image.
<Cell Art Cell Index: x>
- Use this only if you plan on using a sprite sheet.
- Replace 'x' with the index number of the cell starting from 0.
- Otherwise, if this notetag is unused, the index cell will default to 0.
<Card Name: name>
- Replace 'name' with the text that you wish to appear on the card.
<Card Element: name>
- Replace 'name' with the element this card associates with. This will also
determine the Card Template plugin parameter this card uses. If this notetag
is not used, the element will default to 'None'. If you wish to use a custom
card template after defining the element, use <Card Template: x>.
<Card Level: x>
- Replace 'x' with this card's level. This is a numeric value.
<Card Power: x>
- Replace 'x' with this card's power. This is a numeric value.
<Card Health: x>
- Replace 'x' with this card's health. This is a numeric value. This does
not appear on cards by default unless you alter the settings in the Card
Templates plugin parameters to let it show.
<Card Template: name>
- Replace 'name' with the name of the Card Template you wish for this card
to use in place of the default one determined by its element.
<Card Rarity: x>
- Replace 'x' with a number representing the card's rarity. This is used to
determine the aura of the card and where it stands in the card pool when
opening booster packs.

<Card Parallax BG: filename>
- Replace 'filename' with the filename of a graphic from img/parallaxes/
to be used as this card's parallax background. This is case sensitive.
- This is an optional notetag. Not all cards need parallax backgrounds.
<Card Parallax BG Speed: +x, +y>
<Card Parallax BG Speed: -x, -y>
- Replace 'x' and 'y' with numeric values determining the parallax's scroll
speed for this card.
<Card Parallax BG Opacity: x>
- Replace 'x' with a number value between 0 and 255 to determine the opacity
level of the parallax background.
<Card Parallax BG Blend Mode: Normal>
<Card Parallax BG Blend Mode: Additive>
<Card Parallax BG Blend Mode: Multiply>
<Card Parallax BG Blend Mode: Screen>
- Determines which blend mode you wish to use for the parallax background.
You can only pick one of the above.

<Card Holo BG: filename>
- Replace 'filename' with the filename of a graphic from img/pictures/ to be
used as this card's hologram background. This is case sensitive.
- This is an optional notetag. Not all cards need holographic backgrounds.
<Card Holo BG Speed: x>
- Replace 'x' with a numeric value determine how fast the holographic hue
shifts each frame.
<Card Holo BG Opacity: x>
- Replace 'x' with a numeric value between 0 and 255 to determine the
holographic background's opacity.
<Card Holo BG Blend Mode: Normal>
<Card Holo BG Blend Mode: Additive>
<Card Holo BG Blend Mode: Multiply>
<Card Holo BG Blend Mode: Screen>
- Determines which blend mode you wish to use for the holographic background.
You can only pick one of the above.

<Card Parallax FG: filename>
- Replace 'filename' with the filename of a graphic from img/parallaxes/
to be used as this card's parallax foreground. This is case sensitive.
- This is an optional notetag. Not all cards need parallax foregrounds.
<Card Parallax FG Speed: +x, +y>
<Card Parallax FG Speed: -x, -y>
- Replace 'x' and 'y' with numeric values determining the parallax's scroll
speed for this card.
<Card Parallax FG Opacity: x>
- Replace 'x' with a number value between 0 and 255 to determine the opacity
level of the parallax foreground.
<Card Parallax FG Blend Mode: Normal>
<Card Parallax FG Blend Mode: Additive>
<Card Parallax FG Blend Mode: Multiply>
<Card Parallax FG Blend Mode: Screen>
- Determines which blend mode you wish to use for the parallax foreground.
You can only pick one of the above.

<Card Holo FG: filename>
- Replace 'filename' with the filename of a graphic from img/pictures/ to be
used as this card's hologram foreground. This is case sensitive.
- This is an optional notetag. Not all cards need holographic foregrounds.
<Card Holo FG Speed: x>
- Replace 'x' with a numeric value determine how fast the holographic hue
shifts each frame.
<Card Holo FG Opacity: x>
- Replace 'x' with a numeric value between 0 and 255 to determine the
holographic foreground's opacity.
<Card Holo FG Blend Mode: Normal>
<Card Holo FG Blend Mode: Additive>
<Card Holo FG Blend Mode: Multiply>
<Card Holo FG Blend Mode: Screen>
- Determines which blend mode you wish to use for the holographic foreground.
You can only pick one of the above.
<Card Text>
Line 1
Line 2
Line 3
Line 4
</Card Text>
- Replace lines 1 through 4 with text you wish to appear in the card's text
box. If you do not use this notetag, the text will use the card's database
item's description text instead.
<Card Text Scale: x>
- Replace 'x' with a number determining the scale of the text size.
<Not a Card>
- If you want to mark something as <Not a Card>, it won't appear in the
card pool of booster packs even if the number gets listed. It also won't be
registered as a card. This is only to be used in situations where a database
item got flagged incorrectly by the plugin as a card, when it isn't one.
- Booster Notetags
<Booster Art: filename>
- Replace 'filename' with the filename of a graphic from img/pictures/ to be
used as the art for this booster pack. If you do not use this notetag, the
art will default to the one defined in the Plugin Parameters.
<Booster BG: filename>
- Replace 'filename' with the filename of a graphic from img/parallaxes/ to
be used as the background art shown when opening a booster pack during a full
booster animation sequence. If you do not use this notetag, the graphic used
will default to the one defined in the Plugin Parameters.
<Booster Rarities: x>
<Booster Rarities: x, x, x>
<Booster Rarities: x, x, x, x, x>
- Replace 'x' with numbers from 0 to whatever your highest rarity is.
- Use any number of x's you want in the notetag.
- This determines the rarity pools used when opening this booster pack.
- Use multiples of this notetag to have more variety in the booster pack
contents there can be. When this booster pack is opened, it will only choose
one of the above pools.
<Card Pool: x>
<Card Pool: x, x, x>
<Card Pool: x, x, x, x, x, x>
- Replace 'x' with the ID's of the items you wish to put into the card pool.
- Use any number of x's you want in the notetag.
- Use multiples of this notetag if you wish. The card pool will consolidate
each iteration of this notetag.
- This will combine the card pool with the below notetag.
<Card Pool: x to y>
- Replace 'x' and 'y' with the ID's you wish to grab all the numbers of
between and throw them into the card pool.
- Use multiples of this notetag if you wish. The card pool will consolidate
each iteration of this notetag.
- This will combine the card pool with the above notetag.
Card Game Deck Builder
<Deck Box: filename>
- Replace 'filename' with the filename of a graphic from img/pictures/ to
unlock this deck box image for the player if this item is in their inventory.
This is case sensitive.

<Deck Sleeves: filename>
- Replace 'filename' with the filename of a graphic from img/pictures/ to
unlock this deck sleeves image for the player if this item is in their
inventory. This is case sensitive.
Card Game Mechanics
- Start Phase Notetags
<Card Hand Start JS>
code
code
</Card Hand Start JS>
- Runs the JavaScript 'code' inbetween the two notetags if the card is found
in your hand at the start of the game.
<Card Hand Start Common Event: x>
- Runs common event 'x' if the card is found in your hand at the start of
the game. The common event will run after the JavaScript runs.
<Card Discard Start JS>
code
code
</Card Discard Start JS>
- Runs the JavaScript 'code' inbetween the two notetags if the card is found
in discard hand at the start of the game.
<Card Discard Start Common Event: x>
- Runs common event 'x' if the card is found in your discard at the start of
the game. The common event will run after the JavaScript runs.
<Card Exhaust Start JS>
code
code
</Card Exhaust Start JS>
- Runs the JavaScript 'code' inbetween the two notetags if the card is found
in your exhaust at the start of the game.
<Card Hand Start Common Event: x>
- Runs common event 'x' if the card is found in your exhaust at the start of
the game. The common event will run after the JavaScript runs.
<Card Library Start JS>
code
code
</Card Library Start JS>
- Runs the JavaScript 'code' inbetween the two notetags if the card is found
in your library at the start of the game.
<Card Library Start Common Event: x>
- Runs common event 'x' if the card is found in your library at the start of
the game. The common event will run after the JavaScript runs.
- Upkeep Phase Notetags
<Card Hand Upkeep JS>
code
code
</Card Hand Upkeep JS>
- Runs the JavaScript 'code' inbetween the two notetags if the card is found
in your hand during Upkeep Phase.
<Card Hand Upkeep Common Event: x>
- Runs common event 'x' if the card is found in your hand during Upkeep
Phase. The common event will run after the JavaScript runs.
<Card Discard Upkeep JS>
code
code
</Card Discard Upkeep JS>
- Runs the JavaScript 'code' inbetween the two notetags if the card is found
in discard hand during Upkeep Phase.
<Card Discard Upkeep Common Event: x>
- Runs common event 'x' if the card is found in your discard during Upkeep
Phase. The common event will run after the JavaScript runs.
<Card Exhaust Upkeep JS>
code
code
</Card Exhaust Upkeep JS>
- Runs the JavaScript 'code' inbetween the two notetags if the card is found
in your exhaust during Upkeep Phase.
<Card Hand Upkeep Common Event: x>
- Runs common event 'x' if the card is found in your exhaust during Upkeep
Phase. The common event will run after the JavaScript runs.
<Card Library Upkeep JS>
code
code
</Card Library Upkeep JS>
- Runs the JavaScript 'code' inbetween the two notetags if the card is found
in your library during Upkeep Phase.
<Card Library Upkeep Common Event: x>
- Runs common event 'x' if the card is found in your library during Upkeep
Phase. The common event will run after the JavaScript runs.
- Draw Phase Notetags
<Card Hand Draw JS>
code
code
</Card Hand Draw JS>
- Runs the JavaScript 'code' inbetween the two notetags if the card is found
in your hand during Draw Phase.
<Card Hand Draw Common Event: x>
- Runs common event 'x' if the card is found in your hand during Draw
Phase. The common event will run after the JavaScript runs.
<Card Discard Draw JS>
code
code
</Card Discard Draw JS>
- Runs the JavaScript 'code' inbetween the two notetags if the card is found
in discard hand during Draw Phase.
<Card Discard Draw Common Event: x>
- Runs common event 'x' if the card is found in your discard during Draw
Phase. The common event will run after the JavaScript runs.
<Card Exhaust Draw JS>
code
code
</Card Exhaust Draw JS>
- Runs the JavaScript 'code' inbetween the two notetags if the card is found
in your exhaust during Draw Phase.
<Card Hand Draw Common Event: x>
- Runs common event 'x' if the card is found in your exhaust during Draw
Phase. The common event will run after the JavaScript runs.
<Card Library Draw JS>
code
code
</Card Library Draw JS>
- Runs the JavaScript 'code' inbetween the two notetags if the card is found
in your library during Draw Phase.
<Card Library Draw Common Event: x>
- Runs common event 'x' if the card is found in your library during Draw
Phase. The common event will run after the JavaScript runs.
- Main Phase Notetags
<Card No Battle>
- This card is unable to battle.
- - -
<Card Spell 1 JS>
code
code
</Card Spell 1 JS>
- If this card's spell 1 is used, perform the JavaScript 'code' inbetween
the two notetags.
<Card Spell 1 Common Event: x>
- If this card's spell 1 is used, perform common event 'x'. The common event
will run after the JavaScript runs.
<Card Spell 1 Enable>
code
enable = code
</Card Spell 1 Enable>
- If this notetag is found, then the JavaScript 'code' will determine if the
'enable' variable is true/false, making the spell enabled or not.
<Card Spell 1 Icon: x>
- Uses icon 'x' for this card's spell 1.
<Card Spell 1 Name: x>
- Gives this card's spell 1 a name as 'x'.
<Card Spell 1 Animation: x>
- Plays animation 'x' when this card's spell 1 is used.
<Card Spell 1 Allow AI Use>
- Will allow the A.I. to use this card's spell 1.
<Card Spell 1 Check AI Use>
code
enable = code
</Card Spell 1 Check AI Use>
- If this notetag is found, then the JavaScript 'code' will determine if the
'enable' variable is true/false, making the spell allowed to be used by A.I.
or not. This can be used to prevent the A.I. from using healing at full HP.
- - -
<Card Spell 2 JS>
code
code
</Card Spell 2 JS>
- If this card's spell 2 is used, perform the JavaScript 'code' inbetween
the two notetags.
<Card Spell 2 Common Event: x>
- If this card's spell 2 is used, perform common event 'x'. The common event
will run after the JavaScript runs.
<Card Spell 2 Enable>
code
enable = code
</Card Spell 2 Enable>
- If this notetag is found, then the JavaScript 'code' will determine if the
'enable' variable is true/false, making the spell enabled or not.
<Card Spell 2 Icon: x>
- Uses icon 'x' for this card's spell 2.
<Card Spell 2 Name: x>
- Gives this card's spell 2 a name as 'x'.
<Card Spell 2 Animation: x>
- Plays animation 'x' when this card's spell 2 is used.
<Card Spell 2 Allow AI Use>
- Will allow the A.I. to use this card's spell 2.
<Card Spell 2 Check AI Use>
code
enable = code
</Card Spell 2 Check AI Use>
- If this notetag is found, then the JavaScript 'code' will determine if the
'enable' variable is true/false, making the spell allowed to be used by A.I.
or not. This can be used to prevent the A.I. from using healing at full HP.
- - -
<Card Spell 3 JS>
code
code
</Card Spell 3 JS>
- If this card's spell 3 is used, perform the JavaScript 'code' inbetween
the two notetags.
<Card Spell 3 Common Event: x>
- If this card's spell 3 is used, perform common event 'x'. The common event
will run after the JavaScript runs.
<Card Spell 3 Enable>
code
enable = code
</Card Spell 3 Enable>
- If this notetag is found, then the JavaScript 'code' will determine if the
'enable' variable is true/false, making the spell enabled or not.
<Card Spell 3 Icon: x>
- Uses icon 'x' for this card's spell 3.
<Card Spell 3 Name: x>
- Gives this card's spell 3 a name as 'x'.
<Card Spell 3 Animation: x>
- Plays animation 'x' when this card's spell 3 is used.
<Card Spell 3 Allow AI Use>
- Will allow the A.I. to use this card's spell 3.
<Card Spell 3 Check AI Use>
code
enable = code
</Card Spell 3 Check AI Use>
- If this notetag is found, then the JavaScript 'code' will determine if the
'enable' variable is true/false, making the spell allowed to be used by A.I.
or not. This can be used to prevent the A.I. from using healing at full HP.
- - -
<Card Spell 4 JS>
code
code
</Card Spell 4 JS>
- If this card's spell 4 is used, perform the JavaScript 'code' inbetween
the two notetags.
<Card Spell 4 Common Event: x>
- If this card's spell 4 is used, perform common event 'x'. The common event
will run after the JavaScript runs.
<Card Spell 4 Enable>
code
enable = code
</Card Spell 4 Enable>
- If this notetag is found, then the JavaScript 'code' will determine if the
'enable' variable is true/false, making the spell enabled or not.
<Card Spell 4 Icon: x>
- Uses icon 'x' for this card's spell 4.
<Card Spell 4 Name: x>
- Gives this card's spell 4 a name as 'x'.
<Card Spell 4 Animation: x>
- Plays animation 'x' when this card's spell 4 is used.
<Card Spell 4 Allow AI Use>
- Will allow the A.I. to use this card's spell 4.
<Card Spell 4 Check AI Use>
code
enable = code
</Card Spell 4 Check AI Use>
- If this notetag is found, then the JavaScript 'code' will determine if the
'enable' variable is true/false, making the spell allowed to be used by A.I.
or not. This can be used to prevent the A.I. from using healing at full HP.
- - -
There are four spells available per card. Nothing more provided by default.
- Battle Phase Notetags
<Card AI Priority-behavior: x>
- This affects the A.I. only. It will make the A.I. pick specific cards over
others depending on the 'behavior' and the 'x' value.
- Replace 'behavior' with a string stating the behavior type to differentiate
different priority settings when a card has multiples of this notetag.
- Replace 'x' with a number depicting the priority value. Lower values mean
the card is less likely to be picked while higher priority means the card is
more likely to be picked.
- Example: <Card AI Priority-Strong: 50>
 <Card AI Priority-Strong: 25>
 <Card AI Priority-Weak: 60>
 <Card AI Priority-Weak: 30>
 <Card AI Priority-Tactical: 90>
 <Card AI Priority-Tactical: 45>

*NOTE* The A.I. will also pick from a pick list of cards using the 'Strong'
behavior. If a setting turns on the "$calc.pickWeakest" flag, then it will
use the 'Weak' behavior. Keep that in mind when making certain cards pickable
for discarding or adding to the hand.
- - -
<Card Pre-Battle JS>
code
code
</Card Pre-Battle JS>
- If this notetag is found, it will occur before damage calculations. It will
run the JavaScript 'code' found between the two notetags.
<Card Pre-Battle Common Event: x>
- If this notetag is found, it will occur before damage calculations. Perform
common event 'x'. The common event will run after the JavaScript runs.
- - -
<Card Tie Battle JS>
code
code
</Card Tie Battle JS>
- If this notetag is found, it will occur if the battle is tied. It will
run the JavaScript 'code' found between the two notetags.
<Card Tie Battle Common Event: x>
- If this notetag is found, it will occur if the battle is tied. Perform
common event 'x'. The common event will run after the JavaScript runs.
- - -
<Card Lose Battle JS>
code
code
</Card Lose Battle JS>
- If this notetag is found, it will occur if the card loses a battle. It will
run the JavaScript 'code' found between the two notetags.
<Card Lose Battle Common Event: x>
- If this notetag is found, it will occur if the card loses a battle. Perform
common event 'x'. The common event will run after the JavaScript runs.
- - -
<Card Win Battle JS>
code
code
</Card Win Battle JS>
- If this notetag is found, it will occur if the card wins a battle. It will
run the JavaScript 'code' found between the two notetags.
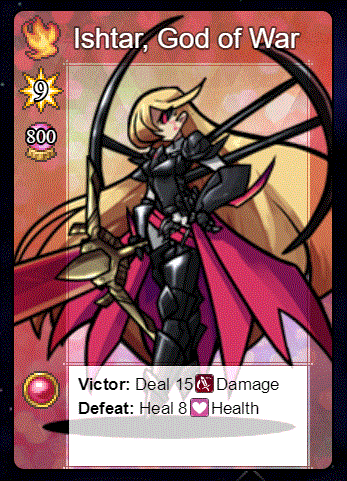
<Card Win Battle Common Event: x>
- If this notetag is found, it will occur if the card wins a battle. Perform
common event 'x'. The common event will run after the JavaScript runs.

*NOTE* If neither of the notetags are found in the card, then there will be
a default effect of dealing 5 damage to the opposing player's health. This
can be modified from within the ╘ Post-Damage Effects common event.
- - -
<Card Post-Battle JS>
code
code
</Card Post-Battle JS>
- If this notetag is found, it will occur after win/loss effects. It will
run the JavaScript 'code' found between the two notetags.

<pre>
<Card Post-Battle Common Event: x>
- If this notetag is found, it will occur after win/loss effects. Perform
common event 'x'. The common event will run after the JavaScript runs.
- - -
<Card Resolve Battle JS>
code
code
</Card Resolve Battle JS>
- If this notetag is found, it will occur after post-battle effects. It will
run the JavaScript 'code' found between the two notetags.
<Card Resolve Battle Common Event: x>
- If this notetag is found, it will occur after post-battle effects. Perform
common event 'x'. The common event will run after the JavaScript runs.

*NOTE* If neither of the notetags are found in the card, then there will be
a default effect of sending the card to the player's discard pile. This can
be modified from within the ╘ Post-Damage Effects common event.
- End Phase Notetags
<Card Hand End JS>
code
code
</Card Hand End JS>
- Runs the JavaScript 'code' inbetween the two notetags if the card is found
in your hand during End Phase.
<Card Hand End Common Event: x>
- Runs common event 'x' if the card is found in your hand during End
Phase. The common event will run after the JavaScript runs.
<Card Discard End JS>
code
code
</Card Discard End JS>
- Runs the JavaScript 'code' inbetween the two notetags if the card is found
in discard hand during End Phase.
<Card Discard End Common Event: x>
- Runs common event 'x' if the card is found in your discard during End
Phase. The common event will run after the JavaScript runs.
<Card Exhaust End JS>
code
code
</Card Exhaust End JS>
- Runs the JavaScript 'code' inbetween the two notetags if the card is found
in your exhaust during End Phase.
<Card Hand End Common Event: x> - Runs common event 'x' if the card is found in your exhaust during End Phase. The common event will run after the JavaScript runs.
<Card Library End JS>
code
code
</Card Library End JS>
- Runs the JavaScript 'code' inbetween the two notetags if the card is found
in your library during End Phase.
<Card Library End Common Event: x>
- Runs common event 'x' if the card is found in your library during End
Phase. The common event will run after the JavaScript runs.
Class Change Core
The following are some notetags you can use with the Class Change Core
plugin.

Actor Notetags:
  <Unlock Class: x>
  <Unlock Class: x, x, x>
  <Unlock Class: x to y>
  This actor will have class(es) x unlocked at the start of the game in
  addition to its current class and access to any of the global classes.

  <Cannot Change Class>
  This prevents this actor from being able to change primary classes. This
  could be reversed from plugin commands, however.

  <Class x Character: filename y>
  When this actor's class is x, the actor's character sprite will become
  'filename' and index y on the fieldmap.

  <Hero Character: filename y>
  <Warrior Character: filename y>
  If you prefer to use class names instead of the class ID, use the above
  format. When this actor is this class, the actor's character sprite will
  become 'filename' and index y on the fieldmap.

  <Class x Face: filename y>
  When this actor's class is x, the actor's face graphic will become
  'filename' and index y for menus.

  <Hero Face: filename y>
  <Warrior Face: filename y>
  If you prefer to use class names instead of the class ID, use the above
  format. When this actor is this class, the actor's face graphic will
  become 'filename' and index y for menus.

  <Class x Battler: filename>
  When this actor's class is x, the actor's battler sprite will become
  'filename' in battle.

  <Hero Battler: filename>
  <Warrior Battler: filename>
  If you prefer to use class names instead of the class ID, use the above
  format. When this actor is this class, the actor's battler sprite will
  become 'filename' in battle.

Class Notetags:
  <Icon: x>
  Sets the icon for this class to x. This icon is used in the Class Change
  menu listing.

  <Use Nickname>
  This will cause the class to use the nickname used by the actor instead
  of the class name.

  <Help Description>
   Text
   Text
  </Help Description>
  Sets the help description for the class to the specified text.

  <Level Unlock Requirements>
   Class x: Level y
   Class x: Level y
  </Level Unlock Requirements>
  Sets the requirements for unlocking that particular class. The unlocking
  of the class will require classes x to be at level y. Insert multiple of
  the strings in between the two opening and closing notetags to require all
  of the class levels to be met.

  <Level Unlock Requirements>
   Hero: Level y
   Warrior: Level y
  </Level Unlock Requirements>
  If you prefer to use class names instead of the class ID, use the above
  format. This will set the level requirement for the mentioned class to y.
  If there are multiple classes with the same name, the class with the
  highest ID value will be taken.
Subclass
You can use the following notetags to modify subclassing aspects.

Actor Notetag:
  <Subclass: x>
  Sets the actor's default subclass to x.

  <Cannot Change Subclass>
  This prevents this actor from being able to change subclasses. This could
  be reversed from plugin commands, however.

  <Restrict Class: x>
  <Restrict Class: x, x, x>
  <Restrict Class: x to y>
  This particular actor cannot switch his or her primary class to class(es)
  x (to y). This does not apply to the subclass. The actor can still change
  to this class via event.

  <Restrict Subclass: x>
  <Restrict Subclass: x, x, x>
  <Restrict Subclass: x to y>
  This particular actor cannot switch his or her subclass to class(es)
  x (to y). This does not apply to the primary class.  The actor can still
  change to this subclass via event.

Class Notetags:
  <Primary Only>
  This class can only be class changed to a primary class and nothing more.
  Actors can still change to this class via event.

  <Subclass Only>
  This class can only be class changed to a subclass and nothing more.
  Actors can still change to this subclass via event.

  <Subclass x Combo Name: text>
  If this class is the primary and the subclass is class ID x, then the
  class name displayed will be 'text'. For example, if the class combination
  is Warrior/Wizard, the name can appear as Spellblade.

  <Hero Combo Name: text>
  <Warrior Combo Name: text>
  If you choose to use the class's name instead, you can write out the name
  of the class in place of Subclass x. If you have multiple classes with the
  same name, priority will be given to the class with the highest ID.

Skill and Item Notetags:
  <Require Class: x>
  <Require Class: x, x, x>
  <Require Class: x to y>
  Replace x with the class's ID. This skill/item can only be used by the
  listed class(es) x. This does not apply to enemies.

  <Require Subclass: x>
  <Require Subclass: x, x, x>
  <Require Subclass: x to y>
  Replace x with the class's ID. This skill/item can only be used by the
  listed subclass(es) x. This does not apply to enemies.
Core Engine
Actor Notetag
  <Initial Level: x>
  Changes the actor's initial level to x. This allows you to bypass the
  editor's level 99 limit.

  <Max Level: x>
  Changes the actor's max level to x. This allows you to bypass the editor's
  level 99 limit.

Class Skill Learn Notetag
  <Learn at Level: x>
  When placed inside a class's "Skills to Learn" notetag, this will cause
  the class to learn the skill at level x.

Item, Weapon, Armor Notetags
  <Price: x>
  Changes the price of the item to x. This notetag allows you to bypass the
  editor's 999,999 gold cost limit.

  <Max Item: x>
  This changes the maximum amount of the item to x.

Weapon and Armor Notetags
  <stat: +x>
  <stat: -x>
  Allows the piece of weapon or armor to gain or lose x amount of stat.
  Replace "stat" with "hp", "mp", "atk", "def", "mat", "mdf", "agi", or
  "luk" to alter that specific stat. This allows the piece of equipment
  to go past the editor's default limitation so long as the maximum value
  allows for it.

Enemy Notetag
  <Gold: x>
  Changes the gold drop value of enemies to x. This notetag allows you to
  bypass the editor's 9,999,999 gold drop limit.

  <stat: x>
  This changes the enemy's stat to x amount. Replace "stat" with "hp",
  "mp", "atk", "def", "mat", "mdf", "agi", or "luk" to alter that
  specific stat. This allows the piece of equipment to go past the
  editor's default limitation.

  <exp: x>
  This changes the enemy's exp given out to x amount. This allows the
  enemy give out more exp than the editor's default 9,999,999 limit.
Extra Parameter Formula
You can use the following notetags to alter the various aspects that modify
the extra parameter values:

Actor, Class, Enemy, Weapon, Armor, and State Notetags:

  <stat Plus: +x%>
  <stat Plus: -x%>
  <stat Plus: +x.y>
  <stat Plus: -x.y>
  Replace 'stat' with 'hit', 'eva', 'cri', 'cev', 'mev', 'mrf', 'cnt',
  'hrg', 'mrg', or 'trg'. This is the value added to the base parameter
  before the rate and flat values contribute to the total parameter value
  assuming the plugin's default formula is utilized.

  <stat Rate: x%>
  <stat Rate: x.y>
  Replace 'stat' with 'hit', 'eva', 'cri', 'cev', 'mev', 'mrf', 'cnt',
  'hrg', 'mrg', or 'trg'. This is the value multipled to the sum of the base
  and plus values of the parameter before added by the flat value assuming
  the plugin's default formula is utilized.

  <stat Flat: +x%>
  <stat Flat: -x%>
  <stat Flat: +x.y>
  <stat Flat: -x.y>
  Replace 'stat' with 'hit', 'eva', 'cri', 'cev', 'mev', 'mrf', 'cnt',
  'hrg', 'mrg', or 'trg'. This is the value added finally to the sum of the
  base and plus values after being multiplied by the rate value assuming the
  plugin's default formula is utilized.
Save Core
New Game+
There are some notetags you can utilize with a few database objects.

Actor, Item, Weapon, Armor Notetag

  <No New Game+ Carry Over>
  - This will prevent the item, weapon, or armor from being carried over to
  New Game+. If this is used on an actor, the actor will be in its default
  state as if a new game started.
Special Parameter Formula
You can use the following notetags to alter the various aspects that modify
the special parameter values:

Actor, Class, Enemy, Weapon, Armor, and State Notetags:

  <stat Plus: +x%>
  <stat Plus: -x%>
  <stat Plus: +x.y>
  <stat Plus: -x.y>
  Replace 'stat' with 'tgr', 'grd', 'rec', 'pha', 'mcr', 'tcr', 'pdr',
  'mdr', 'fdr', or 'exr'. This is the value added to the base parameter
  before the rate and flat values contribute to the total parameter value
  assuming the plugin's default formula is utilized.

  <stat Rate: x%>
  <stat Rate: x.y>
  Replace 'stat' with 'tgr', 'grd', 'rec', 'pha', 'mcr', 'tcr', 'pdr',
  'mdr', 'fdr', or 'exr'. This is the value multipled to the sum of the base
  and plus values of the parameter before added by the flat value assuming
  the plugin's default formula is utilized.

  <stat Flat: +x%>
  <stat Flat: -x%>
  <stat Flat: +x.y>
  <stat Flat: -x.y>
  Replace 'stat' with 'tgr', 'grd', 'rec', 'pha', 'mcr', 'tcr', 'pdr',
  'mdr', 'fdr', or 'exr'. This is the value added finally to the sum of the
  base and plus values after being multiplied by the rate value assuming the
  plugin's default formula is utilized.
Pages in category "Notetags (MV)"
The following 142 pages are in this category, out of 142 total.
A
B
- Base Parameter Control (YEP)
- Battle A.I. Core (YEP)
- Battle BGM Control (YEP)
- Battle Effects Pack 1 (Olivia)
- Battle Effects Pack 2 (Olivia)
- Battle Engine Core (YEP)
- Battle Impact (Olivia)
- Battle Select Cursor (YEP)
- Battle System - ATB (YEP)
- Battle System - CTB (YEP)
- Battle System - STB (YEP)
- Boost Point System (Olivia)
- Break Shield System (Olivia)
- Bright Effects (Olivia)
- Buffs & States Core (YEP)
C
D
E
- Element Core (YEP)
- Enemy Base Parameters (YEP)
- Enemy Levels (YEP)
- Enhanced TP (YEP)
- Equip Battle Skills (YEP)
- Equip Core (YEP)
- Equip Requirements (YEP)
- Equip Skill Tiers (YEP)
- Equipment Set Bonuses (Olivia)
- Event Click Trigger (YEP)
- Event Copier (YEP)
- Event Encounter Aid (YEP)
- Event Hitbox Resize (YEP)
- Event Sprite Offset (YEP)
- Event Step Animation Options (YEP)
- Extended Damage Over Time (YEP)
- Extra Enemy Drops (YEP)
- Extra Parameter Formula (YEP)
I
L
M
P
R
S
- Save Event Locations (YEP)
- Sealed Battle Commands (Arisu)
- Selection Control (YEP)
- Shop Menu Core (YEP)
- Skill Cooldowns (YEP)
- Skill Core (YEP)
- Skill Cost Items (YEP)
- Skill Learn System (YEP)
- Skill Mastery Levels (YEP)
- Slippery Tiles (YEP)
- Smart Jump (YEP)
- Special Parameter Formula (YEP)
- Stat Allocation (YEP)
- State Categories (YEP)
- State Tooltip Display (Olivia)
- Steal & Snatch (YEP)
- Steamworks MV (Visustella)
- Subclass (YEP)
- Swap Enemies (YEP)