Difference between revisions of "Category:Notetags (MV)"
(→Item Core) |
|||
| (96 intermediate revisions by 4 users not shown) | |||
| Line 1: | Line 1: | ||
{{TOCright}} | {{TOCright}} | ||
| + | {{Hide Sidebar}} | ||
| + | |||
| + | {| style="width: 800px;" cellspacing="0" cellpadding="0" | ||
| + | | style="width: 100%; vertical-align: top;" | | ||
| + | |||
| + | [[File:NotetagsMV.png]] | ||
| + | |||
| + | [[RPG Maker MV]]'s editor is unable to allow for custom traits/properties that a game dev may wish to associate with a database object, event, map, etc. [[:Category:Notetags (MV)|Notetags]] are used to work around such limitations by allowing the game dev to tag certain traits/properties using specific Notetags declared by the related plugin. | ||
| + | |||
| + | Here is a list of [[:Category:Notetags (MV)|Notetag(s)]] that you may use. | ||
| + | |||
== [[Absorption Barrier (YEP)|Absorption Barrier]] == | == [[Absorption Barrier (YEP)|Absorption Barrier]] == | ||
| Line 272: | Line 283: | ||
'''Note:''' Making the speed too high will have possible unforeseen consequences that the plugin cannot foresee nor fix. This is because the fast forward and skip functions function off a macroscale that speeds up the game's update frequency. This does not take into consideration the game's delta time since that's impossible to do without causing other problems. It is your own due diligence as a game developer to find the right speeds for each item/skill that won't break the system. | '''Note:''' Making the speed too high will have possible unforeseen consequences that the plugin cannot foresee nor fix. This is because the fast forward and skip functions function off a macroscale that speeds up the game's update frequency. This does not take into consideration the game's delta time since that's impossible to do without causing other problems. It is your own due diligence as a game developer to find the right speeds for each item/skill that won't break the system. | ||
| − | == [[ | + | == [[Auto Passive States (YEP)|Auto Passive States]] == |
<nowiki> | <nowiki> | ||
| − | + | For those who would like to allocate passive states to your battlers, use | |
| − | the | + | the notetags below: |
| + | |||
| + | Actor, Class, Skills, Weapon, Armor, Enemy Notetags: | ||
| + | <Passive State: x> | ||
| + | <Passive State: x, x, x> | ||
| + | This will allow the actor or enemy to have state x as a passive state. | ||
| + | If placed inside a weapon or armor notebox, the user will have that | ||
| + | passive state. | ||
| + | |||
| + | <Passive State: x to y> | ||
| + | This will add the states x through y (in a sequence) for the actor or | ||
| + | enemy to have as a passive state. If placed inside a weapon or armor | ||
| + | notebox, the user will have that passive state. | ||
| − | + | For those who don't want their passive states to always be on, you can use | |
| + | the following notetags to introduce conditions for your passive states. All | ||
| + | conditions must be fulfilled in order for the passive state to appear. | ||
| − | < | + | State Notetags: |
| − | < | + | <Passive Condition: HP Above x%> |
| − | + | <Passive Condition: HP Below x%> | |
| − | or | + | <Passive Condition: MP Above x%> |
| − | + | <Passive Condition: MP Below x%> | |
| − | + | If the user's HP or MP is above/below x% of the MaxHP or MaxMP, this | |
| + | condition will be met for the passive state to appear. | ||
| − | < | + | <Passive Condition: Stat Above x> |
| − | < | + | <Passive Condition: Stat Below x> |
| − | Replace 'stat' with ' | + | Replace 'stat' with 'HP', 'MP', 'TP', 'MAXHP', 'MAXMP', 'ATK', 'DEF', |
| − | + | 'MAT', 'MDF', 'AGI', 'LUK'. If the above stat is above/below x, then the | |
| − | the | + | condition is met for the passive state to appear. |
| − | |||
| − | < | + | <Passive Condition: Switch x ON> |
| − | < | + | <Passive Condition: Switch x OFF> |
| − | + | If switch x is either ON/OFF, then the condition is met for the passive | |
| − | + | state to appear. | |
| − | |||
| − | |||
| − | < | + | <Passive Condition: Variable x Above y> |
| − | < | + | <Passive Condition: Variable x Below y> |
| − | Replace | + | Replace x with the variable you wish to check to see if it's above/below |
| − | + | y, then the condition is met for the passive state to appear. | |
| − | |||
| − | |||
</nowiki> | </nowiki> | ||
| − | == [[ | + | === [[Lunatic Pack - Passive Condition Cases (YEP)|Lunatic Pack - Passive Condition Cases]] === |
| + | <hr> | ||
| − | + | <nowiki> | |
| + | Insert the following notetags into a state's notebox to give it a passive | ||
| + | condition case. | ||
| − | + | State Notetags: | |
| − | |||
| − | |||
| − | |||
| − | |||
| − | |||
| − | |||
| − | + | <Passive Condition Cases> | |
| − | < | + | condition |
| − | + | condition | |
| − | + | </Passive Condition Cases> | |
| − | + | - Use the above format for adding conditions to your passive states. | |
| − | + | Replace the 'condition' text in between the <Passive Condition Cases> | |
| + | and </Passive Condition Cases> notetags with any of the following | ||
| + | conditions below to prompt a condition type. You can insert multiple | ||
| + | conditions to make a passive state require more conditions to be met | ||
| + | before they can be active. | ||
| + | |||
| + | =-=-=-= Conditions List =-=-=-= | ||
| + | |||
| + | --- Switch On/Off --- | ||
| + | |||
| + | Switch x On | ||
| + | Switch x Off | ||
| + | - Replace 'x' with a number value. This will make a conditional check if | ||
| + | an event switch x is on or off. If the conditional check is met, then the | ||
| + | conditional passive will become active if other conditions are met. | ||
| + | SUGGESTED BY: Yanfly | ||
| + | |||
| + | --- Numerical Comparison Check --- | ||
| − | + | x >= y | |
| + | x <= y | ||
| + | x > y | ||
| + | x < y | ||
| + | x != y | ||
| + | x = y | ||
| + | - This will require the condition to make a simple comparison check | ||
| + | between x and y. These number comparisons will be '>=', '<=', '>', '<', | ||
| + | '!=', and '=' (aka greater than or equal to, less than or equal to, | ||
| + | greater than, less than, not equal to, and equal to respectively). Replace | ||
| + | 'x' and 'y' with a number, a percentage, 'HP', 'MP', 'TP', 'HP%', 'MP%', | ||
| + | 'TP%', 'MAXHP', 'MAXMP', 'ATK', 'DEF', 'MAT', 'MDF', 'AGI', 'LUK', or | ||
| + | 'VARIABLE X' for comparison purposes. | ||
| − | + | If a percentage is being checked, it will be checked as if the % has | |
| − | If | + | been dropped off. For example, '50%' will be '50'. |
| − | |||
| − | |||
| − | |||
| − | |||
| − | + | SUGGESTED BY: Yanfly | |
| − | |||
| − | + | --- Has/Not State --- | |
| − | |||
| − | |||
| − | |||
| − | + | Has State x | |
| − | + | - Replace 'x' with the ID of the state you wish to check. If the user is | |
| − | + | affected by that state, then this conditional passive will become active | |
| − | + | as long as all other conditions are met. | |
| − | + | SUGGESTED BY: Goldschuss | |
| − | |||
| − | + | Not State x | |
| + | - Replace 'x' with the ID of the state you wish to check. If the user is | ||
| + | not affected by that state, then this conditional passive will become | ||
| + | active as long as all other conditions are met. | ||
| + | SUGGESTED BY: Goldschuss | ||
| − | + | --- Has/Not Buff/Debuff--- | |
| − | |||
| − | |||
| − | |||
| − | |||
| − | |||
| − | + | Has x Buff | |
| − | + | - Replace 'x' with 'MAXHP', 'MAXMP', 'ATK', 'DEF', 'MAT', 'MDF', 'AGI', or | |
| − | - | + | 'LUK'. This will make a check to see if the user is currently buffed in |
| − | This | + | that parameter. If the user is, the the conditional passive will become |
| − | + | active as long as all other conditions are met. | |
| − | + | SUGGESTED BY: Yanfly | |
| − | |||
| − | |||
| − | + | Has x Debuff | |
| − | + | - Replace 'x' with 'MAXHP', 'MAXMP', 'ATK', 'DEF', 'MAT', 'MDF', 'AGI', or | |
| − | - | + | 'LUK'. This will make a check to see if the user is currently debuffed in |
| − | This | + | that parameter. If the user is, the the conditional passive will become |
| − | + | active as long as all other conditions are met. | |
| − | conditions | + | SUGGESTED BY: Yanfly |
| − | + | ||
| − | + | Not x Buff | |
| − | + | - Replace 'x' with 'MAXHP', 'MAXMP', 'ATK', 'DEF', 'MAT', 'MDF', 'AGI', or | |
| − | + | 'LUK'. This will make a check to see if the user is currently not buffed | |
| − | + | in that parameter. If the user is, the the conditional passive will become | |
| − | + | active as long as all other conditions are met. | |
| − | + | SUGGESTED BY: Yanfly | |
| − | + | ||
| − | + | Not x Debuff | |
| + | - Replace 'x' with 'MAXHP', 'MAXMP', 'ATK', 'DEF', 'MAT', 'MDF', 'AGI', or | ||
| + | 'LUK'. This will make a check to see if the user is currently not debuffed | ||
| + | in that parameter. If the user is, the conditional passive will become | ||
| + | active as long as all other conditions are met. | ||
| + | SUGGESTED BY: Yanfly | ||
| + | |||
| + | --- Total Buffs/Debuffs --- | ||
| − | = | + | Total Buffs >= x |
| − | + | Total Buffs <= x | |
| − | - | + | Total Buffs > x |
| − | + | Total Buffs < x | |
| − | + | Total Buffs != x | |
| − | + | Total Buffs = x | |
| − | + | - Replace 'x' with a number value you wish to check relative to the number | |
| − | + | of buffs the user is currently affected by. If the turn check passes, the | |
| + | conditional passive will become active if other conditions are met. | ||
| + | SUGGESTED BY: Alejandro SQ | ||
| − | = | + | Total Debuffs >= x |
| − | + | Total Debuffs <= x | |
| − | + | Total Debuffs > x | |
| − | Replace ' | + | Total Debuffs < x |
| − | the | + | Total Debuffs != x |
| − | + | Total Debuffs = x | |
| − | + | - Replace 'x' with a number value you wish to check relative to the number | |
| − | + | of debuffs the user is currently affected by. If the turn check passes, | |
| − | + | the conditional passive will become active if other conditions are met. | |
| − | + | SUGGESTED BY: Alejandro SQ | |
| − | |||
| − | + | --- Alive/Dead --- | |
| − | |||
| − | |||
| − | |||
| − | |||
| − | |||
| − | |||
| − | |||
| − | |||
| − | |||
| − | |||
| − | = | + | Alive Actors/Enemies/Allies/Foes >= x |
| − | + | Alive Actors/Enemies/Allies/Foes <= x | |
| − | + | Alive Actors/Enemies/Allies/Foes > x | |
| − | Replace ' | + | Alive Actors/Enemies/Allies/Foes < x |
| − | ' | + | Alive Actors/Enemies/Allies/Foes != x |
| − | + | Alive Actors/Enemies/Allies/Foes = x | |
| − | + | - Replace 'x' with a number value you wish to check relative to the number | |
| − | all | + | of alive actors in the party, enemies in the troop, user's allies, or the |
| − | + | user's foes. Use only one of the four above keywords ('actors', 'enemies', | |
| − | + | 'allies', or 'foes'). If the member count check passes, the conditional | |
| − | + | passive will become active as long as all other conditions are met. | |
| − | + | SUGGESTED BY: Yanfly | |
| − | + | ||
| − | + | Dead Actors/Enemies/Allies/Foes >= x | |
| − | + | Dead Actors/Enemies/Allies/Foes <= x | |
| + | Dead Actors/Enemies/Allies/Foes > x | ||
| + | Dead Actors/Enemies/Allies/Foes < x | ||
| + | Dead Actors/Enemies/Allies/Foes != x | ||
| + | Dead Actors/Enemies/Allies/Foes = x | ||
| + | - Replace 'x' with a number value you wish to check relative to the number | ||
| + | of dead actors in the party, enemies in the troop, user's allies, or the | ||
| + | user's foes. Use only one of the four above keywords ('actors', 'enemies', | ||
| + | 'allies', or 'foes'). If the member count check passes, the conditional | ||
| + | passive will become active as long as all other conditions are met. | ||
| + | SUGGESTED BY: Yanfly | ||
| + | |||
| + | --- Turn Count --- | ||
| − | = | + | Battle Turns >= x |
| − | + | Battle Turns <= x | |
| − | + | Battle Turns > x | |
| − | Replace ' | + | Battle Turns < x |
| − | + | Battle Turns != x | |
| − | + | Battle Turns = x | |
| − | + | - Replace 'x' with a number value you wish to check relative to the number | |
| − | + | of turns that passed in battle. If the turn check passes, the conditional | |
| − | + | passive will become active as long as all other conditions are met. | |
| − | + | SUGGESTED BY: Yanfly | |
| − | |||
| − | |||
| − | + | --- Has Weapon/Armor --- | |
| − | |||
| − | |||
| − | |||
| − | |||
| − | |||
| − | |||
| − | |||
| − | |||
| − | + | Has Weapon x | |
| − | + | - The user must be an actor or else this condition returns false. Replace | |
| − | + | 'x' with the weapon ID you wish to check if the user has. If the user has | |
| − | + | it equipped, the condition will pass and will become active as long as | |
| − | + | all other conditions are met. | |
| − | + | SUGGESTED BY: Yanfly | |
| − | |||
| − | |||
| − | |||
| − | |||
| − | |||
| − | + | Not Weapon x | |
| − | + | - The user must be an actor or else this condition returns false. Replace | |
| − | + | 'x' with the weapon ID you wish to check if the user should not have. If | |
| − | + | the user doesn't have it equipped, the condition will pass and will become | |
| − | + | active as long as all other conditions are met. | |
| − | + | SUGGESTED BY: Yanfly | |
| − | + | ||
| − | + | Has Armor x | |
| − | + | - The user must be an actor or else this condition returns false. Replace | |
| − | + | 'x' with the armor ID you wish to check if the user has. If the user has | |
| − | + | it equipped, the condition will pass and will become active as long as | |
| + | all other conditions are met. | ||
| + | SUGGESTED BY: Yanfly | ||
| − | + | Not Armor x | |
| − | + | - The user must be an actor or else this condition returns false. Replace | |
| − | - | + | 'x' with the armor ID you wish to check if the user should not have. If |
| − | + | the user doesn't have it equipped, the condition will pass and will become | |
| − | + | active as long as all other conditions are met. | |
| − | + | SUGGESTED BY: Yanfly | |
| − | + | </nowiki> | |
| − | |||
| − | |||
| − | |||
| − | |||
| − | = | + | === [[Passive Aura Effects (YEP)|Passive Aura Effects]] === |
| − | + | <hr> | |
| − | |||
| − | |||
| − | |||
| − | |||
| − | |||
| − | |||
| − | |||
| − | |||
| − | |||
| − | + | <nowiki> | |
| − | + | Use the following notetags to make a state generate auras. | |
| − | |||
| − | |||
| − | |||
| − | |||
| − | |||
| − | |||
| − | |||
| − | |||
| − | |||
| − | |||
| − | + | *NOTE* The notetags that affect alive members will affect members that have | |
| − | + | at least 1 HP and not affected by the dead state. Even if they are immortal, | |
| − | + | if they have 0 HP, they will not be affected by the alive aura effects as to | |
| − | + | not conflict with the dead aura effects. | |
| − | + | ||
| − | + | *NOTE* The notetags that affect dead members will affect members that are | |
| − | + | either affected by the death state or if their HP is at 0. The moment the | |
| − | + | dead member has 1 HP or is no longer affected by the dead state, they will | |
| − | + | no longer be affected by dead-only aura effects. | |
| − | |||
| − | |||
| − | |||
| − | + | State Notetags: | |
| − | + | <Ally Aura: x> | |
| − | + | <Ally Aura: x, x, x> | |
| − | + | <Ally Aura: x through y> | |
| − | + | - This will cause the battler's allies to gain state(s) x (to y) | |
| + | while the battler is affected by the current state. | ||
| + | *Note: A state cannot use itself in an aura effect. | ||
| − | - | + | <Alive Ally Aura: x> |
| + | <Alive Ally Aura: x, x, x> | ||
| + | <Alive Ally Aura: x through y> | ||
| + | - This will cause the battler's alive allies to gain state(s) x (to y) | ||
| + | while the battler is affected by the current state. | ||
| + | *Note: A state cannot use itself in an aura effect. | ||
| − | + | <Dead Ally Aura: x> | |
| − | the | + | <Dead Ally Aura: x, x, x> |
| + | <Dead Ally Aura: x through y> | ||
| + | - This will cause the battler's dead allies to gain state(s) x (to y) | ||
| + | while the battler is affected by the current state. | ||
| + | *Note: A state cannot use itself in an aura effect. | ||
| − | + | <Foe Aura: x> | |
| − | + | <Foe Aura: x, x, x> | |
| − | + | <Foe Aura: x through y> | |
| + | - This will cause the battler's foes to gain state(s) x (to y) | ||
| + | while the battler is affected by the current state. | ||
| + | *Note: A state cannot use itself in an aura effect. | ||
| − | + | <Alive Foe Aura: x> | |
| − | + | <Alive Foe Aura: x, x, x> | |
| + | <Alive Foe Aura: x through y> | ||
| + | - This will cause the battler's alive foes to gain state(s) x (to y) | ||
| + | while the battler is affected by the current state. | ||
| + | *Note: A state cannot use itself in an aura effect. | ||
| − | - | + | <Dead Foe Aura: x> |
| + | <Dead Foe Aura: x, x, x> | ||
| + | <Dead Foe Aura: x through y> | ||
| + | - This will cause the battler's dead foes to gain state(s) x (to y) | ||
| + | while the battler is affected by the current state. | ||
| + | *Note: A state cannot use itself in an aura effect. | ||
| − | + | <Party Aura: x> | |
| − | + | <Party Aura: x, x, x> | |
| − | + | <Party Aura: x through y> | |
| + | - This will cause the Actor Party to gain state(s) x (to y) | ||
| + | while the battler is affected by the current state. | ||
| + | *Note: A state cannot use itself in an aura effect. | ||
| − | + | <Alive Party Aura: x> | |
| + | <Alive Party Aura: x, x, x> | ||
| + | <Alive Party Aura: x through y> | ||
| + | - This will cause the battler's alive Actor Party to gain state(s) x (to y) | ||
| + | while the battler is affected by the current state. | ||
| + | *Note: A state cannot use itself in an aura effect. | ||
| − | + | <Dead Party Aura: x> | |
| − | is | + | <Dead Party Aura: x, x, x> |
| − | + | <Dead Party Aura: x through y> | |
| − | + | - This will cause the battler's dead Actor Party to gain state(s) x (to y) | |
| + | while the battler is affected by the current state. | ||
| + | *Note: A state cannot use itself in an aura effect. | ||
| − | + | <Troop Aura: x> | |
| + | <Troop Aura: x, x, x> | ||
| + | <Troop Aura: x through y> | ||
| + | - This will cause the Enemy Troop to gain state(s) x (to y) | ||
| + | while the battler is affected by the current state. | ||
| + | *Note: A state cannot use itself in an aura effect. | ||
| − | + | <Alive Troop Aura: x> | |
| − | + | <Alive Troop Aura: x, x, x> | |
| − | + | <Alive Troop Aura: x through y> | |
| − | + | - This will cause the battler's alive Enemy Troop to gain state(s) x (to y) | |
| − | + | while the battler is affected by the current state. | |
| + | *Note: A state cannot use itself in an aura effect. | ||
| − | + | <Dead Troop Aura: x> | |
| + | <Dead Troop Aura: x, x, x> | ||
| + | <Dead Troop Aura: x through y> | ||
| + | - This will cause the battler's dead Enemy Troop to gain state(s) x (to y) | ||
| + | while the battler is affected by the current state. | ||
| + | *Note: A state cannot use itself in an aura effect. | ||
| − | + | <Everybody Aura: x> | |
| − | + | <Everybody Aura: x, x, x> | |
| − | + | <Everybody Aura: x through y> | |
| − | the | + | - This will cause the all active battlers to gain state(s) x (to y) |
| + | while the battler is affected by the current state. | ||
| + | *Note: A state cannot use itself in an aura effect. | ||
| − | + | <Alive Aura: x> | |
| + | <Alive Aura: x, x, x> | ||
| + | <Alive Aura: x through y> | ||
| + | - This will cause the all alive battlers to gain state(s) x (to y) | ||
| + | while the battler is affected by the current state. | ||
| + | *Note: A state cannot use itself in an aura effect. | ||
| − | + | <Dead Aura: x> | |
| − | + | <Dead Aura: x, x, x> | |
| − | the | + | <Dead Aura: x through y> |
| − | + | - This will cause the all alive battlers to gain state(s) x (to y) | |
| + | while the battler is affected by the current state. | ||
| + | *Note: A state cannot use itself in an aura effect. | ||
| + | </nowiki> | ||
| − | + | == [[Base Parameter Control (YEP)|Base Parameter Control]] == | |
| − | |||
| − | + | <nowiki> | |
| − | + | You can use the following notetags to alter the various aspects that modify | |
| − | + | the base parameter values: | |
| − | |||
| − | |||
| − | |||
| − | |||
| − | |||
| − | |||
| − | |||
| − | |||
| − | |||
| − | |||
| − | |||
| − | |||
| − | |||
| − | |||
| − | |||
| − | |||
| − | |||
| − | |||
| − | |||
| − | |||
| − | |||
| − | |||
| − | |||
| − | |||
| − | |||
| − | |||
| − | |||
| − | |||
| − | |||
| − | |||
| − | |||
| − | |||
| − | |||
| − | + | Actor, Class, Enemy, Weapon, Armor, and State Notetags: | |
| − | |||
| − | + | <stat Plus: +x> | |
| − | + | <stat Plus: -x> | |
| − | + | Replace 'stat' with 'maxhp', 'maxmp', 'atk', 'def', 'mat', 'mdf', 'agi', | |
| − | + | or 'luk'. This is the value added to the base parameter before the rate | |
| − | + | and flat values contribute to the total parameter value assuming the | |
| + | plugin's default formula is utilized. | ||
| − | + | <stat Rate: x%> | |
| + | <stat Rate: x.y> | ||
| + | Replace 'stat' with 'maxhp', 'maxmp', 'atk', 'def', 'mat', 'mdf', 'agi', | ||
| + | or 'luk'. This is the value multiplied to the sum of the base and plus of | ||
| + | the parameter before affected by the buffRate and flat value assuming the | ||
| + | plugin's default formula is utilized. | ||
| − | + | <stat Flat: +x> | |
| − | + | <stat Flat: -x> | |
| − | + | Replace 'stat' with 'maxhp', 'maxmp', 'atk', 'def', 'mat', 'mdf', 'agi', | |
| − | + | or 'luk'. This is the value added at the end after the sum of the base and | |
| − | + | plus parameters have been added and multiplied by the rate values assuming | |
| − | + | the plugin's default formula is utilized. | |
| − | < | + | <stat Max: x> |
| + | <stat Min: x> | ||
| + | Replace 'stat' with 'maxhp', 'maxmp', 'atk', 'def', 'mat', 'mdf', 'agi', | ||
| + | or 'luk'. This sets the maximum or minimum cap of the the stat parameter | ||
| + | to x. If a battler is affected by multiple of these notetags, then the | ||
| + | value used will be the largest value of the notetag used. | ||
| + | </nowiki> | ||
| − | + | == [[Battle A.I. Core (YEP)|Battle A.I. Core]] == | |
| − | |||
| − | |||
| − | |||
| − | + | ; Enemy AI Level | |
| − | |||
<nowiki> | <nowiki> | ||
| − | + | Enemy AI levels do not determine how difficult they are. Instead, they | |
| + | determine how strictly they will follow the <AI Priority> lists. An AI Level | ||
| + | of 80 means it has an 80% chance of following the prioritized action on the | ||
| + | AI Priority list before moving onto the next one where there will be another | ||
| + | 80% chance and so on. If the AI level is lower, the chance is lower, making | ||
| + | the AI to be more random. | ||
| − | + | Enemy Notetag: | |
| − | + | <AI Level: x> | |
| − | + | Sets the enemy's AI level to x. The lower x, the more random the enemy. | |
| − | + | The higher for x, the more strict the enemy is about following the AI | |
| − | |||
| − | |||
| − | |||
| − | |||
| − | |||
| − | |||
| − | |||
| − | |||
| − | |||
| − | <AI Level: x> | ||
| − | Sets the | ||
| − | The higher for x, the more strict the | ||
Priority list found in its notebox, too. | Priority list found in its notebox, too. | ||
| + | </nowiki> | ||
| − | + | ; Enemy AI Priority | |
| − | |||
| − | |||
| − | If | + | <nowiki> |
| + | If an enemy has an AI Priority list, the enemy will go down that list from | ||
top to bottom (giving the actions at the top more priority than the ones at | top to bottom (giving the actions at the top more priority than the ones at | ||
the bottom) looking for any actions whose conditions are fulfilled. If that | the bottom) looking for any actions whose conditions are fulfilled. If that | ||
| − | condition is fulfilled, then that action will be the action the | + | condition is fulfilled, then that action will be the action the enemy will |
partake in. | partake in. | ||
| − | To set up a Priority List for the | + | To set up a Priority List for the enemy, you must place inside the enemy's |
notebox notetags that match the following format: | notebox notetags that match the following format: | ||
| Line 703: | Line 729: | ||
<nowiki> | <nowiki> | ||
| − | The conditions | + | The following is a list of ways you can format your conditions for the enemy |
| − | + | to choose the right skill. In addition to deciding whether or not the skill | |
| − | + | will be used, the condition also selects the enemy target. The following | |
| − | + | list will tell you how the conditions are met and what targets will be | |
| + | selected for battle. | ||
| − | == | + | =-=-=-=-=-=-=-=-=-=-=-=-=-=-=-=-=-=-=-=-=-=-=-=-=-=-=-=-=-=-=-=-=-=-=-=-=-=- |
| + | ALWAYS | ||
| + | - - - - - - - - - - - - - - - - - - - - - - - - - - - - - - - - - - - - - - - | ||
| + | This condition will always be fulfilled. The valid target group is all | ||
| + | targets within scope. | ||
| + | - - - - - - - - - - - - - - - - - - - - - - - - - - - - - - - - - - - - - - - | ||
| + | Example: Always: Skill 10, Lowest HP% | ||
| + | =-=-=-=-=-=-=-=-=-=-=-=-=-=-=-=-=-=-=-=-=-=-=-=-=-=-=-=-=-=-=-=-=-=-=-=-=-=- | ||
| − | + | =-=-=-=-=-=-=-=-=-=-=-=-=-=-=-=-=-=-=-=-=-=-=-=-=-=-=-=-=-=-=-=-=-=-=-=-=-=- | |
| − | + | ELEMENT X case | |
| − | the | + | - - - - - - - - - - - - - - - - - - - - - - - - - - - - - - - - - - - - - - - |
| − | + | This allows you to match the element rate of element X (use either a number | |
| + | or the name of the element in place of 'X') to see whether or not the | ||
| + | conditions for the action are fulfilled. Replace 'case' with 'Neutral' for | ||
| + | normal element rate (under 110% and above 90%), 'Weakness' for anything | ||
| + | above 100% element rate, 'Resistant' for below 100% element rate, 'Null' for | ||
| + | 0% element rate, and 'Absorb' for below 0% element rate. Valid targets will | ||
| + | be those with the matching element rates. | ||
| + | - - - - - - - - - - - - - - - - - - - - - - - - - - - - - - - - - - - - - - - | ||
| + | Example: Element Fire Weakness: Fireball, Lowest HP% | ||
| + | Element Water Resistant: Water Cancel, Highest MAT | ||
| + | Element 4 Null: Earthquake, Lowest MDF | ||
| + | =-=-=-=-=-=-=-=-=-=-=-=-=-=-=-=-=-=-=-=-=-=-=-=-=-=-=-=-=-=-=-=-=-=-=-=-=-=- | ||
| − | + | =-=-=-=-=-=-=-=-=-=-=-=-=-=-=-=-=-=-=-=-=-=-=-=-=-=-=-=-=-=-=-=-=-=-=-=-=-=- | |
| − | + | EVAL eval | |
| − | + | - - - - - - - - - - - - - - - - - - - - - - - - - - - - - - - - - - - - - - - | |
| + | This allows you to use any kind of code to check and fulfill a condition. | ||
| + | This condition uses all alive members of the skill's scope as valid targets. | ||
| + | - - - - - - - - - - - - - - - - - - - - - - - - - - - - - - - - - - - - - - - | ||
| + | Example: Eval user.name() === 'Bat A': Skill 10, Highest HP% | ||
| + | =-=-=-=-=-=-=-=-=-=-=-=-=-=-=-=-=-=-=-=-=-=-=-=-=-=-=-=-=-=-=-=-=-=-=-=-=-=- | ||
| − | + | =-=-=-=-=-=-=-=-=-=-=-=-=-=-=-=-=-=-=-=-=-=-=-=-=-=-=-=-=-=-=-=-=-=-=-=-=-=- | |
| − | + | group ALIVE MEMBERS eval | |
| − | to | + | - - - - - - - - - - - - - - - - - - - - - - - - - - - - - - - - - - - - - - - |
| + | Replace 'group' with either 'party' for the player's party or 'troop' for | ||
| + | the enemy party. This runs the number of party alive members or troop alive | ||
| + | members in a check to see if the conditions can be fulfilled. | ||
| + | - - - - - - - - - - - - - - - - - - - - - - - - - - - - - - - - - - - - - - - | ||
| + | Example: Party Alive Members > 2: Skill 10, Lowest HP% | ||
| + | Troop Alive Members <= 4: Skill 11, Highest HP% | ||
| + | Troop Alive Members === $gameVariables.value(3): Skill 12, Random | ||
| + | =-=-=-=-=-=-=-=-=-=-=-=-=-=-=-=-=-=-=-=-=-=-=-=-=-=-=-=-=-=-=-=-=-=-=-=-=-=- | ||
| − | Skill | + | =-=-=-=-=-=-=-=-=-=-=-=-=-=-=-=-=-=-=-=-=-=-=-=-=-=-=-=-=-=-=-=-=-=-=-=-=-=- |
| + | group DEAD MEMBERS eval | ||
| + | - - - - - - - - - - - - - - - - - - - - - - - - - - - - - - - - - - - - - - - | ||
| + | Replace 'group' with either 'party' for the player's party or 'troop' for | ||
| + | the enemy party. This runs the number of party dead members or troop dead | ||
| + | members in a check to see if the conditions can be fulfilled. | ||
| + | - - - - - - - - - - - - - - - - - - - - - - - - - - - - - - - - - - - - - - - | ||
| + | Example: Party Dead Members > 2: Undead, Highest ATK | ||
| + | Troop Dead Members <= 4: Life, Highest ATK | ||
| + | Troop Dead Members === $gameVariables.value(3): Skill 12, Random | ||
| + | =-=-=-=-=-=-=-=-=-=-=-=-=-=-=-=-=-=-=-=-=-=-=-=-=-=-=-=-=-=-=-=-=-=-=-=-=-=- | ||
| − | < | + | =-=-=-=-=-=-=-=-=-=-=-=-=-=-=-=-=-=-=-=-=-=-=-=-=-=-=-=-=-=-=-=-=-=-=-=-=-=- |
| − | + | stat PARAM eval | |
| + | - - - - - - - - - - - - - - - - - - - - - - - - - - - - - - - - - - - - - - - | ||
| + | Replace 'stat' with either 'atk', 'def', 'mat', 'mdf', 'agi', 'luk', | ||
| + | 'maxhp', 'maxmp', 'hp', 'mp', 'hp%', 'mp%', or 'level' to run it in a | ||
| + | condition check again to see if the action gets passed. The group that it | ||
| + | checks will be based on the skill's scope. If the skill targets foes, then | ||
| + | all foes will take a check to see if they fulfill the conditions. Likewise | ||
| + | for party members if the skill is for allies. The valid targets will be | ||
| + | those who pass the condition check. | ||
| + | - - - - - - - - - - - - - - - - - - - - - - - - - - - - - - - - - - - - - - - | ||
| + | Example: HP% param <= 50%: Heal, Lowest HP% | ||
| + | MP param > 90: Mana Drain, Highest MP | ||
| + | ATK param > user.atk: Power Break, Highest ATK | ||
| + | =-=-=-=-=-=-=-=-=-=-=-=-=-=-=-=-=-=-=-=-=-=-=-=-=-=-=-=-=-=-=-=-=-=-=-=-=-=- | ||
| − | < | + | =-=-=-=-=-=-=-=-=-=-=-=-=-=-=-=-=-=-=-=-=-=-=-=-=-=-=-=-=-=-=-=-=-=-=-=-=-=- |
| − | + | type PARTY LEVEL eval | |
| + | - - - - - - - - - - - - - - - - - - - - - - - - - - - - - - - - - - - - - - - | ||
| + | Replace 'type' with either 'highest', 'lowest', or 'average' to get the | ||
| + | respective party level for the skill's scope. This will reference the entire | ||
| + | party's level. If this condition is fulfilled, all targets would become | ||
| + | valid targets. | ||
| + | - - - - - - - - - - - - - - - - - - - - - - - - - - - - - - - - - - - - - - - | ||
| + | Example: Highest Party Level > 10: Skill 10, Lowest MP% | ||
| + | Lowest Party Level < 12: Skill 11, Lowest HP% | ||
| + | Average Party Level > 15: Skill 12, Highest HP% | ||
| + | =-=-=-=-=-=-=-=-=-=-=-=-=-=-=-=-=-=-=-=-=-=-=-=-=-=-=-=-=-=-=-=-=-=-=-=-=-=- | ||
| − | + | =-=-=-=-=-=-=-=-=-=-=-=-=-=-=-=-=-=-=-=-=-=-=-=-=-=-=-=-=-=-=-=-=-=-=-=-=-=- | |
| − | + | RANDOM x% | |
| − | + | - - - - - - - - - - - - - - - - - - - - - - - - - - - - - - - - - - - - - - - | |
| − | + | This will make the condition based on a random x percent chance. This | |
| − | + | condition allows all possible targets to be valid for targeting. | |
| − | + | - - - - - - - - - - - - - - - - - - - - - - - - - - - - - - - - - - - - - - - | |
| + | Example: Random 50%: Skill 10, Lowest HP% | ||
| + | Random 75%: Skill 11, Highest HP% | ||
| + | =-=-=-=-=-=-=-=-=-=-=-=-=-=-=-=-=-=-=-=-=-=-=-=-=-=-=-=-=-=-=-=-=-=-=-=-=-=- | ||
| − | + | =-=-=-=-=-=-=-=-=-=-=-=-=-=-=-=-=-=-=-=-=-=-=-=-=-=-=-=-=-=-=-=-=-=-=-=-=-=- | |
| − | + | STATE === state x | |
| − | + | STATE === state name | |
| − | + | - - - - - - - - - - - - - - - - - - - - - - - - - - - - - - - - - - - - - - - | |
| − | + | This will detect if the target scope has state x (or state name if you use | |
| + | that instead). If the target does, that target is added into the pool of | ||
| + | valid targets. Any targets not affected by the state will be ignored. | ||
| + | - - - - - - - - - - - - - - - - - - - - - - - - - - - - - - - - - - - - - - - | ||
| + | Example: State === State 5: DeBlind, Highest ATK | ||
| + | State === Knockout: Life, Random | ||
| + | =-=-=-=-=-=-=-=-=-=-=-=-=-=-=-=-=-=-=-=-=-=-=-=-=-=-=-=-=-=-=-=-=-=-=-=-=-=- | ||
| − | + | =-=-=-=-=-=-=-=-=-=-=-=-=-=-=-=-=-=-=-=-=-=-=-=-=-=-=-=-=-=-=-=-=-=-=-=-=-=- | |
| − | + | STATE !== state x | |
| − | that | + | STATE !== state name |
| − | + | - - - - - - - - - - - - - - - - - - - - - - - - - - - - - - - - - - - - - - - | |
| + | This will detect if the target scope does not have state x (or state name if | ||
| + | you use that instead). If the target doesn't, that target is added into the | ||
| + | pool of valid targets. Any targets affected by the state will be ignored. | ||
| + | - - - - - - - - - - - - - - - - - - - - - - - - - - - - - - - - - - - - - - - | ||
| + | Example: State !== State 12: Haste, Random | ||
| + | State !== Courage: Cowardice, Highest ATK | ||
| + | =-=-=-=-=-=-=-=-=-=-=-=-=-=-=-=-=-=-=-=-=-=-=-=-=-=-=-=-=-=-=-=-=-=-=-=-=-=- | ||
| − | + | =-=-=-=-=-=-=-=-=-=-=-=-=-=-=-=-=-=-=-=-=-=-=-=-=-=-=-=-=-=-=-=-=-=-=-=-=-=- | |
| − | + | SWITCH X case | |
| − | + | - - - - - - - - - - - - - - - - - - - - - - - - - - - - - - - - - - - - - - - | |
| − | + | Replace 'x' with the ID of the switch you wish to check. Replace 'case' with | |
| + | either 'on' or 'off' (you may also use 'true' or 'false'). If the switch | ||
| + | matches the case, the condition is fulfilled and all skill targets become | ||
| + | valid targets. | ||
| + | - - - - - - - - - - - - - - - - - - - - - - - - - - - - - - - - - - - - - - - | ||
| + | Example: Switch 5 On: Skill 10, Lowest HP% | ||
| + | Switch 6 Off: Skill 11, Highest HP% | ||
| + | =-=-=-=-=-=-=-=-=-=-=-=-=-=-=-=-=-=-=-=-=-=-=-=-=-=-=-=-=-=-=-=-=-=-=-=-=-=- | ||
| − | + | =-=-=-=-=-=-=-=-=-=-=-=-=-=-=-=-=-=-=-=-=-=-=-=-=-=-=-=-=-=-=-=-=-=-=-=-=-=- | |
| − | + | TURN eval | |
| − | + | - - - - - - - - - - - - - - - - - - - - - - - - - - - - - - - - - - - - - - - | |
| − | + | This will make the condition based on the turn count to be fulfilled by an | |
| − | + | eval statement. This condition allows all possible targets to be valid for | |
| + | targeting. | ||
| + | - - - - - - - - - - - - - - - - - - - - - - - - - - - - - - - - - - - - - - - | ||
| + | Example: Turn > 3: Skill 10, Lowest hp% | ||
| + | Turn === 4: Skill 11, Highest hp% | ||
| + | Turn <= $gameVariables.value(2): Skill 12, Random | ||
| + | =-=-=-=-=-=-=-=-=-=-=-=-=-=-=-=-=-=-=-=-=-=-=-=-=-=-=-=-=-=-=-=-=-=-=-=-=-=- | ||
| − | + | =-=-=-=-=-=-=-=-=-=-=-=-=-=-=-=-=-=-=-=-=-=-=-=-=-=-=-=-=-=-=-=-=-=-=-=-=-=- | |
| − | + | USER stat PARAM eval | |
| − | + | - - - - - - - - - - - - - - - - - - - - - - - - - - - - - - - - - - - - - - - | |
| − | + | Replace 'stat' with either 'atk', 'def', 'mat', 'mdf', 'agi', 'luk', | |
| + | 'maxhp', 'maxmp', 'hp', 'mp', 'hp%', 'mp%', or 'level' to run it in a | ||
| + | condition check again to see if the action gets passed. If the user's param | ||
| + | matches the conditions, the check is fulfilled. | ||
| + | - - - - - - - - - - - - - - - - - - - - - - - - - - - - - - - - - - - - - - - | ||
| + | Example: User HP% param <= 50%: Heal, Lowest HP% | ||
| + | User MP param > 90: Mana Drain, Highest MP | ||
| + | User ATK param > user.atk: Power Break, Highest ATK | ||
| + | =-=-=-=-=-=-=-=-=-=-=-=-=-=-=-=-=-=-=-=-=-=-=-=-=-=-=-=-=-=-=-=-=-=-=-=-=-=- | ||
| − | + | =-=-=-=-=-=-=-=-=-=-=-=-=-=-=-=-=-=-=-=-=-=-=-=-=-=-=-=-=-=-=-=-=-=-=-=-=-=- | |
| − | + | VARIABLE X eval | |
| − | + | - - - - - - - - - - - - - - - - - - - - - - - - - - - - - - - - - - - - - - - | |
| − | + | This will call forth the value of variable 'x' to partake in an eval | |
| + | comparison to see if the condition is fulfilled. If it is, all skill targets | ||
| + | become valid targets. | ||
| + | - - - - - - - - - - - - - - - - - - - - - - - - - - - - - - - - - - - - - - - | ||
| + | Example: Variable 3 > 10: Skill 10, Lowest HP% | ||
| + | Variable 5 <= 100: Skill 11, Highest HP% | ||
| + | Variable 2 === user.atk: Skill 12 | ||
| + | =-=-=-=-=-=-=-=-=-=-=-=-=-=-=-=-=-=-=-=-=-=-=-=-=-=-=-=-=-=-=-=-=-=-=-=-=-=- | ||
| + | </nowiki> | ||
| − | + | ; Multiple Conditions | |
| − | |||
| − | |||
| − | |||
| − | + | <nowiki> | |
| − | + | As of the version 1.11 update, the Battle A.I. Core is now able to support | |
| − | + | multiple conditions. Setting up multiple conditions is relatively simple to | |
| − | + | do and still follows the 'condition: SKILL x, target' format. | |
| − | + | ||
| − | + | - - - - - - - - - - - - - - - - - - - - - - - - - - - - - - - - - - - - - - | |
| − | + | To add multiple conditions, simply insert a +++ between each condition like | |
| − | + | the following examples: | |
| − | |||
| − | |||
| − | + | Switch 1 on +++ Switch 2 on: Fire, Lowest HP% | |
| − | + | Turn 3 > 1 +++ Variable 5 <= 100 +++ Switch 3 on: Ice, Lowest HP% | |
| − | + | Random 50% +++ Highest Party Level > 50: Thunder, Highest HP% | |
| − | |||
| − | |||
| − | |||
| − | |||
| − | |||
| − | |||
| − | + | In the above examples, all the conditions must be met in order for the | |
| − | + | selected skills to be considered for use. | |
| − | + | - - - - - - - - - - - - - - - - - - - - - - - - - - - - - - - - - - - - - - | |
| − | |||
| − | |||
| − | |||
| − | |||
| − | |||
| − | + | For conditions that have strict targeting groups, the targeting group will | |
| + | end up becoming the combination of all of the strict targeting groups. For | ||
| + | example: | ||
| − | + | STATE === Blind +++ STATE === Fear: Dark, Lowest HP% | |
| − | + | In this example, the enemy will only use the 'Dark' skill on a target that | |
| − | + | is both affected by 'Blind' and 'Fear'. If there are multiple targets, then | |
| − | + | the target with the lowest HP% will become the target the enemy will cast | |
| − | + | the 'Dark' on. | |
| − | + | STATE !== Blind +++ ATK param >= 150: Darkness, Highest ATK | |
| − | |||
| − | + | In the above example, the enemy will use the 'Darkness' skill against any | |
| − | the | + | target that isn't blinded and has an ATK parameter of at least 150. If there |
| − | + | are multiple targets, then the enemy will first cast 'Darkness' on the | |
| − | + | target with the highest ATK before casting it on a target with a lower ATK. | |
| − | |||
| − | |||
| − | |||
| − | |||
| − | |||
| − | |||
| − | |||
| − | |||
| − | |||
| − | |||
| − | |||
| − | |||
| − | |||
| − | |||
| − | |||
| − | |||
| − | |||
| − | |||
| − | |||
| − | |||
| − | |||
| − | |||
| − | |||
| − | |||
</nowiki> | </nowiki> | ||
| − | + | ; Targeting | |
| − | |||
<nowiki> | <nowiki> | ||
| − | + | Targeting is optional but can be done via a small change to the condition. | |
| − | + | All you have to do is add a ',' after the skill to indicate which target in | |
| + | the valid target group you would like to target. For example: | ||
| − | + | Random 50%: Fire, Highest HP% | |
| − | + | The condition to be met is the 50% random chance, but if it is fulfilled, | |
| + | the target selected will be the member on the targeting scope's team with | ||
| + | the highest HP percentage. When that happens, the 'Fire' skill will be used | ||
| + | upon that target. | ||
| − | + | If no target is specified, a random target will be selected amongst the | |
| − | + | group of valid targets. Otherwise, refer to the following list: | |
| − | |||
| − | + | ---------------------------------------------------------------------------- | |
| − | + | <<nothing>> Selects a random member of the valid target group. | |
| − | + | First Selects first member of the valid target group. | |
| − | + | User Selects the user itself. | |
| + | Highest MaxHP Selects highest MaxHP valid target. | ||
| + | Highest HP Selects highest HP valid target. | ||
| + | Highest HP% Selects highest HP% valid target. *Note1 | ||
| + | Highest MaxMP Selects highest MaxMP valid target. | ||
| + | Highest MP Selects highest MP valid target. | ||
| + | Highest MP% Selects highest MP% valid target. *Note1 | ||
| + | Highest MaxTP Selects highest MaxTP valid target. | ||
| + | Highest TP Selects highest TP valid target. | ||
| + | Highest TP% Selects highest TP% valid target. *Note1 | ||
| + | Highest ATK Selects highest ATK valid target. | ||
| + | Highest DEF Selects highest DEF valid target. | ||
| + | Highest MAT Selects highest MAT valid target. | ||
| + | Highest MDF Selects highest MDF valid target. | ||
| + | Highest AGI Selects highest AGI valid target. | ||
| + | Highest LUK Selects highest LUK valid target. | ||
| + | Highest Level Selects highest Level valid target. *Note2 | ||
| + | Lowest MaxHP Selects lowest MaxHP valid target. | ||
| + | Lowest HP Selects lowest HP valid target. | ||
| + | Lowest HP% Selects lowest HP% valid target. *Note1 | ||
| + | Lowest MaxMP Selects lowest MaxMP valid target. | ||
| + | Lowest MP Selects lowest MP valid target. | ||
| + | Lowest MP% Selects lowest MP% valid target. *Note1 | ||
| + | Lowest MaxTP Selects lowest MaxMP valid target. | ||
| + | Lowest TP Selects lowest MP valid target. | ||
| + | Lowest TP% Selects lowest MP% valid target. *Note1 | ||
| + | Lowest ATK Selects lowest ATK valid target. | ||
| + | Lowest DEF Selects lowest DEF valid target. | ||
| + | Lowest MAT Selects lowest MAT valid target. | ||
| + | Lowest MDF Selects lowest MDF valid target. | ||
| + | Lowest AGI Selects lowest AGI valid target. | ||
| + | Lowest LUK Selects lowest LUK valid target. | ||
| + | Lowest Level Selects lowest Level valid target. *Note2 | ||
| + | |||
| + | Note1: This is calculated by dividing the current HP with the MaxHP or the | ||
| + | current MP with the MaxMP. | ||
| − | + | Note2: If this is used on an enemy without a proper enemy level plugin | |
| − | + | installed, this will return the player party's highest level. | |
| − | |||
| − | |||
| − | + | ---------------------------------------------------------------------------- | |
| − | + | </nowiki> | |
| − | |||
| − | |||
| − | + | ; Special Notes | |
| − | |||
| − | + | <nowiki> | |
| − | + | If you are using YEP_Taunt.js, enemies will automatically not factor in | |
| − | + | taunts by default. For that matter, targets can be protected by taunts | |
| − | + | effects, which can effectively shut down an enemy's AI performance. However, | |
| + | if you want some enemies to consider the taunt effects of an opponent, | ||
| + | place this notetag inside of the enemy's notebox: | ||
| − | < | + | <AI Consider Taunt> |
| − | |||
| − | |||
| − | + | This will make it that when an enemy makes a decision, it will make a right | |
| − | + | decision while thinking of the taunted enemies, too. You can use this for | |
| + | smarter enemies while keep this notetag disabled for less intelligent foes. | ||
| + | </nowiki> | ||
| − | + | === [[Actor Auto Battle A.I. (YEP)|Actor Auto Battle A.I.]] === | |
| − | + | <hr> | |
| − | |||
| − | |||
| − | |||
| − | + | <nowiki> | |
| − | + | The notetags to setup the auto battle A.I. will go into the class noteboxes. | |
| − | |||
| − | |||
| − | + | - - - - - - - - - - - - - - - - - - - - - - - - - - - - - - - - - - - - - - | |
| − | + | Actor AI Level | |
| − | + | - - - - - - - - - - - - - - - - - - - - - - - - - - - - - - - - - - - - - - | |
| − | |||
| − | + | Actor AI levels do not determine how smart they are. Instead, they determine | |
| − | + | how strictly they will follow the <AI Priority> lists. An AI Level of 80 | |
| − | + | means it has an 80% chance of following the prioritized action on the AI | |
| − | + | Priority list before moving onto the next one where there will be another | |
| − | + | 80% chance and so on. If the AI level is lower, the chance is lower, making | |
| − | + | the AI to be more random. | |
| − | |||
| − | + | Class Notetag: | |
| − | + | <AI Level: x> | |
| − | + | Sets the actor's AI level to x. The lower x, the more random the actor. | |
| − | + | The higher for x, the more strict the actor is about following the AI | |
| − | + | Priority list found in its notebox, too. | |
| − | + | - - - - - - - - - - - - - - - - - - - - - - - - - - - - - - - - - - - - - - | |
| + | Actor AI Priority | ||
| + | - - - - - - - - - - - - - - - - - - - - - - - - - - - - - - - - - - - - - - | ||
| − | + | If a class has an AI Priority list, the actor will go down that list from | |
| − | + | top to bottom (giving the actions at the top more priority than the ones at | |
| − | + | the bottom) looking for any actions whose conditions are fulfilled. If that | |
| − | + | condition is fulfilled, then that action will be the action the actor will | |
| + | partake in. | ||
| − | + | To set up a Priority List for the actor, you must place inside the class's | |
| − | + | notebox notetags that match the following format: | |
| − | |||
| − | |||
| − | |||
| − | < | + | <AI Priority> <AI Priority> |
| − | + | condition: SKILL x, target or condition: skill name, target | |
| + | condition: SKILL x, target condition: skill name, target | ||
| + | </AI Priority> </AI Priority> | ||
| − | + | Any number of conditions and skills can be placed in between the two | |
| − | + | <AI Priority> tags. You can choose to use skill ID's or the skill names. | |
| − | + | However, if you use the skill names, keep in mind that it is not case | |
| + | sensitive and if any skills in your database have matching names, the skill | ||
| + | with the larger skill ID will be the action used. | ||
| + | </nowiki> | ||
| − | + | ; Conditions | |
| − | |||
| − | |||
| − | |||
| − | + | <nowiki> | |
| + | The conditions to be used for the <AI Priority> notetag are the same as the | ||
| + | ones from the YEP_BattleAICore plugin. Please refer to the YEP_BattleAICore | ||
| + | help file for which conditions can be used with the A.I. setups. | ||
| + | </nowiki> | ||
| − | + | == [[Battle Effects Pack 1 (Olivia)|Battle Effects Pack 1]] == | |
| − | |||
| − | |||
| − | |||
| − | + | <html><img src='https://img.itch.zone/aW1nLzE0ODgyNTguZ2lm/original/HWiee3.gif'></html> | |
| − | + | <pre> | |
| − | + | Actor, Class, Enemy, Weapon, Armor, and State Notetags: | |
| − | |||
| − | |||
| − | |||
| − | |||
| − | |||
| − | |||
| − | + | <Skill Target Change: Self to All> | |
| − | + | <Item Target Change: Self to All> | |
| − | + | Changes skills/items with the self scope to become an all scope in battle. | |
| + | Does not affect skills/items with the <Bypass Target Change> notetag. | ||
| − | + | <Skill Target Change Allies: All to One> | |
| − | + | <Skill Target Change Enemies: All to One> | |
| − | + | <Item Target Change Allies: All to One> | |
| − | + | <Item Target Change Enemies: All to One> | |
| − | + | Changes skills/items with the all allies/enemies scope to become 1 ally/enemy | |
| − | + | scope in battle. Does not affect skills/items with the <Bypass Target Change> | |
| − | + | notetag. | |
| − | + | <Skill Target Change Allies: One to All> | |
| − | + | <Skill Target Change Enemies: One to All> | |
| − | + | <Item Target Change Allies: One to All> | |
| − | + | <Item Target Change Enemies: One to All> | |
| + | Changes skills/items with the 1 ally/enemy scope to become all allies/enemies | ||
| + | scope in battle. Does not affect skills/items with the <Bypass Target Change> | ||
| + | notetag. | ||
| − | + | Skill, and Item Notetags: | |
| − | |||
| − | |||
| − | |||
| − | + | <Bypass Target Change> | |
| + | <Divine> | ||
| + | Makes this skill/item immune to the target scope change notetag effects. | ||
| − | + | <JP x5> | |
| − | + | <EXP x10> | |
| + | <Gold x200> | ||
| + | Replace the numbers. Changes the multipliers for the rewards found in the | ||
| + | current battle. JP will require Yanfly's Job Points plugin to have an effect. | ||
| + | After the battle is over, the multipliers will reset. The multipliers do not | ||
| + | stack and will overwrite each other, even if they are different types. | ||
| − | + | Skill Notetags: | |
| − | |||
| − | |||
| − | |||
| − | |||
| − | |||
| − | |||
| − | |||
| − | + | <Destroy Weapon> | |
| − | + | Destroys the actor's currently equipped weapon after it is finished using a | |
| − | + | skill with this notetag. | |
| − | |||
| − | |||
| − | |||
| − | + | <Extra Skill List: x> | |
| − | + | <Extra Skill List: x, x, x> | |
| − | + | Puts the skills x in a new window as a list to select from, turning this | |
| − | + | skill into a folder during battle. This does not work outside of battle. | |
| − | + | The actor must have access to all of the listed skills in order to use them. | |
| − | |||
| − | + | State Notetags: | |
| − | |||
| − | |||
| − | |||
| − | |||
| − | |||
| − | + | <All Element Damage Rate: x%> | |
| − | + | Makes the battler receive x% multiplier from all elements. | |
| − | |||
| − | |||
| − | |||
| − | |||
| − | + | <Break Popup> | |
| − | + | If a battler receives a state with this notetag, the Break Popup will appear. | |
| − | + | It will take priority over the Weak Popup. | |
| − | |||
| − | |||
| − | |||
| − | + | <Buff Immunity: x> | |
| − | + | <Buff Immunity: x, x, x> | |
| − | + | <Debuff Immunity: x> | |
| − | + | <Debuff Immunity: x, x, x> | |
| − | + | Replace x with the parameter ID to make the battler immune to receiving buffs | |
| − | + | or debuffs of that parameter. This does not remove already applied buffs or | |
| + | debuffs. It only stops the battler from receiving them. | ||
| + | 0: Max HP | ||
| + | 1: Max MP | ||
| + | 2: Attack | ||
| + | 3: Defense | ||
| + | 4: Magic Attack | ||
| + | 5: Magic Defense | ||
| + | 6: Agility | ||
| + | 7: Luck | ||
| − | + | <Damage Color: r, g, b, a> | |
| − | + | If the battler receives HP damage while affected by a state with this notetag | |
| − | + | the popup color will change. | |
| − | + | r = red (0-255) | |
| − | + | g = green (0-255) | |
| − | + | b = blue (0-255) | |
| + | a = alpha (0-255) | ||
| − | + | <Item Seal> | |
| − | + | If an actor is affected by a state with this notetag, they cannot use items | |
| − | + | from the actor command menu. | |
| − | |||
| − | |||
| − | |||
| − | + | <Max Turns: x> | |
| + | Sets the maximum number of turns this state can be to x. This is used for | ||
| + | Yanfly's Buffs and States Core if you allow state turn stacking. | ||
| − | + | <No Weak Popup> | |
| − | + | If the battler is hit with an elemental weakness while affected by a state | |
| − | + | with this notetag, the Weak popup will not appear. | |
| − | + | <Physical Follow Up Skill: x> | |
| − | + | <Magical Follow Up Skill: x> | |
| − | + | <Certain Follow Up Skill: x> | |
| + | <Follow Up Skill: x> | ||
| + | This requires Yanfly's Battle Engine Core to work. This makes the battler | ||
| + | affected by this state to perform skill ID x after the current skill is | ||
| + | finished being used. | ||
| + | Physical - Requires battler to perform physical type skill | ||
| + | Magical - Requires battler to perform magical type skill | ||
| + | Certain - Requires battler to perform certain hit type skill | ||
| + | n/a - Requires battler to perform physical or magical type skill | ||
| − | + | <State Immunity: x> | |
| − | + | <State Immunity: x, x, x> | |
| − | + | Insert the IDs of the states that the battler cannot receive if they are | |
| + | affected by a state with this notetag. They do not become resistant to it, | ||
| + | meaning if the states have already been applied, they will not suddenly | ||
| + | disappear, but they will not be able to be applied until this state is gone. | ||
| + | </pre> | ||
| − | + | == [[Battle Effects Pack 2 (Olivia)|Battle Effects Pack 2]] == | |
| − | |||
| − | |||
| − | + | <html><img src='https://img.itch.zone/aW1nLzE1NDQwNzkucG5n/original/9RXUwW.png' width='630'></html> | |
| − | + | <pre> | |
| − | + | Actor, Class, Enemy, Weapon, Armor, and State Notetags: | |
| − | |||
| − | |||
| − | |||
| − | |||
| − | + | <High Health ATK: +x%> | |
| − | < | + | <High Health DEF: +x%> |
| + | <High Health MAT: +x%> | ||
| + | <High Health MDF: +x%> | ||
| + | <High Health AGI: +x%> | ||
| + | <High Health LUK: +x%> | ||
| + | - Increases (or decreases if you use -x%) the parameter as HP% is higher. | ||
| + | Reaches +x% threshhold at 100% health and reduces proportionally as HP% is | ||
| + | lower. This modifier is gone when the actor reaches crisis level HP (which | ||
| + | is 25% by default). | ||
| + | </pre> | ||
| − | + | <html><img src='https://img.itch.zone/aW1nLzE1NDQwODMucG5n/original/WthVt%2F.png' width='630'></html> | |
| − | |||
| − | + | <pre> | |
| − | + | <Low Health ATK: +x%> | |
| − | + | <Low Health DEF: +x%> | |
| − | + | <Low Health MAT: +x%> | |
| − | + | <Low Health MDF: +x%> | |
| − | + | <Low Health AGI: +x%> | |
| − | + | <Low Health LUK: +x%> | |
| − | + | - Increases (or decreases if you use -x%) the parameter as HP% is lower. | |
| − | + | This rate scales harder the lower the HP ratio and reaches +x% at 0% HP. | |
| − | + | <Damage Cut: x%> | |
| − | + | - Decreases incoming damage battler receives by x%. This stacks additively | |
| − | + | with other damage cut-related effects. Damage Cut % cannot go below 0% or | |
| − | + | above 100% rate. | |
| − | |||
| − | |||
| − | + | <Element id Cut: x%> | |
| − | + | <Element name Cut: x%> | |
| − | + | - Decreases incoming damage battler receives by x% if it is a matching | |
| − | + | element. If using id, replace it with the element's ID in the system tab. If | |
| − | + | using name, replace it with the element's name in the system tab. If the | |
| − | + | element's name has an icon text code in it, leave out the icon text code. | |
| − | + | This stacks additively with other damage cut-related effects. Damage Cut % | |
| + | cannot go below 0% or above 100% rate. | ||
| + | </pre> | ||
| − | + | <html><img src='https://img.itch.zone/aW1nLzE1NDQwOTUucG5n/original/dk7%2BCV.png'></html> | |
| − | |||
| − | |||
| − | |||
| − | |||
| − | |||
| − | |||
| − | + | <pre> | |
| − | + | <Overheal HP> | |
| − | + | <Overheal MP> | |
| − | + | <Overheal TP> | |
| − | + | - Lets the notetag-affected battler be able to overheal past the maximum HP, | |
| − | + | MP, or TP amounts. The HP and MP maximum values become their respective | |
| − | + | maximum parameter values (9999 and 999 by default). TP's maximum value | |
| + | reaches the value set in the plugin parameters (200 by default). These | ||
| + | effects are only applied inside of battle. | ||
| − | + | <Swap param1 with param2> | |
| − | + | - Swaps the two parameters with each other. Replace param1 and param2 with | |
| − | + | mhp, mmp, atk, def, mat, mdf, agi, or luk. Any battler affected by this | |
| − | + | notetag will have those parameters swapped. If a battler is affected by | |
| − | + | multiple notetags that alter the similar stats, priority will be given to | |
| + | states, then equipment, then current class, then actor, then enemy. | ||
| − | + | State Notetags: | |
| − | |||
| − | |||
| − | |||
| − | |||
| − | + | <Dissolve State: x> | |
| − | + | <Dissolve State: x, x, x> | |
| − | + | - If a battler becomes affected by any of the states listed in x, that state | |
| + | will be prevented and the current state will be removed. | ||
| − | + | <Set State Counter: x> | |
| − | + | <Add State Counter: x> | |
| − | + | - Requires Yanfly's YEP_BuffsStatesCore.js. This sets the state's counter or | |
| − | + | adds to the states counter whenever the state is applied to the battler. | |
| − | + | This is a notetag made to make setting the counter value easier. | |
| − | + | </pre> | |
| − | + | == [[Battle Engine Core (YEP)|Battle Engine Core]] == | |
| − | |||
| − | |||
| − | |||
| − | |||
| − | |||
| − | + | <nowiki> | |
| − | < | + | When changing "Terms" and the "Messages" that appear in battle, inserting |
| + | the following tag anywhere in the message will cause the message to center | ||
| + | itself in the battle log. | ||
| − | + | <CENTER> | |
| − | + | This tag must be all caps in order for the battle log window to recognize | |
| − | the | + | it as an instruction to center the displayed battle text message. |
| − | + | There are a couple of notetags you can use to change the way certain skills | |
| − | + | and items will show up incase you don't want a name like 'Harold's Attack' | |
| − | + | to appear in the name. | |
| − | |||
| − | |||
| − | + | Skill and Item Notetags: | |
| − | |||
| − | |||
| − | |||
| − | + | <Display Text: x> | |
| − | < | + | This will change the text displayed to x. |
| − | + | <Display Icon: x> | |
| − | + | This will change the icon displayed to x. | |
| − | + | The battle turn order is also fixed, too. This way, any battlers that Have | |
| − | + | their AGI value changed over the course of battle will reflect those changes | |
| − | + | during the current turn rather than the following turn. The action speed | |
| + | calculation can also be adjusted and finetuned to have the random factor of | ||
| + | its speed calculation formula removed, too, making AGI actually worthwhile | ||
| + | as a tactical parameter. | ||
| − | < | + | Skill and Item Notetag: |
| − | This | + | <speed: +x> |
| + | <speed: -x> | ||
| + | This lets you break past the editor's limit of -2000 and 2000 allowing you | ||
| + | to set the speed of your actions with more control. | ||
| − | + | Casting Animations help provide visual hints for players either by letting | |
| − | + | them know which battler is going to perform an action or what type of skill | |
| + | that action will be. This plugin enables skills to have casting animations | ||
| + | that can be modified universally or customized for each individual skill. | ||
| − | + | Skill Notetag: | |
| − | < | + | <Cast Animation: x> |
| − | + | Sets the skill's cast animation to animation ID x. Setting x to zero will | |
| − | + | cause the skill to not have any animaton at all. | |
| − | |||
| − | + | In RPG Maker MV's default battle system, both the sideview and the frontview | |
| − | + | settings do not display counterattacks, reflected magic attacks, nor any | |
| − | + | case of substituting for battle members. The Battle Engine Core provides | |
| − | + | games that are using the sideview settings small amounts of animations to | |
| − | + | relay information to the player in a more visual sense. | |
| − | |||
| − | |||
| − | |||
| − | + | Magic Reflection will also display a reflection animation to indicate the | |
| − | + | battler has reflection properties. This animation can be changed in the | |
| − | + | parameters, but certain actors, classes, enemies, weapons, armors, and | |
| − | + | states can display a unique kind of animation for reflection if desired. | |
| − | |||
| − | |||
| − | |||
| − | |||
| − | |||
| − | < | + | Actor, Class, Enemy, Weapon, Armor, and State Notetag: |
| − | + | <Reflect Animation ID: x> | |
| + | Changes the user's reflect animation to x. This will take priority in the | ||
| + | following order: Actor, Class, Enemy, Weapon, Armor, State, Default. | ||
| − | + | Sometimes, you don't want your enemies to be able to move. Or you don't want | |
| − | + | certain actors to be able to move. They're just stationary for whatever | |
| − | + | reason. To accomplish that, you can use this notetag to forbid the battler | |
| + | from moving. | ||
| − | + | Actor, Class, Enemy, Weapon, Armor, and State Notetag: | |
| − | < | + | <Sprite Cannot Move> |
| − | + | Prevents the battler's sprite from moving. This will take priority in the | |
| − | + | following order: Actor, Class, Enemy, Weapon, Armor, and State. If an | |
| + | enemy is unable to move when it performs an action, it will flash white as | ||
| + | if it normally does in front view. | ||
| − | + | Sideview battlers are generally centered horizontally, and grounded at their | |
| − | + | feet. However, not all sideview battler spritesheets work this way. In the | |
| − | + | event you have a sideview battler that doesn't conform to those standards, | |
| − | + | you can 'anchor' them a different way. | |
| − | < | + | Actor, Class, Weapon, Armor, State Notetags: |
| − | < | + | <Anchor X: y.z> |
| − | + | <Anchor Y: y.z> | |
| − | + | This sets the anchor location for the actor's sideview battler at y.z. | |
| − | the | + | By default, the X anchor is 0.5 while the Y anchor is 1.0. If you want |
| − | + | the X anchor to be a bit more to the left, make it less than 0.5. Make it | |
| − | + | more than 0.5 to make the X anchor more towards the right. To raise the | |
| − | + | Y anchor, set the number value to less than 1.0. Keep adjusting until you | |
| + | find that perfect anchor setting. | ||
| − | + | If an anchor has multiple traits that yield different anchors, it will be | |
| − | + | used in a priority list akin to this order: | |
| − | |||
| − | |||
| − | |||
| − | + | States | |
| − | + | Weapons | |
| − | + | Armors | |
| − | + | Class | |
| − | + | Actor | |
| − | + | Default | |
| − | + | The higher it is on the priority list, the higher its priority. | |
| − | |||
| − | |||
| − | |||
| − | |||
| − | |||
| − | + | To give your enemies unique attack animations, you can use this notetag: | |
| − | |||
| − | + | Enemy Notetag: | |
| − | + | <Attack Animation: x> | |
| + | Replace x with the ID of the battle animation you wish to set as the | ||
| + | enemy's default attack animation. | ||
| − | + | By default, RPG Maker MV's battle system has automatic state removal under | |
| + | three different conditions: none, action end, turn end. | ||
| − | + | None and Turn End are working as intended. However, Action End, however, had | |
| − | + | the states removed at the start of the battler's action rather than the end. | |
| − | + | This is changed and updated to occur only at the end of a battler's action. | |
| − | |||
| − | |||
| − | |||
| − | |||
| − | |||
| − | |||
| − | + | Two more automatic conditions are now added: Action Start and Turn Start. | |
| − | + | These can be added and implemented using the following notetags: | |
| − | + | State Notetags: | |
| − | + | <Action Start: x> | |
| − | + | <Action Start: x to y> | |
| + | This will cause this state to update its turns remaining at the start of | ||
| + | an action. x is the number of turns it will last. If you use x to y, upon | ||
| + | applying the state, the state will be removed a random number of turns | ||
| + | from x to y. | ||
| − | + | <Turn Start: x> | |
| + | <Turn Start: x to y> | ||
| + | This will cause the state to update its turns remaining at the start of a | ||
| + | battle turn. x is the number of turns it will last. If you use x to y, | ||
| + | upon applying the state, the state will be removed a random number of | ||
| + | turns from x to y. | ||
| − | + | States with Action End have a unique trait to them where if the caster of | |
| − | + | the state is the current active battler (subject) and if the state is then | |
| − | + | applied on the user itself, they will gain a 'free turn'. The 'free turn' is | |
| − | + | to mitigate the user from losing 1 duration of the turn since with an Action | |
| − | + | End timing, they would lose the benefit of being under the state for that | |
| − | + | turn's timing. | |
| − | + | </nowiki> | |
| − | + | === [[Animated Sideview Enemies (YEP)|Animated Sideview Enemies]] === | |
| + | <hr> | ||
| − | + | <nowiki> | |
| − | + | Insert these notetags into the enemy noteboxes below to change their | |
| − | + | sidewview battler aspects. | |
| − | |||
| − | |||
| − | |||
| − | |||
| − | |||
| − | |||
| − | + | Enemy Notetags: | |
| − | |||
| − | |||
| − | |||
| − | |||
| − | |||
| − | + | --- General --- | |
| − | |||
| − | |||
| − | |||
| − | |||
| − | < | + | <Breathing> |
| − | + | <No Breathing> | |
| − | + | Enables or disables a 'breathing' effect for the enemy sprite. | |
| − | |||
| − | < | + | <Breathing Speed: x> |
| − | + | How many frames does it take to make a full breathing cycle? The lower the | |
| − | + | x value, the faster the enemy breathes. The higher the x value, the slower | |
| − | + | the enemy breathes. | |
| − | |||
| − | < | + | <Breathing Rate X: x.y> |
| − | + | <Breathing Rate Y: x.y> | |
| − | + | Sets the horizontal and vertical breathing rate to x.y. 1.0 is a 100% | |
| − | + | variance change while 0.0 is a 0% variance. | |
| − | |||
| − | < | + | <Enable HP Link Breathing> |
| − | + | <Disable HP Link Breathing> | |
| − | + | Will enable/disable HP Link Breathing. The lower the HP on the enemy, the | |
| − | + | slower the enemy will breathe. | |
| − | + | <Floating> | |
| + | Sets the enemy to be animated as if it was floating. | ||
| − | < | + | <Floating Speed: x> |
| − | + | How many frames does it take to do a full floating cycle? The lower the x | |
| + | value, the faster the enemy floats. The higher the x value, the slower the | ||
| + | enemy floats. | ||
| − | < | + | <Floating Rate: x.y> |
| − | + | Sets the floating rate for the enemy to x.y. 1.0 is a 100% variance change | |
| + | while 0.0 is a 0% variance change. | ||
| − | < | + | <Floating Height: x> |
| − | + | Sets the minimum float height for the enemy to x. | |
| − | |||
| − | < | + | <Floating Death> |
| − | + | <No Floating Death> | |
| − | + | Decide whether or not this particular enemy will float while dead or | |
| − | + | instead, drop to the ground instantly and will bypass the 'Floating Death' | |
| + | plugin parameter for the particular enemy. | ||
| − | < | + | <Scale Sprite: x%> |
| − | + | This allows you to scale the sprite larger or smaller by x% of the | |
| − | This | + | original sprite size. If you wish to only scale either the width or the |
| − | + | height, use the notetags below: | |
| − | |||
| − | + | <Scale Sprite Width: x%> | |
| + | <Scale Sprite Height: x%> | ||
| + | This will scale the sprite's width or height by x% amount specifically | ||
| + | rather than the whole sprite itself by the same ratio. | ||
| − | + | --- Sideview --- | |
| − | |||
| − | |||
| − | < | + | <Sideview Battler: filename> |
| − | + | This is the filename used for the sideview battler found within your | |
| − | the | + | project's img/sv_actors/ folder. Doing this will enable the following |
| + | notetags to be applied to the battler. This is case-sensitive and used | ||
| + | without the image's file extension. | ||
| − | < | + | *Example: SF_Actor3_8.png would be <Sideview Battler: SF_Actor3_8> |
| − | |||
| − | |||
| − | + | *Note: If more than one of these tags is used, the sideview battler | |
| − | + | selected will be picked from a random pool. Their settings, however, will | |
| − | + | match all of the other sideview settings set in the notetags for the sake | |
| − | + | of simplicity. | |
| − | + | --- Sideview Specific --- | |
| − | + | <Sideview Anchor X: y.z> | |
| − | + | <Sideview Anchor Y: y.z> | |
| − | + | This sets the anchor location for the enemy's sideview battler at y.z. | |
| − | + | This is used for the event you have an odd-proportioned sideview battler. | |
| − | + | ||
| − | + | <Sideview Width: x> | |
| + | <Sideview Height: x> | ||
| + | Sets the width/height of the sideview battler. This is for the event | ||
| + | you're using a battler image that may have different proportions than | ||
| + | normal sideview battlers. | ||
| − | + | <Sideview Collapse> | |
| + | Sets it so that the enemy when it dies will collapse and vanish. | ||
| − | < | + | <Sideview No Collapse> |
| − | + | Sets it so that the enemy when it dies will leave behind a corpse and | |
| − | + | will not vanish. | |
| − | |||
| − | |||
| − | |||
| − | + | <Sideview Frame Speed: x> | |
| + | Sets the frame speed of this sideview battler to x. The lower the x value, | ||
| + | the faster the sideview battler animates. The higher it is, the slower the | ||
| + | battler animates. | ||
| − | + | --- State Overlays --- | |
| − | |||
| − | |||
| − | |||
| − | |||
| − | |||
| − | |||
| − | + | <Sideview Show State Overlay> | |
| + | <Sideview Hide State Overlay> | ||
| + | This will either show or hide the state overlay for the sideview enemy and | ||
| + | ignore the default setting within the plugin parameters. | ||
| − | + | --- Motions --- | |
| − | |||
| − | |||
| − | |||
| − | |||
| − | + | <Sideview Attack Motion: swing> | |
| − | + | <Sideview Attack Motion: thrust> | |
| − | + | <Sideview Attack Motion: missile> | |
| − | + | Sets the basic attack motion for your sideview enemy if the sideview | |
| − | + | enemy is not using any weapons. You can use any of the following motions: | |
| − | + | walk wait chant guard damage evade | |
| − | + | thrust swing missile skill spell item | |
| − | + | escape victory dying abnormal sleep dead | |
| − | + | ||
| − | + | <Sideview Weapon: x> | |
| − | + | This sets the sprite's weapon image to x. If you haven't modified your | |
| − | + | system images of the weapons, they would be as follows: | |
| − | + | 0 - Nothing | |
| − | + | 1 - Dagger 7 - Long Bow 13 - Mace 19 - Slingshot 25 - Book | |
| − | + | 2 - Sword 8 - Crossbow 14 - Rod 20 - Shotgun 26 - Custom | |
| − | + | 3 - Flail 9 - Gun 15 - Club 21 - Rifle 27 - Custom | |
| − | + | 4 - Axe 10 - Claw 16 - Chain 22 - Chainsaw 28 - Custom | |
| − | + | 5 - Whip 11 - Glove 17 - Sword#2 23 - Railgun 29 - Custom | |
| − | + | 6 - Staff 12 - Spear 18 - Iron Pipe 24 - Stun Rod 30 - Custom | |
| − | |||
| − | + | * Note: Inserting multiple of these notetags will put them inside a random | |
| − | + | pool of weapons to use. Keep in mind if you use this notetag, it will use | |
| − | + | all the default settings found in the plugin's parameters. If you wish to | |
| − | + | use more unique settings, use the notetag below: | |
| − | |||
| − | |||
| − | |||
| − | |||
| − | + | <Sideview Weapon: x, y, z> | |
| − | + | This sets the sprite's weapon image to x, motion to y, and attack | |
| − | + | animation to z. An example of how this notetag would be used would be | |
| − | + | as such: | |
| − | |||
| − | |||
| − | |||
| − | |||
| − | |||
| − | |||
| − | |||
| − | |||
| − | + | <Sideview Weapon: 2, swing, 6> | |
| − | |||
| − | |||
| − | |||
| − | |||
| − | |||
| − | |||
| − | |||
| − | |||
| − | |||
| − | |||
| − | |||
| − | |||
| − | |||
| − | + | This will give the battler a sword with the swing motion and playing | |
| − | + | battle animation 6 when attacking. | |
| − | |||
| − | |||
| − | |||
| − | |||
| − | |||
| − | |||
| − | |||
| − | |||
| − | |||
| − | + | <Sideview Idle Motion: x> | |
| − | + | Sets the idling motion for your sideview enemy. You can use any of the | |
| − | + | following motions: | |
| − | + | walk wait chant guard damage evade | |
| − | + | thrust swing missile skill spell item | |
| − | + | escape victory dying abnormal sleep dead | |
| − | + | * Note: Inserting multiple of these notetags will put them inside a random | |
| − | + | pool of motions to use. | |
| − | |||
| − | |||
| − | |||
| − | |||
| − | |||
| − | + | <Sideview Damage Motion: x> | |
| − | + | Sets the damaged motion for your sideview enemy. You can use any of the | |
| − | + | following motions: | |
| − | + | walk wait chant guard damage evade | |
| − | + | thrust swing missile skill spell item | |
| − | + | escape victory dying abnormal sleep dead | |
| − | |||
| − | |||
| − | + | <Sideview Evade Motion: x> | |
| − | + | Sets the evasion motion for your sideview enemy. You can use any of the | |
| − | + | following motions: | |
| − | + | walk wait chant guard damage evade | |
| − | + | thrust swing missile skill spell item | |
| − | + | escape victory dying abnormal sleep dead | |
| − | |||
| − | |||
| − | + | <Sideview Escape Motion: x> | |
| − | + | Sets the escaping motion for your sideview enemy. You can use any of the | |
| − | + | following motions: | |
| − | + | walk wait chant guard damage evade | |
| − | + | thrust swing missile skill spell item | |
| − | + | escape victory dying abnormal sleep dead | |
| − | |||
| − | |||
| − | + | <Sideview Guard Motion: x> | |
| − | + | Sets the guard motion for your sideview enemy. You can use any of the | |
| − | + | following motions: | |
| − | + | walk wait chant guard damage evade | |
| − | + | thrust swing missile skill spell item | |
| − | + | escape victory dying abnormal sleep dead | |
| − | + | ||
| − | + | <Sideview Abnormal Motion: x> | |
| + | Sets the abnormal motion for your sideview enemy. You can use any of the | ||
| + | following motions: | ||
| + | walk wait chant guard damage evade | ||
| + | thrust swing missile skill spell item | ||
| + | escape victory dying abnormal sleep dead | ||
| − | + | <Sideview Sleep Motion: x> | |
| − | + | Sets the sleep motion for your sideview enemy. You can use any of the | |
| − | + | following motions: | |
| − | + | walk wait chant guard damage evade | |
| − | + | thrust swing missile skill spell item | |
| − | + | escape victory dying abnormal sleep dead | |
| − | |||
| − | |||
| − | |||
| − | |||
| − | |||
| − | |||
| − | |||
| − | |||
| − | + | <Sideview Dying Motion: x> | |
| − | + | Sets the dying (crisis) motion for your sideview enemy. You can use any | |
| − | + | of the following motions: | |
| − | + | walk wait chant guard damage evade | |
| − | + | thrust swing missile skill spell item | |
| − | + | escape victory dying abnormal sleep dead | |
| − | |||
| − | |||
| − | |||
| − | |||
| − | |||
| − | |||
| − | |||
| − | + | <Sideview Dead Motion: x> | |
| − | + | Sets the dead motion for your sideview enemy. You can use any of the | |
| − | + | following motions: | |
| − | + | walk wait chant guard damage evade | |
| − | + | thrust swing missile skill spell item | |
| − | + | escape victory dying abnormal sleep dead | |
| − | |||
| − | |||
| − | + | --- Shadows --- | |
| − | |||
| − | |||
| − | |||
| − | |||
| − | |||
| − | |||
| − | |||
| − | + | <Sideview Show Shadow> | |
| − | + | Sets it so the enemy will show its shadow for its sideview sprite. The | |
| − | + | default setting of this is tied to Battle Engine Core's 'Show Shadows'. | |
| − | |||
| − | |||
| − | |||
| − | |||
| − | |||
| − | |||
| − | |||
| − | |||
| − | |||
| − | |||
| − | + | <Sideview Hide Shadow> | |
| − | + | Sets it so the enemy will hide its shadow for its sideview sprite. The | |
| − | + | default setting of this is tied to Battle Engine Core's 'Show Shadows'. | |
| − | |||
| − | |||
| − | |||
| − | |||
| − | |||
| − | |||
| − | |||
| − | |||
| − | |||
| − | |||
| − | + | <Sideview Shadow Width: x%> | |
| − | + | Sets the shadow width to x% larger/smaller than the default shadow size | |
| − | + | found within the img/system folder. | |
| − | |||
| − | |||
| − | |||
| − | |||
| − | |||
| − | + | <Sideview Shadow Height: x%> | |
| − | + | Sets the shadow height to x% larger/smaller than the default shadow size | |
| − | + | found within the img/system folder. | |
| − | |||
| − | |||
| − | |||
| − | |||
| − | |||
| − | |||
| − | + | State Notetags: | |
| − | |||
| − | |||
| − | |||
| − | |||
| − | |||
| − | |||
| − | |||
| − | + | <Hide Sideview Weapon> | |
| − | + | This will cause the animated sideview enemy battler to hide its sideview | |
| − | + | weapon effect. The attack motion will revert back to the barehanded attack | |
| − | + | motion set for the enemy and the attack animation will be the enemy's | |
| − | + | default attack animation. | |
| − | + | </nowiki> | |
| − | |||
| − | |||
| − | |||
| − | |||
| − | |||
| − | |||
| − | |||
| − | = | + | === [[Battle System - ATB (YEP)|Battle System - ATB]] === |
| − | + | <hr> | |
| − | |||
| − | |||
| − | |||
| − | |||
| − | |||
| − | |||
| − | |||
| − | |||
| − | |||
| − | |||
| − | |||
| − | + | <nowiki> | |
| − | + | The following are notetags that pertain to and affect the ATB system. | |
| − | |||
| − | |||
| − | |||
| − | |||
| − | |||
| − | |||
| − | |||
| − | + | Skill and Item Notetags: | |
| − | + | <ATB Help> | |
| − | + | text | |
| − | + | text | |
| − | + | </ATB Help> | |
| − | + | For those planning on using multiple battle systems, sometimes you may | |
| − | + | have your skills perform differently while using ATB. If so, using this | |
| − | + | notetag will allow skills and items to display different help text while | |
| − | + | ATB is enabled. | |
| − | + | <ATB Speed: x> | |
| − | + | <ATB Charge: x> | |
| − | + | <ATB Gauge: x> | |
| − | This | + | Usable only during ATB. This sets the target's current speed or charge to |
| − | the | + | x. If 'speed' or 'charge' is used, it will only affect those gauges while |
| − | + | in the respective phase. If 'gauge' is used, it will affect either. | |
| − | |||
| − | |||
| − | |||
| − | |||
| − | |||
| − | + | <ATB Speed: x%> | |
| − | < | + | <ATB Charge: x%> |
| + | <ATB Gauge: x%> | ||
| + | Usable only during ATB. This sets the target's current speed or charge to | ||
| + | x% of the whole gauge. If 'speed' or 'charge' is used, it will only affect | ||
| + | those gauges while in the respective phase. If 'gauge' is used, it will | ||
| + | affect either. | ||
| − | < | + | <ATB Speed: +x> or <ATB Speed: -x> |
| − | + | <ATB Charge: +x> or <ATB Charge: -x> | |
| − | + | <ATB Gauge: +x> or <ATB Gauge: -x> | |
| + | Usable only during ATB. This increases or decreases the target's current | ||
| + | speed or charge by x. If 'speed' or 'charge' is used, it will only affect | ||
| + | those gauges while in the respective phase. If 'gauge' is used, it will | ||
| + | affect either. | ||
| − | + | <ATB Speed: +x%> or <ATB Speed: -x%> | |
| + | <ATB Charge: +x%> or <ATB Charge: -x%> | ||
| + | <ATB Gauge: +x%> or <ATB Gauge: -x%> | ||
| + | Usable only during ATB. This increases or decreases the target's current | ||
| + | speed or charge by x% of the whole gauge. If 'speed' or 'charge' is used, | ||
| + | it will only affect those gauges while in the respective phase. If 'gauge' | ||
| + | is used, it will affect either. | ||
| − | < | + | <After ATB: x> |
| − | + | <After ATB: x%> | |
| − | + | This will set the skill/item user's ATB speed value to x or x%. If 'x' is | |
| − | < | + | used, this will be the exact ATB value. If x% is used, this will be the |
| − | + | percentage of the ATB gauge that it will be at. | |
| − | notetag. | + | |
| + | <ATB Interrupt> | ||
| + | <ATB Interrupt: x%> | ||
| + | This will give the skill the ability to interrupt and cancel out the | ||
| + | target's current action while it is in the charging phase. If the 'x%' | ||
| + | notetag version is used, it will have a x% chance of success. | ||
| + | |||
| + | <Cannot ATB Interrupt> | ||
| + | This causes the skill to be unable to be interrupted and prevent the | ||
| + | battler's ATB to reset. | ||
| + | |||
| + | Actor, Class, Enemy, Weapon, Armor, and State Notetags: | ||
| + | <ATB Start: +x> | ||
| + | <ATB Start: +x%> | ||
| + | Usable only during ATB. This will give the actor, class, enemy, weapon, | ||
| + | armor, or state the property of starting battle with X ATB Speed or X% of | ||
| + | the ATB gauge filled up. | ||
| + | |||
| + | <ATB Turn: +x> | ||
| + | <ATB Turn: +x%> | ||
| + | Usable only during ATB. This will give the actor, class, enemy, weapon, | ||
| + | armor, or state the property of starting a turn with X ATB Speed or X% of | ||
| + | the ATB gauge filled up. | ||
</nowiki> | </nowiki> | ||
| − | === [[ | + | ==== [[Visual ATB Gauge (YEP)|Visual ATB Gauge]] ==== |
<hr> | <hr> | ||
<nowiki> | <nowiki> | ||
| − | + | The following are some notetags you can use to adjust the appearance of | |
| − | + | the enemy's ATB Gauge. | |
| − | + | Enemy Notetags: | |
| + | <Show ATB Gauge> | ||
| + | <Hide ATB Gauge> | ||
| + | This will cause the ATB Gauge to be shown or hidden ignoring the default | ||
| + | settings found in the parameters. | ||
| − | + | <ATB Gauge Width: x> | |
| + | This allows you to set the enemy's ATB Gauge width to x instead of having | ||
| + | it match the enemy's battler graphic width. | ||
| + | </nowiki> | ||
| − | + | === [[Battle System - CTB (YEP)|Battle System - CTB]] === | |
| − | + | <hr> | |
| − | |||
| − | |||
| − | + | <nowiki> | |
| − | + | The following are notetags that pertain to and affect the CTB system. | |
| − | |||
| − | |||
| − | + | Actor and Enemy Notetags: | |
| + | <CTB Icon: x> | ||
| + | This sets the icon used for the actor/enemy to be x. | ||
| − | < | + | <CTB Border Color: x> |
| − | + | This sets the border color used for the actor/enemy to text color x. | |
| − | |||
| − | < | + | <CTB Background Color: x> |
| − | + | This sets the background color used for the actor/enemy to text color x. | |
| − | |||
| − | + | Actor only Notetags: | |
| + | <Class x CTB Icon: y> | ||
| + | This sets it so that if the actor is a specific class, the actor will get | ||
| + | a specific icon used for the CTB Turn Order. If the actor is class x, it | ||
| + | will receive icon y. | ||
| − | + | <Hero CTB Icon: x> | |
| + | <Warrior CTB Icon: x> | ||
| + | <Mage CTB Icon: x> | ||
| + | <Priest CTB Icon: x> | ||
| + | If you prefer to use names instead of class ID's, you can use the above | ||
| + | notetag format. If the actor is the named class, it will receive icon x. | ||
| + | If you have multiple classes with the same name, priority will be given to | ||
| + | the class with the highest ID. | ||
| − | < | + | Skill and Item Notetags: |
| − | + | <CTB Help> | |
| − | + | text | |
| − | < | + | text |
| − | + | </CTB Help> | |
| − | + | For those planning on using multiple battle systems, sometimes you may | |
| − | + | have your skills perform differently while using CTB. If so, using this | |
| − | + | notetag will allow skills and items to display different help text while | |
| − | + | CTB is enabled. | |
| − | + | <CTB Speed: x> | |
| + | Usable only during CTB. This sets the target's current speed to x. | ||
| − | < | + | <CTB Speed: x%> |
| − | + | Usable only during CTB. This sets the target's current speed to x% of | |
| − | + | the CTB turn completion target. | |
| − | |||
| − | |||
| − | < | + | <CTB Speed: +x> |
| − | < | + | <CTB Speed: -x> |
| − | + | Usable only during CTB. This increases or decreases the target's current | |
| − | x | + | speed by x. |
| − | |||
| − | < | + | <CTB Speed: +x%> |
| − | - | + | <CTB Speed: -x%> |
| − | + | Usable only during CTB. This increases or decreases the target's current | |
| − | + | speed or charge by x% of the CTB turn completion target. | |
| − | |||
| − | < | + | <CTB Order: +x> |
| − | - | + | <CTB Order: -x> |
| − | the | + | Moves target's position in the turn order by +x or -x. +x will make the |
| − | + | target having to wait more before getting their turn while -x will make | |
| − | + | the target having to wait less. The effect is minimal and will only last | |
| + | for the current turn cycle. | ||
| + | * Note: If you use this for multiple targets, each target will shift turns | ||
| + | individually at a time. | ||
| − | + | <After CTB: x> | |
| + | <After CTB: x%> | ||
| + | This will set the skill/item user's CTB speed value to x or x%. If 'x' is | ||
| + | used, this will be the exact CTB value. If x% is used, this will be the | ||
| + | percentage of the CTB turn completion target that it will be at. | ||
| − | < | + | Actor, Class, Enemy, Weapon, Armor, and State Notetags: |
| − | < | + | <CTB Start: +x> |
| − | + | <CTB Start: +x%> | |
| − | + | Usable only during CTB. This will give the actor, class, enemy, weapon, | |
| − | + | armor, or state the property of starting battle with X CTB Speed or X% of | |
| + | the CTB turn completion target. | ||
| − | < | + | <CTB Turn: +x> |
| − | < | + | <CTB Turn: +x%> |
| − | + | Usable only during CTB. This will give the actor, class, enemy, weapon, | |
| − | + | armor, or state the property of starting a turn with X CTB Speed or X% of | |
| − | + | the CTB turn completion target. | |
| + | </nowiki> | ||
| − | + | === [[Order Turn Battle (Olivia)|Battle System - OTB (Order Turn Battle)]] === | |
| − | + | <hr> | |
| − | |||
| − | |||
| − | |||
| − | + | <html><img src='https://img.itch.zone/aW1nLzE0OTczMzkuZ2lm/original/CUlCjM.gif'></html> | |
| − | |||
| − | |||
| − | |||
| − | |||
| − | + | ; Skill and Item Notetags: | |
| − | + | <html><img src='https://img.itch.zone/aW1nLzE0OTczNTAucG5n/original/BmAjBi.png'></html> | |
| − | |||
| − | |||
| − | |||
| − | |||
| − | + | <pre> | |
| − | + | <OTB User Next Turn: +x> | |
| − | + | <OTB User Next Turn: -x> | |
| − | + | Change the user's turn order position for the next turn upon using this | |
| − | + | skill or item. This will only occur once upon usage, no matter how many times | |
| + | the battler hits the target. | ||
| + | </pre> | ||
| − | + | <html><img src='https://img.itch.zone/aW1nLzE0OTczNTMucG5n/original/bG2Pi1.png'></html> | |
| − | + | <pre> | |
| − | + | <OTB Target Current Turn: +x> | |
| − | + | <OTB Target Current Turn: -x> | |
| − | + | <OTB Target Next Turn: +x> | |
| − | + | <OTB Target Next Turn: -x> | |
| − | + | <OTB Target Follow Turn: +x> | |
| − | + | <OTB Target Follow Turn: -x> | |
| − | + | Change the target's turn order position for the current turn, the next turn, | |
| − | + | or the following turn. If you are using the 'Follow' version of the notetag, | |
| − | + | the turn it will modify will depend on if the target has acted during the | |
| + | current turn. If it has acted, then it will affect the next turn, otherwise, | ||
| + | the current turn. Successfully attacking the target multiple times will also | ||
| + | affect the target multiple times. | ||
| + | </pre> | ||
| + | |||
| + | <pre> | ||
| + | <OTB User Add Current Turn Actions: x> | ||
| + | <OTB User Add Next Turn Actions: x> | ||
| + | Add x actions to the current turn or the next turn for the user. This will | ||
| + | only be added once no matter how many times the battler hits the target. | ||
| + | </pre> | ||
| + | |||
| + | <pre> | ||
| + | <OTB Target Add Current Turn Actions: x> | ||
| + | <OTB Target Add Next Turn Actions: x> | ||
| + | Add x actions to the current turn or the next turn for the target. If the | ||
| + | target is targeted multiple times, the target will gain actions multiple | ||
| + | times so please be cautious when using this. | ||
| + | </pre> | ||
| − | + | === [[Battle System - STB (YEP)|Battle System - STB]] === | |
| − | + | <hr> | |
| − | |||
| − | |||
| − | |||
| − | |||
| − | |||
| − | |||
| − | + | <nowiki> | |
| + | The following are notetags that pertain to and affect the STB system. | ||
| − | + | Skill and Item Notetags: | |
| − | |||
| − | |||
| − | |||
| − | < | + | <STB Help> |
| − | + | text | |
| − | + | text | |
| − | + | </STB Help> | |
| + | For those planning on using multiple battle systems, sometimes you may | ||
| + | have your skills perform differently while using STB. If so, using this | ||
| + | notetag will allow skills and items to display different help text while | ||
| + | STB is enabled. | ||
</nowiki> | </nowiki> | ||
| − | === [[ | + | === [[Counter Control (YEP)|Counter Control]] === |
<hr> | <hr> | ||
<nowiki> | <nowiki> | ||
| − | + | You can use the following notetags to alter counters in your game. Each of | |
| − | + | these notetags will alter counters in a particular way. | |
| − | |||
| − | |||
Actor and Enemy Notetags: | Actor and Enemy Notetags: | ||
| − | < | + | <Default Counter: x> |
| − | + | <Default Counter: name> | |
| + | Sets the default counter skill to x. If it is left as 0, then the counter | ||
| + | skill will be RPG Maker MV's default counter skill. If you are using the | ||
| + | name of the skill, and there are multiple skills in the database with the | ||
| + | same name, then priority will be given to the skill with the highest ID. | ||
| + | *Note: Use 0 for x if you wish to add RPG Maker MV's default counter. | ||
| − | + | Actor, Class, Enemy, Weapon, Armor, and State Notetags: | |
| − | |||
| − | < | + | <Counter Skills: x> |
| − | + | <Counter Skills: x, x, x> | |
| + | <Counter Skills: x to y> | ||
| + | This will add to the list of possible counter skills for the battler. | ||
| + | If multiple skill ID's are listed, then they're all added. Priority will | ||
| + | be given to the counter skills listed earlier. | ||
| + | *Note: Use 0 for x if you wish to add RPG Maker MV's default counter. | ||
| + | *Note2: See the Counter List priority to see which skills will be given | ||
| + | priority on the counter skill list. | ||
| − | + | <Counter Skill: name> | |
| + | This will add the named skill to the list of possible counter skills for | ||
| + | the battler. If there are multiple skills in the database with the same | ||
| + | name, then priority will be given to the skill with the highest ID. | ||
| + | *Note: See the Counter List priority to see which skills will be given | ||
| + | priority on the counter skill list. | ||
| − | + | <Counter Total: +x> | |
| + | <Counter Total: -x> | ||
| + | Alters the number of times the battler can counter by x. This is the | ||
| + | amount of times the battler can counter until the battler's turn comes up | ||
| + | at which, the number of times is reset. | ||
| − | < | + | <Target Counter: x%> |
| − | + | When this battler attacks an opponent target, this will cause the target | |
| − | + | counter rate to be altered by x% rate. If a target has 10% CNT, then a | |
| − | + | notetag of 50% will cause the counter rate to become 5%. | |
| − | < | + | <Target Counter: +x%> |
| − | < | + | <Target Counter: -x%> |
| − | + | When this battler attacks an opponent target, this will cause the target | |
| − | + | counter rate to increase or decrease by x%. If a target has 10% CNT, then | |
| − | + | a notetag of +50% will cause the counter rate to become +60%. | |
| − | notetag | ||
| − | |||
| − | |||
| − | |||
| − | + | <Evade Counter> | |
| − | < | + | This will change all counter skills used by the related battler to become |
| + | evade counters regardless of their default nature. However, if the battler | ||
| + | is affected by a trait that is <Hit Counter>, then priority will be given | ||
| + | to the <Hit Counter> trait instead. | ||
| − | + | <Hit Counter> | |
| − | + | This will change all counter skills used by the related battler to become | |
| − | < | + | hit counters regardless of their default nature. If the battler is also |
| − | + | affected by <Evade Counter>, this effect will take priority. | |
| − | + | Skill and Item Notetags: | |
| − | |||
| − | |||
| − | < | + | <Ally Counter> |
| − | + | Makes this action able to proc counter skills by allied members. | |
| − | |||
| − | < | + | <Ally Cannot Counter> |
| − | + | Makes this action unable to proc counter skills by allied members. | |
| − | < | + | <Cannot Counter> |
| − | This | + | Causes this action to be un-counterable. This means that it will always |
| + | return a 0% counterattack possibility. | ||
| − | < | + | <Counter Rate: x%> |
| − | This | + | This will cause this action to proc a counter from the target by x% rate. |
| + | This means if the target has a 10% chance to counter and this notetag is | ||
| + | 50%, then the target will have a 5% chance to counter. | ||
| − | < | + | <Counter Rate: +x%> |
| − | This | + | <Counter Rate: -x%> |
| − | + | This will cause this action to proc a counter from the target by an | |
| + | additive x%. This means if the target has a 10% chance to counter and this | ||
| + | notetag is +50%, then the target has a 60% chance to counter. | ||
| − | + | Skill Notetags: | |
| − | |||
| − | + | <Evade Counter> | |
| − | + | If this skill is being used as the counter skill, the battler will evade | |
| − | the | + | the current action and then counter. |
| − | + | <Hit Counter> | |
| + | If this skill is being used as the counter skill, the battler will take | ||
| + | the hit against the current action and then counter. | ||
| − | < | + | <Counter Name: text> |
| − | + | This changes the displayed name of the skill when used as a counter skill | |
| − | + | to 'text'. | |
| − | |||
| − | |||
| − | |||
| − | <x | + | <Counter Icon: x> |
| − | + | This changes the displayed icon of the skill when used as a counter skill | |
| − | + | to x icon. | |
| − | + | </nowiki> | |
| − | |||
| − | to | ||
| − | |||
| − | + | ; Counter Conditions | |
| − | + | <nowiki> | |
| − | + | When making your counter skills, you can have those counter skills respond | |
| − | + | only to specific conditions. If all conditions are met, the counter skill | |
| − | + | will occur. If a single condition isn't met, that counter skill will then be | |
| − | + | skipped and the next one will be checked. To add counter conditions, use the | |
| − | + | following notetags: | |
| + | |||
| + | Skill Notetags: | ||
| + | |||
| + | <Counter Condition> | ||
| + | condition | ||
| + | condition | ||
| + | </Counter Condition> | ||
| + | Replace the 'condition' text in between the notetags with the listed in | ||
| + | the conditions list below to best fit what you want. | ||
| + | |||
| + | --- Example --- | ||
| − | < | + | <Counter Condition> |
| − | + | physical hit | |
| − | + | single target | |
| − | + | </Counter Condition> | |
| − | + | This skill will only be used as a counter skill if the current action is | |
| − | + | a physical hit that's single target. | |
| − | |||
</nowiki> | </nowiki> | ||
| − | + | ; Counter Condition List | |
<nowiki> | <nowiki> | ||
| − | + | Here is a list of all the counter conditions that come with this plugin that | |
| − | + | you can use. Keep in mind that all of the counter conditions must be met | |
| + | before a counter will take effect. If even a single counter condition fails | ||
| + | to be met, the counter skill will not proc. | ||
| − | + | =-=-=-=-=-=-=-=-=-=-=-=-=-=-=-=-=-=-=-=-=-=-=-=-=-=-=-=-=-=-=-=-=-=-=-=-=-=- | |
| + | ATTACKER param eval | ||
| + | - - - - - - - - - - - - - - - - - - - - - - - - - - - - - - - - - - - - - - - | ||
| + | Replace 'param' with 'level', 'maxhp', 'hp', 'maxmp', 'mp', 'atk', 'def', | ||
| + | 'mat', 'mdf', 'agi', or 'luk'. This will run a check against the attacker's | ||
| + | parameter. If the check returns 'true', the counter condition is met. If it | ||
| + | returns 'false', the counter condition isn't met. | ||
| + | - - - - - - - - - - - - - - - - - - - - - - - - - - - - - - - - - - - - - - - | ||
| + | Example: Attacker level > 50 | ||
| + | Attacker hp <= attacker.mhp * 0.50 | ||
| + | Attacker atk > defender.def | ||
| + | =-=-=-=-=-=-=-=-=-=-=-=-=-=-=-=-=-=-=-=-=-=-=-=-=-=-=-=-=-=-=-=-=-=-=-=-=-=- | ||
| − | + | =-=-=-=-=-=-=-=-=-=-=-=-=-=-=-=-=-=-=-=-=-=-=-=-=-=-=-=-=-=-=-=-=-=-=-=-=-=- | |
| − | + | CERTAIN HIT | |
| − | + | - - - - - - - - - - - - - - - - - - - - - - - - - - - - - - - - - - - - - - - | |
| − | + | If the current action used against the target is a certain hit, the counter | |
| + | condition is met. If it isn't, the counter condition isn't met. | ||
| + | - - - - - - - - - - - - - - - - - - - - - - - - - - - - - - - - - - - - - - - | ||
| + | Example: Certain Hit | ||
| + | =-=-=-=-=-=-=-=-=-=-=-=-=-=-=-=-=-=-=-=-=-=-=-=-=-=-=-=-=-=-=-=-=-=-=-=-=-=- | ||
| − | + | =-=-=-=-=-=-=-=-=-=-=-=-=-=-=-=-=-=-=-=-=-=-=-=-=-=-=-=-=-=-=-=-=-=-=-=-=-=- | |
| − | + | COUNTER HIT | |
| − | + | - - - - - - - - - - - - - - - - - - - - - - - - - - - - - - - - - - - - - - - | |
| − | + | If the current action used against the target is a counter skill, the | |
| − | + | counter condition is met. If it isn't, the counter condition isn't met. | |
| − | + | - - - - - - - - - - - - - - - - - - - - - - - - - - - - - - - - - - - - - - - | |
| − | + | Example: Counter Hit | |
| − | + | =-=-=-=-=-=-=-=-=-=-=-=-=-=-=-=-=-=-=-=-=-=-=-=-=-=-=-=-=-=-=-=-=-=-=-=-=-=- | |
| − | + | =-=-=-=-=-=-=-=-=-=-=-=-=-=-=-=-=-=-=-=-=-=-=-=-=-=-=-=-=-=-=-=-=-=-=-=-=-=- | |
| − | + | DEFENDER param eval | |
| − | + | - - - - - - - - - - - - - - - - - - - - - - - - - - - - - - - - - - - - - - - | |
| − | + | Replace 'param' with 'level', 'maxhp', 'hp', 'maxmp', 'mp', 'atk', 'def', | |
| − | + | 'mat', 'mdf', 'agi', or 'luk'. This will run a check against the defender's | |
| − | + | parameter. If the check returns 'true', the counter condition is met. If it | |
| − | + | returns 'false', the counter condition isn't met. | |
| − | + | - - - - - - - - - - - - - - - - - - - - - - - - - - - - - - - - - - - - - - - | |
| − | + | Example: Defender level > 50 | |
| + | Defender hp <= defender.mhp * 0.50 | ||
| + | Defender atk > attacker.def | ||
| + | =-=-=-=-=-=-=-=-=-=-=-=-=-=-=-=-=-=-=-=-=-=-=-=-=-=-=-=-=-=-=-=-=-=-=-=-=-=- | ||
| − | == | + | =-=-=-=-=-=-=-=-=-=-=-=-=-=-=-=-=-=-=-=-=-=-=-=-=-=-=-=-=-=-=-=-=-=-=-=-=-=- |
| − | + | ELEMENT: x | |
| − | + | ELEMENT: name | |
| − | + | - - - - - - - - - - - - - - - - - - - - - - - - - - - - - - - - - - - - - - - | |
| + | If the current action used against the target has element X attached to it, | ||
| + | the counter condition is met. If it isn't, the counter condition isn't met. | ||
| + | Replace 'x' with the element ID or the element name in the database system | ||
| + | tab. If multiple elements share the same name, priority will be given to the | ||
| + | element with the highest ID. | ||
| + | - - - - - - - - - - - - - - - - - - - - - - - - - - - - - - - - - - - - - - - | ||
| + | Example: Element: 4 | ||
| + | Element: Fire | ||
| + | Element: Ice | ||
| + | =-=-=-=-=-=-=-=-=-=-=-=-=-=-=-=-=-=-=-=-=-=-=-=-=-=-=-=-=-=-=-=-=-=-=-=-=-=- | ||
| − | --- | + | =-=-=-=-=-=-=-=-=-=-=-=-=-=-=-=-=-=-=-=-=-=-=-=-=-=-=-=-=-=-=-=-=-=-=-=-=-=- |
| + | EVAL: code | ||
| + | - - - - - - - - - - - - - - - - - - - - - - - - - - - - - - - - - - - - - - - | ||
| + | For those with JavaScript experience, you can use the above line to perform | ||
| + | an eval check to see if the conditions are met for the counter skill. If the | ||
| + | eval check returns 'true', the condition is met. If it returns 'false', the | ||
| + | condition isn't met. | ||
| + | - - - - - - - - - - - - - - - - - - - - - - - - - - - - - - - - - - - - - - - | ||
| + | Example: Eval: attacker.name() === 'Harold' | ||
| + | Eval: defender.hpRate() <= 0.50 | ||
| + | =-=-=-=-=-=-=-=-=-=-=-=-=-=-=-=-=-=-=-=-=-=-=-=-=-=-=-=-=-=-=-=-=-=-=-=-=-=- | ||
| − | + | =-=-=-=-=-=-=-=-=-=-=-=-=-=-=-=-=-=-=-=-=-=-=-=-=-=-=-=-=-=-=-=-=-=-=-=-=-=- | |
| − | + | ITEM: x | |
| − | + | ITEM: name | |
| − | + | - - - - - - - - - - - - - - - - - - - - - - - - - - - - - - - - - - - - - - - | |
| − | + | If the current aciton used against the target is item x, the counter | |
| − | + | condition is met. If it isn't, the counter condition isn't met. Replace 'x' | |
| − | + | with the item ID. If you choose to use the item name, and your database | |
| − | + | has multiple items with the same name, priority will be given to the item | |
| − | + | with the highest ID. | |
| + | - - - - - - - - - - - - - - - - - - - - - - - - - - - - - - - - - - - - - - - | ||
| + | Example: Item: 30 | ||
| + | Item: Bomb | ||
| + | =-=-=-=-=-=-=-=-=-=-=-=-=-=-=-=-=-=-=-=-=-=-=-=-=-=-=-=-=-=-=-=-=-=-=-=-=-=- | ||
| − | + | =-=-=-=-=-=-=-=-=-=-=-=-=-=-=-=-=-=-=-=-=-=-=-=-=-=-=-=-=-=-=-=-=-=-=-=-=-=- | |
| − | + | MAGICAL HIT | |
| − | + | - - - - - - - - - - - - - - - - - - - - - - - - - - - - - - - - - - - - - - - | |
| − | + | If the current action used against the target is a magical hit, the counter | |
| − | + | condition is met. If it isn't, the counter condition isn't met. | |
| − | + | - - - - - - - - - - - - - - - - - - - - - - - - - - - - - - - - - - - - - - - | |
| − | + | Example: Magical Hit | |
| + | =-=-=-=-=-=-=-=-=-=-=-=-=-=-=-=-=-=-=-=-=-=-=-=-=-=-=-=-=-=-=-=-=-=-=-=-=-=- | ||
| − | --- | + | =-=-=-=-=-=-=-=-=-=-=-=-=-=-=-=-=-=-=-=-=-=-=-=-=-=-=-=-=-=-=-=-=-=-=-=-=-=- |
| + | MULTI TARGET | ||
| + | - - - - - - - - - - - - - - - - - - - - - - - - - - - - - - - - - - - - - - - | ||
| + | If the current action used against the target is a multi target action, the | ||
| + | counter condition is met. If it isn't, the counter condition isn't met. | ||
| + | - - - - - - - - - - - - - - - - - - - - - - - - - - - - - - - - - - - - - - - | ||
| + | Example: Multi Target | ||
| + | =-=-=-=-=-=-=-=-=-=-=-=-=-=-=-=-=-=-=-=-=-=-=-=-=-=-=-=-=-=-=-=-=-=-=-=-=-=- | ||
| − | + | =-=-=-=-=-=-=-=-=-=-=-=-=-=-=-=-=-=-=-=-=-=-=-=-=-=-=-=-=-=-=-=-=-=-=-=-=-=- | |
| − | + | NOT CERTAIN HIT | |
| − | + | - - - - - - - - - - - - - - - - - - - - - - - - - - - - - - - - - - - - - - - | |
| − | + | If the current action used against the target is NOT certain hit, the | |
| − | + | counter condition is met. If it is, the counter condition isn't met. | |
| + | - - - - - - - - - - - - - - - - - - - - - - - - - - - - - - - - - - - - - - - | ||
| + | Example: Not Certain Hit | ||
| + | =-=-=-=-=-=-=-=-=-=-=-=-=-=-=-=-=-=-=-=-=-=-=-=-=-=-=-=-=-=-=-=-=-=-=-=-=-=- | ||
| − | + | =-=-=-=-=-=-=-=-=-=-=-=-=-=-=-=-=-=-=-=-=-=-=-=-=-=-=-=-=-=-=-=-=-=-=-=-=-=- | |
| − | + | NOT COUNTER HIT | |
| − | + | - - - - - - - - - - - - - - - - - - - - - - - - - - - - - - - - - - - - - - - | |
| + | If the current action used against the target is NOT a counter skill, the | ||
| + | counter condition is met. If it is, the counter condition isn't met. | ||
| + | - - - - - - - - - - - - - - - - - - - - - - - - - - - - - - - - - - - - - - - | ||
| + | Example: Not Counter Hit | ||
| + | =-=-=-=-=-=-=-=-=-=-=-=-=-=-=-=-=-=-=-=-=-=-=-=-=-=-=-=-=-=-=-=-=-=-=-=-=-=- | ||
| − | + | =-=-=-=-=-=-=-=-=-=-=-=-=-=-=-=-=-=-=-=-=-=-=-=-=-=-=-=-=-=-=-=-=-=-=-=-=-=- | |
| − | + | NOT ELEMENT: x | |
| − | + | NOT ELEMENT: name | |
| − | + | - - - - - - - - - - - - - - - - - - - - - - - - - - - - - - - - - - - - - - - | |
| − | + | If the current action used against the target has element X attached to it, | |
| + | the counter condition is NOT met. If it isn't, the counter condition is met. | ||
| + | Replace 'x' with the element ID or the element name in the database system | ||
| + | tab. If multiple elements share the same name, priority will be given to the | ||
| + | element with the highest ID. | ||
| + | - - - - - - - - - - - - - - - - - - - - - - - - - - - - - - - - - - - - - - - | ||
| + | Example: Not Element: 4 | ||
| + | Not Element: Fire | ||
| + | Not Element: Ice | ||
| + | =-=-=-=-=-=-=-=-=-=-=-=-=-=-=-=-=-=-=-=-=-=-=-=-=-=-=-=-=-=-=-=-=-=-=-=-=-=- | ||
| − | + | =-=-=-=-=-=-=-=-=-=-=-=-=-=-=-=-=-=-=-=-=-=-=-=-=-=-=-=-=-=-=-=-=-=-=-=-=-=- | |
| − | + | NOT ITEM: x | |
| − | + | NOT ITEM: name | |
| − | + | - - - - - - - - - - - - - - - - - - - - - - - - - - - - - - - - - - - - - - - | |
| − | + | If the current aciton used against the target is NOT item x, the counter | |
| − | + | condition is met. If it is, the counter condition isn't met. Replace 'x' | |
| + | with the item ID. If you choose to use the item name, and your database | ||
| + | has multiple items with the same name, priority will be given to the item | ||
| + | with the highest ID. | ||
| + | - - - - - - - - - - - - - - - - - - - - - - - - - - - - - - - - - - - - - - - | ||
| + | Example: Not Item: 30 | ||
| + | Not Item: Bomb | ||
| + | =-=-=-=-=-=-=-=-=-=-=-=-=-=-=-=-=-=-=-=-=-=-=-=-=-=-=-=-=-=-=-=-=-=-=-=-=-=- | ||
| − | + | =-=-=-=-=-=-=-=-=-=-=-=-=-=-=-=-=-=-=-=-=-=-=-=-=-=-=-=-=-=-=-=-=-=-=-=-=-=- | |
| − | + | NOT MAGICAL HIT | |
| − | + | - - - - - - - - - - - - - - - - - - - - - - - - - - - - - - - - - - - - - - - | |
| + | If the current action used against the target is NOT a magical hit, the | ||
| + | counter condition is met. If it is, the counter condition isn't met. | ||
| + | - - - - - - - - - - - - - - - - - - - - - - - - - - - - - - - - - - - - - - - | ||
| + | Example: Not Magical Hit | ||
| + | =-=-=-=-=-=-=-=-=-=-=-=-=-=-=-=-=-=-=-=-=-=-=-=-=-=-=-=-=-=-=-=-=-=-=-=-=-=- | ||
| − | + | =-=-=-=-=-=-=-=-=-=-=-=-=-=-=-=-=-=-=-=-=-=-=-=-=-=-=-=-=-=-=-=-=-=-=-=-=-=- | |
| − | + | NOT PHYSICAL HIT | |
| − | + | - - - - - - - - - - - - - - - - - - - - - - - - - - - - - - - - - - - - - - - | |
| − | + | If the current action used against the target is NOT a physical hit, the | |
| − | + | counter condition is met. If it is, the counter condition isn't met. | |
| − | + | - - - - - - - - - - - - - - - - - - - - - - - - - - - - - - - - - - - - - - - | |
| − | + | Example: Not Physical Hit | |
| + | =-=-=-=-=-=-=-=-=-=-=-=-=-=-=-=-=-=-=-=-=-=-=-=-=-=-=-=-=-=-=-=-=-=-=-=-=-=- | ||
| − | + | =-=-=-=-=-=-=-=-=-=-=-=-=-=-=-=-=-=-=-=-=-=-=-=-=-=-=-=-=-=-=-=-=-=-=-=-=-=- | |
| − | + | NOT SKILL: x | |
| − | + | NOT SKILL: name | |
| − | + | - - - - - - - - - - - - - - - - - - - - - - - - - - - - - - - - - - - - - - - | |
| − | + | If the current aciton used against the target is NOT skill x, the counter | |
| − | + | condition is met. If it is, the counter condition isn't met. Replace 'x' | |
| − | + | with the skill ID. If you choose to use the skill name, and your database | |
| − | + | has multiple skills with the same name, priority will be given to the skill | |
| − | + | with the highest ID. | |
| + | - - - - - - - - - - - - - - - - - - - - - - - - - - - - - - - - - - - - - - - | ||
| + | Example: Not Skill: 50 | ||
| + | Not Skill: Firaga | ||
| + | =-=-=-=-=-=-=-=-=-=-=-=-=-=-=-=-=-=-=-=-=-=-=-=-=-=-=-=-=-=-=-=-=-=-=-=-=-=- | ||
| − | + | =-=-=-=-=-=-=-=-=-=-=-=-=-=-=-=-=-=-=-=-=-=-=-=-=-=-=-=-=-=-=-=-=-=-=-=-=-=- | |
| − | + | NOT STYPE: x | |
| − | + | NOT STYPE: name | |
| − | + | - - - - - - - - - - - - - - - - - - - - - - - - - - - - - - - - - - - - - - - | |
| − | + | If the current action used against the target is NOT a skill and skill type | |
| − | + | x, the counter condition is met. If it isn't the counter condition isn't | |
| − | + | met. Replace 'x' with the Skill Type ID. If you choose to use the skill type | |
| + | name and your database has multiple skill types with the same name, priority | ||
| + | will be given to the skill type with the highest ID. | ||
| + | - - - - - - - - - - - - - - - - - - - - - - - - - - - - - - - - - - - - - - - | ||
| + | Example: Not Stype: 1 | ||
| + | Not Stype: Magic | ||
| + | =-=-=-=-=-=-=-=-=-=-=-=-=-=-=-=-=-=-=-=-=-=-=-=-=-=-=-=-=-=-=-=-=-=-=-=-=-=- | ||
| − | === | + | =-=-=-=-=-=-=-=-=-=-=-=-=-=-=-=-=-=-=-=-=-=-=-=-=-=-=-=-=-=-=-=-=-=-=-=-=-=- |
| − | + | PHYSICAL HIT | |
| + | - - - - - - - - - - - - - - - - - - - - - - - - - - - - - - - - - - - - - - - | ||
| + | If the current action used against the target is a physical hit, the counter | ||
| + | condition is met. If it isn't, the counter condition isn't met. | ||
| + | - - - - - - - - - - - - - - - - - - - - - - - - - - - - - - - - - - - - - - - | ||
| + | Example: Physical Hit | ||
| + | =-=-=-=-=-=-=-=-=-=-=-=-=-=-=-=-=-=-=-=-=-=-=-=-=-=-=-=-=-=-=-=-=-=-=-=-=-=- | ||
| − | + | =-=-=-=-=-=-=-=-=-=-=-=-=-=-=-=-=-=-=-=-=-=-=-=-=-=-=-=-=-=-=-=-=-=-=-=-=-=- | |
| − | + | RANDOM: x% | |
| − | + | - - - - - - - - - - - - - - - - - - - - - - - - - - - - - - - - - - - - - - - | |
| + | This will run a random check. There is a x% chance that this counter check | ||
| + | will pass. If it passes, the counter condition is met. If it doesn't, the | ||
| + | counter condition isn't met. | ||
| + | - - - - - - - - - - - - - - - - - - - - - - - - - - - - - - - - - - - - - - - | ||
| + | Example: Random: 30% | ||
| + | =-=-=-=-=-=-=-=-=-=-=-=-=-=-=-=-=-=-=-=-=-=-=-=-=-=-=-=-=-=-=-=-=-=-=-=-=-=- | ||
| − | + | =-=-=-=-=-=-=-=-=-=-=-=-=-=-=-=-=-=-=-=-=-=-=-=-=-=-=-=-=-=-=-=-=-=-=-=-=-=- | |
| + | SINGLE TARGET | ||
| + | - - - - - - - - - - - - - - - - - - - - - - - - - - - - - - - - - - - - - - - | ||
| + | If the current action used against the target is a single target action, the | ||
| + | counter condition is met. If it isn't, the counter condition isn't met. | ||
| + | - - - - - - - - - - - - - - - - - - - - - - - - - - - - - - - - - - - - - - - | ||
| + | Example: Single Target | ||
| + | =-=-=-=-=-=-=-=-=-=-=-=-=-=-=-=-=-=-=-=-=-=-=-=-=-=-=-=-=-=-=-=-=-=-=-=-=-=- | ||
| − | + | =-=-=-=-=-=-=-=-=-=-=-=-=-=-=-=-=-=-=-=-=-=-=-=-=-=-=-=-=-=-=-=-=-=-=-=-=-=- | |
| + | SKILL: x | ||
| + | SKILL: name | ||
| + | - - - - - - - - - - - - - - - - - - - - - - - - - - - - - - - - - - - - - - - | ||
| + | If the current aciton used against the target is skill x, the counter | ||
| + | condition is met. If it isn't, the counter condition isn't met. Replace 'x' | ||
| + | with the skill ID. If you choose to use the skill name, and your database | ||
| + | has multiple skills with the same name, priority will be given to the skill | ||
| + | with the highest ID. | ||
| + | - - - - - - - - - - - - - - - - - - - - - - - - - - - - - - - - - - - - - - - | ||
| + | Example: Skill: 50 | ||
| + | Skill: Firaga | ||
| + | =-=-=-=-=-=-=-=-=-=-=-=-=-=-=-=-=-=-=-=-=-=-=-=-=-=-=-=-=-=-=-=-=-=-=-=-=-=- | ||
| − | + | =-=-=-=-=-=-=-=-=-=-=-=-=-=-=-=-=-=-=-=-=-=-=-=-=-=-=-=-=-=-=-=-=-=-=-=-=-=- | |
| − | + | STYPE: x | |
| − | + | STYPE: name | |
| − | + | - - - - - - - - - - - - - - - - - - - - - - - - - - - - - - - - - - - - - - - | |
| − | + | If the current action used against the target is a skill and skill type x, | |
| + | the counter condition is met. If it isn't the counter condition isn't met. | ||
| + | Replace 'x' with the Skill Type ID. If you choose to use the skill type name | ||
| + | and your database has multiple skill types with the same name, priority will | ||
| + | be given to the skill type with the highest ID. | ||
| + | - - - - - - - - - - - - - - - - - - - - - - - - - - - - - - - - - - - - - - - | ||
| + | Example: Stype: 1 | ||
| + | Stype: Magic | ||
| + | =-=-=-=-=-=-=-=-=-=-=-=-=-=-=-=-=-=-=-=-=-=-=-=-=-=-=-=-=-=-=-=-=-=-=-=-=-=- | ||
| − | + | =-=-=-=-=-=-=-=-=-=-=-=-=-=-=-=-=-=-=-=-=-=-=-=-=-=-=-=-=-=-=-=-=-=-=-=-=-=- | |
| − | + | SWITCH x OFF | |
| − | + | - - - - - - - - - - - - - - - - - - - - - - - - - - - - - - - - - - - - - - - | |
| + | If switch x is OFF (false) prior to the current action being used against | ||
| + | the target, the counter condition is met. If it is ON (true), the counter | ||
| + | condition isn't met. | ||
| + | - - - - - - - - - - - - - - - - - - - - - - - - - - - - - - - - - - - - - - - | ||
| + | Example: Switch 10 Off | ||
| + | =-=-=-=-=-=-=-=-=-=-=-=-=-=-=-=-=-=-=-=-=-=-=-=-=-=-=-=-=-=-=-=-=-=-=-=-=-=- | ||
| − | + | =-=-=-=-=-=-=-=-=-=-=-=-=-=-=-=-=-=-=-=-=-=-=-=-=-=-=-=-=-=-=-=-=-=-=-=-=-=- | |
| − | + | SWITCH x ON | |
| + | - - - - - - - - - - - - - - - - - - - - - - - - - - - - - - - - - - - - - - - | ||
| + | If switch x is ON (ftrue) prior to the current action being used against | ||
| + | the target, the counter condition is met. If it is OFF (false), the counter | ||
| + | condition isn't met. | ||
| + | - - - - - - - - - - - - - - - - - - - - - - - - - - - - - - - - - - - - - - - | ||
| + | Example: Switch 10 On | ||
| + | =-=-=-=-=-=-=-=-=-=-=-=-=-=-=-=-=-=-=-=-=-=-=-=-=-=-=-=-=-=-=-=-=-=-=-=-=-=- | ||
| − | --- | + | =-=-=-=-=-=-=-=-=-=-=-=-=-=-=-=-=-=-=-=-=-=-=-=-=-=-=-=-=-=-=-=-=-=-=-=-=-=- |
| + | VARIABLE x eval | ||
| + | - - - - - - - - - - - - - - - - - - - - - - - - - - - - - - - - - - - - - - - | ||
| + | This runs an eval check against variable x. If the eval check returns 'true' | ||
| + | the condition is met. If it returns 'false' then the condition isn't met. | ||
| + | - - - - - - - - - - - - - - - - - - - - - - - - - - - - - - - - - - - - - - - | ||
| + | Example: Variable 15 >= 15 | ||
| + | Variable 16 <= 20 | ||
| + | Variable 17 === $gameParty.aliveMembers().length | ||
| + | =-=-=-=-=-=-=-=-=-=-=-=-=-=-=-=-=-=-=-=-=-=-=-=-=-=-=-=-=-=-=-=-=-=-=-=-=-=- | ||
| + | </nowiki> | ||
| − | + | === [[In-Battle Status (YEP)|In-Battle Status]] === | |
| − | + | <hr> | |
| − | |||
| − | + | <nowiki> | |
| − | + | For those who would like to add help descriptions to states, use these | |
| − | + | following notetags: | |
| − | + | State Notetags: | |
| − | < | + | <Help Description> |
| − | + | text | |
| − | + | text | |
| − | + | </Help Description> | |
| − | + | - This will set the help description of the state to the text used in the | |
| − | + | notetag. You can use text codes. | |
| − | |||
| − | |||
| − | |||
| − | |||
| − | |||
| − | |||
| − | - This will | ||
| − | |||
| − | |||
| − | |||
| − | |||
| − | |||
| − | |||
| − | |||
| − | |||
| − | |||
| − | |||
| − | |||
| − | |||
| − | |||
| − | |||
| − | |||
| − | |||
| − | |||
| − | |||
</nowiki> | </nowiki> | ||
| − | === [[Lunatic Pack - | + | === [[Lunatic Pack - Action Beginning and End Effects (YEP)|Lunatic Pack - Action Beginning and End Effects]] === |
<hr> | <hr> | ||
<nowiki> | <nowiki> | ||
| − | Insert the following notetags into a skill or | + | Insert the following notetags into a skill, item, or state's notebox to give |
| − | of these effects: | + | it one of these effects: |
--- | --- | ||
| − | State Notetags: | + | Skill, Item, and State Notetags: |
| + | |||
| + | <timing Action: effect> | ||
| + | - Most of this plugin's notetags will follow the above format. 'timing' is | ||
| + | to be replaced with either 'Begin' or 'End' while 'effect' is to be | ||
| + | replaced by the entries in the following EFFECT section below. | ||
| + | |||
| + | Insert multiple notetag entries to give your skills/items more effects. If | ||
| + | a multitude of effects are present, then the order they'll occur will be: | ||
| + | skill/item first, state effects based off of their state priority order | ||
| + | from highest priority to lowest priority. | ||
| − | + | =-=-=-= Action TIMING =-=-=-= | |
| − | |||
| − | |||
| − | |||
| − | < | + | <Begin Action: effect> |
| − | - | + | - If the timing is 'begin', then this effect will occur after the action's |
| − | + | cost is used. | |
| − | |||
| − | |||
| − | |||
| − | |||
| − | + | <End Action: effect> | |
| + | - If the timing is 'end', it will occur after all action sequences are | ||
| + | completed at the end of the current action. | ||
| − | + | =-=-=-= Action EFFECTS =-=-=-= | |
| − | + | --- Animation Effects --- | |
| − | - | ||
| − | |||
| − | |||
| − | < | + | <timing Action: Animation x> |
| − | < | + | <timing Action: Animation x, Mirror> |
| − | - | + | <timing Action: Animation x, Delay y> |
| − | + | <timing Action: Animation x, Mirror, Delay y> | |
| + | - This will make the animation x play on the user performing the action. | ||
| + | If you insert 'Mirror' into the effect line, then the animation will be | ||
| + | mirrored. If you insert 'Delay y' and replace 'y' with a number value, | ||
| + | the animation will be delayed y frames before playing the animation. | ||
SUGGESTED BY: Yanfly | SUGGESTED BY: Yanfly | ||
| − | --- | + | --- HP Effects --- |
| − | < | + | <timing Action: +x HP> |
| − | - Replace ' | + | <timing Action: -x HP> |
| − | wish to | + | - Replace 'effect' with the above format. Replace 'x' with a flat amount |
| − | + | of HP you wish to apply to the user. | |
SUGGESTED BY: Yanfly | SUGGESTED BY: Yanfly | ||
| − | < | + | <timing Action: +x HP%> |
| − | - Replace 'x' with | + | <timing Action: -x HP%> |
| − | + | - Replace 'effect' with the above format. Replace 'x' with a HP equal to | |
| − | + | x% of the user's MaxHP to apply to the user. | |
SUGGESTED BY: Yanfly | SUGGESTED BY: Yanfly | ||
| − | + | <End Action: Drain x% Total HP Damage> | |
| − | + | - Can only work with end actions. Use the above format. Replace 'x' with | |
| − | < | + | the percentage of all total HP damage dealt directly by the user this |
| − | - Replace 'x' with the percentage | + | action to recover as HP. |
| − | |||
| − | |||
SUGGESTED BY: Yanfly | SUGGESTED BY: Yanfly | ||
| − | < | + | <End Action: Recoil x% Total HP Damage> |
| − | - Replace 'x' with the percentage | + | - Can only work with end actions. Use the above format. Replace 'x' with |
| − | + | the percentage of all total HP damage dealt directly by the user this | |
| − | + | action to self-damage as HP. | |
SUGGESTED BY: Yanfly | SUGGESTED BY: Yanfly | ||
| − | --- | + | --- MP Effects --- |
| − | < | + | <timing Action: +x MP> |
| − | - | + | <timing Action: -x MP> |
| − | you wish to | + | - Replace 'effect' with the above format. Replace 'x' with a flat amount |
| − | + | of MP you wish to apply to the user. | |
| − | |||
| − | |||
SUGGESTED BY: Yanfly | SUGGESTED BY: Yanfly | ||
| − | < | + | <timing Action: +x MP%> |
| − | - | + | <timing Action: -x MP%> |
| − | + | - Replace 'effect' with the above format. Replace 'x' with a MP equal to | |
| − | + | x% of the user's MaxMP to apply to the user. | |
| − | + | SUGGESTED BY: Yanfly | |
| − | |||
| − | SUGGESTED BY: | ||
| − | < | + | <End Action: Drain x% Total MP Damage> |
| − | - | + | - Can only work with end actions. Use the above format. Replace 'x' with |
| − | + | the percentage of all total MP damage dealt directly by the user this | |
| − | + | action to recover as MP. | |
| − | + | SUGGESTED BY: Yanfly | |
| − | SUGGESTED BY: | ||
| − | + | <End Action: Recoil x% Total MP Damage> | |
| − | + | - Can only work with end actions. Use the above format. Replace 'x' with | |
| − | < | + | the percentage of all total MP damage dealt directly by the user this |
| − | - | + | action to self-damage as MP. |
| − | |||
| − | |||
SUGGESTED BY: Yanfly | SUGGESTED BY: Yanfly | ||
| − | + | --- TP Effects --- | |
| − | |||
| − | |||
| − | |||
| − | - | ||
| − | |||
| − | |||
| − | |||
| − | |||
| − | |||
| − | < | + | <timing Action: +x TP> |
| − | < | + | <timing Action: -x TP> |
| − | - | + | - Replace 'effect' with the above format. Replace 'x' with a flat amount |
| − | + | of HP you wish to apply to the user. | |
| − | |||
SUGGESTED BY: Yanfly | SUGGESTED BY: Yanfly | ||
| − | < | + | <timing Action: +x TP%> |
| − | - | + | <timing Action: -x TP%> |
| − | + | - Replace 'effect' with the above format. Replace 'x' with a TP equal to | |
| − | to apply to the | + | x% of the user's MaxTP to apply to the user. |
SUGGESTED BY: Yanfly | SUGGESTED BY: Yanfly | ||
| − | < | + | --- Buff/Debuff Effects --- |
| − | - | + | |
| − | + | <timing Action: Add x Buff> | |
| − | + | <timing Action: Add x Buff, y Turns> | |
| + | <timing Action: Add x Debuff> | ||
| + | <timing Action: Add x Debuff, y Turns> | ||
| + | - Replace 'effect' with the above format(s). Replace 'x' with any of the | ||
| + | following parameters: 'MaxHP', 'MaxMP', 'ATK', 'DEF', 'MAT', 'MDF', 'AGI', | ||
| + | or 'LUK' to have the effect alter the respective stat. If using the format | ||
| + | with 'y' turns, replace 'y' with the number of turns you wish for the buff | ||
| + | or debuff to last. If 'y' is not used, it will last for 5 turns instead. | ||
SUGGESTED BY: Yanfly | SUGGESTED BY: Yanfly | ||
| − | + | <timing Action: Remove x Buff> | |
| + | <timing Action: Remove x Debuff> | ||
| + | - Replace 'effect' with the above format(s). Replace 'x' with any of the | ||
| + | following parameters: 'MaxHP', 'MaxMP', 'ATK', 'DEF', 'MAT', 'MDF', 'AGI', | ||
| + | or 'LUK' to have the effect remove the respective buff/debuff from the | ||
| + | user if the conditions are met. If 'y' is not used, it will last for 5 | ||
| + | turns instead. | ||
| + | SUGGESTED BY: Yanfly | ||
| − | + | --- State Effects --- | |
| − | - | ||
| − | |||
| − | < | + | <timing Action: Add State x> |
| − | + | - Replace 'effect' with the above format(s). Replace 'x' with the state ID | |
| − | - | + | you wish to add to the user. |
| − | + | SUGGESTED BY: Yanfly | |
| − | |||
| − | < | + | <timing Action: Remove State x> |
| − | - | + | - Replace 'effect' with the above format(s). Replace 'x' with the state ID |
| − | + | you wish to remove from the user. | |
| + | SUGGESTED BY: Yanfly | ||
| + | </nowiki> | ||
| − | + | === [[Turn Order Display (YEP)|Turn Order Display]] === | |
| − | |||
| − | |||
| − | |||
| − | |||
| − | |||
| − | |||
| − | |||
| − | |||
| − | |||
| − | |||
| − | |||
| − | === [[ | ||
<hr> | <hr> | ||
<nowiki> | <nowiki> | ||
| − | + | Insert the following notetags to give your actors and enemies unique turn | |
| − | + | order icons. | |
| − | + | - - - - - - - - - - - - - - - - - - - - - - - - - - - - - - - - - - - - - - | |
| − | + | Actor and Enemy Notetags: | |
| − | |||
| − | |||
| − | < | + | <Turn Order Icon: x> |
| − | + | - This sets the icon used for the actor/enemy to be x. | |
| − | |||
| − | < | + | <Turn Order Border Color: x> |
| − | + | - This sets the border color used for the actor/enemy to text color x. | |
| − | |||
| − | |||
| − | < | + | <Turn Order Background Color: x> |
| − | + | - This sets the background color used for the actor/enemy to text color x. | |
| − | |||
| − | + | - - - - - - - - - - - - - - - - - - - - - - - - - - - - - - - - - - - - - - | |
| − | + | Actor Only Notetags: | |
| − | |||
| − | |||
| − | < | + | <Class x Turn Order Icon: y> |
| − | + | - This sets it so that if the actor is a specific class, the actor will | |
| − | + | get a specific icon used for the Turn Order Display. If the actor is class | |
| − | + | x, it will receive icon y. | |
| − | + | ||
| + | <Hero Turn Order Icon: x> | ||
| + | <Warrior Turn Order Icon: x> | ||
| + | <Mage Turn Order Icon: x> | ||
| + | <Priest Turn Order Icon: x> | ||
| + | - If you prefer to use names instead of class ID's, you can use the above | ||
| + | notetag format. If the actor is the named class, it will receive icon x. | ||
| + | If you have multiple classes with the same name, priority will be given to | ||
| + | the class with the highest ID. | ||
</nowiki> | </nowiki> | ||
| − | === [[Visual | + | === [[Visual HP Gauges (YEP)|Visual HP Gauges]] === |
<hr> | <hr> | ||
<nowiki> | <nowiki> | ||
| − | + | Class and Enemy Notetags: | |
| − | + | <Hide HP Gauge> | |
| + | This HP gauge will always be hidden if this notetag is present. | ||
| − | + | <Show HP Gauge> | |
| + | This HP gauge will always be shown if this notetag is present while the | ||
| + | target is selected or taking damage. | ||
| − | < | + | <HP Gauge Width: x> |
| − | + | This will set the battler's HP Gauge width to x pixels. However, if this | |
| − | + | width is less than the minimum width, minimum width will take priority. | |
| − | |||
| − | |||
| − | |||
| − | |||
| − | |||
| − | |||
| − | |||
| − | |||
| − | |||
| − | |||
| − | |||
| − | |||
| − | |||
| − | |||
| − | |||
| − | |||
| − | |||
| − | |||
| − | |||
| − | < | + | <HP Gauge Height: x> |
| − | + | This set's the HP Gauge height to x pixels. | |
| − | + | ||
| − | + | <HP Gauge Back Color: x> | |
| − | + | This changes the HP Gauge's back color to x text color. | |
| − | + | ||
| + | <HP Gauge Color 1: x> | ||
| + | This changes the HP Gauge's color 1 to x text color. | ||
| + | |||
| + | <HP Gauge Color 2: x> | ||
| + | This changes the HP Gauge's color 2 to x text color. | ||
</nowiki> | </nowiki> | ||
| − | + | === [[Weak Enemy Poses (YEP)|Weak Enemy Poses]] === | |
| − | |||
| − | === [[ | ||
<hr> | <hr> | ||
| − | + | <nowiki> | |
| + | Insert the following notetags into the database entries' noteboxes to alter | ||
| + | the weak pose data. | ||
| − | + | Enemy Notetags: | |
| − | < | + | <x% Health Pose: filename> |
| − | + | - At x% HP or lower, the enemy will use 'filename' for its battler image | |
| − | + | instead of its default one. The filename is case sensitive and must not | |
| − | + | include the file extension. Insert multiple of these notetags to give the | |
| − | + | enemy various poses across different health values. | |
| − | + | * NOTE: This applies only to static enemies and NOT animated enemies. | |
| − | |||
| − | |||
| − | |||
| − | < | + | <x% Health Pose: filename, hue> |
| + | - At x% HP or lower, the enemy will use 'filename' for its battler image | ||
| + | instead of its default one and a different hue instead of its default. The | ||
| + | filename is case sensitive and must not include the file extension. The | ||
| + | hue must be a value between 0 and 360. Insert multiple of these notetags | ||
| + | to give the enemy various poses across different health values. | ||
| + | * NOTE: This applies only to static enemies and NOT animated enemies. | ||
| − | + | State Notetags: | |
| − | < | + | |
| − | - | + | <Force Enemy Pose: filename> |
| − | + | - When an enemy is afflicted with this state, the enemy would take on this | |
| − | + | battler image as long as that state is the highest priority state with a | |
| − | This | + | forced enemy pose. Replace 'filename' with the battler image to be used. |
| − | + | The filename is case sensitive and must not include the file extension. | |
| + | * NOTE: This applies only to static enemies and NOT animated enemies. | ||
| − | < | + | <Force Enemy Pose: filename, hue> |
| + | - When an enemy is afflicted with this state, the enemy would take on this | ||
| + | battler image as long as that state is the highest priority state with a | ||
| + | forced enemy pose. Replace 'filename' with the battler image to be used. | ||
| + | The filename is case sensitive and must not include the file extension. | ||
| + | The hue must be a value between 0 and 360. | ||
| + | * NOTE: This applies only to static enemies and NOT animated enemies. | ||
| + | </nowiki> | ||
| − | + | == [[Battle Impact (Olivia)|Battle Impact]] == | |
| − | |||
| − | |||
| − | |||
| − | |||
| − | < | + | <html><img src='https://img.itch.zone/aW1nLzE5MjcxNTIuZ2lm/original/9ZKqSx.gif'></html> |
| − | < | ||
| − | |||
| − | |||
| − | |||
| − | </ | ||
<pre> | <pre> | ||
| − | < | + | <Ignore Icon Effect> |
| − | + | For some states, if you don't want them to play the state/buff icon effect, | |
| − | + | you can set the state icon to 0 or put <Ignore Icon Effect> in the notebox. | |
</pre> | </pre> | ||
| − | + | == [[Battle Select Cursor (YEP)|Battle Select Cursor]] == | |
| − | < | + | <nowiki> |
| − | + | You can use the following notetags to adjust the cursor settings for your | |
| − | + | actors and enemies. | |
| − | |||
| − | |||
| − | |||
| − | |||
| − | |||
| − | + | Actor and Enemy Notetags: | |
| − | < | + | |
| − | - | + | <Battle Select Cursor: filename> |
| − | + | - This will change the filename of the cursor image used for this actor or | |
| − | - | + | enemy when selected. The same rules apply as the ones listed in the |
| − | + | Instructions - Cursor Filenames section of the help file. | |
| − | < | + | <Battle Select Cursor Anchor X: Left> |
| − | < | + | <Battle Select Cursor Anchor X: Center> |
| − | - | + | <Battle Select Cursor Anchor X: Right> |
| − | + | <Battle Select Cursor Anchor Y: Top> | |
| + | <Battle Select Cursor Anchor Y: Middle> | ||
| + | <Battle Select Cursor Anchor Y: Bottom> | ||
| + | - These notetags determine where the origin point of the cursor sprite | ||
| + | should be. | ||
| − | < | + | <Battle Select Cursor Position X: Left> |
| − | < | + | <Battle Select Cursor Position X: Center> |
| − | + | <Battle Select Cursor Position X: Right> | |
| − | + | <Battle Select Cursor Position Y: Top> | |
| − | + | <Battle Select Cursor Position Y: Middle> | |
| − | + | <Battle Select Cursor Position Y: Bottom> | |
| − | </ | + | - These notetags determine where the select cursor will appear on the |
| + | actor or enemy when targeting them. | ||
| + | </nowiki> | ||
| − | + | == [[Boost Point System (Olivia)|Boost Point System]] == | |
| − | |||
| − | |||
| − | |||
| − | < | + | <html><img src='https://img.itch.zone/aW1hZ2UvMjk4OTQ0LzE0NjI3MDguZ2lm/original/8wXpnQ.gif'></html> |
| − | < | ||
| − | |||
| − | </ | ||
<pre> | <pre> | ||
| − | + | Skill and Item Notetags: | |
| − | |||
| − | |||
| − | |||
| − | |||
| − | < | + | <Require x BP> |
| + | This will make the action require at least x BP to use for actors. | ||
| + | If for enemies, then at least x BP must be stored. This will not | ||
| + | make the enemies use the BP until you use the enemy BP use notetags. | ||
| + | <Require > x BP> | ||
| + | <Require >= x BP> | ||
| + | <Require = x BP> | ||
| + | <Require <= x BP> | ||
| + | <Require < x BP> | ||
| + | This will make the action require greater than, greater than or equal to, | ||
| + | equal to exactly, less than or equal to, or less than x BP for the skill | ||
| + | to be used for actors. If for enemies, this will be the BP stored. This | ||
| + | will not make the enemies use the BP until you use the enemy BP use notetag. | ||
| + | |||
| + | <Target BP: +x> | ||
| + | <Target BP: -x> | ||
| + | The target will gain or lose BP equal to x. This is a BP effect. | ||
| + | |||
| + | <User BP: +x> | ||
| + | <User BP: -x> | ||
| + | The user will gain or lose BP equal to x. This is a BP effect. | ||
| + | |||
| + | <Boost Damage> | ||
| + | If the action's user is using BP, this will boost the damage multiplier | ||
| + | for this action by the multiplier set in the plugin parameters. | ||
| + | |||
| + | <Boost Turns> | ||
| + | If the action's user is using BP, this will boost the state/buff turns | ||
| + | for this action by the multiplier set in the plugin parameters. | ||
| + | |||
| + | <Boost Repeats> | ||
| + | If the action's user is using BP, this will boost the number of repeated | ||
| + | hits for this action by the multiplier set in the plugin parameters. | ||
| + | |||
| + | <Boost Analyze> | ||
| + | If the action's user is using BP, this will boost the number of weaknesses | ||
| + | revealed for this action by the multiplier set in the plugin parameters. | ||
| + | |||
| + | <Boost BP Effect> | ||
| + | If the action's user is using BP, this will boost the number of BP effects | ||
| + | for this action by the multiplier set in the plugin parameters. | ||
| + | |||
| + | Actor, Class, Enemy, Weapon, Armor, and State Notetags: | ||
| + | |||
| + | <BP Battle Start: x%> | ||
| + | <BP Battle Start: +x> | ||
| + | <BP Battle Start: -x> | ||
| + | Changes the amount of BP the battler starts with in battle by a | ||
| + | percentage (x%) or by a flat amount (+x or -x); | ||
| + | |||
| + | <BP Regen: x%> | ||
| + | <BP Regen: +x> | ||
| + | <BP Regen: -x> | ||
| + | Changes the amount of BP the battler regens each turn in battle by a | ||
| + | percentage (x%) or by a flat amount (+x or -x); | ||
| + | |||
| + | Enemy Notetags: | ||
| + | |||
| + | <Boost Skill x: Full> | ||
| + | <Boost skillname: Full> | ||
| + | Whenever the enemy uses skill x (or the skillname if you use that), | ||
| + | it will use as much BP as it can for the skill when it performs it. | ||
| + | |||
| + | <Boost Skill x: At Least y> | ||
| + | <Boost skillname: At Least y> | ||
| + | Whenever the enemy uses skill x (or the skillname if you use that), | ||
| + | it will use BP after reaching y BP and use as much as it can. | ||
| + | |||
| + | <Boost Skill x: At Most y> | ||
| + | <Boost skillname: At Most y> | ||
| + | Whenever the enemy uses skill x (or the skillname if you use that), | ||
| + | it will use as much BP as it can unless BP is over y BP. | ||
| + | |||
| + | State Notetags: | ||
| + | |||
| + | <Boost Sealed> | ||
| + | If a battler is affected by a state with this notetag, they cannot boost. | ||
<pre> | <pre> | ||
| − | < | + | |
| − | + | == [[Break Shield System (Olivia)|Break Shield System]] == | |
| − | + | ||
| − | </ | + | <html><img src='https://img.itch.zone/aW1nLzE0NjA4MDguZ2lm/original/kXW3sC.gif'></html> |
<pre> | <pre> | ||
| − | < | + | Skills and Items Notetags: |
| − | + | ||
| − | + | <Break Reduce: x> | |
| − | + | Reduces the target's Break Shield by x if this action hits a weakness. | |
| + | If you do not use this notetag, x will be the default value found in | ||
| + | the plugin's parameters. | ||
| + | |||
| + | <Change Break Shield: x> | ||
| + | This will change the target battler's Break Shield value to x if the | ||
| + | battler isn't currently stunned. No effect if you don't use this notetag. | ||
| + | |||
| + | <Increase Break Shield: +x> | ||
| + | <Decrease Break Shield: -x> | ||
| + | This will either increase the target battler's break shield by x or | ||
| + | decrease the target battler's break shield by x. Happens after the | ||
| + | Change Break Shield notetag. No effect if you don't use this notetag. | ||
</pre> | </pre> | ||
| − | < | + | <pre> |
| + | Actor, Class, and Enemy Notetags: | ||
| − | < | + | <Break Shields: x> |
| − | + | x is the base number of Break Shields the battler starts with. | |
| − | + | If you do not use this notetag, x will be the default value found in | |
| − | + | the plugin's parameters. | |
| − | |||
</pre> | </pre> | ||
<pre> | <pre> | ||
| − | < | + | Class, Weapon, Armor, and State Notetags: |
| − | < | + | |
| − | + | <Break Shields: +x> | |
| − | + | <Break Shields: -x> | |
| + | x is the increased/decreased amount of Break Shields applied to how | ||
| + | much the battler will start with. If you do not use this notetag, | ||
| + | then no extra Break Shields will be added. | ||
</pre> | </pre> | ||
| + | |||
| + | <html><img src='https://img.itch.zone/aW1nLzE0NjA3OTEucG5n/original/8sUFMK.png'></html> | ||
<pre> | <pre> | ||
| − | < | + | <Protect Element: x> |
| − | + | <Protect Elements: x, x, x, x, x> | |
| − | + | x element will be guarded. A maximum of 100% damage will be dealt to | |
| + | the battler if that element is protected. This will also prevent the | ||
| + | Break Shields from reducing for that element. Insert more x's to | ||
| + | protect more elements. | ||
</pre> | </pre> | ||
| − | < | + | <html><img src='https://img.itch.zone/aW1nLzE0NjA4MDQuanBn/original/Ait%2Fw5.jpg' width='630'></html> |
| − | < | + | |
| − | < | + | == [[Bright Effects (Olivia)|Bright Effects]] == |
| − | + | ||
| − | + | Use these notetags in maps or put them in the names of your troops. | |
| − | + | ||
| − | + | ; Bloom Map Notetags and Troop Name Tags | |
| − | |||
| − | <html><img src='https://img.itch.zone/ | + | <html><img src='https://img.itch.zone/aW1nLzE5ODYwMDIucG5n/original/f0%2F9MS.png'></html> |
<pre> | <pre> | ||
| − | < | + | <Bloom Scale: x> |
| − | + | Changes the bloom scale to x for map/battle. x uses decimal values. | |
| − | + | Lower - Less bloom | |
| − | - | + | Higher - More bloom |
</pre> | </pre> | ||
| + | |||
| + | <html><img src='https://img.itch.zone/aW1nLzE5ODYwMjYucG5n/original/Efokq1.png'></html> | ||
<pre> | <pre> | ||
| − | < | + | <Bloom Brightness: x> |
| − | - | + | Changes the bloom brightness to x for map/battle. x uses decimal values. |
| − | + | Lower - Darker | |
| + | Higher - Brighter | ||
</pre> | </pre> | ||
| + | |||
| + | <html><img src='https://img.itch.zone/aW1nLzE5ODYwMzIucG5n/original/gye%2B7u.png'></html> | ||
<pre> | <pre> | ||
| − | < | + | <Bloom Threshold: x> |
| − | - | + | Changes the bloom threshold to x for map/battle. x uses decimal values. |
| − | + | Lower - Less picky | |
| + | Higher - More picky | ||
</pre> | </pre> | ||
| + | |||
| + | <html><img src='https://img.itch.zone/aW1nLzE5ODYwMzcuZ2lm/original/4FGofu.gif'></html> | ||
<pre> | <pre> | ||
| − | < | + | <Bloom Horz Scale: x to y> |
| − | < | + | <Bloom Vert Scale: x to y> |
| − | + | Map only. Sets an adjusting scale when traveling left to right on the map | |
| − | + | (Horz) or up to down on the map (Vert). x and y use decimal values. | |
| − | + | Lower - Less bloom | |
| − | + | Higher - More bloom | |
</pre> | </pre> | ||
| − | |||
| − | |||
<pre> | <pre> | ||
| − | < | + | <Bloom Horz Brightness: x to y> |
| − | + | <Bloom Vert Brightness: x to y> | |
| − | to | + | Map only. Sets an adjusting brightness when traveling left to right on the |
| − | - | + | map (Horz) or up to down on the map (Vert). x and y use decimal values. |
| + | Lower - Darker | ||
| + | Higher - Brighter | ||
</pre> | </pre> | ||
<pre> | <pre> | ||
| − | < | + | <Bloom Horz Threshold: x to y> |
| − | < | + | <Bloom Vert Threshold: x to y> |
| − | + | Map only. Sets an adjusting threshold when traveling left to right on the | |
| − | + | map (Horz) or up to down on the map (Vert). x and y use decimal values. | |
| + | Lower - Less picky | ||
| + | Higher - More picky | ||
</pre> | </pre> | ||
| + | |||
| + | ; Godray Map Notetags and Troop Name Tags | ||
| + | |||
| + | <html><img src='https://img.itch.zone/aW1nLzE5ODYwNDEuZ2lm/original/SB52LR.gif'></html> | ||
<pre> | <pre> | ||
| − | < | + | <Godray> |
| − | + | <No Godray> | |
| − | + | Changes if there will be a godray on the map/battle regardless of the default | |
| + | settings in the plugin parameters. | ||
</pre> | </pre> | ||
<pre> | <pre> | ||
| − | < | + | <Godray Speed: x> |
| − | + | Sets the flickering speed of the rays. x uses decimal values. | |
| − | + | Lower - Slower | |
| − | + | Higher - Faster | |
| − | |||
| − | |||
</pre> | </pre> | ||
| − | <html><img src='https://img.itch.zone/ | + | <html><img src='https://img.itch.zone/aW1nLzE5ODYwNTcucG5n/original/PT6OEK.png'></html> |
<pre> | <pre> | ||
| − | < | + | <Godray Gain: x> |
| − | + | Sets the gain/intensity of the rays. x uses decimal values. | |
| − | + | Lower - Lighter | |
| − | + | Higher - Intense | |
| − | </ | + | </pre> |
| + | |||
| + | <html><img src='https://img.itch.zone/aW1nLzE5ODYwNjUucG5n/original/lvVkZq.png'></html> | ||
<pre> | <pre> | ||
| − | < | + | <Godray Lacunarity: x> |
| − | - | + | Sets the lacunarity/density of the rays. x uses decimal values. |
| − | + | Lower - Less dense | |
| + | Higher - More dense | ||
</pre> | </pre> | ||
| + | |||
| + | <html><img src='https://img.itch.zone/aW1nLzE5ODYwNzEucG5n/original/5UCEub.png'></html> | ||
<pre> | <pre> | ||
| − | < | + | <Godray Angle: x> |
| − | + | Sets the angle of the rays. x can be a negative or positive integar value. | |
| − | + | Negative - Coming from the left | |
| + | Positive - Coming from the right | ||
</pre> | </pre> | ||
| + | |||
| + | <html><img src='https://img.itch.zone/aW1nLzE5ODYwNzkuZ2lm/original/CsfvR5.gif'></html> | ||
<pre> | <pre> | ||
| − | < | + | <Godray Horz Speed: x to y> |
| − | < | + | <Godray Vert Speed: x to y> |
| − | + | Map only. Adjusts godray speed going left to right on a map (Horz) or up to | |
| − | + | down on a map (Vert). x and y use decimal values. | |
| − | - | + | Lower - Slower |
| − | + | Higher - Faster | |
</pre> | </pre> | ||
<pre> | <pre> | ||
| − | < | + | <Godray Horz Gain: x to y> |
| − | + | <Godray Vert Gain: x to y> | |
| − | + | Map only. Adjusts godray gain going left to right on a map (Horz) or up to | |
| − | + | down on a map (Vert). x and y use decimal values. | |
| − | + | Lower - Lighter | |
| − | < | + | Higher - Intense |
| − | |||
| − | |||
| − | |||
</pre> | </pre> | ||
<pre> | <pre> | ||
| − | < | + | <Godray Horz Lacunarity: x to y> |
| − | + | <Godray Vert Lacunarity: x to y> | |
| + | Map only. Adjusts godray lacunarity going left to right on a map (Horz) or | ||
| + | up to down on a map (Vert). x and y use decimal values. | ||
| + | Lower - Less dense | ||
| + | Higher - More dense | ||
</pre> | </pre> | ||
<pre> | <pre> | ||
| − | < | + | <Godray Horz Angle: x to y> |
| − | + | <Godray Vert Angle: x to y> | |
| − | + | Map only. Adjusts godray angle going left to right on a map (Horz) or up to | |
| − | + | down on a map (Vert). x and y use decimal values. | |
| − | + | Negative - Coming from the left | |
| + | Positive - Coming from the right | ||
</pre> | </pre> | ||
| − | ; | + | ; Color Adjust Map Notetags and Troop Name Tags |
| − | <html><img src='https://img.itch.zone/ | + | <html><img src='https://img.itch.zone/aW1nLzE5ODYwODgucG5n/original/zWsfUd.png'></html> |
<pre> | <pre> | ||
| − | < | + | <Color Adjust Brightness: x> |
| − | + | Alters the screen brightness for the map/battle. x uses decimal values. | |
| − | + | Lower - Darker | |
| − | + | Higher - Brighter | |
</pre> | </pre> | ||
| − | <html><img src='https://img.itch.zone/ | + | <html><img src='https://img.itch.zone/aW1nLzE5ODYwOTEucG5n/original/Yk53qx.png'></html> |
<pre> | <pre> | ||
| − | < | + | <Color Adjust Contrast: x> |
| − | + | Adjusts the screen contrast for the map/battle. x uses decimal values. | |
| − | + | Lower - Less contrast | |
| − | + | Higher - More contrast | |
| − | |||
</pre> | </pre> | ||
| − | <html><img src='https://img.itch.zone/ | + | <html><img src='https://img.itch.zone/aW1nLzE5ODYwOTgucG5n/original/tZF%2F7k.png'></html> |
<pre> | <pre> | ||
| − | < | + | <Color Adjust Saturate: x> |
| − | + | Adjusts the screen saturation for the map/battle. x uses decimal values. | |
| − | + | Lower - Less intensity | |
| − | + | Higher - More intensity | |
| − | + | </pre> | |
| − | - | ||
| − | - | ||
| − | |||
| − | |||
| − | </pre> | ||
| − | <html><img src='https://img.itch.zone/ | + | <html><img src='https://img.itch.zone/aW1nLzE5ODYxMTAuZ2lm/original/MxwQ2x.gif'></html> |
<pre> | <pre> | ||
| − | < | + | <Color Adjust Horz Brightness: x to y> |
| − | < | + | <Color Adjust Vert Brightness: x to y> |
| − | + | Map only. Alters the screen brightness when moving left to right on a map | |
| − | + | (Horz) or up to down on a map (Vert). x and y use decimal values. | |
| − | + | Lower - Darker | |
| − | - | + | Higher - Brighter |
| − | |||
| − | - | ||
</pre> | </pre> | ||
<pre> | <pre> | ||
| − | < | + | <Color Adjust Horz Contrast: x to y> |
| − | + | <Color Adjust Vert Contrast: x to y> | |
| − | + | Map only. Adjusts the screen contrast when moving left to right on a map | |
| − | - | + | (Horz) or up to down on a map (Vert). x and y use decimal values. |
| − | + | Lower - Less contrast | |
| − | - | + | Higher - More contrast |
</pre> | </pre> | ||
| − | |||
| − | |||
| − | |||
| − | |||
| − | |||
<pre> | <pre> | ||
| − | < | + | <Color Adjust Horz Saturate: x to y> |
| − | + | <Color Adjust Vert Saturate: x to y> | |
| − | + | Map only. Adjusts the screen saturation when moving left to right on a map | |
| − | + | (Horz) or up to down on a map (Vert). x and y use decimal values. | |
| + | Lower - Less intensity | ||
| + | Higher - More intensity | ||
</pre> | </pre> | ||
| − | + | == [[Buffs & States Core (YEP)|Buffs & States Core]] == | |
| − | < | + | <nowiki> |
| − | + | The following are various notetags you can use to modify states and buffs. | |
| − | |||
| − | |||
| − | |||
| − | |||
| − | + | --- Buff Related --- | |
| − | |||
| − | + | Actor, Class, Enemy, Weapon, Armor, and State notetags: | |
| − | + | <Max stat Buff: +x> | |
| − | < | + | <Max stat Buff: -x> |
| − | < | + | <Max stat Debuff: +x> |
| − | + | <Max stat Debuff: -x> | |
| − | + | Replace 'stat' with 'maxhp', 'maxmp', 'atk', 'def', 'mat', 'mdf', 'agi', | |
| − | < | + | or 'luk' without the quotes. This notetag adjusts the maximum number of |
| − | + | times the stat can be buffed or debuffed to the Maximum Limit cap in the | |
| − | in | + | plugin parameters. |
| − | |||
| − | < | + | Skill and Item Notetags: |
| − | < | + | <stat Buff Turns: +x> |
| − | - | + | <stat Buff Turns: -x> |
| − | + | <stat Debuff Turns: +x> | |
| − | + | <stat Debuff Turns: -x> | |
| + | Modifies already applied buff/debuff turns on target by x value. If this | ||
| + | brings a buff/debuff to 0 or below, the buff/debuff is removed. | ||
| − | + | --- State Related --- | |
| − | |||
| − | |||
| − | |||
| − | |||
| − | - | ||
| − | |||
| − | |||
| − | < | + | State Notetags: |
| − | < | + | <Show Turns> |
| − | + | <Hide Turns> | |
| − | + | Show/hide the turn count remaining for the state. This will override the | |
| − | + | default setting. | |
| − | < | + | <Turn Font Size: x> |
| − | + | Sets the font size used for this specific state to be x. This will | |
| − | + | override the default setting. | |
| − | |||
| − | |||
| − | |||
| − | |||
| − | |||
| − | < | + | <Turn Alignment: Left> |
| − | < | + | <Turn Alignment: Center> |
| − | + | <Turn Alignment: Right> | |
| − | + | This sets the text alignment for the turn count indicator. This will | |
| − | + | override the default setting. | |
| − | < | + | <Turn Buffer X: +x> |
| − | < | + | <Turn Buffer X: -x> |
| − | + | <Turn Buffer Y: +x> | |
| − | + | <Turn Buffer Y: -x> | |
| − | < | + | Allows you to adjust the x/y position manually for the turn count for this |
| − | + | particular state. This will override the default settings. | |
| − | |||
| − | |||
| − | < | + | <Turn Color: x> |
| − | + | This will set the turn count display color to text color x. This will | |
| − | + | override the default setting. | |
| − | |||
| − | |||
| − | + | <Reapply Ignore Turns> | |
| + | <Reapply Reset Turns> | ||
| + | <Reapply Add Turns> | ||
| + | Changes the rules when this state is reapplied on a battler. When ignored, | ||
| + | the turn count remains unchanged. When reset, the turn count is set back | ||
| + | to the default amount with variance. When added, the turn count is added | ||
| + | upon with variance. | ||
| − | < | + | Skill and Item Notetags: |
| − | + | <State x Turns: +y> | |
| − | < | + | <State x Turns: -y> |
| − | < | + | <State named Turns: +y> |
| − | + | <State named Turns: -y> | |
| − | + | Modifies already applied state x turns on target by y value. If this | |
| − | < | + | brings the state to 0 or below turns, the state is removed. If you are |
| − | + | using named states and have multiple states with the same name, priority | |
| − | + | will be given to the state with the highest ID. | |
| − | </ | + | |
| + | Enemy Notetags: | ||
| + | <Show State Turns> | ||
| + | <Hide State Turns> | ||
| + | Affected by the Battle Engine Core. When selecting enemies, the state | ||
| + | turns will show up in the help window. You can use this to have certain | ||
| + | enemies show the state turns or hide them. | ||
| + | </nowiki> | ||
| + | |||
| + | === [[Extended Damage Over Time (YEP)|Extended Damage Over Time]] === | ||
| + | <hr> | ||
| − | < | + | <nowiki> |
| − | + | Insert the following notetags into your states to achieve their respective | |
| − | + | damage over time effects. | |
| − | |||
| − | |||
| − | + | State Notetags: | |
| − | |||
| − | |||
| − | |||
| − | |||
| − | |||
| − | |||
| − | |||
| − | + | --- | |
| − | |||
| − | - | ||
| − | |||
| − | |||
| − | < | + | <Regen Animation: x> |
| − | < | + | <DoT Animation: x> |
| − | + | - This will make the state play animation x for regen/damage over time if | |
| − | + | there is any healing or damage dealt through the extended damage over time | |
| − | + | formulas used below. | |
| − | - | + | |
| − | + | Examples: | |
| − | </ | + | <Regen Animation: 41> // Play animation 41 when regen occurs |
| + | <DoT Animation: 59> // Play animation 59 when DoT occurs | ||
| − | + | * NOTE: Animations will only occur if it is used with one of the below | |
| − | + | formulas and the formula does not yield a 0 value. | |
| − | |||
| − | |||
| − | |||
| − | + | --- | |
| − | |||
| − | |||
| − | |||
| − | |||
| − | - | ||
| − | |||
| − | |||
| − | < | + | <Regen Formula: x> |
| − | + | - This will make the affected battler regenerate x HP each turn. You can | |
| − | - | + | use either a formula or a numeric value in place of 'x'. |
| − | |||
| − | |||
| − | + | Examples: | |
| + | <Regen Formula: 100> // Regen 100 HP exactly each turn | ||
| + | <Regen Formula: a.mdf * 2> // Regen HP equal to the origin's MDF | ||
| − | + | --- | |
| − | |||
| − | |||
| − | |||
| − | |||
| − | - | ||
| − | |||
| − | |||
| − | < | + | <DoT Formula: x> |
| − | + | - This will make the affected battler take x HP damage each turn. You can | |
| − | - | + | use either a formula or a numeric value in place of 'x'. |
| − | + | ||
| − | </ | + | Examples: |
| + | <DoT Formula: 100> // Damage 100 HP exactly each turn | ||
| + | <DoT Formula: a.mat * 2> // Damage HP equal to the origin's MAT | ||
| − | + | --- | |
| − | |||
| − | |||
| − | |||
| − | |||
| − | - | ||
| − | |||
| − | |||
| − | < | + | <Regen Element: x> |
| − | < | + | <DoT Element: x> |
| − | - | + | - This will make the healing/damage done by this state to be element 'x'. |
| − | + | This will take into consideration the target's elemental rates towards | |
| − | + | that element. If this is left blank, there will be no element modifiers. | |
| − | + | Examples: | |
| − | < | + | <Regen Element: 4> // Healing done will be affected by element 4. |
| − | + | <DoT Element: 5> // Damage done will be affected by element 5. | |
| − | |||
| − | |||
| − | |||
| − | |||
| − | </ | ||
| − | + | --- | |
| − | |||
| − | - | ||
| − | |||
| − | |||
| − | < | + | <Regen Variance: x%> |
| − | < | + | <DoT Variance: x%> |
| − | + | - The amount of variance you want the DoT effect to have. Replace x with | |
| − | + | a percentage value. If this is left blank, the settings in the plugin | |
| − | + | parameters will be used by default. | |
| − | - | ||
| − | |||
| − | |||
| − | < | + | Examples: |
| − | < | + | <Regen Variance: 10%> // Regen will have 10% healing variance |
| − | + | <DoT Variance: 20%> // DoT will have 20% damage variance | |
| − | + | </nowiki> | |
| − | </ | ||
| − | + | === [[Lunatic Pack - State Protection (YEP)|Lunatic Pack - State Protection]] === | |
| + | <hr> | ||
| − | < | + | <nowiki> |
| − | + | Insert the following notetags into a skill or item's notebox to give it one | |
| − | + | of these effects: | |
| − | |||
| − | - - - | + | --- |
| − | + | State Notetags: | |
| − | < | + | <Protection Animation: x> |
| − | + | - If a protection effect goes off, it will display animation x on the | |
| − | + | protected unit. This animation will be played in place of the default | |
| − | + | animation to indicate the effect has taken place. | |
| − | |||
| − | - If | ||
| − | the | ||
| − | |||
| − | < | + | <type Protection: effect> |
| − | + | - Most of this plugin's notetags will follow the above format. 'type' will | |
| − | - | + | be replaced with either 'HP', 'MP', or 'Both' to indicate which damage |
| − | + | types will be protected against. Replace 'effect' with one of the effects | |
| − | + | found below. Insert multiple entries of this notetag to give it multiple | |
| + | effects. The order of effects will be played by the order they're inserted | ||
| + | into the notebox. | ||
| − | + | =-=-=-= Protection EFFECTS =-=-=-= | |
| − | |||
| − | |||
| − | |||
| − | |||
| − | - | ||
| − | |||
| − | |||
| − | + | --- Damage Reduction --- | |
| − | |||
| − | - | ||
| − | |||
| − | < | + | <type Protection: Damage Cut x%> |
| − | + | - Replace 'x' with a number. Will reduce damage by x% of the original | |
| − | - | + | damage value and not the current value. |
| − | + | SUGGESTED BY: Yanfly | |
| − | < | + | <type Protection: Damage Block -x> |
| − | < | + | <type Protection: Damage Block +x> |
| − | - | + | - Replace 'x' with a flat value you wish to block (or increase) damage by. |
| − | + | This is a flat change to the damage final value. | |
| + | SUGGESTED BY: Yanfly | ||
| − | + | --- Damage Nullifiers --- | |
| − | |||
| − | - | ||
| − | |||
| − | < | + | <type Protection: Damage Null x%> |
| − | + | - Replace 'x' with the percentage value of the target's MaxHP/MaxMP you | |
| − | + | wish to set as the break point. If the damage value is less than or equal | |
| − | + | to the break point, damage will be nullified and set to zero. | |
| − | + | SUGGESTED BY: Yanfly | |
| − | - | ||
| − | ' | ||
| − | |||
| − | |||
| − | - | + | <type Protection: Damage Barrier x%> |
| + | - Replace 'x' with the percentage value of the target's MaxHP/MaxMP you | ||
| + | wish to set as the break point. If the damage value is less than or | ||
| + | equal to the break point, damage will be nullified and set to zero. | ||
| + | SUGGESTED BY: Yanfly | ||
| − | + | --- Damage Cappers --- | |
| − | |||
| − | |||
| − | |||
| − | |||
| − | - | ||
| − | |||
| − | |||
| − | < | + | <type Protection: Damage Ceiling x%> |
| − | + | - Replace 'x' with the percentage value of the target's MaxHP/MaxMP you | |
| − | - | + | wish to set as the break point. If the current damage value is above the |
| − | will | + | break point, the damage value will become the break point. |
| − | + | SUGGESTED BY: Yanfly | |
| − | < | + | <type Protection: Damage Floor x%> |
| − | + | - Replace 'x' with the percentage value of the target's MaxHP/MaxMP you | |
| − | + | wish to set as the break point. If the current damage value is below the | |
| − | + | break point, the damage value will become the break point. | |
| − | + | SUGGESTED BY: Yanfly | |
| − | |||
| − | |||
| − | |||
| − | + | --- Death Cheaters --- | |
| − | |||
| − | - | ||
| − | |||
| − | < | + | <HP Protection: Guts x%> |
| − | + | - Works only with HP type. Replace 'x' with the success rate percentage | |
| − | - | + | you wish to give this effect. If the affected target were to receive fatal |
| − | + | damage as a result of this attack, there would be a x% chance the target | |
| + | would be able to survive with 1 HP left. This will not trigger if the | ||
| + | target has exactly 1 HP left. | ||
| + | SUGGESTED BY: Yanfly | ||
| − | < | + | <HP Protection: True Guts x%> |
| − | + | - Works only with HP type. Replace 'x' with the success rate percentage | |
| − | - | + | you wish to give this effect. If the affected target were to receive fatal |
| − | + | damage as a result of this attack, there would be a x% chance the target | |
| + | would be able to survive with 1 HP left. Unlike the regular guts, this | ||
| + | remain in effect even if the user is at exactly 1 HP left. | ||
| + | SUGGESTED BY: Joshua Pactor | ||
| − | < | + | <HP Protection: Fatal Damage Absorbx %> |
| − | + | - Works only with HP type. Replace 'x' with the success rate percentage | |
| − | - | + | you wish to give this effect. If the affected target were to receive fatal |
| − | + | damage as a result of this attack, the target would receive the damage as | |
| + | recovered health instead. | ||
| + | SUGGESTED BY: Shaun Pattenden | ||
| − | + | --- Triggers --- | |
| − | |||
| − | |||
| − | |||
| − | |||
| − | - | ||
| − | |||
| − | |||
| − | |||
| − | - | + | <type Protection: Trigger Removal x%> |
| + | - If any of this state's protection effects have been triggered/activated, | ||
| + | then remove this state as a result of the effect happening. Replace 'x' | ||
| + | with the success rate you wish for this effect to occur. | ||
| + | SUGGESTED BY: Yanfly | ||
| − | < | + | <type Protection: Trigger Add x Buff> |
| − | < | + | <type Protection: Trigger Add x Buff, y Turns> |
| − | + | <type Protection: Trigger Add x Debuff> | |
| − | + | <type Protection: Trigger Add x Debuff, y Turns> | |
| − | < | + | - If any of this state's protection effects have been triggered/activated, |
| − | - If this | + | then add a buff/debuff for parameter 'x'. Replace 'x' with 'MaxHP', |
| − | the | + | 'MaxMP', 'ATK', 'DEF', 'MAT', 'MDF', 'AGI', or 'LUK'. You can replace 'y' |
| − | + | with the number of turns the buff/debuff will last. If you do not use the | |
| + | notetag variant with the turn count, then it will default to 5 turns. | ||
| + | SUGGESTED BY: Yanfly | ||
| − | < | + | <type Protection: Trigger Remove x Buff> |
| − | < | + | <type Protection: Trigger Remove x Debuff> |
| − | - If this | + | - If any of this state's protection effects have been triggered/activated, |
| − | + | then remove a buff/debuff for parameter 'x'. Replace 'x' with 'MaxHP', | |
| − | + | 'MaxMP', 'ATK', 'DEF', 'MAT', 'MDF', 'AGI', or 'LUK'. | |
| + | SUGGESTED BY: Yanfly | ||
| − | < | + | <type Protection: Trigger Add State x> |
| − | + | - If any of this state's protection effects have been triggered/activated, | |
| − | + | then add state 'x' onto the target. Replace 'x' with the state ID you wish | |
| − | + | to apply to the target. | |
| − | + | SUGGESTED BY: Yanfly | |
| − | - If this | ||
| − | |||
| − | |||
| − | < | + | <type Protection: Trigger Remove State x> |
| − | + | - If any of this state's protection effects have been triggered/activated, | |
| − | - | + | then remove state 'x' onto the target. Replace 'x' with the state ID you |
| − | + | wish to remove from the target. | |
| + | SUGGESTED BY: Yanfly | ||
| − | + | =-=-=-= Examples =-=-=-= | |
| − | |||
| − | - | ||
| − | |||
| − | < | + | <HP Protection: Damage Cut 70%> |
| − | < | + | - This will reduce incoming HP damage for the affected unit by 70% meaning |
| − | - | + | only 30% of the damage will go through. |
| − | + | ||
| + | <HP Protection: Damage Block -500> | ||
| + | <HP Protection: Damage Null 20%> | ||
| + | - This will reduce incoming HP damage for the affected unit by a flat 500 | ||
| + | first. If the damage is less than 20% of the unit's MaxHP, then it will be | ||
| + | nullified completely. | ||
| − | < | + | <MP Protection: Damage Barrier 20%> |
| − | + | - If the affected unit receives MP damage and the MP damage is more than | |
| − | + | 20% of the unit's MaxMP, nullify that damage completely. | |
| − | |||
| − | < | + | <HP Protection: Damage Ceiling 30%> |
| − | + | - If the affected unit receives HP damage and the HP damage is more than | |
| − | + | 30% of the unit's MaxHP, then the damage will be reduced to equal 30% of | |
| − | + | the unit's MaxHP. | |
| − | |||
| − | - If | ||
| − | ' | ||
| − | |||
| − | |||
| − | - | + | <HP Protection: Guts 100%> |
| + | <HP Protection: Trigger Removal 100%> | ||
| + | - If the affected unit receives HP damage that would be fatal, the damage | ||
| + | is reduced until the unit would be left with 1 HP left. At that point, the | ||
| + | state that gives the Guts effect will be removed. | ||
| + | </nowiki> | ||
| − | + | === [[State Categories (YEP)|State Categories]] === | |
| − | + | <hr> | |
| − | |||
| − | |||
| − | |||
| − | |||
| − | |||
| − | < | ||
| − | < | + | <nowiki> |
| − | + | Use the following notetags to alter various properties revolving around | |
| − | + | state categories for your database objects. | |
| − | + | ||
| − | + | State Notetags: | |
| − | < | + | <Category: text> |
| − | + | Adds the 'text' category to this state. You can insert multiples of this | |
| − | + | notetag to give a state multiple categories. | |
| − | |||
| − | |||
| − | |||
| − | |||
| − | |||
| − | < | + | <Category: Bypass Death Removal> |
| − | + | Adds the 'Bypass Death Removal' category to the state. This is a category | |
| − | + | utilized by the plugin to bypass removal of it upon death. | |
| − | |||
| − | < | + | <Category: Bypass Recover All Removal> |
| − | + | Adds the 'Bypass Recover All Removal' category to the state. This is a | |
| − | + | category utilized by the plugin to bypass removal of it upon using the | |
| − | + | Recover All event. | |
| − | < | + | <Category: Group Defeat> |
| − | + | Adds the 'Group Defeat' category to the state. If all group members are | |
| − | + | afflicted by states that have this effect, it is considered a lost battle. | |
| − | |||
| − | + | Skill and Item Notetags: | |
| − | |||
| − | |||
| − | |||
| − | < | + | <Remove State Category: text> |
| − | + | Causes this action to remove all states from category 'text' from the | |
| − | + | action's target. This will not attempt to remove passive states. | |
| − | |||
| − | |||
| − | |||
| − | ' | ||
| − | |||
| − | |||
| − | + | <Remove x State Category: text> | |
| + | Causes this action to remove x states from category 'text' from the | ||
| + | action's target. The states removed will be the front x states of highest | ||
| + | to lowest priority with the matching category text. This will not attempt | ||
| + | to remove passive states. | ||
| + | </nowiki> | ||
| − | + | === [[Visual State Effects (YEP)|Visual State Effects]] === | |
| + | <hr> | ||
| − | + | <nowiki> | |
| + | You can use the following notetags to give different various visual effects | ||
| + | for your states. | ||
| − | + | State Notetags: | |
| − | |||
| − | |||
| − | |||
| − | |||
| − | |||
| − | |||
| − | |||
| − | |||
| − | |||
| − | |||
| − | |||
| − | |||
| − | |||
| − | |||
| − | + | <State Motion: Walk> | |
| − | + | <State Motion: Wait> | |
| − | + | <State Motion: Chant> | |
| − | + | <State Motion: Guard> | |
| − | + | <State Motion: Damage> | |
| − | + | <State Motion: Evade> | |
| − | + | <State Motion: Thrust> | |
| + | <State Motion: Swing> | ||
| + | <State Motion: Missile> | ||
| + | <State Motion: Skill> | ||
| + | <State Motion: Spell> | ||
| + | <State Motion: Item> | ||
| + | <State Motion: Escape> | ||
| + | <State Motion: Victory> | ||
| + | <State Motion: Dying> | ||
| + | <State Motion: Abnormal> | ||
| + | <State Motion: Sleep> | ||
| + | <State Motion: Dead> | ||
| + | - This allows you to set a custom motion when the battler is affected by | ||
| + | this state. If a battler has multiple states with custom motions, then | ||
| + | priority will go to the state with the highest priority number (in the | ||
| + | database) with this state motion notetag. | ||
| − | < | + | <State Animation: x> |
| + | - If a battler is affected by a state with this notetag, then a repeating | ||
| + | animation x will play on the battler while in battle. If a battler is | ||
| + | affected by multiple states with this notetag, then priority will go to | ||
| + | the state with the highest priority number (in the database) with this | ||
| + | state animation notetag. | ||
| + | </nowiki> | ||
| + | |||
| + | == [[Collectible Card Game (Irina)|Collectible Card Game]] == | ||
| + | |||
| + | === [[Card Game Core (Irina)|Card Game Core]] === | ||
| + | <hr> | ||
| + | |||
| + | ; Card Notetags | ||
| − | < | + | <html><img src='https://img.itch.zone/aW1nLzIxMTM4NDcucG5n/original/IJnOA4.png' width='300'></html> |
| − | |||
| − | |||
| − | |||
| − | </ | ||
| − | |||
| − | |||
| − | </ | ||
<pre> | <pre> | ||
| − | <Card | + | <Card Art: foldername, filename> |
| − | - If this | + | <Card Art: foldername, filename, hue> |
| − | + | - Replace 'foldername' with the img/folder's name (case sensitive) | |
| + | - Replace 'filename' with the graphic's filename (case sensitive) | ||
| + | - (Optional) Replace 'hue' with a number between 0 and 360 for the hue. If | ||
| + | you don't use this option, it will default to 0. | ||
| + | - Example: <Card Art: sv_enemies, Dragon, 100> | ||
</pre> | </pre> | ||
| − | + | <html><img src='https://img.itch.zone/aW1nLzIxMTM4NDEuZ2lm/original/bxrYUY.gif' width='300'></html> | |
<pre> | <pre> | ||
| − | <Card | + | <Card Dragonbones: armature> |
| − | + | - If you are running KELYEP_DragonBones, you can use DB armatures for the | |
| − | + | card art instead. Replace 'armature' with the name of the armature you wish | |
| − | + | load onto this card. The armature is automatically loaded upon game start. | |
| − | - If | + | This is case sensitive. |
| − | |||
</pre> | </pre> | ||
| + | |||
| + | <html><img src='https://img.itch.zone/aW1nLzIxMTM4NDUuZ2lm/original/3scvpM.gif' width='300'></html> | ||
<pre> | <pre> | ||
| − | <Card | + | <Card Dragonbones Animation: animationName> |
| − | - | + | - Replace 'animationName' with the name of the animation used by the DB |
| − | + | armature. The animation name is case sensitive. | |
</pre> | </pre> | ||
| − | |||
| − | |||
| − | |||
| − | |||
<pre> | <pre> | ||
| − | <Card | + | <Card Art Offset: +x, +y> |
| − | + | <Card Art Offset: -x, -y> | |
| − | + | - Replace 'x' and 'y' with numeric values to determine the horizontal and | |
| − | < | + | vertical offset for the art graphic from the center. |
| − | - | ||
| − | |||
</pre> | </pre> | ||
<pre> | <pre> | ||
| − | <Card | + | <Card Art Scale: x> |
| − | - | + | - Replace 'x' with a number to determine the scaling value of the art. |
| − | + | 1.0 is 100%. 0.5 is 50%. 2.5 is 250%. | |
</pre> | </pre> | ||
| − | + | <html><img src='https://img.itch.zone/aW1nLzIxMTg0NTIucG5n/original/lbtsJj.png' width='300'></html> | |
| − | < | + | <pre> |
| + | <Card Art Cells: ColxRow> | ||
| + | - Use this notetag only if you plan on using a sprite sheet. | ||
| + | - Replace 'Col' with the number of cell columns the sprite sheet has. | ||
| + | - Replace 'Row' with the number of cell rows the sprite sheet has. | ||
| + | - Otherwise, if this notetag is unused, the art will be treated as a | ||
| + | normal full-sized image. | ||
| + | </pre> | ||
<pre> | <pre> | ||
| − | < | + | <Cell Art Cell Index: x> |
| − | + | - Use this only if you plan on using a sprite sheet. | |
| − | + | - Replace 'x' with the index number of the cell starting from 0. | |
| − | + | - Otherwise, if this notetag is unused, the index cell will default to 0. | |
| − | - | ||
| − | |||
</pre> | </pre> | ||
<pre> | <pre> | ||
| − | <Card | + | <Card Name: name> |
| − | - | + | - Replace 'name' with the text that you wish to appear on the card. |
| − | + | </pre> | |
| − | + | <pre> | |
| − | + | <Card Element: name> | |
| − | + | - Replace 'name' with the element this card associates with. This will also | |
| + | determine the Card Template plugin parameter this card uses. If this notetag | ||
| + | is not used, the element will default to 'None'. If you wish to use a custom | ||
| + | card template after defining the element, use <Card Template: x>. | ||
</pre> | </pre> | ||
| − | + | <pre> | |
| − | + | <Card Level: x> | |
| − | < | + | - Replace 'x' with this card's level. This is a numeric value. |
| + | </pre> | ||
<pre> | <pre> | ||
| − | <Card | + | <Card Power: x> |
| − | + | - Replace 'x' with this card's power. This is a numeric value. | |
| − | + | </pre> | |
| − | |||
| − | - | ||
| − | |||
<pre> | <pre> | ||
| − | <Card | + | <Card Health: x> |
| − | - | + | - Replace 'x' with this card's health. This is a numeric value. This does |
| − | + | not appear on cards by default unless you alter the settings in the Card | |
| + | Templates plugin parameters to let it show. | ||
</pre> | </pre> | ||
| − | + | <html><img src='https://img.itch.zone/aW1nLzIxMTM4NTEucG5n/original/i90jce.png' width='300'></html> | |
<pre> | <pre> | ||
| − | <Card | + | <Card Template: name> |
| − | + | - Replace 'name' with the name of the Card Template you wish for this card | |
| − | + | to use in place of the default one determined by its element. | |
| − | |||
| − | |||
| − | |||
</pre> | </pre> | ||
<pre> | <pre> | ||
| − | <Card | + | <Card Rarity: x> |
| − | - | + | - Replace 'x' with a number representing the card's rarity. This is used to |
| − | + | determine the aura of the card and where it stands in the card pool when | |
| − | + | opening booster packs. | |
| − | |||
| − | |||
| − | |||
</pre> | </pre> | ||
| − | + | <html><img src='https://img.itch.zone/aW1nLzIxMTM4NTIucG5n/original/vAnBeg.png' width='300'></html> | |
<pre> | <pre> | ||
| − | <Card | + | <Card Parallax BG: filename> |
| − | + | - Replace 'filename' with the filename of a graphic from img/parallaxes/ | |
| − | + | to be used as this card's parallax background. This is case sensitive. | |
| − | + | - This is an optional notetag. Not all cards need parallax backgrounds. | |
| − | - | ||
| − | |||
</pre> | </pre> | ||
<pre> | <pre> | ||
| − | <Card | + | <Card Parallax BG Speed: +x, +y> |
| − | - | + | <Card Parallax BG Speed: -x, -y> |
| − | + | - Replace 'x' and 'y' with numeric values determining the parallax's scroll | |
| + | speed for this card. | ||
</pre> | </pre> | ||
<pre> | <pre> | ||
| − | <Card | + | <Card Parallax BG Opacity: x> |
| − | + | - Replace 'x' with a number value between 0 and 255 to determine the opacity | |
| − | + | level of the parallax background. | |
| − | |||
| − | - | ||
| − | |||
</pre> | </pre> | ||
<pre> | <pre> | ||
| − | <Card | + | <Card Parallax BG Blend Mode: Normal> |
| − | - | + | <Card Parallax BG Blend Mode: Additive> |
| − | + | <Card Parallax BG Blend Mode: Multiply> | |
| + | <Card Parallax BG Blend Mode: Screen> | ||
| + | - Determines which blend mode you wish to use for the parallax background. | ||
| + | You can only pick one of the above. | ||
</pre> | </pre> | ||
| + | |||
| + | <html><img src='https://img.itch.zone/aW1nLzIxMTM4NTMucG5n/original/lPF95o.png' width='300'></html> | ||
<pre> | <pre> | ||
| − | <Card | + | <Card Holo BG: filename> |
| − | + | - Replace 'filename' with the filename of a graphic from img/pictures/ to be | |
| − | + | used as this card's hologram background. This is case sensitive. | |
| − | + | - This is an optional notetag. Not all cards need holographic backgrounds. | |
| − | - | ||
| − | |||
</pre> | </pre> | ||
| − | <Card | + | <pre> |
| − | - | + | <Card Holo BG Speed: x> |
| − | + | - Replace 'x' with a numeric value determine how fast the holographic hue | |
| + | shifts each frame. | ||
</pre> | </pre> | ||
<pre> | <pre> | ||
| − | <Card | + | <Card Holo BG Opacity: x> |
| − | + | - Replace 'x' with a numeric value between 0 and 255 to determine the | |
| − | + | holographic background's opacity. | |
| − | |||
| − | - | ||
| − | |||
</pre> | </pre> | ||
<pre> | <pre> | ||
| − | <Card | + | <Card Holo BG Blend Mode: Normal> |
| − | - | + | <Card Holo BG Blend Mode: Additive> |
| − | + | <Card Holo BG Blend Mode: Multiply> | |
| + | <Card Holo BG Blend Mode: Screen> | ||
| + | - Determines which blend mode you wish to use for the holographic background. | ||
| + | You can only pick one of the above. | ||
</pre> | </pre> | ||
| − | == | + | <html><img src='https://img.itch.zone/aW1nLzIxMTM4NTQucG5n/original/GC%2FveD.png' width='300'></html> |
| − | + | <pre> | |
| − | + | <Card Parallax FG: filename> | |
| − | + | - Replace 'filename' with the filename of a graphic from img/parallaxes/ | |
| + | to be used as this card's parallax foreground. This is case sensitive. | ||
| + | - This is an optional notetag. Not all cards need parallax foregrounds. | ||
| + | </pre> | ||
| − | + | <pre> | |
| − | + | <Card Parallax FG Speed: +x, +y> | |
| − | + | <Card Parallax FG Speed: -x, -y> | |
| − | + | - Replace 'x' and 'y' with numeric values determining the parallax's scroll | |
| − | + | speed for this card. | |
| − | + | </pre> | |
| − | + | <pre> | |
| − | + | <Card Parallax FG Opacity: x> | |
| − | + | - Replace 'x' with a number value between 0 and 255 to determine the opacity | |
| + | level of the parallax foreground. | ||
| + | </pre> | ||
| − | + | <pre> | |
| − | + | <Card Parallax FG Blend Mode: Normal> | |
| − | + | <Card Parallax FG Blend Mode: Additive> | |
| + | <Card Parallax FG Blend Mode: Multiply> | ||
| + | <Card Parallax FG Blend Mode: Screen> | ||
| + | - Determines which blend mode you wish to use for the parallax foreground. | ||
| + | You can only pick one of the above. | ||
| + | </pre> | ||
| − | + | <html><img src='https://img.itch.zone/aW1nLzIxMTM4NTUucG5n/original/g%2F%2BALM.png' width='300'></html> | |
| − | |||
| − | |||
| − | |||
| − | |||
| − | + | <pre> | |
| − | + | <Card Holo FG: filename> | |
| − | + | - Replace 'filename' with the filename of a graphic from img/pictures/ to be | |
| + | used as this card's hologram foreground. This is case sensitive. | ||
| + | - This is an optional notetag. Not all cards need holographic foregrounds. | ||
| + | </pre> | ||
| − | + | <pre> | |
| − | + | <Card Holo FG Speed: x> | |
| − | + | - Replace 'x' with a numeric value determine how fast the holographic hue | |
| − | + | shifts each frame. | |
| − | + | </pre> | |
| − | + | <pre> | |
| − | + | <Card Holo FG Opacity: x> | |
| − | + | - Replace 'x' with a numeric value between 0 and 255 to determine the | |
| + | holographic foreground's opacity. | ||
| + | </pre> | ||
| − | + | <pre> | |
| − | + | <Card Holo FG Blend Mode: Normal> | |
| − | + | <Card Holo FG Blend Mode: Additive> | |
| − | + | <Card Holo FG Blend Mode: Multiply> | |
| − | + | <Card Holo FG Blend Mode: Screen> | |
| + | - Determines which blend mode you wish to use for the holographic foreground. | ||
| + | You can only pick one of the above. | ||
| + | </pre> | ||
| − | + | <pre> | |
| − | + | <Card Text> | |
| − | + | Line 1 | |
| − | + | Line 2 | |
| + | Line 3 | ||
| + | Line 4 | ||
| + | </Card Text> | ||
| + | - Replace lines 1 through 4 with text you wish to appear in the card's text | ||
| + | box. If you do not use this notetag, the text will use the card's database | ||
| + | item's description text instead. | ||
| + | </pre> | ||
| − | + | <pre> | |
| − | + | <Card Text Scale: x> | |
| − | + | - Replace 'x' with a number determining the scale of the text size. | |
| + | </pre> | ||
| − | + | <pre> | |
| − | + | <Not a Card> | |
| − | + | - If you want to mark something as <Not a Card>, it won't appear in the | |
| − | + | card pool of booster packs even if the number gets listed. It also won't be | |
| − | + | registered as a card. This is only to be used in situations where a database | |
| + | item got flagged incorrectly by the plugin as a card, when it isn't one. | ||
| + | </pre> | ||
| − | + | ; Booster Notetags | |
| − | |||
| − | |||
| − | |||
| − | |||
| − | |||
| − | |||
| − | |||
| − | + | <html><img src='https://img.itch.zone/aW1nLzIxMTM4NTcucG5n/original/HsoKGj.png' width='300'></html> | |
| − | |||
| − | |||
| − | |||
| − | |||
| − | |||
| − | |||
| − | |||
| − | </ | ||
| − | + | <pre> | |
| − | < | + | <Booster Art: filename> |
| + | - Replace 'filename' with the filename of a graphic from img/pictures/ to be | ||
| + | used as the art for this booster pack. If you do not use this notetag, the | ||
| + | art will default to the one defined in the Plugin Parameters. | ||
| + | </pre> | ||
| − | + | <html><img src='https://img.itch.zone/aW1nLzIxMTM4NTgucG5n/original/%2FwgAG3.png' width='300'></html> | |
| − | |||
| − | + | <pre> | |
| − | + | <Booster BG: filename> | |
| − | + | - Replace 'filename' with the filename of a graphic from img/parallaxes/ to | |
| + | be used as the background art shown when opening a booster pack during a full | ||
| + | booster animation sequence. If you do not use this notetag, the graphic used | ||
| + | will default to the one defined in the Plugin Parameters. | ||
| + | </pre> | ||
| − | + | <html><img src='https://img.itch.zone/aW1nLzIxMTM4NjIucG5n/original/930WOs.png' width='300'></html> | |
| − | |||
| − | |||
| − | + | <pre> | |
| − | + | <Booster Rarities: x> | |
| − | + | <Booster Rarities: x, x, x> | |
| − | + | <Booster Rarities: x, x, x, x, x> | |
| − | + | - Replace 'x' with numbers from 0 to whatever your highest rarity is. | |
| − | + | - Use any number of x's you want in the notetag. | |
| + | - This determines the rarity pools used when opening this booster pack. | ||
| + | - Use multiples of this notetag to have more variety in the booster pack | ||
| + | contents there can be. When this booster pack is opened, it will only choose | ||
| + | one of the above pools. | ||
| + | </pre> | ||
| − | + | <html><img src='https://img.itch.zone/aW1nLzIxMTM4NjMucG5n/original/xYQSBy.png' width='300'></html> | |
| − | |||
| − | |||
| − | |||
| − | |||
| − | |||
| − | + | <pre> | |
| − | + | <Card Pool: x> | |
| − | + | <Card Pool: x, x, x> | |
| − | + | <Card Pool: x, x, x, x, x, x> | |
| + | - Replace 'x' with the ID's of the items you wish to put into the card pool. | ||
| + | - Use any number of x's you want in the notetag. | ||
| + | - Use multiples of this notetag if you wish. The card pool will consolidate | ||
| + | each iteration of this notetag. | ||
| + | - This will combine the card pool with the below notetag. | ||
| + | </pre> | ||
| − | + | <pre> | |
| − | + | <Card Pool: x to y> | |
| − | + | - Replace 'x' and 'y' with the ID's you wish to grab all the numbers of | |
| + | between and throw them into the card pool. | ||
| + | - Use multiples of this notetag if you wish. The card pool will consolidate | ||
| + | each iteration of this notetag. | ||
| + | - This will combine the card pool with the above notetag. | ||
| + | </pre> | ||
| − | + | === [[Card Game Deck Builder (Irina)|Card Game Deck Builder]] === | |
| − | + | <hr> | |
| − | |||
| − | |||
| − | + | <html><img src='https://img.itch.zone/aW1nLzIxNDMxNzQucG5n/original/08%2BRfX.png' width='300'></html> | |
| − | |||
| − | |||
| − | |||
| − | |||
| − | + | <pre> | |
| − | + | <Deck Box: filename> | |
| − | + | - Replace 'filename' with the filename of a graphic from img/pictures/ to | |
| − | + | unlock this deck box image for the player if this item is in their inventory. | |
| − | + | This is case sensitive. | |
| − | + | </pre> | |
| − | + | <html><img src='https://img.itch.zone/aW1nLzIxNDMxNzUucG5n/original/fFx2GP.png' width='300'></html> | |
| − | |||
| − | |||
| − | |||
| − | |||
| − | </ | ||
| − | + | <pre> | |
| + | <Deck Sleeves: filename> | ||
| + | - Replace 'filename' with the filename of a graphic from img/pictures/ to | ||
| + | unlock this deck sleeves image for the player if this item is in their | ||
| + | inventory. This is case sensitive. | ||
| + | </pre> | ||
| − | + | === [[Card Game Mechanics (Irina)|Card Game Mechanics]] === | |
| − | + | <hr> | |
| − | |||
| − | |||
| − | |||
| − | + | ; Start Phase Notetags | |
| − | |||
| − | |||
| − | + | <pre> | |
| − | + | <Card Hand Start JS> | |
| − | + | code | |
| − | + | code | |
| + | </Card Hand Start JS> | ||
| + | - Runs the JavaScript 'code' inbetween the two notetags if the card is found | ||
| + | in your hand at the start of the game. | ||
| + | </pre> | ||
| − | + | <pre> | |
| − | + | <Card Hand Start Common Event: x> | |
| − | + | - Runs common event 'x' if the card is found in your hand at the start of | |
| − | + | the game. The common event will run after the JavaScript runs. | |
| + | </pre> | ||
| − | + | <pre> | |
| − | + | <Card Discard Start JS> | |
| + | code | ||
| + | code | ||
| + | </Card Discard Start JS> | ||
| + | - Runs the JavaScript 'code' inbetween the two notetags if the card is found | ||
| + | in discard hand at the start of the game. | ||
| + | </pre> | ||
| − | + | <pre> | |
| − | + | <Card Discard Start Common Event: x> | |
| − | + | - Runs common event 'x' if the card is found in your discard at the start of | |
| − | + | the game. The common event will run after the JavaScript runs. | |
| − | + | </pre> | |
| − | |||
| − | |||
| − | |||
| − | + | <pre> | |
| − | + | <Card Exhaust Start JS> | |
| − | + | code | |
| − | + | code | |
| − | + | </Card Exhaust Start JS> | |
| − | + | - Runs the JavaScript 'code' inbetween the two notetags if the card is found | |
| − | + | in your exhaust at the start of the game. | |
| − | + | </pre> | |
| − | |||
| − | |||
| − | + | <pre> | |
| − | + | <Card Hand Start Common Event: x> | |
| − | + | - Runs common event 'x' if the card is found in your exhaust at the start of | |
| + | the game. The common event will run after the JavaScript runs. | ||
</pre> | </pre> | ||
| − | + | <pre> | |
| + | <Card Library Start JS> | ||
| + | code | ||
| + | code | ||
| + | </Card Library Start JS> | ||
| + | - Runs the JavaScript 'code' inbetween the two notetags if the card is found | ||
| + | in your library at the start of the game. | ||
| + | </pre> | ||
| − | + | <pre> | |
| − | The | + | <Card Library Start Common Event: x> |
| + | - Runs common event 'x' if the card is found in your library at the start of | ||
| + | the game. The common event will run after the JavaScript runs. | ||
| + | </pre> | ||
| − | + | ; Upkeep Phase Notetags | |
| − | |||
| − | |||
| − | |||
| − | |||
| − | |||
| − | + | <html><img src='https://img.itch.zone/aW1nLzIxOTA2ODYucG5n/original/b7FI45.png'></html> | |
| − | |||
| − | |||
| − | |||
| − | + | <pre> | |
| − | + | <Card Hand Upkeep JS> | |
| − | + | code | |
| − | + | code | |
| − | + | </Card Hand Upkeep JS> | |
| − | + | - Runs the JavaScript 'code' inbetween the two notetags if the card is found | |
| − | + | in your hand during Upkeep Phase. | |
| − | + | </pre> | |
| − | </ | ||
| − | + | <pre> | |
| − | < | + | <Card Hand Upkeep Common Event: x> |
| + | - Runs common event 'x' if the card is found in your hand during Upkeep | ||
| + | Phase. The common event will run after the JavaScript runs. | ||
| + | </pre> | ||
| − | + | <pre> | |
| − | + | <Card Discard Upkeep JS> | |
| − | + | code | |
| + | code | ||
| + | </Card Discard Upkeep JS> | ||
| + | - Runs the JavaScript 'code' inbetween the two notetags if the card is found | ||
| + | in discard hand during Upkeep Phase. | ||
| + | </pre> | ||
| − | + | <pre> | |
| − | + | <Card Discard Upkeep Common Event: x> | |
| − | + | - Runs common event 'x' if the card is found in your discard during Upkeep | |
| − | + | Phase. The common event will run after the JavaScript runs. | |
| + | </pre> | ||
| − | + | <pre> | |
| − | + | <Card Exhaust Upkeep JS> | |
| − | + | code | |
| + | code | ||
| + | </Card Exhaust Upkeep JS> | ||
| + | - Runs the JavaScript 'code' inbetween the two notetags if the card is found | ||
| + | in your exhaust during Upkeep Phase. | ||
| + | </pre> | ||
| − | + | <pre> | |
| − | + | <Card Hand Upkeep Common Event: x> | |
| − | + | - Runs common event 'x' if the card is found in your exhaust during Upkeep | |
| + | Phase. The common event will run after the JavaScript runs. | ||
| + | </pre> | ||
| − | + | <pre> | |
| − | + | <Card Library Upkeep JS> | |
| − | + | code | |
| + | code | ||
| + | </Card Library Upkeep JS> | ||
| + | - Runs the JavaScript 'code' inbetween the two notetags if the card is found | ||
| + | in your library during Upkeep Phase. | ||
| + | </pre> | ||
| − | + | <pre> | |
| − | + | <Card Library Upkeep Common Event: x> | |
| − | + | - Runs common event 'x' if the card is found in your library during Upkeep | |
| + | Phase. The common event will run after the JavaScript runs. | ||
| + | </pre> | ||
| − | + | ; Draw Phase Notetags | |
| − | |||
| − | |||
| − | |||
| − | + | <pre> | |
| − | + | <Card Hand Draw JS> | |
| − | + | code | |
| + | code | ||
| + | </Card Hand Draw JS> | ||
| + | - Runs the JavaScript 'code' inbetween the two notetags if the card is found | ||
| + | in your hand during Draw Phase. | ||
| + | </pre> | ||
| − | + | <pre> | |
| − | + | <Card Hand Draw Common Event: x> | |
| − | + | - Runs common event 'x' if the card is found in your hand during Draw | |
| + | Phase. The common event will run after the JavaScript runs. | ||
| + | </pre> | ||
| − | + | <pre> | |
| − | + | <Card Discard Draw JS> | |
| − | + | code | |
| + | code | ||
| + | </Card Discard Draw JS> | ||
| + | - Runs the JavaScript 'code' inbetween the two notetags if the card is found | ||
| + | in discard hand during Draw Phase. | ||
| + | </pre> | ||
| − | + | <pre> | |
| − | + | <Card Discard Draw Common Event: x> | |
| − | + | - Runs common event 'x' if the card is found in your discard during Draw | |
| + | Phase. The common event will run after the JavaScript runs. | ||
| + | </pre> | ||
| − | + | <pre> | |
| − | + | <Card Exhaust Draw JS> | |
| − | + | code | |
| + | code | ||
| + | </Card Exhaust Draw JS> | ||
| + | - Runs the JavaScript 'code' inbetween the two notetags if the card is found | ||
| + | in your exhaust during Draw Phase. | ||
| + | </pre> | ||
| − | + | <pre> | |
| − | + | <Card Hand Draw Common Event: x> | |
| − | + | - Runs common event 'x' if the card is found in your exhaust during Draw | |
| + | Phase. The common event will run after the JavaScript runs. | ||
| + | </pre> | ||
| − | + | <pre> | |
| − | + | <Card Library Draw JS> | |
| − | + | code | |
| + | code | ||
| + | </Card Library Draw JS> | ||
| + | - Runs the JavaScript 'code' inbetween the two notetags if the card is found | ||
| + | in your library during Draw Phase. | ||
| + | </pre> | ||
| − | + | <pre> | |
| − | + | <Card Library Draw Common Event: x> | |
| − | + | - Runs common event 'x' if the card is found in your library during Draw | |
| + | Phase. The common event will run after the JavaScript runs. | ||
| + | </pre> | ||
| − | + | ; Main Phase Notetags | |
| − | |||
| − | |||
| − | + | <pre> | |
| − | + | <Card No Battle> | |
| − | + | - This card is unable to battle. | |
| + | </pre> | ||
| − | + | - - - | |
| − | |||
| − | |||
| − | |||
| − | = | + | <html><img src='https://img.itch.zone/aW1nLzIxOTA2ODgucG5n/original/LKLmIB.png'></html> |
| − | < | ||
| − | + | <pre> | |
| − | + | <Card Spell 1 JS> | |
| − | + | code | |
| + | code | ||
| + | </Card Spell 1 JS> | ||
| + | - If this card's spell 1 is used, perform the JavaScript 'code' inbetween | ||
| + | the two notetags. | ||
| + | </pre> | ||
| − | + | <pre> | |
| − | + | <Card Spell 1 Common Event: x> | |
| − | + | - If this card's spell 1 is used, perform common event 'x'. The common event | |
| − | + | will run after the JavaScript runs. | |
| − | + | </pre> | |
| − | |||
| − | + | <pre> | |
| − | + | <Card Spell 1 Enable> | |
| − | + | code | |
| − | + | enable = code | |
| − | + | </Card Spell 1 Enable> | |
| + | - If this notetag is found, then the JavaScript 'code' will determine if the | ||
| + | 'enable' variable is true/false, making the spell enabled or not. | ||
| + | </pre> | ||
| − | + | <pre> | |
| − | + | <Card Spell 1 Icon: x> | |
| − | + | - Uses icon 'x' for this card's spell 1. | |
| − | + | </pre> | |
| − | + | <pre> | |
| − | + | <Card Spell 1 Name: x> | |
| − | + | - Gives this card's spell 1 a name as 'x'. | |
| − | + | </pre> | |
| − | + | <pre> | |
| − | + | <Card Spell 1 Animation: x> | |
| − | + | - Plays animation 'x' when this card's spell 1 is used. | |
| − | + | </pre> | |
| − | + | <pre> | |
| − | + | <Card Spell 1 Allow AI Use> | |
| − | + | - Will allow the A.I. to use this card's spell 1. | |
| − | + | </pre> | |
| − | |||
| − | + | <pre> | |
| − | + | <Card Spell 1 Check AI Use> | |
| − | + | code | |
| − | + | enable = code | |
| − | + | </Card Spell 1 Check AI Use> | |
| − | + | - If this notetag is found, then the JavaScript 'code' will determine if the | |
| − | + | 'enable' variable is true/false, making the spell allowed to be used by A.I. | |
| − | + | or not. This can be used to prevent the A.I. from using healing at full HP. | |
| − | + | </pre> | |
| − | |||
| − | + | - - - | |
| − | |||
| − | |||
| − | |||
| − | |||
| − | + | <pre> | |
| − | + | <Card Spell 2 JS> | |
| − | + | code | |
| − | + | code | |
| − | + | </Card Spell 2 JS> | |
| − | </ | + | - If this card's spell 2 is used, perform the JavaScript 'code' inbetween |
| + | the two notetags. | ||
| + | </pre> | ||
| − | + | <pre> | |
| − | < | + | <Card Spell 2 Common Event: x> |
| + | - If this card's spell 2 is used, perform common event 'x'. The common event | ||
| + | will run after the JavaScript runs. | ||
| + | </pre> | ||
| − | + | <pre> | |
| − | + | <Card Spell 2 Enable> | |
| − | + | code | |
| + | enable = code | ||
| + | </Card Spell 2 Enable> | ||
| + | - If this notetag is found, then the JavaScript 'code' will determine if the | ||
| + | 'enable' variable is true/false, making the spell enabled or not. | ||
| + | </pre> | ||
| − | - | + | <pre> |
| + | <Card Spell 2 Icon: x> | ||
| + | - Uses icon 'x' for this card's spell 2. | ||
| + | </pre> | ||
| − | + | <pre> | |
| + | <Card Spell 2 Name: x> | ||
| + | - Gives this card's spell 2 a name as 'x'. | ||
| + | </pre> | ||
| − | + | <pre> | |
| − | + | <Card Spell 2 Animation: x> | |
| − | + | - Plays animation 'x' when this card's spell 2 is used. | |
| − | + | </pre> | |
| − | |||
| − | |||
| − | |||
| − | |||
| − | + | <pre> | |
| − | + | <Card Spell 2 Allow AI Use> | |
| − | + | - Will allow the A.I. to use this card's spell 2. | |
| − | + | </pre> | |
| − | |||
| − | |||
| − | |||
| − | |||
| − | =- | + | <pre> |
| + | <Card Spell 2 Check AI Use> | ||
| + | code | ||
| + | enable = code | ||
| + | </Card Spell 2 Check AI Use> | ||
| + | - If this notetag is found, then the JavaScript 'code' will determine if the | ||
| + | 'enable' variable is true/false, making the spell allowed to be used by A.I. | ||
| + | or not. This can be used to prevent the A.I. from using healing at full HP. | ||
| + | </pre> | ||
| − | + | - - - | |
| − | + | <pre> | |
| − | + | <Card Spell 3 JS> | |
| − | + | code | |
| − | + | code | |
| − | + | </Card Spell 3 JS> | |
| − | + | - If this card's spell 3 is used, perform the JavaScript 'code' inbetween | |
| − | + | the two notetags. | |
| + | </pre> | ||
| − | + | <pre> | |
| − | + | <Card Spell 3 Common Event: x> | |
| − | + | - If this card's spell 3 is used, perform common event 'x'. The common event | |
| − | + | will run after the JavaScript runs. | |
| − | + | </pre> | |
| − | |||
| − | |||
| − | + | <pre> | |
| + | <Card Spell 3 Enable> | ||
| + | code | ||
| + | enable = code | ||
| + | </Card Spell 3 Enable> | ||
| + | - If this notetag is found, then the JavaScript 'code' will determine if the | ||
| + | 'enable' variable is true/false, making the spell enabled or not. | ||
| + | </pre> | ||
| − | + | <pre> | |
| − | + | <Card Spell 3 Icon: x> | |
| − | + | - Uses icon 'x' for this card's spell 3. | |
| − | + | </pre> | |
| − | |||
| − | |||
| − | |||
| − | + | <pre> | |
| − | + | <Card Spell 3 Name: x> | |
| − | + | - Gives this card's spell 3 a name as 'x'. | |
| − | + | </pre> | |
| − | |||
| − | |||
| − | |||
| − | + | <pre> | |
| − | + | <Card Spell 3 Animation: x> | |
| − | + | - Plays animation 'x' when this card's spell 3 is used. | |
| − | + | </pre> | |
| − | |||
| − | |||
| − | |||
| − | |||
| − | |||
| − | + | <pre> | |
| + | <Card Spell 3 Allow AI Use> | ||
| + | - Will allow the A.I. to use this card's spell 3. | ||
| + | </pre> | ||
| − | + | <pre> | |
| − | + | <Card Spell 3 Check AI Use> | |
| − | + | code | |
| − | + | enable = code | |
| − | + | </Card Spell 3 Check AI Use> | |
| − | + | - If this notetag is found, then the JavaScript 'code' will determine if the | |
| − | + | 'enable' variable is true/false, making the spell allowed to be used by A.I. | |
| − | + | or not. This can be used to prevent the A.I. from using healing at full HP. | |
| + | </pre> | ||
| − | + | - - - | |
| − | |||
| − | |||
| − | |||
| − | |||
| − | |||
| − | |||
| − | |||
| − | + | <pre> | |
| + | <Card Spell 4 JS> | ||
| + | code | ||
| + | code | ||
| + | </Card Spell 4 JS> | ||
| + | - If this card's spell 4 is used, perform the JavaScript 'code' inbetween | ||
| + | the two notetags. | ||
| + | </pre> | ||
| − | + | <pre> | |
| − | + | <Card Spell 4 Common Event: x> | |
| − | + | - If this card's spell 4 is used, perform common event 'x'. The common event | |
| − | + | will run after the JavaScript runs. | |
| − | + | </pre> | |
| − | |||
| − | |||
| − | |||
| − | |||
| − | + | <pre> | |
| − | + | <Card Spell 4 Enable> | |
| − | + | code | |
| − | + | enable = code | |
| − | + | </Card Spell 4 Enable> | |
| − | + | - If this notetag is found, then the JavaScript 'code' will determine if the | |
| − | + | 'enable' variable is true/false, making the spell enabled or not. | |
| − | + | </pre> | |
| − | |||
| − | + | <pre> | |
| + | <Card Spell 4 Icon: x> | ||
| + | - Uses icon 'x' for this card's spell 4. | ||
| + | </pre> | ||
| − | + | <pre> | |
| − | + | <Card Spell 4 Name: x> | |
| − | + | - Gives this card's spell 4 a name as 'x'. | |
| − | + | </pre> | |
| − | |||
| − | |||
| − | |||
| − | |||
| − | |||
| − | + | <pre> | |
| − | + | <Card Spell 4 Animation: x> | |
| − | + | - Plays animation 'x' when this card's spell 4 is used. | |
| − | + | </pre> | |
| − | |||
| − | |||
| − | |||
| − | |||
| − | |||
| − | + | <pre> | |
| + | <Card Spell 4 Allow AI Use> | ||
| + | - Will allow the A.I. to use this card's spell 4. | ||
| + | </pre> | ||
| − | + | <pre> | |
| − | + | <Card Spell 4 Check AI Use> | |
| − | + | code | |
| + | enable = code | ||
| + | </Card Spell 4 Check AI Use> | ||
| + | - If this notetag is found, then the JavaScript 'code' will determine if the | ||
| + | 'enable' variable is true/false, making the spell allowed to be used by A.I. | ||
| + | or not. This can be used to prevent the A.I. from using healing at full HP. | ||
| + | </pre> | ||
| − | + | - - - | |
| − | |||
| − | |||
| − | |||
| − | |||
| − | |||
| − | |||
| − | + | There are four spells available per card. Nothing more provided by default. | |
| − | |||
| − | |||
| − | |||
| − | |||
| − | |||
| − | + | ; Battle Phase Notetags | |
| − | |||
| − | |||
| − | + | <pre> | |
| − | + | <Card AI Priority-behavior: x> | |
| − | + | - This affects the A.I. only. It will make the A.I. pick specific cards over | |
| − | + | others depending on the 'behavior' and the 'x' value. | |
| − | < | + | - Replace 'behavior' with a string stating the behavior type to differentiate |
| + | different priority settings when a card has multiples of this notetag. | ||
| + | - Replace 'x' with a number depicting the priority value. Lower values mean | ||
| + | the card is less likely to be picked while higher priority means the card is | ||
| + | more likely to be picked. | ||
| + | - Example: <Card AI Priority-Strong: 50> | ||
| + | <Card AI Priority-Strong: 25> | ||
| + | <Card AI Priority-Weak: 60> | ||
| + | <Card AI Priority-Weak: 30> | ||
| + | <Card AI Priority-Tactical: 90> | ||
| + | <Card AI Priority-Tactical: 45> | ||
| − | + | *NOTE* The A.I. will also pick from a pick list of cards using the 'Strong' | |
| + | behavior. If a setting turns on the "$calc.pickWeakest" flag, then it will | ||
| + | use the 'Weak' behavior. Keep that in mind when making certain cards pickable | ||
| + | for discarding or adding to the hand. | ||
| + | </pre> | ||
| − | + | - - - | |
| − | |||
| − | |||
| − | + | <html><img src='https://img.itch.zone/aW1nLzIxOTA2OTEucG5n/original/h9GcVA.png'></html> | |
| − | + | <pre> | |
| − | + | <Card Pre-Battle JS> | |
| − | + | code | |
| + | code | ||
| + | </Card Pre-Battle JS> | ||
| + | - If this notetag is found, it will occur before damage calculations. It will | ||
| + | run the JavaScript 'code' found between the two notetags. | ||
| + | </pre> | ||
| − | + | <pre> | |
| − | + | <Card Pre-Battle Common Event: x> | |
| − | + | - If this notetag is found, it will occur before damage calculations. Perform | |
| − | + | common event 'x'. The common event will run after the JavaScript runs. | |
| − | + | </pre> | |
| − | |||
| − | |||
| − | |||
| − | + | - - - | |
| − | |||
| − | |||
| − | |||
| − | |||
| − | |||
| − | |||
| − | |||
| − | |||
| − | + | <pre> | |
| + | <Card Tie Battle JS> | ||
| + | code | ||
| + | code | ||
| + | </Card Tie Battle JS> | ||
| + | - If this notetag is found, it will occur if the battle is tied. It will | ||
| + | run the JavaScript 'code' found between the two notetags. | ||
| + | </pre> | ||
| − | + | <pre> | |
| − | + | <Card Tie Battle Common Event: x> | |
| − | + | - If this notetag is found, it will occur if the battle is tied. Perform | |
| − | + | common event 'x'. The common event will run after the JavaScript runs. | |
| − | + | </pre> | |
| − | |||
| − | |||
| − | |||
| − | |||
| − | |||
| − | + | - - - | |
| − | |||
| − | |||
| − | |||
| − | |||
| − | |||
| − | |||
| − | + | <html><img src='https://img.itch.zone/aW1nLzIxOTA2OTMucG5n/original/D%2Byt8J.png'></html> | |
| − | |||
| − | |||
| − | |||
| − | |||
| − | |||
| − | |||
| − | |||
| − | + | <pre> | |
| − | + | <Card Lose Battle JS> | |
| − | + | code | |
| − | + | code | |
| − | + | </Card Lose Battle JS> | |
| − | + | - If this notetag is found, it will occur if the card loses a battle. It will | |
| − | + | run the JavaScript 'code' found between the two notetags. | |
| − | + | </pre> | |
| − | + | <pre> | |
| − | + | <Card Lose Battle Common Event: x> | |
| − | + | - If this notetag is found, it will occur if the card loses a battle. Perform | |
| − | + | common event 'x'. The common event will run after the JavaScript runs. | |
| + | </pre> | ||
| − | + | - - - | |
| − | |||
| − | |||
| − | |||
| − | |||
| − | |||
| − | |||
| − | |||
| − | = | + | <html><img src='https://img.itch.zone/aW1nLzIxOTA2OTUucG5n/original/y7xNA4.png'></html> |
| − | + | <pre> | |
| + | <Card Win Battle JS> | ||
| + | code | ||
| + | code | ||
| + | </Card Win Battle JS> | ||
| + | - If this notetag is found, it will occur if the card wins a battle. It will | ||
| + | run the JavaScript 'code' found between the two notetags. | ||
| + | </pre> | ||
| − | + | <pre> | |
| − | + | <Card Win Battle Common Event: x> | |
| − | + | - If this notetag is found, it will occur if the card wins a battle. Perform | |
| − | + | common event 'x'. The common event will run after the JavaScript runs. | |
| − | + | *NOTE* If neither of the notetags are found in the card, then there will be | |
| − | + | a default effect of dealing 5 damage to the opposing player's health. This | |
| − | + | can be modified from within the ╘ Post-Damage Effects common event. | |
| − | + | </pre> | |
| − | |||
| − | |||
| − | |||
| − | + | - - - | |
| − | |||
| − | |||
| − | |||
| − | |||
| − | |||
| − | |||
| − | |||
| − | + | <html><img src='https://img.itch.zone/aW1nLzIxOTA2OTcucG5n/original/Kxd%2FK%2F.png'></html> | |
| − | |||
| − | |||
| − | |||
| − | |||
| − | |||
| − | |||
| − | |||
| − | |||
| − | + | <pre> | |
| − | + | <Card Post-Battle JS> | |
| − | + | code | |
| − | + | code | |
| − | + | </Card Post-Battle JS> | |
| − | + | - If this notetag is found, it will occur after win/loss effects. It will | |
| − | + | run the JavaScript 'code' found between the two notetags. | |
| − | |||
| − | |||
| − | |||
| − | |||
| − | |||
| − | + | <pre> | |
| + | <Card Post-Battle Common Event: x> | ||
| + | - If this notetag is found, it will occur after win/loss effects. Perform | ||
| + | common event 'x'. The common event will run after the JavaScript runs. | ||
| + | </pre> | ||
| + | |||
| + | - - - | ||
| − | + | <pre> | |
| − | + | <Card Resolve Battle JS> | |
| − | + | code | |
| − | + | code | |
| − | + | </Card Resolve Battle JS> | |
| + | - If this notetag is found, it will occur after post-battle effects. It will | ||
| + | run the JavaScript 'code' found between the two notetags. | ||
| + | </pre> | ||
| − | + | <pre> | |
| − | + | <Card Resolve Battle Common Event: x> | |
| − | + | - If this notetag is found, it will occur after post-battle effects. Perform | |
| − | + | common event 'x'. The common event will run after the JavaScript runs. | |
| − | |||
| − | + | *NOTE* If neither of the notetags are found in the card, then there will be | |
| − | + | a default effect of sending the card to the player's discard pile. This can | |
| − | + | be modified from within the ╘ Post-Damage Effects common event. | |
| − | + | </pre> | |
| − | + | ; End Phase Notetags | |
| − | |||
| − | |||
| − | |||
| − | |||
| − | |||
| − | |||
| − | + | <pre> | |
| − | + | <Card Hand End JS> | |
| − | + | code | |
| − | + | code | |
| − | + | </Card Hand End JS> | |
| − | + | - Runs the JavaScript 'code' inbetween the two notetags if the card is found | |
| − | + | in your hand during End Phase. | |
| − | + | </pre> | |
| − | |||
| − | The | + | <pre> |
| + | <Card Hand End Common Event: x> | ||
| + | - Runs common event 'x' if the card is found in your hand during End | ||
| + | Phase. The common event will run after the JavaScript runs. | ||
| + | </pre> | ||
| − | + | <pre> | |
| − | + | <Card Discard End JS> | |
| − | - | + | code |
| − | + | code | |
| − | + | </Card Discard End JS> | |
| − | + | - Runs the JavaScript 'code' inbetween the two notetags if the card is found | |
| − | + | in discard hand during End Phase. | |
| − | + | </pre> | |
| − | |||
| − | |||
| − | + | <pre> | |
| − | + | <Card Discard End Common Event: x> | |
| − | - | + | - Runs common event 'x' if the card is found in your discard during End |
| − | + | Phase. The common event will run after the JavaScript runs. | |
| − | the | + | </pre> |
| − | |||
| − | |||
| − | |||
| − | + | <pre> | |
| − | + | <Card Exhaust End JS> | |
| − | + | code | |
| − | + | code | |
| − | + | </Card Exhaust End JS> | |
| − | - | + | - Runs the JavaScript 'code' inbetween the two notetags if the card is found |
| − | + | in your exhaust during End Phase. | |
| − | + | </pre> | |
| − | |||
| − | in | ||
| − | |||
| − | |||
| − | |||
| − | |||
| − | |||
| − | |||
| − | + | <Card Hand End Common Event: x> | |
| − | + | - Runs common event 'x' if the card is found in your exhaust during End | |
| − | - | + | Phase. The common event will run after the JavaScript runs. |
| − | + | </pre> | |
| − | |||
| − | |||
| − | |||
| − | |||
| − | |||
| − | |||
| − | + | <pre> | |
| − | + | <Card Library End JS> | |
| − | - | + | code |
| − | + | code | |
| − | + | </Card Library End JS> | |
| − | + | - Runs the JavaScript 'code' inbetween the two notetags if the card is found | |
| − | + | in your library during End Phase. | |
| − | + | </pre> | |
| − | |||
| − | |||
| − | + | <pre> | |
| − | + | <Card Library End Common Event: x> | |
| − | - | + | - Runs common event 'x' if the card is found in your library during End |
| − | + | Phase. The common event will run after the JavaScript runs. | |
| − | + | </pre> | |
| − | |||
| − | |||
| − | |||
| − | |||
| − | |||
| − | = | + | == [[Class Change Core (YEP)|Class Change Core]] == |
| − | |||
| − | |||
| − | |||
| − | |||
| − | |||
| − | |||
| − | |||
| − | + | <nowiki> | |
| − | + | The following are some notetags you can use with the Class Change Core | |
| − | + | plugin. | |
| − | |||
| − | |||
| − | |||
| − | |||
| − | |||
| − | |||
| − | |||
| − | |||
| − | |||
| − | |||
| − | |||
| − | |||
| − | + | Actor Notetags: | |
| − | + | <Unlock Class: x> | |
| − | + | <Unlock Class: x, x, x> | |
| − | This | + | <Unlock Class: x to y> |
| − | the | + | This actor will have class(es) x unlocked at the start of the game in |
| − | + | addition to its current class and access to any of the global classes. | |
| − | |||
| − | |||
| − | |||
| − | |||
| − | + | <Cannot Change Class> | |
| − | + | This prevents this actor from being able to change primary classes. This | |
| − | + | could be reversed from plugin commands, however. | |
| − | This | ||
| − | |||
| − | |||
| − | |||
| − | |||
| − | + | <Class x Character: filename y> | |
| − | + | When this actor's class is x, the actor's character sprite will become | |
| − | + | 'filename' and index y on the fieldmap. | |
| − | |||
| − | |||
| − | |||
| − | |||
| − | |||
| − | |||
| − | |||
| − | + | <Hero Character: filename y> | |
| − | + | <Warrior Character: filename y> | |
| − | + | If you prefer to use class names instead of the class ID, use the above | |
| − | + | format. When this actor is this class, the actor's character sprite will | |
| − | + | become 'filename' and index y on the fieldmap. | |
| − | |||
| − | |||
| − | |||
| − | |||
| − | |||
| − | + | <Class x Face: filename y> | |
| − | + | When this actor's class is x, the actor's face graphic will become | |
| − | + | 'filename' and index y for menus. | |
| − | + | ||
| − | + | <Hero Face: filename y> | |
| − | + | <Warrior Face: filename y> | |
| − | + | If you prefer to use class names instead of the class ID, use the above | |
| − | + | format. When this actor is this class, the actor's face graphic will | |
| − | + | become 'filename' and index y for menus. | |
| − | |||
| − | + | <Class x Battler: filename> | |
| − | + | When this actor's class is x, the actor's battler sprite will become | |
| − | + | 'filename' in battle. | |
| − | |||
| − | |||
| − | |||
| − | |||
| − | |||
| − | |||
| − | |||
| − | + | <Hero Battler: filename> | |
| − | + | <Warrior Battler: filename> | |
| − | + | If you prefer to use class names instead of the class ID, use the above | |
| − | + | format. When this actor is this class, the actor's battler sprite will | |
| − | + | become 'filename' in battle. | |
| − | |||
| − | |||
| − | |||
| − | |||
| − | |||
| − | + | Class Notetags: | |
| − | + | <Icon: x> | |
| − | + | Sets the icon for this class to x. This icon is used in the Class Change | |
| − | + | menu listing. | |
| − | |||
| − | |||
| − | |||
| − | |||
| − | |||
| − | + | <Use Nickname> | |
| − | + | This will cause the class to use the nickname used by the actor instead | |
| − | + | of the class name. | |
| − | This will | ||
| − | |||
| − | |||
| − | |||
| − | |||
| − | |||
| − | |||
| − | + | <Help Description> | |
| − | + | Text | |
| − | + | Text | |
| − | + | </Help Description> | |
| − | + | Sets the help description for the class to the specified text. | |
| − | |||
| − | |||
| − | |||
| − | |||
| − | |||
| − | </ | ||
| − | + | <Level Unlock Requirements> | |
| + | Class x: Level y | ||
| + | Class x: Level y | ||
| + | </Level Unlock Requirements> | ||
| + | Sets the requirements for unlocking that particular class. The unlocking | ||
| + | of the class will require classes x to be at level y. Insert multiple of | ||
| + | the strings in between the two opening and closing notetags to require all | ||
| + | of the class levels to be met. | ||
| − | + | <Level Unlock Requirements> | |
| − | + | Hero: Level y | |
| − | + | Warrior: Level y | |
| − | + | </Level Unlock Requirements> | |
| − | + | If you prefer to use class names instead of the class ID, use the above | |
| − | + | format. This will set the level requirement for the mentioned class to y. | |
| − | < | + | If there are multiple classes with the same name, the class with the |
| − | + | highest ID value will be taken. | |
| − | |||
| − | < | ||
| − | |||
| − | |||
| − | |||
| − | |||
| − | |||
| − | |||
| − | |||
| − | |||
| − | |||
| − | |||
| − | |||
| − | |||
| − | |||
| − | |||
| − | |||
| − | |||
| − | |||
| − | |||
| − | |||
| − | |||
</nowiki> | </nowiki> | ||
| − | == [[ | + | === [[Subclass (YEP)|Subclass]] === |
| + | <hr> | ||
<nowiki> | <nowiki> | ||
| − | + | You can use the following notetags to modify subclassing aspects. | |
| − | + | ||
| + | Actor Notetag: | ||
| + | <Subclass: x> | ||
| + | Sets the actor's default subclass to x. | ||
| − | + | <Cannot Change Subclass> | |
| + | This prevents this actor from being able to change subclasses. This could | ||
| + | be reversed from plugin commands, however. | ||
| − | < | + | <Restrict Class: x> |
| − | < | + | <Restrict Class: x, x, x> |
| − | + | <Restrict Class: x to y> | |
| − | < | + | This particular actor cannot switch his or her primary class to class(es) |
| − | + | x (to y). This does not apply to the subclass. The actor can still change | |
| − | + | to this class via event. | |
| − | |||
| − | |||
| − | |||
| − | + | <Restrict Subclass: x> | |
| + | <Restrict Subclass: x, x, x> | ||
| + | <Restrict Subclass: x to y> | ||
| + | This particular actor cannot switch his or her subclass to class(es) | ||
| + | x (to y). This does not apply to the primary class. The actor can still | ||
| + | change to this subclass via event. | ||
| − | < | + | Class Notetags: |
| − | + | <Primary Only> | |
| − | + | This class can only be class changed to a primary class and nothing more. | |
| + | Actors can still change to this class via event. | ||
| − | + | <Subclass Only> | |
| − | + | This class can only be class changed to a subclass and nothing more. | |
| − | + | Actors can still change to this subclass via event. | |
| − | + | <Subclass x Combo Name: text> | |
| + | If this class is the primary and the subclass is class ID x, then the | ||
| + | class name displayed will be 'text'. For example, if the class combination | ||
| + | is Warrior/Wizard, the name can appear as Spellblade. | ||
| − | + | <Hero Combo Name: text> | |
| − | If you | + | <Warrior Combo Name: text> |
| − | + | If you choose to use the class's name instead, you can write out the name | |
| + | of the class in place of Subclass x. If you have multiple classes with the | ||
| + | same name, priority will be given to the class with the highest ID. | ||
| − | Item, | + | Skill and Item Notetags: |
| − | < | + | <Require Class: x> |
| − | + | <Require Class: x, x, x> | |
| − | + | <Require Class: x to y> | |
| + | Replace x with the class's ID. This skill/item can only be used by the | ||
| + | listed class(es) x. This does not apply to enemies. | ||
| − | < | + | <Require Subclass: x> |
| − | + | <Require Subclass: x, x, x> | |
| − | item | + | <Require Subclass: x to y> |
| − | + | Replace x with the class's ID. This skill/item can only be used by the | |
| + | listed subclass(es) x. This does not apply to enemies. | ||
| + | </nowiki> | ||
| + | |||
| + | == [[Counter State (Arisu)|Counter State]] == | ||
| − | + | <html><img src='https://img.itch.zone/aW1nLzM0ODYzNDEucG5n/original/fa%2Fxec.png'></html> | |
| − | |||
| − | |||
| − | + | Insert these notetags into the database object's note box. | |
| − | |||
| − | |||
| − | |||
| − | + | <pre> | |
| − | < | + | <Counter State id: n%> |
| + | <Physical Counter State id: n%> | ||
| + | <Magical Counter State id: n%> | ||
| + | <Certain Hit Counter State id: n%> | ||
| + | - For: Actor, Class, Skill, Weapon, Armor, Enemy, State Notetags | ||
| + | - When an opponent battler attacks this battler, there is a 'n'% chance to | ||
| + | affect the attacking battler with state 'id'. | ||
| + | - Replace 'id' with the ID of the state to function as a counter state. | ||
| + | - Replace 'n' with the percent chance to successfully affect with. | ||
| + | - Use <Counter State id: n%> to affect all types of attacks. | ||
| + | - Use <Physical Counter State id: n%> to affect physical type attacks. | ||
| + | - Use <Magical Counter State id: n%> to affect magical type attacks. | ||
| + | - Use <Certain Hit Counter State id: n%> to affect certain hit type attacks. | ||
| + | </pre> | ||
| − | + | == [[Core Engine (YEP)|Core Engine]] == | |
| − | |||
| − | |||
| − | + | <pre> | |
| + | Actor Notetag | ||
| + | <Initial Level: x> | ||
| + | Changes the actor's initial level to x. This allows you to bypass the | ||
| + | editor's level 99 limit. | ||
| − | < | + | <Max Level: x> |
| − | + | Changes the actor's max level to x. This allows you to bypass the editor's | |
| − | + | level 99 limit. | |
| − | |||
| − | |||
| − | |||
| − | This allows you to | ||
| − | |||
| − | < | + | Class Skill Learn Notetag |
| − | + | <Learn at Level: x> | |
| + | When placed inside a class's "Skills to Learn" notetag, this will cause | ||
| + | the class to learn the skill at level x. | ||
Item, Weapon, Armor Notetags | Item, Weapon, Armor Notetags | ||
| + | <Price: x> | ||
| + | Changes the price of the item to x. This notetag allows you to bypass the | ||
| + | editor's 999,999 gold cost limit. | ||
| − | < | + | <Max Item: x> |
| − | + | This changes the maximum amount of the item to x. | |
| − | |||
| − | |||
| − | |||
| − | |||
| − | This | ||
| − | |||
| − | |||
| − | |||
| − | |||
| − | |||
| − | |||
| − | |||
| − | |||
| − | |||
| − | |||
| − | |||
| − | |||
| − | |||
| − | |||
| − | < | + | Weapon and Armor Notetags |
| − | + | <stat: +x> | |
| − | + | <stat: -x> | |
| − | < | + | Allows the piece of weapon or armor to gain or lose x amount of stat. |
| − | + | Replace "stat" with "hp", "mp", "atk", "def", "mat", "mdf", "agi", or | |
| − | + | "luk" to alter that specific stat. This allows the piece of equipment | |
| − | + | to go past the editor's default limitation so long as the maximum value | |
| − | the | + | allows for it. |
| − | |||
| − | |||
| − | |||
| − | + | Enemy Notetag | |
| − | + | <Gold: x> | |
| − | + | Changes the gold drop value of enemies to x. This notetag allows you to | |
| − | + | bypass the editor's 9,999,999 gold drop limit. | |
| − | + | ||
| − | the | + | <stat: x> |
| + | This changes the enemy's stat to x amount. Replace "stat" with "hp", | ||
| + | "mp", "atk", "def", "mat", "mdf", "agi", or "luk" to alter that | ||
| + | specific stat. This allows the piece of equipment to go past the | ||
| + | editor's default limitation. | ||
| − | + | <exp: x> | |
| + | This changes the enemy's exp given out to x amount. This allows the | ||
| + | enemy give out more exp than the editor's default 9,999,999 limit. | ||
| + | </pre> | ||
| − | + | == [[Damage Core (YEP)|Damage Core]] == | |
| − | |||
| − | |||
| − | |||
| − | + | <nowiki> | |
| + | The following are some notetags you can use to modify the damage caps. | ||
| − | + | Skill and Item Notetag: | |
| − | + | <Bypass Damage Cap> | |
| − | + | This causes the skill/item to ignore the damage cap and go with the | |
| − | + | regular value of the calculated damage. This will cancel out any damage | |
| − | + | cap effects otherwise. This will take priority over any damage cap | |
| − | This will | + | breaking effects. |
| − | |||
| − | |||
| − | + | Actor, Class, Enemy, Weapon, Armor, and State Notetags: | |
| + | <Bypass Damage Cap> | ||
| + | This will cause the related battler to bypass any damage capping effects | ||
| + | and its skills/items will go with the uncapped calculated value. | ||
| − | + | <Damage Cap: x> | |
| − | + | <Heal Cap: x> | |
| − | + | This will set the skill to have a damage/healing cap of x. This will | |
| − | + | cancel out any damage cap bypassers. If a battler has more than one | |
| − | + | damage cap, it will go with the highest value. This means if an actor that | |
| + | has a weapon that brings the damage cap to 99,999 and an accessory that | ||
| + | brings the damage cap to 999,999, then the battler's damage cap will be | ||
| + | the highest value of 999,999. | ||
| + | </nowiki> | ||
| − | + | === [[Armor Scaling (YEP)|Armor Scaling]] === | |
| − | + | <hr> | |
| − | |||
| − | + | <nowiki> | |
| + | You may use these notetags to adjust various factors for armor scaling rates | ||
| + | and calculations. | ||
| − | + | Skill and Item Notetags: | |
| − | + | <Armor Reduction: x> | |
| + | Causes the skill/item to reduce the target's armor level by x. This is | ||
| + | calculated first above everything else. | ||
| − | + | <Armor Reduction: x%> | |
| + | Causes the skill/item to reduce the target's armor level by x%. This is | ||
| + | calculated second but is ignored if the armor level is less than 0. | ||
| − | + | <Armor Penetration: x%> | |
| − | + | Causes the skill/item to reduce the target's armor level by x% (but will | |
| − | + | not go past 0). This is calculated third. | |
| − | |||
| − | |||
| − | |||
| − | + | <Armor Penetration: x> | |
| + | Causes the skill/item to reduce the target's armor level by x (but will | ||
| + | not go past 0). This is calculated last. | ||
| − | + | <Bypass Armor Scaling> | |
| − | + | This notetag allows you to bypass the armor scaling process for this | |
| − | + | individual skill/item. | |
| − | |||
| − | |||
| − | |||
| − | |||
| − | |||
| − | |||
| − | + | Actor, Class, Enemy, Weapon, Armor, State Notetags: | |
| + | <Physical Armor Reduction: x> | ||
| + | Causes this actor to lose x armor when targeted by physical skills/items. | ||
| + | This is calculated first. | ||
| − | + | <Magical Armor Reduction: x> | |
| − | + | Causes this actor to lose x armor when targeted by magical skills/items. | |
| − | + | This is calculated first. | |
| − | |||
| − | |||
| − | |||
| − | |||
| − | |||
| − | |||
| − | + | <Certain Armor Reduction: x> | |
| + | Causes this actor to lose x armor when targeted by certain skills/items. | ||
| + | This is calculated first. | ||
| − | + | <Physical Armor Reduction: x%> | |
| − | + | Causes this actor to lose x% armor when targeted by physical skills/items. | |
| − | + | This is calculated second. | |
| − | |||
| − | |||
| − | |||
| − | |||
| − | |||
| − | |||
| − | |||
| − | + | <Magical Armor Reduction: x%> | |
| + | Causes this actor to lose x% armor when targeted by magical skills/items. | ||
| + | This is calculated second. | ||
| − | + | <Certain Armor Reduction: x%> | |
| − | + | Causes this actor to lose x% armor when targeted by certain skills/items. | |
| − | + | This is calculated second. | |
| − | |||
| − | |||
| − | |||
| − | + | <Physical Armor Penetration: x%> | |
| + | Causes this actor to cause the target to lose x% armor when using a | ||
| + | physical skills/items. This is calculated third. | ||
| − | + | <Magical Armor Penetration: x%> | |
| − | + | Causes this actor to cause the target to lose x% armor when using a | |
| − | + | magical skills/items. This is calculated third. | |
| − | + | ||
| − | + | <Certain Armor Penetration: x%> | |
| − | This | + | Causes this actor to cause the target to lose x% armor when using a |
| − | is | + | physical skills/items. This is calculated third. |
| − | + | <Physical Armor Penetration: x> | |
| + | Causes this actor to cause the target to lose x armor but not drop below | ||
| + | 0 armor when using a physical skills/items. This is calculated last. | ||
| − | + | <Magical Armor Penetration: x> | |
| − | + | Causes this actor to cause the target to lose x armor but not drop below | |
| − | + | 0 armor when using a magical skills/items. This is calculated last. | |
| − | |||
| − | |||
| − | |||
| − | |||
| − | |||
| − | |||
| − | + | <Certain Armor Penetration: x> | |
| + | Causes this actor to cause the target to lose x armor but not drop below | ||
| + | 0 armor when using a certain skills/items. This is calculated last. | ||
| + | </nowiki> | ||
| − | + | === [[Critical Control (YEP)|Critical Control]] === | |
| − | + | <hr> | |
| − | |||
| − | |||
| − | |||
| − | |||
| − | |||
| − | |||
| − | |||
| − | |||
| − | + | <nowiki> | |
| + | You may use these notetags to adjust various factors for critical success | ||
| + | rates and critical damage adjustments. | ||
| − | + | Skill and Item Notetags: | |
| − | + | <Critical Rate: x%> | |
| − | + | This sets the skill/item's critical hit rate to x%, ignoring any critical | |
| − | + | hit rate bonuses the user may have and ignoring any critical hit evasion | |
| − | + | bonuses the target may have. | |
| − | + | *Note: Using this tag sets the skill/item to enable Critical Hits. | |
| − | + | <Critical Rate: x.y> | |
| + | This sets the skill/item's critical hit rate to the float x.y, ignoring | ||
| + | any critical hit rate bonuses the user may have and ignoring any critical | ||
| + | hit evasion bonuses the target may have. | ||
| + | *Note: Using this tag sets the skill/item to enable Critical Hits. | ||
| − | + | <Critical Multiplier: x%> | |
| − | + | This sets the skill/item's critical damage multiplier as x% while still | |
| − | + | factoring in the user's critical damage multiplier bonuses. | |
| − | the item | + | *Note: Using this tag sets the skill/item to enable Critical Hits. |
| − | |||
| − | + | <Critical Multiplier: x.y> | |
| + | This sets the skill/item's critical damage multiplier as x.y while still | ||
| + | factoring in the user's critical damage multiplier bonuses. | ||
| + | *Note: Using this tag sets the skill/item to enable Critical Hits. | ||
| − | + | <Flat Critical: x% stat> | |
| − | + | Increases the skill/item's flat critical bonus by x% of 'stat'. Replace | |
| − | + | 'stat' with 'hp', 'mp', 'atk', 'def', 'mat', 'mdf', 'agi', or 'luk'. Using | |
| − | + | multiple instances of this notetag will override the previous. | |
| − | |||
| − | - | + | Actor, Class, Enemy, Weapon, Armor, and State Notetags: |
| + | <Critical Multiplier: +x%> | ||
| + | <Critical Multiplier: -x%> | ||
| + | Alters the damage of a critical hit by x% for this actor, class, enemy, | ||
| + | weapon, armor, or state. This is an additive trait. | ||
| − | + | <Flat Critical: +x> | |
| − | + | <Flat Critical: -x> | |
| − | - | + | Alters the damage of a critical hit by +x or -x for this actor, class, |
| − | + | enemy, weapon, armor, or state. This is an additive trait. | |
| − | |||
| − | |||
| − | -- | + | <Certain Hit Critical Rate: +x%> |
| + | <Certain Hit Critical Rate: -x%> | ||
| + | Alters the critical hit rate chance of certain hit skills for the user by | ||
| + | +x% or -x% if this notetag exists in the actor, class, enemy, weapon, | ||
| + | armor, or state notetags. This is an additive trait. | ||
| − | + | <Physical Critical Rate: +x%> | |
| − | + | <Physical Critical Rate: -x%> | |
| − | + | Alters the physical critical rate chance of certain hit skills for the user | |
| − | + | by +x% or -x% if this notetag exists in the actor, class, enemy, weapon, | |
| − | + | armor, or state notetags. This is an additive trait. | |
| − | |||
| − | -- | + | <Magical Critical Rate: +x%> |
| + | <Magical Critical Rate: -x%> | ||
| + | Alters the magical critical rate chance of certain hit skills for the user | ||
| + | by +x% or -x% if this notetag exists in the actor, class, enemy, weapon, | ||
| + | armor, or state notetags. This is an additive trait. | ||
| + | </nowiki> | ||
| − | + | === [[Lunatic Pack - Critical Sway (YEP)|Lunatic Pack - Critical Sway]] === | |
| − | + | <hr> | |
| − | - | ||
| − | |||
| − | |||
| − | + | <nowiki> | |
| − | + | Insert the following notetags into a skill or item's notebox to give it one | |
| − | + | of these effects: | |
| − | |||
| − | |||
| − | |||
| − | |||
--- | --- | ||
| − | + | Skill, Item, State Notetags: | |
| − | |||
| − | |||
| − | |||
| − | |||
| − | - | + | <Custom Critical Rate: effect> |
| + | - Most of this plugin's notetags will follow the above format. Replace | ||
| + | 'effect' with one of the following entries from the EFFECT section below. | ||
| + | Insert multiple entries to give your skills/items/states multiple effects. | ||
| + | If there are multiple effects that modify the critical hit rate, they will | ||
| + | go in the order of the skill/item first, then in priority order for the | ||
| + | user's states. Multiple entries of the same notetag effect can stack with | ||
| + | one another unless mentioned otherwise. | ||
| − | + | <Custom Critical Rate: effect, nonstackable> | |
| − | + | - Using the above notetag format and sticking on 'nonstackable' at the end | |
| − | - | + | of the effect will make it nonstackable with other modifiers of the same |
| − | is | + | type. As a result, only the first entry of a similar effect will go |
| − | then priority | + | through regardless of whether or not the effect is stronger or weaker. |
| − | + | It will go through in the order of skill/item first, then in priority | |
| + | order for the user's states. Not all effects can become nonstackable. | ||
| + | Effects listed below will suggest if they can become nonstackable. | ||
| − | === | + | =-=-=-= Effect CONDITIONS =-=-=-= |
| − | |||
| − | + | --- User Param Rate --- | |
| − | |||
| − | + | <Custom Critical Rate: x Pride y%> | |
| + | <Custom Critical Rate: x Pride y%, nonstackable> | ||
| + | - Replace 'x' with 'HP', 'MP', or 'TP'. This will use the attacker's | ||
| + | current HP, MP, or TP rate as a critical hit rate modifier. Replace 'y' | ||
| + | with a percentage value on how much you'd want this modifier to matter. | ||
| + | The higher the attacker's HP, MP, or TP rate, the higher the modifier. | ||
| + | SUGGESTED BY: Yanfly | ||
| − | < | + | <Custom Critical Rate: x Crisis y%> |
| − | + | <Custom Critical Rate: x Crisis y%, nonstackable> | |
| − | + | - Replace 'x' with 'HP', 'MP', or 'TP'. This will use the attacker's | |
| − | < | + | current HP, MP, or TP rate as a critical hit rate modifier. Replace 'y' |
| − | This | + | with a percentage value on how much you'd want this modifier to matter. |
| − | Replace | + | The higher the attacker's HP, MP, or TP rate, the higher the modifier. |
| − | + | SUGGESTED BY: Yanfly | |
| − | + | --- Target Param Rate --- | |
| − | |||
| − | |||
| − | |||
| − | |||
| − | |||
| − | |||
| − | |||
| − | - | + | <Custom Critical Rate: x Hero y%> |
| + | <Custom Critical Rate: x Hero y%, nonstackable> | ||
| + | - Replace 'x' with 'HP', 'MP', or 'TP'. This will use the defender's | ||
| + | current HP, MP, or TP rate as a critical hit rate modifier. Replace 'y' | ||
| + | with a percentage value on how much you'd want this modifier to matter. | ||
| + | The higher the defender's HP, MP, or TP rate, the higher the modifier. | ||
| + | SUGGESTED BY: Yanfly | ||
| − | + | <Custom Critical Rate: x Bully y%> | |
| − | + | <Custom Critical Rate: x Bully y%, nonstackable> | |
| − | + | - Replace 'x' with 'HP', 'MP', or 'TP'. This will use the defender's | |
| − | + | current HP, MP, or TP rate as a critical hit rate modifier. Replace 'y' | |
| − | + | with a percentage value on how much you'd want this modifier to matter. | |
| − | + | The higher the defender's HP, MP, or TP rate, the higher the modifier. | |
| − | the | + | SUGGESTED BY: Yanfly |
| − | |||
| − | + | --- Element Rate --- | |
| − | |||
| − | |||
| − | |||
| − | - | ||
| − | |||
| − | |||
| − | + | <Custom Critical Rate: Element Rate x%> | |
| − | + | <Custom Critical Rate: Element Rate x%, nonstackable> | |
| − | + | - If the current action has an element attached to it, this effect will | |
| − | + | adjust the critical hit rate based off the target's damage rate against | |
| − | + | the action's element. Replace 'x' with a percentage value of how much you | |
| − | + | want the element rate to influence the critical hit rate. | |
| + | SUGGESTED BY: Yanfly | ||
| − | + | --- State Modifiers --- | |
| − | |||
| − | |||
| − | |||
| − | |||
| − | |||
| − | |||
| − | + | <Custom Critical Rate: User States +x%> | |
| − | + | <Custom Critical Rate: User States -x%> | |
| − | + | <Custom Critical Rate: User States +x%, nonstackable> | |
| − | + | <Custom Critical Rate: User States -x%, nonstackable> | |
| − | - | + | - Alters the critical rate for the current action based off the number of |
| − | + | states the user has. The amount altered will be determined by the percent | |
| + | 'x' to increase/decrease the current critical hit rate per state. | ||
| + | SUGGESTED BY: Yanfly | ||
| − | + | <Custom Critical Rate: Target States +x%> | |
| − | + | <Custom Critical Rate: Target States -x%> | |
| − | + | <Custom Critical Rate: Target States +x%, nonstackable> | |
| − | + | <Custom Critical Rate: Target States -x%, nonstackable> | |
| − | - | + | - Alters the critical rate for the current action based off the number of |
| − | + | states the target has. The amount altered will be determined by the | |
| − | + | percent 'x' to increase/decrease the current critical hit rate per state. | |
| + | SUGGESTED BY: Yanfly | ||
| − | --- | + | --- Buff Modifiers --- |
| − | + | <Custom Critical Rate: User Buffs +x%> | |
| − | + | <Custom Critical Rate: User Buffs -x%> | |
| + | <Custom Critical Rate: User Buffs +x%, nonstackable> | ||
| + | <Custom Critical Rate: User Buffs -x%, nonstackable> | ||
| + | - Alters the critical rate for the current action based off the number of | ||
| + | buff types the user has. The amount altered will be determined by the | ||
| + | percent 'x' to increase/decrease the current critical hit rate per buff | ||
| + | type. This does not include the stacks per buff. | ||
| + | SUGGESTED BY: Yanfly | ||
| − | < | + | <Custom Critical Rate: Target States +x%> |
| − | - | + | <Custom Critical Rate: Target States -x%> |
| − | + | <Custom Critical Rate: Target States +x%, nonstackable> | |
| + | <Custom Critical Rate: Target States -x%, nonstackable> | ||
| + | - Alters the critical rate for the current action based off the number of | ||
| + | buff types the target has. The amount altered will be determined by the | ||
| + | percent 'x' to increase/decrease the current critical hit rate per buff | ||
| + | type. This does not include the stacks per buff. | ||
| + | SUGGESTED BY: Yanfly | ||
| + | |||
| + | --- Debuff Modifiers --- | ||
| − | < | + | <Custom Critical Rate: User Buffs +x%> |
| − | < | + | <Custom Critical Rate: User Buffs -x%> |
| − | + | <Custom Critical Rate: User Buffs +x%, nonstackable> | |
| − | + | <Custom Critical Rate: User Buffs -x%, nonstackable> | |
| + | - Alters the critical rate for the current action based off the number of | ||
| + | debuff types the user has. The amount altered will be determined by the | ||
| + | percent 'x' to increase/decrease the current critical hit rate per debuff | ||
| + | type. This does not include the stacks per debuff. | ||
| + | SUGGESTED BY: Yanfly | ||
| − | < | + | <Custom Critical Rate: Target States +x%> |
| − | - | + | <Custom Critical Rate: Target States -x%> |
| − | + | <Custom Critical Rate: Target States +x%, nonstackable> | |
| − | + | <Custom Critical Rate: Target States -x%, nonstackable> | |
| + | - Alters the critical rate for the current action based off the number of | ||
| + | debuff types the target has. The amount altered will be determined by the | ||
| + | percent 'x' to increase/decrease the current critical hit rate per debuff | ||
| + | type. This does not include the stacks per debuff. | ||
| + | SUGGESTED BY: Yanfly | ||
| − | + | =-=-=-= Effect EXAMPLES =-=-=-= | |
| − | |||
| − | |||
| − | |||
| − | |||
| − | |||
| − | < | + | <Custom Critical Rate: TP Pride 50%> |
| − | < | + | - This will raise the user's critical hit rate relative to the user's |
| − | < | + | current TP rate up to 50% (every 1 TP will add 0.5% critical hit rate). |
| − | < | + | |
| − | - | + | <Custom Critical Rate: HP Crisis 200%> |
| − | + | <Custom Critical Rate: HP Hero 50%> | |
| + | - This will raise the user's critical hit rate based off how low the | ||
| + | user's current HP is and how high the target's current HP is. For every | ||
| + | 1% HP the user is missing, the critical hit rate will increase by 2% and | ||
| + | for every 1% HP the target has, the critical hit rate will also increase | ||
| + | by 0.5%. | ||
| + | |||
| + | <Custom Critical Rate: Element Rate 100%> | ||
| + | - This will alter the user's critical hit rate against the target if the | ||
| + | current action is elemental. If the target is 200% weak to the element, | ||
| + | then the critical hit rate will also be increased by 200%. If the target | ||
| + | is 50% resistant against the element, then the critical hit rate will also | ||
| + | be adjusted to be 50% lower. | ||
| + | |||
| + | <Custom Critical Rate: Target States +5%> | ||
| + | - This will raise the user's critical hit rate by 5% for every state the | ||
| + | target is affected by. | ||
| + | |||
| + | <Custom Critical Rate: User Buffs +3%> | ||
| + | <Custom Critical Rate: Target Debuffs +6%> | ||
| + | - This will raise the user's critical hit rate by 3% for every buff the | ||
| + | user has and by 6% for every debuff the target has. | ||
</nowiki> | </nowiki> | ||
| − | + | == [[Dash Toggle (YEP)|Dash Toggle]] == | |
| − | |||
<nowiki> | <nowiki> | ||
| − | + | You can use these notetags to add a disabled dashing trait. If the leading | |
| − | + | party member has a trait that disables dashing, then the player cannot dash | |
| − | + | while that actor is in the lead. | |
| + | |||
| + | Actor, Class, Weapon, Armor, and State Notetag: | ||
| + | |||
| + | <Disable Dashing> | ||
| + | If the leading party member has a trait with this notetag, then the player | ||
| + | cannot dash while that actor is in the lead. | ||
| + | </nowiki> | ||
| + | |||
| + | == [[Disable Auto Shadow Extended (YEP)|Disable Auto Shadow Extended]] == | ||
| − | + | <nowiki> | |
| + | Insert the following notetags into a map or tileset's notebox to change how | ||
| + | they affect shadows on their map. | ||
| − | + | Tileset and Map Notetags: | |
| − | |||
| − | |||
| − | < | + | <Hide Shadows> |
| − | - This will | + | <Show Shadows> |
| − | + | - This will hide/show shadows for that specific map or tileset. If a map | |
| + | has a shadow-related notetag while using a tileset with a shadow-related | ||
| + | notetag, priority will be given to the notetag on the map. If neither the | ||
| + | map nor the tileset has a shadow-related notetag, then the shadow state | ||
| + | will depend on the setting in the plugin parameters. | ||
</nowiki> | </nowiki> | ||
| − | + | == [[Dragonbones Integration (YEP)|Dragonbones Integration]] == | |
| − | |||
<nowiki> | <nowiki> | ||
| − | + | Use the following notetags to make full use of your DragonBone battler | |
| + | integration for your RPG Maker MV game! | ||
| − | + | Actor and Enemy Notetags: | |
| − | < | + | - - - - - - - - - - - - - - - - - - - - - - - - - - - - - - - - - - - - - |
| − | + | ||
| − | + | <DragonBone: name> | |
| − | + | <DragonBone Battler: name> | |
| + | - Sets the DragonBones associated with this actor/enemy to be "name". The | ||
| + | name will be associated with the assets used. It will be used to check for | ||
| + | associated filenames that end with _ske.json, _tex.json, and _tex.png. The | ||
| + | listed assets must be found in your assets folder. | ||
| + | |||
| + | * Note: The name is case sensitive. | ||
| + | * Note: If the plugin parameter 'Auto-Preload Battlers' is set to 'true', | ||
| + | then this will add the battler to the list of assets to be preloaded. | ||
| − | + | **EXAMPLES** | |
| − | |||
| − | |||
| − | < | + | <DragonBone: Demon> |
| − | + | <DragonBone: DragonBoy> | |
| − | + | <DragonBone: Swordsman> | |
| − | + | <DragonBone: Ubbie> | |
| − | + | - - - - - - - - - - - - - - - - - - - - - - - - - - - - - - - - - - - - - | |
| − | |||
| − | |||
| − | |||
| − | + | If a DragonBones battler is not detected here, it will not be able to | |
| − | + | utilize the following notetags and their effects. | |
| − | |||
| − | |||
| − | |||
| − | |||
| − | |||
| − | |||
| − | + | - - - - - - - - - - - - - - - - - - - - - - - - - - - - - - - - - - - - - | |
| − | < | + | <DragonBone ScaleX: n> |
| − | This will | + | <DragonBone ScaleY: n> |
| − | is | + | - Replace 'n' with a number. It can be positive or negative, whole or |
| + | decimal number. This will affect how much the battler will be scaled by. | ||
| + | A number less than 1 will be smaller than the base asset itself while a | ||
| + | number larger than 1 will be larger than the base asset. If the number is | ||
| + | negative, it will be mirrored horizontally or vertically depending if | ||
| + | ScaleX or ScaleY is used respectively. | ||
| − | + | * Note: This will overwrite the setting set in the plugin parameters for | |
| − | + | 'Default ScaleX' and 'Default ScaleY'. | |
| − | |||
| − | |||
| − | + | **EXAMPLES** | |
| − | |||
| − | |||
| − | |||
| − | < | + | <DragonBone ScaleX: -0.3> |
| − | < | + | <DragonBone ScaleY: 0.3> |
| − | |||
| − | |||
| − | |||
| − | |||
| − | |||
| − | < | + | <DragonBone ScaleX: 1.2> |
| − | + | <DragonBone ScaleY: 1.2> | |
| − | + | - - - - - - - - - - - - - - - - - - - - - - - - - - - - - - - - - - - - - | |
| − | |||
| − | |||
| − | < | + | <DragonBone Width: x> |
| − | < | + | <DragonBone Height: x> |
| − | + | - This allows you to set the 'width' and 'height' of the DragonBones | |
| − | + | battler by replacing 'x' with an integar value. This value is mostly used | |
| − | + | for collision purposes as well as mouse click activation. These values can | |
| + | be adjusted because each battler can be a dynamic width/height so it is | ||
| + | important for you to adjust them properly. If not adjusted, they will take | ||
| + | on the default width/height values found in the plugin parameters. | ||
| + | |||
| + | **EXAMPLES** | ||
| − | + | <DragonBone Width: 150> | |
| + | <DragonBone Height: 180> | ||
| − | + | - - - - - - - - - - - - - - - - - - - - - - - - - - - - - - - - - - - - - | |
| − | |||
| − | |||
| − | |||
| − | |||
| − | < | + | <DragonBone Keep Sprite> |
| − | < | + | <DragonBone Replace Sprite> |
| − | + | - Lets you decide if you want to keep the original sprite used for the | |
| − | + | actor/enemy or have the DragonBone battler replace it altogether. If you | |
| − | + | opt to replace the sprite, then the sprite will be hidden during battle | |
| + | as long as there is a DragonBone battler in place of it. | ||
| − | + | - - - - - - - - - - - - - - - - - - - - - - - - - - - - - - - - - - - - - | |
| − | |||
| − | |||
| − | |||
| − | |||
| − | < | + | <DragonBone Ani motion: animation> |
| − | + | - Replace 'motion' with a proper battler motion name. 'animation' is to be | |
| − | + | replaced with a skeletal animation name from DragonBones. This is for any | |
| − | + | motion that doesn't have a specified skeletal animation of the same name | |
| − | + | in DragonBones. | |
| − | |||
| − | + | Replace 'motion' with one of the following: | |
| − | + | attack | |
| − | + | walk thrust escape | |
| − | + | wait swing victory | |
| − | + | chant missile dying | |
| + | guard skill abnormal | ||
| + | damage spell sleep | ||
| + | evade item dead | ||
| − | + | * Note: The 'animation' to be replaced is case sensitive. | |
| − | |||
| − | |||
| − | |||
| − | |||
| − | + | **EXAMPLES** | |
| − | |||
| − | |||
| − | |||
| − | |||
| − | < | + | <DragonBone Ani Attack: normalAttack> |
| − | < | + | <DragonBone Ani Walk: steady> |
| − | + | <DragonBone Ani Damage: hit> | |
| − | + | <DragonBone Ani Dead: dead> | |
| − | + | <DragonBone Ani Wait: steady> | |
| + | <DragonBone Ani Chant: stun> | ||
| + | <DragonBone Ani Swing: stun> | ||
| + | <DragonBone Ani Evade: stun> | ||
| + | <DragonBone Ani Thrust: stun> | ||
| + | <DragonBone Ani Missile: stun> | ||
| + | <DragonBone Ani Skill: stun> | ||
| + | <DragonBone Ani Spell: stun> | ||
| + | <DragonBone Ani Item: stun> | ||
| + | <DragonBone Ani Victory: stun> | ||
| + | <DragonBone Ani Dying: stun> | ||
| + | <DragonBone Ani Abnormal: stun> | ||
| + | <DragonBone Ani Sleep: stun> | ||
| − | + | - - - - - - - - - - - - - - - - - - - - - - - - - - - - - - - - - - - - - | |
| − | |||
| − | |||
| − | |||
| − | |||
| − | + | For those who want a more condensed way to adjust the DragonBone battler | |
| − | + | settings, you can use the following notetag format: | |
| − | |||
| − | |||
| − | |||
| − | |||
| − | < | + | <DragonBone Settings> |
| − | + | Battler: name // The name used for the DB battler | |
| − | |||
| − | |||
| − | |||
| − | + | ScaleX: 0.3 // Scale X used for the DB battler | |
| − | + | ScaleY: 0.3 // Scale Y used for the DB battler | |
| − | + | Width: 150 // Width used for the DB battler | |
| − | + | Height: 180 // Height used for the DB battler | |
| − | |||
| − | |||
| − | + | // Below are a bunch of battler motions tied to skeletal animations | |
| − | + | Ani Attack: normalAttack | |
| − | + | Ani Walk: steady | |
| − | + | Ani Damage: hit | |
| + | Ani Dead: dead | ||
| + | Ani Wait: steady | ||
| + | Ani Chant: stun | ||
| + | Ani Swing: stun | ||
| + | Ani Evade: stun | ||
| + | Ani Thrust: stun | ||
| + | Ani Missile: stun | ||
| + | Ani Skill: stun | ||
| + | Ani Spell: stun | ||
| + | Ani Item: stun | ||
| + | Ani Victory: stun | ||
| + | Ani Dying: stun | ||
| + | Ani Abnormal: stun | ||
| + | Ani Sleep: stun | ||
| − | + | Keep Sprite // Allow the sprite to show alongside DB battler | |
| + | Replace Sprite // Hide the sprite while the DB battler is active | ||
| + | </DragonBone Settings> | ||
| − | + | - Anything placed in between the notetags: <DragonBone Settings> and | |
| + | </DragonBone Settings> will be used to determine the properties set for | ||
| + | the DragonBone battler used for the actor/enemy. With the exception of the | ||
| + | 'name' property, all other properties are optional and can be omitted from | ||
| + | the list of properties to sandwich inbetween your notetags. | ||
| − | + | **EXAMPLES** | |
| − | |||
| − | |||
| − | |||
| − | < | + | <DragonBone Settings> |
| − | + | Battler: Ubbie | |
| − | + | Replace Sprite | |
| − | + | ScaleX: -0.2 | |
| + | ScaleY: 0.2 | ||
| + | Width: 150 | ||
| + | Height: 100 | ||
| + | </DragonBone Settings> | ||
| − | < | + | <DragonBone Settings> |
| − | + | Battler: Demon | |
| − | + | Replace Sprite | |
| − | + | ScaleX: 0.3 | |
| + | ScaleY: 0.3 | ||
| + | Width: 140 | ||
| + | Height: 140 | ||
| + | </DragonBone Settings> | ||
| − | < | + | <DragonBone Settings> |
| − | + | Battler: Swordsman | |
| − | + | Replace Sprite | |
| − | + | ScaleX: -0.4 | |
| − | + | ScaleY: 0.4 | |
| + | Width: 150 | ||
| + | Height: 180 | ||
| + | </DragonBone Settings> | ||
| + | </nowiki> | ||
| − | + | == [[Dragonbones Map Sprites (Irina)|Dragonbones Map Sprites]] == | |
| − | + | You can use Dragonbones armatures as map sprites. When used, any of the | |
| + | original sprites before will become invisible and will be replaced with the | ||
| + | Dragonbones armature. | ||
| − | + | These notetags can be used for actors and events. In the case of events, | |
| − | + | both notetags and comment tags can be used to determine what settings to use | |
| − | + | for the Dragonbones armatures. | |
| − | + | Be cautious when using Comment Tags for event pages since comments contain a | |
| − | + | maximum line count of 6. | |
| − | |||
| − | + | <hr> | |
| − | |||
| − | |||
| − | + | <html><img src='https://img.itch.zone/aW1nLzI5MjM1ODQuZ2lm/original/t9jIxI.gif'></html> | |
| − | |||
| − | |||
| − | |||
| − | |||
| − | |||
| − | + | <pre> | |
| − | + | <Dragonbones Sprite: filename> | |
| − | |||
| − | + | - Used for: Actor, Event Notetags and Event Page Comment Tags | |
| − | + | - Sets the DragonBones associated with this map sprite to be 'filename'. | |
| − | + | - The name will be associated with the assets used. | |
| + | - It will be used to check for associated filenames that end with _ske.json, | ||
| + | _tex.json, and _tex.png. | ||
| + | - The listed assets must be found in the assigned assets folder. | ||
| + | </pre> | ||
| − | + | Examples: | |
| − | |||
| − | |||
| − | + | <pre> | |
| − | + | <Dragonbones Sprite: Demon> | |
| − | + | <Dragonbones Sprite: DragonBoy> | |
| − | + | <Dragonbones Sprite: Swordsman> | |
| − | + | <Dragonbones Sprite: Ubbie> | |
| − | + | </pre> | |
| − | + | <hr> | |
| − | |||
| − | + | <pre> | |
| − | + | <Dragonbones Sprite Scale: x, y> | |
| − | |||
| − | + | <Dragonbones Sprite Scale X: x> | |
| − | + | <Dragonbones Sprite Scale Y: x> | |
| − | + | - Used for: Actor, Event Notetags and Event Page Comment Tags | |
| − | < | + | - Sets the base scale for the Dragonbones associated with this map sprite. |
| − | + | This is for those instances where a Dragonbones armature is too large or | |
| + | small and needs to be scaled down/up. | ||
| + | - This scale will be amplified by the character's sprite's scale value. | ||
| + | - Use the 1st notetag to assign values to both Scale X and Scale Y. | ||
| + | - Use the 2nd/3rd notetags to assign Scale X and Y values separately. | ||
| + | - Use negative values to flip the Dragonbones armature around. | ||
| + | </pre> | ||
| − | + | Examples: | |
| − | |||
| − | + | <pre> | |
| + | <Dragonbones Sprite Scale: -0.3, 0.3> | ||
| − | + | <Dragonbones Sprite Scale X: -0.3> | |
| − | + | <Dragonbones Sprite Scale Y: 0.3> | |
| − | + | </pre> | |
| − | + | <hr> | |
| − | + | <pre> | |
| − | + | <Dragonbones Sprite Time Scale: x> | |
| − | |||
| − | |||
| − | |||
| − | + | - Used for: Actor, Event Notetags and Event Page Comment Tags | |
| − | + | - Lets you adjust the time scale for the Dragonbones armature. | |
| − | + | - Replace 'x' with a number value depicting how fast the armature should | |
| + | animate. | ||
| + | - 1.0 is the default value. | ||
| + | - Higher numbers animate faster. | ||
| + | - Lower numbers animate slower. | ||
| + | - If a number is too small, it may not animate at all. | ||
| + | </pre> | ||
| − | + | Example: | |
| − | |||
| − | |||
| − | |||
| − | |||
| − | + | <pre> | |
| − | + | <Dragonbones Sprite Time Scale: 1.5> | |
| − | + | </pre> | |
| − | |||
| − | |||
| − | + | <hr> | |
| − | |||
| − | |||
| − | |||
| − | + | <pre> | |
| + | <Dragonbones Sprite Size: width, height> | ||
| − | + | <Dragonbones Sprite Width: x> | |
| − | + | <Dragonbones Sprite Height: x> | |
| − | |||
| − | |||
| − | + | - Used for: Actor, Enemy Notetags | |
| − | + | - Dragonbones armatures have no standard width or height. This makes it | |
| − | + | problematic when trying to calculate the sprite's width/height for various | |
| − | + | plugins that use it. These notetags allow you to assign a width and | |
| − | + | height value to the sprite, despite the fact the Dragonbones armatures | |
| − | - - - | + | have no such thing. |
| − | + | - Replace 'width', 'height', or 'x' with number values representing the | |
| − | + | dimension values in pixels. | |
| + | - Use the 1st notetag to assign values to both Width and Height. | ||
| + | - Use the 2nd/3rd notetags to assign Width and Height values separately. | ||
| + | - If these notetags aren't used, then use the values defined by default in | ||
| + | the Plugin Parameters. | ||
| + | </pre> | ||
| − | + | Examples: | |
| − | |||
| − | < | + | <pre> |
| − | + | <Dragonbones Sprite Size: 48, 64> | |
| − | |||
| − | + | <Dragonbones Sprite Width: 48> | |
| − | + | <Dragonbones Sprite Height: 64> | |
| − | </ | + | </pre> |
| − | |||
| − | |||
| − | |||
<hr> | <hr> | ||
| − | + | <pre> | |
| + | <Dragonbones Sprite Flip Left> | ||
| + | <Dragonbones Sprite Flip Right> | ||
| − | + | <Dragonbones Sprite No Flip Left> | |
| + | <Dragonbones Sprite No Flip Right> | ||
| − | + | - Used for: Actor, Event Notetags and Event Page Comment Tags | |
| − | + | - Lets the map sprite know to flip itself when facing either the left/right | |
| − | + | directions in order to reuse animations. | |
| − | + | - The 'No' variants will prevent flipping from occuring. | |
| − | </ | + | - These notetags will override settings applied in the Plugin Parameters. |
| + | </pre> | ||
| − | + | <hr> | |
| − | + | <pre> | |
| − | + | <Dragonbones Sprite Motion Idle: animation> | |
| + | <Dragonbones Sprite Motion Walk: animation> | ||
| + | <Dragonbones Sprite Motion Dash: animation> | ||
| + | <Dragonbones Sprite Motion Jump: animation> | ||
| + | <Dragonbones Sprite Motion LadderIdle: animation> | ||
| + | <Dragonbones Sprite Motion LadderClimb: animation> | ||
| − | Actor, | + | - Used for: Actor, Event Notetags and Event Page Comment Tags |
| + | - Lets you set specific animations different from the ones listed in the | ||
| + | Plugin Parameters for specific motions. | ||
| + | - Replace 'animation' with the name of the Dragonbones animation. | ||
| + | - If this notetag is not used, when such a motion is rquested, it will | ||
| + | default to attempting to play the animation name equal to the motion. | ||
| + | - Animation names do not need to be case sensitive. | ||
| + | - If no animation is found, then no animation will be played. | ||
| + | </pre> | ||
| − | + | Example: | |
| − | |||
| − | |||
| − | |||
| − | |||
| − | |||
| − | |||
| − | |||
| − | + | <pre> | |
| − | + | <Dragonbones Sprite Motion Idle: stand> | |
| − | + | <Dragonbones Sprite Motion Walk: move> | |
| − | + | <Dragonbones Sprite Motion Dash: run> | |
| − | + | <Dragonbones Sprite Motion Jump: hop> | |
| − | + | </pre> | |
| − | + | <hr> | |
| − | |||
| − | |||
| − | |||
| − | |||
| − | |||
| − | |||
| − | |||
| − | |||
| − | + | <pre> | |
| + | <Dragonbones Sprite Settings> | ||
| + | Filename: filename | ||
| − | + | Scale: x, y | |
| − | |||
| − | |||
| − | + | Scale X: x | |
| + | Scale Y: x | ||
| − | + | Time Scale: x | |
| − | + | ||
| − | + | Width: x | |
| + | Height: x | ||
| − | + | Flip Left | |
| − | + | Flip Right | |
| − | |||
| − | + | No Flip Left | |
| − | + | No Flip Right | |
| − | + | Motion Idle: animation | |
| − | + | Motion Walk: animation | |
| + | Motion Dash: animation | ||
| + | Motion Jump: animation | ||
| + | Motion LadderIdle: animation | ||
| + | Motion LadderClimb: animation | ||
| + | </Dragonbones Sprite Settings> | ||
| − | + | - Used for: Actor, Event Notetags and Event Page Comment Tags | |
| − | + | - The above notetag allows to wrap up all the information you'd like to | |
| + | set for Dragonbones battler armatures needed inside a single notetag | ||
| + | container. | ||
| + | - The settings are the same as the notetags listed above it. | ||
| + | - You may remove the settings you don't wish to change. | ||
| + | - The only necessary data is the 'Filename: filename' line. | ||
| + | </pre> | ||
| − | + | Example: | |
| − | |||
| − | |||
| − | + | <pre> | |
| − | + | <Dragonbones Sprite Settings> | |
| + | Filename: Ubbie | ||
| + | Scale: 0.1, 0.1 | ||
| + | Flip Right | ||
| + | Motion Idle: stand | ||
| + | Motion Walk: walk | ||
| + | </Dragonbones Sprite Settings> | ||
| + | </pre> | ||
| − | + | <hr> | |
| − | |||
| − | + | == [[Element Core (YEP)|Element Core]] == | |
| − | |||
| − | + | <nowiki> | |
| − | + | Use these notetags if you wish to modify various aspects of elements for | |
| + | your database objects. | ||
| − | + | Skill and Item Notetags | |
| − | |||
| − | |||
| − | |||
| − | |||
| − | |||
| − | < | + | <Bypass Element Reflect> |
| − | + | - Allows this skill/item to ignore elemental reflect properties. This will | |
| − | + | not bypass reflect properties as a whole, however. | |
| − | |||
| − | |||
| − | |||
| − | < | + | <Multiple Elements: x> |
| − | + | <Multiple Elements: x to y> | |
| − | + | <Multiple Elements: x, x, x> | |
| − | + | <Multiple Elements: name, name, name> | |
| − | + | - This adds elements x (or name) to the skill/item in addition to the | |
| − | + | skill/item's current element. Skills and items with multiple elements will | |
| + | follow the Multi-Element Rule when calculating damage rate. Insert more of | ||
| + | this notetag to insert more elements. | ||
| − | --- | + | <Multi-Element Rule: Lowest> |
| + | <Multi-Element Rule: Add> | ||
| + | <Multi-Element Rule: Multiply> | ||
| + | <Multi-Element Rule: Highest> | ||
| + | <Multi-Element Rule: Average> | ||
| + | - This allows you to set the rule for this skill/item if it has multiple | ||
| + | elements. Either the lowest rate, the additive sum of all rates, the | ||
| + | multiplicative product of all rates, or the highest rate will be used. If | ||
| + | average is used, it will be the average of all element rates. | ||
| − | + | Actor, Class, Enemy, Weapon, Armor, and State Notetags: | |
| − | |||
| − | |||
| − | < | + | <Element Absorb: x> |
| − | This will | + | <Element Absorb: x, x, x> |
| − | + | <Element Absorb: name> | |
| + | <Element Absorb: name, name, name> | ||
| + | - Causes element x to be absorbed and heals the battler. When an element | ||
| + | is absorbed, the rate goes down by 200% instead of being just an inverse. | ||
| + | This is so that battlers that are originally resistant to the element will | ||
| + | absorb more of the element while battlers that are originally vulnerable | ||
| + | to the element will absorb less of the element. The minimum amount | ||
| + | absorbed is 0.01%. | ||
| − | < | + | <Element Reflect x: +y%> |
| − | + | <Element Reflect x: -y%> | |
| − | + | <Element Reflect name: +y%> | |
| − | + | <Element Reflect name: -y%> | |
| + | - Increases or decreases the rate to reflect element x by y%. If a skill | ||
| + | or item has multiple elements, the reflect rate is added for each element | ||
| + | used by the skill/item. | ||
| − | < | + | <Element Magnify x: +y%> |
| − | + | <Element Magnify x: -y%> | |
| − | + | <Element Magnify name: +y%> | |
| − | + | <Element Magnify name: -y%> | |
| + | - If the user performs a skill or item that utilizes element x (or name), | ||
| + | increase or decrease its damage by y%. If a skill or item has multiple | ||
| + | elements, the rate is increased additively for each element and adjusted | ||
| + | multiplicatively with base rate. This bottoms out at 0%. | ||
| − | < | + | <Element Amplify x: +y%> |
| − | + | <Element Amplify x: -y%> | |
| − | + | <Element Amplify name: +y%> | |
| + | <Element Amplify name: -y%> | ||
| + | - If the user performs a skill or item that utilizes element x (or name), | ||
| + | increase or decrease its damage by y%. If a skill or item has multiple | ||
| + | elements, the rate is increased additively for each element and adjusted | ||
| + | additively for base rate. | ||
| − | < | + | <Element Null> |
| − | This will | + | - This will cause the battler to not have elemental attacks when using |
| − | + | skills and items. However, this will not bypass the 'Force Element' action | |
| + | sequence effect. | ||
| − | < | + | <Force Element x Rate: y%> |
| − | This | + | <Force Element name Rate: y%> |
| − | a | + | - This forces the battler's elemental rate for x (or named) to be y%. This |
| − | + | will work in a priority setting of states (highest priority to lowest), | |
| − | + | equips (first to last), then class, then actor/enemy if more than one | |
| − | + | notetag is used for the same element. If y is negative, the element is | |
| − | + | absorbed. | |
| − | |||
| − | |||
</nowiki> | </nowiki> | ||
| − | + | == [[Enemy Levels (YEP)|Enemy Levels]] == | |
| − | |||
<nowiki> | <nowiki> | ||
| − | You can use | + | You can use these notetags to adjust how enemy levels are handled |
| − | + | individually per enemy. | |
| − | + | Enemy Notetags: | |
| − | + | <Show Level> | |
| + | <Hide Level> | ||
| + | This will cause the enemy to show or hide its level upon target selection. | ||
| − | < | + | <Minimum Level: x> |
| − | + | <Maximum Level: x> | |
| − | + | This sets the enemy's minimum and maximum levels respectively to x. This | |
| + | will cause the enemy, upon the start of battle, to adjust levels within | ||
| + | this particular range. Any skills that alter enemy levels are able to | ||
| + | bypass these limits unless if it were to bypass the maximum cap. | ||
| − | < | + | <Static Level: x> |
| − | + | This sets the enemy's starting level to exactly x. This will cause the | |
| + | enemy, upon the start of battle, to adjust levels within this particular | ||
| + | range. Any skills that alter enemy levels are able to bypass these limits | ||
| + | unless if it were to bypass the maximum cap. | ||
| − | < | + | <Starting Level Type: x> |
| − | + | This sets the enemy's starting level type to x from 0 to 5. Refer to the | |
| − | + | 'Default Level Types' party of the Help File. | |
| − | |||
| − | |||
| − | < | + | <Positive Level Fluctuation: x> |
| − | This | + | <Negative Level Fluctuation: x> |
| − | is | + | This sets the positive/negative level fluctuation for the enemy. Any level |
| + | fluctuation is calculated at the start of battle, but after the starting | ||
| + | level type has been determined. | ||
| − | < | + | <Level Fluctuation: x> |
| − | This | + | This sets both the positive and negative level fluctuation for the enemy |
| − | + | to x. Any level fluctuation is calculated at the start of battle, but | |
| + | after the starting level type has been determined. | ||
| − | + | <stat Rate: +x% per level> | |
| − | + | <stat Rate: -x% per level> | |
| + | <stat Rate: +x.y per level> | ||
| + | <stat Rate: -x.y per level> | ||
| + | Replace 'stat' with 'maxhp', 'maxmp', 'atk', 'def', 'mat', 'mdf', 'agi', | ||
| + | 'luk', 'exp', or 'gold'. This will set this enemy to have an increase or | ||
| + | decrease of x% rate per level. If you use the x.y formula, it will have a | ||
| + | rate increase of +x.y or -x.y per level. | ||
| − | --- | + | <stat Flat: +x per level> |
| + | <stat Flat: -x per level> | ||
| + | <stat Flat: +x.y per level> | ||
| + | <stat Flat: -x.y per level> | ||
| + | Replace 'stat' with 'maxhp', 'maxmp', 'atk', 'def', 'mat', 'mdf', 'agi', | ||
| + | 'luk', 'exp', or 'gold'. This will set this enemy to have an increase or | ||
| + | decrease of flat x value per level. If you use the x.y formula, it will | ||
| + | have a flat increase of +x.y or -x.y per level. | ||
| − | < | + | <Resist Level Change> |
| − | This will | + | This will cause the enemy to be immune to any form of level changing |
| − | + | through skills and items. However, the enemy is not immune to any level | |
| − | + | changing through script calls. | |
| − | < | + | <Skill x Require Level: y> |
| − | + | <Skill name Require Level: y> | |
| − | + | If this enemy is to use skill x (or named skill), it must be at least | |
| − | will | + | level y to be able to use it. If the enemy is under level y, the skill |
| + | will be sealed and cannot be used. | ||
| − | < | + | <Ignore Level Bonus> |
| − | This will | + | This will cause the enemy to ignore all the stat changes added by levels |
| − | + | and use its base stats as its current level stats. Any changes to its | |
| − | + | current level will not alter the enemy's stats. | |
| − | + | Skill and Item Notetags: | |
| − | |||
| − | |||
| − | |||
| − | |||
| − | < | + | <Reset Enemy Level> |
| − | This will | + | This will reset the target enemy's level back to what it was at the start |
| − | + | of battle. | |
| − | < | + | <Change Enemy Level: +x> |
| − | + | <Change Enemy Level: -x> | |
| − | + | If this action is used against an enemy, it will change the enemy's level | |
| + | by +x or -x. If an action contains both a reset and level change, the | ||
| + | reset will occur first before the level change. | ||
| + | </nowiki> | ||
| − | + | === [[Difficulty Slider (YEP)|Difficulty Slider]] === | |
| − | + | <hr> | |
| − | + | <nowiki> | |
| + | There is a notetag you can use for the Difficulty Slider plugin. | ||
| − | + | Enemy Notetag: | |
| − | |||
| − | |||
| − | |||
| − | < | + | <Unaffected by Difficulty Slider> |
| − | This will | + | - This will make the enemy's level unaffected by the difficulty slider, |
| − | + | meaning the enemy will always be at 100% its current calculated level. | |
| + | </nowiki> | ||
| − | + | === [[Enemy Base Parameters (YEP)|Enemy Base Parameters]] === | |
| + | <hr> | ||
| − | + | <nowiki> | |
| + | You can use this notetag to base an enemy's stats on a class. | ||
| − | + | Enemy Notetag: | |
| − | |||
| − | < | + | <Base Parameters on Class: x> |
| − | + | - This will base all parameters except for 'exp' and 'gold' on class x. | |
| − | + | * Note: This will take priority over the custom enemy parameters. | |
| − | |||
| − | |||
| − | |||
| − | < | + | <Base stat Parameter on Class: x> |
| − | + | - This will base the specific 'stat' parameter on class x. Replace 'stat' | |
| − | This will | + | with 'maxhp', 'maxmp', 'atk', 'def', 'mat', 'mdf', 'agi', or 'luk'. |
| − | + | * Note: This will take priority over the custom enemy parameters. | |
</nowiki> | </nowiki> | ||
| − | === [[ | + | === [[Map Enemy Levels (YEP)|Map Enemy Levels]] === |
<hr> | <hr> | ||
| − | + | <pre> | |
| + | Insert the following notetags into your map's notebox to set the desired | ||
| + | enemy level settings. | ||
| + | |||
| + | Map Notetags: | ||
| + | |||
| + | <Enemy Level Base: x> | ||
| + | - Replace 'x' with the static base level to set for the enemies encountered | ||
| + | on the map. Positive and negative level fluctuations from YEP_EnemyLevels | ||
| + | will be applied after. | ||
| + | |||
| + | <Enemy Level Base Variable: x> | ||
| + | - Replace 'x' with the variable whose value will determine the static base | ||
| + | level of the enemies encountered on the map. Positive and negative level | ||
| + | fluctuations from YEP_EnemyLevels will be applied after. | ||
| + | |||
| + | <Enemy Level Range: x to y> | ||
| + | - Replace 'x' with the minimum base level and 'y' with the maximum base | ||
| + | level for the enemies encountered on the map. Positive and negative level | ||
| + | fluctuations from YEP_EnemyLevels will be applied after. | ||
| + | |||
| + | <Enemy Level Range Variables: x to y> | ||
| + | - Replace 'x' with the variable whose value will determine the minimum base | ||
| + | level and 'y' with the variable whose value will determine the maximum base | ||
| + | level for the enemies encountered on the map. Positive and negative level | ||
| + | fluctuations from YEP_EnemyLevels will be applied after. | ||
| + | </pre> | ||
| + | |||
| + | == [[Enhanced TP (YEP)|Enhanced TP]] == | ||
<nowiki> | <nowiki> | ||
| − | + | You can use the following notetags to adjust the various settings for TP. | |
| − | the | + | |
| + | Actor and Enemy Notetags: | ||
| + | |||
| + | <TP Mode: x> | ||
| + | This will set the actor's default TP mode to x. If this notetag isn't used | ||
| + | then the actor will default to the mode within the plugin's parameters. | ||
| + | |||
| + | <Unlock TP Mode: x> | ||
| + | <Unlock TP Mode: x, x, x> | ||
| + | <Unlock TP Mode: x to y> | ||
| + | This unlocks what TP modes the actor can use by default. This tag will add | ||
| + | upon the default unlocks already preset in the plugin's parameters. | ||
Skill and Item Notetags: | Skill and Item Notetags: | ||
| − | < | + | <Unlock TP Mode: x> |
| − | This will | + | <Unlock TP Mode: x, x, x> |
| − | + | <Unlock TP Mode: x to y> | |
| − | + | This will cause the target to unlock TP mode x (to y). This will make the | |
| − | + | TP mode available in the TP menu. | |
| − | + | ||
| − | to | + | Skill Notetags: |
| − | + | ||
| − | + | <Learn Unlock TP Mode: x> | |
| − | + | <Learn Unlock TP Mode: x, x, x> | |
| − | + | <Learn Unlock TP Mode: x to y> | |
| + | When this skill is learned, unlock TP mode x (to y) in the process of also | ||
| + | learning it. This will make the TP mode available in the TP menu. | ||
| + | </nowiki> | ||
| − | + | == [[Equip Battle Skills (YEP)|Equip Battle Skills]] == | |
| − | |||
| − | |||
| − | |||
| − | |||
| − | + | <nowiki> | |
| − | + | The following notetags adjust various aspects about equippable battle skills. | |
| − | |||
| − | |||
| − | |||
| − | |||
| − | |||
| − | |||
| − | |||
| − | + | Actor Notetag: | |
| − | < | + | <Starting Skill Slots: x> |
| − | + | This sets the actor's starting skill slots to x amount. This value will | |
| − | + | not allow the actor to bypass the Maximum Skills limit. | |
| − | |||
| − | |||
| − | + | Skill Notetags: | |
| − | + | <Equip stat: +x> | |
| − | + | <Equip stat: -x> | |
| − | + | Replace 'stat' with 'HP', 'MP', 'ATK', 'DEF', 'MAT', 'MDF', 'AGI', or | |
| − | + | 'LUK' to have that stat increase or decrease by x amount while the skill | |
| + | is equipped for battle. | ||
| − | + | <Equip State: x> | |
| + | <Equip State: x, x, x> | ||
| + | <Equip State: x through x> | ||
| + | This causes the actor to be affected by state x while the skill is | ||
| + | equipped for battle. | ||
| − | < | + | <Unequippable> |
| − | + | This skill cannot be equipped no matter what. | |
| − | |||
| − | < | + | <All Access Equippable> |
| − | + | This makes the skill equippable whether the actor has the available skill | |
| − | + | type needed for the skill or not. | |
| − | This | ||
| − | |||
| − | |||
| − | |||
| − | < | + | <Access Only Equippable> |
| − | + | This makes the skill equippable only for actors with the specific skill | |
| − | + | type. Actors without access to the skill type cannot equip it. | |
| − | |||
| − | < | + | Class, Skill, Weapon, Armor, and State Notetags: |
| − | < | + | <Equip Skill Slots: +x> |
| − | This | + | <Equip Skill Slots: -x> |
| − | the | + | This increases or decreases the amount of skills the actor can equip for |
| − | + | battle by x. This value will not allow the actor to bypass the Maximum | |
| − | + | Skills Limit. | |
| + | </nowiki> | ||
| − | + | === [[Equip Skill Tiers (YEP)|Equip Skill Tiers]] === | |
| − | + | <hr> | |
| − | |||
| − | |||
| − | |||
| − | |||
| − | + | <nowiki> | |
| − | + | The following are notetags that alter the tier settings of skills. | |
| − | |||
| − | |||
| − | |||
| − | |||
| − | < | + | Skill Notetag |
| − | + | <Skill Tier: x> | |
| − | + | Sets the skill's tier to x, making it limited by the restrictions applied | |
| − | + | by the actor. | |
| − | |||
| − | |||
| − | Weapon and | + | Actor, Class, Skill, Weapon, Armor, and State Notetags |
| − | + | <Skill Tier x Slots: +y> | |
| − | < | + | <Skill Tier x Slots: -y> |
| − | + | Increases or decreases the skill tier for tier x by y slots. The changes | |
| − | + | made here do not go under 0 nor do they bypass the maximum battle skills | |
| − | + | equip limit. | |
| − | |||
| − | |||
| − | |||
| − | |||
| − | |||
| − | |||
| − | |||
| − | |||
</nowiki> | </nowiki> | ||
| − | + | == [[Equip Core (YEP)|Equip Core]] == | |
<nowiki> | <nowiki> | ||
| − | + | You can use the following notetags to change a class's equipment setup. | |
| − | following | + | |
| + | Class Notetags: | ||
| + | <Equip Slot: x> Example: <Equip Slot: 1, 2, 3, 4, 5, 5, 5, 5> | ||
| + | <Equip Slot: x, x, x> | ||
| + | Changes this class's equipment slots to x. Using repeating numbers makes | ||
| + | it so that equipment type is duplicated and that the class can equip | ||
| + | multiple equipment of that type. To find the Equipment Type ID, go to your | ||
| + | database's Types tab and look for the ID type. | ||
| − | + | If you don't like the above method for setting equipment slots, you can | |
| + | use the following notetags instead: | ||
| − | + | <Equip Slot> Example: <Equip Slot> | |
| + | string Weapon | ||
| + | string Armor | ||
| + | string Accessory | ||
| + | string Accessory | ||
| + | </Equip Slot> </Equip Slot> | ||
| + | Replace 'string' with the Equipment type's name entry. This is case | ||
| + | sensitive so if the string does not match a name entry perfectly, the slot | ||
| + | will not be granted to the class. Multiple copies of a name entry would | ||
| + | mean the class can equip multiple equipment of that type. Everything works | ||
| + | the same as the previous notetag. | ||
| − | < | + | Weapon and Armor Notetags: |
| − | + | <stat: +x> | |
| − | + | <stat: -x> | |
| − | < | + | Allows the piece of weapon or armor to gain or lose x amount of stat. |
| − | Replace | + | Replace "stat" with "hp", "mp", "atk", "def", "mat", "mdf", "agi", or |
| − | + | "luk" to alter that specific stat. This allows the piece of equipment | |
| − | + | to go past the editor's default limitation so long as the maximum value | |
| − | + | allows for it. Changes made here alter the base parameters. | |
| − | + | </nowiki> | |
| − | + | === [[Change Battle Equip (YEP)|Change Battle Equip]] === | |
| + | <hr> | ||
| − | + | <nowiki> | |
| + | Use the following notetags to alter how the Change Battle Equip command | ||
| + | functions for your actors in battle. | ||
| − | + | Actor, Class, Weapons, Armors, and State Notetags: | |
| − | + | <Change Battle Equip Cooldown: +x> | |
| − | - | + | <Change Battle Equip Cooldown: -x> |
| − | + | Increases or decreases the number of turns an actor has to wait in battle | |
| − | + | before the actor can change equips again by x amount. | |
| − | - | + | <Disable Change Battle Equip> |
| + | This will disable the ability to change equipment mid-battle for the | ||
| + | related actor. | ||
| + | </nowiki> | ||
| − | + | === [[Equip Requirements (YEP)|Equip Requirements]] === | |
| − | + | <hr> | |
| − | |||
| − | |||
| − | |||
| − | |||
| − | + | <nowiki> | |
| + | You can use these notetags to implement requirements onto your weapons and | ||
| + | armors. These notetags will have to be set up in a certain way: | ||
| − | + | Weapon and Armor Notetags: | |
| − | |||
| − | |||
| − | |||
| − | |||
| − | |||
| − | - | + | <Equip Requirement> |
| + | requirement | ||
| + | requirement | ||
| + | </Equip Requirement> | ||
| + | - The main requirements will have to be placed in between these notetags. | ||
| + | You can have a multitude of requirements for your weapons/armors. Replace | ||
| + | 'requirement' with any of the following below: | ||
| − | Weapon | + | Weapon and Armor Requiprements: |
| − | |||
| − | |||
| − | |||
| − | |||
| − | - | + | param > x |
| + | param >= x | ||
| + | param === x | ||
| + | param <= x | ||
| + | param < x | ||
| + | - Replace 'param' with 'level', 'maxhp', 'maxmp', 'atk', 'def', 'mat', | ||
| + | 'mdf', 'agi', or 'luk'. This will make the piece of equipment require the | ||
| + | actor's base parameter to be greater than (>), greater than or equal to | ||
| + | (>=), equal to (===), less than or equal to (<=), or less than (<). This | ||
| + | is NOT the value for the total parameter, only the base parameter. The | ||
| + | base parameter is calculated by the user's class parameter value, any | ||
| + | bonuses received by equipment and/or permanent stat increases. | ||
| − | + | class: x | |
| − | - | + | class: name |
| − | + | - This will make the piece of equipment require the actor to be class x. | |
| − | + | If 'name' is used, priority will be given to the class with the highest ID | |
| − | + | in the database. Insert multiple of these requirements to add more | |
| + | classes. Having multiple classes will mean that the actor can be any of | ||
| + | those classes to be able to equip the gear. | ||
| − | --- | + | skill: x |
| + | skill: name | ||
| + | - This will make the piece of equipment require the actor to have learned | ||
| + | skill x. If 'name' is used, priority will be given to the skill with the | ||
| + | highest ID in the database. Insert multiple of these requirements to add | ||
| + | more skills. Having multiple skills means the actor must have learned ALL | ||
| + | of the skills to be able to equip the gear. | ||
| + | *NOTE: The actor needs to have LEARNED the skill. This means that if you | ||
| + | have added a skill to the actor's skill library through a trait, it will | ||
| + | not count. | ||
| + | |||
| + | switch: x | ||
| + | - This will require switch X to be on. If it isn't, the piece of equipment | ||
| + | cannot be worn. Insert multiple of these to add more switches that are | ||
| + | are required to be on. | ||
| + | |||
| + | unique only | ||
| + | - This will make the piece of equipment to be "unique", rendering the | ||
| + | actor to be unable to wear more than 1 of its kind. | ||
| + | </nowiki> | ||
| + | |||
| + | == [[Equipment Set Bonuses (Olivia)|Equipment Set Bonuses]] == | ||
| + | |||
| + | <html><img src='https://img.itch.zone/aW1hZ2UvMzU5MjY0LzE3OTUyODMucG5n/original/XTaQPZ.png'></html> | ||
| + | |||
| + | <html><img src='https://img.itch.zone/aW1nLzE3OTUyNzgucG5n/original/FwjBYu.png'></html> | ||
| + | |||
| + | <pre> | ||
| + | Weapon and Armor Notetags: | ||
| + | |||
| + | <Equip Set: name> | ||
| + | This assigns this item to an equipment set. | ||
| + | - 'name' is the set name you're going to associate this equip with. | ||
| + | |||
| + | If you want to make a piece of equipment be a part of two different equipment | ||
| + | sets, use multiple copies of the <Equip Set: name> notetag. | ||
| + | </pre> | ||
| + | |||
| + | <html><img src='https://img.itch.zone/aW1nLzE3OTUyODAucG5n/original/pfc7i2.png'></html> | ||
| + | |||
| + | <pre> | ||
| + | Actor Notetags: | ||
| + | |||
| + | <name Set, x Pieces Character: filename, index> | ||
| + | This changes the character sprite, aka the map sprite, for this actor. | ||
| + | - 'name' is the set name that is associated with this graphic change. | ||
| + | - 'x' is to be replaced by a number. This is the minimum required pieces. | ||
| + | - 'filename' is the filename of the graphic. IMPORTANT: Case sensitive. | ||
| + | - 'index' is to be replaced by a number. This is the index number of the | ||
| + | graphic starting from 0 as the first slot. | ||
| + | |||
| + | <name Set, x Pieces Face: filename, index> | ||
| + | This changes the face art for the actor. | ||
| + | - 'name' is the set name that is associated with this graphic change. | ||
| + | - 'x' is to be replaced by a number. This is the minimum required pieces. | ||
| + | - 'filename' is the filename of the graphic. IMPORTANT: Case sensitive. | ||
| + | - 'index' is to be replaced by a number. This is the index number of the | ||
| + | graphic starting from 0 as the first slot. | ||
| + | |||
| + | <name Set, x Pieces Battler: filename> | ||
| + | This changes the sideview battler sprite for this actor. | ||
| + | - 'name' is the set name that is associated with this graphic change. | ||
| + | - 'x' is to be replaced by a number. This is the minimum required pieces. | ||
| + | - 'filename' is the filename of the graphic. IMPORTANT: Case sensitive. | ||
| + | |||
| + | To make different sets of graphics per set, add multiples of the above | ||
| + | notetags for each actor. This effect may or may not be compatible with other | ||
| + | plugins that alter the appearance of your actors. | ||
| + | </pre> | ||
| + | |||
| + | == [[Event Click Trigger (YEP)|Event Click Trigger]] == | ||
| − | + | <nowiki> | |
| − | + | To make an event click triggerable from anywhere on the screen, use either | |
| − | + | notetags or comment tags to enable them to become clickable. If a notetag is | |
| − | + | used, then this will apply to the whole event, no matter what page it is. If | |
| + | only comment tags are used, it will only apply to that specific event page. | ||
| − | + | Event Notetag and Comment Tags | |
| − | + | <Click Trigger> | |
| − | - | + | - This will cause the event to be clickable from afar without needing the |
| − | in | + | player to walk all the way up in front of it to trigger it. |
| − | + | </nowiki> | |
| − | + | == [[Event Copier (YEP)|Event Copier]] == | |
| − | + | <nowiki> | |
| − | + | To decide if an event will copy from a template map, please follow these | |
| − | + | instructions below and insert the desired notetag into the event's notebox. | |
| − | |||
| − | |||
| − | |||
| − | |||
| − | |||
| − | |||
| − | --- | + | - - - - - - - - - - - - - - - - - - - - - - - - - - - - - - - - - - - - - - |
| + | Event Notetags: | ||
| + | - - - - - - - - - - - - - - - - - - - - - - - - - - - - - - - - - - - - - - | ||
| − | State: x | + | <Copy Event: Map x, Event y> |
| − | State: name | + | - Replace 'x' with the ID of the map to copy the event from. |
| − | - The target must have state 'x' in order to be selected as a valid target. | + | - Replace 'y' with the ID of the event to copy from that map. |
| − | If you're using the named version of the condition and you have multiple | + | |
| − | states with the same name in your database, priority will be given to the | + | - - - |
| + | |||
| + | <Copy Event: mapId, eventId> | ||
| + | - Replace 'mapId' with the ID of the map to copy the event from. | ||
| + | - Replace 'eventId' with the ID of the event to copy from that map. | ||
| + | |||
| + | - - - | ||
| + | |||
| + | <Copy Event: template> | ||
| + | - Replace 'template' with a name from the 'Template Names' plugin param. | ||
| + | This will require you to have version 1.5.0+ of RPG Maker MV. All of the | ||
| + | Map ID and event ID data from the stored template will be used for this | ||
| + | event. This notetag will also have the bonus of having custom Lunatic | ||
| + | Code unique only to this template name. | ||
| + | |||
| + | - - - | ||
| + | |||
| + | When an event is copied, all data will be carried over, from the name of the | ||
| + | map, to the graphics used, to the pages, their conditions, and all of the | ||
| + | event commands. The only things that will NOT be copied over will be the | ||
| + | original event's ID, x positon, and y position. | ||
| + | </nowiki> | ||
| + | |||
| + | == [[Event Encounter Aid (YEP)|Event Encounter Aid]] == | ||
| + | |||
| + | <nowiki> | ||
| + | You can place these notetags into the notebox at the top of an event's page. | ||
| + | These notetags will enable unique effects for event encounters. | ||
| + | |||
| + | Event Notetag: | ||
| + | |||
| + | <Encounter Lock> | ||
| + | <Encounter Direction Lock> | ||
| + | - This will cause the event to not immediately face the player when | ||
| + | approached making it possible for the game to check the direction each is | ||
| + | facing. | ||
| + | |||
| + | <Follower Touch> | ||
| + | <Follower Trigger> | ||
| + | - This will allow the event to trigger if the event touches a follower and | ||
| + | not just the main player. | ||
| + | </nowiki> | ||
| + | |||
| + | == [[Event Hitbox Resize (YEP)|Event Hitbox Resize]] == | ||
| + | |||
| + | <nowiki> | ||
| + | To make an event's hitbox larger, use either notetags or comment tags to | ||
| + | apply the hitbox enlargement. If a notetag is used, this will apply to the | ||
| + | event no matter what the page is. If a comment tag is used, it will | ||
| + | overwrite whatever setting the notetags have. | ||
| + | |||
| + | Event Notetag and Comment Tags: | ||
| + | |||
| + | <Hitbox Up: x> | ||
| + | <Hitbox Left: x> | ||
| + | <Hitbox Right: x> | ||
| + | <Hitbox Down: x> | ||
| + | - This will expand the hitbox upward, left, right, or down by x. The value | ||
| + | inserted for x will extend the hitbox that direction by that many tiles. | ||
| + | If any of these notetags are used, it will make the event immobile, unable | ||
| + | to move unless the movement type is set to "Through", allowing it to pass | ||
| + | through anything. | ||
| + | </nowiki> | ||
| + | |||
| + | == [[Event Sprite Offset (YEP)|Event Sprite Offset]] == | ||
| + | |||
| + | <nowiki> | ||
| + | To offset sprites using the event notetags, using the following below: | ||
| + | |||
| + | Event Notetags: | ||
| + | |||
| + | <Sprite Offset X: +n> | ||
| + | <Sprite Offset X: -n> | ||
| + | - Replace 'n' with the number of pixels you wish to offset the horizontal | ||
| + | position of the sprite by. A positive number moves the sprite to the | ||
| + | right. A negative number moves the sprite to the left. | ||
| + | |||
| + | <Sprite Offset Y: +n> | ||
| + | <Sprite Offset Y: -n> | ||
| + | - Replace 'n' with the number of pixels you wish to offset the vertical | ||
| + | position of the sprite by. A positive number moves the sprite down. A | ||
| + | negative number moves the sprite up. | ||
| + | |||
| + | <Sprite Offset: +x, +y> | ||
| + | <Sprite Offset: -x, -y> | ||
| + | - If you wish to put sprite offset information on one line, use the above | ||
| + | comment tag instead. Replace 'x' and 'y' with the values to offset the | ||
| + | sprite by. Positive x will move the sprite right. Negative x will move the | ||
| + | sprite left. Positive y will move the sprite down. Negative y will move | ||
| + | the sprite up. | ||
| + | </nowiki> | ||
| + | |||
| + | == [[Event Step Animation Options (YEP)|Event Step Animation Options]] == | ||
| + | |||
| + | <pre> | ||
| + | To offset sprites using the event notetags, using the following below: | ||
| + | |||
| + | Event Notetags: | ||
| + | |||
| + | <Step Animation: Left to Right> | ||
| + | - Makes the event sprite's step behavior go from frame 0 to 1 to 2, then | ||
| + | back to 0 instead of looping backwards. | ||
| + | |||
| + | <Step Animation: Right to Left> | ||
| + | - Makes the event sprite's step behavior go from frame 2 to 1 to 0, then | ||
| + | back to 2 instead of looping forwards. | ||
| + | |||
| + | <Step Animation: Spin Clockwise> | ||
| + | <Step Animation: Spin CW> | ||
| + | - Makes the event sprite's step behavior spin itself clockwise. | ||
| + | |||
| + | <Step Animation: Spin CounterClockwise> | ||
| + | <Step Animation: Spin CCW> | ||
| + | <Step Animation: Spin AntiClockwise> | ||
| + | <Step Animation: Spin ACW> | ||
| + | - Makes the event sprite's step behavior spin itself counterclockwise. | ||
| + | </pre> | ||
| + | |||
| + | == [[Extra Enemy Drops (YEP)|Extra Enemy Drops]] == | ||
| + | |||
| + | ; Generic Drop | ||
| + | |||
| + | <nowiki> | ||
| + | Use the following notetags to determine extra enemy drops. These drops will | ||
| + | drop normally without any special conditions other than having to go through | ||
| + | and pass a random number generator. | ||
| + | |||
| + | Enemy Notetags: | ||
| + | <Item x: y%> | ||
| + | <Weapon x: y%> | ||
| + | <Armor x: y%> | ||
| + | Adds item, weapon, or armor ID of x to the enemy's drop pool with a y% | ||
| + | chance of dropping the item. Insert multiples of this notetag to add more | ||
| + | drop items for the enemy drop pool. | ||
| + | |||
| + | <Enemy Drops> | ||
| + | Item x: y% | ||
| + | Weapon x: y% | ||
| + | Armor x: y% | ||
| + | </Enemy Drops> | ||
| + | Alternatively, using the above notetag format will allow you to group a | ||
| + | large number of enemy drops together. Replace x with the item, weapon, or | ||
| + | armor ID to give the item a drop rate of y%. | ||
| + | |||
| + | <Drop Potion: x%> | ||
| + | <Drop Short Sword: x%> | ||
| + | <Drop Feather Cap: x%> | ||
| + | If you prefer to use names instead, you can use the above format for the | ||
| + | notetags. This will make the named item have a drop rate of x%. If you | ||
| + | have multiple items in your database with the same name, priority will be | ||
| + | given to the item with the highest ID in the order of item, weapons, then | ||
| + | armors. Insert multiple multiples of this notetag to add more drop items | ||
| + | for the enemy drop pool. | ||
| + | |||
| + | <Enemy Drops> | ||
| + | Potion: x% | ||
| + | Short Sword: x% | ||
| + | Feather Cap: x% | ||
| + | </Enemy Drops> | ||
| + | Alternatively, you can write your notetag like such to group together a | ||
| + | list of named items. This will make the named item have a drop rate of x%. | ||
| + | If you have multiple items in your database with the same name, priority | ||
| + | will be given to the item with the highest ID in the order of item, | ||
| + | weapons, then armors. Insert multiple multiples of this notetag to add | ||
| + | more drop items for the enemy drop pool. | ||
| + | </nowiki> | ||
| + | |||
| + | ; Conditional Drop | ||
| + | |||
| + | <nowiki> | ||
| + | Sometimes, you want certain conditions to be met before enemies will drop a | ||
| + | specific item. These conditional drops would have a 0% chance otherwise. For | ||
| + | each condition met, you can increase or decrease the drop rate. Use the | ||
| + | below format to create a conditional drop. | ||
| + | |||
| + | Enemy Notetags: | ||
| + | <Conditional Item x Drop> | ||
| + | condition: +y% | ||
| + | condition: -y% | ||
| + | </Conditional Item x Drop> | ||
| + | |||
| + | <Conditional Weapon x Drop> | ||
| + | condition: +y% | ||
| + | condition: -y% | ||
| + | </Conditional Weapon x Drop> | ||
| + | |||
| + | <Conditional Armor x Drop> | ||
| + | condition: +y% | ||
| + | condition: -y% | ||
| + | </Conditional Armor x Drop> | ||
| + | The above notetags will create the conditions for item, weapon, or armor x | ||
| + | to drop. Insert various conditions in between the notetags to produce the | ||
| + | conditional rate increases or decreases of y% for the drop. | ||
| + | |||
| + | <Conditional Named Drop> | ||
| + | condition: +y% | ||
| + | condition: -y% | ||
| + | </Conditional Named Drop> | ||
| + | If you prefer to name your drop, use the above format. If database entries | ||
| + | have matching names, priority will be given to the item with the highest | ||
| + | ID in the order of items, weapons, then armor. Insert various conditions | ||
| + | in between the notetags to produce the conditional rate increases or | ||
| + | decreases for y% for the drop. | ||
| + | |||
| + | The following are various conditions you may use: | ||
| + | |||
| + | =-=-=-=-=-=-=-=-=-=-=-=-=-=-=-=-=-=-=-=-=-=-=-=-=-=-=-=-=-=-=-=-=-=-=-=-=-=- | ||
| + | ALIVE MEMBERS EVAL | ||
| + | - - - - - - - - - - - - - - - - - - - - - - - - - - - - - - - - - - - - - - - | ||
| + | This checks the number of alive party members the player has when the drops | ||
| + | are being calculated and made and runs it against an eval check. | ||
| + | - - - - - - - - - - - - - - - - - - - - - - - - - - - - - - - - - - - - - - - | ||
| + | Example: Alive Members > 1: +20% | ||
| + | Alive Members === 2: +25% | ||
| + | Alive Members <= 3: -30% | ||
| + | =-=-=-=-=-=-=-=-=-=-=-=-=-=-=-=-=-=-=-=-=-=-=-=-=-=-=-=-=-=-=-=-=-=-=-=-=-=- | ||
| + | |||
| + | =-=-=-=-=-=-=-=-=-=-=-=-=-=-=-=-=-=-=-=-=-=-=-=-=-=-=-=-=-=-=-=-=-=-=-=-=-=- | ||
| + | ALWAYS | ||
| + | - - - - - - - - - - - - - - - - - - - - - - - - - - - - - - - - - - - - - - - | ||
| + | This condition will always pass. This can be used as setting a base rate for | ||
| + | the item drop. | ||
| + | - - - - - - - - - - - - - - - - - - - - - - - - - - - - - - - - - - - - - - - | ||
| + | Example: Always: +50% | ||
| + | =-=-=-=-=-=-=-=-=-=-=-=-=-=-=-=-=-=-=-=-=-=-=-=-=-=-=-=-=-=-=-=-=-=-=-=-=-=- | ||
| + | |||
| + | =-=-=-=-=-=-=-=-=-=-=-=-=-=-=-=-=-=-=-=-=-=-=-=-=-=-=-=-=-=-=-=-=-=-=-=-=-=- | ||
| + | item x COUNT EVAL | ||
| + | weapon x COUNT EVAL | ||
| + | armor x COUNT EVAL | ||
| + | named item COUNT EVAL | ||
| + | - - - - - - - - - - - - - - - - - - - - - - - - - - - - - - - - - - - - - - - | ||
| + | This checks the quantity of specific items, weapons, armors, and/or named | ||
| + | items you have. If you choose a named item and multiple database entries | ||
| + | share the name of that named item, priority will be given to the highest ID | ||
| + | in the order of items, weapons, and then armor. | ||
| + | - - - - - - - - - - - - - - - - - - - - - - - - - - - - - - - - - - - - - - - | ||
| + | Example: Item 1 Count > 1: +20% | ||
| + | Weapon 2 Count === 2: +25% | ||
| + | Armor 3 Count <= 3: -30% | ||
| + | Potion Count >= 4: +35% | ||
| + | =-=-=-=-=-=-=-=-=-=-=-=-=-=-=-=-=-=-=-=-=-=-=-=-=-=-=-=-=-=-=-=-=-=-=-=-=-=- | ||
| + | |||
| + | =-=-=-=-=-=-=-=-=-=-=-=-=-=-=-=-=-=-=-=-=-=-=-=-=-=-=-=-=-=-=-=-=-=-=-=-=-=- | ||
| + | DEAD MEMBERS EVAL | ||
| + | - - - - - - - - - - - - - - - - - - - - - - - - - - - - - - - - - - - - - - - | ||
| + | This checks the number of dead party members the player has when the drops | ||
| + | are being calculated and made and runs it against an eval check. | ||
| + | - - - - - - - - - - - - - - - - - - - - - - - - - - - - - - - - - - - - - - - | ||
| + | Example: Dead Members > 1: +20% | ||
| + | Dead Members === 2: +25% | ||
| + | Dead Members <= 3: -30% | ||
| + | =-=-=-=-=-=-=-=-=-=-=-=-=-=-=-=-=-=-=-=-=-=-=-=-=-=-=-=-=-=-=-=-=-=-=-=-=-=- | ||
| + | |||
| + | =-=-=-=-=-=-=-=-=-=-=-=-=-=-=-=-=-=-=-=-=-=-=-=-=-=-=-=-=-=-=-=-=-=-=-=-=-=- | ||
| + | DEATH TURN EVAL | ||
| + | - - - - - - - - - - - - - - - - - - - - - - - - - - - - - - - - - - - - - - - | ||
| + | This will run an eval check to compare the turn number the enemy has died. | ||
| + | This effect requires the Battle Engine Core. | ||
| + | - - - - - - - - - - - - - - - - - - - - - - - - - - - - - - - - - - - - - - - | ||
| + | Example: Death Turn > 5: +10% | ||
| + | Death Turn === 5: +20% | ||
| + | Death Turn <= 4: +30% | ||
| + | =-=-=-=-=-=-=-=-=-=-=-=-=-=-=-=-=-=-=-=-=-=-=-=-=-=-=-=-=-=-=-=-=-=-=-=-=-=- | ||
| + | |||
| + | =-=-=-=-=-=-=-=-=-=-=-=-=-=-=-=-=-=-=-=-=-=-=-=-=-=-=-=-=-=-=-=-=-=-=-=-=-=- | ||
| + | ENEMY LEVEL EVAL | ||
| + | - - - - - - - - - - - - - - - - - - - - - - - - - - - - - - - - - - - - - - - | ||
| + | This will run an eval check to compare the enemy's level. This effect | ||
| + | requires the YEP Enemy Levels plugin. | ||
| + | - - - - - - - - - - - - - - - - - - - - - - - - - - - - - - - - - - - - - - - | ||
| + | Example: Enemy Level === 10: +30% | ||
| + | Enemy Level <= 5: -20% | ||
| + | Enemy Level >= 15: +10% | ||
| + | =-=-=-=-=-=-=-=-=-=-=-=-=-=-=-=-=-=-=-=-=-=-=-=-=-=-=-=-=-=-=-=-=-=-=-=-=-=- | ||
| + | |||
| + | =-=-=-=-=-=-=-=-=-=-=-=-=-=-=-=-=-=-=-=-=-=-=-=-=-=-=-=-=-=-=-=-=-=-=-=-=-=- | ||
| + | EVAL code | ||
| + | - - - - - - - - - - - - - - - - - - - - - - - - - - - - - - - - - - - - - - - | ||
| + | This will run an eval check for the code you've inserted. If it returns true | ||
| + | then the condition is met. | ||
| + | - - - - - - - - - - - - - - - - - - - - - - - - - - - - - - - - - - - - - - - | ||
| + | Example: Eval user.name() === 'Bat A': +30% | ||
| + | =-=-=-=-=-=-=-=-=-=-=-=-=-=-=-=-=-=-=-=-=-=-=-=-=-=-=-=-=-=-=-=-=-=-=-=-=-=- | ||
| + | |||
| + | =-=-=-=-=-=-=-=-=-=-=-=-=-=-=-=-=-=-=-=-=-=-=-=-=-=-=-=-=-=-=-=-=-=-=-=-=-=- | ||
| + | LAST STRIKE SKILL X | ||
| + | LAST STRIKE ITEM X | ||
| + | LAST STRIKE named | ||
| + | - - - - - - - - - - - - - - - - - - - - - - - - - - - - - - - - - - - - - - - | ||
| + | This checks to see if the last strike on the enemy is item x, skill x, or a | ||
| + | named action. If a named action is used and multiple database entries share | ||
| + | the name of the action, priority will be given to the highest ID in the | ||
| + | order of skills then items. | ||
| + | - - - - - - - - - - - - - - - - - - - - - - - - - - - - - - - - - - - - - - - | ||
| + | Example: Last Strike Skill 40: +20% | ||
| + | Last Strike Item 50: -30% | ||
| + | Last Strike Firaga: +40% | ||
| + | Last Strike Ice Bomb: -50% | ||
| + | =-=-=-=-=-=-=-=-=-=-=-=-=-=-=-=-=-=-=-=-=-=-=-=-=-=-=-=-=-=-=-=-=-=-=-=-=-=- | ||
| + | |||
| + | =-=-=-=-=-=-=-=-=-=-=-=-=-=-=-=-=-=-=-=-=-=-=-=-=-=-=-=-=-=-=-=-=-=-=-=-=-=- | ||
| + | PARTY MEMBERS EVAL | ||
| + | - - - - - - - - - - - - - - - - - - - - - - - - - - - - - - - - - - - - - - - | ||
| + | This checks the number of party members (dead or alive) the player has when | ||
| + | the drops are being calculated and made and runs it against an eval check. | ||
| + | - - - - - - - - - - - - - - - - - - - - - - - - - - - - - - - - - - - - - - - | ||
| + | Example: Party Members > 1: +20% | ||
| + | Party Members === 2: +25% | ||
| + | Party Members <= 3: -30% | ||
| + | =-=-=-=-=-=-=-=-=-=-=-=-=-=-=-=-=-=-=-=-=-=-=-=-=-=-=-=-=-=-=-=-=-=-=-=-=-=- | ||
| + | |||
| + | =-=-=-=-=-=-=-=-=-=-=-=-=-=-=-=-=-=-=-=-=-=-=-=-=-=-=-=-=-=-=-=-=-=-=-=-=-=- | ||
| + | RANDOM X% | ||
| + | - - - - - - - - - - - - - - - - - - - - - - - - - - - - - - - - - - - - - - - | ||
| + | This condition has a random x% chance to pass. | ||
| + | - - - - - - - - - - - - - - - - - - - - - - - - - - - - - - - - - - - - - - - | ||
| + | Example: Random 20%: +40% | ||
| + | Random 30%: -60% | ||
| + | =-=-=-=-=-=-=-=-=-=-=-=-=-=-=-=-=-=-=-=-=-=-=-=-=-=-=-=-=-=-=-=-=-=-=-=-=-=- | ||
| + | |||
| + | =-=-=-=-=-=-=-=-=-=-=-=-=-=-=-=-=-=-=-=-=-=-=-=-=-=-=-=-=-=-=-=-=-=-=-=-=-=- | ||
| + | TIMES ELEMENT X STRUCK EVAL | ||
| + | - - - - - - - - - - - - - - - - - - - - - - - - - - - - - - - - - - - - - - - | ||
| + | This compares the number of times the enemy has been struck by element x. | ||
| + | You can also replace x with the name of the item. | ||
| + | - - - - - - - - - - - - - - - - - - - - - - - - - - - - - - - - - - - - - - - | ||
| + | Example: Times Element Fire Struck > 6: +10% | ||
| + | Times Element 3 Struck === 5: -10% | ||
| + | Times Element Thunder <= 4: +20% | ||
| + | =-=-=-=-=-=-=-=-=-=-=-=-=-=-=-=-=-=-=-=-=-=-=-=-=-=-=-=-=-=-=-=-=-=-=-=-=-=- | ||
| + | |||
| + | =-=-=-=-=-=-=-=-=-=-=-=-=-=-=-=-=-=-=-=-=-=-=-=-=-=-=-=-=-=-=-=-=-=-=-=-=-=- | ||
| + | TIMES ITEM X STRUCK EVAL | ||
| + | - - - - - - - - - - - - - - - - - - - - - - - - - - - - - - - - - - - - - - - | ||
| + | This compares the number of times the enemy has been struck by item x. You | ||
| + | can also replace x with the name of the item. | ||
| + | - - - - - - - - - - - - - - - - - - - - - - - - - - - - - - - - - - - - - - - | ||
| + | Example: Times Item Bomb Struck > 6: +10% | ||
| + | Times Item 42 Struck === 5: -10% | ||
| + | Times Item Uni Struck <= 4: +20% | ||
| + | =-=-=-=-=-=-=-=-=-=-=-=-=-=-=-=-=-=-=-=-=-=-=-=-=-=-=-=-=-=-=-=-=-=-=-=-=-=- | ||
| + | |||
| + | =-=-=-=-=-=-=-=-=-=-=-=-=-=-=-=-=-=-=-=-=-=-=-=-=-=-=-=-=-=-=-=-=-=-=-=-=-=- | ||
| + | TIMES SKILL X STRUCK EVAL | ||
| + | - - - - - - - - - - - - - - - - - - - - - - - - - - - - - - - - - - - - - - - | ||
| + | This compares the number of times the enemy has been struck by skill x. You | ||
| + | can also replace x with the name of the skill. | ||
| + | - - - - - - - - - - - - - - - - - - - - - - - - - - - - - - - - - - - - - - - | ||
| + | Example: Times Skill Firaga Struck > 6: +10% | ||
| + | Times Skill 40 Struck === 5: -10% | ||
| + | Times Skill Thundaga Struck <= 4: +20% | ||
| + | =-=-=-=-=-=-=-=-=-=-=-=-=-=-=-=-=-=-=-=-=-=-=-=-=-=-=-=-=-=-=-=-=-=-=-=-=-=- | ||
| + | |||
| + | =-=-=-=-=-=-=-=-=-=-=-=-=-=-=-=-=-=-=-=-=-=-=-=-=-=-=-=-=-=-=-=-=-=-=-=-=-=- | ||
| + | TIMES STATE X STRUCK EVAL | ||
| + | - - - - - - - - - - - - - - - - - - - - - - - - - - - - - - - - - - - - - - - | ||
| + | This compares the number of times the enemy has been struck by state x. | ||
| + | You can also replace x with the name of the state. | ||
| + | - - - - - - - - - - - - - - - - - - - - - - - - - - - - - - - - - - - - - - - | ||
| + | Example: Times State 4 Struck > 6: +10% | ||
| + | Times State Blind Struck === 5: -10% | ||
| + | Times State Silence Struck <= 4: +20% | ||
| + | =-=-=-=-=-=-=-=-=-=-=-=-=-=-=-=-=-=-=-=-=-=-=-=-=-=-=-=-=-=-=-=-=-=-=-=-=-=- | ||
| + | |||
| + | =-=-=-=-=-=-=-=-=-=-=-=-=-=-=-=-=-=-=-=-=-=-=-=-=-=-=-=-=-=-=-=-=-=-=-=-=-=- | ||
| + | TIMES STYPE X STRUCK EVAL | ||
| + | - - - - - - - - - - - - - - - - - - - - - - - - - - - - - - - - - - - - - - - | ||
| + | This compares the number of times the enemy has been struck by skill type x. | ||
| + | You can also replace x with the name of the skill type. | ||
| + | - - - - - - - - - - - - - - - - - - - - - - - - - - - - - - - - - - - - - - - | ||
| + | Example: Times SType 1 Struck > 6: +10% | ||
| + | Times SType Magic Struck === 5: -10% | ||
| + | Times SType Special Struck <= 4: +20% | ||
| + | =-=-=-=-=-=-=-=-=-=-=-=-=-=-=-=-=-=-=-=-=-=-=-=-=-=-=-=-=-=-=-=-=-=-=-=-=-=- | ||
| + | |||
| + | =-=-=-=-=-=-=-=-=-=-=-=-=-=-=-=-=-=-=-=-=-=-=-=-=-=-=-=-=-=-=-=-=-=-=-=-=-=- | ||
| + | SWITCH X ON | ||
| + | SWITCH X OFF | ||
| + | - - - - - - - - - - - - - - - - - - - - - - - - - - - - - - - - - - - - - - - | ||
| + | Replace X with a switch ID. If switch X is ON or OFF, the condition is met. | ||
| + | - - - - - - - - - - - - - - - - - - - - - - - - - - - - - - - - - - - - - - - | ||
| + | Example: Switch 5 ON: +10% | ||
| + | Switch 6 OFF: -10% | ||
| + | =-=-=-=-=-=-=-=-=-=-=-=-=-=-=-=-=-=-=-=-=-=-=-=-=-=-=-=-=-=-=-=-=-=-=-=-=-=- | ||
| + | |||
| + | =-=-=-=-=-=-=-=-=-=-=-=-=-=-=-=-=-=-=-=-=-=-=-=-=-=-=-=-=-=-=-=-=-=-=-=-=-=- | ||
| + | TURN EVAL | ||
| + | - - - - - - - - - - - - - - - - - - - - - - - - - - - - - - - - - - - - - - - | ||
| + | This will run an eval check to compare the number of turns the battle has | ||
| + | gone on for until the time the drops have been made. | ||
| + | - - - - - - - - - - - - - - - - - - - - - - - - - - - - - - - - - - - - - - - | ||
| + | Example: Turn > 5: +10% | ||
| + | Turn === 5: +20% | ||
| + | Turn <= 4: +30% | ||
| + | =-=-=-=-=-=-=-=-=-=-=-=-=-=-=-=-=-=-=-=-=-=-=-=-=-=-=-=-=-=-=-=-=-=-=-=-=-=- | ||
| + | |||
| + | =-=-=-=-=-=-=-=-=-=-=-=-=-=-=-=-=-=-=-=-=-=-=-=-=-=-=-=-=-=-=-=-=-=-=-=-=-=- | ||
| + | VARIABLE X EVAL | ||
| + | - - - - - - - - - - - - - - - - - - - - - - - - - - - - - - - - - - - - - - - | ||
| + | Replace X with a variable ID. This will run an eval check to compare the | ||
| + | variable's value to see if it meets the conditions. | ||
| + | - - - - - - - - - - - - - - - - - - - - - - - - - - - - - - - - - - - - - - - | ||
| + | Example: Variable 5 > 10: +20% | ||
| + | Variable 6 === 11: +25% | ||
| + | Variable 7 <= 12: -30% | ||
| + | =-=-=-=-=-=-=-=-=-=-=-=-=-=-=-=-=-=-=-=-=-=-=-=-=-=-=-=-=-=-=-=-=-=-=-=-=-=- | ||
| + | </nowiki> | ||
| + | |||
| + | == [[Extra Parameter Formula (YEP)|Extra Parameter Formula]] == | ||
| + | |||
| + | <nowiki> | ||
| + | You can use the following notetags to alter the various aspects that modify | ||
| + | the extra parameter values: | ||
| + | |||
| + | Actor, Class, Enemy, Weapon, Armor, and State Notetags: | ||
| + | |||
| + | <stat Plus: +x%> | ||
| + | <stat Plus: -x%> | ||
| + | <stat Plus: +x.y> | ||
| + | <stat Plus: -x.y> | ||
| + | Replace 'stat' with 'hit', 'eva', 'cri', 'cev', 'mev', 'mrf', 'cnt', | ||
| + | 'hrg', 'mrg', or 'trg'. This is the value added to the base parameter | ||
| + | before the rate and flat values contribute to the total parameter value | ||
| + | assuming the plugin's default formula is utilized. | ||
| + | |||
| + | <stat Rate: x%> | ||
| + | <stat Rate: x.y> | ||
| + | Replace 'stat' with 'hit', 'eva', 'cri', 'cev', 'mev', 'mrf', 'cnt', | ||
| + | 'hrg', 'mrg', or 'trg'. This is the value multipled to the sum of the base | ||
| + | and plus values of the parameter before added by the flat value assuming | ||
| + | the plugin's default formula is utilized. | ||
| + | |||
| + | <stat Flat: +x%> | ||
| + | <stat Flat: -x%> | ||
| + | <stat Flat: +x.y> | ||
| + | <stat Flat: -x.y> | ||
| + | Replace 'stat' with 'hit', 'eva', 'cri', 'cev', 'mev', 'mrf', 'cnt', | ||
| + | 'hrg', 'mrg', or 'trg'. This is the value added finally to the sum of the | ||
| + | base and plus values after being multiplied by the rate value assuming the | ||
| + | plugin's default formula is utilized. | ||
| + | </nowiki> | ||
| + | |||
| + | == [[Floor Damage (YEP)|Floor Damage]] == | ||
| + | |||
| + | <nowiki> | ||
| + | Insert the following notetags into the noteboxes for your tilesets: | ||
| + | |||
| + | Tileset Notetag: | ||
| + | |||
| + | <Floor Damage x: y> | ||
| + | - 'x' is the terrain tag to mark the tileset with. By default, terrain | ||
| + | tags are set to 0. They will go up as high as 7. 'y' will be the amount of | ||
| + | damage dealt to each actor in the party. For example, <Floor Damage 2: 50> | ||
| + | will cause all damage tiles marked with terrain tag 2 to deal 50 damage. | ||
| + | * Note: You will still need to mark the tile itself as a damage tile in | ||
| + | the database editor. | ||
| + | |||
| + | <Floor Flash x: r, g, b, o> | ||
| + | - 'x' is the terrain tag to mark the tileset with. Replace 'r', 'g', 'b', | ||
| + | and 'o' with values between 0-255 to indicate the red, green, blue, and | ||
| + | opacity values respectively. This will make the screen flash this color | ||
| + | combination when the player takes damage from this tile. | ||
| + | * Note: You will still need to mark the tile itself as a damage tile in | ||
| + | the database editor. | ||
| + | </nowiki> | ||
| + | |||
| + | == [[Footstep Sounds (YEP)|Footstep Sounds]] == | ||
| + | |||
| + | <nowiki> | ||
| + | Insert the following notetags to add footsteps to your maps. | ||
| + | |||
| + | Event Notetag: | ||
| + | |||
| + | <No Footsteps> | ||
| + | - Insert this into the notebox of any event you wish to not make any | ||
| + | footsteps when moving. | ||
| + | |||
| + | Tileset Notetags: | ||
| + | |||
| + | <Terrain Tag x Footstep Sound: filename> | ||
| + | <Terrain Tag x Footstep Sound: filename, volume> | ||
| + | <Terrain Tag x Footstep Sound: filename, volume, pitch> | ||
| + | - Replace 'x' with the terrain tag ID (from 1 to 7). If 0 is used, it will | ||
| + | be ignored. When inserting the filename, the filename must be case | ||
| + | sensitive and must not include the extension. The 'volume' and 'pitch' | ||
| + | variables must be integar values between 0 and 100 if they are used. | ||
| + | |||
| + | Examples: | ||
| + | |||
| + | <Terrain Tag 1 Footstep Sound: Move1> | ||
| + | <Terrain Tag 2 Footstep Sound: Move2, 80> | ||
| + | <Terrain Tag 3 Footstep Sound: Move3, 75, 150> | ||
| + | |||
| + | In the above examples, the tiles marked by terrain tags 1, 2, or 3 will | ||
| + | play their respective sound effect when stepped on by the player or an | ||
| + | event that can trigger footsteps. | ||
| + | |||
| + | Map Notetags: | ||
| + | |||
| + | <Region x Footstep Sound: filename> | ||
| + | <Region x Footstep Sound: filename, volume> | ||
| + | <Region x Footstep Sound: filename, volume, pitch> | ||
| + | - Replace 'x' with the region tag ID (from 1 to 255). If 0 is used, it | ||
| + | will become the default footstep sound. When inserting the filename, the | ||
| + | filename must be case sensitive and must not include the extension. The | ||
| + | 'volume' and 'pitch' variables must be integar values between 0 and 100 if | ||
| + | they are used. | ||
| + | |||
| + | Examples: | ||
| + | |||
| + | <Region 10 Footstep Sound: Move1> | ||
| + | <Region 20 Footstep Sound: Move2, 80> | ||
| + | <Region 30 Footstep Sound: Move3, 75, 150> | ||
| + | |||
| + | In the above examples, the tiles marked by regions 10, 20, or 30 will play | ||
| + | their respective sound effect when stepped on by the player or an event | ||
| + | that can trigger footsteps. | ||
| + | </nowiki> | ||
| + | |||
| + | == [[Hit Damage Sounds (YEP)|Hit Damage Sounds]] == | ||
| + | |||
| + | <nowiki> | ||
| + | Insert the following notetags into the armors and/or enemy noteboxes to make | ||
| + | them play different sounds when getting struck. | ||
| + | |||
| + | Armor and Enemy Notetags | ||
| + | |||
| + | <Hit Damage Sound: filename> | ||
| + | <Hit Damage Sound: filename, volume> | ||
| + | <Hit Damage Sound: filename, volume, pitch> | ||
| + | <Hit Damage Sound: filename, volume, pitch, pan> | ||
| + | - Makes the piece of armor or enemy play 'filename' when struck. When | ||
| + | inserting the filename, the filename must be case sensitive and must not | ||
| + | include the extension. The 'volume' and 'pitch' variables must be integar | ||
| + | values between 0 and 100 if they are used. The 'pan' variable can be an | ||
| + | integar value between -100 and 100 if it is used. | ||
| + | |||
| + | Examples: | ||
| + | |||
| + | <Hit Damage Sound: Fire1> | ||
| + | <Hit Damage Sound: Fire2, 80> | ||
| + | <Hit Damage Sound: Fire3, 80, 130, 20> | ||
| + | |||
| + | In the above examples, the armor piece or enemy will play the Fire sound | ||
| + | effects when struck. This will override the default settings. | ||
| + | </nowiki> | ||
| + | |||
| + | == [[Icons on Events (YEP)|Icons on Events]] == | ||
| + | |||
| + | <nowiki> | ||
| + | The easiest way to attach icons to events would be to use notetags and/or | ||
| + | comment tags. Using notetags will make the icon always attached to the event | ||
| + | while using comment tags will make the icon attached to the event only if | ||
| + | the page containing the comment tag is active. | ||
| + | |||
| + | <Icon on Event: n> | ||
| + | - Replace 'n' with the icon you wish to attach to the event. | ||
| + | |||
| + | <Icon on Event Buffer X: +x> | ||
| + | <Icon on Event Buffer X: -x> | ||
| + | - Replace 'x' with the buffer amount for X. For X, a negative number moves | ||
| + | it left and a positive one moves it right. | ||
| + | |||
| + | <Icon on Event Buffer Y: +y> | ||
| + | <Icon on Event Buffer Y: -y> | ||
| + | - Replace 'y' with the buffer amount for Y. For Y, a negative number moves | ||
| + | it up and a positive one moves it down. | ||
| + | |||
| + | <Icon on Event Buffer: +x, +y> | ||
| + | <Icon on Event Buffer: -x, -y> | ||
| + | - Replace 'x' and 'y' with the respective buffer values you wish to apply. | ||
| + | For X, a negative number moves it left and a positive one moves it right. | ||
| + | For Y, a negative number moves it up and a positive one moves it down. | ||
| + | |||
| + | Keep in mind these notetags and comment tags only work for events. They do | ||
| + | not work on the player character. If you wish to apply icons to the player | ||
| + | character, you'd have to use one of the methods below. | ||
| + | </nowiki> | ||
| + | |||
| + | == [[Instant Cast (YEP)|Instant Cast]] == | ||
| + | |||
| + | <nowiki> | ||
| + | The following are some notetags you can use to apply Instant Cast properties | ||
| + | to your actions. | ||
| + | |||
| + | Skill and Item Notetags: | ||
| + | <Instant> | ||
| + | <Instant Cast> | ||
| + | Both notetags work the same. This causes this action when selected as the | ||
| + | first action for an actor to be instantly cast. When used by an enemy, | ||
| + | this will cause the enemy to have a follow up action without consuming the | ||
| + | enemy's turn. | ||
| + | |||
| + | Actor, Class, Enemy, Weapon, Armor, and State Notetags: | ||
| + | <Instant Skill: x> | ||
| + | <Instant Skill: x, x, x> | ||
| + | <Instant Skill: x to y> | ||
| + | This makes skill(s) x into having instant cast properties for the actor, | ||
| + | class, enemy, or whenever the weapon or armor is equipped, or whenever the | ||
| + | state is applied. If using 'x to y', it will be applied to all the skills | ||
| + | from x to y. | ||
| + | |||
| + | <Instant Item: x> | ||
| + | <Instant Item: x, x, x> | ||
| + | <Instant Item: x to y> | ||
| + | This makes item(s) x into having instant cast properties for the actor, | ||
| + | class, enemy, or whenever the weapon or armor is equipped, or whenever the | ||
| + | state is applied. If using 'x to y', it will be applied to all the items | ||
| + | from x to y. | ||
| + | |||
| + | <Cancel Instant Skill: x> | ||
| + | <Cancel Instant Skill: x, x, x> | ||
| + | <Cancel Instant Skill: x to y> | ||
| + | This makes skill(s) x unable to be instantly cast. This will take priority | ||
| + | over all other properties that may influence instant casting if the actor, | ||
| + | class, enemy, equipment, or states possess this notetag. If using 'x to y' | ||
| + | then it will be applied to all skills from x to y. | ||
| + | |||
| + | <Cancel Instant Item: x> | ||
| + | <Cancel Instant Item: x, x, x> | ||
| + | <Cancel Instant item: x to y> | ||
| + | This makes item(s) x unable to be instantly cast. This will take priority | ||
| + | over all other properties that may influence instant casting if the actor, | ||
| + | class, enemy, equipment, or states possess this notetag. If using 'x to y' | ||
| + | then it will be applied to all items from x to y. | ||
| + | </nowiki> | ||
| + | |||
| + | == [[Item Concoctions (Olivia)|Item Concoctions]] == | ||
| + | |||
| + | <html><img src='https://img.itch.zone/aW1nLzE1MTgzMzQuZ2lm/original/2g414z.gif'></html> | ||
| + | |||
| + | <pre> | ||
| + | Actor, Class, Weapon, Armor, State Notetags | ||
| + | |||
| + | <Item Concoct> | ||
| + | If an actor is affected by this notetag either directly or indirectly through | ||
| + | related traits, the actor can use the Concoct command in battle. | ||
| + | |||
| + | State Notetag | ||
| + | |||
| + | <Item Concoct Seal> | ||
| + | If an actor is affected by a state with this notetag, the actor's Concoct | ||
| + | command will be disabled. | ||
| + | |||
| + | Item Notetags | ||
| + | |||
| + | <Item Concoct> | ||
| + | list | ||
| + | list | ||
| + | list | ||
| + | list | ||
| + | </Item Concoct> | ||
| + | Makes the item with the notetag a primary component for item concoctions. | ||
| + | Insert multiple 'list' items to make it combinable with more items. | ||
| + | |||
| + | 'list' can be formatted in any of these four ways: | ||
| + | |||
| + | Item x: Item x | ||
| + | Item x: name | ||
| + | name: name | ||
| + | name: Item x | ||
| + | |||
| + | If you are using Item x, replace x with the ID of the item you wish to refer | ||
| + | to. If you are using a name version, replace name with the full name of the | ||
| + | item (it is case sensitive). The first item on the list before the : is the | ||
| + | secondary component for item concoctions. The second item on the list after | ||
| + | the : is the item effect that will occur when the first and second components | ||
| + | are combined. The effects of the first and second items are unrelated to the | ||
| + | combined item effect. | ||
| + | |||
| + | Here is an example of how an Item Concoction notetag and list could look: | ||
| + | |||
| + | <Item Concoct> | ||
| + | Item 51: Item 61 | ||
| + | Item 52: Item 62 | ||
| + | Item 53: Lucid Mist | ||
| + | Item 54: Healing Mist | ||
| + | Plum Essence: Inspiriting Mist | ||
| + | Tomato Essence: Boosting Mist | ||
| + | Onion Bloom: Item 67 | ||
| + | Curious Bloom: Item 68 | ||
| + | </Item Concoct> | ||
| + | |||
| + | Concoctions will be composed of a primary component, secondary component, and | ||
| + | a resulting effect. In this case, the primary component is the item with the | ||
| + | notetag. The secondary component can be any of the items before the : in the | ||
| + | list. The resulting effect is the item after the : next to the secondary | ||
| + | component selected on the list. | ||
| + | </pre> | ||
| + | |||
| + | == [[Item Core (YEP)|Item Core]] == | ||
| + | |||
| + | <nowiki> | ||
| + | If you are using independent items, items that aren't gained through the | ||
| + | shop can have a random variance applied to its stats. | ||
| + | |||
| + | Item, Weapon, Armor Notetag | ||
| + | <Random Variance: x> | ||
| + | If this item is acquired through non-shop means, it will have random | ||
| + | stats offset by x amount in either a positive or negative value. | ||
| + | |||
| + | <Not Independent Item> | ||
| + | Sets an item that is independent by default to become a nonindependent | ||
| + | item, allowing it to stack and making it unable to be affected by | ||
| + | independent item modifiers. | ||
| + | |||
| + | <Priority Name> | ||
| + | This sets the item, weapon, or armor's priority name to its database | ||
| + | entry so that name schemes cannot affect the item. | ||
| + | |||
| + | <Text Color: x> | ||
| + | This sets the text color of this item, weapon, or armor to use text color | ||
| + | x from the window skin. | ||
| + | </nowiki> | ||
| + | |||
| + | === [[Attachable Augments (YEP)|Attachable Augments]] === | ||
| + | <hr> | ||
| + | |||
| + | <nowiki> | ||
| + | You can use the following notetags to setup how augments work in your game | ||
| + | and affect your equipment. | ||
| + | |||
| + | Weapon and Armor Notetags: | ||
| + | |||
| + | <Augment Slots> | ||
| + | Rune | ||
| + | Glyph | ||
| + | Orb | ||
| + | Mark | ||
| + | </Augment Slots> | ||
| + | This allows you to set what kind of augments are used for the item. The | ||
| + | names used for the augment slots are the augment types used for that item. | ||
| + | |||
| + | <No Augment Slots> | ||
| + | This makes the item have no augment slots. | ||
| + | |||
| + | Item, Weapon, Armor Notetags | ||
| + | |||
| + | <Augment: type> | ||
| + | augment effect | ||
| + | augment effect | ||
| + | </Augment: type> | ||
| + | This will change the item into a non-Independent item. This item can be | ||
| + | used to augment equipment that contain the appropriate augment 'type'. | ||
| + | This particular notetag will decide the augment effect for attaching the | ||
| + | augment component and the reverse effect for detaching the component. | ||
| + | Insert multiple sets of these notetags to allow different augment effects | ||
| + | when used on different augment slot types. | ||
| + | |||
| + | <Augment Attach: type> | ||
| + | augment effect | ||
| + | augment effect | ||
| + | </Augment Attach: type> | ||
| + | This will change the item into a non-Independent item. This item can be | ||
| + | used to augment equipment that contain the appropriate augment 'type'. | ||
| + | This notetag will decide only the augment effects that are applied when | ||
| + | the augment component is attached to the equipment and not when detached. | ||
| + | Insert multiple sets of these notetags to allow different augment effects | ||
| + | when used on different augment slot types. | ||
| + | |||
| + | <Augment Detach: type> | ||
| + | augment effect | ||
| + | augment effect | ||
| + | </Augment Detach: type> | ||
| + | This will change the item into a non-Independent item. This item can be | ||
| + | used to augment equipment that contain the appropriate augment 'type'. | ||
| + | This notetag will decide only the augment effects that are applied when | ||
| + | the augment component is detached from the equipment and not attached. | ||
| + | Insert multiple sets of these notetags to allow different augment effects | ||
| + | when used on different augment slot types. | ||
| + | </nowiki> | ||
| + | |||
| + | ; Augment Effect List | ||
| + | |||
| + | <nowiki> | ||
| + | The following is a list of effects you can use for the <Augment: type>, | ||
| + | <Augment Attach: type>, <Augment Detatch: type> notetags to have it apply | ||
| + | the desired effects to the upgraded item. | ||
| + | |||
| + | --- Effects --- | ||
| + | |||
| + | Param: +x | ||
| + | Param: -x | ||
| + | - Replace 'Param' with 'MaxHP', 'MaxMP', 'ATK', 'DEF', 'MAT', 'MDF', 'AGI', | ||
| + | or 'LUK'. This will increase/decrease the parameter for the item by x. | ||
| + | |||
| + | --- | ||
| + | |||
| + | Param: +x% | ||
| + | Param: -x% | ||
| + | - Replace 'Param' with 'MaxHP', 'MaxMP', 'ATK', 'DEF', 'MAT', 'MDF', 'AGI', | ||
| + | 'LUK', 'HIT', 'EVA', 'CRI', 'CEV', 'MEV', 'MRF', 'CNT', 'HRG', 'MRG', 'TRG', | ||
| + | 'TGR', 'GRD', 'REC', 'PHA', 'MCR', 'TCR', 'PDR', 'MDR', 'FDR', or 'EXR'. | ||
| + | This will increase/decrease the rate for that parameter for the item by x%. | ||
| + | Refer to the Base Parameter Control, Extra Parameter Formula, and Special | ||
| + | Parameter Formula plugins for more information regarding these stats. | ||
| + | |||
| + | --- | ||
| + | |||
| + | Boost: +x | ||
| + | Boost: -x | ||
| + | - This will increase or decrease the boost count of the item by x. | ||
| + | |||
| + | --- | ||
| + | |||
| + | Price: +x | ||
| + | Price: -x | ||
| + | - This will increase or decrease the price of the item by x. | ||
| + | |||
| + | --- | ||
| + | |||
| + | Cannot Detach | ||
| + | - This makes the augment unable to be detached once applied. | ||
| + | |||
| + | --- | ||
| + | |||
| + | Add Attack Element: x | ||
| + | Remove Attack Element: x | ||
| + | - Add/Remove Attack Element 'x' to item. You can use either the name or the | ||
| + | ID of the element. If the name is used and you have multiple elements in | ||
| + | your database with the same name, priority will be given to the element with | ||
| + | the highest ID. | ||
| + | |||
| + | --- | ||
| + | |||
| + | Add Attack State: x | ||
| + | Add Attack State: x, y% | ||
| + | Remove Attack State: x | ||
| + | Remove Attack State: x, y% | ||
| + | - Add/Remove Attack State 'x' to item. You can use either the name of the ID | ||
| + | of the state. If the name is used and you have multiple states in your | ||
| + | database with the same name, priority will be given to the state with the | ||
| + | highest ID. If 'y' is used, then the success rate of landing the state will | ||
| + | be y%. If 'y' is not used, the success rate of landing the state is 100%. | ||
| + | |||
| + | --- | ||
| + | |||
| + | Add Debuff Rate: param, x% | ||
| + | Add Debuff Rate: param, +x% | ||
| + | Add Debuff Rate: param, -x% | ||
| + | Remove Debuff Rate: param, x% | ||
| + | Remove Debuff Rate: param, +x% | ||
| + | Remove Debuff Rate: param, -x% | ||
| + | - Replace 'param' with 'MaxHP', 'MaxMP', 'ATK', 'DEF', 'MAT', 'MDF', 'AGI', | ||
| + | or LUK. Add/remove the debuff affliction rate of the parameter for the item | ||
| + | to 'x%' rate. | ||
| + | |||
| + | --- | ||
| + | |||
| + | Add Element Rate: x, y% | ||
| + | Add Element Rate: x, +y% | ||
| + | Add Element Rate: x, -y% | ||
| + | Remove Element Rate: x, y% | ||
| + | Remove Element Rate: x, +y% | ||
| + | Remove Element Rate: x, -y% | ||
| + | - Add/Remove element rate 'x' to item. You can use either the name or the | ||
| + | ID of the element. If the name is used and you have multiple elements in | ||
| + | your database with the same name, priority will be given to the element with | ||
| + | the highest ID. The item's element rate for 'x' will be 'y%' rate. | ||
| + | |||
| + | --- | ||
| + | |||
| + | Add Passive State: x | ||
| + | Remove Passive State: x | ||
| + | - Requires YEP_AutoPassiveStates.js installed. Add/Remove passive state 'x' | ||
| + | to item. You can use either the name or the ID of the state. If the name is | ||
| + | used and you have multiple states in your database with the same name, | ||
| + | priority will be given to the state with the highest ID. | ||
| + | |||
| + | --- | ||
| + | |||
| + | Add Skill: x | ||
| + | Remove Skill: x | ||
| + | - Add/Remove skill 'x' to item. You can use either the name or the ID of the | ||
| + | skill. If the name is used and you have multiple skills in your database | ||
| + | with the same name, priority will be given to the skill with the highest ID. | ||
| + | This will make the skill temporarily usable by the actor as long as the item | ||
| + | is equipped with the augment on it. | ||
| + | |||
| + | --- | ||
| + | |||
| + | Add Skill Type: x | ||
| + | Add SType: x | ||
| + | Remove Skill Type: x | ||
| + | Remove SType: x | ||
| + | - Add/Remove skill type 'x' to item. You can use either the name or the ID | ||
| + | of the skill type. If the name is used and you have multiple skills in your | ||
| + | database with the same name, priority will be given to the skill type with | ||
| + | the highest ID. This will make the skill type temporarily usable by the | ||
| + | actor as long as the item is equipped with the augment on it. | ||
| + | |||
| + | --- | ||
| + | |||
| + | Add State Rate: x, y% | ||
| + | Add State Rate: x, +y% | ||
| + | Add State Rate: x, -y% | ||
| + | Remove State Rate: x, y% | ||
| + | Remove State Rate: x, +y% | ||
| + | Remove State Rate: x, -y% | ||
| + | - Add/Remove state rate for state 'x' to item. You can use either the name | ||
| + | or the ID of the state. If the name is used and you have multiple states in | ||
| + | your database with the same name, priority will be given to the state with | ||
| + | the highest ID. The item's state rate for 'x' will be 'y%' rate. | ||
| + | |||
| + | --- | ||
| + | |||
| + | Add State Resist: x | ||
| + | Remove State Resist: x | ||
| + | - Add/Remove state resist for state 'x' to item. You can use either the name | ||
| + | or the ID of the state. If the name is used and you have multiple states in | ||
| + | your database with the same name, priority will be given to the state with | ||
| + | the highest ID. | ||
| + | |||
| + | --- | ||
| + | |||
| + | Change Base Name: x | ||
| + | Cancel Base Name: x | ||
| + | - Changes/Cancels the base name of the item to 'x' while the augment is on | ||
| + | the item. If an item has multiple augments that alter the base name, then | ||
| + | priority is given to the first augment that alters the base name. | ||
| + | |||
| + | --- | ||
| + | |||
| + | Change Icon: x | ||
| + | Cancel Icon: x | ||
| + | - Changes/cancels the icon of the item to 'x' while the augment is on the | ||
| + | item. If an item has multiple augments that alter the icon, then priority is | ||
| + | given to the first augment that alters the icon. | ||
| + | |||
| + | --- | ||
| + | |||
| + | Change Picture Hue: x | ||
| + | Cancel Picture Hue: x | ||
| + | - Changes/cancels the picture hue used for the item to 'x' while the | ||
| + | augment is on the item. If an item has multiple augments that alter the | ||
| + | picture hue, then priority is given to the first augment that alters the | ||
| + | picture hue. This requires the plugin: Item Picture Images. | ||
| + | |||
| + | --- | ||
| + | |||
| + | Change Picture Image: x | ||
| + | Cancel Picture Image: x | ||
| + | - Changes/cancels the picture image used for the item to 'x' while the | ||
| + | augment is on the item. If an item has multiple augments that alter the | ||
| + | picture image, then priority is given to the first augment that alters the | ||
| + | picture image. This requires the plugin: Item Picture Images. | ||
| + | |||
| + | --- | ||
| + | |||
| + | Change Prefix: x | ||
| + | Cancel Prefix: x | ||
| + | - Changes/Cancels the prefix of the item to 'x' while the augment is on the | ||
| + | item. If an item has multiple augments that alter the prefix, then priority | ||
| + | is given to the first augment that alters the priority. | ||
| + | |||
| + | --- | ||
| + | |||
| + | Change Priority Name: x | ||
| + | Cancel Priority Name: x | ||
| + | - Changes/Cancels the priority name of the item to 'x' while the augment is | ||
| + | on the item. If an item has multiple augments that alter the priority name, | ||
| + | then priority is given to the first augment that alters the priority name. | ||
| + | |||
| + | --- | ||
| + | |||
| + | Change Suffix: x | ||
| + | Cancel Suffix: x | ||
| + | - Changes/Cancels the suffix of the item to 'x' while the augment is on the | ||
| + | item. If an item has multiple augments that alter the suffix, then priority | ||
| + | is given to the first augment that alters the suffix. | ||
| + | |||
| + | --- | ||
| + | |||
| + | Change Text Color: x | ||
| + | Cancel Text Color: x | ||
| + | - Changes/Cancels the text color used for the item to 'x' while the augment | ||
| + | is on the item. If an item has multiple augments that alter the text color, | ||
| + | then priority is given to the first augment that alters text color. | ||
| + | </nowiki> | ||
| + | |||
| + | === [[Item Disassemble (YEP)|Item Disassemble]] === | ||
| + | <hr> | ||
| + | |||
| + | <nowiki> | ||
| + | Making items be disassemble-able can be done with these notetags: | ||
| + | |||
| + | Item, Weapon, and Armor Notetags: | ||
| + | |||
| + | <Disassemble Pool> | ||
| + | item | ||
| + | item | ||
| + | </Disassemble Pool> | ||
| + | This is the pool of items that will be given when using any disassemblers. | ||
| + | Replace the 'item' in the notetag setup with one of the syntax in the | ||
| + | notetag Item Pool Format list below. | ||
| + | |||
| + | <Disassemble Pool: type> | ||
| + | item | ||
| + | item | ||
| + | </Disassemble Pool: type> | ||
| + | This is the pool of items made specifically for the disassembler type. | ||
| + | The items listed in this pool will only drop if the disassembler's type | ||
| + | matches this pool's type. Replace the 'item' in the notetag setup with | ||
| + | one of the syntax in the notetag Item Pool Format list below. | ||
| + | |||
| + | --- Item Pool Format --- | ||
| + | |||
| + | item x | ||
| + | weapon x | ||
| + | armor x | ||
| + | name | ||
| + | - This adds item, weapon, or armor ID x to the disassemble pool. If you | ||
| + | plan on using the item's name and multiple objects in the database have | ||
| + | the same name, priority will be given to items, weapons, then armors in | ||
| + | that order. Then, priority is then given to the entry with the highest ID. | ||
| + | |||
| + | item x: y% | ||
| + | weapon x: y% | ||
| + | armor x: y% | ||
| + | name: y% | ||
| + | - If you wish for a chance of getting an item when disassembling instead | ||
| + | of a 100% chance of getting it, you can use this format. For the item, | ||
| + | there will be a y% chance of getting the item when disassembling. | ||
| + | |||
| + | x2 item y | ||
| + | x3 weapon y | ||
| + | x4 armor y | ||
| + | x5 name | ||
| + | - When disassembling, items can yield quantities. You can set the amount | ||
| + | of an item given when disassembling using this setup. | ||
| + | |||
| + | x2-3 item y | ||
| + | x3-5 weapon y | ||
| + | x5-8 armor y | ||
| + | x8-10 name | ||
| + | - If you wish for there to be random quantity amounts, you can use this | ||
| + | disassembling format to set the amount of quantity given of an item from | ||
| + | a minimum amount to a maximum amount. | ||
| + | |||
| + | x2 item y: z% | ||
| + | x3 weapon y: z% | ||
| + | x4 armor y: z% | ||
| + | x5 name: z% | ||
| + | - To make an item yield a larger quantity than 1 with a random success | ||
| + | rate of doing it, use the above format for the item line. | ||
| + | |||
| + | x2-3 item y: z% | ||
| + | x3-5 weapon y: z% | ||
| + | x5-8 armor y: z% | ||
| + | x8-10 name: z% | ||
| + | - To give a random amount of item quantities while having a random success | ||
| + | rate of acquiring them item during a disassembling process, use the above | ||
| + | item line format. | ||
| + | |||
| + | --- | ||
| + | |||
| + | *NOTE: When turning an item into a Disassembler, it will become a | ||
| + | non-Independent item. | ||
| + | |||
| + | <Disassembler> | ||
| + | - This item can be used to disassemble all types of items. This will fall | ||
| + | under the 'All' category. | ||
| + | |||
| + | <Disassembler: +x%> | ||
| + | <Disassembler: -x%> | ||
| + | - This item can be used to disassemble all types of items with a +/- x% | ||
| + | success rate than normal. This will fall under the 'All' category. | ||
| + | |||
| + | <Disassembler: type> | ||
| + | - This item can be used to disassemble item categories for 'All' and | ||
| + | 'type' where 'type' is the disassemble pool type. Insert multiples of this | ||
| + | notetag if you want this item to be able to disassemble more pool types. | ||
| + | |||
| + | <Disassembler: type +x%> | ||
| + | <Disassembler: type -x%> | ||
| + | - This item can be used to disassemble item categories for 'All' and | ||
| + | 'type' where 'type' is the disassemble pool type. This has a success rate | ||
| + | change of +/-% than normal. Insert multiples of this notetag if you want | ||
| + | this item to be able to disassemble more pool types. | ||
| + | |||
| + | <Disassemble Sound Name: filename> | ||
| + | <Disassemble Sound Volume: x> | ||
| + | <Disassemble Sound Pitch: x> | ||
| + | <Disassemble Sound Pan: +x> or <Disassemble Sound Pan: -x> | ||
| + | - When this item is disassembled, it will play this sound effect. The | ||
| + | filename is case sensitive. Do not include the filename extension. | ||
| + | </nowiki> | ||
| + | |||
| + | === [[Item Discard (YEP)|Item Discard]] === | ||
| + | <hr> | ||
| + | |||
| + | <nowiki> | ||
| + | There are a couple of notetags you can use with the Item Discard plugin. | ||
| + | They exist to allow you to offset the Default Discard option in the plugin's | ||
| + | parameter settings. | ||
| + | |||
| + | Item, Weapon, and Armor Notetags: | ||
| + | |||
| + | <Can Discard> | ||
| + | - This will set the item, weapon, or armor to be discardable regardless of | ||
| + | the Default Discard plugin parameter. | ||
| + | |||
| + | <Cannot Discard> | ||
| + | - This will set the item, weapon, or armor unable to be discarded | ||
| + | regardless of the Default Discard plugin parameter. | ||
| + | </nowiki> | ||
| + | |||
| + | === [[Item Durability (YEP)|Item Durability]] === | ||
| + | <hr> | ||
| + | |||
| + | <nowiki> | ||
| + | The following notetags can be used to adjust item durability for equipment. | ||
| + | |||
| + | Weapon and Armor Notetags: | ||
| + | |||
| + | <Durability: x> | ||
| + | This sets the item's default durability value to x. This is the starting | ||
| + | durability value for the item. If this notetag isn't used, the independent | ||
| + | equipment will refer to the value in the plugin parameters. | ||
| + | |||
| + | <Durability Variance: x> | ||
| + | This alters the starting durability value with a variance of x. This means | ||
| + | there can be a variance of -x to +x for the durability starting value. | ||
| + | |||
| + | <Durability Maximum: x> | ||
| + | This is the maximum durability value the independent equipment can have. | ||
| + | When repairing durability, the item's durability value cannot exceed this | ||
| + | amount. This amount is dependent on the base item's durability value. | ||
| + | |||
| + | <Bypass Durability> | ||
| + | <Unbreakable> | ||
| + | This sets the item to not have bypass the durability system and making the | ||
| + | independent item unbreakable. | ||
| + | |||
| + | <Break Sound Name: filename> | ||
| + | <Break Sound Volume: x> | ||
| + | <Break Sound Pitch: x> | ||
| + | <Break Sound Pan: +x> | ||
| + | <Break Sound Pan: -x> | ||
| + | This changes the sound effect played when using this piece of equipment is | ||
| + | broken in battle. Filenames are case sensitive and do not include the file | ||
| + | extension into the filename. | ||
| + | |||
| + | Item, Weapon, Armor Notetags: | ||
| + | |||
| + | <Repair Durability: x> | ||
| + | This will repair any weapon or armor's durability by x. The repair effect | ||
| + | is accessed from the weapon or armor's action menu. | ||
| + | |||
| + | <Repair Weapon: x> | ||
| + | <Repair Armor: x> | ||
| + | This will specifically repair only weapons or armors by x amount. The | ||
| + | repair effect is accessed from the weapon or armor's action menu. | ||
| + | |||
| + | <Repair WType x: y> | ||
| + | <Repair AType x: y> | ||
| + | This will specifically repair only weapon-type x or armor-type x by y | ||
| + | amount. The repair is accessed from the weapon or armor's action menu. | ||
| + | |||
| + | <Repair Sound Name: filename> | ||
| + | <Repair Sound Volume: x> | ||
| + | <Repair Sound Pitch: x> | ||
| + | <Repair Sound Pan: +x> | ||
| + | <Repair Sound Pan: -x> | ||
| + | This changes the sound effect played when using this item to repair the | ||
| + | durability of another item. | ||
| + | |||
| + | <Unbreakable Durability> | ||
| + | Removes the equipment's durability and makes it unbreakable. | ||
| + | |||
| + | <Unbreakable Weapon> | ||
| + | <Unbreakable Armor> | ||
| + | Removes the weapon or armor's durability and makes it unbreakable. | ||
| + | |||
| + | <Unbreakable WType x> | ||
| + | <Unbreakable AType x> | ||
| + | Removes durability for specifically weapon-type x or armor-type x and | ||
| + | makes it unbreakable. Filenames are case sensitive and do not include the | ||
| + | file extension into the filename. | ||
| + | |||
| + | Skill and Item Notetags: | ||
| + | |||
| + | <User Weapon Durability: +x> | ||
| + | <User Weapon Durability: -x> | ||
| + | Each hit of this skill/item will cause all of the user's weapon(s) | ||
| + | durability to be altered by +x or -x. If it reaches 0 or lower, the weapon | ||
| + | will break. | ||
| + | |||
| + | <User All Weapon Durability: +x> | ||
| + | <User All Weapon Durability: -x> | ||
| + | Each hit of this skill/item will cause all of the user's weapon(s) | ||
| + | durability to be altered by +x or -x. If it reaches 0 or lower, the weapon | ||
| + | will break. | ||
| + | |||
| + | <User Random Weapon Durability: +x> | ||
| + | <User Random Weapon Durability: -x> | ||
| + | Each hit of this skill/item will cause a random weapon equipped by the | ||
| + | user to have its durability altered by +x or -x. If it reaches 0 or lower, | ||
| + | the weapon will break. | ||
| + | |||
| + | <User Armor Durability: +x> | ||
| + | <User Armor Durability: -x> | ||
| + | Each hit of this skill/item will cause the user's armor(s) durability to | ||
| + | be altered by +x or -x. Depending on the 'Damage All' plugin parameter, | ||
| + | this will affect either all armors or affect a random armor piece. If the | ||
| + | item reaches 0 or lower, the armor will break. | ||
| + | |||
| + | <User All Armor Durability: +x> | ||
| + | <User All Armor Durability: -x> | ||
| + | Each hit of this skill/item will cause all of the user's armor(s) | ||
| + | durability to be altered by +x or -x. If it reaches 0 or lower, the armor | ||
| + | will break. | ||
| + | |||
| + | <User Random Armor Durability: +x> | ||
| + | <User Random Armor Durability: -x> | ||
| + | Each hit of this skill/item will cause a random armor equipped by the | ||
| + | user to have its durability altered by +x or -x. If it reaches 0 or lower, | ||
| + | the armor will break. | ||
| + | |||
| + | <Target Weapon Durability: +x> | ||
| + | <Target Weapon Durability: -x> | ||
| + | Each hit of this skill/item will cause all of the target's weapon(s) | ||
| + | durability to be altered by +x or -x. If it reaches 0 or lower, the weapon | ||
| + | will break. | ||
| + | |||
| + | <Target All Weapon Durability: +x> | ||
| + | <Target All Weapon Durability: -x> | ||
| + | Each hit of this skill/item will cause all of the target's weapon(s) | ||
| + | durability to be altered by +x or -x. If it reaches 0 or lower, the weapon | ||
| + | will break. | ||
| + | |||
| + | <Target Random Weapon Durability: +x> | ||
| + | <Target Random Weapon Durability: -x> | ||
| + | Each hit of this skill/item will cause a random weapon equipped by the | ||
| + | target to have its durability altered by +x or -x. If it reaches 0 or | ||
| + | lower, the weapon will break. | ||
| + | |||
| + | <Target Armor Durability: +x> | ||
| + | <Target Armor Durability: -x> | ||
| + | Each hit of this skill/item will cause the target's armor(s) durability to | ||
| + | be altered by +x or -x. Depending on the 'Damage All' plugin parameter, | ||
| + | this will affect either all armors or affect a random armor piece. If the | ||
| + | item reaches 0 or lower, the armor will break. | ||
| + | |||
| + | <Target All Armor Durability: +x> | ||
| + | <Target All Armor Durability: -x> | ||
| + | Each hit of this skill/item will cause all of the target's armor(s) | ||
| + | durability to be altered by +x or -x. If it reaches 0 or lower, the armor | ||
| + | will break. | ||
| + | |||
| + | <Target Random Armor Durability: +x> | ||
| + | <Target Random Armor Durability: -x> | ||
| + | Each hit of this skill/item will cause a random armor equipped by the | ||
| + | target to have its durability altered by +x or -x. If it reaches 0 or | ||
| + | lower, the armor will break. | ||
| + | </nowiki> | ||
| + | |||
| + | === [[Item Menu Categories (YEP)|Item Menu Categories]] === | ||
| + | <hr> | ||
| + | |||
| + | <nowiki> | ||
| + | To add custom categories to items, use the following notetag: | ||
| + | |||
| + | - - - - - - - - - - - - - - - - - - - - - - - - - - - - - - - - - - - - - - | ||
| + | |||
| + | Item, Weapon, and Armor Notetags: | ||
| + | |||
| + | <Menu Category: x> | ||
| + | <Menu Category: x, x, x> | ||
| + | - Replace 'x' with the category name you wish to give the item. Insert | ||
| + | multiples of this tag to insert more categories. These categories will be | ||
| + | used in combination with the Category:x plugin parameter syntax keyword. | ||
| + | |||
| + | For Example: | ||
| + | |||
| + | <Menu Category: Herbs> | ||
| + | |||
| + | Would require this syntax keyword in the plugin parameters: | ||
| + | |||
| + | Category:Herbs | ||
| + | |||
| + | If you use the version of the notetag with multiple categories, it would | ||
| + | work something like this: | ||
| + | |||
| + | <Menu Category: Herbs, Potions, Elixirs> | ||
| + | |||
| + | Plugin Parameter: | ||
| + | |||
| + | Category:Herbs, Category:Potions, Category:Elixirs | ||
| + | |||
| + | **Note** The notetag does not apply for any of the pre-made categories. | ||
| + | |||
| + | - - - - - - - - - - - - - - - - - - - - - - - - - - - - - - - - - - - - - - | ||
| + | </nowiki> | ||
| + | |||
| + | === [[Item Picture Images (YEP)|Item Picture Images]] === | ||
| + | <hr> | ||
| + | |||
| + | <nowiki> | ||
| + | Insert the following notetags into your items, weapons, and/or armors to | ||
| + | give them unique images in the item menu. | ||
| + | |||
| + | Item, Weapon, and Armor Notetags: | ||
| + | |||
| + | <Picture: filename> | ||
| + | - This will set the item to use 'filename' image from the 'Pictures' | ||
| + | folder in your game's project folder. For the 'filename', do not include | ||
| + | the file extension. If you are using an image named 'Potion.png', simply | ||
| + | replace the filename in the notetag with 'Potion'. Everything is case | ||
| + | sensitive. This notetag will default the hue to 0. | ||
| + | |||
| + | <Picture Image: filename> | ||
| + | - This will set the item to use 'filename' image from the 'Pictures' | ||
| + | folder in your game's project folder. For the 'filename', do not include | ||
| + | the file extension. If you are using an image named 'Potion.png', simply | ||
| + | replace the filename in the notetag with 'Potion'. Everything is case | ||
| + | sensitive. This notetag will not alter the hue. | ||
| + | |||
| + | <Picture Hue: x> | ||
| + | - This will set the item's picture image to use hue x. Altering the hue | ||
| + | will adjust the color hue for the picture image used. Use a value between | ||
| + | 0 and 360 for the hue. | ||
| + | </nowiki> | ||
| + | |||
| + | === [[Item Rename (YEP)|Item Rename]] === | ||
| + | <hr> | ||
| + | |||
| + | <nowiki> | ||
| + | There are a couple of notetags you can use with the Item Rename plugin. | ||
| + | They exist to allow you to offset the Default Rename option in the plugin's | ||
| + | parameter settings. | ||
| + | |||
| + | Item, Weapon, and Armor Notetags: | ||
| + | |||
| + | <Can Rename> | ||
| + | - This will set the item, weapon, or armor to be renameable regardless of | ||
| + | the Default Rename plugin parameter. | ||
| + | |||
| + | <Cannot Rename> | ||
| + | - This will set the item, weapon, or armor unable to be renameable | ||
| + | regardless of the Default Rename plugin parameter. | ||
| + | </nowiki> | ||
| + | |||
| + | === [[Item Requirements (YEP)|Item Requirements]] === | ||
| + | <hr> | ||
| + | |||
| + | <nowiki> | ||
| + | Use the following notetags to enforce requirements for items before they can | ||
| + | be used. | ||
| + | |||
| + | Item Notetags: | ||
| + | |||
| + | <Enable Requirements> | ||
| + | condition | ||
| + | condition | ||
| + | </Enable Requirements> | ||
| + | - Replace 'condition' with the desired condition setup. You can insert any | ||
| + | number of conditions inside the notetags. All of the conditions must be | ||
| + | met before the item can be used. Look below for a list of the possible | ||
| + | conditions that can be used. | ||
| + | |||
| + | --- | ||
| + | |||
| + | Conditions: | ||
| + | |||
| + | --- | ||
| + | |||
| + | Eval: code | ||
| + | - Replace 'code' with JavaScript code that you'd like to run a check against | ||
| + | to enable the item. If the check returns false, the item will be disabled | ||
| + | regardless of other conditions. | ||
| + | |||
| + | Examples: | ||
| + | Eval: $gameActors.actor(1).name() === 'Harold' | ||
| + | Eval: $gameActors.leader().name() !== 'Ralph' | ||
| + | |||
| + | --- | ||
| + | |||
| + | Actor: x | ||
| + | Actor: x, x, x | ||
| + | - Requires actor(s) ID 'x' to use the item. If the actor isn't the one using | ||
| + | the said item, then the item is disabled and cannot be used regardless of | ||
| + | other conditions. | ||
| + | |||
| + | Not Actor: x | ||
| + | Not Actor: x, x, x | ||
| + | - Requires the actor using the item to NOT be actor ID 'x'. If the actor's | ||
| + | ID matches one of the listed 'x', then the item is disabled and cannot be | ||
| + | used regardless of other conditions. | ||
| + | |||
| + | Examples: | ||
| + | Actor: 1 | ||
| + | Actor: 2, 3, 4, 5, 6 | ||
| + | Not Actor: 7 | ||
| + | Not Actor: 8, 9, 10 | ||
| + | |||
| + | --- | ||
| + | |||
| + | Armor: x | ||
| + | Armor: x, x, x | ||
| + | - Requires the actor to specifically have armor ID 'x' equipped to use the | ||
| + | item. If multiple 'x' are used, the actor can have any of them equipped. If | ||
| + | the actor does not have armor 'x' equipped, then the item is disabled and | ||
| + | cannot be used regardless of other conditions. | ||
| + | |||
| + | Not Armor: x | ||
| + | Not Armor: x, x, x | ||
| + | - Requires the actor to not have armor ID 'x' equipped to use the item. | ||
| + | If multiple 'x' are used, the actor cannot have any of them equipped. If | ||
| + | the actor does have armor 'x' equipped, then the item is disabled and | ||
| + | cannot be used regardless of other conditions. | ||
| + | |||
| + | Examples: | ||
| + | Armor: 1 | ||
| + | Armor: 2, 3, 4, 5, 6 | ||
| + | Not Armor: 7 | ||
| + | Not Armor: 8, 9, 10 | ||
| + | |||
| + | --- | ||
| + | |||
| + | Class: x | ||
| + | Class: x, x, x | ||
| + | - Requires class(es) ID 'x' to use the item. If the actor's class doesn't | ||
| + | match the item requirement, then the item is disabled and cannot be used | ||
| + | regardless of other conditions. | ||
| + | |||
| + | Not Class: x | ||
| + | Not Class: x, x, x | ||
| + | - Requires the actor using the item to NOT be class ID 'x'. If the actor's | ||
| + | class ID matches one of the listed 'x', then the item is disabled and cannot | ||
| + | be used regardless of other conditions. | ||
| + | |||
| + | Examples: | ||
| + | Class: 1 | ||
| + | Class: 2, 3, 4, 5, 6 | ||
| + | Not Class: 7 | ||
| + | Not Class: 8, 9, 10 | ||
| + | |||
| + | --- | ||
| + | |||
| + | Subclass: x | ||
| + | Subclass: x, x, x | ||
| + | - Requires YEP_X_Subclass.js | ||
| + | - Requires subclass(es) ID 'x' to use the item. If the actor's class doesn't | ||
| + | match the item requirement, then the item is disabled and cannot be used | ||
| + | regardless of other conditions. | ||
| + | |||
| + | Not Subclass: x | ||
| + | Not Subclass: x, x, x | ||
| + | - Requires YEP_X_Subclass.js | ||
| + | - Requires the actor using the item to NOT be subclass ID 'x'. If the | ||
| + | actor's subclass ID matches one of the listed 'x', then the item is disabled | ||
| + | and cannot be used regardless of other conditions. | ||
| + | |||
| + | Examples: | ||
| + | Subclass: 1 | ||
| + | Subclass: 2, 3, 4, 5, 6 | ||
| + | Not Subclass: 7 | ||
| + | Not Subclass: 8, 9, 10 | ||
| + | |||
| + | --- | ||
| + | |||
| + | Either Class: x | ||
| + | Either Class: x, x, x | ||
| + | - Requires YEP_X_Subclass.js | ||
| + | - The actor's primary class or subclass ID has to match 'x'. If at least one | ||
| + | of them match, then the condition passes. Otherwise, the condition fails and | ||
| + | the item is disabled and cannot be used regardless of other conditions. | ||
| + | |||
| + | Neither Class: x | ||
| + | Neither Class: x, x, x | ||
| + | - Requires YEP_X_Subclass.js | ||
| + | - Requires YEP_X_Subclass.js | ||
| + | - The actor's primary class or subclass ID has to NOT match 'x'. If at least | ||
| + | one of them match, then the condition fails and the item is disabled and | ||
| + | cannot be used regardless of other conditions. | ||
| + | |||
| + | Examples: | ||
| + | Either Class: 1 | ||
| + | Either Class: 2, 3, 4, 5, 6 | ||
| + | Neither Class: 7 | ||
| + | Neither Class: 8, 9, 10 | ||
| + | |||
| + | --- | ||
| + | |||
| + | State: x | ||
| + | State: x, x, x | ||
| + | - Requires the actor using the item to be affected by state 'x'. If multiple | ||
| + | 'x' are used, the actor can be affected by any of them. If the actor is not | ||
| + | affected by state 'x', then the condition fails and the item is disabled | ||
| + | and cannot be used regardless of other conditions. | ||
| + | |||
| + | Not State: x | ||
| + | Not State: x, x, x | ||
| + | - Requires the actor using the item to be not affected by state 'x'. If | ||
| + | multiple 'x' are used, the actor cannot be affected by any of them. If the | ||
| + | actor is not affected by state 'x', then the condition fails and the item is | ||
| + | disabled and cannot be used regardless of other conditions. | ||
| + | |||
| + | Examples: | ||
| + | State: 10 | ||
| + | State: 11, 12, 13, 14, 15 | ||
| + | Not State: 16 | ||
| + | Not Stage: 17, 18, 19, 20 | ||
| + | |||
| + | --- | ||
| + | |||
| + | Switch Off: x | ||
| + | Switch Off: x, x, x | ||
| + | - Requires switch(es) x to be OFF before the item can be used. If the switch | ||
| + | is ON, then the item is disabled and cannot be used regardless of other | ||
| + | conditions. | ||
| + | |||
| + | Examples: | ||
| + | Switch Off: 1 | ||
| + | Switch Off: 2, 3, 4, 5, 6 | ||
| + | |||
| + | --- | ||
| + | |||
| + | Switch On: x | ||
| + | Switch On: x, x, x | ||
| + | - Requires switch(es) x to be ON before the item can be used. If the switch | ||
| + | is OFF, then the item is disabled and cannot be used regardless of other | ||
| + | conditions. | ||
| + | |||
| + | Examples: | ||
| + | Switch On: 1 | ||
| + | Switch On: 2, 3, 4, 5, 6 | ||
| + | |||
| + | --- | ||
| + | |||
| + | Variable x eval | ||
| + | - Makes a check against variable x. Replace 'x' with an integer value and | ||
| + | 'eval' with the code check you wish to run it against. | ||
| + | |||
| + | Examples: | ||
| + | Variable 1 >= 5 | ||
| + | Variable 2 < 6 | ||
| + | Variable 3 === 7 | ||
| + | Variable 4 !== 8 | ||
| + | |||
| + | --- | ||
| + | |||
| + | Weapon: x | ||
| + | Weapon: x, x, x | ||
| + | - Requires the actor to specifically have weapon ID 'x' equipped to use the | ||
| + | item. If multiple 'x' are used, the actor can have any of them equipped. If | ||
| + | the actor does not have weapon 'x' equipped, then the item is disabled and | ||
| + | cannot be used regardless of other conditions. | ||
| + | |||
| + | Not Weapon: x | ||
| + | Not Weapon: x, x, x | ||
| + | - Requires the actor to not have weapon ID 'x' equipped to use the item. | ||
| + | If multiple 'x' are used, the actor cannot have any of them equipped. If | ||
| + | the actor does have weapon 'x' equipped, then the item is disabled and | ||
| + | cannot be used regardless of other conditions. | ||
| + | |||
| + | Examples: | ||
| + | Weapon: 1 | ||
| + | Weapon: 2, 3, 4, 5, 6 | ||
| + | Not Weapon: 7 | ||
| + | Not Weapon: 8, 9, 10 | ||
| + | |||
| + | --- | ||
| + | |||
| + | Weapon Type: x | ||
| + | Weapon Type: x, x, x | ||
| + | - Requires the actor to have weapon type 'x' equipped. If multiple 'x' are | ||
| + | used, the actor can have any of the 'x' weapon types equipped. If the actor | ||
| + | does not have the matching weapon types, then the item is disabled and | ||
| + | cannot be used regardless of other conditions. | ||
| + | |||
| + | Not Weapon Type: x | ||
| + | Not Weapon Type: x, x, x | ||
| + | - Requires the actor to not have weapon type 'x' equipped. If multiple 'x' | ||
| + | are used, the actor cannot have any of the 'x' weapon types equipped. If the | ||
| + | actor does have the matching weapon types, then the item is disabled and | ||
| + | cannot be used regardless of other conditions. | ||
| + | |||
| + | Examples: | ||
| + | Weapon Type: 1 | ||
| + | Weapon Type: 2, 3, 4, 5, 6 | ||
| + | Not Weapon Type: 7 | ||
| + | Not Weapon Type: 8, 9, 10 | ||
| + | </nowiki> | ||
| + | |||
| + | === [[Item Upgrade Slots (YEP)|Item Upgrade Slots]] === | ||
| + | <hr> | ||
| + | |||
| + | <nowiki> | ||
| + | The following notetags can be used to modify item upgrades. | ||
| + | |||
| + | Weapon, and Armor Notetags | ||
| + | <Upgrade Slots: x> | ||
| + | This sets the number of times an item can be upgraded instead of the | ||
| + | default amount defined in the database. | ||
| + | |||
| + | <Slot Variance: x> | ||
| + | This makes it so that there is a random variance for the number of slots | ||
| + | provided through the item. If this notetag isn't used, it will go by the | ||
| + | setting in the parameters. | ||
| + | |||
| + | <Upgrade Sound: filename> | ||
| + | Changes the upgrade sound played to 'filename'. If this notetag isn't | ||
| + | used, the 'Default Sound' parameter sound will be used instead. | ||
| + | |||
| + | <Upgrade Effect> | ||
| + | effect | ||
| + | effect | ||
| + | </Upgrade Effect> | ||
| + | These are the effects applied (in the order they're listed). Refer to the | ||
| + | 'Upgrade Effects List' in the next section to have those effects applied | ||
| + | to the upgraded item. | ||
| + | |||
| + | <Upgrade Item Type: All> | ||
| + | <Upgrade Item Type: Regular> | ||
| + | <Upgrade Item Type: Key> | ||
| + | <Upgrade Item Type: Hidden A> | ||
| + | <Upgrade Item Type: Hidden B> | ||
| + | <Upgrade Item Type: Always> | ||
| + | <Upgrade Item Type: Battle> | ||
| + | <Upgrade Item Type: Menu> | ||
| + | <Upgrade Item Type: Never> | ||
| + | <Upgrade Item Type: string> | ||
| + | This makes it so this item can be used to upgrade the item that matches | ||
| + | either the item type or the item occassion. If none of those work for you, | ||
| + | you can use the following notetag and place an instance for 'string' | ||
| + | inside of the item upgrade types. | ||
| + | |||
| + | <Type: string> | ||
| + | Puts this type into the notebox for items (not weapons nor armors) and it | ||
| + | will add 'string' as its type. You can insert multiple copies of this | ||
| + | notetag to enable the item to have more types. Any types in here that | ||
| + | match the types for the previous notetag will enable the item to be | ||
| + | upgradeable by that upgrade item type. | ||
| + | |||
| + | <Upgrade Weapon Type: x> | ||
| + | <Upgrade Weapon Type: x, x, x> | ||
| + | <Upgrade Weapon Type: x through x> | ||
| + | This makes it so that only weapon types x can use this item for upgrade. | ||
| + | If you use weapon type 0, all weapons can be upgraded using this item. | ||
| + | |||
| + | <Upgrade Armor Type: x> | ||
| + | <Upgrade Armor Type: x, x, x> | ||
| + | <Upgrade Armor Type: x through x> | ||
| + | This makes it so that only armor types x can use this item for upgrade. | ||
| + | If you use armor type 0, all armor can be upgraded using this item. | ||
| + | </nowiki> | ||
| + | |||
| + | ; Upgrade Effects List | ||
| + | |||
| + | <nowiki> | ||
| + | The following is a list of effects you can use for the <Upgrade Effects> | ||
| + | notetag to have it apply the desired effects to the upgraded item. | ||
| + | |||
| + | Effect Text Upgrade Effect: | ||
| + | Base Name: x - Changes item's base name to x. *Note2 | ||
| + | Boost Count: +x - Increases Boost Count by x. *Note2 | ||
| + | Boost Count: -x - Decreases Boost Count by x. *Note2 | ||
| + | Eval: x - Runs x as a piece of code. *Note2 | ||
| + | Name: x - Changes item's name to x. *Note2 | ||
| + | Icon: x - Changes item's icon to x. *Note2 | ||
| + | Picture Image: filename - Changes item's picture image to filename. *Note4 | ||
| + | Picture Hue: x - Changes item's picture hue to x. *Note4 | ||
| + | Prefix: x - Changes item's prefix to x. *Note2 | ||
| + | Priority Name: x - Sets priority name to x. *Note2 | ||
| + | Random Stat: x - Increases or decreases 'Stat' by 0 to x. *Note1 | ||
| + | Random Stat: +x - Increases 'Stat' by 0 to x. *Note1 | ||
| + | Random Stat: -x - Decreases 'Stat' by 0 to x. *Note1 | ||
| + | Reset Base Name - Resets the base name to default. | ||
| + | Reset Boost Count - Resets the Boost Count to 0. | ||
| + | Reset Icon - Resets the icon back to the default icon. | ||
| + | Reset Prefix - Resets name prefix to default. | ||
| + | Reset Stat - Resets 'Stat' back to base stat values. *Note1 | ||
| + | Reset Suffix - Resets name suffix to default. | ||
| + | Reset Full - Resets every single aspect about item. *Note3 | ||
| + | Slots: x - Changes the slot consumption cost to x. *Note1 | ||
| + | Stat: +x - Increases 'Stat' by x. *Note1 | ||
| + | Stat: +x% - Increases 'Stat' by x% of base stat. *Note1 | ||
| + | Stat: -x - Decreases 'Stat' by x. *Note1 | ||
| + | Stat: -x% - Decreases 'Stat' by x% of base stat. *Note1 | ||
| + | Suffix: x - Changes item's suffix to x. *Note2 | ||
| + | Text Color: x - Changes item's text color to x. | ||
| + | |||
| + | Note1: 'Stat' is to be replaced by 'MaxHP', 'MaxMP', 'ATK', 'DEF', 'MAT', | ||
| + | 'MDF', 'AGI', 'LUK', 'SLOTS', 'ALL' or 'CURRENT'. 'ALL' affects all stats. | ||
| + | 'CURRENT' affects only non-zero stats. This effect will also increase the | ||
| + | boost count (+x) by 1 and update the item's name. | ||
| + | |||
| + | Note2: This does not alter boost count nor update the item's name unless | ||
| + | it is altered by the effect. | ||
| + | |||
| + | Note3: Because this effect resets absolutely everything about an item, it | ||
| + | will send the player away from the upgrade menu to reset the standings of | ||
| + | the item. | ||
| + | |||
| + | Note4: This requires the Item Picture Images plugin. | ||
| + | </nowiki> | ||
| + | |||
| + | == [[Item Synthesis (YEP)|Item Synthesis]] == | ||
| + | |||
| + | <nowiki> | ||
| + | To allow the player the ability to craft a certain item, that item must be | ||
| + | included in a recipe notetag in an item that the player possesses. | ||
| + | |||
| + | Item, Weapon, and Armor Notetags: | ||
| + | <Item Recipe: x> | ||
| + | <Item Recipe: x, x, x> | ||
| + | <Item Recipe: x to y> | ||
| + | This will change this item into a recipe for x item(s). As long as this | ||
| + | item is in possession by the party as a whole, item(s) x can be | ||
| + | synthesized by the player provided that the player has the proper quantity | ||
| + | of ingredients. | ||
| + | * Note: Entries without names will not be included. Entries without both a | ||
| + | synthesis cost and without an ingredient list will not be included. | ||
| + | |||
| + | <Weapon Recipe: x> | ||
| + | <Weapon Recipe: x, x, x> | ||
| + | <Weapon Recipe: x to y> | ||
| + | This will change this item into a recipe for x weapon(s). As long as this | ||
| + | item is in possession by the party as a whole, weapon(s) x can be | ||
| + | synthesized by the player provided that the player has the proper quantity | ||
| + | of ingredients. | ||
| + | * Note: Entries without names will not be included. Entries without both a | ||
| + | synthesis cost and without an ingredient list will not be included. | ||
| + | |||
| + | <Armor Recipe: x> | ||
| + | <Armor Recipe: x, x, x> | ||
| + | <Armor Recipe: x to y> | ||
| + | This will change this item into a recipe for x armor(s). As long as this | ||
| + | item is in possession by the party as a whole, armor(s) x can be | ||
| + | synthesized by the player provided that the player has the proper quantity | ||
| + | of ingredients. | ||
| + | * Note: Entries without names will not be included. Entries without both a | ||
| + | synthesis cost and without an ingredient list will not be included. | ||
| + | |||
| + | <Synthesis Ingredients> | ||
| + | item id | ||
| + | item id: x | ||
| + | weapon id | ||
| + | weapon id: x | ||
| + | armor id | ||
| + | armor id: x | ||
| + | gold: x | ||
| + | named item | ||
| + | named item: x | ||
| + | </Synthesis Ingredients> | ||
| + | Using the above tag in an item will set those items as the ingredients | ||
| + | required for the player to synthesize. Replace "id" with the proper item, | ||
| + | weapon, or armor ID's. If no ":x" is used, the database will register that | ||
| + | as only needing 1 of that item as an ingredient. If "gold: x" is used, | ||
| + | that will be the cost required to synthesize the item. | ||
| + | |||
| + | If you are using named entries, priority will be given to the highest ID | ||
| + | in the order of items, weapons, then armors. | ||
| + | |||
| + | * Note: If you are using Item Core, Independent Items cannot become an | ||
| + | ingredient for a recipe and will therefore be automatically omitted. | ||
| + | |||
| + | <Mask Name: x> | ||
| + | If you are masking unknown items' names, you can change the text shown for | ||
| + | the unknown item with x. This will cause the game to use the mask name | ||
| + | instead of the usual ??? (if that's what you're using) to mask the item. | ||
| + | This can give a player a general idea of what they may be synthesizing | ||
| + | such as "Strange Liquid" or "Weird Crystal". | ||
| + | </nowiki> | ||
| + | |||
| + | == [[Job Points (YEP)|Job Points]] == | ||
| + | |||
| + | <nowiki> | ||
| + | Here are some notetags related to Job Points. | ||
| + | |||
| + | Actor Notetags | ||
| + | <Starting JP: x> | ||
| + | Sets the actor's starting JP value to be x for the actor's initial class. | ||
| + | |||
| + | <Class x Starting JP: y> | ||
| + | Sets the actor's starting JP value for class x to be y. | ||
| + | |||
| + | <JP Rate: x%> | ||
| + | This changes the rate of JP gained by x%. By default, all objects have a | ||
| + | default rate of 100%. Increasing this to 200% will increase JP gained by | ||
| + | twice as much while 50% will halve the amount of JP gained. | ||
| + | |||
| + | Skill and Item Notetags | ||
| + | <JP Gain: x> | ||
| + | This makes it so that the actor using this skill or item will gain x | ||
| + | amount of JP instead of the default amount of JP found in the parameters. | ||
| + | |||
| + | <Target JP Gain: x> | ||
| + | This makes it so that the target actor affected by this skill or item will | ||
| + | gain x amount of JP. | ||
| + | |||
| + | Class, Weapon, Armor, and State Notetag | ||
| + | <JP Rate: x%> | ||
| + | This changes the rate of JP gained by x%. By default, all objects have a | ||
| + | default rate of 100%. Increasing this to 200% will increase JP gained by | ||
| + | twice as much while 50% will halve the amount of JP gained. | ||
| + | |||
| + | Enemy Notetag | ||
| + | <JP: x> | ||
| + | When the enemy is defeated, the party members present will gain x JP each. | ||
| + | </nowiki> | ||
| + | |||
| + | == [[Level Up Growth Effects (YEP)|Level Up Growth Effects]] == | ||
| + | |||
| + | <pre> | ||
| + | Insert the following notetags into the respective database object noteboxes | ||
| + | to acquire their Level Up Growth Effects. | ||
| + | |||
| + | Actor, Class, Skill, Weapon, Armor, State Notetags: | ||
| + | |||
| + | <Level Up stat Growth: +x> | ||
| + | <Level Up stat Growth: -x> | ||
| + | Upon leveling up, this will raise/reduce a particular 'stat' by x value. | ||
| + | - Replace 'stat' with 'MaxHP', 'MaxMP', 'ATK', 'DEF', 'MAT', 'MDF', 'AGI', | ||
| + | or 'LUK' to alter that specific stat. | ||
| + | - Replace 'x' with a numeric value indicating how much growth to apply. | ||
| + | |||
| + | <Level Up Learn Skill: x> | ||
| + | Upon leveling up, this will teach the actor skill x. | ||
| + | - Replace 'x' with the ID of the skill you wish to teach the actor. | ||
| + | |||
| + | <Level Up Switch On: x> | ||
| + | <Level Up Switch On: x, x, x> | ||
| + | <Level Up Switch On: x to y> | ||
| + | <Level Up Switch Off: x> | ||
| + | <Level Up Switch Off: x, x, x> | ||
| + | <Level Up Switch Off: x to y> | ||
| + | Upon leveling up, this will cause switch(es) x to turn on or off. | ||
| + | - Replace 'x' with the ID of the switch(es) to turn on/off. | ||
| + | - If using 'x to y', set 'x' to the starting ID and 'y' to the ending ID. | ||
| + | - Insert multiples of this notetag to affect multiple switches. | ||
| + | |||
| + | <Level Up Recover All> | ||
| + | Upon leveling up, this will cause the Recover All effect to trigger for | ||
| + | the actor. | ||
| + | </pre> | ||
| + | |||
| + | == [[Life Steal (YEP)|Life Steal]] == | ||
| + | |||
| + | <nowiki> | ||
| + | You can use the following notetags to alter how Life Stealing works for the | ||
| + | various database entries. | ||
| + | |||
| + | --- | ||
| + | |||
| + | Skill and Item Notetags: | ||
| + | |||
| + | <HP Life Steal: x%> | ||
| + | <MP Life Steal: x%> | ||
| + | This causes this attack to life steal x% of HP or MP back relative to the | ||
| + | amount of damage dealt. | ||
| + | |||
| + | <HP Life Steal: x> | ||
| + | <MP Life Steal: x> | ||
| + | This causes this attack to life steal exactly x amount of HP or MP back | ||
| + | regardless of damage dealt. | ||
| + | |||
| + | <Cancel Life Steal> | ||
| + | Makes this skill or item cancel any Life Steal effects from passively | ||
| + | activating for this action. However, HP Drain and MP Drain will still | ||
| + | still occur. | ||
| + | |||
| + | <Cancel HP Life Steal> | ||
| + | <Cancel MP Life Steal> | ||
| + | Specifically cancels out HP Life Steal or MP Life Steal effects from | ||
| + | passively activating for this action. However, HP Drain and MP Drain will | ||
| + | still occur. | ||
| + | |||
| + | --- | ||
| + | |||
| + | Actor, Class, Enemy, Weapon, Armor, State Notetags: | ||
| + | |||
| + | <HP Life Steal Physical: +x%> | ||
| + | <HP Life Steal Magical: +x%> | ||
| + | <HP Life Steal Certain: +x%> | ||
| + | |||
| + | <MP Life Steal Physical: +x%> | ||
| + | <MP Life Steal Magical: +x%> | ||
| + | <MP Life Steal Certain: +x%> | ||
| + | |||
| + | <HP Life Steal Physical: -x%> | ||
| + | <HP Life Steal Magical: -x%> | ||
| + | <HP Life Steal Certain: -x%> | ||
| + | |||
| + | <MP Life Steal Physical: -x%> | ||
| + | <MP Life Steal Magical: -x%> | ||
| + | <MP Life Steal Certain: -x%> | ||
| + | This causes the related battler to multiplicatively increase its passive | ||
| + | Life Steal by +x% or -x% of the damage dealt towards Physical, Magical, or | ||
| + | Certain Hit type of attacks. This effect stacks multiplicatively. | ||
| + | |||
| + | <HP Life Steal Physical: +x> | ||
| + | <HP Life Steal Magical: +x> | ||
| + | <HP Life Steal Certain: +x> | ||
| + | |||
| + | <MP Life Steal Physical: +x> | ||
| + | <MP Life Steal Magical: +x> | ||
| + | <MP Life Steal Certain: +x> | ||
| + | |||
| + | <HP Life Steal Physical: -x> | ||
| + | <HP Life Steal Magical: -x> | ||
| + | <HP Life Steal Certain: -x> | ||
| + | |||
| + | <MP Life Steal Physical: -x> | ||
| + | <MP Life Steal Magical: -x> | ||
| + | <MP Life Steal Certain: -x> | ||
| + | This causes the related battler to additively increase its passive Life | ||
| + | Steal by a flat +x or -x of the damage dealt towards Physical, Magical, or | ||
| + | Certain Hit type of attacks. This effect stacks additively. | ||
| + | |||
| + | <Guard Life Steal> | ||
| + | The related battler cannot be life stolen from for both HP and MP. | ||
| + | |||
| + | <Guard HP Life Steal> | ||
| + | <Guard MP Life Steal> | ||
| + | The related battler cannot be life stolen from for either HP or MP. | ||
| + | |||
| + | <Cancel Life Steal> | ||
| + | The related battler cannot passively life steal both HP and MP. | ||
| + | |||
| + | <Cancel HP Life Steal> | ||
| + | <Cancel MP Life Steal> | ||
| + | The related battler cannot passively life steal HP or MP specifically. | ||
| + | |||
| + | --- | ||
| + | </nowiki> | ||
| + | |||
| + | == [[Main Menu Manager (YEP)|Main Menu Manager]] == | ||
| + | |||
| + | === [[Main Menu Actor Events (YEP)|Main Menu Actor Events]] === | ||
| + | <hr> | ||
| + | |||
| + | <pre> | ||
| + | The notetags are only used for actors. They don't apply to classes or any | ||
| + | other database objects. | ||
| + | |||
| + | Actor Notetags: | ||
| + | |||
| + | <Menu keyword Event: x> | ||
| + | - Replace 'keyword' with the exact keyword used in the Main Menu Manager | ||
| + | command ext entry setup that you want to associate with this notetag. | ||
| + | - Replace 'x' with the exact ID of the common event you wish to run. | ||
| + | </pre> | ||
| + | |||
| + | == [[Map Display Name Core (Olivia)|Map Display Name Core]] == | ||
| + | |||
| + | <html><img src='https://img.itch.zone/aW1nLzE0NTY0NjkuZ2lm/original/rFqrRb.gif'></html> | ||
| + | |||
| + | You can use custom Dim Colors for special maps. Put these notetags into | ||
| + | the map's note box. | ||
| + | |||
| + | <pre> | ||
| + | <Dim Color 1: r, g, b, a> | ||
| + | <Dim Color 2: r, g, b, a> | ||
| + | |||
| + | r = red (0-255) | ||
| + | g = green (0-255) | ||
| + | b = blue (0-255) | ||
| + | a = alpha (0-100) | ||
| + | </pre> | ||
| + | |||
| + | For example, a yellow Dim Color 1 notetag would look like this: | ||
| + | |||
| + | <pre> | ||
| + | <Dim Color 1: 255, 255, 0, 60> | ||
| + | </pre> | ||
| + | |||
| + | == [[Meta Controls (Olivia)|Meta Controls]] == | ||
| + | |||
| + | <html><img src='https://img.itch.zone/aW1nLzE1MTUwODAucG5n/original/rxJfDT.png'></html> | ||
| + | |||
| + | <pre> | ||
| + | <Global Meta> | ||
| + | - Place this in the name of a switch or variable that you want to have its | ||
| + | data persist across different saves and even new games. This does not have to | ||
| + | be the full name. It can be just a part of the switch or variable's name. | ||
| + | </pre> | ||
| + | |||
| + | <html><img src='https://img.itch.zone/aW1nLzE1MTUwODEucG5n/original/qLXj2I.png'></html> | ||
| + | |||
| + | <pre> | ||
| + | <Local Meta> | ||
| + | - Place this in the name of a switch or variable that you want to have its | ||
| + | data persist across only related saves. This does not have to be the full | ||
| + | name. It can be a part of the switch or variable's name. | ||
| + | </pre> | ||
| + | |||
| + | == [[Move Route Core (YEP)|Move Route Core]] == | ||
| + | |||
| + | <nowiki> | ||
| + | These are some notetags you can utilize for your events. | ||
| + | |||
| + | Event Notetags: | ||
| + | |||
| + | <Always Update Movement> | ||
| + | - Most events don't update unless they're close to the screen. But any | ||
| + | event with this notetag will always be updating regardless of whether they | ||
| + | are close to the screen or not. | ||
| + | </nowiki> | ||
| + | |||
| + | == [[Multi-Layer HP Gauge (Arisu)|Multi-Layer HP Gauge]] == | ||
| + | |||
| + | <html><img src='https://img.itch.zone/aW1hZ2UvNjIzODc1LzMzMjI2ODkuZ2lm/original/II9Me1.gif'></html> | ||
| + | |||
| + | <pre> | ||
| + | <HP Layers: n> | ||
| + | |||
| + | To give enemies more than one HP Layer, use the <HP Layers: n> notetag. | ||
| + | Up to 10 layers can be used for an enemy. Place inside enemy notebox. | ||
| + | </pre> | ||
| + | |||
| + | == [[Overkill Bonus (YEP)|Overkill Bonus]] == | ||
| + | |||
| + | <nowiki> | ||
| + | Insert the following notetags into the enemy noteboxes you wish to alter the | ||
| + | overkill requirements for. | ||
| + | |||
| + | Enemy Notetags | ||
| + | |||
| + | <Overkill Requirement: x> | ||
| + | - Changes the enemy's overkill requirement to X. This is how much damage | ||
| + | needs to be dealt minimum on the killing blow. You can use JS code here if | ||
| + | you can fit it all on one line. Otherwise, use the notetag setup below in | ||
| + | the Lunatic Mode section. | ||
| + | |||
| + | <Overkill Animation: x> | ||
| + | - This is the animation played when the enemy is overkilled. Replace x | ||
| + | with an animation ID from the database. | ||
| + | |||
| + | <Overkill EXP Rate: x%> | ||
| + | <Overkill EXP Flat: x> | ||
| + | - This is the bonus EXP gained when the enemy is overkilled. Replace x | ||
| + | with a number value. This EXP gained from overkilling will be added on top | ||
| + | of the already gained EXP. | ||
| + | |||
| + | <Overkill Gold Rate: x%> | ||
| + | <Overkill Gold Flat: x> | ||
| + | - This is the bonus gold gained when the enemy is overkilled. Replace x | ||
| + | with a number value. This gold gained from overkilling will be added on | ||
| + | top of the already gained gold. | ||
| + | |||
| + | <Overkill Drop Rate: x%> | ||
| + | - This is the bonus drop rate gained when the enemy is overkilled. Replace | ||
| + | x with the percent rate increase. | ||
| + | </nowiki> | ||
| + | |||
| + | ; Extra Enemy Drops Compatibility - Conditional Drop - Overkill | ||
| + | |||
| + | <nowiki> | ||
| + | To be used together with the YEP_ExtraEnemyDrops plugin. Place this plugin | ||
| + | underneath YEP_ExtraEnemyDrops in the plugin manager list for compatibility. | ||
| + | Then, you can use the following condition: | ||
| + | |||
| + | =-=-=-=-=-=-=-=-=-=-=-=-=-=-=-=-=-=-=-=-=-=-=-=-=-=-=-=-=-=-=-=-=-=-=-=-=-=- | ||
| + | IS OVERKILLED | ||
| + | - - - - - - - - - - - - - - - - - - - - - - - - - - - - - - - - - - - - - - - | ||
| + | This condition will pass only if the enemy is overkilled. If the overkill | ||
| + | requirement isn't met, there will be no additional changes to the drop rate. | ||
| + | - - - - - - - - - - - - - - - - - - - - - - - - - - - - - - - - - - - - - - - | ||
| + | Example: Is Overkilled: +100% | ||
| + | =-=-=-=-=-=-=-=-=-=-=-=-=-=-=-=-=-=-=-=-=-=-=-=-=-=-=-=-=-=-=-=-=-=-=-=-=-=- | ||
| + | |||
| + | One thing you can do to make Overkill only items is using something like the | ||
| + | following setup: | ||
| + | |||
| + | <Conditional Potion Drop> | ||
| + | is overkilled: +100% | ||
| + | </Conditional Potion Drop> | ||
| + | |||
| + | This notetag setup will make the 'Potion' item only drop if the enemy has | ||
| + | been overkilled. Otherwise, nothing will come out of it. | ||
| + | </nowiki> | ||
| + | |||
| + | == [[Provoke Effect (Olivia)|Provoke Effect]] == | ||
| + | |||
| + | <html><a href='link'><img src='https://img.itch.zone/aW1nLzI5OTk1MDcuZ2lm/original/vFJ2%2BZ.gif'></a></html> | ||
| + | |||
| + | <html><img src='https://img.itch.zone/aW1nLzI5OTk2NDkucG5n/original/Nw%2BW0Q.png'></html> | ||
| + | |||
| + | <pre> | ||
| + | <Provoke> | ||
| + | |||
| + | - Used for: State Notetags | ||
| + | - Causes the state affected unit to be able to only attack the caster of the | ||
| + | provoke state for single target actions. | ||
| + | - If multiple provoke states are applied, then the provoker is the one who | ||
| + | applied the highest priority provoke state. | ||
| + | </pre> | ||
| + | |||
| + | <pre> | ||
| + | <Bypass Provoke> | ||
| + | |||
| + | - Used for: Actor, Class, Weapon, Armor, Enemy, State Notetags | ||
| + | - Makes the affected unit to ignore any and all provoke effects applied by | ||
| + | any provoke states, allowing them to target foes as if they are unaffected | ||
| + | by provoke states altogether. | ||
| + | </pre> | ||
| + | |||
| + | == [[Proximity Compass (Olivia)|Proximity Compass]] == | ||
| + | |||
| + | <html><img src='https://img.itch.zone/aW1hZ2UvMzI3MzAwLzE2MTkzNjYuZ2lm/original/d%2B4T1k.gif'></html> | ||
| + | |||
| + | <pre> | ||
| + | <Hide Compass> | ||
| + | - Place this notetag inside maps where you don't want the compass to show. | ||
| + | </pre> | ||
| + | |||
| + | == [[Recruiting Board (Irina)|Recruiting Board]] == | ||
| + | |||
| + | <html><img src='https://img.itch.zone/aW1nLzI0NDM4MjAucG5n/original/MDPZ3%2B.png'></html> | ||
| + | |||
| + | Insert the following notetags to make actors recruitable or change their recruitment properties: | ||
| + | |||
| + | ; Recruit Notetags | ||
| + | |||
| + | <html><img src='https://img.itch.zone/aW1nLzI0NDM4MTMucG5n/original/PLe3te.png' width='300'></html> | ||
| + | |||
| + | <pre> | ||
| + | <Recruitable> | ||
| + | - Makes the actor recruitable. This is absolutely required to make the | ||
| + | actor appear inside the Recruiting Board scene. | ||
| + | </pre> | ||
| + | |||
| + | <pre> | ||
| + | <Recruit Cost: x> | ||
| + | - Replace 'x' with a number or formula on how much the actor should cost. | ||
| + | - If this notetag isn't used, it will use the Plugin Parameters formula. | ||
| + | </pre> | ||
| + | |||
| + | ; Retire Notetags | ||
| + | |||
| + | <html><img src='https://img.itch.zone/aW1nLzI0NDM4MTQucG5n/original/VIfN82.png' width='300'></html> | ||
| + | |||
| + | <pre> | ||
| + | <Cannot Retire> | ||
| + | - Makes the actor unable to be retired, even if you've hired them and even | ||
| + | if they have a retire value. | ||
| + | </pre> | ||
| + | |||
| + | <pre> | ||
| + | <Retire Value: x> | ||
| + | - Replace 'x' with a number or formula on how much the actor should return. | ||
| + | - If this notetag isn't used, it will use the Plugin Parameters formula. | ||
| + | </pre> | ||
| + | |||
| + | == [[Region Battlebacks (YEP)|Region Battlebacks]] == | ||
| + | |||
| + | <nowiki> | ||
| + | To bind specific battlebacks to certain region ID's, you can use these | ||
| + | following notetags: | ||
| + | |||
| + | Map Notetags: | ||
| + | |||
| + | <Region x Battleback1: filename> | ||
| + | <Region x Battleback2: filename> | ||
| + | This will change the battleback1 or battleback2 for region x to use | ||
| + | the battleback image with the matching filename. When writing out the | ||
| + | filename, it is case sensitive. Do not insert the file extension. | ||
| + | |||
| + | For example: | ||
| + | |||
| + | If you want Region 5 to use battleback1 Dirt2.png and battleback2 as | ||
| + | Forest.png, you would use these two notetags: | ||
| + | |||
| + | <Region 5 Battleback1: Dirt2> | ||
| + | <Region 5 Battleback2: Forest> | ||
| + | |||
| + | Insert these combinations into the noteboxes of the maps you wish to use | ||
| + | specific battlebacks per region for. | ||
| + | </nowiki> | ||
| + | |||
| + | == [[Region Events (YEP)|Region Events]] == | ||
| + | |||
| + | <nowiki> | ||
| + | You can use this notetag inside of your maps. | ||
| + | |||
| + | Map Notetags: | ||
| + | <Region x Event: y> | ||
| + | If the player steps onto a tile marked by Region x, it will run the | ||
| + | common event y. This will override the default settings marked in the | ||
| + | editor specifically for that map. | ||
| + | </nowiki> | ||
| + | |||
| + | == [[Region Restrictions (YEP)|Region Restrictions]] == | ||
| + | |||
| + | <nowiki> | ||
| + | You can use this notetag inside of your maps. | ||
| + | |||
| + | Map Notetags: | ||
| + | |||
| + | <Player Restrict Region: x> | ||
| + | <Player Restrict Region: x, x, x> | ||
| + | <Player Restrict Region: x to y> | ||
| + | Restricts region x for the player on this particular map. Use multiple x | ||
| + | to mark more regions. From x to y, you can mark a multitude of regions. | ||
| + | |||
| + | <Event Restrict Region: x> | ||
| + | <Event Restrict Region: x, x, x> | ||
| + | <Event Restrict Region: x to y> | ||
| + | Restricts region x for all events on this particular map. Use multiple x | ||
| + | to mark more regions. From x to y, you can mark a multitude of regions. | ||
| + | |||
| + | <All Restrict Region: x> | ||
| + | <All Restrict Region: x, x, x> | ||
| + | <All Restrict Region: x to y> | ||
| + | Restricts region x for the player and all events on this particular map. | ||
| + | Use multiple x to mark more regions. From x to y, you can mark a multitude | ||
| + | of regions. | ||
| + | |||
| + | <Player Allow Region: x> | ||
| + | <Player Allow Region: x, x, x> | ||
| + | <Player Allow Region: x to y> | ||
| + | Allows region x for the player on this particular map. Use multiple x | ||
| + | to mark more regions. From x to y, you can mark a multitude of regions. | ||
| + | |||
| + | <Event Allow Region: x> | ||
| + | <Event Allow Region: x, x, x> | ||
| + | <Event Allow Region: x to y> | ||
| + | Allows region x for all events on this particular map. Use multiple x | ||
| + | to mark more regions. From x to y, you can mark a multitude of regions. | ||
| + | |||
| + | <All Allow Region: x> | ||
| + | <All Allow Region: x, x, x> | ||
| + | <All Allow Region: x to y> | ||
| + | Allows region x for the player and all events on this particular map. | ||
| + | Use multiple x to mark more regions. From x to y, you can mark a multitude | ||
| + | of regions. | ||
| + | </nowiki> | ||
| + | |||
| + | === [[Vehicle Restrictions (YEP)|Vehicle Restrictions]] === | ||
| + | <hr> | ||
| + | |||
| + | <nowiki> | ||
| + | Insert these notetags into the map noteboxes to allow for custom settings | ||
| + | for vehicles on that map only. | ||
| + | |||
| + | Map Noteboxes: | ||
| + | |||
| + | <Boat Restrict Region: x> | ||
| + | <Boat Restrict Region: x, x, x> | ||
| + | <Boat Restrict Region: x to y> | ||
| + | <Ship Restrict Region: x> | ||
| + | <Ship Restrict Region: x, x, x> | ||
| + | <Ship Restrict Region: x to y> | ||
| + | <Airship Restrict Region: x> | ||
| + | <Airship Restrict Region: x, x, x> | ||
| + | <Airship Restrict Region: x to y> | ||
| + | - These notetags will caused the vehicles to be unable to move past | ||
| + | region(s) marked with x (to y) unless the player character is given the | ||
| + | Through ON movement flag. These regions will be combined with the regions | ||
| + | flagged by the plugin parameters. | ||
| + | |||
| + | <Boat Allow Region: x> | ||
| + | <Boat Allow Region: x, x, x> | ||
| + | <Boat Allow Region: x to y> | ||
| + | <Ship Allow Region: x> | ||
| + | <Ship Allow Region: x, x, x> | ||
| + | <Ship Allow Region: x to y> | ||
| + | <Airship Allow Region: x> | ||
| + | <Airship Allow Region: x, x, x> | ||
| + | <Airship Allow Region: x to y> | ||
| + | - These notetags will cause the vehicles to be able to move through these | ||
| + | region(s) marked with x (to y). These regions will be combined with the | ||
| + | regions flagged by the plugin parameters. | ||
| + | |||
| + | <Boat Land Region: x> | ||
| + | <Boat Land Region: x, x, x> | ||
| + | <Boat Land Region: x to y> | ||
| + | <Ship Land Region: x> | ||
| + | <Ship Land Region: x, x, x> | ||
| + | <Ship Land Region: x to y> | ||
| + | <Airship Land Region: x> | ||
| + | <Airship Land Region: x, x, x> | ||
| + | <Airship Land Region: x to y> | ||
| + | - These notetags will enforce vehicles to only able to land on region(s) | ||
| + | marked by x (to y). They cannot land anywhere else. These regions will be | ||
| + | combined with the regions flagged by the plugin parameters. | ||
| + | </nowiki> | ||
| + | |||
| + | == [[Row Formation (YEP)|Row Formation]] == | ||
| + | |||
| + | <nowiki> | ||
| + | You can use these notetags to modify the various aspects of row formations. | ||
| + | |||
| + | Actor and Enemy Notetags: | ||
| + | <Default Row: x> | ||
| + | <Default Row: x, x, x> | ||
| + | This is the default row assigned to the battler by default. This will | ||
| + | override the default parameter settings. If multiple x values are assigned | ||
| + | then the battler can start in any of those rows. If multiple rows are | ||
| + | included, then at the start of the game (for actors) or start of battle | ||
| + | (for enemies), the battler will start in a random row included. | ||
| + | |||
| + | Actor, Class, Enemy, Weapon, Armor, and State Notetags: | ||
| + | <Row Lock> | ||
| + | This causes the affected battler to be row locked and unable to switch | ||
| + | rows. For enemies, this will override the default parameters. | ||
| + | |||
| + | <Not Row Lock> | ||
| + | This causes the affected battler to be not be row locked and able to | ||
| + | switch rows. This is primarily for enemies since all non-enemies are not | ||
| + | row locked by default. This will override the default parameters. | ||
| + | |||
| + | Skill and Item Notetags: | ||
| + | <Row Only: x> | ||
| + | <Row Only: x, x, x> | ||
| + | <Row Only: x to y> | ||
| + | This makes it so that this skill/item can only be used by the battler if | ||
| + | the battler is in row x. If multiple rows are used, the battler can be in | ||
| + | any of those rows. If you use the x to y notetag, this will account for | ||
| + | all the rows from x to y. | ||
| + | |||
| + | <Change Target Row: x> | ||
| + | Changes target's current row to x. This cannot go under 1 nor can it go | ||
| + | past the designated maximum row set in the parameters. | ||
| + | |||
| + | <Push Back Target Row: x> | ||
| + | This will push the target back x rows. This cannot exceed the maximum row | ||
| + | set in the parameters. | ||
| + | |||
| + | <Pull Forward Target Row: x> | ||
| + | This will pull the target forward x rows. This cannot exceed the maximum | ||
| + | rows set in the parameters. | ||
| + | |||
| + | <Change User Row: x> | ||
| + | Changes user's current row to x. This cannot go under 1 nor can it go | ||
| + | past the designated maximum row set in the parameters. | ||
| + | |||
| + | <Push Back User Row: x> | ||
| + | This will push the user back x rows. This cannot exceed the maximum row | ||
| + | set in the parameters. | ||
| + | |||
| + | <Pull Forward User Row: x> | ||
| + | This will pull the user forward x rows. This cannot exceed the maximum | ||
| + | rows set in the parameters. | ||
| + | </nowiki> | ||
| + | |||
| + | == [[Save Core (YEP)|Save Core]] == | ||
| + | |||
| + | === [[New Game+ (YEP)|New Game+]] === | ||
| + | <hr> | ||
| + | |||
| + | <nowiki>There are some notetags you can utilize with a few database objects. | ||
| + | |||
| + | Actor, Item, Weapon, Armor Notetag | ||
| + | |||
| + | <No New Game+ Carry Over> | ||
| + | - This will prevent the item, weapon, or armor from being carried over to | ||
| + | New Game+. If this is used on an actor, the actor will be in its default | ||
| + | state as if a new game started. | ||
| + | </nowiki> | ||
| + | |||
| + | == [[Save Event Locations (YEP)|Save Event Locations]] == | ||
| + | |||
| + | <nowiki> | ||
| + | Map Notetag: | ||
| + | <Save Event Locations> | ||
| + | This will cause the map to save every event's location on that map. After | ||
| + | leaving and returning to that map, the events will be reloaded onto their | ||
| + | last saved positions in addition to the direction they were facing. | ||
| + | |||
| + | Event Notetag: | ||
| + | <Save Event Location> | ||
| + | This will enable this specific event to save its location on this map. | ||
| + | After leaving and returning to the map, the event will be reloaded onto | ||
| + | its last saved position in addition to the direction it was facing. | ||
| + | |||
| + | If you wish to reset the position of the Event, simply use the Event Editor | ||
| + | and use "Set Event Location" to anchor the event's location to the desired | ||
| + | point as if you would normally. | ||
| + | </nowiki> | ||
| + | |||
| + | == [[Sealed Battle Commands (Arisu)|Sealed Battle Commands]] == | ||
| + | |||
| + | <html><img src='https://img.itch.zone/aW1hZ2UvNDg0NjEwLzI1MDA4NDIucG5n/original/c26%2BOt.png'></html> | ||
| + | |||
| + | ; Actor, Class, Item, Weapon, Armor, Enemy, State Notetags: | ||
| + | |||
| + | <pre> | ||
| + | <Attack Seal> | ||
| + | <Guard Seal> | ||
| + | <Item Seal> | ||
| + | - If a battler has one of these notetags inside their associated noteboxes, | ||
| + | then the battle command for that respective notetag will be sealed. | ||
| + | </pre> | ||
| + | |||
| + | == [[Shop Menu Core (YEP)|Shop Menu Core]] == | ||
| + | |||
| + | <nowiki> | ||
| + | You can use the following notetag to alter various shop aspects | ||
| + | |||
| + | Item, Weapon, and Armor Notetag: | ||
| + | |||
| + | <Price: x> | ||
| + | This notetag allows you to exceed the default editor limit for item prices | ||
| + | of 999,999 gold. | ||
| + | |||
| + | <Sell Price: x> | ||
| + | This sets the selling price of the item to x. | ||
| + | |||
| + | <Cannot Sell> | ||
| + | This makes it so that the item cannot be sold. | ||
| + | |||
| + | <Can Sell> | ||
| + | This makes it so that the item can be sold even if it is at 0 gold. | ||
| + | </nowiki> | ||
| + | |||
| + | === [[Conditional Shop Prices (YEP)|Conditional Shop Prices]] === | ||
| + | <hr> | ||
| + | |||
| + | <pre> | ||
| + | Insert the following notetags into the items, weapons, and/or armors you | ||
| + | want these notetags to affect. | ||
| + | |||
| + | Item, Weapon, and Armor Notetags: | ||
| + | |||
| + | <Base Price Variable: x> | ||
| + | - Sets the base price of the item to this variable's value. | ||
| + | This will replace the price set in the database. | ||
| + | |||
| + | <Percent Price Variable: x> | ||
| + | - Sets the variable which defines the percent modifier for the price. | ||
| + | If the variable's value is 100, then the percentage is 100%. | ||
| + | If the variable's value is 50, then the percentage is 50%. | ||
| + | If the variable's value is 350, then the percentage is 350%. | ||
| + | Use multiples of this notetag to have multiple variables affect the price. | ||
| + | This is calculated after the base price. | ||
| + | |||
| + | <Increase Price Variable: x> | ||
| + | - Sets the variable which defines a flat increase/decrease for the price. | ||
| + | If the variable's value is 100, then the price is increased by 100. | ||
| + | If the variable's value is -200, then the price is decreased by 200. | ||
| + | Use multiples of this notetag to have multiple variables affect the price. | ||
| + | This is calculated after the price percentage modifier. | ||
| + | |||
| + | <Exact Price Variable: x> | ||
| + | - Sets the variable which determines the exact value of the price. | ||
| + | If the variable's value is 50, then the price becomes 50. | ||
| + | If the variable's value is 2000, then the price becomes 2000. | ||
| + | This ignores all other modifiers. | ||
| + | |||
| + | <Price Minimum: x> | ||
| + | <Price Maximum: x> | ||
| + | - Sets the minimum/maximum values the price can reach. This is used to | ||
| + | prevent some prices from overinflating drastically. | ||
| + | </pre> | ||
| + | |||
| + | === [[Hide/Show Shop Items (YEP)|Hide/Show Shop Items]] === | ||
| + | <hr> | ||
| + | |||
| + | <pre> | ||
| + | Place the following notetags to make their visibility as a shop item appear | ||
| + | or not when the shop scene opens up. | ||
| + | |||
| + | Item, Weapon, and Armor Notetags | ||
| + | |||
| + | <Shop Hide if Switch On: x> | ||
| + | <Shop Hide if Switch Off: x> | ||
| + | - This will determine if a shop will be hidden if the specific switch 'x' | ||
| + | is either on/off (depending on the notetag you're using). Insert multiples | ||
| + | of these notetags if you want to use multiple switches to determine the | ||
| + | item's visibility. | ||
| + | |||
| + | <Shop Hide if Any Switch On: x> | ||
| + | <Shop Hide if Any Switch On: x, x, x> | ||
| + | <Shop Hide if Any Switch Off: x> | ||
| + | <Shop Hide if Any Switch Off: x, x, x> | ||
| + | - If any of the switches 'x' are on/off (depending on the notetag you're | ||
| + | using), then the shop will hide the item. Insert multiples of these | ||
| + | notetags if you want to use multiple switch batches to determine the | ||
| + | item's visibility. | ||
| + | |||
| + | <Shop Hide if All Switches On: x> | ||
| + | <Shop Hide if All Switches On: x, x, x> | ||
| + | <Shop Hide if All Switches Off: x> | ||
| + | <Shop Hide if All Switches Off: x, x, x> | ||
| + | - If all of the switches 'x' are on/off (depending on the notetag you're | ||
| + | using), then the shop will hide the item. Insert multiples of these | ||
| + | notetags if you want to use multiple switch batches to determine the | ||
| + | item's visibility. | ||
| + | </pre> | ||
| + | |||
| + | === [[More Currencies (YEP)|More Currencies]] === | ||
| + | <hr> | ||
| + | |||
| + | <nowiki> | ||
| + | You can use the following notetags to adjust various properties for more | ||
| + | currencies for your items, weapons, and armors. | ||
| + | |||
| + | Item, Weapon, and Armor Notetags: | ||
| + | |||
| + | <Variable x Buy Price: y> | ||
| + | This sets the currency of this item, weapon, or armor to variable x with | ||
| + | a buy price of y. You can insert multiples of this notetag to have more | ||
| + | than one variable cost for that item, weapon, or armor. | ||
| + | |||
| + | <Variable x Sell Price: y> | ||
| + | This makes it that when selling this item, weapon, or armor, the player | ||
| + | will gain variable x in y amount. You can insert multiples of this | ||
| + | notetag to have more than one variable cost for that item, weapon, or | ||
| + | armor. | ||
| + | |||
| + | <Item x Buy Price: y> | ||
| + | <Item name Buy Price: y> | ||
| + | This sets the currency of this item, weapon, or armor to cost item x (or | ||
| + | the named item) with a buy price of y. You can insert multiples of this | ||
| + | notetag to have more than one item cost for that item, weapon, or armor. | ||
| + | If you're using Item Core, this will not work on independent items. If you | ||
| + | are using the named version of the notetag and have multiple items in your | ||
| + | database of the same name, priority will be given to the item with the | ||
| + | highest ID. | ||
| + | |||
| + | <Item x Sell Price: y> | ||
| + | <Item name Sell Price: y> | ||
| + | When selling this item, weapon, or armor, the player will get item x (or | ||
| + | the named item) with a quantity of y. You can insert multiples of this | ||
| + | notetag to have more than one item cost for that item, weapon, or armor. | ||
| + | If you're using Item Core, this will not work on independent items. If you | ||
| + | are using the named version of the notetag and have multiple items in your | ||
| + | database of the same name, priority will be given to the item with the | ||
| + | highest ID. | ||
| + | |||
| + | <Weapon x Buy Price: y> | ||
| + | <Weapon name Buy Price: y> | ||
| + | This sets the currency of this item, weapon, or armor to cost weapon x (or | ||
| + | the named weapon) with a buy price of y. You can insert multiples of this | ||
| + | notetag to have more than one weapon cost for that item, weapon, or armor. | ||
| + | If you're using Item Core, this will not work on independent items. If you | ||
| + | are using the named version of the notetag and have multiple items in your | ||
| + | database of the same name, priority will be given to the item with the | ||
| + | highest ID. | ||
| + | |||
| + | <Weapon x Sell Price: y> | ||
| + | <Weapon name Sell Price: y> | ||
| + | When selling this item, weapon, or armor, the player will get weapon x (or | ||
| + | the named weapon) with a quantity of y. You can insert multiples of this | ||
| + | notetag to have more than one weapon cost for that item, weapon, or armor. | ||
| + | If you're using Item Core, this will not work on independent items. If you | ||
| + | are using the named version of the notetag and have multiple items in your | ||
| + | database of the same name, priority will be given to the item with the | ||
| + | highest ID. | ||
| + | |||
| + | <Armor x Buy Price: y> | ||
| + | <Armor name Buy Price: y> | ||
| + | This sets the currency of this item, weapon, or armor to cost armor x (or | ||
| + | the named armor) with a buy price of y. You can insert multiples of this | ||
| + | notetag to have more than one armor cost for that item, weapon, or armor. | ||
| + | If you're using Item Core, this will not work on independent items. If you | ||
| + | are using the named version of the notetag and have multiple items in your | ||
| + | database of the same name, priority will be given to the item with the | ||
| + | highest ID. | ||
| + | |||
| + | <Armor x Sell Price: y> | ||
| + | <Armor name Sell Price: y> | ||
| + | When selling this item, weapon, or armor, the player will get armor x (or | ||
| + | the named armor) with a quantity of y. You can insert multiples of this | ||
| + | notetag to have more than one armor cost for that item, weapon, or armor. | ||
| + | If you're using Item Core, this will not work on independent items. If you | ||
| + | are using the named version of the notetag and have multiple items in your | ||
| + | database of the same name, priority will be given to the item with the | ||
| + | highest ID. | ||
| + | |||
| + | <Proxy Buy: x> | ||
| + | <Proxy Buy: name> | ||
| + | If you're using this item as a proxy for another item (so you can set a | ||
| + | different cost for the item), this item will end up representing item x, | ||
| + | weapon x, or armor x of the same type. If you're using a named notetag and | ||
| + | you have multiple entries in your database with the same name, priority | ||
| + | will be given to the item, weapon, or armor with the highest ID. | ||
| + | </nowiki> | ||
| + | |||
| + | == [[Skill Core (YEP)|Skill Core]] == | ||
| + | |||
| + | <nowiki> | ||
| + | These notetags can adjust either skill costs or special skill effects. | ||
| + | |||
| + | Skill Notetags: | ||
| + | <HP Cost: x> | ||
| + | Changes the skill to have x as its HP cost. RPG Maker MV's editor lacks | ||
| + | HP cost functions so this would allow skills to use HP as their cost. | ||
| + | |||
| + | <HP Cost: x%> | ||
| + | Changes the skill to cost a percentage of the character's MaxHP value. | ||
| + | |||
| + | <MP Cost: x> | ||
| + | Changes the skill to have x as its MP cost. | ||
| + | This helps bypass the database's hard limit of 9999. | ||
| + | |||
| + | <MP Cost: x%> | ||
| + | Changes the skill to cost a percentage of the character's MaxMP value. | ||
| + | |||
| + | <TP Cost: x> | ||
| + | Changes the skill to have x as its TP cost. | ||
| + | This helps bypass the database's hard limit of 99. | ||
| + | |||
| + | <TP Cost: x%> | ||
| + | Changes the skill to cost a percentage of the character's MaxTP value. | ||
| + | Although the default MaxTP is 100, this tag will be useful for any | ||
| + | plugins that will alter a character's MaxTP values. | ||
| + | |||
| + | <Hide in Battle> | ||
| + | This will hide and disable the skill during battle. | ||
| + | |||
| + | <Hide in Field> | ||
| + | This will hide and disable the skill outside of battle. | ||
| + | |||
| + | <Hide if Learned Skill: x> | ||
| + | <Hide if Learned Skill: x, x, x> | ||
| + | <Hide if Learned Skill: x to y> | ||
| + | Will hide and disable this skill if skill x has been learned. If multiple | ||
| + | skills are listed, the skill will be hidden and disabled if any one of the | ||
| + | listed skills have been learned. This will ONLY apply to skills that have | ||
| + | been learned and not skills added through traits. | ||
| + | </nowiki> | ||
| + | |||
| + | ; Gauge Swapping | ||
| + | |||
| + | <nowiki> | ||
| + | This plugin also lets you swap around the HP, MP, and TP Gauges to any order | ||
| + | you want assuming that all the plugins you use will keep the same order of | ||
| + | HP, MP, and TP and does not override the default gauge drawing process. If | ||
| + | you use any plugin extensions, they can be swaped in as well. | ||
| + | |||
| + | Note: If you do not have 'Display TP in Battle' checked under the System tab | ||
| + | in the database, nothing will be shown for the third slot. | ||
| + | |||
| + | Class Notetag: | ||
| + | <Swap Gauge x: y> | ||
| + | This will change gauge x (1, 2, or 3) to y. Replace y with 'HP', 'MP', or | ||
| + | 'TP' to have it display that gauge type in that gauge slot. If you wish | ||
| + | for that slot to display nothing, insert 'Nothing' or 'Null' in place of | ||
| + | y in the notetag. | ||
| + | |||
| + | Weapon, Armor, and State Notetags: | ||
| + | <Swap Gauge x: y> | ||
| + | Actors with equipment or states that contain these notetags or enemies | ||
| + | with states that contain these notetags will display those swapped gauges | ||
| + | in place of the default settings or settings defined by the Class or | ||
| + | Enemy notetags. | ||
| + | |||
| + | Priority will go in the following order: | ||
| + | Weapons, Armors, States, Class, Enemy | ||
| + | </nowiki> | ||
| + | |||
| + | === [[Limited Skill Uses (YEP)|Limited Skill Uses]] === | ||
| + | <hr> | ||
| + | |||
| + | <nowiki> | ||
| + | You can use these notetags to govern the various Limited Uses aspects of | ||
| + | your skills. | ||
| + | |||
| + | Skill Notetags: | ||
| + | |||
| + | <Unlimited Use> | ||
| + | If you've enabled 'Limit All Skills' in the plugin parameters, this will | ||
| + | forcefully make the skill unlimited use. If you use this notetag, it will | ||
| + | override any of the Limited Use settings. | ||
| + | |||
| + | <Limit Uses: x> | ||
| + | This will set the number of times the skill can be used to x. If the skill | ||
| + | has 0 charges left, the skill cannot be used. | ||
| + | |||
| + | <Recover All Uses> | ||
| + | <Not Recover All Uses> | ||
| + | When using the recover all command, depending on the settings within the | ||
| + | plugin parameters, all limited use charges are recovered or not. These | ||
| + | notetags will enable you to utilize the other setting for the skill. | ||
| + | |||
| + | <Victory Uses Recover: x> | ||
| + | <Escape uses Recover: x> | ||
| + | <Lose Uses Recover: x> | ||
| + | When the player wins a battle, escapes a battle, or loses a battle, the | ||
| + | skill use will recover x amount of uses for the respective outcome. If the | ||
| + | notetags aren't used, the amounts restored will be equal to settings made | ||
| + | in the plugin's parameters. | ||
| + | |||
| + | <After Battle Uses Recover: x> | ||
| + | This will set the recovery rate of victory, escape, or loss of battle to | ||
| + | be equal to x indiscriminately. | ||
| + | |||
| + | Skill and Item Notetags: | ||
| + | |||
| + | <Global Limited Uses: +x> | ||
| + | <Global Limited Uses: -x> | ||
| + | This will change the target's limited uses by +x or -x for all skills. | ||
| + | +x will increase the amount of times the skills can be used. -x will | ||
| + | decrease the amount of times the skills can be used. | ||
| + | |||
| + | <SType x Limited Uses: +y> | ||
| + | <SType x Limited Uses: -y> | ||
| + | This will change the target's limited uses by +y or -y for all skills of | ||
| + | the skill type x. +y will increase the amount of times the skills can be | ||
| + | used. -y will decrease the amount of times the skills can be used. | ||
| + | |||
| + | <Skill x Limited Uses: +y> | ||
| + | <Skill x Limited Uses: -y> | ||
| + | <Skill name Limited Uses: +y> | ||
| + | <Skill name Limited Uses: -y> | ||
| + | This will change the target's limited uses by +y or -y for skill x. If | ||
| + | you use the named notetag varient and have multiple skills in the database | ||
| + | with the same name, priority will be given to the skill with the highest | ||
| + | ID. +y will increase the amount of times the skills can be used. -y will | ||
| + | decrease the amount of times the skills can be used. | ||
| + | |||
| + | Actor, Class, Enemy, Weapon, Armor, and State Notetags: | ||
| + | |||
| + | <Global Use Max: +x> | ||
| + | <Global Use Max: -x> | ||
| + | A battler affected by this property will have any Limited Use skills alter | ||
| + | the maximum times used by +x or -x. | ||
| + | |||
| + | <SType x Use Max: +y> | ||
| + | <SType x Use Max: -y> | ||
| + | A battler affected by this property will have Limited Use skills from | ||
| + | skill type x alter the maximum times used by +y or -y. | ||
| + | |||
| + | <Skill x Use Max: +y> | ||
| + | <Skill x Use Max: -y> | ||
| + | <Skill name Use Max: +y> | ||
| + | <Skill name Use Max: -y> | ||
| + | A battler affected by this property will have Limited Use for skill x (or | ||
| + | named if you're using that version of the notetag instead) alter the | ||
| + | maximum times used by +y or -y. If you are using the named version of the | ||
| + | notetag and have multiple skills in the database with the same name, then | ||
| + | priority will be given to the skill with the highest ID. | ||
| + | </nowiki> | ||
| + | |||
| + | === [[Multi-Type Skills (YEP)|Multi-Type Skills]] === | ||
| + | <hr> | ||
| + | |||
| + | <nowiki> | ||
| + | Insert these notetags into your skills' noteboxes that you wish to have | ||
| + | multiple skill types for. | ||
| + | |||
| + | Skill Notetags: | ||
| + | |||
| + | <Skill Type: x> | ||
| + | <Skill Types: x, x, x> | ||
| + | <Skill Types: x to y> | ||
| + | - Gives multiple skill types of x (or to y) for the modified skill. This | ||
| + | will automatically include the skill's type placed by the editor. | ||
| + | </nowiki> | ||
| + | |||
| + | === [[Lunatic Pack - Skill Rewards (YEP)|Lunatic Pack - Skill Rewards]] === | ||
| + | <hr> | ||
| + | |||
| + | <nowiki> | ||
| + | Insert the following notetags into a skill or item's notebox to give it one | ||
| + | of these effects: | ||
| + | |||
| + | --- | ||
| + | |||
| + | Skill and Item Notetags: | ||
| + | |||
| + | <Reward Animation: x> | ||
| + | - If there's a reward tied to this skill/item effect and conditions are | ||
| + | met, this animation will be played in place of the default animations to | ||
| + | indicate an effect has taken place. | ||
| + | |||
| + | <condition Reward: effect> | ||
| + | - Most of this plugin's notetags will follow the above format. 'condition' | ||
| + | and 'effect' in the notetag will be replaced respectively by entries in | ||
| + | the following CONDITION and EFFECT sections below. Insert multiple entries | ||
| + | to give your skills/items multiple effects. | ||
| + | |||
| + | =-=-=-= Reward CONDITIONS =-=-=-= | ||
| + | |||
| + | <Defeat Reward: effect> | ||
| + | - Replace 'condition' with 'Defeat' and you'll enable the notetag to take | ||
| + | effect when the target is defeated (HP reaches 0 or receives death state). | ||
| + | |||
| + | <Critical Reward: effect> | ||
| + | - Replace 'condition' with 'Critical' and you'll enable the notetag to | ||
| + | take effect when the user lands a critical hit on the target. | ||
| + | |||
| + | <Noncritical Reward: effect> | ||
| + | - Replace 'condition' with 'Nonnritical' and you'll enable the notetag to | ||
| + | take effect when the user fails to land a critical hit on the target. | ||
| + | |||
| + | <Hit Reward: effect> | ||
| + | - Replace 'condition' with 'Hit' and you'll enable the notetag to take | ||
| + | effect when the user has successfully hit the target. | ||
| + | |||
| + | <Missed Reward: effect> | ||
| + | - Replace 'condition' with 'Missed' and you'll enable the notetag to take | ||
| + | effect when the user misses the action or the target evades the action. | ||
| + | |||
| + | <Weakness Reward: effect> | ||
| + | - Replace 'condition' with 'Weakness' and you'll enable the notetag to | ||
| + | take effect when the user hits an elemental weakness on the target. | ||
| + | |||
| + | <Resisted Reward: effect> | ||
| + | - Replace 'condition' with 'Resisted' and you'll enable the notetag to | ||
| + | take effect when the user hits an elemental resistance on the target. | ||
| + | |||
| + | <Nulled Reward: effect> | ||
| + | - Replace 'condition' with 'Nulled' and you'll enable the notetag to take | ||
| + | effect when the user hits a nulled element on the target. | ||
| + | |||
| + | <Absorb Reward: effect> | ||
| + | - Replace 'condition' with 'Nulled' and you'll enable the notetag to take | ||
| + | effect when the user hits an absorbed element on the target. | ||
| + | |||
| + | =-=-=-= Reward EFFECTS =-=-=-= | ||
| + | |||
| + | --- HP Effects --- | ||
| + | |||
| + | <condition Reward: +x HP> | ||
| + | - Replace 'effect' with the above format. Replace 'x' with a flat amount | ||
| + | of HP you wish to reward the user when the skill/item condition is met. | ||
| + | SUGGESTED BY: Yanfly | ||
| + | |||
| + | <condition Reward: +x% HP> | ||
| + | - Replace 'effect' with the above format. Replace 'x' with a HP equal to | ||
| + | x% of the user's MaxHP to reward the user when the condition is met. | ||
| + | SUGGESTED BY: Yanfly | ||
| + | |||
| + | <condition Reward: +x% Refund HP Cost> | ||
| + | - Replace 'effect' with the above format. Replace 'x' with a percentage of | ||
| + | the HP cost of the skill used to reward the user if conditions are met. | ||
| + | *Note: Can only be used with skills. | ||
| + | SUGGESTED BY: Yanfly | ||
| + | |||
| + | --- MP Effects --- | ||
| + | |||
| + | <condition Reward: +x MP> | ||
| + | - Replace 'effect' with the above format. Replace 'x' with a flat amount | ||
| + | of MP you wish to reward the user when the skill/item condition is met. | ||
| + | SUGGESTED BY: Yanfly | ||
| + | |||
| + | <condition Reward: +x% MP> | ||
| + | - Replace 'effect' with the above format. Replace 'x' with a MP equal to | ||
| + | x% of the user's MaxMP to reward the user when the condition is met. | ||
| + | SUGGESTED BY: Yanfly | ||
| + | |||
| + | <condition Reward: +x% Refund MP Cost> | ||
| + | - Replace 'effect' with the above format. Replace 'x' with a percentage of | ||
| + | the HP cost of the skill used to reward the user if conditions are met. | ||
| + | *Note: Can only be used with skills. | ||
| + | SUGGESTED BY: Yanfly | ||
| + | |||
| + | --- TP Effects --- | ||
| + | |||
| + | <condition Reward: +x TP> | ||
| + | - Replace 'effect' with the above format. Replace 'x' with a flat amount | ||
| + | of TP you wish to reward the user when the skill/item condition is met. | ||
| + | SUGGESTED BY: Yanfly | ||
| + | |||
| + | <condition Reward: +x% TP> | ||
| + | - Replace 'effect' with the above format. Replace 'x' with a TP equal to | ||
| + | x% of the user's MaxTP to reward the user when the condition is met. | ||
| + | SUGGESTED BY: Yanfly | ||
| + | |||
| + | <condition Reward: +x% Refund TP Cost> | ||
| + | - Replace 'effect' with the above format. Replace 'x' with a percentage of | ||
| + | the HP cost of the skill used to reward the user if conditions are met. | ||
| + | *Note: Can only be used with skills. | ||
| + | SUGGESTED BY: Yanfly | ||
| + | |||
| + | --- Item Effects --- | ||
| + | |||
| + | <condition Reward: x% Refund Item> | ||
| + | - Replace 'effect' with the above format. Replace 'x' with the chance the | ||
| + | user has to refund the item (getting it back) if conditions are met. | ||
| + | |||
| + | *Note: Can only be used with items. Best if used with consumable items. | ||
| + | SUGGESTED BY: Yanfly | ||
| + | |||
| + | --- Buff/Debuff Effects --- | ||
| + | |||
| + | <condition Reward: Add x Buff> | ||
| + | <condition Reward: Add x Buff, y Turns> | ||
| + | <condition Reward: Add x Debuff> | ||
| + | <condition Reward: Add x Debuff, y Turns> | ||
| + | - Replace 'effect' with the above format(s). Replace 'x' with any of the | ||
| + | following parameters: 'MaxHP', 'MaxMP', 'ATK', 'DEF', 'MAT', 'MDF', 'AGI', | ||
| + | or 'LUK' to have the effect alter the respective stat. If using the format | ||
| + | with 'y' turns, replace 'y' with the number of turns you wish for the buff | ||
| + | or debuff to last. If 'y' is not used, it will last for 5 turns instead. | ||
| + | SUGGESTED BY: Yanfly | ||
| + | |||
| + | <condition Reward: Remove x Buff> | ||
| + | <condition Reward: Remove x Debuff> | ||
| + | - Replace 'effect' with the above format(s). Replace 'x' with any of the | ||
| + | following parameters: 'MaxHP', 'MaxMP', 'ATK', 'DEF', 'MAT', 'MDF', 'AGI', | ||
| + | or 'LUK' to have the effect remove the respective buff/debuff from the | ||
| + | user if the conditions are met. If 'y' is not used, it will last for 5 | ||
| + | turns instead. | ||
| + | SUGGESTED BY: Yanfly | ||
| + | |||
| + | --- State Effects --- | ||
| + | |||
| + | <condition Reward: Add State x> | ||
| + | - Replace 'effect' with the above format(s). Replace 'x' with the state ID | ||
| + | you wish to add to the user when conditions are met. | ||
| + | SUGGESTED BY: Yanfly | ||
| + | |||
| + | <condition Reward: Remove State x> | ||
| + | - Replace 'effect' with the above format(s). Replace 'x' with the state ID | ||
| + | you wish to remove from the user when conditions are met. | ||
| + | SUGGESTED BY: Yanfly | ||
| + | |||
| + | --- Rolling Critical --- | ||
| + | |||
| + | <condition Reward: Rolling Critical +x%> | ||
| + | <condition Reward: Rolling Critical -x%> | ||
| + | - Replace 'effect' with the above format(s). Replace 'x' with the percent | ||
| + | increase/decrease for the next usage of the skill. This change will only | ||
| + | occur for the user if the conditions are met. | ||
| + | |||
| + | *Note: Can only be used with skills. Turn on critical hits for the skill. | ||
| + | SUGGESTED BY: Goldschuss | ||
| + | |||
| + | <condition Reward: Rolling Critical x%> | ||
| + | - Replace 'effect' with the above format(s). Replace 'x' with the percent | ||
| + | rate for the next usage of the skill when the conditions are met. | ||
| + | |||
| + | *Note: Can only be used with skills. Turn on critical hits for the skill. | ||
| + | SUGGESTED BY: Goldschuss | ||
| + | |||
| + | =-=-=-= Examples =-=-=-= | ||
| + | |||
| + | <Defeat Reward: +50% MP> | ||
| + | - When the target is defeated by this skill, refunding 50% of the MP the | ||
| + | user has spent in order to cast the skill. | ||
| + | |||
| + | <Critical Reward: Add ATK Buff, 8 Turns> | ||
| + | - When the user lands a critical hit on the enemy, grant the user an ATK | ||
| + | buff that lasts 8 turns. | ||
| + | |||
| + | <Hit Reward: Add DEF Buff, 2 Turns> | ||
| + | - When the user lands a successful hit on the enemy, buff the user's DEF | ||
| + | for 2 turns. | ||
| + | |||
| + | <Missed Reward: Refund Item> | ||
| + | - When the user fails to land using the item, make sure it won't be | ||
| + | consumed by refunding it. | ||
| + | |||
| + | <Weakness Reward: +20 TP> | ||
| + | - If the user performs this skill on an enemy weak to this skill's element | ||
| + | then grant the user +20 additional TP. | ||
| + | |||
| + | <Critical Reward: Rolling Critical 0%> | ||
| + | <Noncritical Reward: Rolling Critical +10%> | ||
| + | - If the user fails to land a critical hit with this skill, the user will | ||
| + | have a 10% chance to do so the next time the user performs the skill. The | ||
| + | critical hit rate will continue to rise by 10% each time until the user | ||
| + | finally manages to land the critical hit. Once the user does, the critical | ||
| + | hit rate bonus will reset back to 0%. | ||
| + | </nowiki> | ||
| + | |||
| + | |||
| + | === [[Party Limit Gauge (YEP)|Party Limit Gauge]] === | ||
| + | <hr> | ||
| + | |||
| + | <nowiki> | ||
| + | You can use these notetags to adjust the Party Limit Gauge aspects. | ||
| + | |||
| + | Skill Notetags: | ||
| + | |||
| + | <Party Limit Cost: x> | ||
| + | Adds a Party Limit Gauge cost to this skill. This skill will require x | ||
| + | increments of the Party Limit Gauge to be able to use it. | ||
| + | |||
| + | <Party Limit Cost: x%> | ||
| + | Adds a party Limit Gauge cost to this skill equal to x% of the total max | ||
| + | gauge size of the battler's party max limit gauge size. The cost is always | ||
| + | rounded upward. | ||
| + | |||
| + | Skill and Item Notetags: | ||
| + | |||
| + | <Ally Party Limit Gauge: +x> | ||
| + | <Ally Party Limit Gauge: -x> | ||
| + | Using this skill will cause the user's party limit gauge to increase or | ||
| + | decrease by x. This is the point value cost and not the increment value. | ||
| + | |||
| + | <Foe Party Limit Gauge: +x> | ||
| + | <Foe Party Limit Gauge: -x> | ||
| + | Using this skill will cause the foe's party limit gauge to increase or | ||
| + | decrease by x. This is the point value cost and not the increment value. | ||
| + | |||
| + | Actor and Enemy Notetag: | ||
| + | |||
| + | <Party Limit: x> | ||
| + | Increases the Party Limit Gauge by x when this party member is present in | ||
| + | battle (dead or alive). If this notetag isn't used, the value will default | ||
| + | to the settings in the plugin parameters. | ||
| + | |||
| + | Actor, Class, Enemy, Weapon, Armor, and State Notetags: | ||
| + | |||
| + | <Party Limit: +x> | ||
| + | <Party Limit: -x> | ||
| + | Increases or decreases the Party Limit Gauge by x if the related unit has | ||
| + | is that actor, class, enemy, or has the weapon or armor equipped, or is | ||
| + | affected by that state. | ||
| + | |||
| + | <Party Limit Cost: x%> | ||
| + | Sets the party limit costs paid by this actor to x%. The modifications are | ||
| + | are multiplicative. The final cost is always rounded upward. | ||
| + | </nowiki> | ||
| + | |||
| + | === [[Skill Cooldowns (YEP)|Skill Cooldowns]] === | ||
| + | <hr> | ||
| + | |||
| + | <nowiki> | ||
| + | Use the following notetags to alter the cooldown properties of a skill. | ||
| + | |||
| + | Skill Notetags: | ||
| + | <Cooldown: x> | ||
| + | Sets the cooldown for the skill to X turns. This cooldown only affects | ||
| + | this skill alone. This value will take priority over Skill Type Cooldowns | ||
| + | and Global Cooldowns. | ||
| + | |||
| + | <Warmup: x> | ||
| + | Sets the warmup for the skill to X turns. When entering a new battle, the | ||
| + | skill will be on a warmup phase and cannot be used until the warmup phase | ||
| + | is over. | ||
| + | |||
| + | <After Battle Cooldown: +x> | ||
| + | <After Battle Cooldown: -x> | ||
| + | After a battle ends (victory, loss, or escape), change the cooldown for | ||
| + | this skill by +x turns or -x turns. | ||
| + | |||
| + | <Cooldown Steps: x> | ||
| + | Outside of battle, every x steps that the Player takes, this skill's | ||
| + | cooldown will drop by 1. | ||
| + | |||
| + | <Skill x Cooldown: y> | ||
| + | <Skill name Cooldown: y> | ||
| + | When using this skill, after paying the skill cost, skill x will have a | ||
| + | linked cooldown of y turns. This value will take priority over Skill Type | ||
| + | Cooldowns and Global Cooldowns. | ||
| + | |||
| + | <SType x Cooldown: y> | ||
| + | When using this skill, after paying the skill cost, all skills with the | ||
| + | matching Skill Type x to have a cooldown of y. This value will take | ||
| + | priority over Global Cooldowns. | ||
| + | |||
| + | <Global Cooldown: x> | ||
| + | When using this skill, all skills within the battler's skill library area | ||
| + | set to be on cooldown for x turns. This value has less priority than | ||
| + | Individual Cooldowns and Skill Type Cooldowns. | ||
| + | |||
| + | <Bypass Cooldown> | ||
| + | This causes the skill to bypass cooldowns, no matter what. This should be | ||
| + | used for skills like Attack, Guard, Escape, etc. that should not have a | ||
| + | cooldown assigned to them. | ||
| + | |||
| + | Skill and Item Notetags: | ||
| + | <Skill x Cooldown: +y> | ||
| + | <Skill x Cooldown: -y> | ||
| + | <Skill name Cooldown: +y> | ||
| + | <Skill name Cooldown: -y> | ||
| + | Targets hit by this skill will have skill x's cooldown adjusted by y. | ||
| + | This does not apply to the user and applies only to the targets. | ||
| + | |||
| + | <SType x Cooldown: +y> | ||
| + | <SType x Cooldown: -y> | ||
| + | Targets hit by this skill will have all skills in their skill library with | ||
| + | Skill Type x to have their cooldowns adjusted by y. This does not apply to | ||
| + | the user and applies only to the targets. | ||
| + | |||
| + | <Global Cooldown: +x> | ||
| + | <Global Cooldown: -x> | ||
| + | Targets hit by this skill will have all skills in their skill library to | ||
| + | have their cooldowns adjusted by y. This does not apply to the user and | ||
| + | applies only to the targets. | ||
| + | |||
| + | Actor, Class, Enemy, Weapon, Armor, and State Notetags: | ||
| + | |||
| + | <Skill x Cooldown Duration: y%> | ||
| + | <Skill name Cooldown Duration: y%> | ||
| + | Alters the cooldown duration of skill x to y% when the cooldown cost is | ||
| + | applied. This effect only applies to skill x. | ||
| + | |||
| + | <SType x Cooldown Duration: y%> | ||
| + | Alters the cooldown duration of skills with Skill Type x to y% when the | ||
| + | cooldown cost is applied. This effect only applies to Skill Type x. | ||
| + | |||
| + | <Global Cooldown Duration: x%> | ||
| + | Alters the cooldown duration of all skills to x% when the cooldown cost | ||
| + | is applied. | ||
| + | |||
| + | <Skill x Cooldown Rate: y%> | ||
| + | <Skill name Cooldown Rate: y%> | ||
| + | Sets the cooldown rate for skill x to y% when the cooldown counter goes | ||
| + | down. This effect only applies to skill x. | ||
| + | |||
| + | <SType x Cooldown Rate: y%> | ||
| + | Sets the cooldown rate for Skill Type x skills to y% when the cooldown | ||
| + | counter goes down. This effect only applies to Skill Type x skills. | ||
| + | |||
| + | <Global Cooldown Rate: x%> | ||
| + | Sets the cooldown rate for all skills to x% when the cooldown counter | ||
| + | goes down. | ||
| + | |||
| + | <Skill x Cooldown: +y> | ||
| + | <Skill x Cooldown: -y> | ||
| + | <Skill name Cooldown: +y> | ||
| + | <Skill name Cooldown: -y> | ||
| + | If the user performs skill x, it will have an increased or decreased | ||
| + | cooldown value as long as the user is the actor, class, enemy, or has the | ||
| + | weapon or armor equipped, or is affected by the state with this notetag. | ||
| + | These flat cooldown modifications are applied after the rates and duration | ||
| + | modifiers have been calculated. | ||
| + | |||
| + | <SType x Cooldown: +y> | ||
| + | <SType x Cooldown: -y> | ||
| + | If the user performs skill with skill type x, it will have an increased or | ||
| + | decreased cooldown value as long as the user is the actor, class, enemy, | ||
| + | or has the weapon or armor equipped, or is affected by the state with this | ||
| + | notetag. These flat cooldown modifications are applied after the rates and | ||
| + | duration modifiers have been calculated. | ||
| + | |||
| + | <Global Cooldown: +x> | ||
| + | <Global Cooldown: -x> | ||
| + | If the user performs any skill, it will have an increased or decreased | ||
| + | cooldown value as long as the user is the actor, class, enemy, or has the | ||
| + | weapon or armor equipped, or is affected by the state with this notetag. | ||
| + | These flat cooldown modifications are applied after the rates and duration | ||
| + | modifiers have been calculated. | ||
| + | |||
| + | <Skill x Warmup: +y> | ||
| + | <Skill x Warmup: -y> | ||
| + | <Skill name Warmup: +y> | ||
| + | <Skill name Warmup: -y> | ||
| + | At the start of battle, skill x will have an increased or decreased warmup | ||
| + | value as long as the user is the actor, class, enemy, or has the weapon or | ||
| + | armor equipped, or is affected by the state with this notetag. These flat | ||
| + | warmup modifications are applied after the rates and duration modifiers | ||
| + | have been calculated. | ||
| + | |||
| + | <SType x Warmup: +y> | ||
| + | <SType x Warmup: -y> | ||
| + | At the start of battle, all skills with skill type x it will have an | ||
| + | increased or decreased warmup value as long as the user is the actor, | ||
| + | class, enemy, or has the weapon or armor equipped, or is affected by the | ||
| + | state with this notetag. These flat warmup modifications are applied after | ||
| + | the rates and duration modifiers have been calculated. | ||
| + | |||
| + | <Global Warmup: +x> | ||
| + | <Global Warmup: -x> | ||
| + | At the start of battle, all skills will have an increased or decreased | ||
| + | warmup value as long as the user is the actor, class, enemy, or has the | ||
| + | weapon or armor equipped, or is affected by the state with this notetag. | ||
| + | These flat warmup modifications are applied after the rates and duration | ||
| + | modifiers have been calculated. | ||
| + | </nowiki> | ||
| + | |||
| + | === [[Skill Cost Items (YEP)|Skill Cost Items]] === | ||
| + | <hr> | ||
| + | |||
| + | <nowiki> | ||
| + | To enable skills to utilize items as costs, use the following notetags: | ||
| + | |||
| + | Skill Notetags: | ||
| + | <Item x Cost: y> | ||
| + | <Weapon x Cost: y> | ||
| + | <Armor x Cost: y> | ||
| + | This will set the cost of the item, weapon, or armor x to require y of it | ||
| + | before it can be used. If you are using YEP_ItemCore, independent items | ||
| + | cannot be used as item costs as the game will not distinguish which of the | ||
| + | independent items is fit to be used. If you use multiple of these tags, | ||
| + | the skill will require all the listed items to be available for usage. | ||
| + | |||
| + | <Item Cost: x Potion> | ||
| + | <Item Cost: x Sword> | ||
| + | <Item Cost: x Feather Cap> | ||
| + | If you prefer to use the names of the items instead, you can use the above | ||
| + | notetag. This will make the skill require x amount of the named item, | ||
| + | weapon, or armor. If you have multiple items with the same name, this | ||
| + | notetag will give priority to the highest ID value in the order of items, | ||
| + | weapons, then armors. If you are using YEP_ItemCore, independent items | ||
| + | cannot be used as item costs as the game will not distinguish which of the | ||
| + | independent items is fit to be used. If you use multiple of these tags, | ||
| + | the skill will require all the listed items to be available for usage. | ||
| + | |||
| + | Class, Weapon, Armor, State Notetags: | ||
| + | <Swap Gauge x: Item y> | ||
| + | <Swap Gauge x: Weapon y> | ||
| + | <Swap Gauge x: Armor y> | ||
| + | Swaps out gauge x to display how much of item, weapon, or armor y the | ||
| + | player/party has. Priority is given in the following order: | ||
| + | Weapons, Armors, States, Class, Enemy | ||
| + | |||
| + | <Swap Gauge x: Item Potion> | ||
| + | <Swap Gauge x: Item Sword> | ||
| + | <Swap Gauge x: Item Feather Cap> | ||
| + | If you prefer to use the names of the items instead, you can use the above | ||
| + | notetag. This will swap out gauge x to display how much of the mentioned | ||
| + | item, weapon, or armor the player/party has. If you have multiple items | ||
| + | with the same name, this notetag will give priority to the highest ID | ||
| + | value in the order of items, weapons, then armors. Priority for the | ||
| + | displayed gauge will be given in the following order: Weapons, Armors, | ||
| + | States, Class, Enemy. | ||
| + | |||
| + | Actor, Class, Weapon, Armor, and State Notetags: | ||
| + | <Item x Cost: +y> | ||
| + | <Item x Cost: -y> | ||
| + | <Weapon x Cost: +y> | ||
| + | <Weapon x Cost: -y> | ||
| + | <Armor x Cost: +y> | ||
| + | <Armor x Cost: -y> | ||
| + | Increases or decreases the cost of item, weapon, or armor x when required | ||
| + | by a value of y. If the item, weapon, or armor isn't required, then this | ||
| + | effect does not apply to the skill cost. | ||
| + | |||
| + | <Item Cost: +x Potion> | ||
| + | <Item Cost: -x Sword> | ||
| + | <Item Cost: +x Feather Cap> | ||
| + | If you prefer to use the names of the items instead, you can use the above | ||
| + | notetag format. This will increase or decrease the mentioned item by x | ||
| + | amount as long as the item is required as a cost. If you have multiple | ||
| + | items with the same name, this notetag will give priority to the highest | ||
| + | ID value in the order of items, weapons, then armors. | ||
| + | |||
| + | <Item x Cost: y%> | ||
| + | <Weapon x Cost: y%> | ||
| + | <Armor x Cost: y%> | ||
| + | Alters the cost of item, weapon, or armor x by y%. If the item, weapon, or | ||
| + | armor isn't required, then this effect does not apply to the skill cost. | ||
| + | |||
| + | <Item Cost: x% Potion> | ||
| + | <Item Cost: x% Sword> | ||
| + | <Item Cost: x% Feather Cap> | ||
| + | If you prefer to use the names of the items instead, you can use the above | ||
| + | notetag format. This will adjust the cost rate of the mentioned item by x% | ||
| + | as long as the item is required as a cost. If you have multiple items with | ||
| + | the same name, this notetag will give priority to the highest ID value in | ||
| + | the order of items, weapons, then armors. | ||
| + | |||
| + | <Replace Type x Cost: Type y> | ||
| + | Replace 'type' with either 'item', 'weapon', or 'armor'. This lets you | ||
| + | exchange the costs used for a particular item for another (item y). The | ||
| + | replacement is given priority to states, weapons, armors, class, and then | ||
| + | actors. | ||
| + | |||
| + | <Replace Potion Cost: Ether> | ||
| + | <Replace Sword Cost: Dagger> | ||
| + | <Replace Feather Cap Cost: Bandana> | ||
| + | If you prefer to use the names of the items instead, you can use the above | ||
| + | notetag format. This lets you exchange the costs used for a particular | ||
| + | item for another. The replacement is given priority to states, weapons, | ||
| + | armors, class, and then actors. If you have multiple items with the same | ||
| + | name, this notetag will give priority to the highest ID value in the order | ||
| + | of items, weapons, then armors. | ||
| + | |||
| + | Item, Weapon, Armor Notetags: | ||
| + | <Item Gauge Color 1: x> | ||
| + | <Item Gauge Color 2: x> | ||
| + | If this item is the item used as gauge display, you can have it produce a | ||
| + | unique color using text color x. | ||
| + | |||
| + | <Item Gauge Text: x> | ||
| + | If this item is the item used as gauge display, you can have it show a | ||
| + | different text other than its name. Replace x with what you want to write. | ||
| + | |||
| + | <Item Gauge Text Color: x> | ||
| + | If you wish to use a text color other than the one predefined in the | ||
| + | plugin's parameters, use this notetag and replace x with the text color | ||
| + | you wish to label the gauge with. | ||
| + | </nowiki> | ||
| + | |||
| + | == [[Skill Learn System (YEP)|Skill Learn System]] == | ||
| + | |||
| + | <nowiki> | ||
| + | Use the following notetags to make use of the Skill Learn System. | ||
| + | |||
| + | Class Notetag: | ||
| + | <Learn Skill: x> | ||
| + | <Learn Skill: x, x, x> | ||
| + | <Learn Skill: x to y> | ||
| + | Enables the class to be able to learn skill(s) x from the menu. Replace | ||
| + | x with the skill's ID. If x to y is used, this enables the class to learn | ||
| + | all the skills from x to y. Replace x and y with skill ID's. | ||
| + | |||
| + | Skill Notetags: | ||
| + | <Learn Cost: x Gold> | ||
| + | Sets the gold cost of learning this skill to x gold. | ||
| + | |||
| + | <Learn Cost: x JP> | ||
| + | Sets the JP cost of learning this skill to x JP. This note requires | ||
| + | YEP_JobPoints.js in order to work. | ||
| + | |||
| + | <Learn Cost> or <Learn Cost> | ||
| + | Item x: y item name: y | ||
| + | Weapon x: y item name: y | ||
| + | Armor x: y </Learn Cost> | ||
| + | </Learn Cost> | ||
| + | Allows you to set the item, weapon, and armor costs of learning the skill. | ||
| + | Replace x with the item's ID and y with the quantity of that item needed. | ||
| + | If you decide to use the item name variant, replace the item name with the | ||
| + | item's name as it appears in the database. If multiple items share the | ||
| + | same name, the item with the highest ID will be used in the order of item, | ||
| + | weapon, and then armor. | ||
| + | *Note: If you are using YEP_ItemCore.js and Independent Items, the learn | ||
| + | costs will not include independent items. | ||
| + | |||
| + | <Learn Require Level: x> | ||
| + | Causes the skill to require the actor's current level to be at least x | ||
| + | before the skill even appears on the list to learn. | ||
| + | |||
| + | <Learn Require Skill: x> | ||
| + | <Learn Require Skill: x, x, x> | ||
| + | <Learn Require Skill: x to y> | ||
| + | In order for the skill to appear, the actor must know the other skill(s) | ||
| + | of x. If x to y is used, the actor must know all the skills from x to y. | ||
| + | Replace x and/or y with skill ID's. | ||
| + | |||
| + | <Learn Require Switch: x> | ||
| + | <Learn Require Switch: x, x, x> | ||
| + | <Learn Require Switch: x to y> | ||
| + | In order for the skill to appear, the switch(es) x must be on. If x to y | ||
| + | is used, all of the switches from x to y must be on in order for the skill | ||
| + | to appear. Replace x and/or y with switch ID's. | ||
| + | </nowiki> | ||
| + | |||
| + | == [[Skill Mastery Levels (YEP)|Skill Mastery Levels]] == | ||
| + | |||
| + | <nowiki> | ||
| + | To determine the effect the mastery level of a skill has or other various | ||
| + | mastery-related properties, use the following notetags for those skills: | ||
| + | |||
| + | --- | ||
| + | |||
| + | Skill Notetags: | ||
| + | |||
| + | <Max Mastery Level: x> | ||
| + | - Replace 'x' with the max mastery level you want a skill to have. If you | ||
| + | don't want the skill to have any mastery level at all, replace it with 0. | ||
| + | |||
| + | <Mastery Effect: +x Damage Per Level> | ||
| + | <Mastery Effect: +x HP Cost Per Level> | ||
| + | <Mastery Effect: +x MP Cost Per Level> | ||
| + | <Mastery Effect: +x TP Cost Per Level> | ||
| + | <Mastery Effect: +x Cooldown Per Level> | ||
| + | <Mastery Effect: -x Damage Per Level> | ||
| + | <Mastery Effect: -x HP Cost Per Level> | ||
| + | <Mastery Effect: -x MP Cost Per Level> | ||
| + | <Mastery Effect: -x TP Cost Per Level> | ||
| + | <Mastery Effect: -x Cooldown Per Level> | ||
| + | - This will increase or decrease the damage, HP cost, MP cost, TP cost, | ||
| + | cooldown turns respectively for the skill depending on its mastery level. | ||
| + | Replace 'x' with a flat number value of how much you want it to shift per | ||
| + | the skill's mastery level. | ||
| + | - Note: HP Cost requires YEP_SkillCore.js. | ||
| + | - Note: Cooldown requires YEP_X_SkillCooldowns. | ||
| + | |||
| + | <Mastery Effect: +x% Damage Per Level> | ||
| + | <Mastery Effect: +x% HP Cost Per Level> | ||
| + | <Mastery Effect: +x% MP Cost Per Level> | ||
| + | <Mastery Effect: +x% TP Cost Per Level> | ||
| + | <Mastery Effect: +x% Cooldown Per Level> | ||
| + | <Mastery Effect: -x% Damage Per Level> | ||
| + | <Mastery Effect: -x% HP Cost Per Level> | ||
| + | <Mastery Effect: -x% MP Cost Per Level> | ||
| + | <Mastery Effect: -x% TP Cost Per Level> | ||
| + | <Mastery Effect: -x% Cooldown Per Level> | ||
| + | - This will increase or decrease the damage, HP cost, MP cost, TP cost, | ||
| + | cooldown turns respectively for the skill depending on its mastery level. | ||
| + | Replace 'x' with a percentile number value of how much you want it to | ||
| + | shift per the skill's mastery level. | ||
| + | - Note: HP Cost requires YEP_SkillCore.js. | ||
| + | - Note: Cooldown requires YEP_X_SkillCooldowns. | ||
| + | |||
| + | <No Damage Mastery Effect> | ||
| + | <No HP Cost Mastery Effect> | ||
| + | <No MP Cost Mastery Effect> | ||
| + | <No TP Cost Mastery Effect> | ||
| + | <No Cooldown Mastery Effect> | ||
| + | - These notetags will disable their respective mastery effects from the | ||
| + | default settings. They will just have their default value with nothing | ||
| + | changed about them at all. | ||
| + | - Note: HP Cost requires YEP_SkillCore.js. | ||
| + | - Note: Cooldown requires YEP_X_SkillCooldowns. | ||
| + | |||
| + | <Custom EXP Mastery Formula: x> | ||
| + | - Makes a custom EXP mastery formula for the skill. Replace 'x' with the | ||
| + | desired formula you wish to use for it. | ||
| + | - Example: <Custom EXP Mastery Formula: level * 20 + 5> | ||
| + | |||
| + | <Custom Damage Mastery Formula: x> | ||
| + | - Makes a custom damage mastery formula for the skill. Replace 'x' with | ||
| + | the desired formula you wish to use for it. | ||
| + | - Example: <Custom Damage Mastery Formula: value * (1.00 + (level * 0.20))> | ||
| + | |||
| + | <Custom HP Cost Mastery Formula: x> | ||
| + | - Makes a custom HP cost mastery formula for the skill. Replace 'x' with | ||
| + | the desired formula you wish to use for it. | ||
| + | - Example: <Custom HP Cost Mastery Formula: cost * (1.00 - (level * 0.05))> | ||
| + | - Note: HP Cost requires YEP_SkillCore.js. | ||
| + | |||
| + | <Custom MP Cost Mastery Formula: x> | ||
| + | - Makes a custom MP cost mastery formula for the skill. Replace 'x' with | ||
| + | the desired formula you wish to use for it. | ||
| + | - Example: <Custom MP Cost Mastery Formula: cost * (1.00 - (level * 0.05))> | ||
| + | |||
| + | <Custom TP Cost Mastery Formula: x> | ||
| + | - Makes a custom TP cost mastery formula for the skill. Replace 'x' with | ||
| + | the desired formula you wish to use for it. | ||
| + | - Example: <Custom TP Cost Mastery Formula: cost * (1.00 - (level * 0.05))> | ||
| + | |||
| + | <Custom Cooldown Mastery Formula: x> | ||
| + | - Makes a custom cooldown mastery formula for the skill. Replace 'x' with | ||
| + | the desired formula you wish to use for it. | ||
| + | - Example: <Custom Cooldown Mastery Formula: turns - (level * 1.5)> | ||
| + | |||
| + | --- | ||
| + | |||
| + | Actor and Enemy Notetags: | ||
| + | |||
| + | <Starting Skill Masteries> | ||
| + | list | ||
| + | list | ||
| + | list | ||
| + | </Starting Skill Masteries> | ||
| + | - If you want actors and/or enemies to have initial starting skill mastery | ||
| + | levels, use the above notetag. This will only apply for actors when | ||
| + | starting a new game or initializing them. Replace 'list' with one of the | ||
| + | following setups: | ||
| + | |||
| + | Skill x: level | ||
| + | Skill x: level, exp | ||
| + | name: level | ||
| + | name: level, exp | ||
| + | - Replace 'x' with the ID of the skill you wish to alter the starting | ||
| + | mastery level of. Alternatively, you can replace 'Skill x' with the skill | ||
| + | 'name'. If multiple skills have the same name in the database, this will | ||
| + | apply to the first skill entry with that name. | ||
| + | - Replace 'level' with the level you wish to start it off as. This cannot | ||
| + | go under 0 nor go above the maximum level of the skill. | ||
| + | - If used, replace 'exp' with the amount of EXP it will currently have at | ||
| + | the start. This cannot be greater than or equal to the maximum value for | ||
| + | the skill mastery level's EXP. If not used, it will default to 0. | ||
| + | |||
| + | Example: | ||
| + | |||
| + | <Starting Skill Masteries> | ||
| + | Skill 5: 2 | ||
| + | Skill 6: 3, 4 | ||
| + | Firaga: 7 | ||
| + | Firaja: 8, 10 | ||
| + | </Starting Skill Masteries> | ||
| + | - In the above example, the actor/enemy will have Skill 5 and 6 starting | ||
| + | at levels 2 and 3 respectively. However, Skill 6 will also have some skill | ||
| + | EXP starting at 4. The actor/enemy's 'Firaga' and 'Firaja' skills will | ||
| + | start at levels 7 and 8 respectively while 'Firaja' will have 10 skill EXP | ||
| + | at the very start. | ||
| + | |||
| + | --- | ||
| + | </nowiki> | ||
| + | |||
| + | == [[Slippery Tiles (YEP)|Slippery Tiles]] == | ||
| + | |||
| + | <nowiki> | ||
| + | You can use these notetags to add slippery tiles to your tilesets. | ||
| + | |||
| + | Tileset Notetag: | ||
| + | <Slippery Tile: x> | ||
| + | <Slippery Tile: x, x, x> | ||
| + | Tiles with terrain ID x will be designated as slippery tiles. | ||
| + | </nowiki> | ||
| + | |||
| + | == [[Smart Jump (YEP)|Smart Jump]] == | ||
| + | |||
| + | <nowiki> | ||
| + | You can use these notetags to set up what Terrain Tags that the player can't | ||
| + | jump on or past. | ||
| + | |||
| + | Tileset Notetags: | ||
| + | |||
| + | <Illegal Jump: x> | ||
| + | <Illegal Jump: x, x, x> | ||
| + | <Illegal Jump: x to y> | ||
| + | Replace x with the terrain tags you want to forbid the player from going | ||
| + | past or landing on while doing Smart Jumps. | ||
| + | |||
| + | Event Notetag: | ||
| + | |||
| + | <Illegal Jump> | ||
| + | This will prevent the player from being able to jump on or over this | ||
| + | event while doing Smart Jumps. If the event is set to Through mode, then | ||
| + | the player can jump through or onto the event. | ||
| + | </nowiki> | ||
| + | |||
| + | == [[Special Parameter Formula (YEP)|Special Parameter Formula]] == | ||
| + | |||
| + | <nowiki>You can use the following notetags to alter the various aspects that modify | ||
| + | the special parameter values: | ||
| + | |||
| + | Actor, Class, Enemy, Weapon, Armor, and State Notetags: | ||
| + | |||
| + | <stat Plus: +x%> | ||
| + | <stat Plus: -x%> | ||
| + | <stat Plus: +x.y> | ||
| + | <stat Plus: -x.y> | ||
| + | Replace 'stat' with 'tgr', 'grd', 'rec', 'pha', 'mcr', 'tcr', 'pdr', | ||
| + | 'mdr', 'fdr', or 'exr'. This is the value added to the base parameter | ||
| + | before the rate and flat values contribute to the total parameter value | ||
| + | assuming the plugin's default formula is utilized. | ||
| + | |||
| + | <stat Rate: x%> | ||
| + | <stat Rate: x.y> | ||
| + | Replace 'stat' with 'tgr', 'grd', 'rec', 'pha', 'mcr', 'tcr', 'pdr', | ||
| + | 'mdr', 'fdr', or 'exr'. This is the value multipled to the sum of the base | ||
| + | and plus values of the parameter before added by the flat value assuming | ||
| + | the plugin's default formula is utilized. | ||
| + | |||
| + | <stat Flat: +x%> | ||
| + | <stat Flat: -x%> | ||
| + | <stat Flat: +x.y> | ||
| + | <stat Flat: -x.y> | ||
| + | Replace 'stat' with 'tgr', 'grd', 'rec', 'pha', 'mcr', 'tcr', 'pdr', | ||
| + | 'mdr', 'fdr', or 'exr'. This is the value added finally to the sum of the | ||
| + | base and plus values after being multiplied by the rate value assuming the | ||
| + | plugin's default formula is utilized. | ||
| + | </nowiki> | ||
| + | |||
| + | == [[Stat Allocation (YEP)|Stat Allocation]] == | ||
| + | |||
| + | <nowiki> | ||
| + | If you want to give certain classes different stats to allocate into, use | ||
| + | the following notetag setups: | ||
| + | |||
| + | Class Notetags: | ||
| + | |||
| + | <Stat Allocation: x, x, x> | ||
| + | |||
| + | or | ||
| + | |||
| + | <Stat Allocation> | ||
| + | x | ||
| + | x | ||
| + | x | ||
| + | </Stat Allocation> | ||
| + | - Replace 'x' with a stat to add it to a list of parameters that players | ||
| + | can allocate points into. Insert as many 'x' entries as you need. They | ||
| + | will appear in the menu in the order they've been placed. Unaffiliated | ||
| + | stats will not appear in the menu. Use any of the stats below: | ||
| + | |||
| + | --- | ||
| + | |||
| + | Param: Stands for: | ||
| + | |||
| + | mhp Max HP | ||
| + | mmp Max MP | ||
| + | atk Attack | ||
| + | def Defense | ||
| + | mat Magic Attack | ||
| + | mdf Magic Defense | ||
| + | agi Agility | ||
| + | luk Luck | ||
| + | |||
| + | XParam: | ||
| + | |||
| + | hit Hit Rate | ||
| + | eva Evasion Rate | ||
| + | cri Critical Hit Rate | ||
| + | cev Critical Evasion Rate | ||
| + | mev Magic Evasion Rate | ||
| + | mrf Magic Reflection Rate | ||
| + | cnt Counterattack Rate | ||
| + | hrg HP Regeneration Rate | ||
| + | mrg MP Regeneration Rate | ||
| + | trg TP Regeneration Rate | ||
| + | |||
| + | SParam: | ||
| + | |||
| + | tgr Target Rate | ||
| + | grd Guard Effect Rate | ||
| + | rec Recovery Rate | ||
| + | pha Pharmacology (Item Effectiveness) | ||
| + | mcr MP Cost Rate | ||
| + | tcr TP Charge Rate | ||
| + | pdr Physical Damage Rate | ||
| + | mdr Magical Damage Rate | ||
| + | fdr Floor Damage Rate | ||
| + | exr Experience Rate | ||
| + | |||
| + | --- | ||
| + | |||
| + | These can be inserted into the 'Default Parameters' plugin parameter, too, | ||
| + | to change up the default listing and make it apply to every class that does | ||
| + | not have their own unique notetag setup. | ||
| + | </nowiki> | ||
| + | |||
| + | == [[State Tooltip Display (Olivia)|State Tooltip Display]] == | ||
| + | |||
| + | <html><img src='https://img.itch.zone/aW1nLzE4NTA2NTIuZ2lm/original/7fuDdB.gif'></html> | ||
| + | |||
| + | <html><img src='https://img.itch.zone/aW1nLzE4NTA2NTgucG5n/original/jgnRd5.png'></html> | ||
| + | |||
| + | <pre> | ||
| + | <Help Description> | ||
| + | insert a help description here | ||
| + | insert another line if you want to | ||
| + | </Help Description> | ||
| + | - Place this in the states that you want to have appear in the tooltip | ||
| + | window. Text codes can be used for the description. If no description is | ||
| + | used, then the state will not appear in the tooltip window. | ||
| + | </pre> | ||
| + | |||
| + | == [[Status Menu Core (YEP)|Status Menu Core]] == | ||
| + | |||
| + | === [[Actor Variables (YEP)|Actor Variables]] === | ||
| + | <hr> | ||
| + | |||
| + | <nowiki> | ||
| + | Use the following notetags to display variables in your Status Menu. | ||
| + | |||
| + | Actor Notetags: | ||
| + | <Column x Variables: y> | ||
| + | <Column x Variables: y, y, y> | ||
| + | <Column x Variables: y to z> | ||
| + | This will display in column x (1 through 4) the variable(s) y. If using | ||
| + | the y to z notetag, this will display all the variables from y to z. | ||
| + | </nowiki> | ||
| + | |||
| + | === [[More Status Menu Pages (YEP)|More Status Menu Pages]] === | ||
| + | <hr> | ||
| + | |||
| + | <nowiki> | ||
| + | Place the following notetags inside of an actor's notebox that you wish to | ||
| + | add more status menu pages to. | ||
| + | |||
| + | Actor Notetags: | ||
| + | |||
| + | ======================================================================== | ||
| + | |||
| + | <Status Menu Page: title> | ||
| + | text | ||
| + | text | ||
| + | </Status Menu Page: title> | ||
| + | - Replace 'title' with the title of the status menu page you wish for it | ||
| + | to display in the command window. Insert as many lines of 'text' as you | ||
| + | see fit for your extra status menu profile. Inserting multiple setups of | ||
| + | this notetag will allow you to have more page entries in the status menu. | ||
| + | |||
| + | Note: You can use text codes for the 'text' entries. | ||
| + | |||
| + | -- Examples --- | ||
| + | |||
| + | <Status Menu Page: Origin> | ||
| + | \n[1] is originally from the kingdom of Dragnof, a country that | ||
| + | existed 400 years in the past; the population was made up of both | ||
| + | humans and Dragons co-existing peacefully with each other. | ||
| + | </Status Menu Page: Origin> | ||
| + | |||
| + | <Status Menu Page: Discipline> | ||
| + | \n[1] firmly believes in noblesse oblige, where the strong and | ||
| + | privileged should act with generosity and nobility towards those | ||
| + | less privileged. | ||
| + | </Status Menu Page: Discipline> | ||
| + | |||
| + | ======================================================================== | ||
| + | |||
| + | <Status Menu Page title Switch: x> | ||
| + | <Status Menu Page title Switch: x, x, x> | ||
| + | - Replace 'title' with the title of the status menu page you wish for this | ||
| + | notetag to affect. Replace 'x' with a switch ID that is required to be ON | ||
| + | in order for this status menu page to show up in the actor's status menu | ||
| + | profile. If you use multiple switches, all the switches must be on in | ||
| + | order for this status menu page to appear. | ||
| + | |||
| + | -- Examples --- | ||
| + | |||
| + | <Status Menu Page Origin Switch: 1> | ||
| + | <Status Menu Page Discipline Switch: 5, 6, 7, 8, 9, 10> | ||
| + | </nowiki> | ||
| + | |||
| + | === [[Profile Status Page (YEP)|Profile Status Page]] === | ||
| + | <hr> | ||
| + | |||
| + | <nowiki> | ||
| + | The following notetags are used for actors specifically to alter the profile | ||
| + | page properties for the Status Menu. | ||
| + | |||
| + | Actor Notetags: | ||
| + | <Profile Text> | ||
| + | text | ||
| + | text | ||
| + | </Profile Text> | ||
| + | Changes the profile text from the default profile text to the text used in | ||
| + | between the two notetags. You can use text codes for the text here. Word | ||
| + | wrap is not supported. | ||
| + | |||
| + | <Profile Image: filename> | ||
| + | If you wish to associate a profile image for the actor, replace 'filename' | ||
| + | with the filename of a picture located in your img/pictures folder. Do not | ||
| + | include the file extension. If your image is Aldo.png, just use 'Aldo' and | ||
| + | do not include the '.png' extension. | ||
| + | |||
| + | <Profile Image Align: Left> | ||
| + | <Profile Image Align: Center> | ||
| + | <Profile Image Align: Right> | ||
| + | If you wish to use a different alignment from the one in the plugin's | ||
| + | parameter settings, you can use these notetags. If you use a nonexistant | ||
| + | word, then the right alignment will be decided by default. | ||
| + | </nowiki> | ||
| + | |||
| + | == [[Steal & Snatch (YEP)|Steal & Snatch]] == | ||
| + | |||
| + | <nowiki> | ||
| + | Use the following notetags to set up your steal effects. | ||
| + | |||
| + | Enemy Notetags: | ||
| + | <Steal Item x: y%> | ||
| + | <Steal Weapon x: y%> | ||
| + | <Steal Armor x: y%> | ||
| + | <Steal Gold x: y%> | ||
| + | Gives the enemy the respect item to be stolen. x is the item's ID while | ||
| + | y% is the rate at which the item can be stolen from. | ||
| + | |||
| + | <Steal Potion: y%> | ||
| + | <Steal Short Sword: y%> | ||
| + | <Steal Round Shield: y%> | ||
| + | If you decide to use names instead of item ID's, you can use the above | ||
| + | notetag format. If you have multiple items with the same name, priority | ||
| + | will be given to the item with the highest item ID in the order of items, | ||
| + | weapons, and then armors. | ||
| + | |||
| + | <Steal Resist: +x%> | ||
| + | <Steal Resist: -x%> | ||
| + | This is the enemy's inherent resistance against stealing. | ||
| + | |||
| + | Skill and Item Notetags: | ||
| + | <Steal> | ||
| + | <Steal: +x%> | ||
| + | <Steal: -x%> | ||
| + | This enables the skill/item to have steal properties. Actions with steal | ||
| + | properties will have a chance of stealing an item. This notetag applies to | ||
| + | all item types. If you use the notetag versions with +x% or -x%, the steal | ||
| + | rate is increased/decreased by x%. | ||
| + | |||
| + | <Steal Item> | ||
| + | <Steal Item: +x%> | ||
| + | <Steal Item: -x%> | ||
| + | This enables the skill/item to have steal properties. Actions with steal | ||
| + | properties will have a chance of stealing an item. This notetag adds item | ||
| + | types to the stealable item pool. If you use the notetag versions with +x% | ||
| + | or -x%, the steal rate is increased/decreased for item types by x%. | ||
| + | |||
| + | <Steal Weapon> | ||
| + | <Steal Weapon: +x%> | ||
| + | <Steal Weapon: -x%> | ||
| + | This enables the skill/item to have steal properties. Actions with steal | ||
| + | properties will have a chance of stealing an item. This notetag adds | ||
| + | weapon types to the stealable item pool. If you use the notetag versions | ||
| + | with +x% or -x%, the steal rate is increased/decreased weapon item types | ||
| + | by x%. | ||
| + | |||
| + | <Steal Armor> | ||
| + | <Steal Armor: +x%> | ||
| + | <Steal Armor: -x%> | ||
| + | This enables the skill/item to have steal properties. Actions with steal | ||
| + | properties will have a chance of stealing an item. This notetag adds armor | ||
| + | types to the stealable item pool. If you use the notetag versions with +x% | ||
| + | or -x%, the steal rate is increased/decreased for armor types by x%. | ||
| + | |||
| + | <Steal Gold> | ||
| + | <Steal Gold: +x%> | ||
| + | <Steal Gold: -x%> | ||
| + | This enables the skill/item to have steal properties. Actions with steal | ||
| + | properties will have a chance of stealing an item. This notetag adds gold | ||
| + | types to the stealable item pool. If you use the notetag versions with +x% | ||
| + | or -x%, the steal rate is increased/decreased for gold by x%. | ||
| + | |||
| + | <Snatch> | ||
| + | <Snatch: +x%> | ||
| + | <Snatch: -x%> | ||
| + | This enables the skill/item to have snatch properties. Actions with snatch | ||
| + | properties are able to select the exact item they wish to steal. This | ||
| + | notetag applies to all item types. If you use the notetag versions with | ||
| + | +x% or -x%, the snatch rate is increased/decreased by x%. | ||
| + | * Note: Snatching only works on skills/items that target. | ||
| + | |||
| + | <Snatch Item> | ||
| + | <Snatch Item: +x%> | ||
| + | <Snatch Item: -x%> | ||
| + | This enables the skill/item to have snatch properties. Actions with snatch | ||
| + | properties are able to select the exact item they wish to steal. This | ||
| + | notetag adds items to the pool. If you use the notetag versions with +x% | ||
| + | or -x%, the snatch rate is increased/decreased by x% for items. | ||
| + | * Note: Snatching only works on skills/items that target. | ||
| + | |||
| + | <Snatch Weapon> | ||
| + | <Snatch Weapon: +x%> | ||
| + | <Snatch Weapon: -x%> | ||
| + | This enables the skill/item to have snatch properties. Actions with snatch | ||
| + | properties are able to select the exact item they wish to steal. This | ||
| + | notetag adds weapons to the pool. If you use the notetag versions with +x% | ||
| + | or -x%, the snatch rate is increased/decreased by x% for weapons. | ||
| + | * Note: Snatching only works on skills/items that target. | ||
| + | |||
| + | <Snatch Armor> | ||
| + | <Snatch Armor: +x%> | ||
| + | <Snatch Armor: -x%> | ||
| + | This enables the skill/item to have snatch properties. Actions with snatch | ||
| + | properties are able to select the exact item they wish to steal. This | ||
| + | notetag adds armors to the pool. If you use the notetag versions with +x% | ||
| + | or -x%, the snatch rate is increased/decreased by x% for armors. | ||
| + | * Note: Snatching only works on skills/items that target. | ||
| + | |||
| + | <Snatch Gold> | ||
| + | <Snatch Gold: +x%> | ||
| + | <Snatch Gold: -x%> | ||
| + | This enables the skill/item to have snatch properties. Actions with snatch | ||
| + | properties are able to select the exact item they wish to steal. This | ||
| + | notetag adds gold targets to the pool. If you use the notetag versions | ||
| + | with +x% or -x%, the snatch rate is increased/decreased by x% for gold. | ||
| + | * Note: Snatching only works on skills/items that target. | ||
| + | |||
| + | Item, Weapon, and Armor Notetags: | ||
| + | <Enable Automatic Debuff> | ||
| + | <Disable Automatic Debuff> | ||
| + | This let's you override the 'Automatic Effect' settings in the parameters | ||
| + | for this individual item. Enabling it will cause any weapons and armors to | ||
| + | debuff the enemy's parameters relative to the piece of equipment stolen. | ||
| + | Disabling it will make no such thing occur. Automatic Debuffing is only | ||
| + | applied to weapons and armors. | ||
| + | |||
| + | <Steal Sound Name: filename> | ||
| + | If you wish to give an item a unique sound effect when stolen, use this | ||
| + | notetag to accomplish that. Exclude file extensions from the 'filename'. | ||
| + | |||
| + | <Steal Sound Volume: x> | ||
| + | To change the volume for this item's sound effect when it is stolen, use | ||
| + | this notetag and replace x with the volume level desired. | ||
| + | |||
| + | <Steal Sound Pitch: x> | ||
| + | To change the pitch for this item's sound effect when it is stolen, use | ||
| + | this notetag and replace x with the pitch desired. | ||
| + | |||
| + | <Steal Sound Pan: x> | ||
| + | To change the pan for this item's sound effect when it is stolen, use this | ||
| + | notetag and replace x with the pan desired. | ||
| + | |||
| + | Actor, Class, Weapon, Armor, and State Notetags: | ||
| + | <Steal Rate: +x%> | ||
| + | <Steal Rate: -x%> | ||
| + | <Steal Type Rate: +x%> | ||
| + | <Steal Type Rate: -x%> | ||
| + | Increase/decrease the steal rate for the user by x%. If you use the 'Type' | ||
| + | notetag, replace 'Type' with 'Item', 'Weapon', 'Armor', or 'Gold' to apply | ||
| + | individual steal rate bonuses for just those types. | ||
| + | </nowiki> | ||
| + | |||
| + | == [[Swap Enemies (YEP)|Swap Enemies]] == | ||
| + | |||
| + | <nowiki> | ||
| + | The purpose of swap enemies is to make it easier to swap out enemies for a | ||
| + | random enemy inside of a particular pool of enemies. Use the following | ||
| + | notetags to utilize this plugin: | ||
| + | |||
| + | Enemy Notetag: | ||
| + | <Swap: x, x, x> | ||
| + | <Swap: x to y> | ||
| + | Changes this enemy into a swap dummy. Replace x with the ID's of the other | ||
| + | enemies you would like to randomly spawn in its place. Insert multiples of | ||
| + | this tag if you wish to add more randomized enemies to the pool. | ||
| + | |||
| + | <Swap> | ||
| + | Slime | ||
| + | Hornet | ||
| + | Bat | ||
| + | Wisp> | ||
| + | </Swap> | ||
| + | If you wish to use names instead, you can construct your notetags in the | ||
| + | above format. Enemies with matching names will be added to the random swap | ||
| + | pool for the swap dummy. If you have multiple enemies in the database with | ||
| + | the same name, priority will be given to the enemy with the highest ID. | ||
| + | </nowiki> | ||
| + | |||
| + | == [[Target Core (YEP)|Target Core]] == | ||
| + | |||
| + | <nowiki> | ||
| + | If you would like to utilize custom target scopes for your skills and items, | ||
| + | you can use these notetags: | ||
| + | |||
| + | Skill and Item Notetags: | ||
| + | |||
| + | <Repeat: x> | ||
| + | This determines the number of times an action is repeatedly used on each | ||
| + | target. This can go beyond the default editor's limit of 9. | ||
| + | |||
| + | <Target: Everybody> | ||
| + | This targets all alive opponent and friendly members with the user being | ||
| + | the very last target. | ||
| + | |||
| + | <Target: x Random Any> | ||
| + | This adds x random alive opponents and/or allies. | ||
| + | |||
| + | <Target: Target All Foes> | ||
| + | This targets a single foe and then adds all alive opponent members. | ||
| + | |||
| + | <Target: Target x Random Foes> | ||
| + | This targets a single foe and then adds x random alive opponent members. | ||
| + | |||
| + | <Target: x Random Foes> | ||
| + | This adds x random alive opponent members. This can go beyond the editor's | ||
| + | default limit of 4 randomf oes. | ||
| + | |||
| + | <Target: All Allies But User> | ||
| + | This will target all friendly alive members except for the user. | ||
| + | |||
| + | <Target: Target All Allies> | ||
| + | This will target a single ally and then adds all alive friendly members. | ||
| + | |||
| + | <Target: Target x Random Allies> | ||
| + | This will target a single ally and then adds x random alive allies. | ||
| + | |||
| + | <Target: x Random Allies> | ||
| + | This adds x random alive allied members. | ||
| + | |||
| + | <Target: Everybody param Multiple Of x> | ||
| + | Replace 'param' with 'level', 'maxhp', 'maxmp', 'atk', 'def', 'mat', | ||
| + | 'mdf', 'agi', 'luk', 'hp', 'mp', or 'tp'. This will make the skill or item | ||
| + | indiscriminately target any living battler on the battlefield whose | ||
| + | parameter value is a multiple of x. | ||
| + | *NOTE: If you are using 'level', make sure you have YEP_EnemyLevels.js. | ||
| + | |||
| + | <Target: Allies param Multiple Of x> | ||
| + | Replace 'param' with 'level', 'maxhp', 'maxmp', 'atk', 'def', 'mat', | ||
| + | 'mdf', 'agi', 'luk', 'hp', 'mp', or 'tp'. This will make the skill or item | ||
| + | target any living allied party member on the battlefield whose parameter | ||
| + | value is a multiple of x. | ||
| + | *NOTE: If you are using 'level', make sure you have YEP_EnemyLevels.js. | ||
| + | |||
| + | <Target: Foes param Multiple Of x> | ||
| + | Replace 'param' with 'level', 'maxhp', 'maxmp', 'atk', 'def', 'mat', | ||
| + | 'mdf', 'agi', 'luk', 'hp', 'mp', or 'tp'. This will make the skill or item | ||
| + | target any living enemy battler on the battlefield whose parameter value | ||
| + | is a multiple of x. | ||
| + | *NOTE: If you are using 'level', make sure you have YEP_EnemyLevels.js. | ||
| + | |||
| + | --- YEP_RowFormation.js and YEP_BattleEngineCore.js Required --- | ||
| + | |||
| + | <Target: Enemy Row> | ||
| + | This will target the enemy row equal to that of the currently selected | ||
| + | target enemy. The entire row will be selected as a whole. | ||
| + | |||
| + | <Target: Enemy Row x> | ||
| + | This will target specifically the enemy row x for the enemy unit. The | ||
| + | entire row will be selected as a whole. | ||
| + | |||
| + | <Target: Front Enemy Row> | ||
| + | This will target the front-most enemy row with alive members. If there is | ||
| + | a row without any alive members, this will target the next row with an | ||
| + | alive member. | ||
| + | |||
| + | <Target: Back Enemy Row> | ||
| + | This will target the back-most enemy row with alive members. If there is | ||
| + | a row without any alive members, this will target the next row with an | ||
| + | alive member. | ||
| + | |||
| + | <Target: Ally Row> | ||
| + | This will target the enemy row equal to that of the currently selected | ||
| + | target enemy. The entire row will be selected as a whole. | ||
| + | |||
| + | <Target: Ally Row x> | ||
| + | This will target specifically the allied row x for the allied unit. The | ||
| + | entire row will be selected as a whole. | ||
| + | |||
| + | <Target: Front Ally Row> | ||
| + | This will target the front-most ally row with alive members. If there is | ||
| + | a row without any alive members, this will target the next row with an | ||
| + | alive member. | ||
| + | |||
| + | <Target: Back Ally Row> | ||
| + | This will target the back-most ally row with alive members. If there is | ||
| + | a row without any alive members, this will target the next row with an | ||
| + | alive member. | ||
| + | </nowiki> | ||
| + | |||
| + | === [[Area of Effect (YEP)|Area of Effect]] === | ||
| + | <hr> | ||
| + | |||
| + | <nowiki> | ||
| + | You can use the following notetags to apply area of effect scopes for your | ||
| + | skills and items! | ||
| + | |||
| + | Skill and Item Notetags: | ||
| + | |||
| + | --- AOE Circle Scope --- | ||
| + | |||
| + | <AOE Radius: x> | ||
| + | Turns the skill into having a target scope with a circular AOE. x is the | ||
| + | amount of pixels of the radius for the AOE Circle. | ||
| + | |||
| + | <AOE Height Rate: x%> | ||
| + | Changes the height to be x% of the diameter of the AOE Circle. | ||
| + | |||
| + | <AOE Graphic: filename> | ||
| + | If you wish to use a different image for the AOE circle for this skill or | ||
| + | item, replace 'filename' with the filename of the graphic found within the | ||
| + | img/pictures/ folder. Do not include the file extension. For example, the | ||
| + | graphic 'aoeblue.png' will result in notetag <AOE Graphic: aoeblue>. | ||
| + | |||
| + | <AOE Hue: x> | ||
| + | This will change the hue of the AOE circle to x. By default, the hue value | ||
| + | is 0. This will alter the color of it. | ||
| + | |||
| + | <AOE Blend: x> | ||
| + | This is the blend mode used for the AOE graphic. 0 is normal with no blend | ||
| + | modes applied. 1 is additive. 2 is multiply. 3 is screen. | ||
| + | |||
| + | *NOTE: This does not work with the unique selection types found with the | ||
| + | YEP_X_SelectionControl plugin. | ||
| + | |||
| + | --- AOE Rectangle Scope --- | ||
| + | |||
| + | <Rect Column: x> | ||
| + | This will make a rectangular area of effect scope that is x pixels wide. | ||
| + | The area of effect zone is vertical and all targets within this zone will | ||
| + | become targets for the action. | ||
| + | |||
| + | <Rect Row: x> | ||
| + | This will make a rectangular area of effect scope that is x pixels tall. | ||
| + | The area of effect zone is horizontal and all targets within this zone | ||
| + | will become targets for the action. | ||
| + | |||
| + | <Rect Screen> | ||
| + | This will target all units within the entirity of the screen. While it is | ||
| + | the same as an all enemies/all allies scope, this can be used to give a | ||
| + | visual representation of which units are selected as a target. | ||
| + | |||
| + | <Rect Graphic: filename> | ||
| + | If you wish to use a different image for the AOE rectangle for this skill | ||
| + | or item, replace 'filename' with the filename of the graphic found within | ||
| + | the img/pictures/ folder. Do not include the file extension. For example, | ||
| + | the graphic 'rectblue.png' will result in notetag <AOE Graphic: rectblue>. | ||
| + | |||
| + | <Rect Hue: x> | ||
| + | This will change the hue of the AOE rectangle to x. By default, the hue | ||
| + | value is 0. This will alter the color of it. | ||
| + | |||
| + | <Rect Blend: x> | ||
| + | This is the blend mode used for the AOE graphic. 0 is normal with no blend | ||
| + | modes applied. 1 is additive. 2 is multiply. 3 is screen. | ||
| + | |||
| + | *NOTE: This does not work with the unique selection types found with the | ||
| + | YEP_X_SelectionControl plugin. | ||
| + | |||
| + | --- Animation Settings --- | ||
| + | |||
| + | <AOE Center Animation> | ||
| + | This will cause the animation for an AOE skill to be played to center on | ||
| + | the first target of the AOE group, which is usually the center of the | ||
| + | AOE targets. | ||
| + | |||
| + | <AOE Group Animation> | ||
| + | This will cause the animation for an AOE skill to be played on all of the | ||
| + | targets within the AOE group as if normally done. | ||
| + | |||
| + | Actor and Enemy Notetags: | ||
| + | |||
| + | --- AOE Hitbox Settings --- | ||
| + | |||
| + | <AOE Buffer X: +x> | ||
| + | <AOE Buffer X: -x> | ||
| + | |||
| + | <AOE Buffer Y: +x> | ||
| + | <AOE Buffer Y: -x> | ||
| + | Changes the buffer x/y of the battler when an AOE image is placed on the | ||
| + | battler. This is also the offset from the center location at which the | ||
| + | AOE targets will be calculated, too. If this notetag isn't used, the | ||
| + | buffer value used will be from the plugin parameters. | ||
| + | |||
| + | <AOE Hitbox Width: x> | ||
| + | <AOE Hitbox Height: x> | ||
| + | This will adjust the hitbox of the battler to have an AOE hitbox width of | ||
| + | x or an AOE hitbox height of x. | ||
| + | </nowiki> | ||
| + | |||
| + | === [[Selection Control (YEP)|Selection Control]] === | ||
| + | <hr> | ||
| + | |||
| + | ; General | ||
| + | |||
| + | <nowiki> | ||
| + | To make skills and items select only certain types of battlers, you can use | ||
| + | the following notetag setup to do so: | ||
| + | |||
| + | Skill and Item Notetags: | ||
| + | |||
| + | <Single or Multiple Select> | ||
| + | This will allow the skill or item to be able to select either single | ||
| + | targets or all targets at once. This will automatically make a skill | ||
| + | default to single target selecting. You MUST change your scope in the | ||
| + | database to work with this effect. | ||
| + | *Note: Having this option will cancel out AoE Circles and AoE Rectangles | ||
| + | to avoid conflicting issues. | ||
| + | *Note: If there is an enemy with taunt, the option to switch between a | ||
| + | group target and a single target will not be available. | ||
| + | *Note: Enemy AI will NOT make use of the ability to toggle between single | ||
| + | target and multi-target scopes. | ||
| + | |||
| + | <Disperse Damage> | ||
| + | Used in conjunction with the above notetag, this will cause damage to be | ||
| + | split evenly amongst the number of targets the skill is dispersed into. | ||
| + | The damage dispersion effect will only occur if multiple targets are being | ||
| + | selected after toggling. | ||
| + | |||
| + | <Enemy or Actor Select> | ||
| + | <Actor or Enemy Select> | ||
| + | This will allow the player to toggle between selecting an enemy or actor | ||
| + | for the action's target scope. When using <Enemy or Actor Select>, it will | ||
| + | first target enemies by default. Using <Actor or Enemy Select> will target | ||
| + | actors by default. Using either notetag will change the action's target | ||
| + | scope to single target. | ||
| + | *Note: Enemy AI will NOT make use of the ability to toggle between actors | ||
| + | or enemies for skill selection. | ||
| + | |||
| + | <Weapon Range> | ||
| + | <Weapon Ranged> | ||
| + | Requires YEP_RowFormation.js. This will make the selection of targets vary | ||
| + | based on the battler's weapon range. If the weapon is 'melee', then it | ||
| + | will target the front row only. If the weapon is 'ranged', then it can | ||
| + | target any row the battler wants. | ||
| + | |||
| + | *Note: If you use any <Select Condition> effects, all selection options | ||
| + | provided by default with the plugin parameters will be reset under the | ||
| + | assumption that it will no longer be an action of default nature. If this is | ||
| + | the case, you will need to use the above notetags to specify how you wish to | ||
| + | make your skill's selection methods. | ||
| + | |||
| + | Actor, Class, Enemy, Weapon, Armor, State Notetags: | ||
| + | |||
| + | <Cannot Select: All> | ||
| + | All actions cannot select this battler unless it's an action whose scope | ||
| + | is a user scope. | ||
| + | |||
| + | <Cannot Select: Physical Hit> | ||
| + | <Cannot Select: Magical Hit> | ||
| + | <Cannot Select: Certain Hit> | ||
| + | This will prevent physical, magical, or certain hit actions from being | ||
| + | able to select the battler. They will be excluded out of multi-hit skills, | ||
| + | as well unless it's an action whose scope targets the user itself. | ||
| + | targets the user itself. | ||
| + | |||
| + | <Cannot Select: Skills> | ||
| + | <Cannot Select: Items> | ||
| + | This will prevent skills/items from being able to target the battler | ||
| + | unless it's an action whose scope targets the user itself. | ||
| + | |||
| + | <Cannot Select: Item x> | ||
| + | <Cannot Select: Item name> | ||
| + | This will prevent item 'x' (or the named item) from being able to target | ||
| + | the battler unless the item's scope targets the user itself. If you have | ||
| + | multiple items in your database with the same name, priority will be given | ||
| + | to the item with the highest ID. | ||
| + | |||
| + | <Cannot Select: Skill x> | ||
| + | <Cannot Select: Skill name> | ||
| + | This will prevent skill 'x' (or the named skill) from being able to target | ||
| + | the battler unless the skill's scope targets the user itself. If you have | ||
| + | multiple skills in your database with the same name, priority will be | ||
| + | given to the skill with the highest ID. | ||
| + | |||
| + | <Cannot Select: SType x> | ||
| + | <Cannot Select: SType name> | ||
| + | This will prevent skills of skill type 'x' (or named) from being able to | ||
| + | target the battler unless the skill's scope targets the user itself. If | ||
| + | you have multiple skill types in your database with the same name, then | ||
| + | priority will be given to the skill type with the highest ID. | ||
| + | |||
| + | <Cannot Select: Element x> | ||
| + | <Cannot Select: Element name> | ||
| + | This will prevent actions with an elemental ID of 'x' (or named) from | ||
| + | being able to target the battler unless the action's scope targets the | ||
| + | user itself. If you have multiple elements in your database with the same | ||
| + | name, then priority will be given to the element with the highest ID. | ||
| + | |||
| + | Weapon and Enemy Notetags: | ||
| + | |||
| + | <Melee> | ||
| + | This will designate the weapon/enemy as being melee and will affect any | ||
| + | skill or item selection range that uses the 'Weapon Range' condition. | ||
| + | Weapons/Enemies of this nature will target only the front row for those | ||
| + | selection conditions. | ||
| + | |||
| + | <Range> | ||
| + | <Ranged> | ||
| + | This will designate the weapon/enemy as being ranged and will affect any | ||
| + | skill or item selection range that uses the 'Weapon Range' condition. | ||
| + | Weapons/Enemies of this nature will be able to target any row for those | ||
| + | selection conditions. | ||
| + | </nowiki> | ||
| + | |||
| + | ; Select Conditions | ||
| + | |||
| + | <nowiki> | ||
| + | To impose specific conditions on which targets are valid targets, use the | ||
| + | following notetag setup: | ||
| + | |||
| + | --- | ||
| + | |||
| + | Skill and Item Notetags: | ||
| + | |||
| + | <Select Conditions> | ||
| + | condition | ||
| + | condition | ||
| + | </Select Conditions> | ||
| + | Replace 'condition' with the desired condition setup. Insert multiple | ||
| + | conditions to make an action require more conditions for viable targets. | ||
| + | Using this will overwrite the default settings imposed by the plugin | ||
| + | parameters so if you wish to use those settings, you'll have to use the | ||
| + | associated condition with it. | ||
| + | |||
| + | --- | ||
| + | |||
| + | Conditions: | ||
| + | |||
| + | --- | ||
| + | |||
| + | Any Row | ||
| + | - Requires YEP_RowFormation.js. The battler can be targeted from any row it | ||
| + | is in as a valid target. This will conflict with the other 'Row Only' select | ||
| + | conditions. | ||
| + | |||
| + | --- | ||
| + | |||
| + | Back Row Only | ||
| + | - Requires YEP_RowFormation.js. This will make only the back row battlers | ||
| + | be selectable for target. The back row will refer to whatever row is in the | ||
| + | back that has living members. If row 3's enemies are all dead, but row 2 | ||
| + | has living members, then row 2 will be considered the back row. This will | ||
| + | conflict with the other 'Row Only' select conditions. | ||
| + | |||
| + | --- | ||
| + | |||
| + | Front Row Only | ||
| + | - Requires YEP_RowFormation.js. This will make only the front row battlers | ||
| + | be selectable for target. The front row will refer to whatever row is in | ||
| + | front that has living members. If row 1's enemies are all dead, but row 2 | ||
| + | has living members, then row 2 will be considered the front row. This will | ||
| + | conflict with the other 'Row Only' select conditions. | ||
| + | |||
| + | --- | ||
| + | |||
| + | Weapon Range | ||
| + | - Requires YEP_RowFormation.js. This will make the selection of targets vary | ||
| + | based on the battler's weapon range. If the weapon is 'melee', then it will | ||
| + | target the front row only. If the weapon is 'ranged', then it can target any | ||
| + | row the battler wants. | ||
| + | |||
| + | --- | ||
| + | |||
| + | Row x Only | ||
| + | - Requires YEP_RowFormation.js. This will make only battlers in row x be | ||
| + | selectable for target. Any battlers not in row x will be excluded from | ||
| + | target selection. This will conflict with the other 'Row Only' select | ||
| + | conditions. | ||
| + | |||
| + | --- | ||
| + | |||
| + | Row x Max | ||
| + | - Requires YEP_RowFormation.js. This will make all battlers who are located | ||
| + | in a lower number row up to row x be selectable for target. Any battlers in | ||
| + | a row number larger than x will be excluded from target selection. | ||
| + | |||
| + | --- | ||
| + | |||
| + | Row x Min | ||
| + | - Requires YEP_RowFormation.js. This will make all battlers who are located | ||
| + | in a row from row x onward selectable for target. Any battlers in a row | ||
| + | number smaller than x will be excluded from target selection. | ||
| + | |||
| + | --- | ||
| + | |||
| + | Param stat eval | ||
| + | ie: Param MaxHP >= 500 | ||
| + | ie: Param HP% <= 0.30 | ||
| + | ie: Param Level === 25 | ||
| + | - This makes the selection have a check on the target's parameter values | ||
| + | before deciding if the target is a valid target for selection. You can | ||
| + | replace 'stat' with 'MaxHP', 'MaxMP', 'MaxTP', 'HP', 'MP', 'TP', 'HP%', | ||
| + | 'MP%', 'TP%', 'ATK', 'DEF', 'MAT', 'MDF', 'AGI', 'LUK', or 'LEVEL'. This | ||
| + | run an eval check against that parameter owned by the target. | ||
| + | |||
| + | --- | ||
| + | |||
| + | State: x | ||
| + | State: name | ||
| + | - The target must have state 'x' in order to be selected as a valid target. | ||
| + | If you're using the named version of the condition and you have multiple | ||
| + | states with the same name in your database, priority will be given to the | ||
state with the highest ID. If the target doesn't have state 'x', then the | state with the highest ID. If the target doesn't have state 'x', then the | ||
| − | target is not a valid target for selection. | + | target is not a valid target for selection. |
| − | + | ||
| − | --- | + | --- |
| − | + | ||
| − | Not State: x | + | Not State: x |
| − | Not State: name | + | Not State: name |
| − | - The target must not have state 'x' in order to be selected as a valid | + | - The target must not have state 'x' in order to be selected as a valid |
| − | target. If you're using the named version of the condition and you have | + | target. If you're using the named version of the condition and you have |
| − | multiple states with the same name in your database, priority will be given | + | multiple states with the same name in your database, priority will be given |
| − | to the state with the highest ID. If the target does have state 'x', then | + | to the state with the highest ID. If the target does have state 'x', then |
| − | the target is not a valid target for selection. | + | the target is not a valid target for selection. |
| − | + | ||
| − | --- | + | --- |
| + | |||
| + | Not User | ||
| + | - This will remove the user from the possible selection pool making the user | ||
| + | unable to be selected as a valid target. | ||
| + | </nowiki> | ||
| + | |||
| + | == [[Taunt (YEP)|Taunt]] == | ||
| + | |||
| + | <nowiki> | ||
| + | The following are some notetags you can use to add taunt traits to your | ||
| + | various database objects. | ||
| + | |||
| + | Actor, Class, Weapon, Armor, State, Enemy Notetags: | ||
| + | <Physical Taunt> | ||
| + | <Magical Taunt> | ||
| + | <Certain Taunt> | ||
| + | These three notetags enable the database object of choice to have the | ||
| + | respective taunt mechanic against those types of actions. Physical taunts | ||
| + | will cause the user to aggro all physical type of actions from the rival | ||
| + | team. The same goes for magical taunts and certain taunts of their nature. | ||
| + | |||
| + | <Null Physical Taunt> | ||
| + | <Null Magical Taunt> | ||
| + | <Null Certain Taunt> | ||
| + | This nullifies the respective taunt trait on the user (not the attacker). | ||
| + | What this means is if a user originally has taunt through some form or | ||
| + | means, having a null taunt trait applied will remove that taunt effect and | ||
| + | the user will be treated as a normal target. | ||
| + | |||
| + | <Ignore Physical Taunt> | ||
| + | <Ignore Magical Taunt> | ||
| + | <Ignore Certain Taunt> | ||
| + | This allows an attacker with this trait to ignore any taunts of the | ||
| + | respective nature and gain access to all possible targets as if no taunts | ||
| + | are in place. | ||
| + | |||
| + | Skill and Item Notetag: | ||
| + | <Bypass Taunt> | ||
| + | This causes this skill/item to ignore taunts altogether and the skill/item | ||
| + | is able to select single targets as if no taunts existed on the field. | ||
| + | </nowiki> | ||
| + | |||
| + | == [[Tool Ring System (Irina)|Tool Ring System]] == | ||
| + | |||
| + | <html><img src='https://img.itch.zone/aW1hZ2UvNjAwNDg2LzMxODIyODUuZ2lm/original/1pzCl7.gif'></html> | ||
| + | |||
| + | <pre> | ||
| + | <Tool Common Event: x> | ||
| + | - For: Items ONLY | ||
| + | - Replace 'x' with the ID of the Common Event to launch when used. | ||
| + | </pre> | ||
| + | |||
| + | == [[Unison Attack (Irina)|Unison Attack]] == | ||
| + | |||
| + | <html><img src='https://img.itch.zone/aW1nLzI0MjE5NjYuZ2lm/original/Ga45yX.gif' width='630'></html> | ||
| + | |||
| + | ; Skill Notetags: | ||
| + | |||
| + | <html><img src='https://img.itch.zone/aW1nLzI0MjE5NTAucG5n/original/t7on3t.png'></html> | ||
| + | |||
| + | <pre> | ||
| + | <Unison Skill: x, x> | ||
| + | <Unison Skill: x, x, x> | ||
| + | <Unison Skill: x, x, x, x> | ||
| + | - Replace 'x' with the skill ID's required for this Unison Attack to work. | ||
| + | - Insert as many skill ID's as needed. | ||
| + | - Once all the skills are found queued in the party, a Unison Attack will | ||
| + | occur. Only the actor party can perform Unison Attacks. | ||
| + | - Skills that become Unison Attacks cannot be directly used from the menu | ||
| + | in order to avoid script crashes. | ||
| + | |||
| + | <Unison Skill Priority: x> | ||
| + | - 'x' determines the priority value of the Unison Attack. | ||
| + | - If multiple recipes for a Unison Attack are found, then the Unison Skill | ||
| + | with the highest priority value will occur. If they're tied, then a random | ||
| + | possible Unison Skill combination of the highest priority is chosen. | ||
| + | </pre> | ||
| + | |||
| + | == [[Visual Item Inventory (Arisu)|Visual Item Inventory]] == | ||
| + | |||
| + | <html><img src='https://img.itch.zone/aW1hZ2UvNDg1OTQwLzI1MDgzODIucG5n/original/9tfprF.png'></html> | ||
| + | |||
| + | ; Item, Weapon, Armor Notetags | ||
| + | |||
| + | <pre> | ||
| + | <Cell BG Color: r, g, b, a> | ||
| + | - Changes the color of the item's cell background color from default. | ||
| + | - Replace 'r' with red value from 0 to 255. | ||
| + | - Replace 'g' with green value from 0 to 255. | ||
| + | - Replace 'b' with blue value from 0 to 255. | ||
| + | - Replace 'a' with alpha value from 0 to 1. | ||
| + | </pre> | ||
| + | |||
| + | == [[Weakness Display (Olivia)|Weakness Display]] == | ||
| + | |||
| + | <html><img src='https://img.itch.zone/aW1nLzE0NTg5NTcuZ2lm/original/Uhrq80.gif'></html> | ||
| + | |||
| + | <pre> | ||
| + | Skill and Item Notetags: | ||
| + | |||
| + | <Analyze Weakness: x> | ||
| + | This will reveal x weaknesses that the player has not currently | ||
| + | revealed yet from the target enemy. | ||
| + | |||
| + | Enemy Notetags: | ||
| + | |||
| + | <Show HP Gauge> | ||
| + | This will show the enemy's HP gauge by default and ignore the plugin | ||
| + | parameter's default settings. | ||
| + | |||
| + | <Hide HP Gauge> | ||
| + | This will hide the enemy's HP gauge by default and ignore the plugin | ||
| + | parameter's default settings. | ||
| + | </pre> | ||
| + | |||
| + | == [[Weapon Animation (YEP)|Weapon Animation]] == | ||
| + | |||
| + | <nowiki> | ||
| + | For those who would like to give their weapons a little bit of a change, you | ||
| + | can make use of these notetags: | ||
| + | |||
| + | Actor, Class, Enemy, Weapon, Armor, and State Notetags: | ||
| + | |||
| + | <Weapon Image: x> | ||
| + | Replace x with a number above 0 and you'll get an image from img/system's | ||
| + | weapon sheets. Each sheet contains 12 weapon images. If you wish to load a | ||
| + | weapon from the first sheet, it'll be within 1-12. If you wish to load a | ||
| + | weapon from the second sheet, it'll be within 13-24, and so on. The weapon | ||
| + | sheets increase in increments of 12, which means that if you wish to load | ||
| + | a weapon from weapon sheet 50, x will be between 589 to 600. | ||
| + | |||
| + | By default, these are the number values associated with each: | ||
| + | 1 - Dagger 7 - Long Bow 13 - Mace 19 - Slingshot 25 - Book | ||
| + | 2 - Sword 8 - Crossbow 14 - Rod 20 - Shotgun 26 - Custom | ||
| + | 3 - Flail 9 - Gun 15 - Club 21 - Rifle 27 - Custom | ||
| + | 4 - Axe 10 - Claw 16 - Chain 22 - Chainsaw 28 - Custom | ||
| + | 5 - Whip 11 - Glove 17 - Sword#2 23 - Railgun 29 - Custom | ||
| + | 6 - Staff 12 - Spear 18 - Iron Pipe 24 - Stun Rod 30 - Custom | ||
| + | |||
| + | <Weapon Image: filename> | ||
| + | If you have created a custom folder to place unique weapon sheets, you can | ||
| + | use this notetag to acquire them. The filename is case sensitive. Do not | ||
| + | include the file extension. If your weapon sheet is called DaggerBlue.png, | ||
| + | then the notetag you'd use would be <Weapon Image: DaggerBlue> only. | ||
| + | |||
| + | <Weapon Motion: thrust> | ||
| + | <Weapon Motion: swing> | ||
| + | <Weapon Motion: missile> | ||
| + | This will dictate the motion the battler will use when attacking if you're | ||
| + | using a custom weapon animation. If nothing is placed here, the motion | ||
| + | will default to the 'Default Motion' value in the plugin parameters. You | ||
| + | can use any of the following motions: | ||
| + | walk wait chant guard damage evade | ||
| + | thrust swing missile skill spell item | ||
| + | escape victory dying abnormal sleep dead | ||
| + | |||
| + | <Weapon Hue: x> | ||
| + | For those who would like to use different hues with your weapon animation, | ||
| + | use this notetag in the same notebox as the <Weapon Image: x> notetag to | ||
| + | change the hue of the weapon animation to x. | ||
| + | |||
| + | <Weapon Animation: x> | ||
| + | If you would like to override the attack animation when using this weapon, | ||
| + | you can use x to dictate which animation will be used for regular attacks. | ||
| + | |||
| + | --- | ||
| + | |||
| + | If you haven't noticed yet, these notetags are made for actors, classes, | ||
| + | enemies, weapons, armors, and also states. What this means is, the weapon | ||
| + | animation changes will behave more like traits. Priorities will occur in the | ||
| + | following order: | ||
| + | |||
| + | States | ||
| + | Weapons | ||
| + | Armors | ||
| + | Classes | ||
| + | Actors | ||
| + | Enemies | ||
| + | |||
| + | This means that if a battler is affected by a state that would modify its | ||
| + | weapon appearance, any other weapon animation changes that the user would | ||
| + | have will be overwritten by the state's weapon animation change until the | ||
| + | state wears off. | ||
| + | </nowiki> | ||
| + | |||
| + | == [[Weapon Swap System (Olivia)|Weapon Swap System]] == | ||
| + | |||
| + | <html><img src='https://img.itch.zone/aW1nLzE0NjUzMjIuZ2lm/original/DzLnwm.gif'></html> | ||
| + | |||
| + | <pre> | ||
| + | Skill and Item Notetags: | ||
| + | |||
| + | <Switch to Weapon: x> | ||
| + | <Switch to Weapon: text> | ||
| + | When the actor uses this skill or item, the actor will switch to this | ||
| + | weapon if it is equipped when the skill cost is paid. x is the weapon | ||
| + | type ID and text is the weapon name. If you use the weapon name, type | ||
| + | it out exactly since it is case sensitive. This notetag does not make | ||
| + | the weapon a requirement. To make it a requirement, use the database's | ||
| + | "Required Weapon" dropdown lists to enforce the requirement. | ||
| + | |||
| + | Skill Notetags: | ||
| + | |||
| + | <Require Any Weapon> | ||
| + | Requires any kind of weapon to be equipped in order to use it. | ||
| + | |||
| + | <Require Weapon Types: x> | ||
| + | <Require Weapon Types: x, x, x> | ||
| + | Insert multiple x to add more weapon types. All of the weapon types must | ||
| + | be equipped in order for this skill to be used. | ||
| + | </pre> | ||
| + | |||
| + | == [[Weapon Unleash (YEP)|Weapon Unleash]] == | ||
| + | |||
| + | <nowiki> | ||
| + | There's a few notetags you can use to replace the default attack and provide | ||
| + | any weapon unleash effects. Note: If you're using notetags that write out | ||
| + | the skill's name and you have multiple skills in your database with the same | ||
| + | name, priority will be given to the skill with the highest ID. | ||
| + | |||
| + | Actor, Class, Enemy, Weapon, Armor, State notetags: | ||
| + | |||
| + | --- Replace Attack --- | ||
| + | |||
| + | <Replace Attack: x> | ||
| + | <Replace Attack: name> | ||
| + | This will replace the attack skill used by the battler. If a battler would | ||
| + | have multiple attack replacements, priority will be given in the following | ||
| + | order in a first-come-first-serve aspect: | ||
| + | |||
| + | States - Highest to Lowest Priority | ||
| + | Equipment - In order of equip list | ||
| + | Enemy Aspect | ||
| + | Class Aspect | ||
| + | Actor Aspect | ||
| + | |||
| + | --- Replace Guard --- | ||
| + | |||
| + | <Replace Guard: x> | ||
| + | <Replace Guard: name> | ||
| + | This will replace the guard skill used by the battler. If a battler would | ||
| + | have multiple guard replacements, priority will be given in the following | ||
| + | order in a first-come-first-serve aspect: | ||
| + | |||
| + | States - Highest to Lowest Priority | ||
| + | Equipment - In order of equip list | ||
| + | Enemy Aspect | ||
| + | Class Aspect | ||
| + | Actor Aspect | ||
| + | |||
| + | --- Weapon Unleash --- | ||
| + | |||
| + | <Weapon Unleash x%: y> | ||
| + | <Weapon Unleash x%: name> | ||
| + | This causes the Attack skill to have a x% chance to randomly use skill y | ||
| + | (or named). This will apply only to the Attack Command. Insert multiple | ||
| + | copies of this notetag to give more weapon unleashes. If a battler would | ||
| + | have multiple weapon unleashes, the randomization check will occur in the | ||
| + | following order: | ||
| + | |||
| + | States - Highest to Lowest Priority | ||
| + | Equipment - In order of equip list | ||
| + | Enemy Aspect | ||
| + | Class Aspect | ||
| + | Actor Aspect | ||
| + | |||
| + | If a weapon unleash check passes earlier in the list while there are still | ||
| + | weapon unleashes later in the list, that weapon unleash will take priority | ||
| + | and override all the following weapon unleashes. | ||
| + | |||
| + | --- Guard Unleash --- | ||
| + | |||
| + | <Guard Unleash x%: y> | ||
| + | <Guard Unleash x%: name> | ||
| + | This causes the Guard skill to have a x% chance to randomly use skill y | ||
| + | (or named). This will apply only to the Guard Command. Insert multiple | ||
| + | copies of this notetag to give more guard unleashes. If a battler would | ||
| + | have multiple guard unleashes, the randomization check will occur in the | ||
| + | following order: | ||
| + | |||
| + | States - Highest to Lowest Priority | ||
| + | Equipment - In order of equip list | ||
| + | Enemy Aspect | ||
| + | Class Aspect | ||
| + | Actor Aspect | ||
| + | |||
| + | If a guard unleash check passes earlier in the list while there are still | ||
| + | guard unleashes later in the list, that guard unleash will take priority | ||
| + | and override all the following guard unleashes. | ||
| + | |||
| + | --- Unleash Rate Modifiers --- | ||
| + | |||
| + | <Weapon Unleash: +x%> | ||
| + | <Weapon Unleash: -x%> | ||
| + | This alters the weapon unleash rate for all weapon unleashes by +x%/-x%. | ||
| + | |||
| + | <Weapon Unleash x: +y%> | ||
| + | <Weapon Unleash x: -y%> | ||
| + | <Weapon Unleash name: +y%> | ||
| + | <Weapon Unleash name: -y%> | ||
| + | This alters the weapon unleash rate for skill x (or name) by +y%/-y%. If | ||
| + | you are using the named notetag and you have multiple skills in your | ||
| + | database that use multiple names, priority will be given to the skill with | ||
| + | the highest ID. | ||
| + | |||
| + | <Guard Unleash: +x%> | ||
| + | <Guard Unleash: -x%> | ||
| + | This alters the guard unleash rate for all weapon unleashes by +x%/-x%. | ||
| + | |||
| + | <Guard Unleash x: +y%> | ||
| + | <Guard Unleash x: -y%> | ||
| + | <Guard Unleash name: +y%> | ||
| + | <Guard Unleash name: -y%> | ||
| + | This alters the guard unleash rate for skill x (or name) by +y%/-y%. If | ||
| + | you are using the named notetag and you have multiple skills in your | ||
| + | database that use multiple names, priority will be given to the skill with | ||
| + | the highest ID. | ||
| + | |||
| + | Skill Notetags: | ||
| − | + | <Command Text: x> | |
| − | + | <Attack Text: x> | |
| − | + | <Guard Text: x> | |
| + | If you are using Replace Attack or Replace Guard, you can change the way | ||
| + | the command name appears in the actor command window to x. If you are | ||
| + | using the <Command Text: x> notetag, this will apply to both Attack and | ||
| + | Guard names. | ||
</nowiki> | </nowiki> | ||
| − | + | |} | |
| − | |||
| − | |||
| − | |||
| − | |||
| − | |||
| − | |||
| − | |||
| − | |||
| − | |||
| − | |||
| − | |||
| − | |||
| − | |||
| − | |||
| − | |||
| − | |||
| − | |||
| − | |||
| − | |||
| − | |||
| − | |||
| − | |||
| − | |||
| − | |||
| − | |||
| − | |||
| − | |||
| − | |||
| − | |||
| − | |||
| − | |||
| − | |||
| − | |||
| − | |||
Latest revision as of 18:35, 29 December 2023


|
VisuStella, Caz Wolf, Fallen Angel Olivia, Atelier Irina, and other affiliated content creators.
Contents
- 1 Absorption Barrier
- 2 Action Cutin
- 3 Action Sequence Fast Forward/Skip
- 4 Auto Passive States
- 5 Base Parameter Control
- 6 Battle A.I. Core
- 7 Battle Effects Pack 1
- 8 Battle Effects Pack 2
- 9 Battle Engine Core
- 9.1 Animated Sideview Enemies
- 9.2 Battle System - ATB
- 9.3 Battle System - CTB
- 9.4 Battle System - OTB (Order Turn Battle)
- 9.5 Battle System - STB
- 9.6 Counter Control
- 9.7 In-Battle Status
- 9.8 Lunatic Pack - Action Beginning and End Effects
- 9.9 Turn Order Display
- 9.10 Visual HP Gauges
- 9.11 Weak Enemy Poses
- 10 Battle Impact
- 11 Battle Select Cursor
- 12 Boost Point System
- 13 Bright Effects
- 14 Buffs & States Core
- 15 Collectible Card Game
- 16 Class Change Core
- 17 Counter State
- 18 Core Engine
- 19 Damage Core
- 20 Dash Toggle
- 21 Disable Auto Shadow Extended
- 22 Dragonbones Integration
- 23 Dragonbones Map Sprites
- 24 Element Core
- 25 Enemy Levels
- 26 Enhanced TP
- 27 Equip Battle Skills
- 28 Equip Core
- 29 Equipment Set Bonuses
- 30 Event Click Trigger
- 31 Event Copier
- 32 Event Encounter Aid
- 33 Event Hitbox Resize
- 34 Event Sprite Offset
- 35 Event Step Animation Options
- 36 Extra Enemy Drops
- 37 Extra Parameter Formula
- 38 Floor Damage
- 39 Footstep Sounds
- 40 Hit Damage Sounds
- 41 Icons on Events
- 42 Instant Cast
- 43 Item Concoctions
- 44 Item Core
- 45 Item Synthesis
- 46 Job Points
- 47 Level Up Growth Effects
- 48 Life Steal
- 49 Main Menu Manager
- 50 Map Display Name Core
- 51 Meta Controls
- 52 Move Route Core
- 53 Multi-Layer HP Gauge
- 54 Overkill Bonus
- 55 Provoke Effect
- 56 Proximity Compass
- 57 Recruiting Board
- 58 Region Battlebacks
- 59 Region Events
- 60 Region Restrictions
- 61 Row Formation
- 62 Save Core
- 63 Save Event Locations
- 64 Sealed Battle Commands
- 65 Shop Menu Core
- 66 Skill Core
- 67 Skill Learn System
- 68 Skill Mastery Levels
- 69 Slippery Tiles
- 70 Smart Jump
- 71 Special Parameter Formula
- 72 Stat Allocation
- 73 State Tooltip Display
- 74 Status Menu Core
- 75 Steal & Snatch
- 76 Swap Enemies
- 77 Target Core
- 78 Taunt
- 79 Tool Ring System
- 80 Unison Attack
- 81 Visual Item Inventory
- 82 Weakness Display
- 83 Weapon Animation
- 84 Weapon Swap System
- 85 Weapon Unleash
|
RPG Maker MV's editor is unable to allow for custom traits/properties that a game dev may wish to associate with a database object, event, map, etc. Notetags are used to work around such limitations by allowing the game dev to tag certain traits/properties using specific Notetags declared by the related plugin. Here is a list of Notetag(s) that you may use. Absorption BarrierUse the following notetags to alter the various mechanics of Barrier Points. Skill and Item Notetags: <User Barrier: +x> <Target Barrier: +x> This adjusts the Barrier Points for user or the target respectively by +x. The Barrier Points altered for this notetag are unexpiring Barrier Points that do not remove themselves as time passes. <User Barrier: -x> <Target Barrier: -x> This will remove x barrier points from the user or the target. This is applied to unexpiring and temporary barrier points alike. <User Barrier x Turns: +y> <Target Barrier x Turns: +y> This adjusts the Barrier Points for the user or target respectively at x turns by +y amount. These Barrier Points will expire after x turns. Each turn goes by during the battler's regeneration timing. <User Barrier x Turns: -y> <Target Barrier x Turns: -y> This will remove y barrier points from the user or target up to x turns. <Bypass Barrier> This causes this skill to be able to bypass Barrier Points to directly deal damage to the target. <Barrier Penetration: x%> Causes x% of this skill or item's damage to bypass the action target's Barrier Points. If the target does not have enough Barrier Points, more damage will be dealt. This is a percentile value. <Barrier Penetration: x> Causes x value of this skill or item's damage to bypass action target's Barrier Points. If the target does not have enough Barrier Points, more damage will be dealt. This is a flat value. Actor, Class, Enemy, Weapon, Armor, State Notetags: <Barrier Penetration: +x%> <Barrier Penetration: -x%> This makes any damaging action by the attacker to have +x% or -x% bonus Barrier Penetration. This is a multiplicative bonus and applied before flat bonuses have been made. <Barrier Penetration: +x> <Barrier Penetration: -x> This makes any damaging action by the attacker to have +x or -x bonus Barrier Penetration. This is a flat bonus and applied after multiplicative changes have been made. <Barrier Points: +x> <Barrier Points: -x> The amount of unexpiring Barrier Points are gained at the start of a new battle for the affected user. <Barrier Points x Turns: +y> <Barrier Points x Turns: -y> The amount of Barrier Points are gained at the start of a new battle for the affected user that will last x turns. <Barrier Regen: +x> <Barrier Regen: -x> During the regeneration phase, the user will regenerate +x/-x unexpiring Barrier Points. <Barrier Regen x Turns: +y> <Barrier Regen x Turns: -y> During the regeneration phase, the user will regenerate Barrier Points that last x turns with a +y/-y value. Action Cutin
If you are using these notetags for actors and classes, priority will be given to the actor notetags before given to the class notetags. <Action Cutin Picture: filename> Changes this actor/enemy's cutin to use that of a picture. - Replace 'filename' with the filename of a graphic in img/pictures/ - The filename is case sensitive! <Action Cutin Face: filename, index> Changes this actor/enemy's cutin to use that of a face graphic. - Replace 'filename' with the filename of a graphic in img/faces/ - The filename is case sensitive! - Replace 'index' with a number indicating the cell of the graphic. - Index starts from 0 and counts upwards. <Action Cutin SV: filename, index> Changes this actor/enemy's cutin to use that of a SV Actor graphic. - Replace 'filename' with the filename of a graphic in img/sv_actors/ - The filename is case sensitive! - Replace 'index' with a number indicating the cell of the graphic. - Index starts from 0 and counts upwards. <Action Cutin Battler: filename> <Action Cutin Battler: filename, hue> Changes this actor/enemy's cutin to use that of a battler graphic. - Replace 'filename' with the filename of a graphic in either img/enemies/ or img/sv_enemies/ depending on if your game is front view or sideview. - Replace 'hue' with a numeric value between (0 to 360) representing hue. <Action Cutin Scale: n> Changes the actor/enemy's cutin graphic's scale. - Replace 'n' with a numeric value to represent scale. - 1.0 is 100%. 0.5 is 50%. 2.25 is 225%. <Action Cutin Offset X: +n> <Action Cutin Offset X: -n> <Action Cutin Offset Y: +n> <Action Cutin Offset Y: -n> Changes the actor/enemy's cutin graphic's offset position for X and Y. - Replace 'n' with a numeric value in pixels to alter the x/y offset. <Action Cutin Anti-Alias> <Action Cutin No Anti-Alias> Changes the anti-alias settings for the cutin graphic.
<Action Cutin>
<No Action Cutin>
Changes whether or not this skill/item will have an action cutin or not. This will bypass the settings in the Plugin Parameters.
<Action Cutin Image: filename>
Changes the speedline graphic behind the face cutin to a different image.
- Replace 'filename' with the filename of a graphic in img/pictures/
- The filename is case sensitive!

<Action Cutin Hue: n>
Changes the hue of the speedline graphic behind the face cutin.
- Replace 'n' with a numeric value between (0 to 360) representing hue.
<Action Cutin Blend Mode: Normal>
<Action Cutin Blend Mode: Additive>
<Action Cutin Blend Mode: Multiply>
<Action Cutin Blend Mode: Screen>
Changes the blend mode of the speedline graphic behind the face cutin.

<Action Cutin Border Thickness: n>
Changes the thickness of the borders for the action cutin.
- Replace 'n' with a numeric value in pixels to represent border thickness.

<Action Cutin Border Color: color>
Changes the color of the borders for the action cutin.
- Replace 'color' with the name of a color or a hex code representing color.

<Action Cutin Screen X: n>
<Action Cutin Screen Y: n>
Changes the speedline graphic's screen X and Y positions.
- Replace 'n' with a numeric value representing their coordinates.
- The X position will be the far left of the speedlines graphic.
- The Y position will be the middle of the speedlines graphic.

<Action Cutin Shift Distance X: n>
<Action Cutin Shift Distance Y: n>
Changes how far the face shifts from side to side.
- Replace 'n' with a numeric value representing the distance in pixels.
<Action Cutin Shift Frames: n>
Changes the duration of the shift.
- Replace 'n' with a numeric value representing the duration in frames.

<Action Cutin Flash>
<Action Cutin No Flash>
Changes whether or not the screen flash is enabled or disabled.

<Action Cutin Flash Color: red, green, blue, intensity>
Changes the color of the screen flash.
- Replace 'red' with a numeric value (0 to 255).
- Replace 'green' with a numeric value (0 to 255).
- Replace 'blue' with a numeric value (0 to 255).
- Replace 'intensity' with a numeric value (0 to 255).

<Action Cutin Flash Duration: n>
Changes the duration of the screen flash.
- Replace 'n' with a numeric value representing the duration in frames.

<Action Cutin Shake>
<Action Cutin No Shake>
Changes whether or not the screen shake is enabled or disabled.

<Action Cutin Shake Power: n>
Changes the power of the screen shake.
- Replace 'n' with a numeric value representing the shake power.

<Action Cutin Shake Speed: n>
Changes the speed of the screen speed.
- Replace 'n' with a numeric value representing the shake speed.

<Action Cutin Shake Duration: n>
Changes the duration of the screen shake.
- Replace 'n' with a numeric value representing the duration in frames.

<Action Cutin Sound>
<Action Cutin No Sound>
Changes whether or not a sound is played when this action cutin occurs.

<Action Cutin Sound Filename: filename>
Changes the sound played for the sound effect.
- Replace 'filename' with the filename of a sound in audio/se/
- The filename is case sensitive!

<Action Cutin Sound Volume: n>
Changes the volume of the sound effect played.
- Replace 'n' with a numeric value representing the volume.

<Action Cutin Sound Pitch: n>
Changes the pitch of the sound effect played.
- Replace 'n' with a numeric value representing the pitch.

<Action Cutin Sound Pan: n>
Changes the pan of the sound effect played.
- Replace 'n' with a numeric value representing the pan.
- Negative for left.
- Positive for right.

<Action Cutin Duration: n>
Changes the duration of the action cutin.
- Replace 'n' with a numeric value representing the duration in frames.

<Action Cutin Opacity Speed: n>
Changes the rate at which the action cutin fades in and out.
- Replace 'n' with a numeric value representing the change.
- Lower numbers are slower.
- Higher numbers are faster.

<Action Cutin Forced Scale: n>
Forces the face graphic of the battler to be scaled a certain value.
- Replace 'n' with a numeric value to represent scale.
- 1.0 is 100%. 0.5 is 50%. 2.25 is 225%.

<Action Cutin Forced Anti-Alias>
<Action Cutin Forced No Anti-Alias>
Forces the face graphic of the battler to use anti-alias or not.

<Action Cutin Forced Offset X: +n>
<Action Cutin Forced Offset X: -n>
<Action Cutin Forced Offset Y: +n>
<Action Cutin Forced Offset Y: -n>
Forces the actor/enemy's cutin graphic's offset position for X and Y.
- Replace 'n' with a numeric value in pixels to alter the x/y offset.
Action Sequence Fast Forward/Skip
<Cannot Fast Forward>
<Cannot Skip Forward>
- Prevents this specific item/skill from being able to Fast Forward or Skip Forward. Possible reasons on why you want to use such a notetag on such an item/skill could be that this is an item that involves button inputs, or displays data on screen (like a Scan) that you don't want the player to miss out on.

<Fast Forward Speed: x>
- Replace x with a number above 1. This is how fast the Fast Forward function will occur for this particular item/skill. To be used with longer action sequences. *See Note*

<Skip Forward Speed: x>
- Replace x with a number above 1. This is how much Skip Forward will speed through the action sequence at. To be used with longer action sequences. *See Note*
Note: Making the speed too high will have possible unforeseen consequences that the plugin cannot foresee nor fix. This is because the fast forward and skip functions function off a macroscale that speeds up the game's update frequency. This does not take into consideration the game's delta time since that's impossible to do without causing other problems. It is your own due diligence as a game developer to find the right speeds for each item/skill that won't break the system. Auto Passive StatesFor those who would like to allocate passive states to your battlers, use the notetags below: Actor, Class, Skills, Weapon, Armor, Enemy Notetags: <Passive State: x> <Passive State: x, x, x> This will allow the actor or enemy to have state x as a passive state. If placed inside a weapon or armor notebox, the user will have that passive state. <Passive State: x to y> This will add the states x through y (in a sequence) for the actor or enemy to have as a passive state. If placed inside a weapon or armor notebox, the user will have that passive state. For those who don't want their passive states to always be on, you can use the following notetags to introduce conditions for your passive states. All conditions must be fulfilled in order for the passive state to appear. State Notetags: <Passive Condition: HP Above x%> <Passive Condition: HP Below x%> <Passive Condition: MP Above x%> <Passive Condition: MP Below x%> If the user's HP or MP is above/below x% of the MaxHP or MaxMP, this condition will be met for the passive state to appear. <Passive Condition: Stat Above x> <Passive Condition: Stat Below x> Replace 'stat' with 'HP', 'MP', 'TP', 'MAXHP', 'MAXMP', 'ATK', 'DEF', 'MAT', 'MDF', 'AGI', 'LUK'. If the above stat is above/below x, then the condition is met for the passive state to appear. <Passive Condition: Switch x ON> <Passive Condition: Switch x OFF> If switch x is either ON/OFF, then the condition is met for the passive state to appear. <Passive Condition: Variable x Above y> <Passive Condition: Variable x Below y> Replace x with the variable you wish to check to see if it's above/below y, then the condition is met for the passive state to appear. Lunatic Pack - Passive Condition CasesInsert the following notetags into a state's notebox to give it a passive
condition case.
State Notetags:
<Passive Condition Cases>
condition
condition
</Passive Condition Cases>
- Use the above format for adding conditions to your passive states.
Replace the 'condition' text in between the <Passive Condition Cases>
and </Passive Condition Cases> notetags with any of the following
conditions below to prompt a condition type. You can insert multiple
conditions to make a passive state require more conditions to be met
before they can be active.
=-=-=-= Conditions List =-=-=-=
--- Switch On/Off ---
Switch x On
Switch x Off
- Replace 'x' with a number value. This will make a conditional check if
an event switch x is on or off. If the conditional check is met, then the
conditional passive will become active if other conditions are met.
SUGGESTED BY: Yanfly
--- Numerical Comparison Check ---
x >= y
x <= y
x > y
x < y
x != y
x = y
- This will require the condition to make a simple comparison check
between x and y. These number comparisons will be '>=', '<=', '>', '<',
'!=', and '=' (aka greater than or equal to, less than or equal to,
greater than, less than, not equal to, and equal to respectively). Replace
'x' and 'y' with a number, a percentage, 'HP', 'MP', 'TP', 'HP%', 'MP%',
'TP%', 'MAXHP', 'MAXMP', 'ATK', 'DEF', 'MAT', 'MDF', 'AGI', 'LUK', or
'VARIABLE X' for comparison purposes.
If a percentage is being checked, it will be checked as if the % has
been dropped off. For example, '50%' will be '50'.
SUGGESTED BY: Yanfly
--- Has/Not State ---
Has State x
- Replace 'x' with the ID of the state you wish to check. If the user is
affected by that state, then this conditional passive will become active
as long as all other conditions are met.
SUGGESTED BY: Goldschuss
Not State x
- Replace 'x' with the ID of the state you wish to check. If the user is
not affected by that state, then this conditional passive will become
active as long as all other conditions are met.
SUGGESTED BY: Goldschuss
--- Has/Not Buff/Debuff---
Has x Buff
- Replace 'x' with 'MAXHP', 'MAXMP', 'ATK', 'DEF', 'MAT', 'MDF', 'AGI', or
'LUK'. This will make a check to see if the user is currently buffed in
that parameter. If the user is, the the conditional passive will become
active as long as all other conditions are met.
SUGGESTED BY: Yanfly
Has x Debuff
- Replace 'x' with 'MAXHP', 'MAXMP', 'ATK', 'DEF', 'MAT', 'MDF', 'AGI', or
'LUK'. This will make a check to see if the user is currently debuffed in
that parameter. If the user is, the the conditional passive will become
active as long as all other conditions are met.
SUGGESTED BY: Yanfly
Not x Buff
- Replace 'x' with 'MAXHP', 'MAXMP', 'ATK', 'DEF', 'MAT', 'MDF', 'AGI', or
'LUK'. This will make a check to see if the user is currently not buffed
in that parameter. If the user is, the the conditional passive will become
active as long as all other conditions are met.
SUGGESTED BY: Yanfly
Not x Debuff
- Replace 'x' with 'MAXHP', 'MAXMP', 'ATK', 'DEF', 'MAT', 'MDF', 'AGI', or
'LUK'. This will make a check to see if the user is currently not debuffed
in that parameter. If the user is, the conditional passive will become
active as long as all other conditions are met.
SUGGESTED BY: Yanfly
--- Total Buffs/Debuffs ---
Total Buffs >= x
Total Buffs <= x
Total Buffs > x
Total Buffs < x
Total Buffs != x
Total Buffs = x
- Replace 'x' with a number value you wish to check relative to the number
of buffs the user is currently affected by. If the turn check passes, the
conditional passive will become active if other conditions are met.
SUGGESTED BY: Alejandro SQ
Total Debuffs >= x
Total Debuffs <= x
Total Debuffs > x
Total Debuffs < x
Total Debuffs != x
Total Debuffs = x
- Replace 'x' with a number value you wish to check relative to the number
of debuffs the user is currently affected by. If the turn check passes,
the conditional passive will become active if other conditions are met.
SUGGESTED BY: Alejandro SQ
--- Alive/Dead ---
Alive Actors/Enemies/Allies/Foes >= x
Alive Actors/Enemies/Allies/Foes <= x
Alive Actors/Enemies/Allies/Foes > x
Alive Actors/Enemies/Allies/Foes < x
Alive Actors/Enemies/Allies/Foes != x
Alive Actors/Enemies/Allies/Foes = x
- Replace 'x' with a number value you wish to check relative to the number
of alive actors in the party, enemies in the troop, user's allies, or the
user's foes. Use only one of the four above keywords ('actors', 'enemies',
'allies', or 'foes'). If the member count check passes, the conditional
passive will become active as long as all other conditions are met.
SUGGESTED BY: Yanfly
Dead Actors/Enemies/Allies/Foes >= x
Dead Actors/Enemies/Allies/Foes <= x
Dead Actors/Enemies/Allies/Foes > x
Dead Actors/Enemies/Allies/Foes < x
Dead Actors/Enemies/Allies/Foes != x
Dead Actors/Enemies/Allies/Foes = x
- Replace 'x' with a number value you wish to check relative to the number
of dead actors in the party, enemies in the troop, user's allies, or the
user's foes. Use only one of the four above keywords ('actors', 'enemies',
'allies', or 'foes'). If the member count check passes, the conditional
passive will become active as long as all other conditions are met.
SUGGESTED BY: Yanfly
--- Turn Count ---
Battle Turns >= x
Battle Turns <= x
Battle Turns > x
Battle Turns < x
Battle Turns != x
Battle Turns = x
- Replace 'x' with a number value you wish to check relative to the number
of turns that passed in battle. If the turn check passes, the conditional
passive will become active as long as all other conditions are met.
SUGGESTED BY: Yanfly
--- Has Weapon/Armor ---
Has Weapon x
- The user must be an actor or else this condition returns false. Replace
'x' with the weapon ID you wish to check if the user has. If the user has
it equipped, the condition will pass and will become active as long as
all other conditions are met.
SUGGESTED BY: Yanfly
Not Weapon x
- The user must be an actor or else this condition returns false. Replace
'x' with the weapon ID you wish to check if the user should not have. If
the user doesn't have it equipped, the condition will pass and will become
active as long as all other conditions are met.
SUGGESTED BY: Yanfly
Has Armor x
- The user must be an actor or else this condition returns false. Replace
'x' with the armor ID you wish to check if the user has. If the user has
it equipped, the condition will pass and will become active as long as
all other conditions are met.
SUGGESTED BY: Yanfly
Not Armor x
- The user must be an actor or else this condition returns false. Replace
'x' with the armor ID you wish to check if the user should not have. If
the user doesn't have it equipped, the condition will pass and will become
active as long as all other conditions are met.
SUGGESTED BY: Yanfly
Passive Aura EffectsUse the following notetags to make a state generate auras. *NOTE* The notetags that affect alive members will affect members that have at least 1 HP and not affected by the dead state. Even if they are immortal, if they have 0 HP, they will not be affected by the alive aura effects as to not conflict with the dead aura effects. *NOTE* The notetags that affect dead members will affect members that are either affected by the death state or if their HP is at 0. The moment the dead member has 1 HP or is no longer affected by the dead state, they will no longer be affected by dead-only aura effects. State Notetags: <Ally Aura: x> <Ally Aura: x, x, x> <Ally Aura: x through y> - This will cause the battler's allies to gain state(s) x (to y) while the battler is affected by the current state. *Note: A state cannot use itself in an aura effect. <Alive Ally Aura: x> <Alive Ally Aura: x, x, x> <Alive Ally Aura: x through y> - This will cause the battler's alive allies to gain state(s) x (to y) while the battler is affected by the current state. *Note: A state cannot use itself in an aura effect. <Dead Ally Aura: x> <Dead Ally Aura: x, x, x> <Dead Ally Aura: x through y> - This will cause the battler's dead allies to gain state(s) x (to y) while the battler is affected by the current state. *Note: A state cannot use itself in an aura effect. <Foe Aura: x> <Foe Aura: x, x, x> <Foe Aura: x through y> - This will cause the battler's foes to gain state(s) x (to y) while the battler is affected by the current state. *Note: A state cannot use itself in an aura effect. <Alive Foe Aura: x> <Alive Foe Aura: x, x, x> <Alive Foe Aura: x through y> - This will cause the battler's alive foes to gain state(s) x (to y) while the battler is affected by the current state. *Note: A state cannot use itself in an aura effect. <Dead Foe Aura: x> <Dead Foe Aura: x, x, x> <Dead Foe Aura: x through y> - This will cause the battler's dead foes to gain state(s) x (to y) while the battler is affected by the current state. *Note: A state cannot use itself in an aura effect. <Party Aura: x> <Party Aura: x, x, x> <Party Aura: x through y> - This will cause the Actor Party to gain state(s) x (to y) while the battler is affected by the current state. *Note: A state cannot use itself in an aura effect. <Alive Party Aura: x> <Alive Party Aura: x, x, x> <Alive Party Aura: x through y> - This will cause the battler's alive Actor Party to gain state(s) x (to y) while the battler is affected by the current state. *Note: A state cannot use itself in an aura effect. <Dead Party Aura: x> <Dead Party Aura: x, x, x> <Dead Party Aura: x through y> - This will cause the battler's dead Actor Party to gain state(s) x (to y) while the battler is affected by the current state. *Note: A state cannot use itself in an aura effect. <Troop Aura: x> <Troop Aura: x, x, x> <Troop Aura: x through y> - This will cause the Enemy Troop to gain state(s) x (to y) while the battler is affected by the current state. *Note: A state cannot use itself in an aura effect. <Alive Troop Aura: x> <Alive Troop Aura: x, x, x> <Alive Troop Aura: x through y> - This will cause the battler's alive Enemy Troop to gain state(s) x (to y) while the battler is affected by the current state. *Note: A state cannot use itself in an aura effect. <Dead Troop Aura: x> <Dead Troop Aura: x, x, x> <Dead Troop Aura: x through y> - This will cause the battler's dead Enemy Troop to gain state(s) x (to y) while the battler is affected by the current state. *Note: A state cannot use itself in an aura effect. <Everybody Aura: x> <Everybody Aura: x, x, x> <Everybody Aura: x through y> - This will cause the all active battlers to gain state(s) x (to y) while the battler is affected by the current state. *Note: A state cannot use itself in an aura effect. <Alive Aura: x> <Alive Aura: x, x, x> <Alive Aura: x through y> - This will cause the all alive battlers to gain state(s) x (to y) while the battler is affected by the current state. *Note: A state cannot use itself in an aura effect. <Dead Aura: x> <Dead Aura: x, x, x> <Dead Aura: x through y> - This will cause the all alive battlers to gain state(s) x (to y) while the battler is affected by the current state. *Note: A state cannot use itself in an aura effect. Base Parameter ControlYou can use the following notetags to alter the various aspects that modify the base parameter values: Actor, Class, Enemy, Weapon, Armor, and State Notetags: <stat Plus: +x> <stat Plus: -x> Replace 'stat' with 'maxhp', 'maxmp', 'atk', 'def', 'mat', 'mdf', 'agi', or 'luk'. This is the value added to the base parameter before the rate and flat values contribute to the total parameter value assuming the plugin's default formula is utilized. <stat Rate: x%> <stat Rate: x.y> Replace 'stat' with 'maxhp', 'maxmp', 'atk', 'def', 'mat', 'mdf', 'agi', or 'luk'. This is the value multiplied to the sum of the base and plus of the parameter before affected by the buffRate and flat value assuming the plugin's default formula is utilized. <stat Flat: +x> <stat Flat: -x> Replace 'stat' with 'maxhp', 'maxmp', 'atk', 'def', 'mat', 'mdf', 'agi', or 'luk'. This is the value added at the end after the sum of the base and plus parameters have been added and multiplied by the rate values assuming the plugin's default formula is utilized. <stat Max: x> <stat Min: x> Replace 'stat' with 'maxhp', 'maxmp', 'atk', 'def', 'mat', 'mdf', 'agi', or 'luk'. This sets the maximum or minimum cap of the the stat parameter to x. If a battler is affected by multiple of these notetags, then the value used will be the largest value of the notetag used. Battle A.I. Core
Enemy AI levels do not determine how difficult they are. Instead, they
determine how strictly they will follow the <AI Priority> lists. An AI Level
of 80 means it has an 80% chance of following the prioritized action on the
AI Priority list before moving onto the next one where there will be another
80% chance and so on. If the AI level is lower, the chance is lower, making
the AI to be more random.

Enemy Notetag:
  <AI Level: x>
  Sets the enemy's AI level to x. The lower x, the more random the enemy.
  The higher for x, the more strict the enemy is about following the AI
  Priority list found in its notebox, too.
If an enemy has an AI Priority list, the enemy will go down that list from
top to bottom (giving the actions at the top more priority than the ones at
the bottom) looking for any actions whose conditions are fulfilled. If that
condition is fulfilled, then that action will be the action the enemy will
partake in.

To set up a Priority List for the enemy, you must place inside the enemy's
notebox notetags that match the following format:

  <AI Priority>                      <AI Priority>
   condition: SKILL x, target   or    condition: skill name, target
   condition: SKILL x, target         condition: skill name, target
  </AI Priority>                     </AI Priority>

Any number of conditions and skills can be placed in between the two
<AI Priority> tags. You can choose to use skill ID's or the skill names.
However, if you use the skill names, keep in mind that it is not case
sensitive and if any skills in your database have matching names, the skill
with the larger skill ID will be the action used.
The following is a list of ways you can format your conditions for the enemy
to choose the right skill. In addition to deciding whether or not the skill
will be used, the condition also selects the enemy target. The following
list will tell you how the conditions are met and what targets will be
selected for battle.

=-=-=-=-=-=-=-=-=-=-=-=-=-=-=-=-=-=-=-=-=-=-=-=-=-=-=-=-=-=-=-=-=-=-=-=-=-=-
ALWAYS
- - - - - - - - - - - - - - - - - - - - - - - - - - - - - - - - - - - - - - -
This condition will always be fulfilled. The valid target group is all
targets within scope.
- - - - - - - - - - - - - - - - - - - - - - - - - - - - - - - - - - - - - - -
Example:   Always: Skill 10, Lowest HP%
=-=-=-=-=-=-=-=-=-=-=-=-=-=-=-=-=-=-=-=-=-=-=-=-=-=-=-=-=-=-=-=-=-=-=-=-=-=-

=-=-=-=-=-=-=-=-=-=-=-=-=-=-=-=-=-=-=-=-=-=-=-=-=-=-=-=-=-=-=-=-=-=-=-=-=-=-
ELEMENT X case
- - - - - - - - - - - - - - - - - - - - - - - - - - - - - - - - - - - - - - -
This allows you to match the element rate of element X (use either a number
or the name of the element in place of 'X') to see whether or not the
conditions for the action are fulfilled. Replace 'case' with 'Neutral' for
normal element rate (under 110% and above 90%), 'Weakness' for anything
above 100% element rate, 'Resistant' for below 100% element rate, 'Null' for
0% element rate, and 'Absorb' for below 0% element rate. Valid targets will
be those with the matching element rates.
- - - - - - - - - - - - - - - - - - - - - - - - - - - - - - - - - - - - - - -
Example:   Element Fire Weakness: Fireball, Lowest HP%
           Element Water Resistant: Water Cancel, Highest MAT
           Element 4 Null: Earthquake, Lowest MDF
=-=-=-=-=-=-=-=-=-=-=-=-=-=-=-=-=-=-=-=-=-=-=-=-=-=-=-=-=-=-=-=-=-=-=-=-=-=-

=-=-=-=-=-=-=-=-=-=-=-=-=-=-=-=-=-=-=-=-=-=-=-=-=-=-=-=-=-=-=-=-=-=-=-=-=-=-
EVAL eval
- - - - - - - - - - - - - - - - - - - - - - - - - - - - - - - - - - - - - - -
This allows you to use any kind of code to check and fulfill a condition.
This condition uses all alive members of the skill's scope as valid targets.
- - - - - - - - - - - - - - - - - - - - - - - - - - - - - - - - - - - - - - -
Example:   Eval user.name() === 'Bat A': Skill 10, Highest HP%
=-=-=-=-=-=-=-=-=-=-=-=-=-=-=-=-=-=-=-=-=-=-=-=-=-=-=-=-=-=-=-=-=-=-=-=-=-=-

=-=-=-=-=-=-=-=-=-=-=-=-=-=-=-=-=-=-=-=-=-=-=-=-=-=-=-=-=-=-=-=-=-=-=-=-=-=-
group ALIVE MEMBERS eval
- - - - - - - - - - - - - - - - - - - - - - - - - - - - - - - - - - - - - - -
Replace 'group' with either 'party' for the player's party or 'troop' for
the enemy party. This runs the number of party alive members or troop alive
members in a check to see if the conditions can be fulfilled.
- - - - - - - - - - - - - - - - - - - - - - - - - - - - - - - - - - - - - - -
Example:   Party Alive Members > 2: Skill 10, Lowest HP%
           Troop Alive Members <= 4: Skill 11, Highest HP%
           Troop Alive Members === $gameVariables.value(3): Skill 12, Random
=-=-=-=-=-=-=-=-=-=-=-=-=-=-=-=-=-=-=-=-=-=-=-=-=-=-=-=-=-=-=-=-=-=-=-=-=-=-

=-=-=-=-=-=-=-=-=-=-=-=-=-=-=-=-=-=-=-=-=-=-=-=-=-=-=-=-=-=-=-=-=-=-=-=-=-=-
group DEAD MEMBERS eval
- - - - - - - - - - - - - - - - - - - - - - - - - - - - - - - - - - - - - - -
Replace 'group' with either 'party' for the player's party or 'troop' for
the enemy party. This runs the number of party dead members or troop dead
members in a check to see if the conditions can be fulfilled.
- - - - - - - - - - - - - - - - - - - - - - - - - - - - - - - - - - - - - - -
Example:   Party Dead Members > 2: Undead, Highest ATK
           Troop Dead Members <= 4: Life, Highest ATK
           Troop Dead Members === $gameVariables.value(3): Skill 12, Random
=-=-=-=-=-=-=-=-=-=-=-=-=-=-=-=-=-=-=-=-=-=-=-=-=-=-=-=-=-=-=-=-=-=-=-=-=-=-

=-=-=-=-=-=-=-=-=-=-=-=-=-=-=-=-=-=-=-=-=-=-=-=-=-=-=-=-=-=-=-=-=-=-=-=-=-=-
stat PARAM eval
- - - - - - - - - - - - - - - - - - - - - - - - - - - - - - - - - - - - - - -
Replace 'stat' with either 'atk', 'def', 'mat', 'mdf', 'agi', 'luk',
'maxhp', 'maxmp', 'hp', 'mp', 'hp%', 'mp%', or 'level' to run it in a
condition check again to see if the action gets passed. The group that it
checks will be based on the skill's scope. If the skill targets foes, then
all foes will take a check to see if they fulfill the conditions. Likewise
for party members if the skill is for allies. The valid targets will be
those who pass the condition check.
- - - - - - - - - - - - - - - - - - - - - - - - - - - - - - - - - - - - - - -
Example:   HP% param <= 50%: Heal, Lowest HP%
           MP param > 90: Mana Drain, Highest MP
           ATK param > user.atk: Power Break, Highest ATK
=-=-=-=-=-=-=-=-=-=-=-=-=-=-=-=-=-=-=-=-=-=-=-=-=-=-=-=-=-=-=-=-=-=-=-=-=-=-

=-=-=-=-=-=-=-=-=-=-=-=-=-=-=-=-=-=-=-=-=-=-=-=-=-=-=-=-=-=-=-=-=-=-=-=-=-=-
type PARTY LEVEL eval
- - - - - - - - - - - - - - - - - - - - - - - - - - - - - - - - - - - - - - -
Replace 'type' with either 'highest', 'lowest', or 'average' to get the
respective party level for the skill's scope. This will reference the entire
party's level. If this condition is fulfilled, all targets would become
valid targets.
- - - - - - - - - - - - - - - - - - - - - - - - - - - - - - - - - - - - - - -
Example:   Highest Party Level > 10: Skill 10, Lowest MP%
           Lowest Party Level < 12: Skill 11, Lowest HP%
           Average Party Level > 15: Skill 12, Highest HP%
=-=-=-=-=-=-=-=-=-=-=-=-=-=-=-=-=-=-=-=-=-=-=-=-=-=-=-=-=-=-=-=-=-=-=-=-=-=-

=-=-=-=-=-=-=-=-=-=-=-=-=-=-=-=-=-=-=-=-=-=-=-=-=-=-=-=-=-=-=-=-=-=-=-=-=-=-
RANDOM x%
- - - - - - - - - - - - - - - - - - - - - - - - - - - - - - - - - - - - - - -
This will make the condition based on a random x percent chance. This
condition allows all possible targets to be valid for targeting.
- - - - - - - - - - - - - - - - - - - - - - - - - - - - - - - - - - - - - - -
Example:   Random 50%: Skill 10, Lowest HP%
           Random 75%: Skill 11, Highest HP%
=-=-=-=-=-=-=-=-=-=-=-=-=-=-=-=-=-=-=-=-=-=-=-=-=-=-=-=-=-=-=-=-=-=-=-=-=-=-

=-=-=-=-=-=-=-=-=-=-=-=-=-=-=-=-=-=-=-=-=-=-=-=-=-=-=-=-=-=-=-=-=-=-=-=-=-=-
STATE === state x
STATE === state name
- - - - - - - - - - - - - - - - - - - - - - - - - - - - - - - - - - - - - - -
This will detect if the target scope has state x (or state name if you use
that instead). If the target does, that target is added into the pool of
valid targets. Any targets not affected by the state will be ignored.
- - - - - - - - - - - - - - - - - - - - - - - - - - - - - - - - - - - - - - -
Example:   State === State 5: DeBlind, Highest ATK
           State === Knockout: Life, Random
=-=-=-=-=-=-=-=-=-=-=-=-=-=-=-=-=-=-=-=-=-=-=-=-=-=-=-=-=-=-=-=-=-=-=-=-=-=-

=-=-=-=-=-=-=-=-=-=-=-=-=-=-=-=-=-=-=-=-=-=-=-=-=-=-=-=-=-=-=-=-=-=-=-=-=-=-
STATE !== state x
STATE !== state name
- - - - - - - - - - - - - - - - - - - - - - - - - - - - - - - - - - - - - - -
This will detect if the target scope does not have state x (or state name if
you use that instead). If the target doesn't, that target is added into the
pool of valid targets. Any targets affected by the state will be ignored.
- - - - - - - - - - - - - - - - - - - - - - - - - - - - - - - - - - - - - - -
Example:   State !== State 12: Haste, Random
           State !== Courage: Cowardice, Highest ATK
=-=-=-=-=-=-=-=-=-=-=-=-=-=-=-=-=-=-=-=-=-=-=-=-=-=-=-=-=-=-=-=-=-=-=-=-=-=-

=-=-=-=-=-=-=-=-=-=-=-=-=-=-=-=-=-=-=-=-=-=-=-=-=-=-=-=-=-=-=-=-=-=-=-=-=-=-
SWITCH X case
- - - - - - - - - - - - - - - - - - - - - - - - - - - - - - - - - - - - - - -
Replace 'x' with the ID of the switch you wish to check. Replace 'case' with
either 'on' or 'off' (you may also use 'true' or 'false'). If the switch
matches the case, the condition is fulfilled and all skill targets become
valid targets.
- - - - - - - - - - - - - - - - - - - - - - - - - - - - - - - - - - - - - - -
Example:   Switch 5 On: Skill 10, Lowest HP%
           Switch 6 Off: Skill 11, Highest HP%
=-=-=-=-=-=-=-=-=-=-=-=-=-=-=-=-=-=-=-=-=-=-=-=-=-=-=-=-=-=-=-=-=-=-=-=-=-=-

=-=-=-=-=-=-=-=-=-=-=-=-=-=-=-=-=-=-=-=-=-=-=-=-=-=-=-=-=-=-=-=-=-=-=-=-=-=-
TURN eval
- - - - - - - - - - - - - - - - - - - - - - - - - - - - - - - - - - - - - - -
This will make the condition based on the turn count to be fulfilled by an
eval statement. This condition allows all possible targets to be valid for
targeting.
- - - - - - - - - - - - - - - - - - - - - - - - - - - - - - - - - - - - - - -
Example:   Turn > 3: Skill 10, Lowest hp%
           Turn === 4: Skill 11, Highest hp%
           Turn <= $gameVariables.value(2): Skill 12, Random
=-=-=-=-=-=-=-=-=-=-=-=-=-=-=-=-=-=-=-=-=-=-=-=-=-=-=-=-=-=-=-=-=-=-=-=-=-=-

=-=-=-=-=-=-=-=-=-=-=-=-=-=-=-=-=-=-=-=-=-=-=-=-=-=-=-=-=-=-=-=-=-=-=-=-=-=-
USER stat PARAM eval
- - - - - - - - - - - - - - - - - - - - - - - - - - - - - - - - - - - - - - -
Replace 'stat' with either 'atk', 'def', 'mat', 'mdf', 'agi', 'luk',
'maxhp', 'maxmp', 'hp', 'mp', 'hp%', 'mp%', or 'level' to run it in a
condition check again to see if the action gets passed. If the user's param
matches the conditions, the check is fulfilled.
- - - - - - - - - - - - - - - - - - - - - - - - - - - - - - - - - - - - - - -
Example:   User HP% param <= 50%: Heal, Lowest HP%
           User MP param > 90: Mana Drain, Highest MP
           User ATK param > user.atk: Power Break, Highest ATK
=-=-=-=-=-=-=-=-=-=-=-=-=-=-=-=-=-=-=-=-=-=-=-=-=-=-=-=-=-=-=-=-=-=-=-=-=-=-

=-=-=-=-=-=-=-=-=-=-=-=-=-=-=-=-=-=-=-=-=-=-=-=-=-=-=-=-=-=-=-=-=-=-=-=-=-=-
VARIABLE X eval
- - - - - - - - - - - - - - - - - - - - - - - - - - - - - - - - - - - - - - -
This will call forth the value of variable 'x' to partake in an eval
comparison to see if the condition is fulfilled. If it is, all skill targets
become valid targets.
- - - - - - - - - - - - - - - - - - - - - - - - - - - - - - - - - - - - - - -
Example:   Variable 3 > 10: Skill 10, Lowest HP%
           Variable 5 <= 100: Skill 11, Highest HP%
           Variable 2 === user.atk: Skill 12
=-=-=-=-=-=-=-=-=-=-=-=-=-=-=-=-=-=-=-=-=-=-=-=-=-=-=-=-=-=-=-=-=-=-=-=-=-=-
As of the version 1.11 update, the Battle A.I. Core is now able to support
multiple conditions. Setting up multiple conditions is relatively simple to
do and still follows the 'condition: SKILL x, target' format.

- - - - - - - - - - - - - - - - - - - - - - - - - - - - - - - - - - - - - -

To add multiple conditions, simply insert a +++ between each condition like
the following examples:

    Switch 1 on +++ Switch 2 on: Fire, Lowest HP%
    Turn 3 > 1 +++ Variable 5 <= 100 +++ Switch 3 on: Ice, Lowest HP%
    Random 50% +++ Highest Party Level > 50: Thunder, Highest HP%

In the above examples, all the conditions must be met in order for the
selected skills to be considered for use.

- - - - - - - - - - - - - - - - - - - - - - - - - - - - - - - - - - - - - -

For conditions that have strict targeting groups, the targeting group will
end up becoming the combination of all of the strict targeting groups. For
example:

    STATE === Blind +++ STATE === Fear: Dark, Lowest HP%

In this example, the enemy will only use the 'Dark' skill on a target that
is both affected by 'Blind' and 'Fear'. If there are multiple targets, then
the target with the lowest HP% will become the target the enemy will cast
the 'Dark' on.

    STATE !== Blind +++ ATK param >= 150: Darkness, Highest ATK

In the above example, the enemy will use the 'Darkness' skill against any
target that isn't blinded and has an ATK parameter of at least 150. If there
are multiple targets, then the enemy will first cast 'Darkness' on the
target with the highest ATK before casting it on a target with a lower ATK.
Targeting is optional but can be done via a small change to the condition.
All you have to do is add a ',' after the skill to indicate which target in
the valid target group you would like to target. For example:

            Random 50%: Fire, Highest HP%

The condition to be met is the 50% random chance, but if it is fulfilled,
the target selected will be the member on the targeting scope's team with
the highest HP percentage. When that happens, the 'Fire' skill will be used
upon that target.

If no target is specified, a random target will be selected amongst the
group of valid targets. Otherwise, refer to the following list:

----------------------------------------------------------------------------
     <<nothing>>       Selects a random member of the valid target group.
     First             Selects first member of the valid target group.
     User              Selects the user itself.
     Highest MaxHP     Selects highest MaxHP valid target.
     Highest HP        Selects highest HP valid target.
     Highest HP%       Selects highest HP% valid target. *Note1
     Highest MaxMP     Selects highest MaxMP valid target.
     Highest MP        Selects highest MP valid target.
     Highest MP%       Selects highest MP% valid target. *Note1
     Highest MaxTP     Selects highest MaxTP valid target.
     Highest TP        Selects highest TP valid target.
     Highest TP%       Selects highest TP% valid target. *Note1
     Highest ATK       Selects highest ATK valid target.
     Highest DEF       Selects highest DEF valid target.
     Highest MAT       Selects highest MAT valid target.
     Highest MDF       Selects highest MDF valid target.
     Highest AGI       Selects highest AGI valid target.
     Highest LUK       Selects highest LUK valid target.
     Highest Level     Selects highest Level valid target. *Note2
     Lowest MaxHP      Selects lowest MaxHP valid target.
     Lowest HP         Selects lowest HP valid target.
     Lowest HP%        Selects lowest HP% valid target. *Note1
     Lowest MaxMP      Selects lowest MaxMP valid target.
     Lowest MP         Selects lowest MP valid target.
     Lowest MP%        Selects lowest MP% valid target. *Note1
     Lowest MaxTP      Selects lowest MaxMP valid target.
     Lowest TP         Selects lowest MP valid target.
     Lowest TP%        Selects lowest MP% valid target. *Note1
     Lowest ATK        Selects lowest ATK valid target.
     Lowest DEF        Selects lowest DEF valid target.
     Lowest MAT        Selects lowest MAT valid target.
     Lowest MDF        Selects lowest MDF valid target.
     Lowest AGI        Selects lowest AGI valid target.
     Lowest LUK        Selects lowest LUK valid target.
     Lowest Level      Selects lowest Level valid target. *Note2

Note1: This is calculated by dividing the current HP with the MaxHP or the
current MP with the MaxMP.

Note2: If this is used on an enemy without a proper enemy level plugin
installed, this will return the player party's highest level.

----------------------------------------------------------------------------
If you are using YEP_Taunt.js, enemies will automatically not factor in
taunts by default. For that matter, targets can be protected by taunts
effects, which can effectively shut down an enemy's AI performance. However,
if you want some enemies to consider the taunt effects of an opponent,
place this notetag inside of the enemy's notebox:

  <AI Consider Taunt>

This will make it that when an enemy makes a decision, it will make a right
decision while thinking of the taunted enemies, too. You can use this for
smarter enemies while keep this notetag disabled for less intelligent foes.
Actor Auto Battle A.I.The notetags to setup the auto battle A.I. will go into the class noteboxes. - - - - - - - - - - - - - - - - - - - - - - - - - - - - - - - - - - - - - - Actor AI Level - - - - - - - - - - - - - - - - - - - - - - - - - - - - - - - - - - - - - - Actor AI levels do not determine how smart they are. Instead, they determine how strictly they will follow the <AI Priority> lists. An AI Level of 80 means it has an 80% chance of following the prioritized action on the AI Priority list before moving onto the next one where there will be another 80% chance and so on. If the AI level is lower, the chance is lower, making the AI to be more random. Class Notetag: <AI Level: x> Sets the actor's AI level to x. The lower x, the more random the actor. The higher for x, the more strict the actor is about following the AI Priority list found in its notebox, too. - - - - - - - - - - - - - - - - - - - - - - - - - - - - - - - - - - - - - - Actor AI Priority - - - - - - - - - - - - - - - - - - - - - - - - - - - - - - - - - - - - - - If a class has an AI Priority list, the actor will go down that list from top to bottom (giving the actions at the top more priority than the ones at the bottom) looking for any actions whose conditions are fulfilled. If that condition is fulfilled, then that action will be the action the actor will partake in. To set up a Priority List for the actor, you must place inside the class's notebox notetags that match the following format: <AI Priority> <AI Priority> condition: SKILL x, target or condition: skill name, target condition: SKILL x, target condition: skill name, target </AI Priority> </AI Priority> Any number of conditions and skills can be placed in between the two <AI Priority> tags. You can choose to use skill ID's or the skill names. However, if you use the skill names, keep in mind that it is not case sensitive and if any skills in your database have matching names, the skill with the larger skill ID will be the action used.
The conditions to be used for the <AI Priority> notetag are the same as the
ones from the YEP_BattleAICore plugin. Please refer to the YEP_BattleAICore
help file for which conditions can be used with the A.I. setups.
Battle Effects Pack 1
Actor, Class, Enemy, Weapon, Armor, and State Notetags:

<Skill Target Change: Self to All>
<Item Target Change: Self to All>
Changes skills/items with the self scope to become an all scope in battle.
Does not affect skills/items with the <Bypass Target Change> notetag.

<Skill Target Change Allies: All to One>
<Skill Target Change Enemies: All to One>
<Item Target Change Allies: All to One>
<Item Target Change Enemies: All to One>
Changes skills/items with the all allies/enemies scope to become 1 ally/enemy
scope in battle. Does not affect skills/items with the <Bypass Target Change>
notetag.

<Skill Target Change Allies: One to All>
<Skill Target Change Enemies: One to All>
<Item Target Change Allies: One to All>
<Item Target Change Enemies: One to All>
Changes skills/items with the 1 ally/enemy scope to become all allies/enemies
scope in battle. Does not affect skills/items with the <Bypass Target Change>
notetag.

Skill, and Item Notetags:

<Bypass Target Change>
<Divine>
Makes this skill/item immune to the target scope change notetag effects.

<JP x5>
<EXP x10>
<Gold x200>
Replace the numbers. Changes the multipliers for the rewards found in the
current battle. JP will require Yanfly's Job Points plugin to have an effect.
After the battle is over, the multipliers will reset. The multipliers do not
stack and will overwrite each other, even if they are different types.

Skill Notetags:

<Destroy Weapon>
Destroys the actor's currently equipped weapon after it is finished using a
skill with this notetag.

<Extra Skill List: x>
<Extra Skill List: x, x, x>
Puts the skills x in a new window as a list to select from, turning this
skill into a folder during battle. This does not work outside of battle.
The actor must have access to all of the listed skills in order to use them.

State Notetags:

<All Element Damage Rate: x%>
Makes the battler receive x% multiplier from all elements.

<Break Popup>
If a battler receives a state with this notetag, the Break Popup will appear.
It will take priority over the Weak Popup.

<Buff Immunity: x>
<Buff Immunity: x, x, x>
<Debuff Immunity: x>
<Debuff Immunity: x, x, x>
Replace x with the parameter ID to make the battler immune to receiving buffs
or debuffs of that parameter. This does not remove already applied buffs or
debuffs. It only stops the battler from receiving them.
0: Max HP
1: Max MP
2: Attack
3: Defense
4: Magic Attack
5: Magic Defense
6: Agility
7: Luck

<Damage Color: r, g, b, a>
If the battler receives HP damage while affected by a state with this notetag
the popup color will change.
r = red (0-255)
g = green (0-255)
b = blue (0-255)
a = alpha (0-255)

<Item Seal>
If an actor is affected by a state with this notetag, they cannot use items
from the actor command menu.

<Max Turns: x>
Sets the maximum number of turns this state can be to x. This is used for
Yanfly's Buffs and States Core if you allow state turn stacking.

<No Weak Popup>
If the battler is hit with an elemental weakness while affected by a state
with this notetag, the Weak popup will not appear.

<Physical Follow Up Skill: x>
<Magical Follow Up Skill: x>
<Certain Follow Up Skill: x>
<Follow Up Skill: x>
This requires Yanfly's Battle Engine Core to work. This makes the battler
affected by this state to perform skill ID x after the current skill is
finished being used.
Physical - Requires battler to perform physical type skill
Magical  - Requires battler to perform magical type skill
Certain  - Requires battler to perform certain hit type skill
n/a      - Requires battler to perform physical or magical type skill

<State Immunity: x>
<State Immunity: x, x, x>
Insert the IDs of the states that the battler cannot receive if they are
affected by a state with this notetag. They do not become resistant to it,
meaning if the states have already been applied, they will not suddenly
disappear, but they will not be able to be applied until this state is gone.
Battle Effects Pack 2
Actor, Class, Enemy, Weapon, Armor, and State Notetags:

<High Health ATK: +x%>
<High Health DEF: +x%>
<High Health MAT: +x%>
<High Health MDF: +x%>
<High Health AGI: +x%>
<High Health LUK: +x%>
- Increases (or decreases if you use -x%) the parameter as HP% is higher.
Reaches +x% threshhold at 100% health and reduces proportionally as HP% is
lower. This modifier is gone when the actor reaches crisis level HP (which
is 25% by default).
<Low Health ATK: +x%>
<Low Health DEF: +x%>
<Low Health MAT: +x%>
<Low Health MDF: +x%>
<Low Health AGI: +x%>
<Low Health LUK: +x%>
- Increases (or decreases if you use -x%) the parameter as HP% is lower.
This rate scales harder the lower the HP ratio and reaches +x% at 0% HP.

<Damage Cut: x%>
- Decreases incoming damage battler receives by x%. This stacks additively
with other damage cut-related effects. Damage Cut % cannot go below 0% or
above 100% rate.

<Element id Cut: x%>
<Element name Cut: x%>
- Decreases incoming damage battler receives by x% if it is a matching
element. If using id, replace it with the element's ID in the system tab. If
using name, replace it with the element's name in the system tab. If the
element's name has an icon text code in it, leave out the icon text code.
This stacks additively with other damage cut-related effects. Damage Cut %
cannot go below 0% or above 100% rate.
<Overheal HP>
<Overheal MP>
<Overheal TP>
- Lets the notetag-affected battler be able to overheal past the maximum HP,
MP, or TP amounts. The HP and MP maximum values become their respective
maximum parameter values (9999 and 999 by default). TP's maximum value
reaches the value set in the plugin parameters (200 by default). These
effects are only applied inside of battle.

<Swap param1 with param2>
- Swaps the two parameters with each other. Replace param1 and param2 with
mhp, mmp, atk, def, mat, mdf, agi, or luk. Any battler affected by this
notetag will have those parameters swapped. If a battler is affected by
multiple notetags that alter the similar stats, priority will be given to
states, then equipment, then current class, then actor, then enemy.

State Notetags:

<Dissolve State: x>
<Dissolve State: x, x, x>
- If a battler becomes affected by any of the states listed in x, that state
will be prevented and the current state will be removed.

<Set State Counter: x>
<Add State Counter: x>
- Requires Yanfly's YEP_BuffsStatesCore.js. This sets the state's counter or
adds to the states counter whenever the state is applied to the battler.
This is a notetag made to make setting the counter value easier.
Battle Engine CoreWhen changing "Terms" and the "Messages" that appear in battle, inserting the following tag anywhere in the message will cause the message to center itself in the battle log. <CENTER> This tag must be all caps in order for the battle log window to recognize it as an instruction to center the displayed battle text message. There are a couple of notetags you can use to change the way certain skills and items will show up incase you don't want a name like 'Harold's Attack' to appear in the name. Skill and Item Notetags: <Display Text: x> This will change the text displayed to x. <Display Icon: x> This will change the icon displayed to x. The battle turn order is also fixed, too. This way, any battlers that Have their AGI value changed over the course of battle will reflect those changes during the current turn rather than the following turn. The action speed calculation can also be adjusted and finetuned to have the random factor of its speed calculation formula removed, too, making AGI actually worthwhile as a tactical parameter. Skill and Item Notetag: <speed: +x> <speed: -x> This lets you break past the editor's limit of -2000 and 2000 allowing you to set the speed of your actions with more control. Casting Animations help provide visual hints for players either by letting them know which battler is going to perform an action or what type of skill that action will be. This plugin enables skills to have casting animations that can be modified universally or customized for each individual skill. Skill Notetag: <Cast Animation: x> Sets the skill's cast animation to animation ID x. Setting x to zero will cause the skill to not have any animaton at all. In RPG Maker MV's default battle system, both the sideview and the frontview settings do not display counterattacks, reflected magic attacks, nor any case of substituting for battle members. The Battle Engine Core provides games that are using the sideview settings small amounts of animations to relay information to the player in a more visual sense. Magic Reflection will also display a reflection animation to indicate the battler has reflection properties. This animation can be changed in the parameters, but certain actors, classes, enemies, weapons, armors, and states can display a unique kind of animation for reflection if desired. Actor, Class, Enemy, Weapon, Armor, and State Notetag: <Reflect Animation ID: x> Changes the user's reflect animation to x. This will take priority in the following order: Actor, Class, Enemy, Weapon, Armor, State, Default. Sometimes, you don't want your enemies to be able to move. Or you don't want certain actors to be able to move. They're just stationary for whatever reason. To accomplish that, you can use this notetag to forbid the battler from moving. Actor, Class, Enemy, Weapon, Armor, and State Notetag: <Sprite Cannot Move> Prevents the battler's sprite from moving. This will take priority in the following order: Actor, Class, Enemy, Weapon, Armor, and State. If an enemy is unable to move when it performs an action, it will flash white as if it normally does in front view. Sideview battlers are generally centered horizontally, and grounded at their feet. However, not all sideview battler spritesheets work this way. In the event you have a sideview battler that doesn't conform to those standards, you can 'anchor' them a different way. Actor, Class, Weapon, Armor, State Notetags: <Anchor X: y.z> <Anchor Y: y.z> This sets the anchor location for the actor's sideview battler at y.z. By default, the X anchor is 0.5 while the Y anchor is 1.0. If you want the X anchor to be a bit more to the left, make it less than 0.5. Make it more than 0.5 to make the X anchor more towards the right. To raise the Y anchor, set the number value to less than 1.0. Keep adjusting until you find that perfect anchor setting. If an anchor has multiple traits that yield different anchors, it will be used in a priority list akin to this order: States Weapons Armors Class Actor Default The higher it is on the priority list, the higher its priority. To give your enemies unique attack animations, you can use this notetag: Enemy Notetag: <Attack Animation: x> Replace x with the ID of the battle animation you wish to set as the enemy's default attack animation. By default, RPG Maker MV's battle system has automatic state removal under three different conditions: none, action end, turn end. None and Turn End are working as intended. However, Action End, however, had the states removed at the start of the battler's action rather than the end. This is changed and updated to occur only at the end of a battler's action. Two more automatic conditions are now added: Action Start and Turn Start. These can be added and implemented using the following notetags: State Notetags: <Action Start: x> <Action Start: x to y> This will cause this state to update its turns remaining at the start of an action. x is the number of turns it will last. If you use x to y, upon applying the state, the state will be removed a random number of turns from x to y. <Turn Start: x> <Turn Start: x to y> This will cause the state to update its turns remaining at the start of a battle turn. x is the number of turns it will last. If you use x to y, upon applying the state, the state will be removed a random number of turns from x to y. States with Action End have a unique trait to them where if the caster of the state is the current active battler (subject) and if the state is then applied on the user itself, they will gain a 'free turn'. The 'free turn' is to mitigate the user from losing 1 duration of the turn since with an Action End timing, they would lose the benefit of being under the state for that turn's timing. Animated Sideview EnemiesInsert these notetags into the enemy noteboxes below to change their
sidewview battler aspects.
Enemy Notetags:
--- General ---
<Breathing>
<No Breathing>
Enables or disables a 'breathing' effect for the enemy sprite.
<Breathing Speed: x>
How many frames does it take to make a full breathing cycle? The lower the
x value, the faster the enemy breathes. The higher the x value, the slower
the enemy breathes.
<Breathing Rate X: x.y>
<Breathing Rate Y: x.y>
Sets the horizontal and vertical breathing rate to x.y. 1.0 is a 100%
variance change while 0.0 is a 0% variance.
<Enable HP Link Breathing>
<Disable HP Link Breathing>
Will enable/disable HP Link Breathing. The lower the HP on the enemy, the
slower the enemy will breathe.
<Floating>
Sets the enemy to be animated as if it was floating.
<Floating Speed: x>
How many frames does it take to do a full floating cycle? The lower the x
value, the faster the enemy floats. The higher the x value, the slower the
enemy floats.
<Floating Rate: x.y>
Sets the floating rate for the enemy to x.y. 1.0 is a 100% variance change
while 0.0 is a 0% variance change.
<Floating Height: x>
Sets the minimum float height for the enemy to x.
<Floating Death>
<No Floating Death>
Decide whether or not this particular enemy will float while dead or
instead, drop to the ground instantly and will bypass the 'Floating Death'
plugin parameter for the particular enemy.
<Scale Sprite: x%>
This allows you to scale the sprite larger or smaller by x% of the
original sprite size. If you wish to only scale either the width or the
height, use the notetags below:
<Scale Sprite Width: x%>
<Scale Sprite Height: x%>
This will scale the sprite's width or height by x% amount specifically
rather than the whole sprite itself by the same ratio.
--- Sideview ---
<Sideview Battler: filename>
This is the filename used for the sideview battler found within your
project's img/sv_actors/ folder. Doing this will enable the following
notetags to be applied to the battler. This is case-sensitive and used
without the image's file extension.
*Example: SF_Actor3_8.png would be <Sideview Battler: SF_Actor3_8>
*Note: If more than one of these tags is used, the sideview battler
selected will be picked from a random pool. Their settings, however, will
match all of the other sideview settings set in the notetags for the sake
of simplicity.
--- Sideview Specific ---
<Sideview Anchor X: y.z>
<Sideview Anchor Y: y.z>
This sets the anchor location for the enemy's sideview battler at y.z.
This is used for the event you have an odd-proportioned sideview battler.
<Sideview Width: x>
<Sideview Height: x>
Sets the width/height of the sideview battler. This is for the event
you're using a battler image that may have different proportions than
normal sideview battlers.
<Sideview Collapse>
Sets it so that the enemy when it dies will collapse and vanish.
<Sideview No Collapse>
Sets it so that the enemy when it dies will leave behind a corpse and
will not vanish.
<Sideview Frame Speed: x>
Sets the frame speed of this sideview battler to x. The lower the x value,
the faster the sideview battler animates. The higher it is, the slower the
battler animates.
--- State Overlays ---
<Sideview Show State Overlay>
<Sideview Hide State Overlay>
This will either show or hide the state overlay for the sideview enemy and
ignore the default setting within the plugin parameters.
--- Motions ---
<Sideview Attack Motion: swing>
<Sideview Attack Motion: thrust>
<Sideview Attack Motion: missile>
Sets the basic attack motion for your sideview enemy if the sideview
enemy is not using any weapons. You can use any of the following motions:
walk wait chant guard damage evade
thrust swing missile skill spell item
escape victory dying abnormal sleep dead
<Sideview Weapon: x>
This sets the sprite's weapon image to x. If you haven't modified your
system images of the weapons, they would be as follows:
0 - Nothing
1 - Dagger 7 - Long Bow 13 - Mace 19 - Slingshot 25 - Book
2 - Sword 8 - Crossbow 14 - Rod 20 - Shotgun 26 - Custom
3 - Flail 9 - Gun 15 - Club 21 - Rifle 27 - Custom
4 - Axe 10 - Claw 16 - Chain 22 - Chainsaw 28 - Custom
5 - Whip 11 - Glove 17 - Sword#2 23 - Railgun 29 - Custom
6 - Staff 12 - Spear 18 - Iron Pipe 24 - Stun Rod 30 - Custom
* Note: Inserting multiple of these notetags will put them inside a random
pool of weapons to use. Keep in mind if you use this notetag, it will use
all the default settings found in the plugin's parameters. If you wish to
use more unique settings, use the notetag below:
<Sideview Weapon: x, y, z>
This sets the sprite's weapon image to x, motion to y, and attack
animation to z. An example of how this notetag would be used would be
as such:
<Sideview Weapon: 2, swing, 6>
This will give the battler a sword with the swing motion and playing
battle animation 6 when attacking.
<Sideview Idle Motion: x>
Sets the idling motion for your sideview enemy. You can use any of the
following motions:
walk wait chant guard damage evade
thrust swing missile skill spell item
escape victory dying abnormal sleep dead
* Note: Inserting multiple of these notetags will put them inside a random
pool of motions to use.
<Sideview Damage Motion: x>
Sets the damaged motion for your sideview enemy. You can use any of the
following motions:
walk wait chant guard damage evade
thrust swing missile skill spell item
escape victory dying abnormal sleep dead
<Sideview Evade Motion: x>
Sets the evasion motion for your sideview enemy. You can use any of the
following motions:
walk wait chant guard damage evade
thrust swing missile skill spell item
escape victory dying abnormal sleep dead
<Sideview Escape Motion: x>
Sets the escaping motion for your sideview enemy. You can use any of the
following motions:
walk wait chant guard damage evade
thrust swing missile skill spell item
escape victory dying abnormal sleep dead
<Sideview Guard Motion: x>
Sets the guard motion for your sideview enemy. You can use any of the
following motions:
walk wait chant guard damage evade
thrust swing missile skill spell item
escape victory dying abnormal sleep dead
<Sideview Abnormal Motion: x>
Sets the abnormal motion for your sideview enemy. You can use any of the
following motions:
walk wait chant guard damage evade
thrust swing missile skill spell item
escape victory dying abnormal sleep dead
<Sideview Sleep Motion: x>
Sets the sleep motion for your sideview enemy. You can use any of the
following motions:
walk wait chant guard damage evade
thrust swing missile skill spell item
escape victory dying abnormal sleep dead
<Sideview Dying Motion: x>
Sets the dying (crisis) motion for your sideview enemy. You can use any
of the following motions:
walk wait chant guard damage evade
thrust swing missile skill spell item
escape victory dying abnormal sleep dead
<Sideview Dead Motion: x>
Sets the dead motion for your sideview enemy. You can use any of the
following motions:
walk wait chant guard damage evade
thrust swing missile skill spell item
escape victory dying abnormal sleep dead
--- Shadows ---
<Sideview Show Shadow>
Sets it so the enemy will show its shadow for its sideview sprite. The
default setting of this is tied to Battle Engine Core's 'Show Shadows'.
<Sideview Hide Shadow>
Sets it so the enemy will hide its shadow for its sideview sprite. The
default setting of this is tied to Battle Engine Core's 'Show Shadows'.
<Sideview Shadow Width: x%>
Sets the shadow width to x% larger/smaller than the default shadow size
found within the img/system folder.
<Sideview Shadow Height: x%>
Sets the shadow height to x% larger/smaller than the default shadow size
found within the img/system folder.
State Notetags:
<Hide Sideview Weapon>
This will cause the animated sideview enemy battler to hide its sideview
weapon effect. The attack motion will revert back to the barehanded attack
motion set for the enemy and the attack animation will be the enemy's
default attack animation.
Battle System - ATBThe following are notetags that pertain to and affect the ATB system. Skill and Item Notetags: <ATB Help> text text </ATB Help> For those planning on using multiple battle systems, sometimes you may have your skills perform differently while using ATB. If so, using this notetag will allow skills and items to display different help text while ATB is enabled. <ATB Speed: x> <ATB Charge: x> <ATB Gauge: x> Usable only during ATB. This sets the target's current speed or charge to x. If 'speed' or 'charge' is used, it will only affect those gauges while in the respective phase. If 'gauge' is used, it will affect either. <ATB Speed: x%> <ATB Charge: x%> <ATB Gauge: x%> Usable only during ATB. This sets the target's current speed or charge to x% of the whole gauge. If 'speed' or 'charge' is used, it will only affect those gauges while in the respective phase. If 'gauge' is used, it will affect either. <ATB Speed: +x> or <ATB Speed: -x> <ATB Charge: +x> or <ATB Charge: -x> <ATB Gauge: +x> or <ATB Gauge: -x> Usable only during ATB. This increases or decreases the target's current speed or charge by x. If 'speed' or 'charge' is used, it will only affect those gauges while in the respective phase. If 'gauge' is used, it will affect either. <ATB Speed: +x%> or <ATB Speed: -x%> <ATB Charge: +x%> or <ATB Charge: -x%> <ATB Gauge: +x%> or <ATB Gauge: -x%> Usable only during ATB. This increases or decreases the target's current speed or charge by x% of the whole gauge. If 'speed' or 'charge' is used, it will only affect those gauges while in the respective phase. If 'gauge' is used, it will affect either. <After ATB: x> <After ATB: x%> This will set the skill/item user's ATB speed value to x or x%. If 'x' is used, this will be the exact ATB value. If x% is used, this will be the percentage of the ATB gauge that it will be at. <ATB Interrupt> <ATB Interrupt: x%> This will give the skill the ability to interrupt and cancel out the target's current action while it is in the charging phase. If the 'x%' notetag version is used, it will have a x% chance of success. <Cannot ATB Interrupt> This causes the skill to be unable to be interrupted and prevent the battler's ATB to reset. Actor, Class, Enemy, Weapon, Armor, and State Notetags: <ATB Start: +x> <ATB Start: +x%> Usable only during ATB. This will give the actor, class, enemy, weapon, armor, or state the property of starting battle with X ATB Speed or X% of the ATB gauge filled up. <ATB Turn: +x> <ATB Turn: +x%> Usable only during ATB. This will give the actor, class, enemy, weapon, armor, or state the property of starting a turn with X ATB Speed or X% of the ATB gauge filled up. Visual ATB GaugeThe following are some notetags you can use to adjust the appearance of the enemy's ATB Gauge. Enemy Notetags: <Show ATB Gauge> <Hide ATB Gauge> This will cause the ATB Gauge to be shown or hidden ignoring the default settings found in the parameters. <ATB Gauge Width: x> This allows you to set the enemy's ATB Gauge width to x instead of having it match the enemy's battler graphic width. Battle System - CTBThe following are notetags that pertain to and affect the CTB system. Actor and Enemy Notetags: <CTB Icon: x> This sets the icon used for the actor/enemy to be x. <CTB Border Color: x> This sets the border color used for the actor/enemy to text color x. <CTB Background Color: x> This sets the background color used for the actor/enemy to text color x. Actor only Notetags: <Class x CTB Icon: y> This sets it so that if the actor is a specific class, the actor will get a specific icon used for the CTB Turn Order. If the actor is class x, it will receive icon y. <Hero CTB Icon: x> <Warrior CTB Icon: x> <Mage CTB Icon: x> <Priest CTB Icon: x> If you prefer to use names instead of class ID's, you can use the above notetag format. If the actor is the named class, it will receive icon x. If you have multiple classes with the same name, priority will be given to the class with the highest ID. Skill and Item Notetags: <CTB Help> text text </CTB Help> For those planning on using multiple battle systems, sometimes you may have your skills perform differently while using CTB. If so, using this notetag will allow skills and items to display different help text while CTB is enabled. <CTB Speed: x> Usable only during CTB. This sets the target's current speed to x. <CTB Speed: x%> Usable only during CTB. This sets the target's current speed to x% of the CTB turn completion target. <CTB Speed: +x> <CTB Speed: -x> Usable only during CTB. This increases or decreases the target's current speed by x. <CTB Speed: +x%> <CTB Speed: -x%> Usable only during CTB. This increases or decreases the target's current speed or charge by x% of the CTB turn completion target. <CTB Order: +x> <CTB Order: -x> Moves target's position in the turn order by +x or -x. +x will make the target having to wait more before getting their turn while -x will make the target having to wait less. The effect is minimal and will only last for the current turn cycle. * Note: If you use this for multiple targets, each target will shift turns individually at a time. <After CTB: x> <After CTB: x%> This will set the skill/item user's CTB speed value to x or x%. If 'x' is used, this will be the exact CTB value. If x% is used, this will be the percentage of the CTB turn completion target that it will be at. Actor, Class, Enemy, Weapon, Armor, and State Notetags: <CTB Start: +x> <CTB Start: +x%> Usable only during CTB. This will give the actor, class, enemy, weapon, armor, or state the property of starting battle with X CTB Speed or X% of the CTB turn completion target. <CTB Turn: +x> <CTB Turn: +x%> Usable only during CTB. This will give the actor, class, enemy, weapon, armor, or state the property of starting a turn with X CTB Speed or X% of the CTB turn completion target. Battle System - OTB (Order Turn Battle)
<OTB User Next Turn: +x>
<OTB User Next Turn: -x>
Change the user's turn order position for the next turn upon using this
skill or item. This will only occur once upon usage, no matter how many times
the battler hits the target.
<OTB Target Current Turn: +x>
<OTB Target Current Turn: -x>
<OTB Target Next Turn: +x>
<OTB Target Next Turn: -x>
<OTB Target Follow Turn: +x>
<OTB Target Follow Turn: -x>
Change the target's turn order position for the current turn, the next turn,
or the following turn. If you are using the 'Follow' version of the notetag,
the turn it will modify will depend on if the target has acted during the
current turn. If it has acted, then it will affect the next turn, otherwise,
the current turn. Successfully attacking the target multiple times will also
affect the target multiple times.
<OTB User Add Current Turn Actions: x> <OTB User Add Next Turn Actions: x> Add x actions to the current turn or the next turn for the user. This will only be added once no matter how many times the battler hits the target. <OTB Target Add Current Turn Actions: x> <OTB Target Add Next Turn Actions: x> Add x actions to the current turn or the next turn for the target. If the target is targeted multiple times, the target will gain actions multiple times so please be cautious when using this. Battle System - STBThe following are notetags that pertain to and affect the STB system. Skill and Item Notetags: <STB Help> text text </STB Help> For those planning on using multiple battle systems, sometimes you may have your skills perform differently while using STB. If so, using this notetag will allow skills and items to display different help text while STB is enabled. Counter ControlYou can use the following notetags to alter counters in your game. Each of these notetags will alter counters in a particular way. Actor and Enemy Notetags: <Default Counter: x> <Default Counter: name> Sets the default counter skill to x. If it is left as 0, then the counter skill will be RPG Maker MV's default counter skill. If you are using the name of the skill, and there are multiple skills in the database with the same name, then priority will be given to the skill with the highest ID. *Note: Use 0 for x if you wish to add RPG Maker MV's default counter. Actor, Class, Enemy, Weapon, Armor, and State Notetags: <Counter Skills: x> <Counter Skills: x, x, x> <Counter Skills: x to y> This will add to the list of possible counter skills for the battler. If multiple skill ID's are listed, then they're all added. Priority will be given to the counter skills listed earlier. *Note: Use 0 for x if you wish to add RPG Maker MV's default counter. *Note2: See the Counter List priority to see which skills will be given priority on the counter skill list. <Counter Skill: name> This will add the named skill to the list of possible counter skills for the battler. If there are multiple skills in the database with the same name, then priority will be given to the skill with the highest ID. *Note: See the Counter List priority to see which skills will be given priority on the counter skill list. <Counter Total: +x> <Counter Total: -x> Alters the number of times the battler can counter by x. This is the amount of times the battler can counter until the battler's turn comes up at which, the number of times is reset. <Target Counter: x%> When this battler attacks an opponent target, this will cause the target counter rate to be altered by x% rate. If a target has 10% CNT, then a notetag of 50% will cause the counter rate to become 5%. <Target Counter: +x%> <Target Counter: -x%> When this battler attacks an opponent target, this will cause the target counter rate to increase or decrease by x%. If a target has 10% CNT, then a notetag of +50% will cause the counter rate to become +60%. <Evade Counter> This will change all counter skills used by the related battler to become evade counters regardless of their default nature. However, if the battler is affected by a trait that is <Hit Counter>, then priority will be given to the <Hit Counter> trait instead. <Hit Counter> This will change all counter skills used by the related battler to become hit counters regardless of their default nature. If the battler is also affected by <Evade Counter>, this effect will take priority. Skill and Item Notetags: <Ally Counter> Makes this action able to proc counter skills by allied members. <Ally Cannot Counter> Makes this action unable to proc counter skills by allied members. <Cannot Counter> Causes this action to be un-counterable. This means that it will always return a 0% counterattack possibility. <Counter Rate: x%> This will cause this action to proc a counter from the target by x% rate. This means if the target has a 10% chance to counter and this notetag is 50%, then the target will have a 5% chance to counter. <Counter Rate: +x%> <Counter Rate: -x%> This will cause this action to proc a counter from the target by an additive x%. This means if the target has a 10% chance to counter and this notetag is +50%, then the target has a 60% chance to counter. Skill Notetags: <Evade Counter> If this skill is being used as the counter skill, the battler will evade the current action and then counter. <Hit Counter> If this skill is being used as the counter skill, the battler will take the hit against the current action and then counter. <Counter Name: text> This changes the displayed name of the skill when used as a counter skill to 'text'. <Counter Icon: x> This changes the displayed icon of the skill when used as a counter skill to x icon.
When making your counter skills, you can have those counter skills respond
only to specific conditions. If all conditions are met, the counter skill
will occur. If a single condition isn't met, that counter skill will then be
skipped and the next one will be checked. To add counter conditions, use the
following notetags:

Skill Notetags:

  <Counter Condition>
   condition
   condition
  </Counter Condition>
  Replace the 'condition' text in between the notetags with the listed in
  the conditions list below to best fit what you want.

--- Example ---

  <Counter Condition>
   physical hit
   single target
  </Counter Condition>
  This skill will only be used as a counter skill if the current action is
  a physical hit that's single target.
Here is a list of all the counter conditions that come with this plugin that
you can use. Keep in mind that all of the counter conditions must be met
before a counter will take effect. If even a single counter condition fails
to be met, the counter skill will not proc.

=-=-=-=-=-=-=-=-=-=-=-=-=-=-=-=-=-=-=-=-=-=-=-=-=-=-=-=-=-=-=-=-=-=-=-=-=-=-
ATTACKER param eval
- - - - - - - - - - - - - - - - - - - - - - - - - - - - - - - - - - - - - - -
Replace 'param' with 'level', 'maxhp', 'hp', 'maxmp', 'mp', 'atk', 'def',
'mat', 'mdf', 'agi', or 'luk'. This will run a check against the attacker's
parameter. If the check returns 'true', the counter condition is met. If it
returns 'false', the counter condition isn't met.
- - - - - - - - - - - - - - - - - - - - - - - - - - - - - - - - - - - - - - -
Example:   Attacker level > 50
           Attacker hp <= attacker.mhp * 0.50
           Attacker atk > defender.def
=-=-=-=-=-=-=-=-=-=-=-=-=-=-=-=-=-=-=-=-=-=-=-=-=-=-=-=-=-=-=-=-=-=-=-=-=-=-

=-=-=-=-=-=-=-=-=-=-=-=-=-=-=-=-=-=-=-=-=-=-=-=-=-=-=-=-=-=-=-=-=-=-=-=-=-=-
CERTAIN HIT
- - - - - - - - - - - - - - - - - - - - - - - - - - - - - - - - - - - - - - -
If the current action used against the target is a certain hit, the counter
condition is met. If it isn't, the counter condition isn't met.
- - - - - - - - - - - - - - - - - - - - - - - - - - - - - - - - - - - - - - -
Example:   Certain Hit
=-=-=-=-=-=-=-=-=-=-=-=-=-=-=-=-=-=-=-=-=-=-=-=-=-=-=-=-=-=-=-=-=-=-=-=-=-=-

=-=-=-=-=-=-=-=-=-=-=-=-=-=-=-=-=-=-=-=-=-=-=-=-=-=-=-=-=-=-=-=-=-=-=-=-=-=-
COUNTER HIT
- - - - - - - - - - - - - - - - - - - - - - - - - - - - - - - - - - - - - - -
If the current action used against the target is a counter skill, the
counter condition is met. If it isn't, the counter condition isn't met.
- - - - - - - - - - - - - - - - - - - - - - - - - - - - - - - - - - - - - - -
Example:   Counter Hit
=-=-=-=-=-=-=-=-=-=-=-=-=-=-=-=-=-=-=-=-=-=-=-=-=-=-=-=-=-=-=-=-=-=-=-=-=-=-

=-=-=-=-=-=-=-=-=-=-=-=-=-=-=-=-=-=-=-=-=-=-=-=-=-=-=-=-=-=-=-=-=-=-=-=-=-=-
DEFENDER param eval
- - - - - - - - - - - - - - - - - - - - - - - - - - - - - - - - - - - - - - -
Replace 'param' with 'level', 'maxhp', 'hp', 'maxmp', 'mp', 'atk', 'def',
'mat', 'mdf', 'agi', or 'luk'. This will run a check against the defender's
parameter. If the check returns 'true', the counter condition is met. If it
returns 'false', the counter condition isn't met.
- - - - - - - - - - - - - - - - - - - - - - - - - - - - - - - - - - - - - - -
Example:   Defender level > 50
           Defender hp <= defender.mhp * 0.50
           Defender atk > attacker.def
=-=-=-=-=-=-=-=-=-=-=-=-=-=-=-=-=-=-=-=-=-=-=-=-=-=-=-=-=-=-=-=-=-=-=-=-=-=-

=-=-=-=-=-=-=-=-=-=-=-=-=-=-=-=-=-=-=-=-=-=-=-=-=-=-=-=-=-=-=-=-=-=-=-=-=-=-
ELEMENT: x
ELEMENT: name
- - - - - - - - - - - - - - - - - - - - - - - - - - - - - - - - - - - - - - -
If the current action used against the target has element X attached to it,
the counter condition is met. If it isn't, the counter condition isn't met.
Replace 'x' with the element ID or the element name in the database system
tab. If multiple elements share the same name, priority will be given to the
element with the highest ID.
- - - - - - - - - - - - - - - - - - - - - - - - - - - - - - - - - - - - - - -
Example:   Element: 4
           Element: Fire
           Element: Ice
=-=-=-=-=-=-=-=-=-=-=-=-=-=-=-=-=-=-=-=-=-=-=-=-=-=-=-=-=-=-=-=-=-=-=-=-=-=-

=-=-=-=-=-=-=-=-=-=-=-=-=-=-=-=-=-=-=-=-=-=-=-=-=-=-=-=-=-=-=-=-=-=-=-=-=-=-
EVAL: code
- - - - - - - - - - - - - - - - - - - - - - - - - - - - - - - - - - - - - - -
For those with JavaScript experience, you can use the above line to perform
an eval check to see if the conditions are met for the counter skill. If the
eval check returns 'true', the condition is met. If it returns 'false', the
condition isn't met.
- - - - - - - - - - - - - - - - - - - - - - - - - - - - - - - - - - - - - - -
Example:   Eval: attacker.name() === 'Harold'
           Eval: defender.hpRate() <= 0.50
=-=-=-=-=-=-=-=-=-=-=-=-=-=-=-=-=-=-=-=-=-=-=-=-=-=-=-=-=-=-=-=-=-=-=-=-=-=-

=-=-=-=-=-=-=-=-=-=-=-=-=-=-=-=-=-=-=-=-=-=-=-=-=-=-=-=-=-=-=-=-=-=-=-=-=-=-
ITEM: x
ITEM: name
- - - - - - - - - - - - - - - - - - - - - - - - - - - - - - - - - - - - - - -
If the current aciton used against the target is item x, the counter
condition is met. If it isn't, the counter condition isn't met. Replace 'x'
with the item ID. If you choose to use the item name, and your database
has multiple items with the same name, priority will be given to the item
with the highest ID.
- - - - - - - - - - - - - - - - - - - - - - - - - - - - - - - - - - - - - - -
Example:   Item: 30
           Item: Bomb
=-=-=-=-=-=-=-=-=-=-=-=-=-=-=-=-=-=-=-=-=-=-=-=-=-=-=-=-=-=-=-=-=-=-=-=-=-=-

=-=-=-=-=-=-=-=-=-=-=-=-=-=-=-=-=-=-=-=-=-=-=-=-=-=-=-=-=-=-=-=-=-=-=-=-=-=-
MAGICAL HIT
- - - - - - - - - - - - - - - - - - - - - - - - - - - - - - - - - - - - - - -
If the current action used against the target is a magical hit, the counter
condition is met. If it isn't, the counter condition isn't met.
- - - - - - - - - - - - - - - - - - - - - - - - - - - - - - - - - - - - - - -
Example:   Magical Hit
=-=-=-=-=-=-=-=-=-=-=-=-=-=-=-=-=-=-=-=-=-=-=-=-=-=-=-=-=-=-=-=-=-=-=-=-=-=-

=-=-=-=-=-=-=-=-=-=-=-=-=-=-=-=-=-=-=-=-=-=-=-=-=-=-=-=-=-=-=-=-=-=-=-=-=-=-
MULTI TARGET
- - - - - - - - - - - - - - - - - - - - - - - - - - - - - - - - - - - - - - -
If the current action used against the target is a multi target action, the
counter condition is met. If it isn't, the counter condition isn't met.
- - - - - - - - - - - - - - - - - - - - - - - - - - - - - - - - - - - - - - -
Example:   Multi Target
=-=-=-=-=-=-=-=-=-=-=-=-=-=-=-=-=-=-=-=-=-=-=-=-=-=-=-=-=-=-=-=-=-=-=-=-=-=-

=-=-=-=-=-=-=-=-=-=-=-=-=-=-=-=-=-=-=-=-=-=-=-=-=-=-=-=-=-=-=-=-=-=-=-=-=-=-
NOT CERTAIN HIT
- - - - - - - - - - - - - - - - - - - - - - - - - - - - - - - - - - - - - - -
If the current action used against the target is NOT certain hit, the
counter condition is met. If it is, the counter condition isn't met.
- - - - - - - - - - - - - - - - - - - - - - - - - - - - - - - - - - - - - - -
Example:   Not Certain Hit
=-=-=-=-=-=-=-=-=-=-=-=-=-=-=-=-=-=-=-=-=-=-=-=-=-=-=-=-=-=-=-=-=-=-=-=-=-=-

=-=-=-=-=-=-=-=-=-=-=-=-=-=-=-=-=-=-=-=-=-=-=-=-=-=-=-=-=-=-=-=-=-=-=-=-=-=-
NOT COUNTER HIT
- - - - - - - - - - - - - - - - - - - - - - - - - - - - - - - - - - - - - - -
If the current action used against the target is NOT a counter skill, the
counter condition is met. If it is, the counter condition isn't met.
- - - - - - - - - - - - - - - - - - - - - - - - - - - - - - - - - - - - - - -
Example:   Not Counter Hit
=-=-=-=-=-=-=-=-=-=-=-=-=-=-=-=-=-=-=-=-=-=-=-=-=-=-=-=-=-=-=-=-=-=-=-=-=-=-

=-=-=-=-=-=-=-=-=-=-=-=-=-=-=-=-=-=-=-=-=-=-=-=-=-=-=-=-=-=-=-=-=-=-=-=-=-=-
NOT ELEMENT: x
NOT ELEMENT: name
- - - - - - - - - - - - - - - - - - - - - - - - - - - - - - - - - - - - - - -
If the current action used against the target has element X attached to it,
the counter condition is NOT met. If it isn't, the counter condition is met.
Replace 'x' with the element ID or the element name in the database system
tab. If multiple elements share the same name, priority will be given to the
element with the highest ID.
- - - - - - - - - - - - - - - - - - - - - - - - - - - - - - - - - - - - - - -
Example:   Not Element: 4
           Not Element: Fire
           Not Element: Ice
=-=-=-=-=-=-=-=-=-=-=-=-=-=-=-=-=-=-=-=-=-=-=-=-=-=-=-=-=-=-=-=-=-=-=-=-=-=-

=-=-=-=-=-=-=-=-=-=-=-=-=-=-=-=-=-=-=-=-=-=-=-=-=-=-=-=-=-=-=-=-=-=-=-=-=-=-
NOT ITEM: x
NOT ITEM: name
- - - - - - - - - - - - - - - - - - - - - - - - - - - - - - - - - - - - - - -
If the current aciton used against the target is NOT item x, the counter
condition is met. If it is, the counter condition isn't met. Replace 'x'
with the item ID. If you choose to use the item name, and your database
has multiple items with the same name, priority will be given to the item
with the highest ID.
- - - - - - - - - - - - - - - - - - - - - - - - - - - - - - - - - - - - - - -
Example:   Not Item: 30
           Not Item: Bomb
=-=-=-=-=-=-=-=-=-=-=-=-=-=-=-=-=-=-=-=-=-=-=-=-=-=-=-=-=-=-=-=-=-=-=-=-=-=-

=-=-=-=-=-=-=-=-=-=-=-=-=-=-=-=-=-=-=-=-=-=-=-=-=-=-=-=-=-=-=-=-=-=-=-=-=-=-
NOT MAGICAL HIT
- - - - - - - - - - - - - - - - - - - - - - - - - - - - - - - - - - - - - - -
If the current action used against the target is NOT a magical hit, the
counter condition is met. If it is, the counter condition isn't met.
- - - - - - - - - - - - - - - - - - - - - - - - - - - - - - - - - - - - - - -
Example:   Not Magical Hit
=-=-=-=-=-=-=-=-=-=-=-=-=-=-=-=-=-=-=-=-=-=-=-=-=-=-=-=-=-=-=-=-=-=-=-=-=-=-

=-=-=-=-=-=-=-=-=-=-=-=-=-=-=-=-=-=-=-=-=-=-=-=-=-=-=-=-=-=-=-=-=-=-=-=-=-=-
NOT PHYSICAL HIT
- - - - - - - - - - - - - - - - - - - - - - - - - - - - - - - - - - - - - - -
If the current action used against the target is NOT a physical hit, the
counter condition is met. If it is, the counter condition isn't met.
- - - - - - - - - - - - - - - - - - - - - - - - - - - - - - - - - - - - - - -
Example:   Not Physical Hit
=-=-=-=-=-=-=-=-=-=-=-=-=-=-=-=-=-=-=-=-=-=-=-=-=-=-=-=-=-=-=-=-=-=-=-=-=-=-

=-=-=-=-=-=-=-=-=-=-=-=-=-=-=-=-=-=-=-=-=-=-=-=-=-=-=-=-=-=-=-=-=-=-=-=-=-=-
NOT SKILL: x
NOT SKILL: name
- - - - - - - - - - - - - - - - - - - - - - - - - - - - - - - - - - - - - - -
If the current aciton used against the target is NOT skill x, the counter
condition is met. If it is, the counter condition isn't met. Replace 'x'
with the skill ID. If you choose to use the skill name, and your database
has multiple skills with the same name, priority will be given to the skill
with the highest ID.
- - - - - - - - - - - - - - - - - - - - - - - - - - - - - - - - - - - - - - -
Example:   Not Skill: 50
           Not Skill: Firaga
=-=-=-=-=-=-=-=-=-=-=-=-=-=-=-=-=-=-=-=-=-=-=-=-=-=-=-=-=-=-=-=-=-=-=-=-=-=-

=-=-=-=-=-=-=-=-=-=-=-=-=-=-=-=-=-=-=-=-=-=-=-=-=-=-=-=-=-=-=-=-=-=-=-=-=-=-
NOT STYPE: x
NOT STYPE: name
- - - - - - - - - - - - - - - - - - - - - - - - - - - - - - - - - - - - - - -
If the current action used against the target is NOT a skill and skill type
x, the counter condition is met. If it isn't the counter condition isn't
met. Replace 'x' with the Skill Type ID. If you choose to use the skill type
name and your database has multiple skill types with the same name, priority
will be given to the skill type with the highest ID.
- - - - - - - - - - - - - - - - - - - - - - - - - - - - - - - - - - - - - - -
Example:   Not Stype: 1
           Not Stype: Magic
=-=-=-=-=-=-=-=-=-=-=-=-=-=-=-=-=-=-=-=-=-=-=-=-=-=-=-=-=-=-=-=-=-=-=-=-=-=-

=-=-=-=-=-=-=-=-=-=-=-=-=-=-=-=-=-=-=-=-=-=-=-=-=-=-=-=-=-=-=-=-=-=-=-=-=-=-
PHYSICAL HIT
- - - - - - - - - - - - - - - - - - - - - - - - - - - - - - - - - - - - - - -
If the current action used against the target is a physical hit, the counter
condition is met. If it isn't, the counter condition isn't met.
- - - - - - - - - - - - - - - - - - - - - - - - - - - - - - - - - - - - - - -
Example:   Physical Hit
=-=-=-=-=-=-=-=-=-=-=-=-=-=-=-=-=-=-=-=-=-=-=-=-=-=-=-=-=-=-=-=-=-=-=-=-=-=-

=-=-=-=-=-=-=-=-=-=-=-=-=-=-=-=-=-=-=-=-=-=-=-=-=-=-=-=-=-=-=-=-=-=-=-=-=-=-
RANDOM: x%
- - - - - - - - - - - - - - - - - - - - - - - - - - - - - - - - - - - - - - -
This will run a random check. There is a x% chance that this counter check
will pass. If it passes, the counter condition is met. If it doesn't, the
counter condition isn't met.
- - - - - - - - - - - - - - - - - - - - - - - - - - - - - - - - - - - - - - -
Example:   Random: 30%
=-=-=-=-=-=-=-=-=-=-=-=-=-=-=-=-=-=-=-=-=-=-=-=-=-=-=-=-=-=-=-=-=-=-=-=-=-=-

=-=-=-=-=-=-=-=-=-=-=-=-=-=-=-=-=-=-=-=-=-=-=-=-=-=-=-=-=-=-=-=-=-=-=-=-=-=-
SINGLE TARGET
- - - - - - - - - - - - - - - - - - - - - - - - - - - - - - - - - - - - - - -
If the current action used against the target is a single target action, the
counter condition is met. If it isn't, the counter condition isn't met.
- - - - - - - - - - - - - - - - - - - - - - - - - - - - - - - - - - - - - - -
Example:   Single Target
=-=-=-=-=-=-=-=-=-=-=-=-=-=-=-=-=-=-=-=-=-=-=-=-=-=-=-=-=-=-=-=-=-=-=-=-=-=-

=-=-=-=-=-=-=-=-=-=-=-=-=-=-=-=-=-=-=-=-=-=-=-=-=-=-=-=-=-=-=-=-=-=-=-=-=-=-
SKILL: x
SKILL: name
- - - - - - - - - - - - - - - - - - - - - - - - - - - - - - - - - - - - - - -
If the current aciton used against the target is skill x, the counter
condition is met. If it isn't, the counter condition isn't met. Replace 'x'
with the skill ID. If you choose to use the skill name, and your database
has multiple skills with the same name, priority will be given to the skill
with the highest ID.
- - - - - - - - - - - - - - - - - - - - - - - - - - - - - - - - - - - - - - -
Example:   Skill: 50
           Skill: Firaga
=-=-=-=-=-=-=-=-=-=-=-=-=-=-=-=-=-=-=-=-=-=-=-=-=-=-=-=-=-=-=-=-=-=-=-=-=-=-

=-=-=-=-=-=-=-=-=-=-=-=-=-=-=-=-=-=-=-=-=-=-=-=-=-=-=-=-=-=-=-=-=-=-=-=-=-=-
STYPE: x
STYPE: name
- - - - - - - - - - - - - - - - - - - - - - - - - - - - - - - - - - - - - - -
If the current action used against the target is a skill and skill type x,
the counter condition is met. If it isn't the counter condition isn't met.
Replace 'x' with the Skill Type ID. If you choose to use the skill type name
and your database has multiple skill types with the same name, priority will
be given to the skill type with the highest ID.
- - - - - - - - - - - - - - - - - - - - - - - - - - - - - - - - - - - - - - -
Example:   Stype: 1
           Stype: Magic
=-=-=-=-=-=-=-=-=-=-=-=-=-=-=-=-=-=-=-=-=-=-=-=-=-=-=-=-=-=-=-=-=-=-=-=-=-=-

=-=-=-=-=-=-=-=-=-=-=-=-=-=-=-=-=-=-=-=-=-=-=-=-=-=-=-=-=-=-=-=-=-=-=-=-=-=-
SWITCH x OFF
- - - - - - - - - - - - - - - - - - - - - - - - - - - - - - - - - - - - - - -
If switch x is OFF (false) prior to the current action being used against
the target, the counter condition is met. If it is ON (true), the counter
condition isn't met.
- - - - - - - - - - - - - - - - - - - - - - - - - - - - - - - - - - - - - - -
Example:   Switch 10 Off
=-=-=-=-=-=-=-=-=-=-=-=-=-=-=-=-=-=-=-=-=-=-=-=-=-=-=-=-=-=-=-=-=-=-=-=-=-=-

=-=-=-=-=-=-=-=-=-=-=-=-=-=-=-=-=-=-=-=-=-=-=-=-=-=-=-=-=-=-=-=-=-=-=-=-=-=-
SWITCH x ON
- - - - - - - - - - - - - - - - - - - - - - - - - - - - - - - - - - - - - - -
If switch x is ON (ftrue) prior to the current action being used against
the target, the counter condition is met. If it is OFF (false), the counter
condition isn't met.
- - - - - - - - - - - - - - - - - - - - - - - - - - - - - - - - - - - - - - -
Example:   Switch 10 On
=-=-=-=-=-=-=-=-=-=-=-=-=-=-=-=-=-=-=-=-=-=-=-=-=-=-=-=-=-=-=-=-=-=-=-=-=-=-

=-=-=-=-=-=-=-=-=-=-=-=-=-=-=-=-=-=-=-=-=-=-=-=-=-=-=-=-=-=-=-=-=-=-=-=-=-=-
VARIABLE x eval
- - - - - - - - - - - - - - - - - - - - - - - - - - - - - - - - - - - - - - -
This runs an eval check against variable x. If the eval check returns 'true'
the condition is met. If it returns 'false' then the condition isn't met.
- - - - - - - - - - - - - - - - - - - - - - - - - - - - - - - - - - - - - - -
Example:   Variable 15 >= 15
           Variable 16 <= 20
           Variable 17 === $gameParty.aliveMembers().length
=-=-=-=-=-=-=-=-=-=-=-=-=-=-=-=-=-=-=-=-=-=-=-=-=-=-=-=-=-=-=-=-=-=-=-=-=-=-
In-Battle StatusFor those who would like to add help descriptions to states, use these following notetags: State Notetags: <Help Description> text text </Help Description> - This will set the help description of the state to the text used in the notetag. You can use text codes. Lunatic Pack - Action Beginning and End EffectsInsert the following notetags into a skill, item, or state's notebox to give it one of these effects: --- Skill, Item, and State Notetags: <timing Action: effect> - Most of this plugin's notetags will follow the above format. 'timing' is to be replaced with either 'Begin' or 'End' while 'effect' is to be replaced by the entries in the following EFFECT section below. Insert multiple notetag entries to give your skills/items more effects. If a multitude of effects are present, then the order they'll occur will be: skill/item first, state effects based off of their state priority order from highest priority to lowest priority. =-=-=-= Action TIMING =-=-=-= <Begin Action: effect> - If the timing is 'begin', then this effect will occur after the action's cost is used. <End Action: effect> - If the timing is 'end', it will occur after all action sequences are completed at the end of the current action. =-=-=-= Action EFFECTS =-=-=-= --- Animation Effects --- <timing Action: Animation x> <timing Action: Animation x, Mirror> <timing Action: Animation x, Delay y> <timing Action: Animation x, Mirror, Delay y> - This will make the animation x play on the user performing the action. If you insert 'Mirror' into the effect line, then the animation will be mirrored. If you insert 'Delay y' and replace 'y' with a number value, the animation will be delayed y frames before playing the animation. SUGGESTED BY: Yanfly --- HP Effects --- <timing Action: +x HP> <timing Action: -x HP> - Replace 'effect' with the above format. Replace 'x' with a flat amount of HP you wish to apply to the user. SUGGESTED BY: Yanfly <timing Action: +x HP%> <timing Action: -x HP%> - Replace 'effect' with the above format. Replace 'x' with a HP equal to x% of the user's MaxHP to apply to the user. SUGGESTED BY: Yanfly <End Action: Drain x% Total HP Damage> - Can only work with end actions. Use the above format. Replace 'x' with the percentage of all total HP damage dealt directly by the user this action to recover as HP. SUGGESTED BY: Yanfly <End Action: Recoil x% Total HP Damage> - Can only work with end actions. Use the above format. Replace 'x' with the percentage of all total HP damage dealt directly by the user this action to self-damage as HP. SUGGESTED BY: Yanfly --- MP Effects --- <timing Action: +x MP> <timing Action: -x MP> - Replace 'effect' with the above format. Replace 'x' with a flat amount of MP you wish to apply to the user. SUGGESTED BY: Yanfly <timing Action: +x MP%> <timing Action: -x MP%> - Replace 'effect' with the above format. Replace 'x' with a MP equal to x% of the user's MaxMP to apply to the user. SUGGESTED BY: Yanfly <End Action: Drain x% Total MP Damage> - Can only work with end actions. Use the above format. Replace 'x' with the percentage of all total MP damage dealt directly by the user this action to recover as MP. SUGGESTED BY: Yanfly <End Action: Recoil x% Total MP Damage> - Can only work with end actions. Use the above format. Replace 'x' with the percentage of all total MP damage dealt directly by the user this action to self-damage as MP. SUGGESTED BY: Yanfly --- TP Effects --- <timing Action: +x TP> <timing Action: -x TP> - Replace 'effect' with the above format. Replace 'x' with a flat amount of HP you wish to apply to the user. SUGGESTED BY: Yanfly <timing Action: +x TP%> <timing Action: -x TP%> - Replace 'effect' with the above format. Replace 'x' with a TP equal to x% of the user's MaxTP to apply to the user. SUGGESTED BY: Yanfly --- Buff/Debuff Effects --- <timing Action: Add x Buff> <timing Action: Add x Buff, y Turns> <timing Action: Add x Debuff> <timing Action: Add x Debuff, y Turns> - Replace 'effect' with the above format(s). Replace 'x' with any of the following parameters: 'MaxHP', 'MaxMP', 'ATK', 'DEF', 'MAT', 'MDF', 'AGI', or 'LUK' to have the effect alter the respective stat. If using the format with 'y' turns, replace 'y' with the number of turns you wish for the buff or debuff to last. If 'y' is not used, it will last for 5 turns instead. SUGGESTED BY: Yanfly <timing Action: Remove x Buff> <timing Action: Remove x Debuff> - Replace 'effect' with the above format(s). Replace 'x' with any of the following parameters: 'MaxHP', 'MaxMP', 'ATK', 'DEF', 'MAT', 'MDF', 'AGI', or 'LUK' to have the effect remove the respective buff/debuff from the user if the conditions are met. If 'y' is not used, it will last for 5 turns instead. SUGGESTED BY: Yanfly --- State Effects --- <timing Action: Add State x> - Replace 'effect' with the above format(s). Replace 'x' with the state ID you wish to add to the user. SUGGESTED BY: Yanfly <timing Action: Remove State x> - Replace 'effect' with the above format(s). Replace 'x' with the state ID you wish to remove from the user. SUGGESTED BY: Yanfly Turn Order DisplayInsert the following notetags to give your actors and enemies unique turn order icons. - - - - - - - - - - - - - - - - - - - - - - - - - - - - - - - - - - - - - - Actor and Enemy Notetags: <Turn Order Icon: x> - This sets the icon used for the actor/enemy to be x. <Turn Order Border Color: x> - This sets the border color used for the actor/enemy to text color x. <Turn Order Background Color: x> - This sets the background color used for the actor/enemy to text color x. - - - - - - - - - - - - - - - - - - - - - - - - - - - - - - - - - - - - - - Actor Only Notetags: <Class x Turn Order Icon: y> - This sets it so that if the actor is a specific class, the actor will get a specific icon used for the Turn Order Display. If the actor is class x, it will receive icon y. <Hero Turn Order Icon: x> <Warrior Turn Order Icon: x> <Mage Turn Order Icon: x> <Priest Turn Order Icon: x> - If you prefer to use names instead of class ID's, you can use the above notetag format. If the actor is the named class, it will receive icon x. If you have multiple classes with the same name, priority will be given to the class with the highest ID. Visual HP GaugesClass and Enemy Notetags: <Hide HP Gauge> This HP gauge will always be hidden if this notetag is present. <Show HP Gauge> This HP gauge will always be shown if this notetag is present while the target is selected or taking damage. <HP Gauge Width: x> This will set the battler's HP Gauge width to x pixels. However, if this width is less than the minimum width, minimum width will take priority. <HP Gauge Height: x> This set's the HP Gauge height to x pixels. <HP Gauge Back Color: x> This changes the HP Gauge's back color to x text color. <HP Gauge Color 1: x> This changes the HP Gauge's color 1 to x text color. <HP Gauge Color 2: x> This changes the HP Gauge's color 2 to x text color. Weak Enemy PosesInsert the following notetags into the database entries' noteboxes to alter the weak pose data. Enemy Notetags: <x% Health Pose: filename> - At x% HP or lower, the enemy will use 'filename' for its battler image instead of its default one. The filename is case sensitive and must not include the file extension. Insert multiple of these notetags to give the enemy various poses across different health values. * NOTE: This applies only to static enemies and NOT animated enemies. <x% Health Pose: filename, hue> - At x% HP or lower, the enemy will use 'filename' for its battler image instead of its default one and a different hue instead of its default. The filename is case sensitive and must not include the file extension. The hue must be a value between 0 and 360. Insert multiple of these notetags to give the enemy various poses across different health values. * NOTE: This applies only to static enemies and NOT animated enemies. State Notetags: <Force Enemy Pose: filename> - When an enemy is afflicted with this state, the enemy would take on this battler image as long as that state is the highest priority state with a forced enemy pose. Replace 'filename' with the battler image to be used. The filename is case sensitive and must not include the file extension. * NOTE: This applies only to static enemies and NOT animated enemies. <Force Enemy Pose: filename, hue> - When an enemy is afflicted with this state, the enemy would take on this battler image as long as that state is the highest priority state with a forced enemy pose. Replace 'filename' with the battler image to be used. The filename is case sensitive and must not include the file extension. The hue must be a value between 0 and 360. * NOTE: This applies only to static enemies and NOT animated enemies. Battle Impact
<Ignore Icon Effect>
For some states, if you don't want them to play the state/buff icon effect,
you can set the state icon to 0 or put <Ignore Icon Effect> in the notebox.
Battle Select CursorYou can use the following notetags to adjust the cursor settings for your actors and enemies. Actor and Enemy Notetags: <Battle Select Cursor: filename> - This will change the filename of the cursor image used for this actor or enemy when selected. The same rules apply as the ones listed in the Instructions - Cursor Filenames section of the help file. <Battle Select Cursor Anchor X: Left> <Battle Select Cursor Anchor X: Center> <Battle Select Cursor Anchor X: Right> <Battle Select Cursor Anchor Y: Top> <Battle Select Cursor Anchor Y: Middle> <Battle Select Cursor Anchor Y: Bottom> - These notetags determine where the origin point of the cursor sprite should be. <Battle Select Cursor Position X: Left> <Battle Select Cursor Position X: Center> <Battle Select Cursor Position X: Right> <Battle Select Cursor Position Y: Top> <Battle Select Cursor Position Y: Middle> <Battle Select Cursor Position Y: Bottom> - These notetags determine where the select cursor will appear on the actor or enemy when targeting them. Boost Point System
Skill and Item Notetags:

<Require x BP>
This will make the action require at least x BP to use for actors.
If for enemies, then at least x BP must be stored. This will not
make the enemies use the BP until you use the enemy BP use notetags.

<Require > x BP>
<Require >= x BP>
<Require = x BP>
<Require <= x BP>
<Require < x BP>
This will make the action require greater than, greater than or equal to,
equal to exactly, less than or equal to, or less than x BP for the skill
to be used for actors. If for enemies, this will be the BP stored. This
will not make the enemies use the BP until you use the enemy BP use notetag.

<Target BP: +x>
<Target BP: -x>
The target will gain or lose BP equal to x. This is a BP effect.

<User BP: +x>
<User BP: -x>
The user will gain or lose BP equal to x. This is a BP effect.

<Boost Damage>
If the action's user is using BP, this will boost the damage multiplier
for this action by the multiplier set in the plugin parameters.

<Boost Turns>
If the action's user is using BP, this will boost the state/buff turns
for this action by the multiplier set in the plugin parameters.

<Boost Repeats>
If the action's user is using BP, this will boost the number of repeated
hits for this action by the multiplier set in the plugin parameters.

<Boost Analyze>
If the action's user is using BP, this will boost the number of weaknesses
revealed for this action by the multiplier set in the plugin parameters.

<Boost BP Effect>
If the action's user is using BP, this will boost the number of BP effects
for this action by the multiplier set in the plugin parameters.

Actor, Class, Enemy, Weapon, Armor, and State Notetags:

<BP Battle Start: x%>
<BP Battle Start: +x>
<BP Battle Start: -x>
Changes the amount of BP the battler starts with in battle by a
percentage (x%) or by a flat amount (+x or -x);

<BP Regen: x%>
<BP Regen: +x>
<BP Regen: -x>
Changes the amount of BP the battler regens each turn in battle by a
percentage (x%) or by a flat amount (+x or -x);

Enemy Notetags:

<Boost Skill x: Full>
<Boost skillname: Full>
Whenever the enemy uses skill x (or the skillname if you use that),
it will use as much BP as it can for the skill when it performs it.

<Boost Skill x: At Least y>
<Boost skillname: At Least y>
Whenever the enemy uses skill x (or the skillname if you use that),
it will use BP after reaching y BP and use as much as it can.

<Boost Skill x: At Most y>
<Boost skillname: At Most y>
Whenever the enemy uses skill x (or the skillname if you use that),
it will use as much BP as it can unless BP is over y BP.

State Notetags:

<Boost Sealed>
If a battler is affected by a state with this notetag, they cannot boost.
<pre>

== [[Break Shield System (Olivia)|Break Shield System]] ==

<html><img src='https://img.itch.zone/aW1nLzE0NjA4MDguZ2lm/original/kXW3sC.gif'></html>

<pre>
Skills and Items Notetags:

<Break Reduce: x>
Reduces the target's Break Shield by x if this action hits a weakness.
If you do not use this notetag, x will be the default value found in
the plugin's parameters.

<Change Break Shield: x>
This will change the target battler's Break Shield value to x if the
battler isn't currently stunned. No effect if you don't use this notetag.

<Increase Break Shield: +x>
<Decrease Break Shield: -x>
This will either increase the target battler's break shield by x or
decrease the target battler's break shield by x. Happens after the
Change Break Shield notetag. No effect if you don't use this notetag.
Actor, Class, and Enemy Notetags: <Break Shields: x> x is the base number of Break Shields the battler starts with. If you do not use this notetag, x will be the default value found in the plugin's parameters. Class, Weapon, Armor, and State Notetags: <Break Shields: +x> <Break Shields: -x> x is the increased/decreased amount of Break Shields applied to how much the battler will start with. If you do not use this notetag, then no extra Break Shields will be added.
<Protect Element: x>
<Protect Elements: x, x, x, x, x>
x element will be guarded. A maximum of 100% damage will be dealt to
the battler if that element is protected. This will also prevent the
Break Shields from reducing for that element. Insert more x's to
protect more elements.
Bright EffectsUse these notetags in maps or put them in the names of your troops.
<Bloom Scale: x>
Changes the bloom scale to x for map/battle. x uses decimal values.
Lower - Less bloom
Higher - More bloom
<Bloom Brightness: x>
Changes the bloom brightness to x for map/battle. x uses decimal values.
Lower - Darker
Higher - Brighter
<Bloom Threshold: x>
Changes the bloom threshold to x for map/battle. x uses decimal values.
Lower - Less picky
Higher - More picky
<Bloom Horz Scale: x to y>
<Bloom Vert Scale: x to y>
Map only. Sets an adjusting scale when traveling left to right on the map
(Horz) or up to down on the map (Vert). x and y use decimal values.
Lower - Less bloom
Higher - More bloom
<Bloom Horz Brightness: x to y> <Bloom Vert Brightness: x to y> Map only. Sets an adjusting brightness when traveling left to right on the map (Horz) or up to down on the map (Vert). x and y use decimal values. Lower - Darker Higher - Brighter <Bloom Horz Threshold: x to y> <Bloom Vert Threshold: x to y> Map only. Sets an adjusting threshold when traveling left to right on the map (Horz) or up to down on the map (Vert). x and y use decimal values. Lower - Less picky Higher - More picky
<Godray>
<No Godray>
Changes if there will be a godray on the map/battle regardless of the default
settings in the plugin parameters.
<Godray Speed: x> Sets the flickering speed of the rays. x uses decimal values. Lower - Slower Higher - Faster
<Godray Gain: x>
Sets the gain/intensity of the rays. x uses decimal values.
Lower - Lighter
Higher - Intense
<Godray Lacunarity: x>
Sets the lacunarity/density of the rays. x uses decimal values.
Lower - Less dense
Higher - More dense
<Godray Angle: x>
Sets the angle of the rays. x can be a negative or positive integar value.
Negative - Coming from the left
Positive - Coming from the right
<Godray Horz Speed: x to y>
<Godray Vert Speed: x to y>
Map only. Adjusts godray speed going left to right on a map (Horz) or up to
down on a map (Vert). x and y use decimal values.
Lower - Slower
Higher - Faster
<Godray Horz Gain: x to y> <Godray Vert Gain: x to y> Map only. Adjusts godray gain going left to right on a map (Horz) or up to down on a map (Vert). x and y use decimal values. Lower - Lighter Higher - Intense <Godray Horz Lacunarity: x to y> <Godray Vert Lacunarity: x to y> Map only. Adjusts godray lacunarity going left to right on a map (Horz) or up to down on a map (Vert). x and y use decimal values. Lower - Less dense Higher - More dense <Godray Horz Angle: x to y> <Godray Vert Angle: x to y> Map only. Adjusts godray angle going left to right on a map (Horz) or up to down on a map (Vert). x and y use decimal values. Negative - Coming from the left Positive - Coming from the right
<Color Adjust Brightness: x>
Alters the screen brightness for the map/battle. x uses decimal values.
Lower - Darker
Higher - Brighter
<Color Adjust Contrast: x>
Adjusts the screen contrast for the map/battle. x uses decimal values.
Lower - Less contrast
Higher - More contrast
<Color Adjust Saturate: x>
Adjusts the screen saturation for the map/battle. x uses decimal values.
Lower - Less intensity
Higher - More intensity
<Color Adjust Horz Brightness: x to y>
<Color Adjust Vert Brightness: x to y>
Map only. Alters the screen brightness when moving left to right on a map
(Horz) or up to down on a map (Vert). x and y use decimal values.
Lower - Darker
Higher - Brighter
<Color Adjust Horz Contrast: x to y> <Color Adjust Vert Contrast: x to y> Map only. Adjusts the screen contrast when moving left to right on a map (Horz) or up to down on a map (Vert). x and y use decimal values. Lower - Less contrast Higher - More contrast <Color Adjust Horz Saturate: x to y> <Color Adjust Vert Saturate: x to y> Map only. Adjusts the screen saturation when moving left to right on a map (Horz) or up to down on a map (Vert). x and y use decimal values. Lower - Less intensity Higher - More intensity Buffs & States CoreThe following are various notetags you can use to modify states and buffs. --- Buff Related --- Actor, Class, Enemy, Weapon, Armor, and State notetags: <Max stat Buff: +x> <Max stat Buff: -x> <Max stat Debuff: +x> <Max stat Debuff: -x> Replace 'stat' with 'maxhp', 'maxmp', 'atk', 'def', 'mat', 'mdf', 'agi', or 'luk' without the quotes. This notetag adjusts the maximum number of times the stat can be buffed or debuffed to the Maximum Limit cap in the plugin parameters. Skill and Item Notetags: <stat Buff Turns: +x> <stat Buff Turns: -x> <stat Debuff Turns: +x> <stat Debuff Turns: -x> Modifies already applied buff/debuff turns on target by x value. If this brings a buff/debuff to 0 or below, the buff/debuff is removed. --- State Related --- State Notetags: <Show Turns> <Hide Turns> Show/hide the turn count remaining for the state. This will override the default setting. <Turn Font Size: x> Sets the font size used for this specific state to be x. This will override the default setting. <Turn Alignment: Left> <Turn Alignment: Center> <Turn Alignment: Right> This sets the text alignment for the turn count indicator. This will override the default setting. <Turn Buffer X: +x> <Turn Buffer X: -x> <Turn Buffer Y: +x> <Turn Buffer Y: -x> Allows you to adjust the x/y position manually for the turn count for this particular state. This will override the default settings. <Turn Color: x> This will set the turn count display color to text color x. This will override the default setting. <Reapply Ignore Turns> <Reapply Reset Turns> <Reapply Add Turns> Changes the rules when this state is reapplied on a battler. When ignored, the turn count remains unchanged. When reset, the turn count is set back to the default amount with variance. When added, the turn count is added upon with variance. Skill and Item Notetags: <State x Turns: +y> <State x Turns: -y> <State named Turns: +y> <State named Turns: -y> Modifies already applied state x turns on target by y value. If this brings the state to 0 or below turns, the state is removed. If you are using named states and have multiple states with the same name, priority will be given to the state with the highest ID. Enemy Notetags: <Show State Turns> <Hide State Turns> Affected by the Battle Engine Core. When selecting enemies, the state turns will show up in the help window. You can use this to have certain enemies show the state turns or hide them. Extended Damage Over TimeInsert the following notetags into your states to achieve their respective
damage over time effects.
State Notetags:
---
<Regen Animation: x>
<DoT Animation: x>
- This will make the state play animation x for regen/damage over time if
there is any healing or damage dealt through the extended damage over time
formulas used below.
Examples:
<Regen Animation: 41> // Play animation 41 when regen occurs
<DoT Animation: 59> // Play animation 59 when DoT occurs
* NOTE: Animations will only occur if it is used with one of the below
formulas and the formula does not yield a 0 value.
---
<Regen Formula: x>
- This will make the affected battler regenerate x HP each turn. You can
use either a formula or a numeric value in place of 'x'.
Examples:
<Regen Formula: 100> // Regen 100 HP exactly each turn
<Regen Formula: a.mdf * 2> // Regen HP equal to the origin's MDF
---
<DoT Formula: x>
- This will make the affected battler take x HP damage each turn. You can
use either a formula or a numeric value in place of 'x'.
Examples:
<DoT Formula: 100> // Damage 100 HP exactly each turn
<DoT Formula: a.mat * 2> // Damage HP equal to the origin's MAT
---
<Regen Element: x>
<DoT Element: x>
- This will make the healing/damage done by this state to be element 'x'.
This will take into consideration the target's elemental rates towards
that element. If this is left blank, there will be no element modifiers.
Examples:
<Regen Element: 4> // Healing done will be affected by element 4.
<DoT Element: 5> // Damage done will be affected by element 5.
---
<Regen Variance: x%>
<DoT Variance: x%>
- The amount of variance you want the DoT effect to have. Replace x with
a percentage value. If this is left blank, the settings in the plugin
parameters will be used by default.
Examples:
<Regen Variance: 10%> // Regen will have 10% healing variance
<DoT Variance: 20%> // DoT will have 20% damage variance
Lunatic Pack - State ProtectionInsert the following notetags into a skill or item's notebox to give it one of these effects: --- State Notetags: <Protection Animation: x> - If a protection effect goes off, it will display animation x on the protected unit. This animation will be played in place of the default animation to indicate the effect has taken place. <type Protection: effect> - Most of this plugin's notetags will follow the above format. 'type' will be replaced with either 'HP', 'MP', or 'Both' to indicate which damage types will be protected against. Replace 'effect' with one of the effects found below. Insert multiple entries of this notetag to give it multiple effects. The order of effects will be played by the order they're inserted into the notebox. =-=-=-= Protection EFFECTS =-=-=-= --- Damage Reduction --- <type Protection: Damage Cut x%> - Replace 'x' with a number. Will reduce damage by x% of the original damage value and not the current value. SUGGESTED BY: Yanfly <type Protection: Damage Block -x> <type Protection: Damage Block +x> - Replace 'x' with a flat value you wish to block (or increase) damage by. This is a flat change to the damage final value. SUGGESTED BY: Yanfly --- Damage Nullifiers --- <type Protection: Damage Null x%> - Replace 'x' with the percentage value of the target's MaxHP/MaxMP you wish to set as the break point. If the damage value is less than or equal to the break point, damage will be nullified and set to zero. SUGGESTED BY: Yanfly <type Protection: Damage Barrier x%> - Replace 'x' with the percentage value of the target's MaxHP/MaxMP you wish to set as the break point. If the damage value is less than or equal to the break point, damage will be nullified and set to zero. SUGGESTED BY: Yanfly --- Damage Cappers --- <type Protection: Damage Ceiling x%> - Replace 'x' with the percentage value of the target's MaxHP/MaxMP you wish to set as the break point. If the current damage value is above the break point, the damage value will become the break point. SUGGESTED BY: Yanfly <type Protection: Damage Floor x%> - Replace 'x' with the percentage value of the target's MaxHP/MaxMP you wish to set as the break point. If the current damage value is below the break point, the damage value will become the break point. SUGGESTED BY: Yanfly --- Death Cheaters --- <HP Protection: Guts x%> - Works only with HP type. Replace 'x' with the success rate percentage you wish to give this effect. If the affected target were to receive fatal damage as a result of this attack, there would be a x% chance the target would be able to survive with 1 HP left. This will not trigger if the target has exactly 1 HP left. SUGGESTED BY: Yanfly <HP Protection: True Guts x%> - Works only with HP type. Replace 'x' with the success rate percentage you wish to give this effect. If the affected target were to receive fatal damage as a result of this attack, there would be a x% chance the target would be able to survive with 1 HP left. Unlike the regular guts, this remain in effect even if the user is at exactly 1 HP left. SUGGESTED BY: Joshua Pactor <HP Protection: Fatal Damage Absorbx %> - Works only with HP type. Replace 'x' with the success rate percentage you wish to give this effect. If the affected target were to receive fatal damage as a result of this attack, the target would receive the damage as recovered health instead. SUGGESTED BY: Shaun Pattenden --- Triggers --- <type Protection: Trigger Removal x%> - If any of this state's protection effects have been triggered/activated, then remove this state as a result of the effect happening. Replace 'x' with the success rate you wish for this effect to occur. SUGGESTED BY: Yanfly <type Protection: Trigger Add x Buff> <type Protection: Trigger Add x Buff, y Turns> <type Protection: Trigger Add x Debuff> <type Protection: Trigger Add x Debuff, y Turns> - If any of this state's protection effects have been triggered/activated, then add a buff/debuff for parameter 'x'. Replace 'x' with 'MaxHP', 'MaxMP', 'ATK', 'DEF', 'MAT', 'MDF', 'AGI', or 'LUK'. You can replace 'y' with the number of turns the buff/debuff will last. If you do not use the notetag variant with the turn count, then it will default to 5 turns. SUGGESTED BY: Yanfly <type Protection: Trigger Remove x Buff> <type Protection: Trigger Remove x Debuff> - If any of this state's protection effects have been triggered/activated, then remove a buff/debuff for parameter 'x'. Replace 'x' with 'MaxHP', 'MaxMP', 'ATK', 'DEF', 'MAT', 'MDF', 'AGI', or 'LUK'. SUGGESTED BY: Yanfly <type Protection: Trigger Add State x> - If any of this state's protection effects have been triggered/activated, then add state 'x' onto the target. Replace 'x' with the state ID you wish to apply to the target. SUGGESTED BY: Yanfly <type Protection: Trigger Remove State x> - If any of this state's protection effects have been triggered/activated, then remove state 'x' onto the target. Replace 'x' with the state ID you wish to remove from the target. SUGGESTED BY: Yanfly =-=-=-= Examples =-=-=-= <HP Protection: Damage Cut 70%> - This will reduce incoming HP damage for the affected unit by 70% meaning only 30% of the damage will go through. <HP Protection: Damage Block -500> <HP Protection: Damage Null 20%> - This will reduce incoming HP damage for the affected unit by a flat 500 first. If the damage is less than 20% of the unit's MaxHP, then it will be nullified completely. <MP Protection: Damage Barrier 20%> - If the affected unit receives MP damage and the MP damage is more than 20% of the unit's MaxMP, nullify that damage completely. <HP Protection: Damage Ceiling 30%> - If the affected unit receives HP damage and the HP damage is more than 30% of the unit's MaxHP, then the damage will be reduced to equal 30% of the unit's MaxHP. <HP Protection: Guts 100%> <HP Protection: Trigger Removal 100%> - If the affected unit receives HP damage that would be fatal, the damage is reduced until the unit would be left with 1 HP left. At that point, the state that gives the Guts effect will be removed. State CategoriesUse the following notetags to alter various properties revolving around state categories for your database objects. State Notetags: <Category: text> Adds the 'text' category to this state. You can insert multiples of this notetag to give a state multiple categories. <Category: Bypass Death Removal> Adds the 'Bypass Death Removal' category to the state. This is a category utilized by the plugin to bypass removal of it upon death. <Category: Bypass Recover All Removal> Adds the 'Bypass Recover All Removal' category to the state. This is a category utilized by the plugin to bypass removal of it upon using the Recover All event. <Category: Group Defeat> Adds the 'Group Defeat' category to the state. If all group members are afflicted by states that have this effect, it is considered a lost battle. Skill and Item Notetags: <Remove State Category: text> Causes this action to remove all states from category 'text' from the action's target. This will not attempt to remove passive states. <Remove x State Category: text> Causes this action to remove x states from category 'text' from the action's target. The states removed will be the front x states of highest to lowest priority with the matching category text. This will not attempt to remove passive states. Visual State EffectsYou can use the following notetags to give different various visual effects for your states. State Notetags: <State Motion: Walk> <State Motion: Wait> <State Motion: Chant> <State Motion: Guard> <State Motion: Damage> <State Motion: Evade> <State Motion: Thrust> <State Motion: Swing> <State Motion: Missile> <State Motion: Skill> <State Motion: Spell> <State Motion: Item> <State Motion: Escape> <State Motion: Victory> <State Motion: Dying> <State Motion: Abnormal> <State Motion: Sleep> <State Motion: Dead> - This allows you to set a custom motion when the battler is affected by this state. If a battler has multiple states with custom motions, then priority will go to the state with the highest priority number (in the database) with this state motion notetag. <State Animation: x> - If a battler is affected by a state with this notetag, then a repeating animation x will play on the battler while in battle. If a battler is affected by multiple states with this notetag, then priority will go to the state with the highest priority number (in the database) with this state animation notetag. Collectible Card GameCard Game Core
<Card Art: foldername, filename>
<Card Art: foldername, filename, hue>
- Replace 'foldername' with the img/folder's name (case sensitive)
- Replace 'filename' with the graphic's filename (case sensitive)
- (Optional) Replace 'hue' with a number between 0 and 360 for the hue. If
you don't use this option, it will default to 0.
- Example: <Card Art: sv_enemies, Dragon, 100>
<Card Dragonbones: armature>
- If you are running KELYEP_DragonBones, you can use DB armatures for the
card art instead. Replace 'armature' with the name of the armature you wish
load onto this card. The armature is automatically loaded upon game start.
This is case sensitive.
<Card Dragonbones Animation: animationName>
- Replace 'animationName' with the name of the animation used by the DB
armature. The animation name is case sensitive.
<Card Art Offset: +x, +y> <Card Art Offset: -x, -y> - Replace 'x' and 'y' with numeric values to determine the horizontal and vertical offset for the art graphic from the center. <Card Art Scale: x> - Replace 'x' with a number to determine the scaling value of the art. 1.0 is 100%. 0.5 is 50%. 2.5 is 250%.
<Card Art Cells: ColxRow>
- Use this notetag only if you plan on using a sprite sheet.
- Replace 'Col' with the number of cell columns the sprite sheet has.
- Replace 'Row' with the number of cell rows the sprite sheet has.
- Otherwise, if this notetag is unused, the art will be treated as a
normal full-sized image.
<Cell Art Cell Index: x> - Use this only if you plan on using a sprite sheet. - Replace 'x' with the index number of the cell starting from 0. - Otherwise, if this notetag is unused, the index cell will default to 0. <Card Name: name> - Replace 'name' with the text that you wish to appear on the card. <Card Element: name> - Replace 'name' with the element this card associates with. This will also determine the Card Template plugin parameter this card uses. If this notetag is not used, the element will default to 'None'. If you wish to use a custom card template after defining the element, use <Card Template: x>. <Card Level: x> - Replace 'x' with this card's level. This is a numeric value. <Card Power: x> - Replace 'x' with this card's power. This is a numeric value. <Card Health: x> - Replace 'x' with this card's health. This is a numeric value. This does not appear on cards by default unless you alter the settings in the Card Templates plugin parameters to let it show.
<Card Template: name>
- Replace 'name' with the name of the Card Template you wish for this card
to use in place of the default one determined by its element.
<Card Rarity: x> - Replace 'x' with a number representing the card's rarity. This is used to determine the aura of the card and where it stands in the card pool when opening booster packs.
<Card Parallax BG: filename>
- Replace 'filename' with the filename of a graphic from img/parallaxes/
to be used as this card's parallax background. This is case sensitive.
- This is an optional notetag. Not all cards need parallax backgrounds.
<Card Parallax BG Speed: +x, +y> <Card Parallax BG Speed: -x, -y> - Replace 'x' and 'y' with numeric values determining the parallax's scroll speed for this card. <Card Parallax BG Opacity: x> - Replace 'x' with a number value between 0 and 255 to determine the opacity level of the parallax background. <Card Parallax BG Blend Mode: Normal> <Card Parallax BG Blend Mode: Additive> <Card Parallax BG Blend Mode: Multiply> <Card Parallax BG Blend Mode: Screen> - Determines which blend mode you wish to use for the parallax background. You can only pick one of the above.
<Card Holo BG: filename>
- Replace 'filename' with the filename of a graphic from img/pictures/ to be
used as this card's hologram background. This is case sensitive.
- This is an optional notetag. Not all cards need holographic backgrounds.
<Card Holo BG Speed: x> - Replace 'x' with a numeric value determine how fast the holographic hue shifts each frame. <Card Holo BG Opacity: x> - Replace 'x' with a numeric value between 0 and 255 to determine the holographic background's opacity. <Card Holo BG Blend Mode: Normal> <Card Holo BG Blend Mode: Additive> <Card Holo BG Blend Mode: Multiply> <Card Holo BG Blend Mode: Screen> - Determines which blend mode you wish to use for the holographic background. You can only pick one of the above.
<Card Parallax FG: filename>
- Replace 'filename' with the filename of a graphic from img/parallaxes/
to be used as this card's parallax foreground. This is case sensitive.
- This is an optional notetag. Not all cards need parallax foregrounds.
<Card Parallax FG Speed: +x, +y> <Card Parallax FG Speed: -x, -y> - Replace 'x' and 'y' with numeric values determining the parallax's scroll speed for this card. <Card Parallax FG Opacity: x> - Replace 'x' with a number value between 0 and 255 to determine the opacity level of the parallax foreground. <Card Parallax FG Blend Mode: Normal> <Card Parallax FG Blend Mode: Additive> <Card Parallax FG Blend Mode: Multiply> <Card Parallax FG Blend Mode: Screen> - Determines which blend mode you wish to use for the parallax foreground. You can only pick one of the above.
<Card Holo FG: filename>
- Replace 'filename' with the filename of a graphic from img/pictures/ to be
used as this card's hologram foreground. This is case sensitive.
- This is an optional notetag. Not all cards need holographic foregrounds.
<Card Holo FG Speed: x> - Replace 'x' with a numeric value determine how fast the holographic hue shifts each frame. <Card Holo FG Opacity: x> - Replace 'x' with a numeric value between 0 and 255 to determine the holographic foreground's opacity. <Card Holo FG Blend Mode: Normal> <Card Holo FG Blend Mode: Additive> <Card Holo FG Blend Mode: Multiply> <Card Holo FG Blend Mode: Screen> - Determines which blend mode you wish to use for the holographic foreground. You can only pick one of the above. <Card Text> Line 1 Line 2 Line 3 Line 4 </Card Text> - Replace lines 1 through 4 with text you wish to appear in the card's text box. If you do not use this notetag, the text will use the card's database item's description text instead. <Card Text Scale: x> - Replace 'x' with a number determining the scale of the text size. <Not a Card> - If you want to mark something as <Not a Card>, it won't appear in the card pool of booster packs even if the number gets listed. It also won't be registered as a card. This is only to be used in situations where a database item got flagged incorrectly by the plugin as a card, when it isn't one.
<Booster Art: filename>
- Replace 'filename' with the filename of a graphic from img/pictures/ to be
used as the art for this booster pack. If you do not use this notetag, the
art will default to the one defined in the Plugin Parameters.
<Booster BG: filename>
- Replace 'filename' with the filename of a graphic from img/parallaxes/ to
be used as the background art shown when opening a booster pack during a full
booster animation sequence. If you do not use this notetag, the graphic used
will default to the one defined in the Plugin Parameters.
<Booster Rarities: x>
<Booster Rarities: x, x, x>
<Booster Rarities: x, x, x, x, x>
- Replace 'x' with numbers from 0 to whatever your highest rarity is.
- Use any number of x's you want in the notetag.
- This determines the rarity pools used when opening this booster pack.
- Use multiples of this notetag to have more variety in the booster pack
contents there can be. When this booster pack is opened, it will only choose
one of the above pools.
<Card Pool: x>
<Card Pool: x, x, x>
<Card Pool: x, x, x, x, x, x>
- Replace 'x' with the ID's of the items you wish to put into the card pool.
- Use any number of x's you want in the notetag.
- Use multiples of this notetag if you wish. The card pool will consolidate
each iteration of this notetag.
- This will combine the card pool with the below notetag.
<Card Pool: x to y> - Replace 'x' and 'y' with the ID's you wish to grab all the numbers of between and throw them into the card pool. - Use multiples of this notetag if you wish. The card pool will consolidate each iteration of this notetag. - This will combine the card pool with the above notetag. Card Game Deck Builder
<Deck Box: filename>
- Replace 'filename' with the filename of a graphic from img/pictures/ to
unlock this deck box image for the player if this item is in their inventory.
This is case sensitive.
<Deck Sleeves: filename>
- Replace 'filename' with the filename of a graphic from img/pictures/ to
unlock this deck sleeves image for the player if this item is in their
inventory. This is case sensitive.
Card Game Mechanics
<Card Hand Start JS>
code
code
</Card Hand Start JS>
- Runs the JavaScript 'code' inbetween the two notetags if the card is found
in your hand at the start of the game.
<Card Hand Start Common Event: x> - Runs common event 'x' if the card is found in your hand at the start of the game. The common event will run after the JavaScript runs. <Card Discard Start JS> code code </Card Discard Start JS> - Runs the JavaScript 'code' inbetween the two notetags if the card is found in discard hand at the start of the game. <Card Discard Start Common Event: x> - Runs common event 'x' if the card is found in your discard at the start of the game. The common event will run after the JavaScript runs. <Card Exhaust Start JS> code code </Card Exhaust Start JS> - Runs the JavaScript 'code' inbetween the two notetags if the card is found in your exhaust at the start of the game. <Card Hand Start Common Event: x> - Runs common event 'x' if the card is found in your exhaust at the start of the game. The common event will run after the JavaScript runs. <Card Library Start JS> code code </Card Library Start JS> - Runs the JavaScript 'code' inbetween the two notetags if the card is found in your library at the start of the game. <Card Library Start Common Event: x> - Runs common event 'x' if the card is found in your library at the start of the game. The common event will run after the JavaScript runs.
<Card Hand Upkeep JS>
code
code
</Card Hand Upkeep JS>
- Runs the JavaScript 'code' inbetween the two notetags if the card is found
in your hand during Upkeep Phase.
<Card Hand Upkeep Common Event: x> - Runs common event 'x' if the card is found in your hand during Upkeep Phase. The common event will run after the JavaScript runs. <Card Discard Upkeep JS> code code </Card Discard Upkeep JS> - Runs the JavaScript 'code' inbetween the two notetags if the card is found in discard hand during Upkeep Phase. <Card Discard Upkeep Common Event: x> - Runs common event 'x' if the card is found in your discard during Upkeep Phase. The common event will run after the JavaScript runs. <Card Exhaust Upkeep JS> code code </Card Exhaust Upkeep JS> - Runs the JavaScript 'code' inbetween the two notetags if the card is found in your exhaust during Upkeep Phase. <Card Hand Upkeep Common Event: x> - Runs common event 'x' if the card is found in your exhaust during Upkeep Phase. The common event will run after the JavaScript runs. <Card Library Upkeep JS> code code </Card Library Upkeep JS> - Runs the JavaScript 'code' inbetween the two notetags if the card is found in your library during Upkeep Phase. <Card Library Upkeep Common Event: x> - Runs common event 'x' if the card is found in your library during Upkeep Phase. The common event will run after the JavaScript runs.
<Card Hand Draw JS>
code
code
</Card Hand Draw JS>
- Runs the JavaScript 'code' inbetween the two notetags if the card is found
in your hand during Draw Phase.
<Card Hand Draw Common Event: x> - Runs common event 'x' if the card is found in your hand during Draw Phase. The common event will run after the JavaScript runs. <Card Discard Draw JS> code code </Card Discard Draw JS> - Runs the JavaScript 'code' inbetween the two notetags if the card is found in discard hand during Draw Phase. <Card Discard Draw Common Event: x> - Runs common event 'x' if the card is found in your discard during Draw Phase. The common event will run after the JavaScript runs. <Card Exhaust Draw JS> code code </Card Exhaust Draw JS> - Runs the JavaScript 'code' inbetween the two notetags if the card is found in your exhaust during Draw Phase. <Card Hand Draw Common Event: x> - Runs common event 'x' if the card is found in your exhaust during Draw Phase. The common event will run after the JavaScript runs. <Card Library Draw JS> code code </Card Library Draw JS> - Runs the JavaScript 'code' inbetween the two notetags if the card is found in your library during Draw Phase. <Card Library Draw Common Event: x> - Runs common event 'x' if the card is found in your library during Draw Phase. The common event will run after the JavaScript runs.
<Card No Battle>
- This card is unable to battle.
- - -
<Card Spell 1 JS>
code
code
</Card Spell 1 JS>
- If this card's spell 1 is used, perform the JavaScript 'code' inbetween
the two notetags.
<Card Spell 1 Common Event: x> - If this card's spell 1 is used, perform common event 'x'. The common event will run after the JavaScript runs. <Card Spell 1 Enable> code enable = code </Card Spell 1 Enable> - If this notetag is found, then the JavaScript 'code' will determine if the 'enable' variable is true/false, making the spell enabled or not. <Card Spell 1 Icon: x> - Uses icon 'x' for this card's spell 1. <Card Spell 1 Name: x> - Gives this card's spell 1 a name as 'x'. <Card Spell 1 Animation: x> - Plays animation 'x' when this card's spell 1 is used. <Card Spell 1 Allow AI Use> - Will allow the A.I. to use this card's spell 1. <Card Spell 1 Check AI Use> code enable = code </Card Spell 1 Check AI Use> - If this notetag is found, then the JavaScript 'code' will determine if the 'enable' variable is true/false, making the spell allowed to be used by A.I. or not. This can be used to prevent the A.I. from using healing at full HP. - - - <Card Spell 2 JS> code code </Card Spell 2 JS> - If this card's spell 2 is used, perform the JavaScript 'code' inbetween the two notetags. <Card Spell 2 Common Event: x> - If this card's spell 2 is used, perform common event 'x'. The common event will run after the JavaScript runs. <Card Spell 2 Enable> code enable = code </Card Spell 2 Enable> - If this notetag is found, then the JavaScript 'code' will determine if the 'enable' variable is true/false, making the spell enabled or not. <Card Spell 2 Icon: x> - Uses icon 'x' for this card's spell 2. <Card Spell 2 Name: x> - Gives this card's spell 2 a name as 'x'. <Card Spell 2 Animation: x> - Plays animation 'x' when this card's spell 2 is used. <Card Spell 2 Allow AI Use> - Will allow the A.I. to use this card's spell 2. <Card Spell 2 Check AI Use> code enable = code </Card Spell 2 Check AI Use> - If this notetag is found, then the JavaScript 'code' will determine if the 'enable' variable is true/false, making the spell allowed to be used by A.I. or not. This can be used to prevent the A.I. from using healing at full HP. - - - <Card Spell 3 JS> code code </Card Spell 3 JS> - If this card's spell 3 is used, perform the JavaScript 'code' inbetween the two notetags. <Card Spell 3 Common Event: x> - If this card's spell 3 is used, perform common event 'x'. The common event will run after the JavaScript runs. <Card Spell 3 Enable> code enable = code </Card Spell 3 Enable> - If this notetag is found, then the JavaScript 'code' will determine if the 'enable' variable is true/false, making the spell enabled or not. <Card Spell 3 Icon: x> - Uses icon 'x' for this card's spell 3. <Card Spell 3 Name: x> - Gives this card's spell 3 a name as 'x'. <Card Spell 3 Animation: x> - Plays animation 'x' when this card's spell 3 is used. <Card Spell 3 Allow AI Use> - Will allow the A.I. to use this card's spell 3. <Card Spell 3 Check AI Use> code enable = code </Card Spell 3 Check AI Use> - If this notetag is found, then the JavaScript 'code' will determine if the 'enable' variable is true/false, making the spell allowed to be used by A.I. or not. This can be used to prevent the A.I. from using healing at full HP. - - - <Card Spell 4 JS> code code </Card Spell 4 JS> - If this card's spell 4 is used, perform the JavaScript 'code' inbetween the two notetags. <Card Spell 4 Common Event: x> - If this card's spell 4 is used, perform common event 'x'. The common event will run after the JavaScript runs. <Card Spell 4 Enable> code enable = code </Card Spell 4 Enable> - If this notetag is found, then the JavaScript 'code' will determine if the 'enable' variable is true/false, making the spell enabled or not. <Card Spell 4 Icon: x> - Uses icon 'x' for this card's spell 4. <Card Spell 4 Name: x> - Gives this card's spell 4 a name as 'x'. <Card Spell 4 Animation: x> - Plays animation 'x' when this card's spell 4 is used. <Card Spell 4 Allow AI Use> - Will allow the A.I. to use this card's spell 4. <Card Spell 4 Check AI Use> code enable = code </Card Spell 4 Check AI Use> - If this notetag is found, then the JavaScript 'code' will determine if the 'enable' variable is true/false, making the spell allowed to be used by A.I. or not. This can be used to prevent the A.I. from using healing at full HP. - - - There are four spells available per card. Nothing more provided by default.
<Card AI Priority-behavior: x>
- This affects the A.I. only. It will make the A.I. pick specific cards over
others depending on the 'behavior' and the 'x' value.
- Replace 'behavior' with a string stating the behavior type to differentiate
different priority settings when a card has multiples of this notetag.
- Replace 'x' with a number depicting the priority value. Lower values mean
the card is less likely to be picked while higher priority means the card is
more likely to be picked.
- Example: <Card AI Priority-Strong: 50>
 <Card AI Priority-Strong: 25>
 <Card AI Priority-Weak: 60>
 <Card AI Priority-Weak: 30>
 <Card AI Priority-Tactical: 90>
 <Card AI Priority-Tactical: 45>

*NOTE* The A.I. will also pick from a pick list of cards using the 'Strong'
behavior. If a setting turns on the "$calc.pickWeakest" flag, then it will
use the 'Weak' behavior. Keep that in mind when making certain cards pickable
for discarding or adding to the hand.
- - -
<Card Pre-Battle JS>
code
code
</Card Pre-Battle JS>
- If this notetag is found, it will occur before damage calculations. It will
run the JavaScript 'code' found between the two notetags.
<Card Pre-Battle Common Event: x> - If this notetag is found, it will occur before damage calculations. Perform common event 'x'. The common event will run after the JavaScript runs. - - - <Card Tie Battle JS> code code </Card Tie Battle JS> - If this notetag is found, it will occur if the battle is tied. It will run the JavaScript 'code' found between the two notetags. <Card Tie Battle Common Event: x> - If this notetag is found, it will occur if the battle is tied. Perform common event 'x'. The common event will run after the JavaScript runs. - - -
<Card Lose Battle JS>
code
code
</Card Lose Battle JS>
- If this notetag is found, it will occur if the card loses a battle. It will
run the JavaScript 'code' found between the two notetags.
<Card Lose Battle Common Event: x> - If this notetag is found, it will occur if the card loses a battle. Perform common event 'x'. The common event will run after the JavaScript runs. - - -
<Card Win Battle JS>
code
code
</Card Win Battle JS>
- If this notetag is found, it will occur if the card wins a battle. It will
run the JavaScript 'code' found between the two notetags.
<Card Win Battle Common Event: x> - If this notetag is found, it will occur if the card wins a battle. Perform common event 'x'. The common event will run after the JavaScript runs. *NOTE* If neither of the notetags are found in the card, then there will be a default effect of dealing 5 damage to the opposing player's health. This can be modified from within the ╘ Post-Damage Effects common event. - - -
<Card Post-Battle JS>
code
code
</Card Post-Battle JS>
- If this notetag is found, it will occur after win/loss effects. It will
run the JavaScript 'code' found between the two notetags.

<pre>
<Card Post-Battle Common Event: x>
- If this notetag is found, it will occur after win/loss effects. Perform
common event 'x'. The common event will run after the JavaScript runs.
- - - <Card Resolve Battle JS> code code </Card Resolve Battle JS> - If this notetag is found, it will occur after post-battle effects. It will run the JavaScript 'code' found between the two notetags. <Card Resolve Battle Common Event: x> - If this notetag is found, it will occur after post-battle effects. Perform common event 'x'. The common event will run after the JavaScript runs. *NOTE* If neither of the notetags are found in the card, then there will be a default effect of sending the card to the player's discard pile. This can be modified from within the ╘ Post-Damage Effects common event.
<Card Hand End JS>
code
code
</Card Hand End JS>
- Runs the JavaScript 'code' inbetween the two notetags if the card is found
in your hand during End Phase.
<Card Hand End Common Event: x> - Runs common event 'x' if the card is found in your hand during End Phase. The common event will run after the JavaScript runs. <Card Discard End JS> code code </Card Discard End JS> - Runs the JavaScript 'code' inbetween the two notetags if the card is found in discard hand during End Phase. <Card Discard End Common Event: x> - Runs common event 'x' if the card is found in your discard during End Phase. The common event will run after the JavaScript runs. <Card Exhaust End JS> code code </Card Exhaust End JS> - Runs the JavaScript 'code' inbetween the two notetags if the card is found in your exhaust during End Phase. <Card Hand End Common Event: x> - Runs common event 'x' if the card is found in your exhaust during End Phase. The common event will run after the JavaScript runs. <Card Library End JS> code code </Card Library End JS> - Runs the JavaScript 'code' inbetween the two notetags if the card is found in your library during End Phase. <Card Library End Common Event: x> - Runs common event 'x' if the card is found in your library during End Phase. The common event will run after the JavaScript runs. Class Change CoreThe following are some notetags you can use with the Class Change Core plugin. Actor Notetags: <Unlock Class: x> <Unlock Class: x, x, x> <Unlock Class: x to y> This actor will have class(es) x unlocked at the start of the game in addition to its current class and access to any of the global classes. <Cannot Change Class> This prevents this actor from being able to change primary classes. This could be reversed from plugin commands, however. <Class x Character: filename y> When this actor's class is x, the actor's character sprite will become 'filename' and index y on the fieldmap. <Hero Character: filename y> <Warrior Character: filename y> If you prefer to use class names instead of the class ID, use the above format. When this actor is this class, the actor's character sprite will become 'filename' and index y on the fieldmap. <Class x Face: filename y> When this actor's class is x, the actor's face graphic will become 'filename' and index y for menus. <Hero Face: filename y> <Warrior Face: filename y> If you prefer to use class names instead of the class ID, use the above format. When this actor is this class, the actor's face graphic will become 'filename' and index y for menus. <Class x Battler: filename> When this actor's class is x, the actor's battler sprite will become 'filename' in battle. <Hero Battler: filename> <Warrior Battler: filename> If you prefer to use class names instead of the class ID, use the above format. When this actor is this class, the actor's battler sprite will become 'filename' in battle. Class Notetags: <Icon: x> Sets the icon for this class to x. This icon is used in the Class Change menu listing. <Use Nickname> This will cause the class to use the nickname used by the actor instead of the class name. <Help Description> Text Text </Help Description> Sets the help description for the class to the specified text. <Level Unlock Requirements> Class x: Level y Class x: Level y </Level Unlock Requirements> Sets the requirements for unlocking that particular class. The unlocking of the class will require classes x to be at level y. Insert multiple of the strings in between the two opening and closing notetags to require all of the class levels to be met. <Level Unlock Requirements> Hero: Level y Warrior: Level y </Level Unlock Requirements> If you prefer to use class names instead of the class ID, use the above format. This will set the level requirement for the mentioned class to y. If there are multiple classes with the same name, the class with the highest ID value will be taken. SubclassYou can use the following notetags to modify subclassing aspects. Actor Notetag: <Subclass: x> Sets the actor's default subclass to x. <Cannot Change Subclass> This prevents this actor from being able to change subclasses. This could be reversed from plugin commands, however. <Restrict Class: x> <Restrict Class: x, x, x> <Restrict Class: x to y> This particular actor cannot switch his or her primary class to class(es) x (to y). This does not apply to the subclass. The actor can still change to this class via event. <Restrict Subclass: x> <Restrict Subclass: x, x, x> <Restrict Subclass: x to y> This particular actor cannot switch his or her subclass to class(es) x (to y). This does not apply to the primary class. The actor can still change to this subclass via event. Class Notetags: <Primary Only> This class can only be class changed to a primary class and nothing more. Actors can still change to this class via event. <Subclass Only> This class can only be class changed to a subclass and nothing more. Actors can still change to this subclass via event. <Subclass x Combo Name: text> If this class is the primary and the subclass is class ID x, then the class name displayed will be 'text'. For example, if the class combination is Warrior/Wizard, the name can appear as Spellblade. <Hero Combo Name: text> <Warrior Combo Name: text> If you choose to use the class's name instead, you can write out the name of the class in place of Subclass x. If you have multiple classes with the same name, priority will be given to the class with the highest ID. Skill and Item Notetags: <Require Class: x> <Require Class: x, x, x> <Require Class: x to y> Replace x with the class's ID. This skill/item can only be used by the listed class(es) x. This does not apply to enemies. <Require Subclass: x> <Require Subclass: x, x, x> <Require Subclass: x to y> Replace x with the class's ID. This skill/item can only be used by the listed subclass(es) x. This does not apply to enemies. Counter State
Insert these notetags into the database object's note box. <Counter State id: n%> <Physical Counter State id: n%> <Magical Counter State id: n%> <Certain Hit Counter State id: n%> - For: Actor, Class, Skill, Weapon, Armor, Enemy, State Notetags - When an opponent battler attacks this battler, there is a 'n'% chance to affect the attacking battler with state 'id'. - Replace 'id' with the ID of the state to function as a counter state. - Replace 'n' with the percent chance to successfully affect with. - Use <Counter State id: n%> to affect all types of attacks. - Use <Physical Counter State id: n%> to affect physical type attacks. - Use <Magical Counter State id: n%> to affect magical type attacks. - Use <Certain Hit Counter State id: n%> to affect certain hit type attacks. Core EngineActor Notetag <Initial Level: x> Changes the actor's initial level to x. This allows you to bypass the editor's level 99 limit. <Max Level: x> Changes the actor's max level to x. This allows you to bypass the editor's level 99 limit. Class Skill Learn Notetag <Learn at Level: x> When placed inside a class's "Skills to Learn" notetag, this will cause the class to learn the skill at level x. Item, Weapon, Armor Notetags <Price: x> Changes the price of the item to x. This notetag allows you to bypass the editor's 999,999 gold cost limit. <Max Item: x> This changes the maximum amount of the item to x. Weapon and Armor Notetags <stat: +x> <stat: -x> Allows the piece of weapon or armor to gain or lose x amount of stat. Replace "stat" with "hp", "mp", "atk", "def", "mat", "mdf", "agi", or "luk" to alter that specific stat. This allows the piece of equipment to go past the editor's default limitation so long as the maximum value allows for it. Enemy Notetag <Gold: x> Changes the gold drop value of enemies to x. This notetag allows you to bypass the editor's 9,999,999 gold drop limit. <stat: x> This changes the enemy's stat to x amount. Replace "stat" with "hp", "mp", "atk", "def", "mat", "mdf", "agi", or "luk" to alter that specific stat. This allows the piece of equipment to go past the editor's default limitation. <exp: x> This changes the enemy's exp given out to x amount. This allows the enemy give out more exp than the editor's default 9,999,999 limit. Damage CoreThe following are some notetags you can use to modify the damage caps. Skill and Item Notetag: <Bypass Damage Cap> This causes the skill/item to ignore the damage cap and go with the regular value of the calculated damage. This will cancel out any damage cap effects otherwise. This will take priority over any damage cap breaking effects. Actor, Class, Enemy, Weapon, Armor, and State Notetags: <Bypass Damage Cap> This will cause the related battler to bypass any damage capping effects and its skills/items will go with the uncapped calculated value. <Damage Cap: x> <Heal Cap: x> This will set the skill to have a damage/healing cap of x. This will cancel out any damage cap bypassers. If a battler has more than one damage cap, it will go with the highest value. This means if an actor that has a weapon that brings the damage cap to 99,999 and an accessory that brings the damage cap to 999,999, then the battler's damage cap will be the highest value of 999,999. Armor ScalingYou may use these notetags to adjust various factors for armor scaling rates and calculations. Skill and Item Notetags: <Armor Reduction: x> Causes the skill/item to reduce the target's armor level by x. This is calculated first above everything else. <Armor Reduction: x%> Causes the skill/item to reduce the target's armor level by x%. This is calculated second but is ignored if the armor level is less than 0. <Armor Penetration: x%> Causes the skill/item to reduce the target's armor level by x% (but will not go past 0). This is calculated third. <Armor Penetration: x> Causes the skill/item to reduce the target's armor level by x (but will not go past 0). This is calculated last. <Bypass Armor Scaling> This notetag allows you to bypass the armor scaling process for this individual skill/item. Actor, Class, Enemy, Weapon, Armor, State Notetags: <Physical Armor Reduction: x> Causes this actor to lose x armor when targeted by physical skills/items. This is calculated first. <Magical Armor Reduction: x> Causes this actor to lose x armor when targeted by magical skills/items. This is calculated first. <Certain Armor Reduction: x> Causes this actor to lose x armor when targeted by certain skills/items. This is calculated first. <Physical Armor Reduction: x%> Causes this actor to lose x% armor when targeted by physical skills/items. This is calculated second. <Magical Armor Reduction: x%> Causes this actor to lose x% armor when targeted by magical skills/items. This is calculated second. <Certain Armor Reduction: x%> Causes this actor to lose x% armor when targeted by certain skills/items. This is calculated second. <Physical Armor Penetration: x%> Causes this actor to cause the target to lose x% armor when using a physical skills/items. This is calculated third. <Magical Armor Penetration: x%> Causes this actor to cause the target to lose x% armor when using a magical skills/items. This is calculated third. <Certain Armor Penetration: x%> Causes this actor to cause the target to lose x% armor when using a physical skills/items. This is calculated third. <Physical Armor Penetration: x> Causes this actor to cause the target to lose x armor but not drop below 0 armor when using a physical skills/items. This is calculated last. <Magical Armor Penetration: x> Causes this actor to cause the target to lose x armor but not drop below 0 armor when using a magical skills/items. This is calculated last. <Certain Armor Penetration: x> Causes this actor to cause the target to lose x armor but not drop below 0 armor when using a certain skills/items. This is calculated last. Critical ControlYou may use these notetags to adjust various factors for critical success rates and critical damage adjustments. Skill and Item Notetags: <Critical Rate: x%> This sets the skill/item's critical hit rate to x%, ignoring any critical hit rate bonuses the user may have and ignoring any critical hit evasion bonuses the target may have. *Note: Using this tag sets the skill/item to enable Critical Hits. <Critical Rate: x.y> This sets the skill/item's critical hit rate to the float x.y, ignoring any critical hit rate bonuses the user may have and ignoring any critical hit evasion bonuses the target may have. *Note: Using this tag sets the skill/item to enable Critical Hits. <Critical Multiplier: x%> This sets the skill/item's critical damage multiplier as x% while still factoring in the user's critical damage multiplier bonuses. *Note: Using this tag sets the skill/item to enable Critical Hits. <Critical Multiplier: x.y> This sets the skill/item's critical damage multiplier as x.y while still factoring in the user's critical damage multiplier bonuses. *Note: Using this tag sets the skill/item to enable Critical Hits. <Flat Critical: x% stat> Increases the skill/item's flat critical bonus by x% of 'stat'. Replace 'stat' with 'hp', 'mp', 'atk', 'def', 'mat', 'mdf', 'agi', or 'luk'. Using multiple instances of this notetag will override the previous. Actor, Class, Enemy, Weapon, Armor, and State Notetags: <Critical Multiplier: +x%> <Critical Multiplier: -x%> Alters the damage of a critical hit by x% for this actor, class, enemy, weapon, armor, or state. This is an additive trait. <Flat Critical: +x> <Flat Critical: -x> Alters the damage of a critical hit by +x or -x for this actor, class, enemy, weapon, armor, or state. This is an additive trait. <Certain Hit Critical Rate: +x%> <Certain Hit Critical Rate: -x%> Alters the critical hit rate chance of certain hit skills for the user by +x% or -x% if this notetag exists in the actor, class, enemy, weapon, armor, or state notetags. This is an additive trait. <Physical Critical Rate: +x%> <Physical Critical Rate: -x%> Alters the physical critical rate chance of certain hit skills for the user by +x% or -x% if this notetag exists in the actor, class, enemy, weapon, armor, or state notetags. This is an additive trait. <Magical Critical Rate: +x%> <Magical Critical Rate: -x%> Alters the magical critical rate chance of certain hit skills for the user by +x% or -x% if this notetag exists in the actor, class, enemy, weapon, armor, or state notetags. This is an additive trait. Lunatic Pack - Critical SwayInsert the following notetags into a skill or item's notebox to give it one of these effects: --- Skill, Item, State Notetags: <Custom Critical Rate: effect> - Most of this plugin's notetags will follow the above format. Replace 'effect' with one of the following entries from the EFFECT section below. Insert multiple entries to give your skills/items/states multiple effects. If there are multiple effects that modify the critical hit rate, they will go in the order of the skill/item first, then in priority order for the user's states. Multiple entries of the same notetag effect can stack with one another unless mentioned otherwise. <Custom Critical Rate: effect, nonstackable> - Using the above notetag format and sticking on 'nonstackable' at the end of the effect will make it nonstackable with other modifiers of the same type. As a result, only the first entry of a similar effect will go through regardless of whether or not the effect is stronger or weaker. It will go through in the order of skill/item first, then in priority order for the user's states. Not all effects can become nonstackable. Effects listed below will suggest if they can become nonstackable. =-=-=-= Effect CONDITIONS =-=-=-= --- User Param Rate --- <Custom Critical Rate: x Pride y%> <Custom Critical Rate: x Pride y%, nonstackable> - Replace 'x' with 'HP', 'MP', or 'TP'. This will use the attacker's current HP, MP, or TP rate as a critical hit rate modifier. Replace 'y' with a percentage value on how much you'd want this modifier to matter. The higher the attacker's HP, MP, or TP rate, the higher the modifier. SUGGESTED BY: Yanfly <Custom Critical Rate: x Crisis y%> <Custom Critical Rate: x Crisis y%, nonstackable> - Replace 'x' with 'HP', 'MP', or 'TP'. This will use the attacker's current HP, MP, or TP rate as a critical hit rate modifier. Replace 'y' with a percentage value on how much you'd want this modifier to matter. The higher the attacker's HP, MP, or TP rate, the higher the modifier. SUGGESTED BY: Yanfly --- Target Param Rate --- <Custom Critical Rate: x Hero y%> <Custom Critical Rate: x Hero y%, nonstackable> - Replace 'x' with 'HP', 'MP', or 'TP'. This will use the defender's current HP, MP, or TP rate as a critical hit rate modifier. Replace 'y' with a percentage value on how much you'd want this modifier to matter. The higher the defender's HP, MP, or TP rate, the higher the modifier. SUGGESTED BY: Yanfly <Custom Critical Rate: x Bully y%> <Custom Critical Rate: x Bully y%, nonstackable> - Replace 'x' with 'HP', 'MP', or 'TP'. This will use the defender's current HP, MP, or TP rate as a critical hit rate modifier. Replace 'y' with a percentage value on how much you'd want this modifier to matter. The higher the defender's HP, MP, or TP rate, the higher the modifier. SUGGESTED BY: Yanfly --- Element Rate --- <Custom Critical Rate: Element Rate x%> <Custom Critical Rate: Element Rate x%, nonstackable> - If the current action has an element attached to it, this effect will adjust the critical hit rate based off the target's damage rate against the action's element. Replace 'x' with a percentage value of how much you want the element rate to influence the critical hit rate. SUGGESTED BY: Yanfly --- State Modifiers --- <Custom Critical Rate: User States +x%> <Custom Critical Rate: User States -x%> <Custom Critical Rate: User States +x%, nonstackable> <Custom Critical Rate: User States -x%, nonstackable> - Alters the critical rate for the current action based off the number of states the user has. The amount altered will be determined by the percent 'x' to increase/decrease the current critical hit rate per state. SUGGESTED BY: Yanfly <Custom Critical Rate: Target States +x%> <Custom Critical Rate: Target States -x%> <Custom Critical Rate: Target States +x%, nonstackable> <Custom Critical Rate: Target States -x%, nonstackable> - Alters the critical rate for the current action based off the number of states the target has. The amount altered will be determined by the percent 'x' to increase/decrease the current critical hit rate per state. SUGGESTED BY: Yanfly --- Buff Modifiers --- <Custom Critical Rate: User Buffs +x%> <Custom Critical Rate: User Buffs -x%> <Custom Critical Rate: User Buffs +x%, nonstackable> <Custom Critical Rate: User Buffs -x%, nonstackable> - Alters the critical rate for the current action based off the number of buff types the user has. The amount altered will be determined by the percent 'x' to increase/decrease the current critical hit rate per buff type. This does not include the stacks per buff. SUGGESTED BY: Yanfly <Custom Critical Rate: Target States +x%> <Custom Critical Rate: Target States -x%> <Custom Critical Rate: Target States +x%, nonstackable> <Custom Critical Rate: Target States -x%, nonstackable> - Alters the critical rate for the current action based off the number of buff types the target has. The amount altered will be determined by the percent 'x' to increase/decrease the current critical hit rate per buff type. This does not include the stacks per buff. SUGGESTED BY: Yanfly --- Debuff Modifiers --- <Custom Critical Rate: User Buffs +x%> <Custom Critical Rate: User Buffs -x%> <Custom Critical Rate: User Buffs +x%, nonstackable> <Custom Critical Rate: User Buffs -x%, nonstackable> - Alters the critical rate for the current action based off the number of debuff types the user has. The amount altered will be determined by the percent 'x' to increase/decrease the current critical hit rate per debuff type. This does not include the stacks per debuff. SUGGESTED BY: Yanfly <Custom Critical Rate: Target States +x%> <Custom Critical Rate: Target States -x%> <Custom Critical Rate: Target States +x%, nonstackable> <Custom Critical Rate: Target States -x%, nonstackable> - Alters the critical rate for the current action based off the number of debuff types the target has. The amount altered will be determined by the percent 'x' to increase/decrease the current critical hit rate per debuff type. This does not include the stacks per debuff. SUGGESTED BY: Yanfly =-=-=-= Effect EXAMPLES =-=-=-= <Custom Critical Rate: TP Pride 50%> - This will raise the user's critical hit rate relative to the user's current TP rate up to 50% (every 1 TP will add 0.5% critical hit rate). <Custom Critical Rate: HP Crisis 200%> <Custom Critical Rate: HP Hero 50%> - This will raise the user's critical hit rate based off how low the user's current HP is and how high the target's current HP is. For every 1% HP the user is missing, the critical hit rate will increase by 2% and for every 1% HP the target has, the critical hit rate will also increase by 0.5%. <Custom Critical Rate: Element Rate 100%> - This will alter the user's critical hit rate against the target if the current action is elemental. If the target is 200% weak to the element, then the critical hit rate will also be increased by 200%. If the target is 50% resistant against the element, then the critical hit rate will also be adjusted to be 50% lower. <Custom Critical Rate: Target States +5%> - This will raise the user's critical hit rate by 5% for every state the target is affected by. <Custom Critical Rate: User Buffs +3%> <Custom Critical Rate: Target Debuffs +6%> - This will raise the user's critical hit rate by 3% for every buff the user has and by 6% for every debuff the target has. Dash ToggleYou can use these notetags to add a disabled dashing trait. If the leading party member has a trait that disables dashing, then the player cannot dash while that actor is in the lead. Actor, Class, Weapon, Armor, and State Notetag: <Disable Dashing> If the leading party member has a trait with this notetag, then the player cannot dash while that actor is in the lead. Disable Auto Shadow ExtendedInsert the following notetags into a map or tileset's notebox to change how they affect shadows on their map. Tileset and Map Notetags: <Hide Shadows> <Show Shadows> - This will hide/show shadows for that specific map or tileset. If a map has a shadow-related notetag while using a tileset with a shadow-related notetag, priority will be given to the notetag on the map. If neither the map nor the tileset has a shadow-related notetag, then the shadow state will depend on the setting in the plugin parameters. Dragonbones IntegrationUse the following notetags to make full use of your DragonBone battler
integration for your RPG Maker MV game!
Actor and Enemy Notetags:
- - - - - - - - - - - - - - - - - - - - - - - - - - - - - - - - - - - - -
<DragonBone: name>
<DragonBone Battler: name>
- Sets the DragonBones associated with this actor/enemy to be "name". The
name will be associated with the assets used. It will be used to check for
associated filenames that end with _ske.json, _tex.json, and _tex.png. The
listed assets must be found in your assets folder.
* Note: The name is case sensitive.
* Note: If the plugin parameter 'Auto-Preload Battlers' is set to 'true',
then this will add the battler to the list of assets to be preloaded.
**EXAMPLES**
<DragonBone: Demon>
<DragonBone: DragonBoy>
<DragonBone: Swordsman>
<DragonBone: Ubbie>
- - - - - - - - - - - - - - - - - - - - - - - - - - - - - - - - - - - - -
If a DragonBones battler is not detected here, it will not be able to
utilize the following notetags and their effects.
- - - - - - - - - - - - - - - - - - - - - - - - - - - - - - - - - - - - -
<DragonBone ScaleX: n>
<DragonBone ScaleY: n>
- Replace 'n' with a number. It can be positive or negative, whole or
decimal number. This will affect how much the battler will be scaled by.
A number less than 1 will be smaller than the base asset itself while a
number larger than 1 will be larger than the base asset. If the number is
negative, it will be mirrored horizontally or vertically depending if
ScaleX or ScaleY is used respectively.
* Note: This will overwrite the setting set in the plugin parameters for
'Default ScaleX' and 'Default ScaleY'.
**EXAMPLES**
<DragonBone ScaleX: -0.3>
<DragonBone ScaleY: 0.3>
<DragonBone ScaleX: 1.2>
<DragonBone ScaleY: 1.2>
- - - - - - - - - - - - - - - - - - - - - - - - - - - - - - - - - - - - -
<DragonBone Width: x>
<DragonBone Height: x>
- This allows you to set the 'width' and 'height' of the DragonBones
battler by replacing 'x' with an integar value. This value is mostly used
for collision purposes as well as mouse click activation. These values can
be adjusted because each battler can be a dynamic width/height so it is
important for you to adjust them properly. If not adjusted, they will take
on the default width/height values found in the plugin parameters.
**EXAMPLES**
<DragonBone Width: 150>
<DragonBone Height: 180>
- - - - - - - - - - - - - - - - - - - - - - - - - - - - - - - - - - - - -
<DragonBone Keep Sprite>
<DragonBone Replace Sprite>
- Lets you decide if you want to keep the original sprite used for the
actor/enemy or have the DragonBone battler replace it altogether. If you
opt to replace the sprite, then the sprite will be hidden during battle
as long as there is a DragonBone battler in place of it.
- - - - - - - - - - - - - - - - - - - - - - - - - - - - - - - - - - - - -
<DragonBone Ani motion: animation>
- Replace 'motion' with a proper battler motion name. 'animation' is to be
replaced with a skeletal animation name from DragonBones. This is for any
motion that doesn't have a specified skeletal animation of the same name
in DragonBones.
Replace 'motion' with one of the following:
attack
walk thrust escape
wait swing victory
chant missile dying
guard skill abnormal
damage spell sleep
evade item dead
* Note: The 'animation' to be replaced is case sensitive.
**EXAMPLES**
<DragonBone Ani Attack: normalAttack>
<DragonBone Ani Walk: steady>
<DragonBone Ani Damage: hit>
<DragonBone Ani Dead: dead>
<DragonBone Ani Wait: steady>
<DragonBone Ani Chant: stun>
<DragonBone Ani Swing: stun>
<DragonBone Ani Evade: stun>
<DragonBone Ani Thrust: stun>
<DragonBone Ani Missile: stun>
<DragonBone Ani Skill: stun>
<DragonBone Ani Spell: stun>
<DragonBone Ani Item: stun>
<DragonBone Ani Victory: stun>
<DragonBone Ani Dying: stun>
<DragonBone Ani Abnormal: stun>
<DragonBone Ani Sleep: stun>
- - - - - - - - - - - - - - - - - - - - - - - - - - - - - - - - - - - - -
For those who want a more condensed way to adjust the DragonBone battler
settings, you can use the following notetag format:
<DragonBone Settings>
Battler: name // The name used for the DB battler
ScaleX: 0.3 // Scale X used for the DB battler
ScaleY: 0.3 // Scale Y used for the DB battler
Width: 150 // Width used for the DB battler
Height: 180 // Height used for the DB battler
// Below are a bunch of battler motions tied to skeletal animations
Ani Attack: normalAttack
Ani Walk: steady
Ani Damage: hit
Ani Dead: dead
Ani Wait: steady
Ani Chant: stun
Ani Swing: stun
Ani Evade: stun
Ani Thrust: stun
Ani Missile: stun
Ani Skill: stun
Ani Spell: stun
Ani Item: stun
Ani Victory: stun
Ani Dying: stun
Ani Abnormal: stun
Ani Sleep: stun
Keep Sprite // Allow the sprite to show alongside DB battler
Replace Sprite // Hide the sprite while the DB battler is active
</DragonBone Settings>
- Anything placed in between the notetags: <DragonBone Settings> and
</DragonBone Settings> will be used to determine the properties set for
the DragonBone battler used for the actor/enemy. With the exception of the
'name' property, all other properties are optional and can be omitted from
the list of properties to sandwich inbetween your notetags.
**EXAMPLES**
<DragonBone Settings>
Battler: Ubbie
Replace Sprite
ScaleX: -0.2
ScaleY: 0.2
Width: 150
Height: 100
</DragonBone Settings>
<DragonBone Settings>
Battler: Demon
Replace Sprite
ScaleX: 0.3
ScaleY: 0.3
Width: 140
Height: 140
</DragonBone Settings>
<DragonBone Settings>
Battler: Swordsman
Replace Sprite
ScaleX: -0.4
ScaleY: 0.4
Width: 150
Height: 180
</DragonBone Settings>
Dragonbones Map SpritesYou can use Dragonbones armatures as map sprites. When used, any of the original sprites before will become invisible and will be replaced with the Dragonbones armature. These notetags can be used for actors and events. In the case of events, both notetags and comment tags can be used to determine what settings to use for the Dragonbones armatures. Be cautious when using Comment Tags for event pages since comments contain a maximum line count of 6.
<Dragonbones Sprite: filename>

- Used for: Actor, Event Notetags and Event Page Comment Tags
- Sets the DragonBones associated with this map sprite to be 'filename'.
- The name will be associated with the assets used.
- It will be used to check for associated filenames that end with _ske.json,
  _tex.json, and _tex.png.
- The listed assets must be found in the assigned assets folder.
Examples: <Dragonbones Sprite: Demon> <Dragonbones Sprite: DragonBoy> <Dragonbones Sprite: Swordsman> <Dragonbones Sprite: Ubbie> <Dragonbones Sprite Scale: x, y> <Dragonbones Sprite Scale X: x> <Dragonbones Sprite Scale Y: x> - Used for: Actor, Event Notetags and Event Page Comment Tags - Sets the base scale for the Dragonbones associated with this map sprite. This is for those instances where a Dragonbones armature is too large or small and needs to be scaled down/up. - This scale will be amplified by the character's sprite's scale value. - Use the 1st notetag to assign values to both Scale X and Scale Y. - Use the 2nd/3rd notetags to assign Scale X and Y values separately. - Use negative values to flip the Dragonbones armature around. Examples: <Dragonbones Sprite Scale: -0.3, 0.3> <Dragonbones Sprite Scale X: -0.3> <Dragonbones Sprite Scale Y: 0.3> <Dragonbones Sprite Time Scale: x> - Used for: Actor, Event Notetags and Event Page Comment Tags - Lets you adjust the time scale for the Dragonbones armature. - Replace 'x' with a number value depicting how fast the armature should animate. - 1.0 is the default value. - Higher numbers animate faster. - Lower numbers animate slower. - If a number is too small, it may not animate at all. Example: <Dragonbones Sprite Time Scale: 1.5> <Dragonbones Sprite Size: width, height> <Dragonbones Sprite Width: x> <Dragonbones Sprite Height: x> - Used for: Actor, Enemy Notetags - Dragonbones armatures have no standard width or height. This makes it problematic when trying to calculate the sprite's width/height for various plugins that use it. These notetags allow you to assign a width and height value to the sprite, despite the fact the Dragonbones armatures have no such thing. - Replace 'width', 'height', or 'x' with number values representing the dimension values in pixels. - Use the 1st notetag to assign values to both Width and Height. - Use the 2nd/3rd notetags to assign Width and Height values separately. - If these notetags aren't used, then use the values defined by default in the Plugin Parameters. Examples: <Dragonbones Sprite Size: 48, 64> <Dragonbones Sprite Width: 48> <Dragonbones Sprite Height: 64> <Dragonbones Sprite Flip Left> <Dragonbones Sprite Flip Right> <Dragonbones Sprite No Flip Left> <Dragonbones Sprite No Flip Right> - Used for: Actor, Event Notetags and Event Page Comment Tags - Lets the map sprite know to flip itself when facing either the left/right directions in order to reuse animations. - The 'No' variants will prevent flipping from occuring. - These notetags will override settings applied in the Plugin Parameters. <Dragonbones Sprite Motion Idle: animation> <Dragonbones Sprite Motion Walk: animation> <Dragonbones Sprite Motion Dash: animation> <Dragonbones Sprite Motion Jump: animation> <Dragonbones Sprite Motion LadderIdle: animation> <Dragonbones Sprite Motion LadderClimb: animation> - Used for: Actor, Event Notetags and Event Page Comment Tags - Lets you set specific animations different from the ones listed in the Plugin Parameters for specific motions. - Replace 'animation' with the name of the Dragonbones animation. - If this notetag is not used, when such a motion is rquested, it will default to attempting to play the animation name equal to the motion. - Animation names do not need to be case sensitive. - If no animation is found, then no animation will be played. Example: <Dragonbones Sprite Motion Idle: stand> <Dragonbones Sprite Motion Walk: move> <Dragonbones Sprite Motion Dash: run> <Dragonbones Sprite Motion Jump: hop> <Dragonbones Sprite Settings> Filename: filename Scale: x, y Scale X: x Scale Y: x Time Scale: x Width: x Height: x Flip Left Flip Right No Flip Left No Flip Right Motion Idle: animation Motion Walk: animation Motion Dash: animation Motion Jump: animation Motion LadderIdle: animation Motion LadderClimb: animation </Dragonbones Sprite Settings> - Used for: Actor, Event Notetags and Event Page Comment Tags - The above notetag allows to wrap up all the information you'd like to set for Dragonbones battler armatures needed inside a single notetag container. - The settings are the same as the notetags listed above it. - You may remove the settings you don't wish to change. - The only necessary data is the 'Filename: filename' line. Example: <Dragonbones Sprite Settings> Filename: Ubbie Scale: 0.1, 0.1 Flip Right Motion Idle: stand Motion Walk: walk </Dragonbones Sprite Settings> Element CoreUse these notetags if you wish to modify various aspects of elements for your database objects. Skill and Item Notetags <Bypass Element Reflect> - Allows this skill/item to ignore elemental reflect properties. This will not bypass reflect properties as a whole, however. <Multiple Elements: x> <Multiple Elements: x to y> <Multiple Elements: x, x, x> <Multiple Elements: name, name, name> - This adds elements x (or name) to the skill/item in addition to the skill/item's current element. Skills and items with multiple elements will follow the Multi-Element Rule when calculating damage rate. Insert more of this notetag to insert more elements. <Multi-Element Rule: Lowest> <Multi-Element Rule: Add> <Multi-Element Rule: Multiply> <Multi-Element Rule: Highest> <Multi-Element Rule: Average> - This allows you to set the rule for this skill/item if it has multiple elements. Either the lowest rate, the additive sum of all rates, the multiplicative product of all rates, or the highest rate will be used. If average is used, it will be the average of all element rates. Actor, Class, Enemy, Weapon, Armor, and State Notetags: <Element Absorb: x> <Element Absorb: x, x, x> <Element Absorb: name> <Element Absorb: name, name, name> - Causes element x to be absorbed and heals the battler. When an element is absorbed, the rate goes down by 200% instead of being just an inverse. This is so that battlers that are originally resistant to the element will absorb more of the element while battlers that are originally vulnerable to the element will absorb less of the element. The minimum amount absorbed is 0.01%. <Element Reflect x: +y%> <Element Reflect x: -y%> <Element Reflect name: +y%> <Element Reflect name: -y%> - Increases or decreases the rate to reflect element x by y%. If a skill or item has multiple elements, the reflect rate is added for each element used by the skill/item. <Element Magnify x: +y%> <Element Magnify x: -y%> <Element Magnify name: +y%> <Element Magnify name: -y%> - If the user performs a skill or item that utilizes element x (or name), increase or decrease its damage by y%. If a skill or item has multiple elements, the rate is increased additively for each element and adjusted multiplicatively with base rate. This bottoms out at 0%. <Element Amplify x: +y%> <Element Amplify x: -y%> <Element Amplify name: +y%> <Element Amplify name: -y%> - If the user performs a skill or item that utilizes element x (or name), increase or decrease its damage by y%. If a skill or item has multiple elements, the rate is increased additively for each element and adjusted additively for base rate. <Element Null> - This will cause the battler to not have elemental attacks when using skills and items. However, this will not bypass the 'Force Element' action sequence effect. <Force Element x Rate: y%> <Force Element name Rate: y%> - This forces the battler's elemental rate for x (or named) to be y%. This will work in a priority setting of states (highest priority to lowest), equips (first to last), then class, then actor/enemy if more than one notetag is used for the same element. If y is negative, the element is absorbed. Enemy LevelsYou can use these notetags to adjust how enemy levels are handled individually per enemy. Enemy Notetags: <Show Level> <Hide Level> This will cause the enemy to show or hide its level upon target selection. <Minimum Level: x> <Maximum Level: x> This sets the enemy's minimum and maximum levels respectively to x. This will cause the enemy, upon the start of battle, to adjust levels within this particular range. Any skills that alter enemy levels are able to bypass these limits unless if it were to bypass the maximum cap. <Static Level: x> This sets the enemy's starting level to exactly x. This will cause the enemy, upon the start of battle, to adjust levels within this particular range. Any skills that alter enemy levels are able to bypass these limits unless if it were to bypass the maximum cap. <Starting Level Type: x> This sets the enemy's starting level type to x from 0 to 5. Refer to the 'Default Level Types' party of the Help File. <Positive Level Fluctuation: x> <Negative Level Fluctuation: x> This sets the positive/negative level fluctuation for the enemy. Any level fluctuation is calculated at the start of battle, but after the starting level type has been determined. <Level Fluctuation: x> This sets both the positive and negative level fluctuation for the enemy to x. Any level fluctuation is calculated at the start of battle, but after the starting level type has been determined. <stat Rate: +x% per level> <stat Rate: -x% per level> <stat Rate: +x.y per level> <stat Rate: -x.y per level> Replace 'stat' with 'maxhp', 'maxmp', 'atk', 'def', 'mat', 'mdf', 'agi', 'luk', 'exp', or 'gold'. This will set this enemy to have an increase or decrease of x% rate per level. If you use the x.y formula, it will have a rate increase of +x.y or -x.y per level. <stat Flat: +x per level> <stat Flat: -x per level> <stat Flat: +x.y per level> <stat Flat: -x.y per level> Replace 'stat' with 'maxhp', 'maxmp', 'atk', 'def', 'mat', 'mdf', 'agi', 'luk', 'exp', or 'gold'. This will set this enemy to have an increase or decrease of flat x value per level. If you use the x.y formula, it will have a flat increase of +x.y or -x.y per level. <Resist Level Change> This will cause the enemy to be immune to any form of level changing through skills and items. However, the enemy is not immune to any level changing through script calls. <Skill x Require Level: y> <Skill name Require Level: y> If this enemy is to use skill x (or named skill), it must be at least level y to be able to use it. If the enemy is under level y, the skill will be sealed and cannot be used. <Ignore Level Bonus> This will cause the enemy to ignore all the stat changes added by levels and use its base stats as its current level stats. Any changes to its current level will not alter the enemy's stats. Skill and Item Notetags: <Reset Enemy Level> This will reset the target enemy's level back to what it was at the start of battle. <Change Enemy Level: +x> <Change Enemy Level: -x> If this action is used against an enemy, it will change the enemy's level by +x or -x. If an action contains both a reset and level change, the reset will occur first before the level change. Difficulty SliderThere is a notetag you can use for the Difficulty Slider plugin. Enemy Notetag: <Unaffected by Difficulty Slider> - This will make the enemy's level unaffected by the difficulty slider, meaning the enemy will always be at 100% its current calculated level. Enemy Base ParametersYou can use this notetag to base an enemy's stats on a class. Enemy Notetag: <Base Parameters on Class: x> - This will base all parameters except for 'exp' and 'gold' on class x. * Note: This will take priority over the custom enemy parameters. <Base stat Parameter on Class: x> - This will base the specific 'stat' parameter on class x. Replace 'stat' with 'maxhp', 'maxmp', 'atk', 'def', 'mat', 'mdf', 'agi', or 'luk'. * Note: This will take priority over the custom enemy parameters. Map Enemy LevelsInsert the following notetags into your map's notebox to set the desired enemy level settings. Map Notetags: <Enemy Level Base: x> - Replace 'x' with the static base level to set for the enemies encountered on the map. Positive and negative level fluctuations from YEP_EnemyLevels will be applied after. <Enemy Level Base Variable: x> - Replace 'x' with the variable whose value will determine the static base level of the enemies encountered on the map. Positive and negative level fluctuations from YEP_EnemyLevels will be applied after. <Enemy Level Range: x to y> - Replace 'x' with the minimum base level and 'y' with the maximum base level for the enemies encountered on the map. Positive and negative level fluctuations from YEP_EnemyLevels will be applied after. <Enemy Level Range Variables: x to y> - Replace 'x' with the variable whose value will determine the minimum base level and 'y' with the variable whose value will determine the maximum base level for the enemies encountered on the map. Positive and negative level fluctuations from YEP_EnemyLevels will be applied after. Enhanced TPYou can use the following notetags to adjust the various settings for TP. Actor and Enemy Notetags: <TP Mode: x> This will set the actor's default TP mode to x. If this notetag isn't used then the actor will default to the mode within the plugin's parameters. <Unlock TP Mode: x> <Unlock TP Mode: x, x, x> <Unlock TP Mode: x to y> This unlocks what TP modes the actor can use by default. This tag will add upon the default unlocks already preset in the plugin's parameters. Skill and Item Notetags: <Unlock TP Mode: x> <Unlock TP Mode: x, x, x> <Unlock TP Mode: x to y> This will cause the target to unlock TP mode x (to y). This will make the TP mode available in the TP menu. Skill Notetags: <Learn Unlock TP Mode: x> <Learn Unlock TP Mode: x, x, x> <Learn Unlock TP Mode: x to y> When this skill is learned, unlock TP mode x (to y) in the process of also learning it. This will make the TP mode available in the TP menu. Equip Battle SkillsThe following notetags adjust various aspects about equippable battle skills. Actor Notetag: <Starting Skill Slots: x> This sets the actor's starting skill slots to x amount. This value will not allow the actor to bypass the Maximum Skills limit. Skill Notetags: <Equip stat: +x> <Equip stat: -x> Replace 'stat' with 'HP', 'MP', 'ATK', 'DEF', 'MAT', 'MDF', 'AGI', or 'LUK' to have that stat increase or decrease by x amount while the skill is equipped for battle. <Equip State: x> <Equip State: x, x, x> <Equip State: x through x> This causes the actor to be affected by state x while the skill is equipped for battle. <Unequippable> This skill cannot be equipped no matter what. <All Access Equippable> This makes the skill equippable whether the actor has the available skill type needed for the skill or not. <Access Only Equippable> This makes the skill equippable only for actors with the specific skill type. Actors without access to the skill type cannot equip it. Class, Skill, Weapon, Armor, and State Notetags: <Equip Skill Slots: +x> <Equip Skill Slots: -x> This increases or decreases the amount of skills the actor can equip for battle by x. This value will not allow the actor to bypass the Maximum Skills Limit. Equip Skill TiersThe following are notetags that alter the tier settings of skills. Skill Notetag <Skill Tier: x> Sets the skill's tier to x, making it limited by the restrictions applied by the actor. Actor, Class, Skill, Weapon, Armor, and State Notetags <Skill Tier x Slots: +y> <Skill Tier x Slots: -y> Increases or decreases the skill tier for tier x by y slots. The changes made here do not go under 0 nor do they bypass the maximum battle skills equip limit. Equip CoreYou can use the following notetags to change a class's equipment setup. Class Notetags: <Equip Slot: x> Example: <Equip Slot: 1, 2, 3, 4, 5, 5, 5, 5> <Equip Slot: x, x, x> Changes this class's equipment slots to x. Using repeating numbers makes it so that equipment type is duplicated and that the class can equip multiple equipment of that type. To find the Equipment Type ID, go to your database's Types tab and look for the ID type. If you don't like the above method for setting equipment slots, you can use the following notetags instead: <Equip Slot> Example: <Equip Slot> string Weapon string Armor string Accessory string Accessory </Equip Slot> </Equip Slot> Replace 'string' with the Equipment type's name entry. This is case sensitive so if the string does not match a name entry perfectly, the slot will not be granted to the class. Multiple copies of a name entry would mean the class can equip multiple equipment of that type. Everything works the same as the previous notetag. Weapon and Armor Notetags: <stat: +x> <stat: -x> Allows the piece of weapon or armor to gain or lose x amount of stat. Replace "stat" with "hp", "mp", "atk", "def", "mat", "mdf", "agi", or "luk" to alter that specific stat. This allows the piece of equipment to go past the editor's default limitation so long as the maximum value allows for it. Changes made here alter the base parameters. Change Battle EquipUse the following notetags to alter how the Change Battle Equip command functions for your actors in battle. Actor, Class, Weapons, Armors, and State Notetags: <Change Battle Equip Cooldown: +x> <Change Battle Equip Cooldown: -x> Increases or decreases the number of turns an actor has to wait in battle before the actor can change equips again by x amount. <Disable Change Battle Equip> This will disable the ability to change equipment mid-battle for the related actor. Equip RequirementsYou can use these notetags to implement requirements onto your weapons and armors. These notetags will have to be set up in a certain way: Weapon and Armor Notetags: <Equip Requirement> requirement requirement </Equip Requirement> - The main requirements will have to be placed in between these notetags. You can have a multitude of requirements for your weapons/armors. Replace 'requirement' with any of the following below: Weapon and Armor Requiprements: param > x param >= x param === x param <= x param < x - Replace 'param' with 'level', 'maxhp', 'maxmp', 'atk', 'def', 'mat', 'mdf', 'agi', or 'luk'. This will make the piece of equipment require the actor's base parameter to be greater than (>), greater than or equal to (>=), equal to (===), less than or equal to (<=), or less than (<). This is NOT the value for the total parameter, only the base parameter. The base parameter is calculated by the user's class parameter value, any bonuses received by equipment and/or permanent stat increases. class: x class: name - This will make the piece of equipment require the actor to be class x. If 'name' is used, priority will be given to the class with the highest ID in the database. Insert multiple of these requirements to add more classes. Having multiple classes will mean that the actor can be any of those classes to be able to equip the gear. skill: x skill: name - This will make the piece of equipment require the actor to have learned skill x. If 'name' is used, priority will be given to the skill with the highest ID in the database. Insert multiple of these requirements to add more skills. Having multiple skills means the actor must have learned ALL of the skills to be able to equip the gear. *NOTE: The actor needs to have LEARNED the skill. This means that if you have added a skill to the actor's skill library through a trait, it will not count. switch: x - This will require switch X to be on. If it isn't, the piece of equipment cannot be worn. Insert multiple of these to add more switches that are are required to be on. unique only - This will make the piece of equipment to be "unique", rendering the actor to be unable to wear more than 1 of its kind. Equipment Set Bonuses
Weapon and Armor Notetags: <Equip Set: name> This assigns this item to an equipment set. - 'name' is the set name you're going to associate this equip with. If you want to make a piece of equipment be a part of two different equipment sets, use multiple copies of the <Equip Set: name> notetag.
Actor Notetags: <name Set, x Pieces Character: filename, index> This changes the character sprite, aka the map sprite, for this actor. - 'name' is the set name that is associated with this graphic change. - 'x' is to be replaced by a number. This is the minimum required pieces. - 'filename' is the filename of the graphic. IMPORTANT: Case sensitive. - 'index' is to be replaced by a number. This is the index number of the graphic starting from 0 as the first slot. <name Set, x Pieces Face: filename, index> This changes the face art for the actor. - 'name' is the set name that is associated with this graphic change. - 'x' is to be replaced by a number. This is the minimum required pieces. - 'filename' is the filename of the graphic. IMPORTANT: Case sensitive. - 'index' is to be replaced by a number. This is the index number of the graphic starting from 0 as the first slot. <name Set, x Pieces Battler: filename> This changes the sideview battler sprite for this actor. - 'name' is the set name that is associated with this graphic change. - 'x' is to be replaced by a number. This is the minimum required pieces. - 'filename' is the filename of the graphic. IMPORTANT: Case sensitive. To make different sets of graphics per set, add multiples of the above notetags for each actor. This effect may or may not be compatible with other plugins that alter the appearance of your actors. Event Click TriggerTo make an event click triggerable from anywhere on the screen, use either notetags or comment tags to enable them to become clickable. If a notetag is used, then this will apply to the whole event, no matter what page it is. If only comment tags are used, it will only apply to that specific event page. Event Notetag and Comment Tags <Click Trigger> - This will cause the event to be clickable from afar without needing the player to walk all the way up in front of it to trigger it. Event CopierTo decide if an event will copy from a template map, please follow these instructions below and insert the desired notetag into the event's notebox. - - - - - - - - - - - - - - - - - - - - - - - - - - - - - - - - - - - - - - Event Notetags: - - - - - - - - - - - - - - - - - - - - - - - - - - - - - - - - - - - - - - <Copy Event: Map x, Event y> - Replace 'x' with the ID of the map to copy the event from. - Replace 'y' with the ID of the event to copy from that map. - - - <Copy Event: mapId, eventId> - Replace 'mapId' with the ID of the map to copy the event from. - Replace 'eventId' with the ID of the event to copy from that map. - - - <Copy Event: template> - Replace 'template' with a name from the 'Template Names' plugin param. This will require you to have version 1.5.0+ of RPG Maker MV. All of the Map ID and event ID data from the stored template will be used for this event. This notetag will also have the bonus of having custom Lunatic Code unique only to this template name. - - - When an event is copied, all data will be carried over, from the name of the map, to the graphics used, to the pages, their conditions, and all of the event commands. The only things that will NOT be copied over will be the original event's ID, x positon, and y position. Event Encounter AidYou can place these notetags into the notebox at the top of an event's page. These notetags will enable unique effects for event encounters. Event Notetag: <Encounter Lock> <Encounter Direction Lock> - This will cause the event to not immediately face the player when approached making it possible for the game to check the direction each is facing. <Follower Touch> <Follower Trigger> - This will allow the event to trigger if the event touches a follower and not just the main player. Event Hitbox ResizeTo make an event's hitbox larger, use either notetags or comment tags to apply the hitbox enlargement. If a notetag is used, this will apply to the event no matter what the page is. If a comment tag is used, it will overwrite whatever setting the notetags have. Event Notetag and Comment Tags: <Hitbox Up: x> <Hitbox Left: x> <Hitbox Right: x> <Hitbox Down: x> - This will expand the hitbox upward, left, right, or down by x. The value inserted for x will extend the hitbox that direction by that many tiles. If any of these notetags are used, it will make the event immobile, unable to move unless the movement type is set to "Through", allowing it to pass through anything. Event Sprite OffsetTo offset sprites using the event notetags, using the following below: Event Notetags: <Sprite Offset X: +n> <Sprite Offset X: -n> - Replace 'n' with the number of pixels you wish to offset the horizontal position of the sprite by. A positive number moves the sprite to the right. A negative number moves the sprite to the left. <Sprite Offset Y: +n> <Sprite Offset Y: -n> - Replace 'n' with the number of pixels you wish to offset the vertical position of the sprite by. A positive number moves the sprite down. A negative number moves the sprite up. <Sprite Offset: +x, +y> <Sprite Offset: -x, -y> - If you wish to put sprite offset information on one line, use the above comment tag instead. Replace 'x' and 'y' with the values to offset the sprite by. Positive x will move the sprite right. Negative x will move the sprite left. Positive y will move the sprite down. Negative y will move the sprite up. Event Step Animation OptionsTo offset sprites using the event notetags, using the following below: Event Notetags: <Step Animation: Left to Right> - Makes the event sprite's step behavior go from frame 0 to 1 to 2, then back to 0 instead of looping backwards. <Step Animation: Right to Left> - Makes the event sprite's step behavior go from frame 2 to 1 to 0, then back to 2 instead of looping forwards. <Step Animation: Spin Clockwise> <Step Animation: Spin CW> - Makes the event sprite's step behavior spin itself clockwise. <Step Animation: Spin CounterClockwise> <Step Animation: Spin CCW> <Step Animation: Spin AntiClockwise> <Step Animation: Spin ACW> - Makes the event sprite's step behavior spin itself counterclockwise. Extra Enemy Drops
Use the following notetags to determine extra enemy drops. These drops will drop normally without any special conditions other than having to go through and pass a random number generator. Enemy Notetags: <Item x: y%> <Weapon x: y%> <Armor x: y%> Adds item, weapon, or armor ID of x to the enemy's drop pool with a y% chance of dropping the item. Insert multiples of this notetag to add more drop items for the enemy drop pool. <Enemy Drops> Item x: y% Weapon x: y% Armor x: y% </Enemy Drops> Alternatively, using the above notetag format will allow you to group a large number of enemy drops together. Replace x with the item, weapon, or armor ID to give the item a drop rate of y%. <Drop Potion: x%> <Drop Short Sword: x%> <Drop Feather Cap: x%> If you prefer to use names instead, you can use the above format for the notetags. This will make the named item have a drop rate of x%. If you have multiple items in your database with the same name, priority will be given to the item with the highest ID in the order of item, weapons, then armors. Insert multiple multiples of this notetag to add more drop items for the enemy drop pool. <Enemy Drops> Potion: x% Short Sword: x% Feather Cap: x% </Enemy Drops> Alternatively, you can write your notetag like such to group together a list of named items. This will make the named item have a drop rate of x%. If you have multiple items in your database with the same name, priority will be given to the item with the highest ID in the order of item, weapons, then armors. Insert multiple multiples of this notetag to add more drop items for the enemy drop pool.
Sometimes, you want certain conditions to be met before enemies will drop a
specific item. These conditional drops would have a 0% chance otherwise. For
each condition met, you can increase or decrease the drop rate. Use the
below format to create a conditional drop.
Enemy Notetags:
<Conditional Item x Drop>
condition: +y%
condition: -y%
</Conditional Item x Drop>
<Conditional Weapon x Drop>
condition: +y%
condition: -y%
</Conditional Weapon x Drop>
<Conditional Armor x Drop>
condition: +y%
condition: -y%
</Conditional Armor x Drop>
The above notetags will create the conditions for item, weapon, or armor x
to drop. Insert various conditions in between the notetags to produce the
conditional rate increases or decreases of y% for the drop.
<Conditional Named Drop>
condition: +y%
condition: -y%
</Conditional Named Drop>
If you prefer to name your drop, use the above format. If database entries
have matching names, priority will be given to the item with the highest
ID in the order of items, weapons, then armor. Insert various conditions
in between the notetags to produce the conditional rate increases or
decreases for y% for the drop.
The following are various conditions you may use:
=-=-=-=-=-=-=-=-=-=-=-=-=-=-=-=-=-=-=-=-=-=-=-=-=-=-=-=-=-=-=-=-=-=-=-=-=-=-
ALIVE MEMBERS EVAL
- - - - - - - - - - - - - - - - - - - - - - - - - - - - - - - - - - - - - - -
This checks the number of alive party members the player has when the drops
are being calculated and made and runs it against an eval check.
- - - - - - - - - - - - - - - - - - - - - - - - - - - - - - - - - - - - - - -
Example: Alive Members > 1: +20%
Alive Members === 2: +25%
Alive Members <= 3: -30%
=-=-=-=-=-=-=-=-=-=-=-=-=-=-=-=-=-=-=-=-=-=-=-=-=-=-=-=-=-=-=-=-=-=-=-=-=-=-
=-=-=-=-=-=-=-=-=-=-=-=-=-=-=-=-=-=-=-=-=-=-=-=-=-=-=-=-=-=-=-=-=-=-=-=-=-=-
ALWAYS
- - - - - - - - - - - - - - - - - - - - - - - - - - - - - - - - - - - - - - -
This condition will always pass. This can be used as setting a base rate for
the item drop.
- - - - - - - - - - - - - - - - - - - - - - - - - - - - - - - - - - - - - - -
Example: Always: +50%
=-=-=-=-=-=-=-=-=-=-=-=-=-=-=-=-=-=-=-=-=-=-=-=-=-=-=-=-=-=-=-=-=-=-=-=-=-=-
=-=-=-=-=-=-=-=-=-=-=-=-=-=-=-=-=-=-=-=-=-=-=-=-=-=-=-=-=-=-=-=-=-=-=-=-=-=-
item x COUNT EVAL
weapon x COUNT EVAL
armor x COUNT EVAL
named item COUNT EVAL
- - - - - - - - - - - - - - - - - - - - - - - - - - - - - - - - - - - - - - -
This checks the quantity of specific items, weapons, armors, and/or named
items you have. If you choose a named item and multiple database entries
share the name of that named item, priority will be given to the highest ID
in the order of items, weapons, and then armor.
- - - - - - - - - - - - - - - - - - - - - - - - - - - - - - - - - - - - - - -
Example: Item 1 Count > 1: +20%
Weapon 2 Count === 2: +25%
Armor 3 Count <= 3: -30%
Potion Count >= 4: +35%
=-=-=-=-=-=-=-=-=-=-=-=-=-=-=-=-=-=-=-=-=-=-=-=-=-=-=-=-=-=-=-=-=-=-=-=-=-=-
=-=-=-=-=-=-=-=-=-=-=-=-=-=-=-=-=-=-=-=-=-=-=-=-=-=-=-=-=-=-=-=-=-=-=-=-=-=-
DEAD MEMBERS EVAL
- - - - - - - - - - - - - - - - - - - - - - - - - - - - - - - - - - - - - - -
This checks the number of dead party members the player has when the drops
are being calculated and made and runs it against an eval check.
- - - - - - - - - - - - - - - - - - - - - - - - - - - - - - - - - - - - - - -
Example: Dead Members > 1: +20%
Dead Members === 2: +25%
Dead Members <= 3: -30%
=-=-=-=-=-=-=-=-=-=-=-=-=-=-=-=-=-=-=-=-=-=-=-=-=-=-=-=-=-=-=-=-=-=-=-=-=-=-
=-=-=-=-=-=-=-=-=-=-=-=-=-=-=-=-=-=-=-=-=-=-=-=-=-=-=-=-=-=-=-=-=-=-=-=-=-=-
DEATH TURN EVAL
- - - - - - - - - - - - - - - - - - - - - - - - - - - - - - - - - - - - - - -
This will run an eval check to compare the turn number the enemy has died.
This effect requires the Battle Engine Core.
- - - - - - - - - - - - - - - - - - - - - - - - - - - - - - - - - - - - - - -
Example: Death Turn > 5: +10%
Death Turn === 5: +20%
Death Turn <= 4: +30%
=-=-=-=-=-=-=-=-=-=-=-=-=-=-=-=-=-=-=-=-=-=-=-=-=-=-=-=-=-=-=-=-=-=-=-=-=-=-
=-=-=-=-=-=-=-=-=-=-=-=-=-=-=-=-=-=-=-=-=-=-=-=-=-=-=-=-=-=-=-=-=-=-=-=-=-=-
ENEMY LEVEL EVAL
- - - - - - - - - - - - - - - - - - - - - - - - - - - - - - - - - - - - - - -
This will run an eval check to compare the enemy's level. This effect
requires the YEP Enemy Levels plugin.
- - - - - - - - - - - - - - - - - - - - - - - - - - - - - - - - - - - - - - -
Example: Enemy Level === 10: +30%
Enemy Level <= 5: -20%
Enemy Level >= 15: +10%
=-=-=-=-=-=-=-=-=-=-=-=-=-=-=-=-=-=-=-=-=-=-=-=-=-=-=-=-=-=-=-=-=-=-=-=-=-=-
=-=-=-=-=-=-=-=-=-=-=-=-=-=-=-=-=-=-=-=-=-=-=-=-=-=-=-=-=-=-=-=-=-=-=-=-=-=-
EVAL code
- - - - - - - - - - - - - - - - - - - - - - - - - - - - - - - - - - - - - - -
This will run an eval check for the code you've inserted. If it returns true
then the condition is met.
- - - - - - - - - - - - - - - - - - - - - - - - - - - - - - - - - - - - - - -
Example: Eval user.name() === 'Bat A': +30%
=-=-=-=-=-=-=-=-=-=-=-=-=-=-=-=-=-=-=-=-=-=-=-=-=-=-=-=-=-=-=-=-=-=-=-=-=-=-
=-=-=-=-=-=-=-=-=-=-=-=-=-=-=-=-=-=-=-=-=-=-=-=-=-=-=-=-=-=-=-=-=-=-=-=-=-=-
LAST STRIKE SKILL X
LAST STRIKE ITEM X
LAST STRIKE named
- - - - - - - - - - - - - - - - - - - - - - - - - - - - - - - - - - - - - - -
This checks to see if the last strike on the enemy is item x, skill x, or a
named action. If a named action is used and multiple database entries share
the name of the action, priority will be given to the highest ID in the
order of skills then items.
- - - - - - - - - - - - - - - - - - - - - - - - - - - - - - - - - - - - - - -
Example: Last Strike Skill 40: +20%
Last Strike Item 50: -30%
Last Strike Firaga: +40%
Last Strike Ice Bomb: -50%
=-=-=-=-=-=-=-=-=-=-=-=-=-=-=-=-=-=-=-=-=-=-=-=-=-=-=-=-=-=-=-=-=-=-=-=-=-=-
=-=-=-=-=-=-=-=-=-=-=-=-=-=-=-=-=-=-=-=-=-=-=-=-=-=-=-=-=-=-=-=-=-=-=-=-=-=-
PARTY MEMBERS EVAL
- - - - - - - - - - - - - - - - - - - - - - - - - - - - - - - - - - - - - - -
This checks the number of party members (dead or alive) the player has when
the drops are being calculated and made and runs it against an eval check.
- - - - - - - - - - - - - - - - - - - - - - - - - - - - - - - - - - - - - - -
Example: Party Members > 1: +20%
Party Members === 2: +25%
Party Members <= 3: -30%
=-=-=-=-=-=-=-=-=-=-=-=-=-=-=-=-=-=-=-=-=-=-=-=-=-=-=-=-=-=-=-=-=-=-=-=-=-=-
=-=-=-=-=-=-=-=-=-=-=-=-=-=-=-=-=-=-=-=-=-=-=-=-=-=-=-=-=-=-=-=-=-=-=-=-=-=-
RANDOM X%
- - - - - - - - - - - - - - - - - - - - - - - - - - - - - - - - - - - - - - -
This condition has a random x% chance to pass.
- - - - - - - - - - - - - - - - - - - - - - - - - - - - - - - - - - - - - - -
Example: Random 20%: +40%
Random 30%: -60%
=-=-=-=-=-=-=-=-=-=-=-=-=-=-=-=-=-=-=-=-=-=-=-=-=-=-=-=-=-=-=-=-=-=-=-=-=-=-
=-=-=-=-=-=-=-=-=-=-=-=-=-=-=-=-=-=-=-=-=-=-=-=-=-=-=-=-=-=-=-=-=-=-=-=-=-=-
TIMES ELEMENT X STRUCK EVAL
- - - - - - - - - - - - - - - - - - - - - - - - - - - - - - - - - - - - - - -
This compares the number of times the enemy has been struck by element x.
You can also replace x with the name of the item.
- - - - - - - - - - - - - - - - - - - - - - - - - - - - - - - - - - - - - - -
Example: Times Element Fire Struck > 6: +10%
Times Element 3 Struck === 5: -10%
Times Element Thunder <= 4: +20%
=-=-=-=-=-=-=-=-=-=-=-=-=-=-=-=-=-=-=-=-=-=-=-=-=-=-=-=-=-=-=-=-=-=-=-=-=-=-
=-=-=-=-=-=-=-=-=-=-=-=-=-=-=-=-=-=-=-=-=-=-=-=-=-=-=-=-=-=-=-=-=-=-=-=-=-=-
TIMES ITEM X STRUCK EVAL
- - - - - - - - - - - - - - - - - - - - - - - - - - - - - - - - - - - - - - -
This compares the number of times the enemy has been struck by item x. You
can also replace x with the name of the item.
- - - - - - - - - - - - - - - - - - - - - - - - - - - - - - - - - - - - - - -
Example: Times Item Bomb Struck > 6: +10%
Times Item 42 Struck === 5: -10%
Times Item Uni Struck <= 4: +20%
=-=-=-=-=-=-=-=-=-=-=-=-=-=-=-=-=-=-=-=-=-=-=-=-=-=-=-=-=-=-=-=-=-=-=-=-=-=-
=-=-=-=-=-=-=-=-=-=-=-=-=-=-=-=-=-=-=-=-=-=-=-=-=-=-=-=-=-=-=-=-=-=-=-=-=-=-
TIMES SKILL X STRUCK EVAL
- - - - - - - - - - - - - - - - - - - - - - - - - - - - - - - - - - - - - - -
This compares the number of times the enemy has been struck by skill x. You
can also replace x with the name of the skill.
- - - - - - - - - - - - - - - - - - - - - - - - - - - - - - - - - - - - - - -
Example: Times Skill Firaga Struck > 6: +10%
Times Skill 40 Struck === 5: -10%
Times Skill Thundaga Struck <= 4: +20%
=-=-=-=-=-=-=-=-=-=-=-=-=-=-=-=-=-=-=-=-=-=-=-=-=-=-=-=-=-=-=-=-=-=-=-=-=-=-
=-=-=-=-=-=-=-=-=-=-=-=-=-=-=-=-=-=-=-=-=-=-=-=-=-=-=-=-=-=-=-=-=-=-=-=-=-=-
TIMES STATE X STRUCK EVAL
- - - - - - - - - - - - - - - - - - - - - - - - - - - - - - - - - - - - - - -
This compares the number of times the enemy has been struck by state x.
You can also replace x with the name of the state.
- - - - - - - - - - - - - - - - - - - - - - - - - - - - - - - - - - - - - - -
Example: Times State 4 Struck > 6: +10%
Times State Blind Struck === 5: -10%
Times State Silence Struck <= 4: +20%
=-=-=-=-=-=-=-=-=-=-=-=-=-=-=-=-=-=-=-=-=-=-=-=-=-=-=-=-=-=-=-=-=-=-=-=-=-=-
=-=-=-=-=-=-=-=-=-=-=-=-=-=-=-=-=-=-=-=-=-=-=-=-=-=-=-=-=-=-=-=-=-=-=-=-=-=-
TIMES STYPE X STRUCK EVAL
- - - - - - - - - - - - - - - - - - - - - - - - - - - - - - - - - - - - - - -
This compares the number of times the enemy has been struck by skill type x.
You can also replace x with the name of the skill type.
- - - - - - - - - - - - - - - - - - - - - - - - - - - - - - - - - - - - - - -
Example: Times SType 1 Struck > 6: +10%
Times SType Magic Struck === 5: -10%
Times SType Special Struck <= 4: +20%
=-=-=-=-=-=-=-=-=-=-=-=-=-=-=-=-=-=-=-=-=-=-=-=-=-=-=-=-=-=-=-=-=-=-=-=-=-=-
=-=-=-=-=-=-=-=-=-=-=-=-=-=-=-=-=-=-=-=-=-=-=-=-=-=-=-=-=-=-=-=-=-=-=-=-=-=-
SWITCH X ON
SWITCH X OFF
- - - - - - - - - - - - - - - - - - - - - - - - - - - - - - - - - - - - - - -
Replace X with a switch ID. If switch X is ON or OFF, the condition is met.
- - - - - - - - - - - - - - - - - - - - - - - - - - - - - - - - - - - - - - -
Example: Switch 5 ON: +10%
Switch 6 OFF: -10%
=-=-=-=-=-=-=-=-=-=-=-=-=-=-=-=-=-=-=-=-=-=-=-=-=-=-=-=-=-=-=-=-=-=-=-=-=-=-
=-=-=-=-=-=-=-=-=-=-=-=-=-=-=-=-=-=-=-=-=-=-=-=-=-=-=-=-=-=-=-=-=-=-=-=-=-=-
TURN EVAL
- - - - - - - - - - - - - - - - - - - - - - - - - - - - - - - - - - - - - - -
This will run an eval check to compare the number of turns the battle has
gone on for until the time the drops have been made.
- - - - - - - - - - - - - - - - - - - - - - - - - - - - - - - - - - - - - - -
Example: Turn > 5: +10%
Turn === 5: +20%
Turn <= 4: +30%
=-=-=-=-=-=-=-=-=-=-=-=-=-=-=-=-=-=-=-=-=-=-=-=-=-=-=-=-=-=-=-=-=-=-=-=-=-=-
=-=-=-=-=-=-=-=-=-=-=-=-=-=-=-=-=-=-=-=-=-=-=-=-=-=-=-=-=-=-=-=-=-=-=-=-=-=-
VARIABLE X EVAL
- - - - - - - - - - - - - - - - - - - - - - - - - - - - - - - - - - - - - - -
Replace X with a variable ID. This will run an eval check to compare the
variable's value to see if it meets the conditions.
- - - - - - - - - - - - - - - - - - - - - - - - - - - - - - - - - - - - - - -
Example: Variable 5 > 10: +20%
Variable 6 === 11: +25%
Variable 7 <= 12: -30%
=-=-=-=-=-=-=-=-=-=-=-=-=-=-=-=-=-=-=-=-=-=-=-=-=-=-=-=-=-=-=-=-=-=-=-=-=-=-
Extra Parameter FormulaYou can use the following notetags to alter the various aspects that modify the extra parameter values: Actor, Class, Enemy, Weapon, Armor, and State Notetags: <stat Plus: +x%> <stat Plus: -x%> <stat Plus: +x.y> <stat Plus: -x.y> Replace 'stat' with 'hit', 'eva', 'cri', 'cev', 'mev', 'mrf', 'cnt', 'hrg', 'mrg', or 'trg'. This is the value added to the base parameter before the rate and flat values contribute to the total parameter value assuming the plugin's default formula is utilized. <stat Rate: x%> <stat Rate: x.y> Replace 'stat' with 'hit', 'eva', 'cri', 'cev', 'mev', 'mrf', 'cnt', 'hrg', 'mrg', or 'trg'. This is the value multipled to the sum of the base and plus values of the parameter before added by the flat value assuming the plugin's default formula is utilized. <stat Flat: +x%> <stat Flat: -x%> <stat Flat: +x.y> <stat Flat: -x.y> Replace 'stat' with 'hit', 'eva', 'cri', 'cev', 'mev', 'mrf', 'cnt', 'hrg', 'mrg', or 'trg'. This is the value added finally to the sum of the base and plus values after being multiplied by the rate value assuming the plugin's default formula is utilized. Floor DamageInsert the following notetags into the noteboxes for your tilesets: Tileset Notetag: <Floor Damage x: y> - 'x' is the terrain tag to mark the tileset with. By default, terrain tags are set to 0. They will go up as high as 7. 'y' will be the amount of damage dealt to each actor in the party. For example, <Floor Damage 2: 50> will cause all damage tiles marked with terrain tag 2 to deal 50 damage. * Note: You will still need to mark the tile itself as a damage tile in the database editor. <Floor Flash x: r, g, b, o> - 'x' is the terrain tag to mark the tileset with. Replace 'r', 'g', 'b', and 'o' with values between 0-255 to indicate the red, green, blue, and opacity values respectively. This will make the screen flash this color combination when the player takes damage from this tile. * Note: You will still need to mark the tile itself as a damage tile in the database editor. Footstep SoundsInsert the following notetags to add footsteps to your maps. Event Notetag: <No Footsteps> - Insert this into the notebox of any event you wish to not make any footsteps when moving. Tileset Notetags: <Terrain Tag x Footstep Sound: filename> <Terrain Tag x Footstep Sound: filename, volume> <Terrain Tag x Footstep Sound: filename, volume, pitch> - Replace 'x' with the terrain tag ID (from 1 to 7). If 0 is used, it will be ignored. When inserting the filename, the filename must be case sensitive and must not include the extension. The 'volume' and 'pitch' variables must be integar values between 0 and 100 if they are used. Examples: <Terrain Tag 1 Footstep Sound: Move1> <Terrain Tag 2 Footstep Sound: Move2, 80> <Terrain Tag 3 Footstep Sound: Move3, 75, 150> In the above examples, the tiles marked by terrain tags 1, 2, or 3 will play their respective sound effect when stepped on by the player or an event that can trigger footsteps. Map Notetags: <Region x Footstep Sound: filename> <Region x Footstep Sound: filename, volume> <Region x Footstep Sound: filename, volume, pitch> - Replace 'x' with the region tag ID (from 1 to 255). If 0 is used, it will become the default footstep sound. When inserting the filename, the filename must be case sensitive and must not include the extension. The 'volume' and 'pitch' variables must be integar values between 0 and 100 if they are used. Examples: <Region 10 Footstep Sound: Move1> <Region 20 Footstep Sound: Move2, 80> <Region 30 Footstep Sound: Move3, 75, 150> In the above examples, the tiles marked by regions 10, 20, or 30 will play their respective sound effect when stepped on by the player or an event that can trigger footsteps. Hit Damage SoundsInsert the following notetags into the armors and/or enemy noteboxes to make them play different sounds when getting struck. Armor and Enemy Notetags <Hit Damage Sound: filename> <Hit Damage Sound: filename, volume> <Hit Damage Sound: filename, volume, pitch> <Hit Damage Sound: filename, volume, pitch, pan> - Makes the piece of armor or enemy play 'filename' when struck. When inserting the filename, the filename must be case sensitive and must not include the extension. The 'volume' and 'pitch' variables must be integar values between 0 and 100 if they are used. The 'pan' variable can be an integar value between -100 and 100 if it is used. Examples: <Hit Damage Sound: Fire1> <Hit Damage Sound: Fire2, 80> <Hit Damage Sound: Fire3, 80, 130, 20> In the above examples, the armor piece or enemy will play the Fire sound effects when struck. This will override the default settings. Icons on EventsThe easiest way to attach icons to events would be to use notetags and/or comment tags. Using notetags will make the icon always attached to the event while using comment tags will make the icon attached to the event only if the page containing the comment tag is active. <Icon on Event: n> - Replace 'n' with the icon you wish to attach to the event. <Icon on Event Buffer X: +x> <Icon on Event Buffer X: -x> - Replace 'x' with the buffer amount for X. For X, a negative number moves it left and a positive one moves it right. <Icon on Event Buffer Y: +y> <Icon on Event Buffer Y: -y> - Replace 'y' with the buffer amount for Y. For Y, a negative number moves it up and a positive one moves it down. <Icon on Event Buffer: +x, +y> <Icon on Event Buffer: -x, -y> - Replace 'x' and 'y' with the respective buffer values you wish to apply. For X, a negative number moves it left and a positive one moves it right. For Y, a negative number moves it up and a positive one moves it down. Keep in mind these notetags and comment tags only work for events. They do not work on the player character. If you wish to apply icons to the player character, you'd have to use one of the methods below. Instant CastThe following are some notetags you can use to apply Instant Cast properties to your actions. Skill and Item Notetags: <Instant> <Instant Cast> Both notetags work the same. This causes this action when selected as the first action for an actor to be instantly cast. When used by an enemy, this will cause the enemy to have a follow up action without consuming the enemy's turn. Actor, Class, Enemy, Weapon, Armor, and State Notetags: <Instant Skill: x> <Instant Skill: x, x, x> <Instant Skill: x to y> This makes skill(s) x into having instant cast properties for the actor, class, enemy, or whenever the weapon or armor is equipped, or whenever the state is applied. If using 'x to y', it will be applied to all the skills from x to y. <Instant Item: x> <Instant Item: x, x, x> <Instant Item: x to y> This makes item(s) x into having instant cast properties for the actor, class, enemy, or whenever the weapon or armor is equipped, or whenever the state is applied. If using 'x to y', it will be applied to all the items from x to y. <Cancel Instant Skill: x> <Cancel Instant Skill: x, x, x> <Cancel Instant Skill: x to y> This makes skill(s) x unable to be instantly cast. This will take priority over all other properties that may influence instant casting if the actor, class, enemy, equipment, or states possess this notetag. If using 'x to y' then it will be applied to all skills from x to y. <Cancel Instant Item: x> <Cancel Instant Item: x, x, x> <Cancel Instant item: x to y> This makes item(s) x unable to be instantly cast. This will take priority over all other properties that may influence instant casting if the actor, class, enemy, equipment, or states possess this notetag. If using 'x to y' then it will be applied to all items from x to y. Item Concoctions
Actor, Class, Weapon, Armor, State Notetags <Item Concoct> If an actor is affected by this notetag either directly or indirectly through related traits, the actor can use the Concoct command in battle. State Notetag <Item Concoct Seal> If an actor is affected by a state with this notetag, the actor's Concoct command will be disabled. Item Notetags <Item Concoct> list list list list </Item Concoct> Makes the item with the notetag a primary component for item concoctions. Insert multiple 'list' items to make it combinable with more items. 'list' can be formatted in any of these four ways: Item x: Item x Item x: name name: name name: Item x If you are using Item x, replace x with the ID of the item you wish to refer to. If you are using a name version, replace name with the full name of the item (it is case sensitive). The first item on the list before the : is the secondary component for item concoctions. The second item on the list after the : is the item effect that will occur when the first and second components are combined. The effects of the first and second items are unrelated to the combined item effect. Here is an example of how an Item Concoction notetag and list could look: <Item Concoct> Item 51: Item 61 Item 52: Item 62 Item 53: Lucid Mist Item 54: Healing Mist Plum Essence: Inspiriting Mist Tomato Essence: Boosting Mist Onion Bloom: Item 67 Curious Bloom: Item 68 </Item Concoct> Concoctions will be composed of a primary component, secondary component, and a resulting effect. In this case, the primary component is the item with the notetag. The secondary component can be any of the items before the : in the list. The resulting effect is the item after the : next to the secondary component selected on the list. Item CoreIf you are using independent items, items that aren't gained through the shop can have a random variance applied to its stats. Item, Weapon, Armor Notetag <Random Variance: x> If this item is acquired through non-shop means, it will have random stats offset by x amount in either a positive or negative value. <Not Independent Item> Sets an item that is independent by default to become a nonindependent item, allowing it to stack and making it unable to be affected by independent item modifiers. <Priority Name> This sets the item, weapon, or armor's priority name to its database entry so that name schemes cannot affect the item. <Text Color: x> This sets the text color of this item, weapon, or armor to use text color x from the window skin. Attachable AugmentsYou can use the following notetags to setup how augments work in your game and affect your equipment. Weapon and Armor Notetags: <Augment Slots> Rune Glyph Orb Mark </Augment Slots> This allows you to set what kind of augments are used for the item. The names used for the augment slots are the augment types used for that item. <No Augment Slots> This makes the item have no augment slots. Item, Weapon, Armor Notetags <Augment: type> augment effect augment effect </Augment: type> This will change the item into a non-Independent item. This item can be used to augment equipment that contain the appropriate augment 'type'. This particular notetag will decide the augment effect for attaching the augment component and the reverse effect for detaching the component. Insert multiple sets of these notetags to allow different augment effects when used on different augment slot types. <Augment Attach: type> augment effect augment effect </Augment Attach: type> This will change the item into a non-Independent item. This item can be used to augment equipment that contain the appropriate augment 'type'. This notetag will decide only the augment effects that are applied when the augment component is attached to the equipment and not when detached. Insert multiple sets of these notetags to allow different augment effects when used on different augment slot types. <Augment Detach: type> augment effect augment effect </Augment Detach: type> This will change the item into a non-Independent item. This item can be used to augment equipment that contain the appropriate augment 'type'. This notetag will decide only the augment effects that are applied when the augment component is detached from the equipment and not attached. Insert multiple sets of these notetags to allow different augment effects when used on different augment slot types.
The following is a list of effects you can use for the <Augment: type>, <Augment Attach: type>, <Augment Detatch: type> notetags to have it apply the desired effects to the upgraded item. --- Effects --- Param: +x Param: -x - Replace 'Param' with 'MaxHP', 'MaxMP', 'ATK', 'DEF', 'MAT', 'MDF', 'AGI', or 'LUK'. This will increase/decrease the parameter for the item by x. --- Param: +x% Param: -x% - Replace 'Param' with 'MaxHP', 'MaxMP', 'ATK', 'DEF', 'MAT', 'MDF', 'AGI', 'LUK', 'HIT', 'EVA', 'CRI', 'CEV', 'MEV', 'MRF', 'CNT', 'HRG', 'MRG', 'TRG', 'TGR', 'GRD', 'REC', 'PHA', 'MCR', 'TCR', 'PDR', 'MDR', 'FDR', or 'EXR'. This will increase/decrease the rate for that parameter for the item by x%. Refer to the Base Parameter Control, Extra Parameter Formula, and Special Parameter Formula plugins for more information regarding these stats. --- Boost: +x Boost: -x - This will increase or decrease the boost count of the item by x. --- Price: +x Price: -x - This will increase or decrease the price of the item by x. --- Cannot Detach - This makes the augment unable to be detached once applied. --- Add Attack Element: x Remove Attack Element: x - Add/Remove Attack Element 'x' to item. You can use either the name or the ID of the element. If the name is used and you have multiple elements in your database with the same name, priority will be given to the element with the highest ID. --- Add Attack State: x Add Attack State: x, y% Remove Attack State: x Remove Attack State: x, y% - Add/Remove Attack State 'x' to item. You can use either the name of the ID of the state. If the name is used and you have multiple states in your database with the same name, priority will be given to the state with the highest ID. If 'y' is used, then the success rate of landing the state will be y%. If 'y' is not used, the success rate of landing the state is 100%. --- Add Debuff Rate: param, x% Add Debuff Rate: param, +x% Add Debuff Rate: param, -x% Remove Debuff Rate: param, x% Remove Debuff Rate: param, +x% Remove Debuff Rate: param, -x% - Replace 'param' with 'MaxHP', 'MaxMP', 'ATK', 'DEF', 'MAT', 'MDF', 'AGI', or LUK. Add/remove the debuff affliction rate of the parameter for the item to 'x%' rate. --- Add Element Rate: x, y% Add Element Rate: x, +y% Add Element Rate: x, -y% Remove Element Rate: x, y% Remove Element Rate: x, +y% Remove Element Rate: x, -y% - Add/Remove element rate 'x' to item. You can use either the name or the ID of the element. If the name is used and you have multiple elements in your database with the same name, priority will be given to the element with the highest ID. The item's element rate for 'x' will be 'y%' rate. --- Add Passive State: x Remove Passive State: x - Requires YEP_AutoPassiveStates.js installed. Add/Remove passive state 'x' to item. You can use either the name or the ID of the state. If the name is used and you have multiple states in your database with the same name, priority will be given to the state with the highest ID. --- Add Skill: x Remove Skill: x - Add/Remove skill 'x' to item. You can use either the name or the ID of the skill. If the name is used and you have multiple skills in your database with the same name, priority will be given to the skill with the highest ID. This will make the skill temporarily usable by the actor as long as the item is equipped with the augment on it. --- Add Skill Type: x Add SType: x Remove Skill Type: x Remove SType: x - Add/Remove skill type 'x' to item. You can use either the name or the ID of the skill type. If the name is used and you have multiple skills in your database with the same name, priority will be given to the skill type with the highest ID. This will make the skill type temporarily usable by the actor as long as the item is equipped with the augment on it. --- Add State Rate: x, y% Add State Rate: x, +y% Add State Rate: x, -y% Remove State Rate: x, y% Remove State Rate: x, +y% Remove State Rate: x, -y% - Add/Remove state rate for state 'x' to item. You can use either the name or the ID of the state. If the name is used and you have multiple states in your database with the same name, priority will be given to the state with the highest ID. The item's state rate for 'x' will be 'y%' rate. --- Add State Resist: x Remove State Resist: x - Add/Remove state resist for state 'x' to item. You can use either the name or the ID of the state. If the name is used and you have multiple states in your database with the same name, priority will be given to the state with the highest ID. --- Change Base Name: x Cancel Base Name: x - Changes/Cancels the base name of the item to 'x' while the augment is on the item. If an item has multiple augments that alter the base name, then priority is given to the first augment that alters the base name. --- Change Icon: x Cancel Icon: x - Changes/cancels the icon of the item to 'x' while the augment is on the item. If an item has multiple augments that alter the icon, then priority is given to the first augment that alters the icon. --- Change Picture Hue: x Cancel Picture Hue: x - Changes/cancels the picture hue used for the item to 'x' while the augment is on the item. If an item has multiple augments that alter the picture hue, then priority is given to the first augment that alters the picture hue. This requires the plugin: Item Picture Images. --- Change Picture Image: x Cancel Picture Image: x - Changes/cancels the picture image used for the item to 'x' while the augment is on the item. If an item has multiple augments that alter the picture image, then priority is given to the first augment that alters the picture image. This requires the plugin: Item Picture Images. --- Change Prefix: x Cancel Prefix: x - Changes/Cancels the prefix of the item to 'x' while the augment is on the item. If an item has multiple augments that alter the prefix, then priority is given to the first augment that alters the priority. --- Change Priority Name: x Cancel Priority Name: x - Changes/Cancels the priority name of the item to 'x' while the augment is on the item. If an item has multiple augments that alter the priority name, then priority is given to the first augment that alters the priority name. --- Change Suffix: x Cancel Suffix: x - Changes/Cancels the suffix of the item to 'x' while the augment is on the item. If an item has multiple augments that alter the suffix, then priority is given to the first augment that alters the suffix. --- Change Text Color: x Cancel Text Color: x - Changes/Cancels the text color used for the item to 'x' while the augment is on the item. If an item has multiple augments that alter the text color, then priority is given to the first augment that alters text color. Item DisassembleMaking items be disassemble-able can be done with these notetags: Item, Weapon, and Armor Notetags: <Disassemble Pool> item item </Disassemble Pool> This is the pool of items that will be given when using any disassemblers. Replace the 'item' in the notetag setup with one of the syntax in the notetag Item Pool Format list below. <Disassemble Pool: type> item item </Disassemble Pool: type> This is the pool of items made specifically for the disassembler type. The items listed in this pool will only drop if the disassembler's type matches this pool's type. Replace the 'item' in the notetag setup with one of the syntax in the notetag Item Pool Format list below. --- Item Pool Format --- item x weapon x armor x name - This adds item, weapon, or armor ID x to the disassemble pool. If you plan on using the item's name and multiple objects in the database have the same name, priority will be given to items, weapons, then armors in that order. Then, priority is then given to the entry with the highest ID. item x: y% weapon x: y% armor x: y% name: y% - If you wish for a chance of getting an item when disassembling instead of a 100% chance of getting it, you can use this format. For the item, there will be a y% chance of getting the item when disassembling. x2 item y x3 weapon y x4 armor y x5 name - When disassembling, items can yield quantities. You can set the amount of an item given when disassembling using this setup. x2-3 item y x3-5 weapon y x5-8 armor y x8-10 name - If you wish for there to be random quantity amounts, you can use this disassembling format to set the amount of quantity given of an item from a minimum amount to a maximum amount. x2 item y: z% x3 weapon y: z% x4 armor y: z% x5 name: z% - To make an item yield a larger quantity than 1 with a random success rate of doing it, use the above format for the item line. x2-3 item y: z% x3-5 weapon y: z% x5-8 armor y: z% x8-10 name: z% - To give a random amount of item quantities while having a random success rate of acquiring them item during a disassembling process, use the above item line format. --- *NOTE: When turning an item into a Disassembler, it will become a non-Independent item. <Disassembler> - This item can be used to disassemble all types of items. This will fall under the 'All' category. <Disassembler: +x%> <Disassembler: -x%> - This item can be used to disassemble all types of items with a +/- x% success rate than normal. This will fall under the 'All' category. <Disassembler: type> - This item can be used to disassemble item categories for 'All' and 'type' where 'type' is the disassemble pool type. Insert multiples of this notetag if you want this item to be able to disassemble more pool types. <Disassembler: type +x%> <Disassembler: type -x%> - This item can be used to disassemble item categories for 'All' and 'type' where 'type' is the disassemble pool type. This has a success rate change of +/-% than normal. Insert multiples of this notetag if you want this item to be able to disassemble more pool types. <Disassemble Sound Name: filename> <Disassemble Sound Volume: x> <Disassemble Sound Pitch: x> <Disassemble Sound Pan: +x> or <Disassemble Sound Pan: -x> - When this item is disassembled, it will play this sound effect. The filename is case sensitive. Do not include the filename extension. Item DiscardThere are a couple of notetags you can use with the Item Discard plugin. They exist to allow you to offset the Default Discard option in the plugin's parameter settings. Item, Weapon, and Armor Notetags: <Can Discard> - This will set the item, weapon, or armor to be discardable regardless of the Default Discard plugin parameter. <Cannot Discard> - This will set the item, weapon, or armor unable to be discarded regardless of the Default Discard plugin parameter. Item DurabilityThe following notetags can be used to adjust item durability for equipment. Weapon and Armor Notetags: <Durability: x> This sets the item's default durability value to x. This is the starting durability value for the item. If this notetag isn't used, the independent equipment will refer to the value in the plugin parameters. <Durability Variance: x> This alters the starting durability value with a variance of x. This means there can be a variance of -x to +x for the durability starting value. <Durability Maximum: x> This is the maximum durability value the independent equipment can have. When repairing durability, the item's durability value cannot exceed this amount. This amount is dependent on the base item's durability value. <Bypass Durability> <Unbreakable> This sets the item to not have bypass the durability system and making the independent item unbreakable. <Break Sound Name: filename> <Break Sound Volume: x> <Break Sound Pitch: x> <Break Sound Pan: +x> <Break Sound Pan: -x> This changes the sound effect played when using this piece of equipment is broken in battle. Filenames are case sensitive and do not include the file extension into the filename. Item, Weapon, Armor Notetags: <Repair Durability: x> This will repair any weapon or armor's durability by x. The repair effect is accessed from the weapon or armor's action menu. <Repair Weapon: x> <Repair Armor: x> This will specifically repair only weapons or armors by x amount. The repair effect is accessed from the weapon or armor's action menu. <Repair WType x: y> <Repair AType x: y> This will specifically repair only weapon-type x or armor-type x by y amount. The repair is accessed from the weapon or armor's action menu. <Repair Sound Name: filename> <Repair Sound Volume: x> <Repair Sound Pitch: x> <Repair Sound Pan: +x> <Repair Sound Pan: -x> This changes the sound effect played when using this item to repair the durability of another item. <Unbreakable Durability> Removes the equipment's durability and makes it unbreakable. <Unbreakable Weapon> <Unbreakable Armor> Removes the weapon or armor's durability and makes it unbreakable. <Unbreakable WType x> <Unbreakable AType x> Removes durability for specifically weapon-type x or armor-type x and makes it unbreakable. Filenames are case sensitive and do not include the file extension into the filename. Skill and Item Notetags: <User Weapon Durability: +x> <User Weapon Durability: -x> Each hit of this skill/item will cause all of the user's weapon(s) durability to be altered by +x or -x. If it reaches 0 or lower, the weapon will break. <User All Weapon Durability: +x> <User All Weapon Durability: -x> Each hit of this skill/item will cause all of the user's weapon(s) durability to be altered by +x or -x. If it reaches 0 or lower, the weapon will break. <User Random Weapon Durability: +x> <User Random Weapon Durability: -x> Each hit of this skill/item will cause a random weapon equipped by the user to have its durability altered by +x or -x. If it reaches 0 or lower, the weapon will break. <User Armor Durability: +x> <User Armor Durability: -x> Each hit of this skill/item will cause the user's armor(s) durability to be altered by +x or -x. Depending on the 'Damage All' plugin parameter, this will affect either all armors or affect a random armor piece. If the item reaches 0 or lower, the armor will break. <User All Armor Durability: +x> <User All Armor Durability: -x> Each hit of this skill/item will cause all of the user's armor(s) durability to be altered by +x or -x. If it reaches 0 or lower, the armor will break. <User Random Armor Durability: +x> <User Random Armor Durability: -x> Each hit of this skill/item will cause a random armor equipped by the user to have its durability altered by +x or -x. If it reaches 0 or lower, the armor will break. <Target Weapon Durability: +x> <Target Weapon Durability: -x> Each hit of this skill/item will cause all of the target's weapon(s) durability to be altered by +x or -x. If it reaches 0 or lower, the weapon will break. <Target All Weapon Durability: +x> <Target All Weapon Durability: -x> Each hit of this skill/item will cause all of the target's weapon(s) durability to be altered by +x or -x. If it reaches 0 or lower, the weapon will break. <Target Random Weapon Durability: +x> <Target Random Weapon Durability: -x> Each hit of this skill/item will cause a random weapon equipped by the target to have its durability altered by +x or -x. If it reaches 0 or lower, the weapon will break. <Target Armor Durability: +x> <Target Armor Durability: -x> Each hit of this skill/item will cause the target's armor(s) durability to be altered by +x or -x. Depending on the 'Damage All' plugin parameter, this will affect either all armors or affect a random armor piece. If the item reaches 0 or lower, the armor will break. <Target All Armor Durability: +x> <Target All Armor Durability: -x> Each hit of this skill/item will cause all of the target's armor(s) durability to be altered by +x or -x. If it reaches 0 or lower, the armor will break. <Target Random Armor Durability: +x> <Target Random Armor Durability: -x> Each hit of this skill/item will cause a random armor equipped by the target to have its durability altered by +x or -x. If it reaches 0 or lower, the armor will break. Item Menu CategoriesTo add custom categories to items, use the following notetag:
- - - - - - - - - - - - - - - - - - - - - - - - - - - - - - - - - - - - - -
Item, Weapon, and Armor Notetags:
<Menu Category: x>
<Menu Category: x, x, x>
- Replace 'x' with the category name you wish to give the item. Insert
multiples of this tag to insert more categories. These categories will be
used in combination with the Category:x plugin parameter syntax keyword.
For Example:
<Menu Category: Herbs>
Would require this syntax keyword in the plugin parameters:
Category:Herbs
If you use the version of the notetag with multiple categories, it would
work something like this:
<Menu Category: Herbs, Potions, Elixirs>
Plugin Parameter:
Category:Herbs, Category:Potions, Category:Elixirs
**Note** The notetag does not apply for any of the pre-made categories.
- - - - - - - - - - - - - - - - - - - - - - - - - - - - - - - - - - - - - -
Item Picture ImagesInsert the following notetags into your items, weapons, and/or armors to give them unique images in the item menu. Item, Weapon, and Armor Notetags: <Picture: filename> - This will set the item to use 'filename' image from the 'Pictures' folder in your game's project folder. For the 'filename', do not include the file extension. If you are using an image named 'Potion.png', simply replace the filename in the notetag with 'Potion'. Everything is case sensitive. This notetag will default the hue to 0. <Picture Image: filename> - This will set the item to use 'filename' image from the 'Pictures' folder in your game's project folder. For the 'filename', do not include the file extension. If you are using an image named 'Potion.png', simply replace the filename in the notetag with 'Potion'. Everything is case sensitive. This notetag will not alter the hue. <Picture Hue: x> - This will set the item's picture image to use hue x. Altering the hue will adjust the color hue for the picture image used. Use a value between 0 and 360 for the hue. Item RenameThere are a couple of notetags you can use with the Item Rename plugin. They exist to allow you to offset the Default Rename option in the plugin's parameter settings. Item, Weapon, and Armor Notetags: <Can Rename> - This will set the item, weapon, or armor to be renameable regardless of the Default Rename plugin parameter. <Cannot Rename> - This will set the item, weapon, or armor unable to be renameable regardless of the Default Rename plugin parameter. Item RequirementsUse the following notetags to enforce requirements for items before they can be used. Item Notetags: <Enable Requirements> condition condition </Enable Requirements> - Replace 'condition' with the desired condition setup. You can insert any number of conditions inside the notetags. All of the conditions must be met before the item can be used. Look below for a list of the possible conditions that can be used. --- Conditions: --- Eval: code - Replace 'code' with JavaScript code that you'd like to run a check against to enable the item. If the check returns false, the item will be disabled regardless of other conditions. Examples: Eval: $gameActors.actor(1).name() === 'Harold' Eval: $gameActors.leader().name() !== 'Ralph' --- Actor: x Actor: x, x, x - Requires actor(s) ID 'x' to use the item. If the actor isn't the one using the said item, then the item is disabled and cannot be used regardless of other conditions. Not Actor: x Not Actor: x, x, x - Requires the actor using the item to NOT be actor ID 'x'. If the actor's ID matches one of the listed 'x', then the item is disabled and cannot be used regardless of other conditions. Examples: Actor: 1 Actor: 2, 3, 4, 5, 6 Not Actor: 7 Not Actor: 8, 9, 10 --- Armor: x Armor: x, x, x - Requires the actor to specifically have armor ID 'x' equipped to use the item. If multiple 'x' are used, the actor can have any of them equipped. If the actor does not have armor 'x' equipped, then the item is disabled and cannot be used regardless of other conditions. Not Armor: x Not Armor: x, x, x - Requires the actor to not have armor ID 'x' equipped to use the item. If multiple 'x' are used, the actor cannot have any of them equipped. If the actor does have armor 'x' equipped, then the item is disabled and cannot be used regardless of other conditions. Examples: Armor: 1 Armor: 2, 3, 4, 5, 6 Not Armor: 7 Not Armor: 8, 9, 10 --- Class: x Class: x, x, x - Requires class(es) ID 'x' to use the item. If the actor's class doesn't match the item requirement, then the item is disabled and cannot be used regardless of other conditions. Not Class: x Not Class: x, x, x - Requires the actor using the item to NOT be class ID 'x'. If the actor's class ID matches one of the listed 'x', then the item is disabled and cannot be used regardless of other conditions. Examples: Class: 1 Class: 2, 3, 4, 5, 6 Not Class: 7 Not Class: 8, 9, 10 --- Subclass: x Subclass: x, x, x - Requires YEP_X_Subclass.js - Requires subclass(es) ID 'x' to use the item. If the actor's class doesn't match the item requirement, then the item is disabled and cannot be used regardless of other conditions. Not Subclass: x Not Subclass: x, x, x - Requires YEP_X_Subclass.js - Requires the actor using the item to NOT be subclass ID 'x'. If the actor's subclass ID matches one of the listed 'x', then the item is disabled and cannot be used regardless of other conditions. Examples: Subclass: 1 Subclass: 2, 3, 4, 5, 6 Not Subclass: 7 Not Subclass: 8, 9, 10 --- Either Class: x Either Class: x, x, x - Requires YEP_X_Subclass.js - The actor's primary class or subclass ID has to match 'x'. If at least one of them match, then the condition passes. Otherwise, the condition fails and the item is disabled and cannot be used regardless of other conditions. Neither Class: x Neither Class: x, x, x - Requires YEP_X_Subclass.js - Requires YEP_X_Subclass.js - The actor's primary class or subclass ID has to NOT match 'x'. If at least one of them match, then the condition fails and the item is disabled and cannot be used regardless of other conditions. Examples: Either Class: 1 Either Class: 2, 3, 4, 5, 6 Neither Class: 7 Neither Class: 8, 9, 10 --- State: x State: x, x, x - Requires the actor using the item to be affected by state 'x'. If multiple 'x' are used, the actor can be affected by any of them. If the actor is not affected by state 'x', then the condition fails and the item is disabled and cannot be used regardless of other conditions. Not State: x Not State: x, x, x - Requires the actor using the item to be not affected by state 'x'. If multiple 'x' are used, the actor cannot be affected by any of them. If the actor is not affected by state 'x', then the condition fails and the item is disabled and cannot be used regardless of other conditions. Examples: State: 10 State: 11, 12, 13, 14, 15 Not State: 16 Not Stage: 17, 18, 19, 20 --- Switch Off: x Switch Off: x, x, x - Requires switch(es) x to be OFF before the item can be used. If the switch is ON, then the item is disabled and cannot be used regardless of other conditions. Examples: Switch Off: 1 Switch Off: 2, 3, 4, 5, 6 --- Switch On: x Switch On: x, x, x - Requires switch(es) x to be ON before the item can be used. If the switch is OFF, then the item is disabled and cannot be used regardless of other conditions. Examples: Switch On: 1 Switch On: 2, 3, 4, 5, 6 --- Variable x eval - Makes a check against variable x. Replace 'x' with an integer value and 'eval' with the code check you wish to run it against. Examples: Variable 1 >= 5 Variable 2 < 6 Variable 3 === 7 Variable 4 !== 8 --- Weapon: x Weapon: x, x, x - Requires the actor to specifically have weapon ID 'x' equipped to use the item. If multiple 'x' are used, the actor can have any of them equipped. If the actor does not have weapon 'x' equipped, then the item is disabled and cannot be used regardless of other conditions. Not Weapon: x Not Weapon: x, x, x - Requires the actor to not have weapon ID 'x' equipped to use the item. If multiple 'x' are used, the actor cannot have any of them equipped. If the actor does have weapon 'x' equipped, then the item is disabled and cannot be used regardless of other conditions. Examples: Weapon: 1 Weapon: 2, 3, 4, 5, 6 Not Weapon: 7 Not Weapon: 8, 9, 10 --- Weapon Type: x Weapon Type: x, x, x - Requires the actor to have weapon type 'x' equipped. If multiple 'x' are used, the actor can have any of the 'x' weapon types equipped. If the actor does not have the matching weapon types, then the item is disabled and cannot be used regardless of other conditions. Not Weapon Type: x Not Weapon Type: x, x, x - Requires the actor to not have weapon type 'x' equipped. If multiple 'x' are used, the actor cannot have any of the 'x' weapon types equipped. If the actor does have the matching weapon types, then the item is disabled and cannot be used regardless of other conditions. Examples: Weapon Type: 1 Weapon Type: 2, 3, 4, 5, 6 Not Weapon Type: 7 Not Weapon Type: 8, 9, 10 Item Upgrade SlotsThe following notetags can be used to modify item upgrades. Weapon, and Armor Notetags <Upgrade Slots: x> This sets the number of times an item can be upgraded instead of the default amount defined in the database. <Slot Variance: x> This makes it so that there is a random variance for the number of slots provided through the item. If this notetag isn't used, it will go by the setting in the parameters. <Upgrade Sound: filename> Changes the upgrade sound played to 'filename'. If this notetag isn't used, the 'Default Sound' parameter sound will be used instead. <Upgrade Effect> effect effect </Upgrade Effect> These are the effects applied (in the order they're listed). Refer to the 'Upgrade Effects List' in the next section to have those effects applied to the upgraded item. <Upgrade Item Type: All> <Upgrade Item Type: Regular> <Upgrade Item Type: Key> <Upgrade Item Type: Hidden A> <Upgrade Item Type: Hidden B> <Upgrade Item Type: Always> <Upgrade Item Type: Battle> <Upgrade Item Type: Menu> <Upgrade Item Type: Never> <Upgrade Item Type: string> This makes it so this item can be used to upgrade the item that matches either the item type or the item occassion. If none of those work for you, you can use the following notetag and place an instance for 'string' inside of the item upgrade types. <Type: string> Puts this type into the notebox for items (not weapons nor armors) and it will add 'string' as its type. You can insert multiple copies of this notetag to enable the item to have more types. Any types in here that match the types for the previous notetag will enable the item to be upgradeable by that upgrade item type. <Upgrade Weapon Type: x> <Upgrade Weapon Type: x, x, x> <Upgrade Weapon Type: x through x> This makes it so that only weapon types x can use this item for upgrade. If you use weapon type 0, all weapons can be upgraded using this item. <Upgrade Armor Type: x> <Upgrade Armor Type: x, x, x> <Upgrade Armor Type: x through x> This makes it so that only armor types x can use this item for upgrade. If you use armor type 0, all armor can be upgraded using this item.
The following is a list of effects you can use for the <Upgrade Effects> notetag to have it apply the desired effects to the upgraded item. Effect Text Upgrade Effect: Base Name: x - Changes item's base name to x. *Note2 Boost Count: +x - Increases Boost Count by x. *Note2 Boost Count: -x - Decreases Boost Count by x. *Note2 Eval: x - Runs x as a piece of code. *Note2 Name: x - Changes item's name to x. *Note2 Icon: x - Changes item's icon to x. *Note2 Picture Image: filename - Changes item's picture image to filename. *Note4 Picture Hue: x - Changes item's picture hue to x. *Note4 Prefix: x - Changes item's prefix to x. *Note2 Priority Name: x - Sets priority name to x. *Note2 Random Stat: x - Increases or decreases 'Stat' by 0 to x. *Note1 Random Stat: +x - Increases 'Stat' by 0 to x. *Note1 Random Stat: -x - Decreases 'Stat' by 0 to x. *Note1 Reset Base Name - Resets the base name to default. Reset Boost Count - Resets the Boost Count to 0. Reset Icon - Resets the icon back to the default icon. Reset Prefix - Resets name prefix to default. Reset Stat - Resets 'Stat' back to base stat values. *Note1 Reset Suffix - Resets name suffix to default. Reset Full - Resets every single aspect about item. *Note3 Slots: x - Changes the slot consumption cost to x. *Note1 Stat: +x - Increases 'Stat' by x. *Note1 Stat: +x% - Increases 'Stat' by x% of base stat. *Note1 Stat: -x - Decreases 'Stat' by x. *Note1 Stat: -x% - Decreases 'Stat' by x% of base stat. *Note1 Suffix: x - Changes item's suffix to x. *Note2 Text Color: x - Changes item's text color to x. Note1: 'Stat' is to be replaced by 'MaxHP', 'MaxMP', 'ATK', 'DEF', 'MAT', 'MDF', 'AGI', 'LUK', 'SLOTS', 'ALL' or 'CURRENT'. 'ALL' affects all stats. 'CURRENT' affects only non-zero stats. This effect will also increase the boost count (+x) by 1 and update the item's name. Note2: This does not alter boost count nor update the item's name unless it is altered by the effect. Note3: Because this effect resets absolutely everything about an item, it will send the player away from the upgrade menu to reset the standings of the item. Note4: This requires the Item Picture Images plugin. Item SynthesisTo allow the player the ability to craft a certain item, that item must be
included in a recipe notetag in an item that the player possesses.
Item, Weapon, and Armor Notetags:
<Item Recipe: x>
<Item Recipe: x, x, x>
<Item Recipe: x to y>
This will change this item into a recipe for x item(s). As long as this
item is in possession by the party as a whole, item(s) x can be
synthesized by the player provided that the player has the proper quantity
of ingredients.
* Note: Entries without names will not be included. Entries without both a
synthesis cost and without an ingredient list will not be included.
<Weapon Recipe: x>
<Weapon Recipe: x, x, x>
<Weapon Recipe: x to y>
This will change this item into a recipe for x weapon(s). As long as this
item is in possession by the party as a whole, weapon(s) x can be
synthesized by the player provided that the player has the proper quantity
of ingredients.
* Note: Entries without names will not be included. Entries without both a
synthesis cost and without an ingredient list will not be included.
<Armor Recipe: x>
<Armor Recipe: x, x, x>
<Armor Recipe: x to y>
This will change this item into a recipe for x armor(s). As long as this
item is in possession by the party as a whole, armor(s) x can be
synthesized by the player provided that the player has the proper quantity
of ingredients.
* Note: Entries without names will not be included. Entries without both a
synthesis cost and without an ingredient list will not be included.
<Synthesis Ingredients>
item id
item id: x
weapon id
weapon id: x
armor id
armor id: x
gold: x
named item
named item: x
</Synthesis Ingredients>
Using the above tag in an item will set those items as the ingredients
required for the player to synthesize. Replace "id" with the proper item,
weapon, or armor ID's. If no ":x" is used, the database will register that
as only needing 1 of that item as an ingredient. If "gold: x" is used,
that will be the cost required to synthesize the item.
If you are using named entries, priority will be given to the highest ID
in the order of items, weapons, then armors.
* Note: If you are using Item Core, Independent Items cannot become an
ingredient for a recipe and will therefore be automatically omitted.
<Mask Name: x>
If you are masking unknown items' names, you can change the text shown for
the unknown item with x. This will cause the game to use the mask name
instead of the usual ??? (if that's what you're using) to mask the item.
This can give a player a general idea of what they may be synthesizing
such as "Strange Liquid" or "Weird Crystal".
Job PointsHere are some notetags related to Job Points. Actor Notetags <Starting JP: x> Sets the actor's starting JP value to be x for the actor's initial class. <Class x Starting JP: y> Sets the actor's starting JP value for class x to be y. <JP Rate: x%> This changes the rate of JP gained by x%. By default, all objects have a default rate of 100%. Increasing this to 200% will increase JP gained by twice as much while 50% will halve the amount of JP gained. Skill and Item Notetags <JP Gain: x> This makes it so that the actor using this skill or item will gain x amount of JP instead of the default amount of JP found in the parameters. <Target JP Gain: x> This makes it so that the target actor affected by this skill or item will gain x amount of JP. Class, Weapon, Armor, and State Notetag <JP Rate: x%> This changes the rate of JP gained by x%. By default, all objects have a default rate of 100%. Increasing this to 200% will increase JP gained by twice as much while 50% will halve the amount of JP gained. Enemy Notetag <JP: x> When the enemy is defeated, the party members present will gain x JP each. Level Up Growth EffectsInsert the following notetags into the respective database object noteboxes to acquire their Level Up Growth Effects. Actor, Class, Skill, Weapon, Armor, State Notetags: <Level Up stat Growth: +x> <Level Up stat Growth: -x> Upon leveling up, this will raise/reduce a particular 'stat' by x value. - Replace 'stat' with 'MaxHP', 'MaxMP', 'ATK', 'DEF', 'MAT', 'MDF', 'AGI', or 'LUK' to alter that specific stat. - Replace 'x' with a numeric value indicating how much growth to apply. <Level Up Learn Skill: x> Upon leveling up, this will teach the actor skill x. - Replace 'x' with the ID of the skill you wish to teach the actor. <Level Up Switch On: x> <Level Up Switch On: x, x, x> <Level Up Switch On: x to y> <Level Up Switch Off: x> <Level Up Switch Off: x, x, x> <Level Up Switch Off: x to y> Upon leveling up, this will cause switch(es) x to turn on or off. - Replace 'x' with the ID of the switch(es) to turn on/off. - If using 'x to y', set 'x' to the starting ID and 'y' to the ending ID. - Insert multiples of this notetag to affect multiple switches. <Level Up Recover All> Upon leveling up, this will cause the Recover All effect to trigger for the actor. Life StealYou can use the following notetags to alter how Life Stealing works for the various database entries. --- Skill and Item Notetags: <HP Life Steal: x%> <MP Life Steal: x%> This causes this attack to life steal x% of HP or MP back relative to the amount of damage dealt. <HP Life Steal: x> <MP Life Steal: x> This causes this attack to life steal exactly x amount of HP or MP back regardless of damage dealt. <Cancel Life Steal> Makes this skill or item cancel any Life Steal effects from passively activating for this action. However, HP Drain and MP Drain will still still occur. <Cancel HP Life Steal> <Cancel MP Life Steal> Specifically cancels out HP Life Steal or MP Life Steal effects from passively activating for this action. However, HP Drain and MP Drain will still occur. --- Actor, Class, Enemy, Weapon, Armor, State Notetags: <HP Life Steal Physical: +x%> <HP Life Steal Magical: +x%> <HP Life Steal Certain: +x%> <MP Life Steal Physical: +x%> <MP Life Steal Magical: +x%> <MP Life Steal Certain: +x%> <HP Life Steal Physical: -x%> <HP Life Steal Magical: -x%> <HP Life Steal Certain: -x%> <MP Life Steal Physical: -x%> <MP Life Steal Magical: -x%> <MP Life Steal Certain: -x%> This causes the related battler to multiplicatively increase its passive Life Steal by +x% or -x% of the damage dealt towards Physical, Magical, or Certain Hit type of attacks. This effect stacks multiplicatively. <HP Life Steal Physical: +x> <HP Life Steal Magical: +x> <HP Life Steal Certain: +x> <MP Life Steal Physical: +x> <MP Life Steal Magical: +x> <MP Life Steal Certain: +x> <HP Life Steal Physical: -x> <HP Life Steal Magical: -x> <HP Life Steal Certain: -x> <MP Life Steal Physical: -x> <MP Life Steal Magical: -x> <MP Life Steal Certain: -x> This causes the related battler to additively increase its passive Life Steal by a flat +x or -x of the damage dealt towards Physical, Magical, or Certain Hit type of attacks. This effect stacks additively. <Guard Life Steal> The related battler cannot be life stolen from for both HP and MP. <Guard HP Life Steal> <Guard MP Life Steal> The related battler cannot be life stolen from for either HP or MP. <Cancel Life Steal> The related battler cannot passively life steal both HP and MP. <Cancel HP Life Steal> <Cancel MP Life Steal> The related battler cannot passively life steal HP or MP specifically. --- Main Menu ManagerMain Menu Actor EventsThe notetags are only used for actors. They don't apply to classes or any other database objects. Actor Notetags: <Menu keyword Event: x> - Replace 'keyword' with the exact keyword used in the Main Menu Manager command ext entry setup that you want to associate with this notetag. - Replace 'x' with the exact ID of the common event you wish to run. Map Display Name Core
You can use custom Dim Colors for special maps. Put these notetags into the map's note box. <Dim Color 1: r, g, b, a> <Dim Color 2: r, g, b, a> r = red (0-255) g = green (0-255) b = blue (0-255) a = alpha (0-100) For example, a yellow Dim Color 1 notetag would look like this: <Dim Color 1: 255, 255, 0, 60> Meta Controls
<Global Meta> - Place this in the name of a switch or variable that you want to have its data persist across different saves and even new games. This does not have to be the full name. It can be just a part of the switch or variable's name.
<Local Meta> - Place this in the name of a switch or variable that you want to have its data persist across only related saves. This does not have to be the full name. It can be a part of the switch or variable's name. Move Route CoreThese are some notetags you can utilize for your events. Event Notetags: <Always Update Movement> - Most events don't update unless they're close to the screen. But any event with this notetag will always be updating regardless of whether they are close to the screen or not. Multi-Layer HP Gauge
<HP Layers: n> To give enemies more than one HP Layer, use the <HP Layers: n> notetag. Up to 10 layers can be used for an enemy. Place inside enemy notebox. Overkill BonusInsert the following notetags into the enemy noteboxes you wish to alter the overkill requirements for. Enemy Notetags <Overkill Requirement: x> - Changes the enemy's overkill requirement to X. This is how much damage needs to be dealt minimum on the killing blow. You can use JS code here if you can fit it all on one line. Otherwise, use the notetag setup below in the Lunatic Mode section. <Overkill Animation: x> - This is the animation played when the enemy is overkilled. Replace x with an animation ID from the database. <Overkill EXP Rate: x%> <Overkill EXP Flat: x> - This is the bonus EXP gained when the enemy is overkilled. Replace x with a number value. This EXP gained from overkilling will be added on top of the already gained EXP. <Overkill Gold Rate: x%> <Overkill Gold Flat: x> - This is the bonus gold gained when the enemy is overkilled. Replace x with a number value. This gold gained from overkilling will be added on top of the already gained gold. <Overkill Drop Rate: x%> - This is the bonus drop rate gained when the enemy is overkilled. Replace x with the percent rate increase.
To be used together with the YEP_ExtraEnemyDrops plugin. Place this plugin underneath YEP_ExtraEnemyDrops in the plugin manager list for compatibility. Then, you can use the following condition: =-=-=-=-=-=-=-=-=-=-=-=-=-=-=-=-=-=-=-=-=-=-=-=-=-=-=-=-=-=-=-=-=-=-=-=-=-=- IS OVERKILLED - - - - - - - - - - - - - - - - - - - - - - - - - - - - - - - - - - - - - - - This condition will pass only if the enemy is overkilled. If the overkill requirement isn't met, there will be no additional changes to the drop rate. - - - - - - - - - - - - - - - - - - - - - - - - - - - - - - - - - - - - - - - Example: Is Overkilled: +100% =-=-=-=-=-=-=-=-=-=-=-=-=-=-=-=-=-=-=-=-=-=-=-=-=-=-=-=-=-=-=-=-=-=-=-=-=-=- One thing you can do to make Overkill only items is using something like the following setup: <Conditional Potion Drop> is overkilled: +100% </Conditional Potion Drop> This notetag setup will make the 'Potion' item only drop if the enemy has been overkilled. Otherwise, nothing will come out of it. Provoke Effect
<Provoke> - Used for: State Notetags - Causes the state affected unit to be able to only attack the caster of the provoke state for single target actions. - If multiple provoke states are applied, then the provoker is the one who applied the highest priority provoke state. <Bypass Provoke> - Used for: Actor, Class, Weapon, Armor, Enemy, State Notetags - Makes the affected unit to ignore any and all provoke effects applied by any provoke states, allowing them to target foes as if they are unaffected by provoke states altogether. Proximity Compass
<Hide Compass> - Place this notetag inside maps where you don't want the compass to show. Recruiting Board
Insert the following notetags to make actors recruitable or change their recruitment properties:
<Recruitable> - Makes the actor recruitable. This is absolutely required to make the actor appear inside the Recruiting Board scene. <Recruit Cost: x> - Replace 'x' with a number or formula on how much the actor should cost. - If this notetag isn't used, it will use the Plugin Parameters formula.
<Cannot Retire> - Makes the actor unable to be retired, even if you've hired them and even if they have a retire value. <Retire Value: x> - Replace 'x' with a number or formula on how much the actor should return. - If this notetag isn't used, it will use the Plugin Parameters formula. Region BattlebacksTo bind specific battlebacks to certain region ID's, you can use these following notetags: Map Notetags: <Region x Battleback1: filename> <Region x Battleback2: filename> This will change the battleback1 or battleback2 for region x to use the battleback image with the matching filename. When writing out the filename, it is case sensitive. Do not insert the file extension. For example: If you want Region 5 to use battleback1 Dirt2.png and battleback2 as Forest.png, you would use these two notetags: <Region 5 Battleback1: Dirt2> <Region 5 Battleback2: Forest> Insert these combinations into the noteboxes of the maps you wish to use specific battlebacks per region for. Region EventsYou can use this notetag inside of your maps. Map Notetags: <Region x Event: y> If the player steps onto a tile marked by Region x, it will run the common event y. This will override the default settings marked in the editor specifically for that map. Region RestrictionsYou can use this notetag inside of your maps. Map Notetags: <Player Restrict Region: x> <Player Restrict Region: x, x, x> <Player Restrict Region: x to y> Restricts region x for the player on this particular map. Use multiple x to mark more regions. From x to y, you can mark a multitude of regions. <Event Restrict Region: x> <Event Restrict Region: x, x, x> <Event Restrict Region: x to y> Restricts region x for all events on this particular map. Use multiple x to mark more regions. From x to y, you can mark a multitude of regions. <All Restrict Region: x> <All Restrict Region: x, x, x> <All Restrict Region: x to y> Restricts region x for the player and all events on this particular map. Use multiple x to mark more regions. From x to y, you can mark a multitude of regions. <Player Allow Region: x> <Player Allow Region: x, x, x> <Player Allow Region: x to y> Allows region x for the player on this particular map. Use multiple x to mark more regions. From x to y, you can mark a multitude of regions. <Event Allow Region: x> <Event Allow Region: x, x, x> <Event Allow Region: x to y> Allows region x for all events on this particular map. Use multiple x to mark more regions. From x to y, you can mark a multitude of regions. <All Allow Region: x> <All Allow Region: x, x, x> <All Allow Region: x to y> Allows region x for the player and all events on this particular map. Use multiple x to mark more regions. From x to y, you can mark a multitude of regions. Vehicle RestrictionsInsert these notetags into the map noteboxes to allow for custom settings for vehicles on that map only. Map Noteboxes: <Boat Restrict Region: x> <Boat Restrict Region: x, x, x> <Boat Restrict Region: x to y> <Ship Restrict Region: x> <Ship Restrict Region: x, x, x> <Ship Restrict Region: x to y> <Airship Restrict Region: x> <Airship Restrict Region: x, x, x> <Airship Restrict Region: x to y> - These notetags will caused the vehicles to be unable to move past region(s) marked with x (to y) unless the player character is given the Through ON movement flag. These regions will be combined with the regions flagged by the plugin parameters. <Boat Allow Region: x> <Boat Allow Region: x, x, x> <Boat Allow Region: x to y> <Ship Allow Region: x> <Ship Allow Region: x, x, x> <Ship Allow Region: x to y> <Airship Allow Region: x> <Airship Allow Region: x, x, x> <Airship Allow Region: x to y> - These notetags will cause the vehicles to be able to move through these region(s) marked with x (to y). These regions will be combined with the regions flagged by the plugin parameters. <Boat Land Region: x> <Boat Land Region: x, x, x> <Boat Land Region: x to y> <Ship Land Region: x> <Ship Land Region: x, x, x> <Ship Land Region: x to y> <Airship Land Region: x> <Airship Land Region: x, x, x> <Airship Land Region: x to y> - These notetags will enforce vehicles to only able to land on region(s) marked by x (to y). They cannot land anywhere else. These regions will be combined with the regions flagged by the plugin parameters. Row FormationYou can use these notetags to modify the various aspects of row formations. Actor and Enemy Notetags: <Default Row: x> <Default Row: x, x, x> This is the default row assigned to the battler by default. This will override the default parameter settings. If multiple x values are assigned then the battler can start in any of those rows. If multiple rows are included, then at the start of the game (for actors) or start of battle (for enemies), the battler will start in a random row included. Actor, Class, Enemy, Weapon, Armor, and State Notetags: <Row Lock> This causes the affected battler to be row locked and unable to switch rows. For enemies, this will override the default parameters. <Not Row Lock> This causes the affected battler to be not be row locked and able to switch rows. This is primarily for enemies since all non-enemies are not row locked by default. This will override the default parameters. Skill and Item Notetags: <Row Only: x> <Row Only: x, x, x> <Row Only: x to y> This makes it so that this skill/item can only be used by the battler if the battler is in row x. If multiple rows are used, the battler can be in any of those rows. If you use the x to y notetag, this will account for all the rows from x to y. <Change Target Row: x> Changes target's current row to x. This cannot go under 1 nor can it go past the designated maximum row set in the parameters. <Push Back Target Row: x> This will push the target back x rows. This cannot exceed the maximum row set in the parameters. <Pull Forward Target Row: x> This will pull the target forward x rows. This cannot exceed the maximum rows set in the parameters. <Change User Row: x> Changes user's current row to x. This cannot go under 1 nor can it go past the designated maximum row set in the parameters. <Push Back User Row: x> This will push the user back x rows. This cannot exceed the maximum row set in the parameters. <Pull Forward User Row: x> This will pull the user forward x rows. This cannot exceed the maximum rows set in the parameters. Save CoreNew Game+There are some notetags you can utilize with a few database objects. Actor, Item, Weapon, Armor Notetag <No New Game+ Carry Over> - This will prevent the item, weapon, or armor from being carried over to New Game+. If this is used on an actor, the actor will be in its default state as if a new game started. Save Event LocationsMap Notetag: <Save Event Locations> This will cause the map to save every event's location on that map. After leaving and returning to that map, the events will be reloaded onto their last saved positions in addition to the direction they were facing. Event Notetag: <Save Event Location> This will enable this specific event to save its location on this map. After leaving and returning to the map, the event will be reloaded onto its last saved position in addition to the direction it was facing. If you wish to reset the position of the Event, simply use the Event Editor and use "Set Event Location" to anchor the event's location to the desired point as if you would normally. Sealed Battle Commands
<Attack Seal> <Guard Seal> <Item Seal> - If a battler has one of these notetags inside their associated noteboxes, then the battle command for that respective notetag will be sealed. Shop Menu CoreYou can use the following notetag to alter various shop aspects Item, Weapon, and Armor Notetag: <Price: x> This notetag allows you to exceed the default editor limit for item prices of 999,999 gold. <Sell Price: x> This sets the selling price of the item to x. <Cannot Sell> This makes it so that the item cannot be sold. <Can Sell> This makes it so that the item can be sold even if it is at 0 gold. Conditional Shop PricesInsert the following notetags into the items, weapons, and/or armors you want these notetags to affect. Item, Weapon, and Armor Notetags: <Base Price Variable: x> - Sets the base price of the item to this variable's value. This will replace the price set in the database. <Percent Price Variable: x> - Sets the variable which defines the percent modifier for the price. If the variable's value is 100, then the percentage is 100%. If the variable's value is 50, then the percentage is 50%. If the variable's value is 350, then the percentage is 350%. Use multiples of this notetag to have multiple variables affect the price. This is calculated after the base price. <Increase Price Variable: x> - Sets the variable which defines a flat increase/decrease for the price. If the variable's value is 100, then the price is increased by 100. If the variable's value is -200, then the price is decreased by 200. Use multiples of this notetag to have multiple variables affect the price. This is calculated after the price percentage modifier. <Exact Price Variable: x> - Sets the variable which determines the exact value of the price. If the variable's value is 50, then the price becomes 50. If the variable's value is 2000, then the price becomes 2000. This ignores all other modifiers. <Price Minimum: x> <Price Maximum: x> - Sets the minimum/maximum values the price can reach. This is used to prevent some prices from overinflating drastically. Hide/Show Shop ItemsPlace the following notetags to make their visibility as a shop item appear or not when the shop scene opens up. Item, Weapon, and Armor Notetags <Shop Hide if Switch On: x> <Shop Hide if Switch Off: x> - This will determine if a shop will be hidden if the specific switch 'x' is either on/off (depending on the notetag you're using). Insert multiples of these notetags if you want to use multiple switches to determine the item's visibility. <Shop Hide if Any Switch On: x> <Shop Hide if Any Switch On: x, x, x> <Shop Hide if Any Switch Off: x> <Shop Hide if Any Switch Off: x, x, x> - If any of the switches 'x' are on/off (depending on the notetag you're using), then the shop will hide the item. Insert multiples of these notetags if you want to use multiple switch batches to determine the item's visibility. <Shop Hide if All Switches On: x> <Shop Hide if All Switches On: x, x, x> <Shop Hide if All Switches Off: x> <Shop Hide if All Switches Off: x, x, x> - If all of the switches 'x' are on/off (depending on the notetag you're using), then the shop will hide the item. Insert multiples of these notetags if you want to use multiple switch batches to determine the item's visibility. More CurrenciesYou can use the following notetags to adjust various properties for more currencies for your items, weapons, and armors. Item, Weapon, and Armor Notetags: <Variable x Buy Price: y> This sets the currency of this item, weapon, or armor to variable x with a buy price of y. You can insert multiples of this notetag to have more than one variable cost for that item, weapon, or armor. <Variable x Sell Price: y> This makes it that when selling this item, weapon, or armor, the player will gain variable x in y amount. You can insert multiples of this notetag to have more than one variable cost for that item, weapon, or armor. <Item x Buy Price: y> <Item name Buy Price: y> This sets the currency of this item, weapon, or armor to cost item x (or the named item) with a buy price of y. You can insert multiples of this notetag to have more than one item cost for that item, weapon, or armor. If you're using Item Core, this will not work on independent items. If you are using the named version of the notetag and have multiple items in your database of the same name, priority will be given to the item with the highest ID. <Item x Sell Price: y> <Item name Sell Price: y> When selling this item, weapon, or armor, the player will get item x (or the named item) with a quantity of y. You can insert multiples of this notetag to have more than one item cost for that item, weapon, or armor. If you're using Item Core, this will not work on independent items. If you are using the named version of the notetag and have multiple items in your database of the same name, priority will be given to the item with the highest ID. <Weapon x Buy Price: y> <Weapon name Buy Price: y> This sets the currency of this item, weapon, or armor to cost weapon x (or the named weapon) with a buy price of y. You can insert multiples of this notetag to have more than one weapon cost for that item, weapon, or armor. If you're using Item Core, this will not work on independent items. If you are using the named version of the notetag and have multiple items in your database of the same name, priority will be given to the item with the highest ID. <Weapon x Sell Price: y> <Weapon name Sell Price: y> When selling this item, weapon, or armor, the player will get weapon x (or the named weapon) with a quantity of y. You can insert multiples of this notetag to have more than one weapon cost for that item, weapon, or armor. If you're using Item Core, this will not work on independent items. If you are using the named version of the notetag and have multiple items in your database of the same name, priority will be given to the item with the highest ID. <Armor x Buy Price: y> <Armor name Buy Price: y> This sets the currency of this item, weapon, or armor to cost armor x (or the named armor) with a buy price of y. You can insert multiples of this notetag to have more than one armor cost for that item, weapon, or armor. If you're using Item Core, this will not work on independent items. If you are using the named version of the notetag and have multiple items in your database of the same name, priority will be given to the item with the highest ID. <Armor x Sell Price: y> <Armor name Sell Price: y> When selling this item, weapon, or armor, the player will get armor x (or the named armor) with a quantity of y. You can insert multiples of this notetag to have more than one armor cost for that item, weapon, or armor. If you're using Item Core, this will not work on independent items. If you are using the named version of the notetag and have multiple items in your database of the same name, priority will be given to the item with the highest ID. <Proxy Buy: x> <Proxy Buy: name> If you're using this item as a proxy for another item (so you can set a different cost for the item), this item will end up representing item x, weapon x, or armor x of the same type. If you're using a named notetag and you have multiple entries in your database with the same name, priority will be given to the item, weapon, or armor with the highest ID. Skill CoreThese notetags can adjust either skill costs or special skill effects. Skill Notetags: <HP Cost: x> Changes the skill to have x as its HP cost. RPG Maker MV's editor lacks HP cost functions so this would allow skills to use HP as their cost. <HP Cost: x%> Changes the skill to cost a percentage of the character's MaxHP value. <MP Cost: x> Changes the skill to have x as its MP cost. This helps bypass the database's hard limit of 9999. <MP Cost: x%> Changes the skill to cost a percentage of the character's MaxMP value. <TP Cost: x> Changes the skill to have x as its TP cost. This helps bypass the database's hard limit of 99. <TP Cost: x%> Changes the skill to cost a percentage of the character's MaxTP value. Although the default MaxTP is 100, this tag will be useful for any plugins that will alter a character's MaxTP values. <Hide in Battle> This will hide and disable the skill during battle. <Hide in Field> This will hide and disable the skill outside of battle. <Hide if Learned Skill: x> <Hide if Learned Skill: x, x, x> <Hide if Learned Skill: x to y> Will hide and disable this skill if skill x has been learned. If multiple skills are listed, the skill will be hidden and disabled if any one of the listed skills have been learned. This will ONLY apply to skills that have been learned and not skills added through traits.
This plugin also lets you swap around the HP, MP, and TP Gauges to any order
you want assuming that all the plugins you use will keep the same order of
HP, MP, and TP and does not override the default gauge drawing process. If
you use any plugin extensions, they can be swaped in as well.
Note: If you do not have 'Display TP in Battle' checked under the System tab
in the database, nothing will be shown for the third slot.
Class Notetag:
<Swap Gauge x: y>
This will change gauge x (1, 2, or 3) to y. Replace y with 'HP', 'MP', or
'TP' to have it display that gauge type in that gauge slot. If you wish
for that slot to display nothing, insert 'Nothing' or 'Null' in place of
y in the notetag.
Weapon, Armor, and State Notetags:
<Swap Gauge x: y>
Actors with equipment or states that contain these notetags or enemies
with states that contain these notetags will display those swapped gauges
in place of the default settings or settings defined by the Class or
Enemy notetags.
Priority will go in the following order:
Weapons, Armors, States, Class, Enemy
Limited Skill UsesYou can use these notetags to govern the various Limited Uses aspects of your skills. Skill Notetags: <Unlimited Use> If you've enabled 'Limit All Skills' in the plugin parameters, this will forcefully make the skill unlimited use. If you use this notetag, it will override any of the Limited Use settings. <Limit Uses: x> This will set the number of times the skill can be used to x. If the skill has 0 charges left, the skill cannot be used. <Recover All Uses> <Not Recover All Uses> When using the recover all command, depending on the settings within the plugin parameters, all limited use charges are recovered or not. These notetags will enable you to utilize the other setting for the skill. <Victory Uses Recover: x> <Escape uses Recover: x> <Lose Uses Recover: x> When the player wins a battle, escapes a battle, or loses a battle, the skill use will recover x amount of uses for the respective outcome. If the notetags aren't used, the amounts restored will be equal to settings made in the plugin's parameters. <After Battle Uses Recover: x> This will set the recovery rate of victory, escape, or loss of battle to be equal to x indiscriminately. Skill and Item Notetags: <Global Limited Uses: +x> <Global Limited Uses: -x> This will change the target's limited uses by +x or -x for all skills. +x will increase the amount of times the skills can be used. -x will decrease the amount of times the skills can be used. <SType x Limited Uses: +y> <SType x Limited Uses: -y> This will change the target's limited uses by +y or -y for all skills of the skill type x. +y will increase the amount of times the skills can be used. -y will decrease the amount of times the skills can be used. <Skill x Limited Uses: +y> <Skill x Limited Uses: -y> <Skill name Limited Uses: +y> <Skill name Limited Uses: -y> This will change the target's limited uses by +y or -y for skill x. If you use the named notetag varient and have multiple skills in the database with the same name, priority will be given to the skill with the highest ID. +y will increase the amount of times the skills can be used. -y will decrease the amount of times the skills can be used. Actor, Class, Enemy, Weapon, Armor, and State Notetags: <Global Use Max: +x> <Global Use Max: -x> A battler affected by this property will have any Limited Use skills alter the maximum times used by +x or -x. <SType x Use Max: +y> <SType x Use Max: -y> A battler affected by this property will have Limited Use skills from skill type x alter the maximum times used by +y or -y. <Skill x Use Max: +y> <Skill x Use Max: -y> <Skill name Use Max: +y> <Skill name Use Max: -y> A battler affected by this property will have Limited Use for skill x (or named if you're using that version of the notetag instead) alter the maximum times used by +y or -y. If you are using the named version of the notetag and have multiple skills in the database with the same name, then priority will be given to the skill with the highest ID. Multi-Type SkillsInsert these notetags into your skills' noteboxes that you wish to have multiple skill types for. Skill Notetags: <Skill Type: x> <Skill Types: x, x, x> <Skill Types: x to y> - Gives multiple skill types of x (or to y) for the modified skill. This will automatically include the skill's type placed by the editor. Lunatic Pack - Skill RewardsInsert the following notetags into a skill or item's notebox to give it one of these effects: --- Skill and Item Notetags: <Reward Animation: x> - If there's a reward tied to this skill/item effect and conditions are met, this animation will be played in place of the default animations to indicate an effect has taken place. <condition Reward: effect> - Most of this plugin's notetags will follow the above format. 'condition' and 'effect' in the notetag will be replaced respectively by entries in the following CONDITION and EFFECT sections below. Insert multiple entries to give your skills/items multiple effects. =-=-=-= Reward CONDITIONS =-=-=-= <Defeat Reward: effect> - Replace 'condition' with 'Defeat' and you'll enable the notetag to take effect when the target is defeated (HP reaches 0 or receives death state). <Critical Reward: effect> - Replace 'condition' with 'Critical' and you'll enable the notetag to take effect when the user lands a critical hit on the target. <Noncritical Reward: effect> - Replace 'condition' with 'Nonnritical' and you'll enable the notetag to take effect when the user fails to land a critical hit on the target. <Hit Reward: effect> - Replace 'condition' with 'Hit' and you'll enable the notetag to take effect when the user has successfully hit the target. <Missed Reward: effect> - Replace 'condition' with 'Missed' and you'll enable the notetag to take effect when the user misses the action or the target evades the action. <Weakness Reward: effect> - Replace 'condition' with 'Weakness' and you'll enable the notetag to take effect when the user hits an elemental weakness on the target. <Resisted Reward: effect> - Replace 'condition' with 'Resisted' and you'll enable the notetag to take effect when the user hits an elemental resistance on the target. <Nulled Reward: effect> - Replace 'condition' with 'Nulled' and you'll enable the notetag to take effect when the user hits a nulled element on the target. <Absorb Reward: effect> - Replace 'condition' with 'Nulled' and you'll enable the notetag to take effect when the user hits an absorbed element on the target. =-=-=-= Reward EFFECTS =-=-=-= --- HP Effects --- <condition Reward: +x HP> - Replace 'effect' with the above format. Replace 'x' with a flat amount of HP you wish to reward the user when the skill/item condition is met. SUGGESTED BY: Yanfly <condition Reward: +x% HP> - Replace 'effect' with the above format. Replace 'x' with a HP equal to x% of the user's MaxHP to reward the user when the condition is met. SUGGESTED BY: Yanfly <condition Reward: +x% Refund HP Cost> - Replace 'effect' with the above format. Replace 'x' with a percentage of the HP cost of the skill used to reward the user if conditions are met. *Note: Can only be used with skills. SUGGESTED BY: Yanfly --- MP Effects --- <condition Reward: +x MP> - Replace 'effect' with the above format. Replace 'x' with a flat amount of MP you wish to reward the user when the skill/item condition is met. SUGGESTED BY: Yanfly <condition Reward: +x% MP> - Replace 'effect' with the above format. Replace 'x' with a MP equal to x% of the user's MaxMP to reward the user when the condition is met. SUGGESTED BY: Yanfly <condition Reward: +x% Refund MP Cost> - Replace 'effect' with the above format. Replace 'x' with a percentage of the HP cost of the skill used to reward the user if conditions are met. *Note: Can only be used with skills. SUGGESTED BY: Yanfly --- TP Effects --- <condition Reward: +x TP> - Replace 'effect' with the above format. Replace 'x' with a flat amount of TP you wish to reward the user when the skill/item condition is met. SUGGESTED BY: Yanfly <condition Reward: +x% TP> - Replace 'effect' with the above format. Replace 'x' with a TP equal to x% of the user's MaxTP to reward the user when the condition is met. SUGGESTED BY: Yanfly <condition Reward: +x% Refund TP Cost> - Replace 'effect' with the above format. Replace 'x' with a percentage of the HP cost of the skill used to reward the user if conditions are met. *Note: Can only be used with skills. SUGGESTED BY: Yanfly --- Item Effects --- <condition Reward: x% Refund Item> - Replace 'effect' with the above format. Replace 'x' with the chance the user has to refund the item (getting it back) if conditions are met. *Note: Can only be used with items. Best if used with consumable items. SUGGESTED BY: Yanfly --- Buff/Debuff Effects --- <condition Reward: Add x Buff> <condition Reward: Add x Buff, y Turns> <condition Reward: Add x Debuff> <condition Reward: Add x Debuff, y Turns> - Replace 'effect' with the above format(s). Replace 'x' with any of the following parameters: 'MaxHP', 'MaxMP', 'ATK', 'DEF', 'MAT', 'MDF', 'AGI', or 'LUK' to have the effect alter the respective stat. If using the format with 'y' turns, replace 'y' with the number of turns you wish for the buff or debuff to last. If 'y' is not used, it will last for 5 turns instead. SUGGESTED BY: Yanfly <condition Reward: Remove x Buff> <condition Reward: Remove x Debuff> - Replace 'effect' with the above format(s). Replace 'x' with any of the following parameters: 'MaxHP', 'MaxMP', 'ATK', 'DEF', 'MAT', 'MDF', 'AGI', or 'LUK' to have the effect remove the respective buff/debuff from the user if the conditions are met. If 'y' is not used, it will last for 5 turns instead. SUGGESTED BY: Yanfly --- State Effects --- <condition Reward: Add State x> - Replace 'effect' with the above format(s). Replace 'x' with the state ID you wish to add to the user when conditions are met. SUGGESTED BY: Yanfly <condition Reward: Remove State x> - Replace 'effect' with the above format(s). Replace 'x' with the state ID you wish to remove from the user when conditions are met. SUGGESTED BY: Yanfly --- Rolling Critical --- <condition Reward: Rolling Critical +x%> <condition Reward: Rolling Critical -x%> - Replace 'effect' with the above format(s). Replace 'x' with the percent increase/decrease for the next usage of the skill. This change will only occur for the user if the conditions are met. *Note: Can only be used with skills. Turn on critical hits for the skill. SUGGESTED BY: Goldschuss <condition Reward: Rolling Critical x%> - Replace 'effect' with the above format(s). Replace 'x' with the percent rate for the next usage of the skill when the conditions are met. *Note: Can only be used with skills. Turn on critical hits for the skill. SUGGESTED BY: Goldschuss =-=-=-= Examples =-=-=-= <Defeat Reward: +50% MP> - When the target is defeated by this skill, refunding 50% of the MP the user has spent in order to cast the skill. <Critical Reward: Add ATK Buff, 8 Turns> - When the user lands a critical hit on the enemy, grant the user an ATK buff that lasts 8 turns. <Hit Reward: Add DEF Buff, 2 Turns> - When the user lands a successful hit on the enemy, buff the user's DEF for 2 turns. <Missed Reward: Refund Item> - When the user fails to land using the item, make sure it won't be consumed by refunding it. <Weakness Reward: +20 TP> - If the user performs this skill on an enemy weak to this skill's element then grant the user +20 additional TP. <Critical Reward: Rolling Critical 0%> <Noncritical Reward: Rolling Critical +10%> - If the user fails to land a critical hit with this skill, the user will have a 10% chance to do so the next time the user performs the skill. The critical hit rate will continue to rise by 10% each time until the user finally manages to land the critical hit. Once the user does, the critical hit rate bonus will reset back to 0%.
Party Limit GaugeYou can use these notetags to adjust the Party Limit Gauge aspects. Skill Notetags: <Party Limit Cost: x> Adds a Party Limit Gauge cost to this skill. This skill will require x increments of the Party Limit Gauge to be able to use it. <Party Limit Cost: x%> Adds a party Limit Gauge cost to this skill equal to x% of the total max gauge size of the battler's party max limit gauge size. The cost is always rounded upward. Skill and Item Notetags: <Ally Party Limit Gauge: +x> <Ally Party Limit Gauge: -x> Using this skill will cause the user's party limit gauge to increase or decrease by x. This is the point value cost and not the increment value. <Foe Party Limit Gauge: +x> <Foe Party Limit Gauge: -x> Using this skill will cause the foe's party limit gauge to increase or decrease by x. This is the point value cost and not the increment value. Actor and Enemy Notetag: <Party Limit: x> Increases the Party Limit Gauge by x when this party member is present in battle (dead or alive). If this notetag isn't used, the value will default to the settings in the plugin parameters. Actor, Class, Enemy, Weapon, Armor, and State Notetags: <Party Limit: +x> <Party Limit: -x> Increases or decreases the Party Limit Gauge by x if the related unit has is that actor, class, enemy, or has the weapon or armor equipped, or is affected by that state. <Party Limit Cost: x%> Sets the party limit costs paid by this actor to x%. The modifications are are multiplicative. The final cost is always rounded upward. Skill CooldownsUse the following notetags to alter the cooldown properties of a skill. Skill Notetags: <Cooldown: x> Sets the cooldown for the skill to X turns. This cooldown only affects this skill alone. This value will take priority over Skill Type Cooldowns and Global Cooldowns. <Warmup: x> Sets the warmup for the skill to X turns. When entering a new battle, the skill will be on a warmup phase and cannot be used until the warmup phase is over. <After Battle Cooldown: +x> <After Battle Cooldown: -x> After a battle ends (victory, loss, or escape), change the cooldown for this skill by +x turns or -x turns. <Cooldown Steps: x> Outside of battle, every x steps that the Player takes, this skill's cooldown will drop by 1. <Skill x Cooldown: y> <Skill name Cooldown: y> When using this skill, after paying the skill cost, skill x will have a linked cooldown of y turns. This value will take priority over Skill Type Cooldowns and Global Cooldowns. <SType x Cooldown: y> When using this skill, after paying the skill cost, all skills with the matching Skill Type x to have a cooldown of y. This value will take priority over Global Cooldowns. <Global Cooldown: x> When using this skill, all skills within the battler's skill library area set to be on cooldown for x turns. This value has less priority than Individual Cooldowns and Skill Type Cooldowns. <Bypass Cooldown> This causes the skill to bypass cooldowns, no matter what. This should be used for skills like Attack, Guard, Escape, etc. that should not have a cooldown assigned to them. Skill and Item Notetags: <Skill x Cooldown: +y> <Skill x Cooldown: -y> <Skill name Cooldown: +y> <Skill name Cooldown: -y> Targets hit by this skill will have skill x's cooldown adjusted by y. This does not apply to the user and applies only to the targets. <SType x Cooldown: +y> <SType x Cooldown: -y> Targets hit by this skill will have all skills in their skill library with Skill Type x to have their cooldowns adjusted by y. This does not apply to the user and applies only to the targets. <Global Cooldown: +x> <Global Cooldown: -x> Targets hit by this skill will have all skills in their skill library to have their cooldowns adjusted by y. This does not apply to the user and applies only to the targets. Actor, Class, Enemy, Weapon, Armor, and State Notetags: <Skill x Cooldown Duration: y%> <Skill name Cooldown Duration: y%> Alters the cooldown duration of skill x to y% when the cooldown cost is applied. This effect only applies to skill x. <SType x Cooldown Duration: y%> Alters the cooldown duration of skills with Skill Type x to y% when the cooldown cost is applied. This effect only applies to Skill Type x. <Global Cooldown Duration: x%> Alters the cooldown duration of all skills to x% when the cooldown cost is applied. <Skill x Cooldown Rate: y%> <Skill name Cooldown Rate: y%> Sets the cooldown rate for skill x to y% when the cooldown counter goes down. This effect only applies to skill x. <SType x Cooldown Rate: y%> Sets the cooldown rate for Skill Type x skills to y% when the cooldown counter goes down. This effect only applies to Skill Type x skills. <Global Cooldown Rate: x%> Sets the cooldown rate for all skills to x% when the cooldown counter goes down. <Skill x Cooldown: +y> <Skill x Cooldown: -y> <Skill name Cooldown: +y> <Skill name Cooldown: -y> If the user performs skill x, it will have an increased or decreased cooldown value as long as the user is the actor, class, enemy, or has the weapon or armor equipped, or is affected by the state with this notetag. These flat cooldown modifications are applied after the rates and duration modifiers have been calculated. <SType x Cooldown: +y> <SType x Cooldown: -y> If the user performs skill with skill type x, it will have an increased or decreased cooldown value as long as the user is the actor, class, enemy, or has the weapon or armor equipped, or is affected by the state with this notetag. These flat cooldown modifications are applied after the rates and duration modifiers have been calculated. <Global Cooldown: +x> <Global Cooldown: -x> If the user performs any skill, it will have an increased or decreased cooldown value as long as the user is the actor, class, enemy, or has the weapon or armor equipped, or is affected by the state with this notetag. These flat cooldown modifications are applied after the rates and duration modifiers have been calculated. <Skill x Warmup: +y> <Skill x Warmup: -y> <Skill name Warmup: +y> <Skill name Warmup: -y> At the start of battle, skill x will have an increased or decreased warmup value as long as the user is the actor, class, enemy, or has the weapon or armor equipped, or is affected by the state with this notetag. These flat warmup modifications are applied after the rates and duration modifiers have been calculated. <SType x Warmup: +y> <SType x Warmup: -y> At the start of battle, all skills with skill type x it will have an increased or decreased warmup value as long as the user is the actor, class, enemy, or has the weapon or armor equipped, or is affected by the state with this notetag. These flat warmup modifications are applied after the rates and duration modifiers have been calculated. <Global Warmup: +x> <Global Warmup: -x> At the start of battle, all skills will have an increased or decreased warmup value as long as the user is the actor, class, enemy, or has the weapon or armor equipped, or is affected by the state with this notetag. These flat warmup modifications are applied after the rates and duration modifiers have been calculated. Skill Cost ItemsTo enable skills to utilize items as costs, use the following notetags: Skill Notetags: <Item x Cost: y> <Weapon x Cost: y> <Armor x Cost: y> This will set the cost of the item, weapon, or armor x to require y of it before it can be used. If you are using YEP_ItemCore, independent items cannot be used as item costs as the game will not distinguish which of the independent items is fit to be used. If you use multiple of these tags, the skill will require all the listed items to be available for usage. <Item Cost: x Potion> <Item Cost: x Sword> <Item Cost: x Feather Cap> If you prefer to use the names of the items instead, you can use the above notetag. This will make the skill require x amount of the named item, weapon, or armor. If you have multiple items with the same name, this notetag will give priority to the highest ID value in the order of items, weapons, then armors. If you are using YEP_ItemCore, independent items cannot be used as item costs as the game will not distinguish which of the independent items is fit to be used. If you use multiple of these tags, the skill will require all the listed items to be available for usage. Class, Weapon, Armor, State Notetags: <Swap Gauge x: Item y> <Swap Gauge x: Weapon y> <Swap Gauge x: Armor y> Swaps out gauge x to display how much of item, weapon, or armor y the player/party has. Priority is given in the following order: Weapons, Armors, States, Class, Enemy <Swap Gauge x: Item Potion> <Swap Gauge x: Item Sword> <Swap Gauge x: Item Feather Cap> If you prefer to use the names of the items instead, you can use the above notetag. This will swap out gauge x to display how much of the mentioned item, weapon, or armor the player/party has. If you have multiple items with the same name, this notetag will give priority to the highest ID value in the order of items, weapons, then armors. Priority for the displayed gauge will be given in the following order: Weapons, Armors, States, Class, Enemy. Actor, Class, Weapon, Armor, and State Notetags: <Item x Cost: +y> <Item x Cost: -y> <Weapon x Cost: +y> <Weapon x Cost: -y> <Armor x Cost: +y> <Armor x Cost: -y> Increases or decreases the cost of item, weapon, or armor x when required by a value of y. If the item, weapon, or armor isn't required, then this effect does not apply to the skill cost. <Item Cost: +x Potion> <Item Cost: -x Sword> <Item Cost: +x Feather Cap> If you prefer to use the names of the items instead, you can use the above notetag format. This will increase or decrease the mentioned item by x amount as long as the item is required as a cost. If you have multiple items with the same name, this notetag will give priority to the highest ID value in the order of items, weapons, then armors. <Item x Cost: y%> <Weapon x Cost: y%> <Armor x Cost: y%> Alters the cost of item, weapon, or armor x by y%. If the item, weapon, or armor isn't required, then this effect does not apply to the skill cost. <Item Cost: x% Potion> <Item Cost: x% Sword> <Item Cost: x% Feather Cap> If you prefer to use the names of the items instead, you can use the above notetag format. This will adjust the cost rate of the mentioned item by x% as long as the item is required as a cost. If you have multiple items with the same name, this notetag will give priority to the highest ID value in the order of items, weapons, then armors. <Replace Type x Cost: Type y> Replace 'type' with either 'item', 'weapon', or 'armor'. This lets you exchange the costs used for a particular item for another (item y). The replacement is given priority to states, weapons, armors, class, and then actors. <Replace Potion Cost: Ether> <Replace Sword Cost: Dagger> <Replace Feather Cap Cost: Bandana> If you prefer to use the names of the items instead, you can use the above notetag format. This lets you exchange the costs used for a particular item for another. The replacement is given priority to states, weapons, armors, class, and then actors. If you have multiple items with the same name, this notetag will give priority to the highest ID value in the order of items, weapons, then armors. Item, Weapon, Armor Notetags: <Item Gauge Color 1: x> <Item Gauge Color 2: x> If this item is the item used as gauge display, you can have it produce a unique color using text color x. <Item Gauge Text: x> If this item is the item used as gauge display, you can have it show a different text other than its name. Replace x with what you want to write. <Item Gauge Text Color: x> If you wish to use a text color other than the one predefined in the plugin's parameters, use this notetag and replace x with the text color you wish to label the gauge with. Skill Learn SystemUse the following notetags to make use of the Skill Learn System. Class Notetag: <Learn Skill: x> <Learn Skill: x, x, x> <Learn Skill: x to y> Enables the class to be able to learn skill(s) x from the menu. Replace x with the skill's ID. If x to y is used, this enables the class to learn all the skills from x to y. Replace x and y with skill ID's. Skill Notetags: <Learn Cost: x Gold> Sets the gold cost of learning this skill to x gold. <Learn Cost: x JP> Sets the JP cost of learning this skill to x JP. This note requires YEP_JobPoints.js in order to work. <Learn Cost> or <Learn Cost> Item x: y item name: y Weapon x: y item name: y Armor x: y </Learn Cost> </Learn Cost> Allows you to set the item, weapon, and armor costs of learning the skill. Replace x with the item's ID and y with the quantity of that item needed. If you decide to use the item name variant, replace the item name with the item's name as it appears in the database. If multiple items share the same name, the item with the highest ID will be used in the order of item, weapon, and then armor. *Note: If you are using YEP_ItemCore.js and Independent Items, the learn costs will not include independent items. <Learn Require Level: x> Causes the skill to require the actor's current level to be at least x before the skill even appears on the list to learn. <Learn Require Skill: x> <Learn Require Skill: x, x, x> <Learn Require Skill: x to y> In order for the skill to appear, the actor must know the other skill(s) of x. If x to y is used, the actor must know all the skills from x to y. Replace x and/or y with skill ID's. <Learn Require Switch: x> <Learn Require Switch: x, x, x> <Learn Require Switch: x to y> In order for the skill to appear, the switch(es) x must be on. If x to y is used, all of the switches from x to y must be on in order for the skill to appear. Replace x and/or y with switch ID's. Skill Mastery LevelsTo determine the effect the mastery level of a skill has or other various mastery-related properties, use the following notetags for those skills: --- Skill Notetags: <Max Mastery Level: x> - Replace 'x' with the max mastery level you want a skill to have. If you don't want the skill to have any mastery level at all, replace it with 0. <Mastery Effect: +x Damage Per Level> <Mastery Effect: +x HP Cost Per Level> <Mastery Effect: +x MP Cost Per Level> <Mastery Effect: +x TP Cost Per Level> <Mastery Effect: +x Cooldown Per Level> <Mastery Effect: -x Damage Per Level> <Mastery Effect: -x HP Cost Per Level> <Mastery Effect: -x MP Cost Per Level> <Mastery Effect: -x TP Cost Per Level> <Mastery Effect: -x Cooldown Per Level> - This will increase or decrease the damage, HP cost, MP cost, TP cost, cooldown turns respectively for the skill depending on its mastery level. Replace 'x' with a flat number value of how much you want it to shift per the skill's mastery level. - Note: HP Cost requires YEP_SkillCore.js. - Note: Cooldown requires YEP_X_SkillCooldowns. <Mastery Effect: +x% Damage Per Level> <Mastery Effect: +x% HP Cost Per Level> <Mastery Effect: +x% MP Cost Per Level> <Mastery Effect: +x% TP Cost Per Level> <Mastery Effect: +x% Cooldown Per Level> <Mastery Effect: -x% Damage Per Level> <Mastery Effect: -x% HP Cost Per Level> <Mastery Effect: -x% MP Cost Per Level> <Mastery Effect: -x% TP Cost Per Level> <Mastery Effect: -x% Cooldown Per Level> - This will increase or decrease the damage, HP cost, MP cost, TP cost, cooldown turns respectively for the skill depending on its mastery level. Replace 'x' with a percentile number value of how much you want it to shift per the skill's mastery level. - Note: HP Cost requires YEP_SkillCore.js. - Note: Cooldown requires YEP_X_SkillCooldowns. <No Damage Mastery Effect> <No HP Cost Mastery Effect> <No MP Cost Mastery Effect> <No TP Cost Mastery Effect> <No Cooldown Mastery Effect> - These notetags will disable their respective mastery effects from the default settings. They will just have their default value with nothing changed about them at all. - Note: HP Cost requires YEP_SkillCore.js. - Note: Cooldown requires YEP_X_SkillCooldowns. <Custom EXP Mastery Formula: x> - Makes a custom EXP mastery formula for the skill. Replace 'x' with the desired formula you wish to use for it. - Example: <Custom EXP Mastery Formula: level * 20 + 5> <Custom Damage Mastery Formula: x> - Makes a custom damage mastery formula for the skill. Replace 'x' with the desired formula you wish to use for it. - Example: <Custom Damage Mastery Formula: value * (1.00 + (level * 0.20))> <Custom HP Cost Mastery Formula: x> - Makes a custom HP cost mastery formula for the skill. Replace 'x' with the desired formula you wish to use for it. - Example: <Custom HP Cost Mastery Formula: cost * (1.00 - (level * 0.05))> - Note: HP Cost requires YEP_SkillCore.js. <Custom MP Cost Mastery Formula: x> - Makes a custom MP cost mastery formula for the skill. Replace 'x' with the desired formula you wish to use for it. - Example: <Custom MP Cost Mastery Formula: cost * (1.00 - (level * 0.05))> <Custom TP Cost Mastery Formula: x> - Makes a custom TP cost mastery formula for the skill. Replace 'x' with the desired formula you wish to use for it. - Example: <Custom TP Cost Mastery Formula: cost * (1.00 - (level * 0.05))> <Custom Cooldown Mastery Formula: x> - Makes a custom cooldown mastery formula for the skill. Replace 'x' with the desired formula you wish to use for it. - Example: <Custom Cooldown Mastery Formula: turns - (level * 1.5)> --- Actor and Enemy Notetags: <Starting Skill Masteries> list list list </Starting Skill Masteries> - If you want actors and/or enemies to have initial starting skill mastery levels, use the above notetag. This will only apply for actors when starting a new game or initializing them. Replace 'list' with one of the following setups: Skill x: level Skill x: level, exp name: level name: level, exp - Replace 'x' with the ID of the skill you wish to alter the starting mastery level of. Alternatively, you can replace 'Skill x' with the skill 'name'. If multiple skills have the same name in the database, this will apply to the first skill entry with that name. - Replace 'level' with the level you wish to start it off as. This cannot go under 0 nor go above the maximum level of the skill. - If used, replace 'exp' with the amount of EXP it will currently have at the start. This cannot be greater than or equal to the maximum value for the skill mastery level's EXP. If not used, it will default to 0. Example: <Starting Skill Masteries> Skill 5: 2 Skill 6: 3, 4 Firaga: 7 Firaja: 8, 10 </Starting Skill Masteries> - In the above example, the actor/enemy will have Skill 5 and 6 starting at levels 2 and 3 respectively. However, Skill 6 will also have some skill EXP starting at 4. The actor/enemy's 'Firaga' and 'Firaja' skills will start at levels 7 and 8 respectively while 'Firaja' will have 10 skill EXP at the very start. --- Slippery TilesYou can use these notetags to add slippery tiles to your tilesets. Tileset Notetag: <Slippery Tile: x> <Slippery Tile: x, x, x> Tiles with terrain ID x will be designated as slippery tiles. Smart JumpYou can use these notetags to set up what Terrain Tags that the player can't jump on or past. Tileset Notetags: <Illegal Jump: x> <Illegal Jump: x, x, x> <Illegal Jump: x to y> Replace x with the terrain tags you want to forbid the player from going past or landing on while doing Smart Jumps. Event Notetag: <Illegal Jump> This will prevent the player from being able to jump on or over this event while doing Smart Jumps. If the event is set to Through mode, then the player can jump through or onto the event. Special Parameter FormulaYou can use the following notetags to alter the various aspects that modify the special parameter values: Actor, Class, Enemy, Weapon, Armor, and State Notetags: <stat Plus: +x%> <stat Plus: -x%> <stat Plus: +x.y> <stat Plus: -x.y> Replace 'stat' with 'tgr', 'grd', 'rec', 'pha', 'mcr', 'tcr', 'pdr', 'mdr', 'fdr', or 'exr'. This is the value added to the base parameter before the rate and flat values contribute to the total parameter value assuming the plugin's default formula is utilized. <stat Rate: x%> <stat Rate: x.y> Replace 'stat' with 'tgr', 'grd', 'rec', 'pha', 'mcr', 'tcr', 'pdr', 'mdr', 'fdr', or 'exr'. This is the value multipled to the sum of the base and plus values of the parameter before added by the flat value assuming the plugin's default formula is utilized. <stat Flat: +x%> <stat Flat: -x%> <stat Flat: +x.y> <stat Flat: -x.y> Replace 'stat' with 'tgr', 'grd', 'rec', 'pha', 'mcr', 'tcr', 'pdr', 'mdr', 'fdr', or 'exr'. This is the value added finally to the sum of the base and plus values after being multiplied by the rate value assuming the plugin's default formula is utilized. Stat AllocationIf you want to give certain classes different stats to allocate into, use the following notetag setups: Class Notetags: <Stat Allocation: x, x, x> or <Stat Allocation> x x x </Stat Allocation> - Replace 'x' with a stat to add it to a list of parameters that players can allocate points into. Insert as many 'x' entries as you need. They will appear in the menu in the order they've been placed. Unaffiliated stats will not appear in the menu. Use any of the stats below: --- Param: Stands for: mhp Max HP mmp Max MP atk Attack def Defense mat Magic Attack mdf Magic Defense agi Agility luk Luck XParam: hit Hit Rate eva Evasion Rate cri Critical Hit Rate cev Critical Evasion Rate mev Magic Evasion Rate mrf Magic Reflection Rate cnt Counterattack Rate hrg HP Regeneration Rate mrg MP Regeneration Rate trg TP Regeneration Rate SParam: tgr Target Rate grd Guard Effect Rate rec Recovery Rate pha Pharmacology (Item Effectiveness) mcr MP Cost Rate tcr TP Charge Rate pdr Physical Damage Rate mdr Magical Damage Rate fdr Floor Damage Rate exr Experience Rate --- These can be inserted into the 'Default Parameters' plugin parameter, too, to change up the default listing and make it apply to every class that does not have their own unique notetag setup. State Tooltip Display
<Help Description> insert a help description here insert another line if you want to </Help Description> - Place this in the states that you want to have appear in the tooltip window. Text codes can be used for the description. If no description is used, then the state will not appear in the tooltip window. Status Menu CoreActor VariablesUse the following notetags to display variables in your Status Menu. Actor Notetags: <Column x Variables: y> <Column x Variables: y, y, y> <Column x Variables: y to z> This will display in column x (1 through 4) the variable(s) y. If using the y to z notetag, this will display all the variables from y to z. More Status Menu PagesPlace the following notetags inside of an actor's notebox that you wish to add more status menu pages to. Actor Notetags: ======================================================================== <Status Menu Page: title> text text </Status Menu Page: title> - Replace 'title' with the title of the status menu page you wish for it to display in the command window. Insert as many lines of 'text' as you see fit for your extra status menu profile. Inserting multiple setups of this notetag will allow you to have more page entries in the status menu. Note: You can use text codes for the 'text' entries. -- Examples --- <Status Menu Page: Origin> \n[1] is originally from the kingdom of Dragnof, a country that existed 400 years in the past; the population was made up of both humans and Dragons co-existing peacefully with each other. </Status Menu Page: Origin> <Status Menu Page: Discipline> \n[1] firmly believes in noblesse oblige, where the strong and privileged should act with generosity and nobility towards those less privileged. </Status Menu Page: Discipline> ======================================================================== <Status Menu Page title Switch: x> <Status Menu Page title Switch: x, x, x> - Replace 'title' with the title of the status menu page you wish for this notetag to affect. Replace 'x' with a switch ID that is required to be ON in order for this status menu page to show up in the actor's status menu profile. If you use multiple switches, all the switches must be on in order for this status menu page to appear. -- Examples --- <Status Menu Page Origin Switch: 1> <Status Menu Page Discipline Switch: 5, 6, 7, 8, 9, 10> Profile Status PageThe following notetags are used for actors specifically to alter the profile page properties for the Status Menu. Actor Notetags: <Profile Text> text text </Profile Text> Changes the profile text from the default profile text to the text used in between the two notetags. You can use text codes for the text here. Word wrap is not supported. <Profile Image: filename> If you wish to associate a profile image for the actor, replace 'filename' with the filename of a picture located in your img/pictures folder. Do not include the file extension. If your image is Aldo.png, just use 'Aldo' and do not include the '.png' extension. <Profile Image Align: Left> <Profile Image Align: Center> <Profile Image Align: Right> If you wish to use a different alignment from the one in the plugin's parameter settings, you can use these notetags. If you use a nonexistant word, then the right alignment will be decided by default. Steal & SnatchUse the following notetags to set up your steal effects. Enemy Notetags: <Steal Item x: y%> <Steal Weapon x: y%> <Steal Armor x: y%> <Steal Gold x: y%> Gives the enemy the respect item to be stolen. x is the item's ID while y% is the rate at which the item can be stolen from. <Steal Potion: y%> <Steal Short Sword: y%> <Steal Round Shield: y%> If you decide to use names instead of item ID's, you can use the above notetag format. If you have multiple items with the same name, priority will be given to the item with the highest item ID in the order of items, weapons, and then armors. <Steal Resist: +x%> <Steal Resist: -x%> This is the enemy's inherent resistance against stealing. Skill and Item Notetags: <Steal> <Steal: +x%> <Steal: -x%> This enables the skill/item to have steal properties. Actions with steal properties will have a chance of stealing an item. This notetag applies to all item types. If you use the notetag versions with +x% or -x%, the steal rate is increased/decreased by x%. <Steal Item> <Steal Item: +x%> <Steal Item: -x%> This enables the skill/item to have steal properties. Actions with steal properties will have a chance of stealing an item. This notetag adds item types to the stealable item pool. If you use the notetag versions with +x% or -x%, the steal rate is increased/decreased for item types by x%. <Steal Weapon> <Steal Weapon: +x%> <Steal Weapon: -x%> This enables the skill/item to have steal properties. Actions with steal properties will have a chance of stealing an item. This notetag adds weapon types to the stealable item pool. If you use the notetag versions with +x% or -x%, the steal rate is increased/decreased weapon item types by x%. <Steal Armor> <Steal Armor: +x%> <Steal Armor: -x%> This enables the skill/item to have steal properties. Actions with steal properties will have a chance of stealing an item. This notetag adds armor types to the stealable item pool. If you use the notetag versions with +x% or -x%, the steal rate is increased/decreased for armor types by x%. <Steal Gold> <Steal Gold: +x%> <Steal Gold: -x%> This enables the skill/item to have steal properties. Actions with steal properties will have a chance of stealing an item. This notetag adds gold types to the stealable item pool. If you use the notetag versions with +x% or -x%, the steal rate is increased/decreased for gold by x%. <Snatch> <Snatch: +x%> <Snatch: -x%> This enables the skill/item to have snatch properties. Actions with snatch properties are able to select the exact item they wish to steal. This notetag applies to all item types. If you use the notetag versions with +x% or -x%, the snatch rate is increased/decreased by x%. * Note: Snatching only works on skills/items that target. <Snatch Item> <Snatch Item: +x%> <Snatch Item: -x%> This enables the skill/item to have snatch properties. Actions with snatch properties are able to select the exact item they wish to steal. This notetag adds items to the pool. If you use the notetag versions with +x% or -x%, the snatch rate is increased/decreased by x% for items. * Note: Snatching only works on skills/items that target. <Snatch Weapon> <Snatch Weapon: +x%> <Snatch Weapon: -x%> This enables the skill/item to have snatch properties. Actions with snatch properties are able to select the exact item they wish to steal. This notetag adds weapons to the pool. If you use the notetag versions with +x% or -x%, the snatch rate is increased/decreased by x% for weapons. * Note: Snatching only works on skills/items that target. <Snatch Armor> <Snatch Armor: +x%> <Snatch Armor: -x%> This enables the skill/item to have snatch properties. Actions with snatch properties are able to select the exact item they wish to steal. This notetag adds armors to the pool. If you use the notetag versions with +x% or -x%, the snatch rate is increased/decreased by x% for armors. * Note: Snatching only works on skills/items that target. <Snatch Gold> <Snatch Gold: +x%> <Snatch Gold: -x%> This enables the skill/item to have snatch properties. Actions with snatch properties are able to select the exact item they wish to steal. This notetag adds gold targets to the pool. If you use the notetag versions with +x% or -x%, the snatch rate is increased/decreased by x% for gold. * Note: Snatching only works on skills/items that target. Item, Weapon, and Armor Notetags: <Enable Automatic Debuff> <Disable Automatic Debuff> This let's you override the 'Automatic Effect' settings in the parameters for this individual item. Enabling it will cause any weapons and armors to debuff the enemy's parameters relative to the piece of equipment stolen. Disabling it will make no such thing occur. Automatic Debuffing is only applied to weapons and armors. <Steal Sound Name: filename> If you wish to give an item a unique sound effect when stolen, use this notetag to accomplish that. Exclude file extensions from the 'filename'. <Steal Sound Volume: x> To change the volume for this item's sound effect when it is stolen, use this notetag and replace x with the volume level desired. <Steal Sound Pitch: x> To change the pitch for this item's sound effect when it is stolen, use this notetag and replace x with the pitch desired. <Steal Sound Pan: x> To change the pan for this item's sound effect when it is stolen, use this notetag and replace x with the pan desired. Actor, Class, Weapon, Armor, and State Notetags: <Steal Rate: +x%> <Steal Rate: -x%> <Steal Type Rate: +x%> <Steal Type Rate: -x%> Increase/decrease the steal rate for the user by x%. If you use the 'Type' notetag, replace 'Type' with 'Item', 'Weapon', 'Armor', or 'Gold' to apply individual steal rate bonuses for just those types. Swap EnemiesThe purpose of swap enemies is to make it easier to swap out enemies for a random enemy inside of a particular pool of enemies. Use the following notetags to utilize this plugin: Enemy Notetag: <Swap: x, x, x> <Swap: x to y> Changes this enemy into a swap dummy. Replace x with the ID's of the other enemies you would like to randomly spawn in its place. Insert multiples of this tag if you wish to add more randomized enemies to the pool. <Swap> Slime Hornet Bat Wisp> </Swap> If you wish to use names instead, you can construct your notetags in the above format. Enemies with matching names will be added to the random swap pool for the swap dummy. If you have multiple enemies in the database with the same name, priority will be given to the enemy with the highest ID. Target CoreIf you would like to utilize custom target scopes for your skills and items, you can use these notetags: Skill and Item Notetags: <Repeat: x> This determines the number of times an action is repeatedly used on each target. This can go beyond the default editor's limit of 9. <Target: Everybody> This targets all alive opponent and friendly members with the user being the very last target. <Target: x Random Any> This adds x random alive opponents and/or allies. <Target: Target All Foes> This targets a single foe and then adds all alive opponent members. <Target: Target x Random Foes> This targets a single foe and then adds x random alive opponent members. <Target: x Random Foes> This adds x random alive opponent members. This can go beyond the editor's default limit of 4 randomf oes. <Target: All Allies But User> This will target all friendly alive members except for the user. <Target: Target All Allies> This will target a single ally and then adds all alive friendly members. <Target: Target x Random Allies> This will target a single ally and then adds x random alive allies. <Target: x Random Allies> This adds x random alive allied members. <Target: Everybody param Multiple Of x> Replace 'param' with 'level', 'maxhp', 'maxmp', 'atk', 'def', 'mat', 'mdf', 'agi', 'luk', 'hp', 'mp', or 'tp'. This will make the skill or item indiscriminately target any living battler on the battlefield whose parameter value is a multiple of x. *NOTE: If you are using 'level', make sure you have YEP_EnemyLevels.js. <Target: Allies param Multiple Of x> Replace 'param' with 'level', 'maxhp', 'maxmp', 'atk', 'def', 'mat', 'mdf', 'agi', 'luk', 'hp', 'mp', or 'tp'. This will make the skill or item target any living allied party member on the battlefield whose parameter value is a multiple of x. *NOTE: If you are using 'level', make sure you have YEP_EnemyLevels.js. <Target: Foes param Multiple Of x> Replace 'param' with 'level', 'maxhp', 'maxmp', 'atk', 'def', 'mat', 'mdf', 'agi', 'luk', 'hp', 'mp', or 'tp'. This will make the skill or item target any living enemy battler on the battlefield whose parameter value is a multiple of x. *NOTE: If you are using 'level', make sure you have YEP_EnemyLevels.js. --- YEP_RowFormation.js and YEP_BattleEngineCore.js Required --- <Target: Enemy Row> This will target the enemy row equal to that of the currently selected target enemy. The entire row will be selected as a whole. <Target: Enemy Row x> This will target specifically the enemy row x for the enemy unit. The entire row will be selected as a whole. <Target: Front Enemy Row> This will target the front-most enemy row with alive members. If there is a row without any alive members, this will target the next row with an alive member. <Target: Back Enemy Row> This will target the back-most enemy row with alive members. If there is a row without any alive members, this will target the next row with an alive member. <Target: Ally Row> This will target the enemy row equal to that of the currently selected target enemy. The entire row will be selected as a whole. <Target: Ally Row x> This will target specifically the allied row x for the allied unit. The entire row will be selected as a whole. <Target: Front Ally Row> This will target the front-most ally row with alive members. If there is a row without any alive members, this will target the next row with an alive member. <Target: Back Ally Row> This will target the back-most ally row with alive members. If there is a row without any alive members, this will target the next row with an alive member. Area of EffectYou can use the following notetags to apply area of effect scopes for your skills and items! Skill and Item Notetags: --- AOE Circle Scope --- <AOE Radius: x> Turns the skill into having a target scope with a circular AOE. x is the amount of pixels of the radius for the AOE Circle. <AOE Height Rate: x%> Changes the height to be x% of the diameter of the AOE Circle. <AOE Graphic: filename> If you wish to use a different image for the AOE circle for this skill or item, replace 'filename' with the filename of the graphic found within the img/pictures/ folder. Do not include the file extension. For example, the graphic 'aoeblue.png' will result in notetag <AOE Graphic: aoeblue>. <AOE Hue: x> This will change the hue of the AOE circle to x. By default, the hue value is 0. This will alter the color of it. <AOE Blend: x> This is the blend mode used for the AOE graphic. 0 is normal with no blend modes applied. 1 is additive. 2 is multiply. 3 is screen. *NOTE: This does not work with the unique selection types found with the YEP_X_SelectionControl plugin. --- AOE Rectangle Scope --- <Rect Column: x> This will make a rectangular area of effect scope that is x pixels wide. The area of effect zone is vertical and all targets within this zone will become targets for the action. <Rect Row: x> This will make a rectangular area of effect scope that is x pixels tall. The area of effect zone is horizontal and all targets within this zone will become targets for the action. <Rect Screen> This will target all units within the entirity of the screen. While it is the same as an all enemies/all allies scope, this can be used to give a visual representation of which units are selected as a target. <Rect Graphic: filename> If you wish to use a different image for the AOE rectangle for this skill or item, replace 'filename' with the filename of the graphic found within the img/pictures/ folder. Do not include the file extension. For example, the graphic 'rectblue.png' will result in notetag <AOE Graphic: rectblue>. <Rect Hue: x> This will change the hue of the AOE rectangle to x. By default, the hue value is 0. This will alter the color of it. <Rect Blend: x> This is the blend mode used for the AOE graphic. 0 is normal with no blend modes applied. 1 is additive. 2 is multiply. 3 is screen. *NOTE: This does not work with the unique selection types found with the YEP_X_SelectionControl plugin. --- Animation Settings --- <AOE Center Animation> This will cause the animation for an AOE skill to be played to center on the first target of the AOE group, which is usually the center of the AOE targets. <AOE Group Animation> This will cause the animation for an AOE skill to be played on all of the targets within the AOE group as if normally done. Actor and Enemy Notetags: --- AOE Hitbox Settings --- <AOE Buffer X: +x> <AOE Buffer X: -x> <AOE Buffer Y: +x> <AOE Buffer Y: -x> Changes the buffer x/y of the battler when an AOE image is placed on the battler. This is also the offset from the center location at which the AOE targets will be calculated, too. If this notetag isn't used, the buffer value used will be from the plugin parameters. <AOE Hitbox Width: x> <AOE Hitbox Height: x> This will adjust the hitbox of the battler to have an AOE hitbox width of x or an AOE hitbox height of x. Selection Control
To make skills and items select only certain types of battlers, you can use the following notetag setup to do so: Skill and Item Notetags: <Single or Multiple Select> This will allow the skill or item to be able to select either single targets or all targets at once. This will automatically make a skill default to single target selecting. You MUST change your scope in the database to work with this effect. *Note: Having this option will cancel out AoE Circles and AoE Rectangles to avoid conflicting issues. *Note: If there is an enemy with taunt, the option to switch between a group target and a single target will not be available. *Note: Enemy AI will NOT make use of the ability to toggle between single target and multi-target scopes. <Disperse Damage> Used in conjunction with the above notetag, this will cause damage to be split evenly amongst the number of targets the skill is dispersed into. The damage dispersion effect will only occur if multiple targets are being selected after toggling. <Enemy or Actor Select> <Actor or Enemy Select> This will allow the player to toggle between selecting an enemy or actor for the action's target scope. When using <Enemy or Actor Select>, it will first target enemies by default. Using <Actor or Enemy Select> will target actors by default. Using either notetag will change the action's target scope to single target. *Note: Enemy AI will NOT make use of the ability to toggle between actors or enemies for skill selection. <Weapon Range> <Weapon Ranged> Requires YEP_RowFormation.js. This will make the selection of targets vary based on the battler's weapon range. If the weapon is 'melee', then it will target the front row only. If the weapon is 'ranged', then it can target any row the battler wants. *Note: If you use any <Select Condition> effects, all selection options provided by default with the plugin parameters will be reset under the assumption that it will no longer be an action of default nature. If this is the case, you will need to use the above notetags to specify how you wish to make your skill's selection methods. Actor, Class, Enemy, Weapon, Armor, State Notetags: <Cannot Select: All> All actions cannot select this battler unless it's an action whose scope is a user scope. <Cannot Select: Physical Hit> <Cannot Select: Magical Hit> <Cannot Select: Certain Hit> This will prevent physical, magical, or certain hit actions from being able to select the battler. They will be excluded out of multi-hit skills, as well unless it's an action whose scope targets the user itself. targets the user itself. <Cannot Select: Skills> <Cannot Select: Items> This will prevent skills/items from being able to target the battler unless it's an action whose scope targets the user itself. <Cannot Select: Item x> <Cannot Select: Item name> This will prevent item 'x' (or the named item) from being able to target the battler unless the item's scope targets the user itself. If you have multiple items in your database with the same name, priority will be given to the item with the highest ID. <Cannot Select: Skill x> <Cannot Select: Skill name> This will prevent skill 'x' (or the named skill) from being able to target the battler unless the skill's scope targets the user itself. If you have multiple skills in your database with the same name, priority will be given to the skill with the highest ID. <Cannot Select: SType x> <Cannot Select: SType name> This will prevent skills of skill type 'x' (or named) from being able to target the battler unless the skill's scope targets the user itself. If you have multiple skill types in your database with the same name, then priority will be given to the skill type with the highest ID. <Cannot Select: Element x> <Cannot Select: Element name> This will prevent actions with an elemental ID of 'x' (or named) from being able to target the battler unless the action's scope targets the user itself. If you have multiple elements in your database with the same name, then priority will be given to the element with the highest ID. Weapon and Enemy Notetags: <Melee> This will designate the weapon/enemy as being melee and will affect any skill or item selection range that uses the 'Weapon Range' condition. Weapons/Enemies of this nature will target only the front row for those selection conditions. <Range> <Ranged> This will designate the weapon/enemy as being ranged and will affect any skill or item selection range that uses the 'Weapon Range' condition. Weapons/Enemies of this nature will be able to target any row for those selection conditions.
To impose specific conditions on which targets are valid targets, use the following notetag setup: --- Skill and Item Notetags: <Select Conditions> condition condition </Select Conditions> Replace 'condition' with the desired condition setup. Insert multiple conditions to make an action require more conditions for viable targets. Using this will overwrite the default settings imposed by the plugin parameters so if you wish to use those settings, you'll have to use the associated condition with it. --- Conditions: --- Any Row - Requires YEP_RowFormation.js. The battler can be targeted from any row it is in as a valid target. This will conflict with the other 'Row Only' select conditions. --- Back Row Only - Requires YEP_RowFormation.js. This will make only the back row battlers be selectable for target. The back row will refer to whatever row is in the back that has living members. If row 3's enemies are all dead, but row 2 has living members, then row 2 will be considered the back row. This will conflict with the other 'Row Only' select conditions. --- Front Row Only - Requires YEP_RowFormation.js. This will make only the front row battlers be selectable for target. The front row will refer to whatever row is in front that has living members. If row 1's enemies are all dead, but row 2 has living members, then row 2 will be considered the front row. This will conflict with the other 'Row Only' select conditions. --- Weapon Range - Requires YEP_RowFormation.js. This will make the selection of targets vary based on the battler's weapon range. If the weapon is 'melee', then it will target the front row only. If the weapon is 'ranged', then it can target any row the battler wants. --- Row x Only - Requires YEP_RowFormation.js. This will make only battlers in row x be selectable for target. Any battlers not in row x will be excluded from target selection. This will conflict with the other 'Row Only' select conditions. --- Row x Max - Requires YEP_RowFormation.js. This will make all battlers who are located in a lower number row up to row x be selectable for target. Any battlers in a row number larger than x will be excluded from target selection. --- Row x Min - Requires YEP_RowFormation.js. This will make all battlers who are located in a row from row x onward selectable for target. Any battlers in a row number smaller than x will be excluded from target selection. --- Param stat eval ie: Param MaxHP >= 500 ie: Param HP% <= 0.30 ie: Param Level === 25 - This makes the selection have a check on the target's parameter values before deciding if the target is a valid target for selection. You can replace 'stat' with 'MaxHP', 'MaxMP', 'MaxTP', 'HP', 'MP', 'TP', 'HP%', 'MP%', 'TP%', 'ATK', 'DEF', 'MAT', 'MDF', 'AGI', 'LUK', or 'LEVEL'. This run an eval check against that parameter owned by the target. --- State: x State: name - The target must have state 'x' in order to be selected as a valid target. If you're using the named version of the condition and you have multiple states with the same name in your database, priority will be given to the state with the highest ID. If the target doesn't have state 'x', then the target is not a valid target for selection. --- Not State: x Not State: name - The target must not have state 'x' in order to be selected as a valid target. If you're using the named version of the condition and you have multiple states with the same name in your database, priority will be given to the state with the highest ID. If the target does have state 'x', then the target is not a valid target for selection. --- Not User - This will remove the user from the possible selection pool making the user unable to be selected as a valid target. TauntThe following are some notetags you can use to add taunt traits to your various database objects. Actor, Class, Weapon, Armor, State, Enemy Notetags: <Physical Taunt> <Magical Taunt> <Certain Taunt> These three notetags enable the database object of choice to have the respective taunt mechanic against those types of actions. Physical taunts will cause the user to aggro all physical type of actions from the rival team. The same goes for magical taunts and certain taunts of their nature. <Null Physical Taunt> <Null Magical Taunt> <Null Certain Taunt> This nullifies the respective taunt trait on the user (not the attacker). What this means is if a user originally has taunt through some form or means, having a null taunt trait applied will remove that taunt effect and the user will be treated as a normal target. <Ignore Physical Taunt> <Ignore Magical Taunt> <Ignore Certain Taunt> This allows an attacker with this trait to ignore any taunts of the respective nature and gain access to all possible targets as if no taunts are in place. Skill and Item Notetag: <Bypass Taunt> This causes this skill/item to ignore taunts altogether and the skill/item is able to select single targets as if no taunts existed on the field. Tool Ring System
<Tool Common Event: x> - For: Items ONLY - Replace 'x' with the ID of the Common Event to launch when used. Unison Attack
<Unison Skill: x, x> <Unison Skill: x, x, x> <Unison Skill: x, x, x, x> - Replace 'x' with the skill ID's required for this Unison Attack to work. - Insert as many skill ID's as needed. - Once all the skills are found queued in the party, a Unison Attack will occur. Only the actor party can perform Unison Attacks. - Skills that become Unison Attacks cannot be directly used from the menu in order to avoid script crashes. <Unison Skill Priority: x> - 'x' determines the priority value of the Unison Attack. - If multiple recipes for a Unison Attack are found, then the Unison Skill with the highest priority value will occur. If they're tied, then a random possible Unison Skill combination of the highest priority is chosen. Visual Item Inventory
<Cell BG Color: r, g, b, a> - Changes the color of the item's cell background color from default. - Replace 'r' with red value from 0 to 255. - Replace 'g' with green value from 0 to 255. - Replace 'b' with blue value from 0 to 255. - Replace 'a' with alpha value from 0 to 1. Weakness Display
Skill and Item Notetags: <Analyze Weakness: x> This will reveal x weaknesses that the player has not currently revealed yet from the target enemy. Enemy Notetags: <Show HP Gauge> This will show the enemy's HP gauge by default and ignore the plugin parameter's default settings. <Hide HP Gauge> This will hide the enemy's HP gauge by default and ignore the plugin parameter's default settings. Weapon AnimationFor those who would like to give their weapons a little bit of a change, you can make use of these notetags: Actor, Class, Enemy, Weapon, Armor, and State Notetags: <Weapon Image: x> Replace x with a number above 0 and you'll get an image from img/system's weapon sheets. Each sheet contains 12 weapon images. If you wish to load a weapon from the first sheet, it'll be within 1-12. If you wish to load a weapon from the second sheet, it'll be within 13-24, and so on. The weapon sheets increase in increments of 12, which means that if you wish to load a weapon from weapon sheet 50, x will be between 589 to 600. By default, these are the number values associated with each: 1 - Dagger 7 - Long Bow 13 - Mace 19 - Slingshot 25 - Book 2 - Sword 8 - Crossbow 14 - Rod 20 - Shotgun 26 - Custom 3 - Flail 9 - Gun 15 - Club 21 - Rifle 27 - Custom 4 - Axe 10 - Claw 16 - Chain 22 - Chainsaw 28 - Custom 5 - Whip 11 - Glove 17 - Sword#2 23 - Railgun 29 - Custom 6 - Staff 12 - Spear 18 - Iron Pipe 24 - Stun Rod 30 - Custom <Weapon Image: filename> If you have created a custom folder to place unique weapon sheets, you can use this notetag to acquire them. The filename is case sensitive. Do not include the file extension. If your weapon sheet is called DaggerBlue.png, then the notetag you'd use would be <Weapon Image: DaggerBlue> only. <Weapon Motion: thrust> <Weapon Motion: swing> <Weapon Motion: missile> This will dictate the motion the battler will use when attacking if you're using a custom weapon animation. If nothing is placed here, the motion will default to the 'Default Motion' value in the plugin parameters. You can use any of the following motions: walk wait chant guard damage evade thrust swing missile skill spell item escape victory dying abnormal sleep dead <Weapon Hue: x> For those who would like to use different hues with your weapon animation, use this notetag in the same notebox as the <Weapon Image: x> notetag to change the hue of the weapon animation to x. <Weapon Animation: x> If you would like to override the attack animation when using this weapon, you can use x to dictate which animation will be used for regular attacks. --- If you haven't noticed yet, these notetags are made for actors, classes, enemies, weapons, armors, and also states. What this means is, the weapon animation changes will behave more like traits. Priorities will occur in the following order: States Weapons Armors Classes Actors Enemies This means that if a battler is affected by a state that would modify its weapon appearance, any other weapon animation changes that the user would have will be overwritten by the state's weapon animation change until the state wears off. Weapon Swap System
Skill and Item Notetags: <Switch to Weapon: x> <Switch to Weapon: text> When the actor uses this skill or item, the actor will switch to this weapon if it is equipped when the skill cost is paid. x is the weapon type ID and text is the weapon name. If you use the weapon name, type it out exactly since it is case sensitive. This notetag does not make the weapon a requirement. To make it a requirement, use the database's "Required Weapon" dropdown lists to enforce the requirement. Skill Notetags: <Require Any Weapon> Requires any kind of weapon to be equipped in order to use it. <Require Weapon Types: x> <Require Weapon Types: x, x, x> Insert multiple x to add more weapon types. All of the weapon types must be equipped in order for this skill to be used. Weapon UnleashThere's a few notetags you can use to replace the default attack and provide any weapon unleash effects. Note: If you're using notetags that write out the skill's name and you have multiple skills in your database with the same name, priority will be given to the skill with the highest ID. Actor, Class, Enemy, Weapon, Armor, State notetags: --- Replace Attack --- <Replace Attack: x> <Replace Attack: name> This will replace the attack skill used by the battler. If a battler would have multiple attack replacements, priority will be given in the following order in a first-come-first-serve aspect: States - Highest to Lowest Priority Equipment - In order of equip list Enemy Aspect Class Aspect Actor Aspect --- Replace Guard --- <Replace Guard: x> <Replace Guard: name> This will replace the guard skill used by the battler. If a battler would have multiple guard replacements, priority will be given in the following order in a first-come-first-serve aspect: States - Highest to Lowest Priority Equipment - In order of equip list Enemy Aspect Class Aspect Actor Aspect --- Weapon Unleash --- <Weapon Unleash x%: y> <Weapon Unleash x%: name> This causes the Attack skill to have a x% chance to randomly use skill y (or named). This will apply only to the Attack Command. Insert multiple copies of this notetag to give more weapon unleashes. If a battler would have multiple weapon unleashes, the randomization check will occur in the following order: States - Highest to Lowest Priority Equipment - In order of equip list Enemy Aspect Class Aspect Actor Aspect If a weapon unleash check passes earlier in the list while there are still weapon unleashes later in the list, that weapon unleash will take priority and override all the following weapon unleashes. --- Guard Unleash --- <Guard Unleash x%: y> <Guard Unleash x%: name> This causes the Guard skill to have a x% chance to randomly use skill y (or named). This will apply only to the Guard Command. Insert multiple copies of this notetag to give more guard unleashes. If a battler would have multiple guard unleashes, the randomization check will occur in the following order: States - Highest to Lowest Priority Equipment - In order of equip list Enemy Aspect Class Aspect Actor Aspect If a guard unleash check passes earlier in the list while there are still guard unleashes later in the list, that guard unleash will take priority and override all the following guard unleashes. --- Unleash Rate Modifiers --- <Weapon Unleash: +x%> <Weapon Unleash: -x%> This alters the weapon unleash rate for all weapon unleashes by +x%/-x%. <Weapon Unleash x: +y%> <Weapon Unleash x: -y%> <Weapon Unleash name: +y%> <Weapon Unleash name: -y%> This alters the weapon unleash rate for skill x (or name) by +y%/-y%. If you are using the named notetag and you have multiple skills in your database that use multiple names, priority will be given to the skill with the highest ID. <Guard Unleash: +x%> <Guard Unleash: -x%> This alters the guard unleash rate for all weapon unleashes by +x%/-x%. <Guard Unleash x: +y%> <Guard Unleash x: -y%> <Guard Unleash name: +y%> <Guard Unleash name: -y%> This alters the guard unleash rate for skill x (or name) by +y%/-y%. If you are using the named notetag and you have multiple skills in your database that use multiple names, priority will be given to the skill with the highest ID. Skill Notetags: <Command Text: x> <Attack Text: x> <Guard Text: x> If you are using Replace Attack or Replace Guard, you can change the way the command name appears in the actor command window to x. If you are using the <Command Text: x> notetag, this will apply to both Attack and Guard names. |

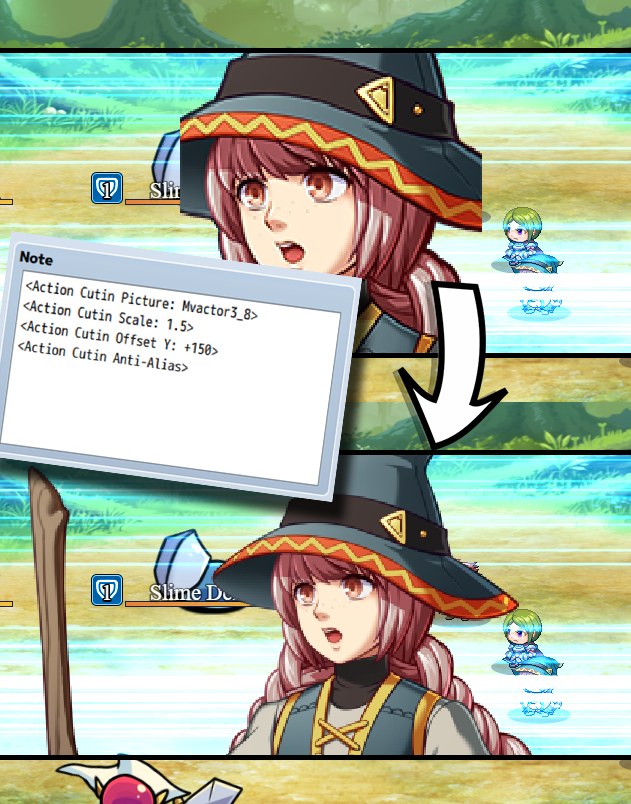
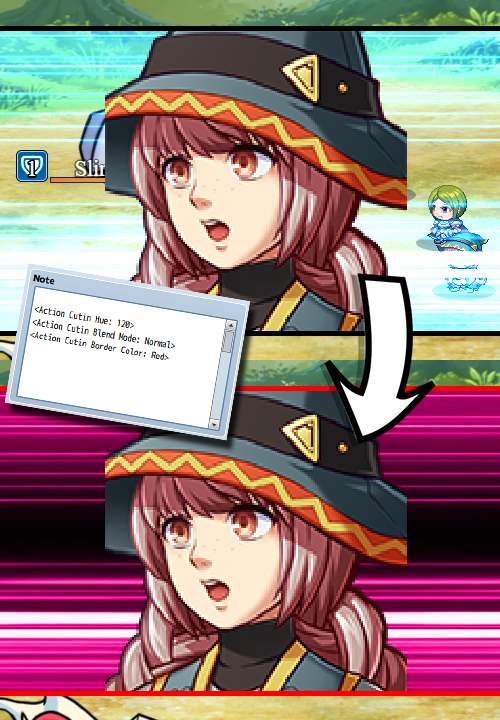
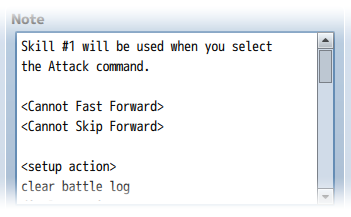
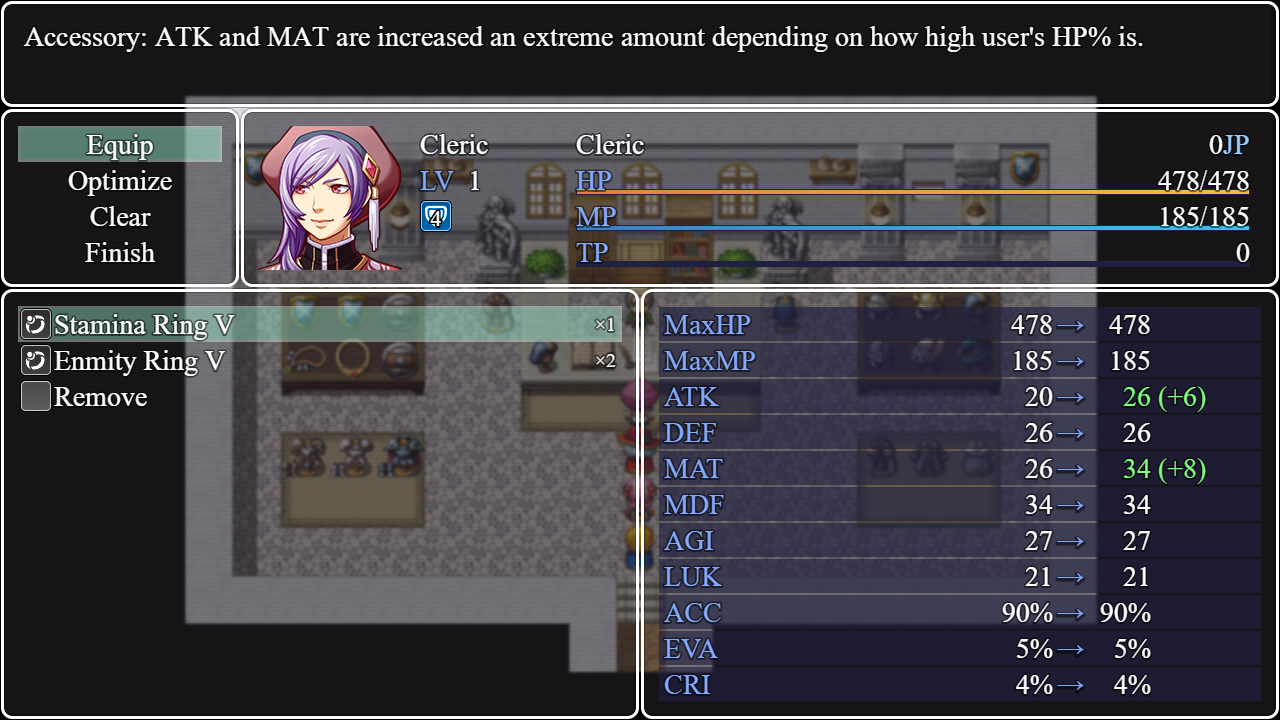
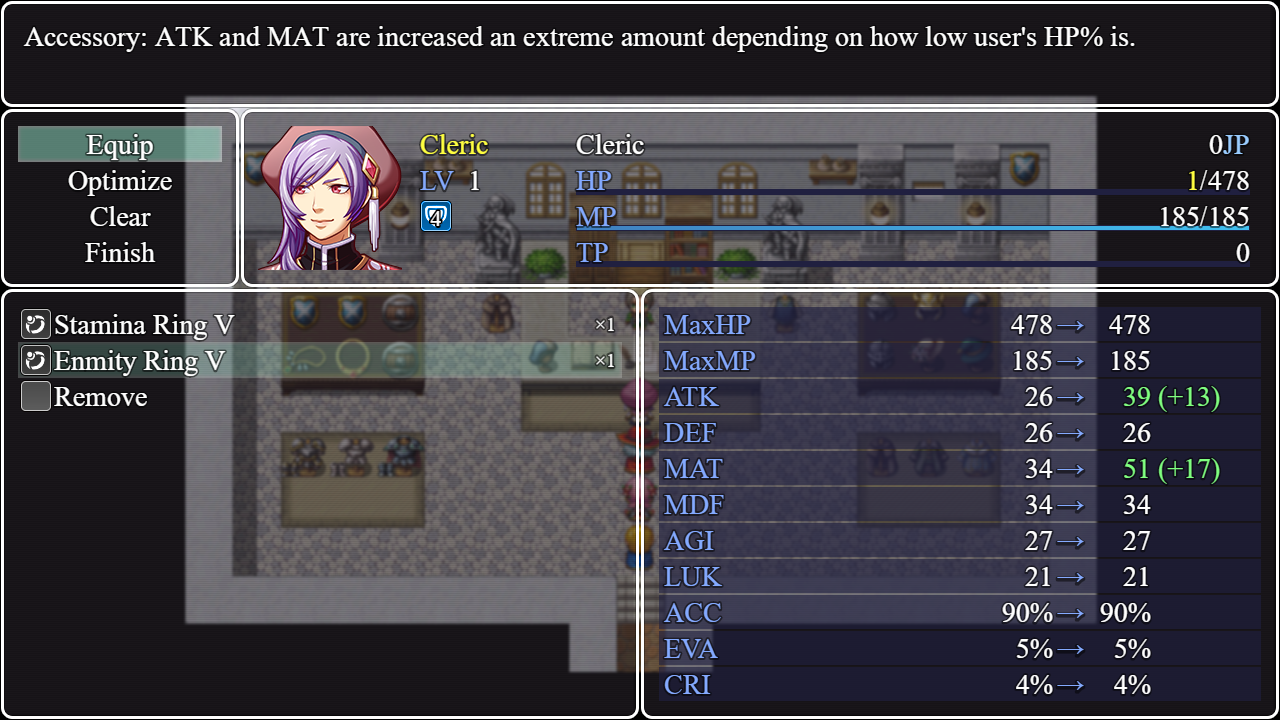
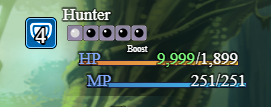

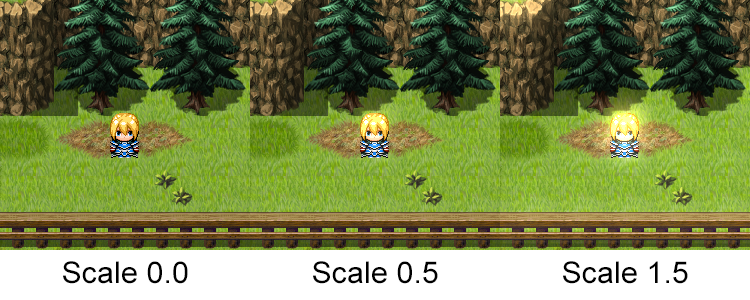
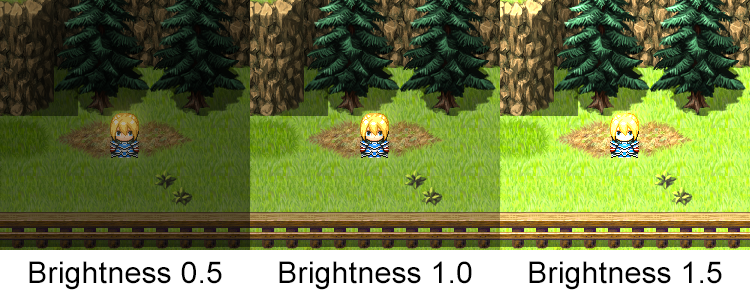
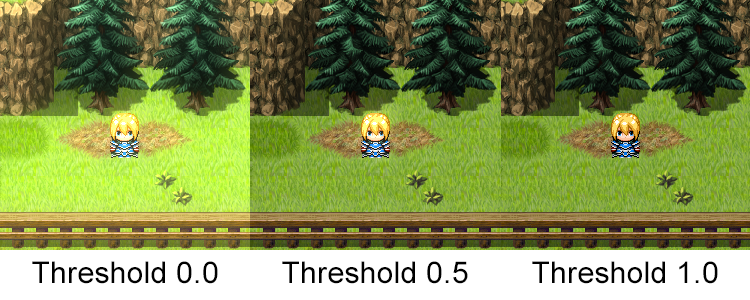

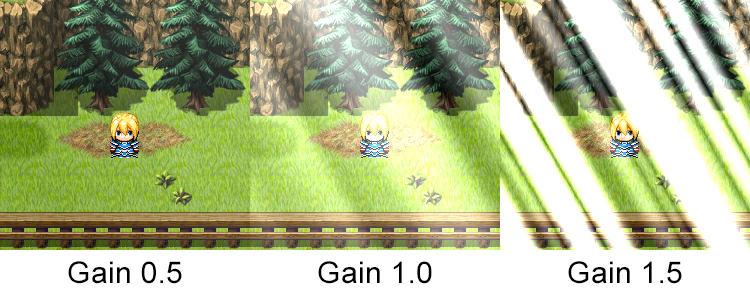
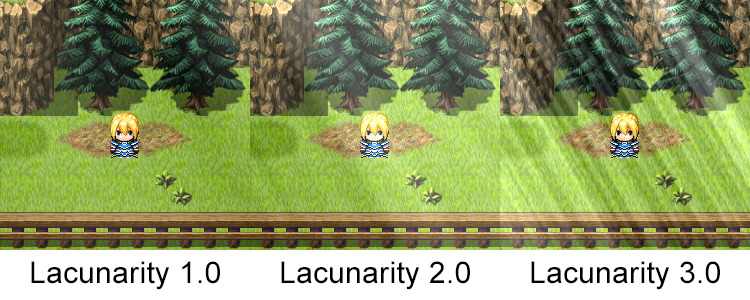
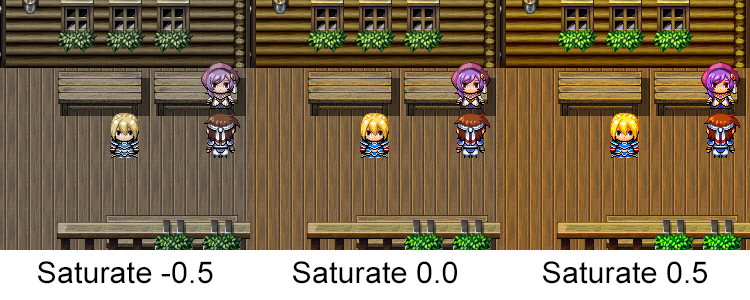
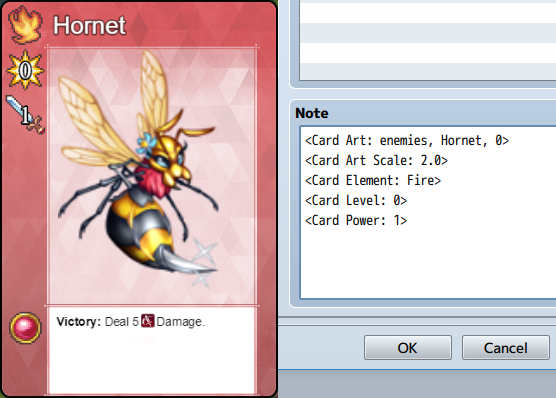


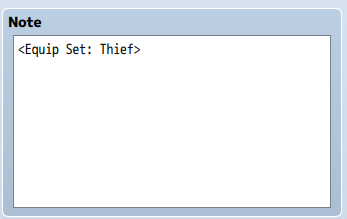
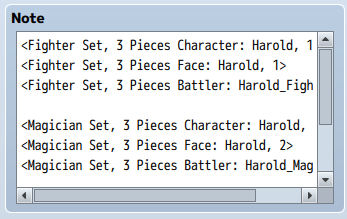


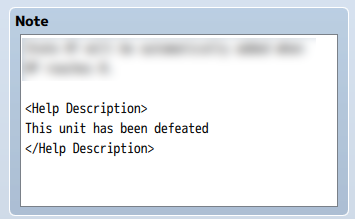


Pages in category "Notetags (MV)"
The following 142 pages are in this category, out of 142 total.
A
B
- Base Parameter Control (YEP)
- Battle A.I. Core (YEP)
- Battle BGM Control (YEP)
- Battle Effects Pack 1 (Olivia)
- Battle Effects Pack 2 (Olivia)
- Battle Engine Core (YEP)
- Battle Impact (Olivia)
- Battle Select Cursor (YEP)
- Battle System - ATB (YEP)
- Battle System - CTB (YEP)
- Battle System - STB (YEP)
- Boost Point System (Olivia)
- Break Shield System (Olivia)
- Bright Effects (Olivia)
- Buffs & States Core (YEP)
C
D
E
- Element Core (YEP)
- Enemy Base Parameters (YEP)
- Enemy Levels (YEP)
- Enhanced TP (YEP)
- Equip Battle Skills (YEP)
- Equip Core (YEP)
- Equip Requirements (YEP)
- Equip Skill Tiers (YEP)
- Equipment Set Bonuses (Olivia)
- Event Click Trigger (YEP)
- Event Copier (YEP)
- Event Encounter Aid (YEP)
- Event Hitbox Resize (YEP)
- Event Sprite Offset (YEP)
- Event Step Animation Options (YEP)
- Extended Damage Over Time (YEP)
- Extra Enemy Drops (YEP)
- Extra Parameter Formula (YEP)
I
L
M
P
R
S
- Save Event Locations (YEP)
- Sealed Battle Commands (Arisu)
- Selection Control (YEP)
- Shop Menu Core (YEP)
- Skill Cooldowns (YEP)
- Skill Core (YEP)
- Skill Cost Items (YEP)
- Skill Learn System (YEP)
- Skill Mastery Levels (YEP)
- Slippery Tiles (YEP)
- Smart Jump (YEP)
- Special Parameter Formula (YEP)
- Stat Allocation (YEP)
- State Categories (YEP)
- State Tooltip Display (Olivia)
- Steal & Snatch (YEP)
- Steamworks MV (Visustella)
- Subclass (YEP)
- Swap Enemies (YEP)